Neutral

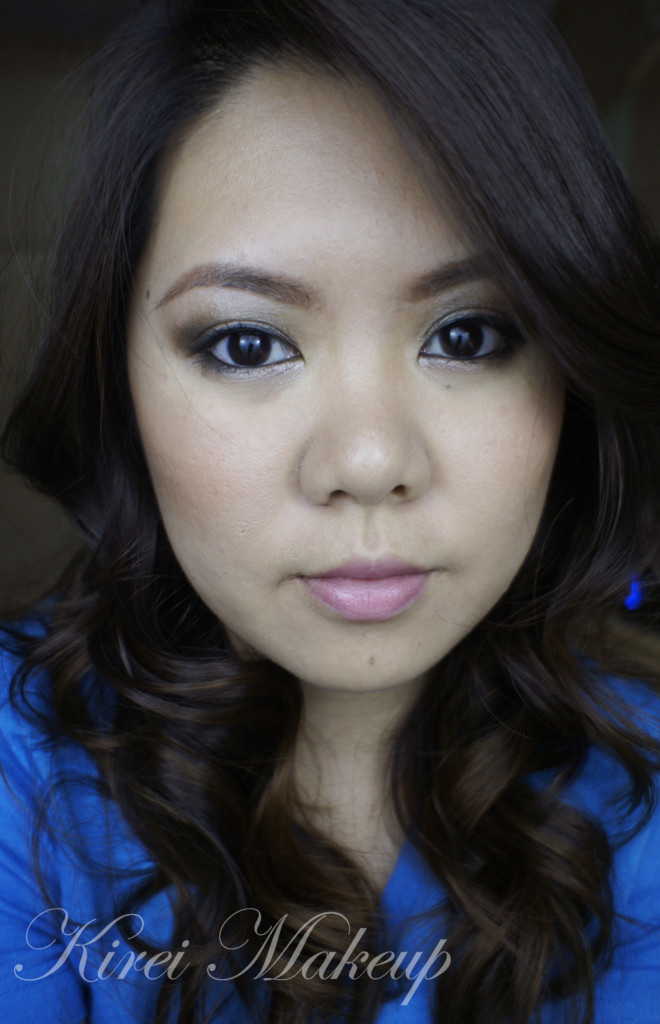
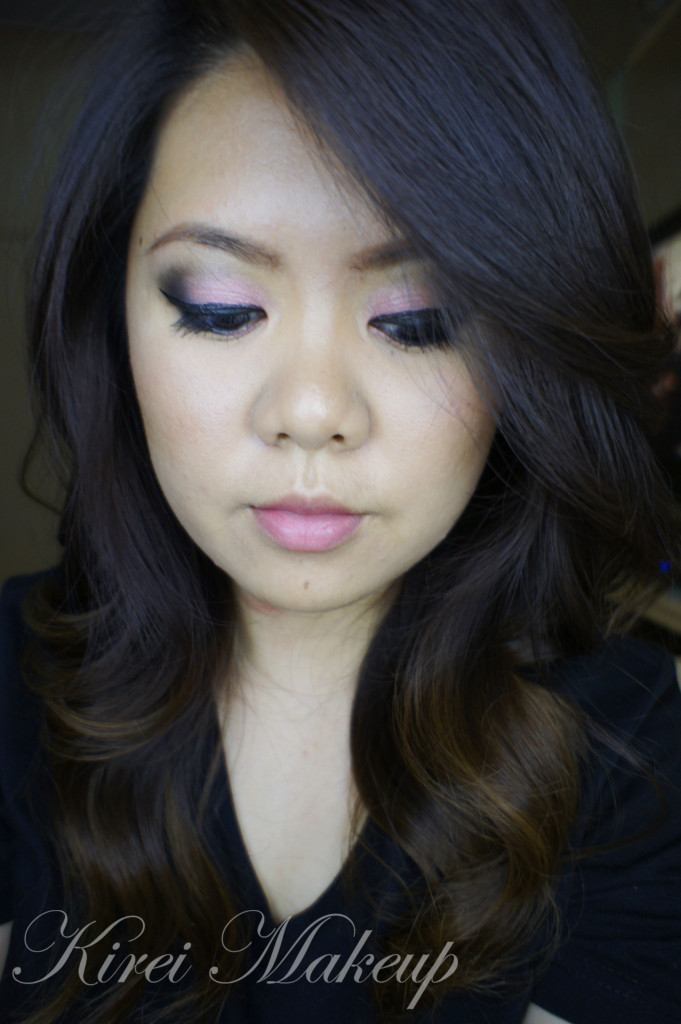
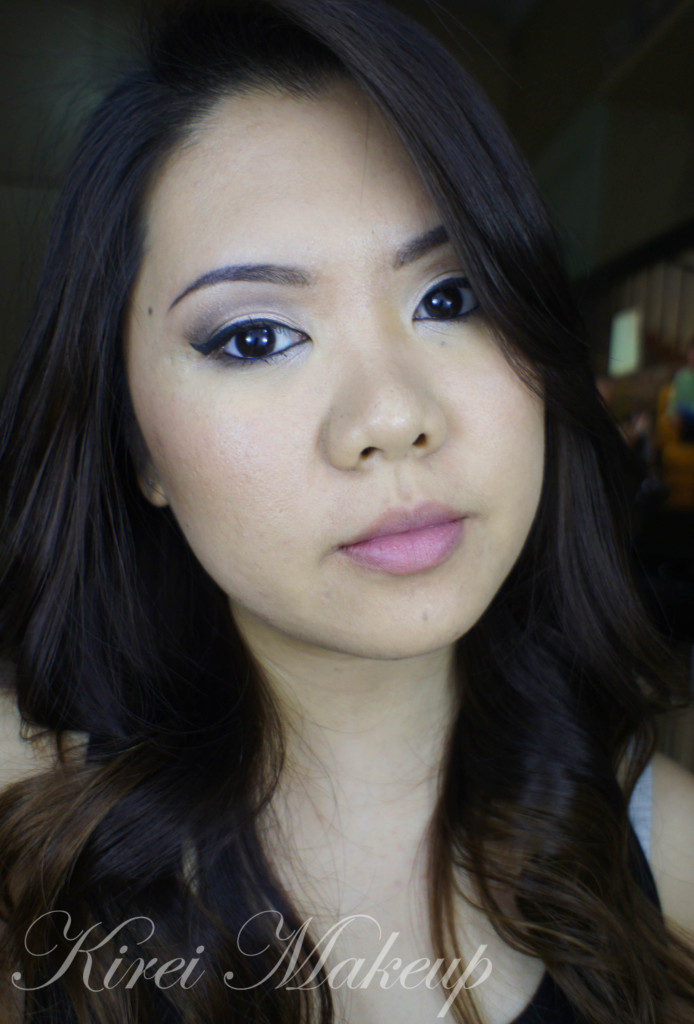
I wanted to do a pretty makeup, something that will be good for brides, or prom goers, or just for anyone who wants an extra something something..bahahahaha..anyways! I love how it ended up and I think this look is perfect for brides, if they don’t want anything too smoky.

Anyways, I love how I’ve been using UD Naked palette more lately. I think I might do more tutorials using the Naked and Naked 2 palettes. Also, how do you like my brows? I managed to fix it today. Lately, I’ve played around with the MUFE Aqua Brow gel and I have to say, I’m loving it! More on that later on during the week.

How-to:

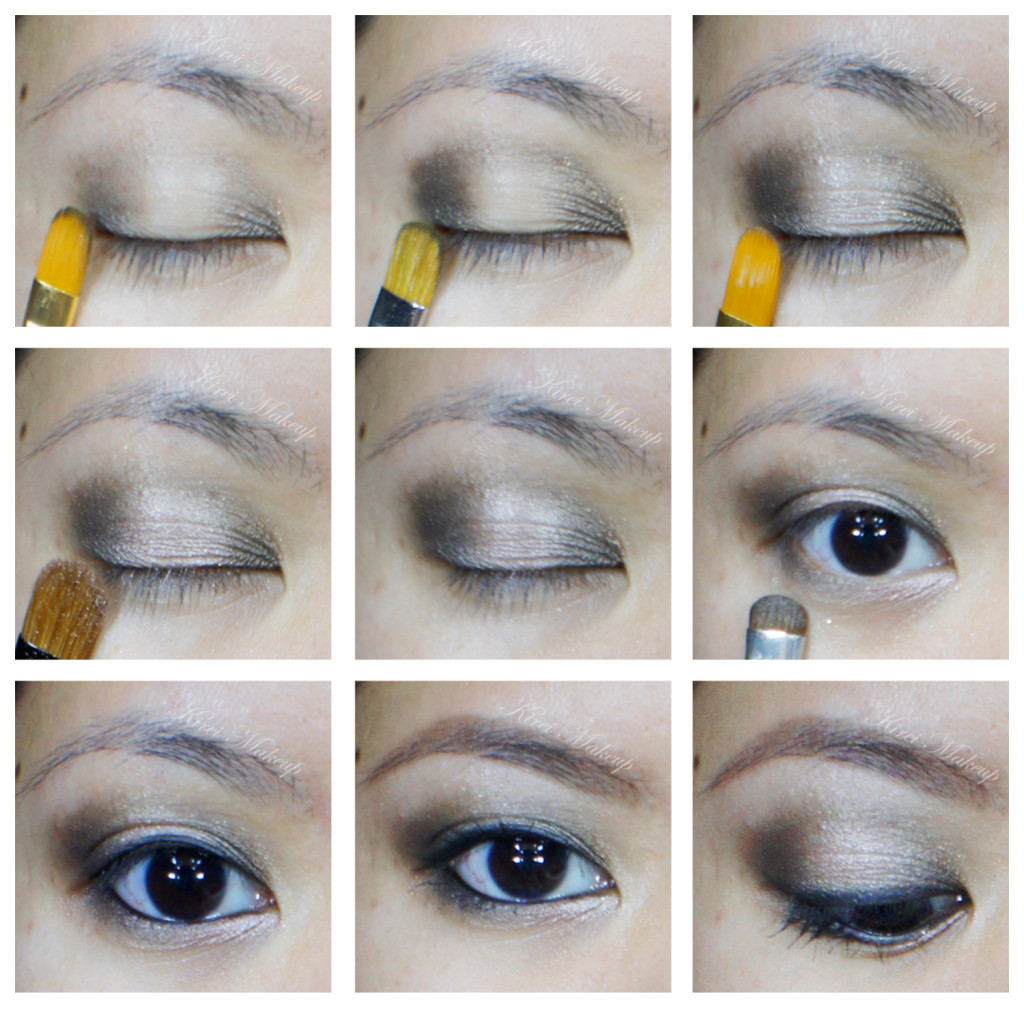
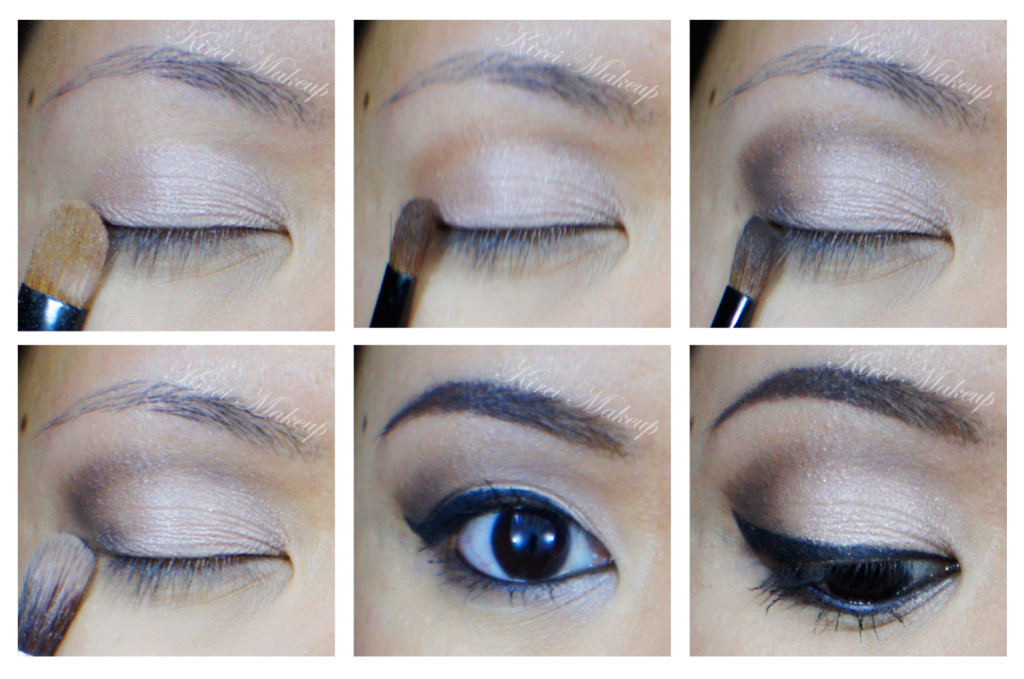
1. I applied UD Sin eyeshadow all over the lid using a flat eyeshadow brush.

2. On the crease, I applied UD Buck eyeshadow using a small blending brush.

3. Using the same brush, I applied MAC Brun on the outer V.

4. I clean the edge of the crease using a clean blending brush.

5. Using a small shader brush, I applied Sin on the inner corner of the lower lid and MAC Brun on the outer corner.

6. I created a winged liner along the upper lashline using MUFE Aqua Black gel liner and an angled eyeliner brush.

7. I lined my waterline using L’oreal Voluminous Smoldering eyeliner.

8. For my lashes, I applied MUFE Smoky Lash mascara on both top and lower lashes.

9. I filled my brows in using MUFE Aqua Brow.

natural makeup with urban decay naked palette

10. For the face, I applied UD Naked foundation using a foundation brush.

11. Under the eyes, I applied MAC Pro Conceal/Correct concealer in Medium.

12. I applied MAC Shadowy as a light contour and then MAC Cubic on my cheeks as blush.

13. For the lips, I filled it in using MAC Dervish lipliner.

asian bridal makeup

Gunmetal

How is everyone’s Monday going??? I apologize for M.I.A last week. If you follow me on twitter/instagram, you’d know that I burnt my fingers (because of steam)  on Tuesday. My ring and pinky fingers were burnt due to the steam from boiling water. Anyways, long story short, my ring finger didn’t get burnt as bad as my pinky. There were bubbles forming on my pinky finger! It hurt a lot, and well it’s red and purple now. Due to the burnt, I couldn’t really hold my makeup brushes properly since it hurt a lot. I have a very low tolerance of pain (exception for piercings..hahaha). Heck, I couldn’t even hold my chopsticks properly.

However, since the ring finger gotten better, I managed to do one tutorial. I wanted to play with the Gunmetal eyeshadow from Urban Decay Naked 1 Palette, so I created this smoky eyes look. Very simple and very easy. This will look great for party makeup, prom or wedding.

Also, ignore my brows, haven’t had time to get them trimmed or shaped because of the recent incident.

How-to:

1. I applied Chanel Illusion D’ombre in Emmervielle all over the lid using my finger.

2. Using a flat eyeshadow brush, I applied UD Gunmetal eyeshadow on the outer third of the lid.

3. I blended the edge of the shadow using a clean fluffy brush.

4. Using a bullet brush by Smashbox, I applied UD Creep eyeshadow from Naked palette on the outer V.

5. Using a small shader brush, I applied UD Gunmetal eyeshadow on the lower lid.

6. Using a flat eyeshadow brush, I applied L’oreal Infallible Hourglass Beige eyeshadow in on the inner half of the upper lid, and slightly on the inner corner of the lower lid.

7. I lined my upper lashline and waterline using L’oreal Voluminous Smoldering eyeliner.

8. I filled my brows using Shu Uemura brow pencil.

9. I curled my lashes using MUFE Smoky Lashes mascara.

asian smoky eyes

10. For the face, I used Giorgio Armani Silk foundation and a foundation brush.

11. Under the eyes, I applied MAC Pro Correct/Conceal yellow corrector.

12. I applied MAC Shadowy as contour and MAC Fleur Power on the cheeks.

13. For the lips, I applied Clinique Chubbystick in Heaping Hazelnut.

asian smoky eyes

Color Crush

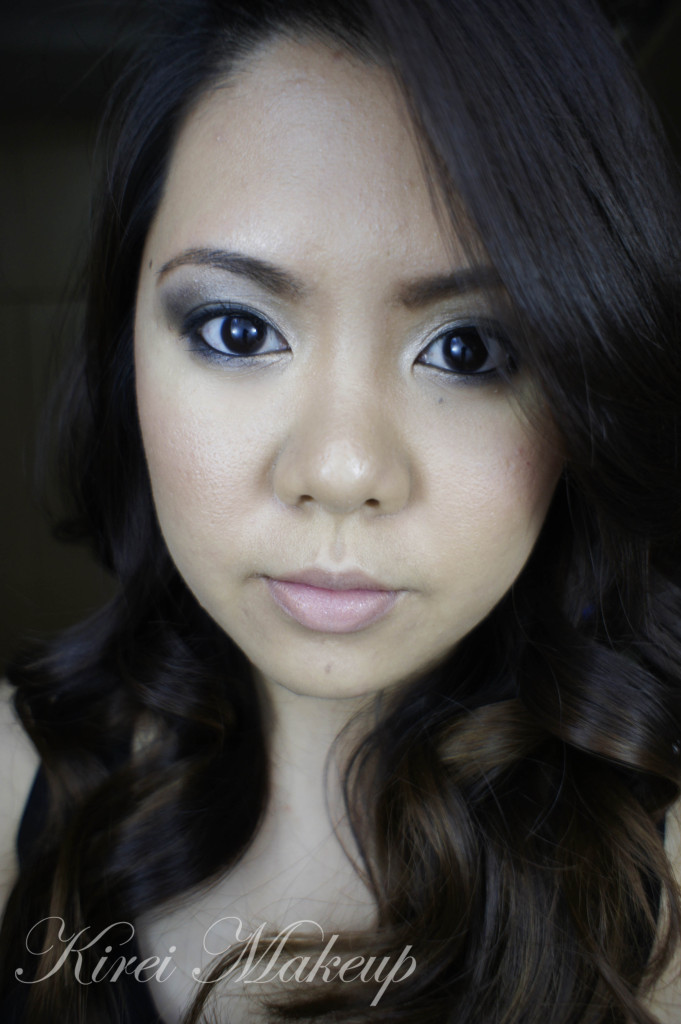
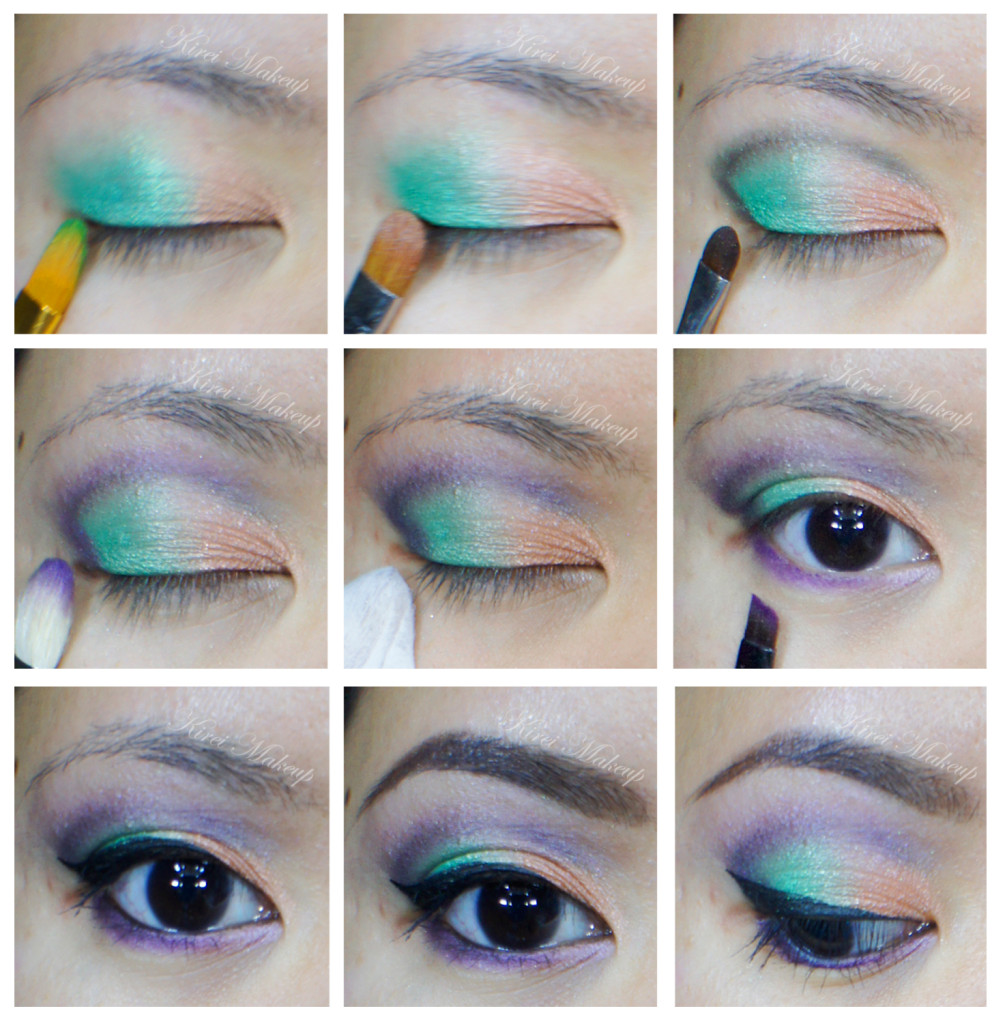
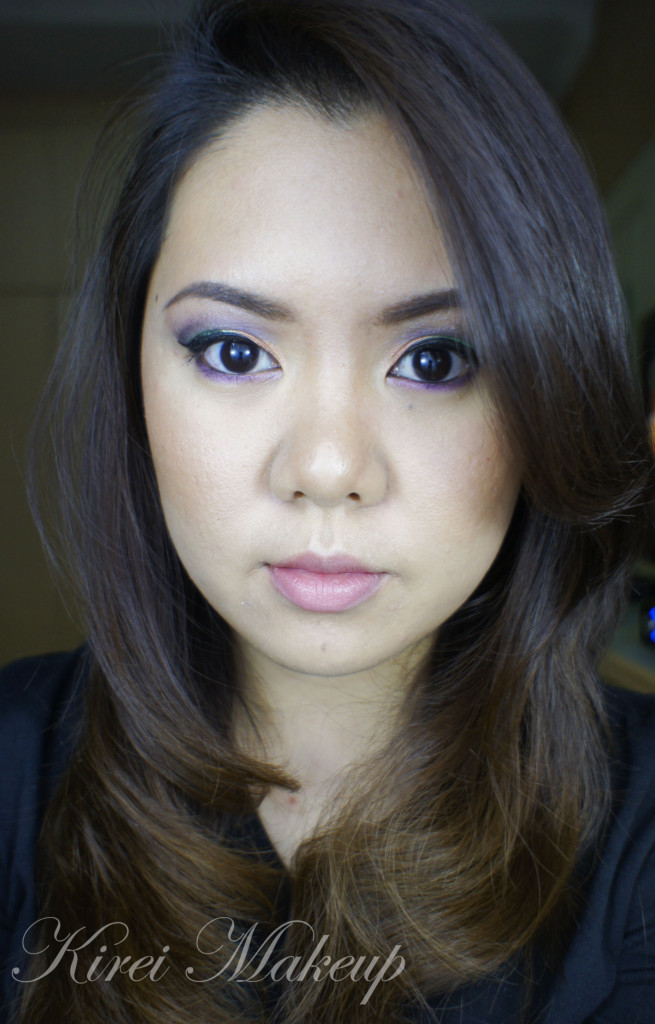
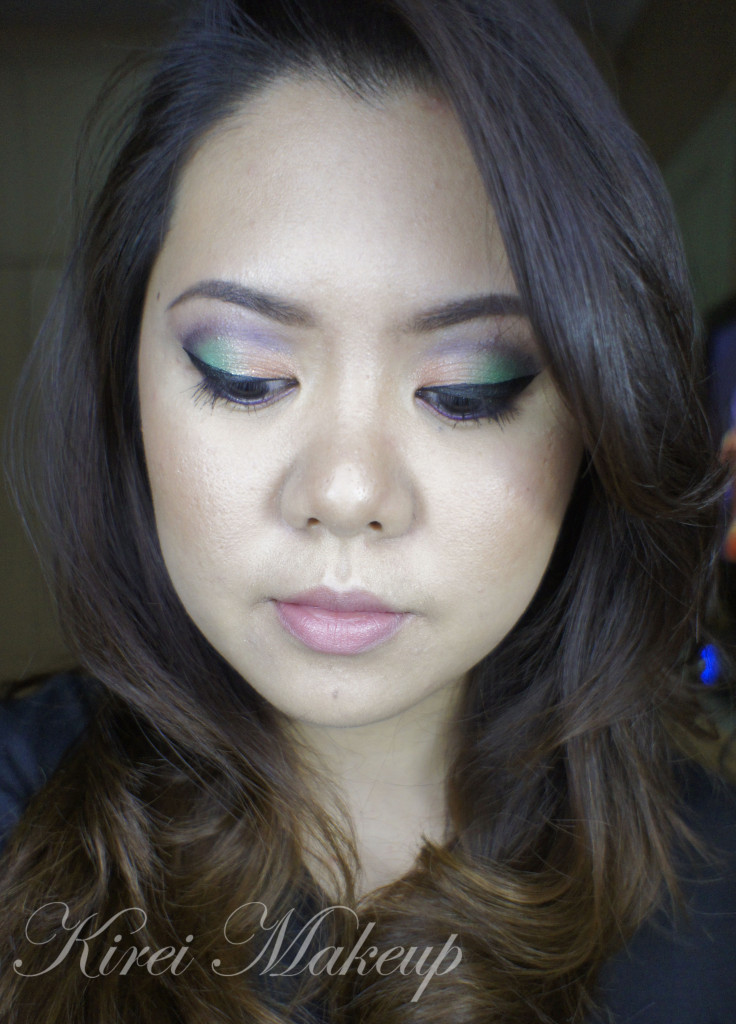
I have a crush on the MUFE Aqua Cream no. 52. The color is just so pretty! I just want to use it on every tutorial…Anyways, I did this look just to play around with colors. I think I might do another look with the green cream shadow. We’ll see. I had a lot of fun playing around with this color.

How-to:

1. Using a synthetic brush, I applied MUFE Aqua cream no. 52 Pearly Green Dragon on the outer half of my lid.

2. Using MUFE Aqua Shadow stick in Pearly Peach on the inner half of the lid. I used my finger to blend the colors.

3. I used a flat eyeshadow brush and applied Smashbox Admire Me Soft Shimmering Coral on the inner half of the lid and UD Kush on the outer half.

4. Using a small shader eyeshadow brush, I applied UD Perversion on the outer V and the crease.

5. I cleaned the small shader brush on a tissue and use the brush to blend the harsh line.

6. I applied MUFE no. 92 eyeshadow on the crease lightly using a blending brush.

7. Using wet wipe, I cleaned the outer edge of my eye to clean up and sharpen the edge.

8. I also applied UD Foxy eyeshadow under the brow.

9. Using an angled eyebrow brush, I applied MUFE no. 92 eyeshadow on the lower lid. I applied UD Bordello on the inner corner of the lower lid.

10. I lined my waterline using L’oreal Voluminous Smoldering eyeliner and lined the upper lashline using Kanebo Kate Super Sharp liner.

11. I curled my lashes and applied Dior Overcurl mascara.

12. I filled my brows using MUFE Aqua Brow gel no. 40 and an angled eyeliner brush.

13. I brushed my brows using a clean spooly.

mufe aqua cream 22

14. For the face, I applied MUFE HD Foundation using a foundation brush.

15. I applied MAC Cubic blush and MAC Bronzer on the cheeks.

16. I contoured the sides of my nose using MAC Shadowy.

17. On the lips, I applied Clinique Bountiful Blush chubby stick.

bright colorful makeup

orange and green makeup

Product of the Week: Shu Uemura Hard Formula Brow Pencil

Brows, brows, brows! I’ve been asked to do a brow tutorial, but been putting it on hold for the longest time. Let me first of all, introduce this brow pencil to you guys. Whether you are a beginner or a makeup artist, I think everyone should own the Shu Uemura Hard Formula brow pencil! This pencil is currently my favorite brow product, ever since I ran out of my Anastasia Brow Wiz.

Anyhow, so what is Shu Uemura Hard Formula Brow pencil?

Natural finish and shape. This unique eyebrow pencil only releases color pigment when it interacts with the oils in the brow hairs. The result is natural, defined brows. Smudge-proof and long-lasting. (Shu Uemura, 2013)

Shu Uemura Brow Pencil

If you happen to go to a Shu Uemura counter or their website, you might realized that the shape of their eyebrow pencil is not exactly like my photo. That’s because their pencil is shaped using a cutter in a Naginata shaped. I knew about the shape because I went to a Shu Uemura counter in Canada and they explained it to me back then. However, I purchased this pencil from Shu Uemura counter in Grand Indonesia mall, and they did not cut it for me in Naginata style, instead they handed me in this form. I don’t really care, Naginata or not, this brow pencil still rocks!

Anyways, I might drop by the Shu Uemura counter again just to ask them to re-shape my brow pencil.

Pros

  • The color is perfect. Mine is Hard 9 (Acorn), and I think it has just enough warm undertone for my warm undertone hair. It’s not too red, and at the same time not too ashy.
  • It brings a certain warmness to the face and it works for a lot of people. I’ve used this pencil on several people and for bridal makeup as well.
  • Since its hard formula is very waxy, when you draw this pencil in, it mimicked your brow hair. You can get the most natural finish with this product.

Longevity

I’ve worn this pencil for a good 8-10 hours without any smudging whatsoever in a very warm and humid climate (a.k.a Bali).

Price

I don’t quite recall how much it cost in Jakarta since I’ve bought it quite a while back.  I will let you guys know once Shu Uemura Indonesia answers my tweet 😉

Anyways, I know this pencil costs CAD$29 in Canada and USD$23 in USA.

Cons

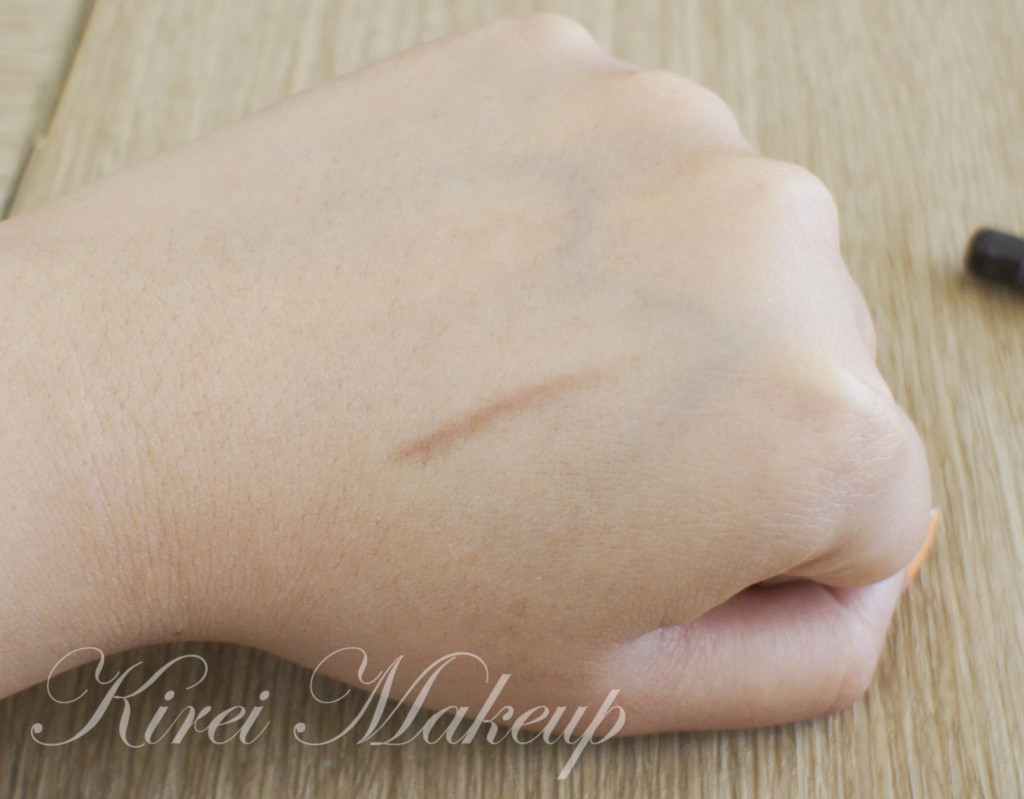
  • Since it’s a hard formula and very waxy, you might not be able to swatch this on your hand. I managed to do it after going at it several times the back of my hand.
  • They carry 2 more colors in Asia than in North America, namely Acorn and Walnut Brown.

Shu Uemura Brow Pencil no. 9

Keep in mind, even if your hair is black, you might want to use brown instead so your brows don’t look harsh.

Also, if you want to know how I shaped my brows, please visit my tutorial in Brows 101.

How-to:

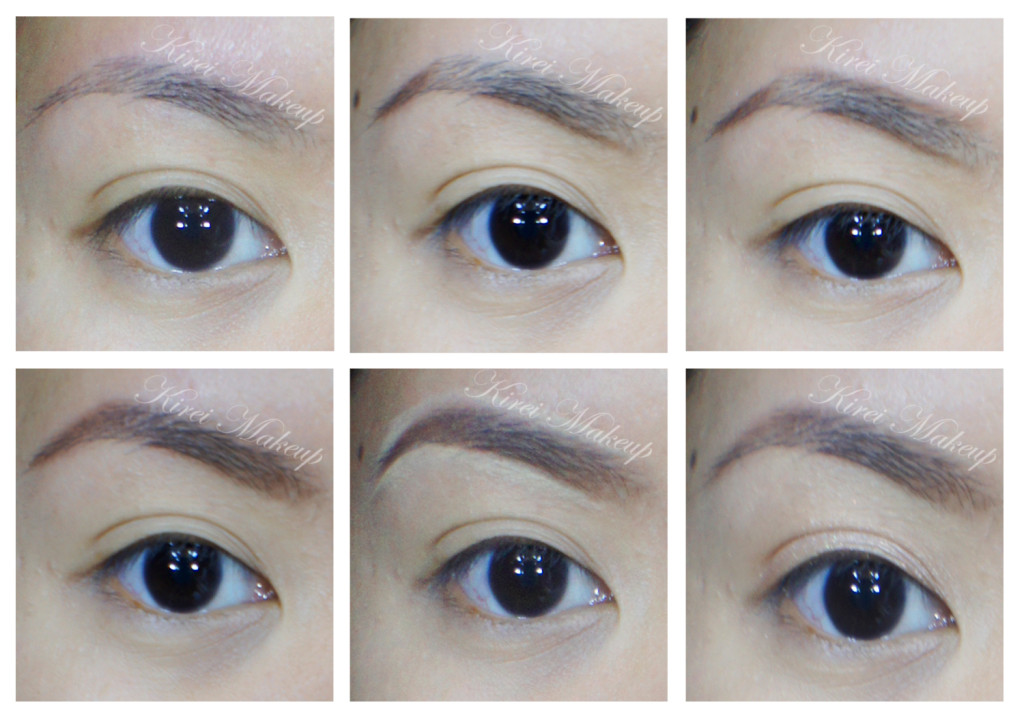
1. Starting with a clean brow, use a clean spooly (or mascara brush) to brush the brow hair upwards. Trim any excess with a cuticle scissors if needed.

2. I like to start with the tail of brow. Just filling it in and extend it slightly.

3. I created a diagonal line on the lower part of my brow from the head to just below the arch (hard to explain, please look at photo below…bahahaha).

4. Next I drew a diagonal line along the top of the brow to the highest point of the brow (i.e. arch).

5. I filled it the rest of the brow using the pencil. (I purposely drew a lot in so you can see the difference between my non-filled brow with the filled-in brow).

6. This step is optional, but works wonder if you want an extra shape or an extra lift. So, using a flat sturdy brush, I applied M.A.C pro conceal/correct palette in yellow corrector along the bottom and top part of the brow. I blended it out using a clean flat brush.

7. At this stage, I brushed my brow hair upwards again using a clean spooly (or mascara brush) for a natural finish look.

Pretty much, lots of my tutorials prior to this post used the Shu Uemura Hard Formula Brow Pencil.

how to do brows

Seafoam

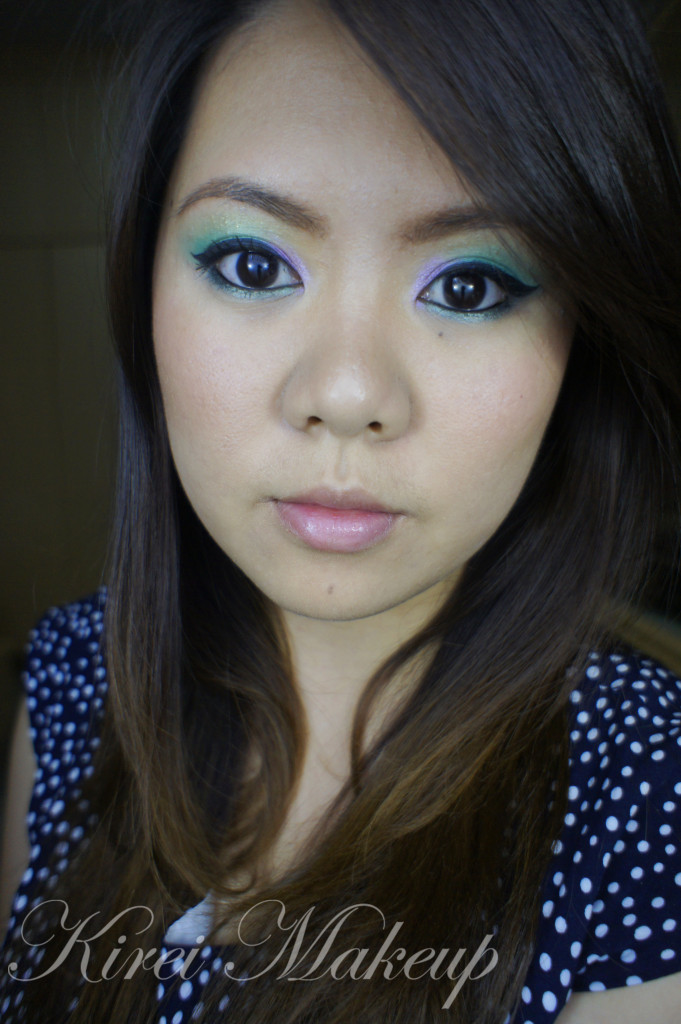
I’m sure by now you guys are probably tired of me using my Sleek Makeup Snapshot palette…but I can’t help it! It’s too gorgeous! Today’s look is very simple, no crease or outer V whatsoever…I’ve actually worn mascara the whole day, and didn’t take it off for the tutorial, so don’t mind the mascara on the step-by-step picture..

Let’s get on the tutorial! (I prepped my eyes using MAC Soft Ochre paint pot)

How-to:

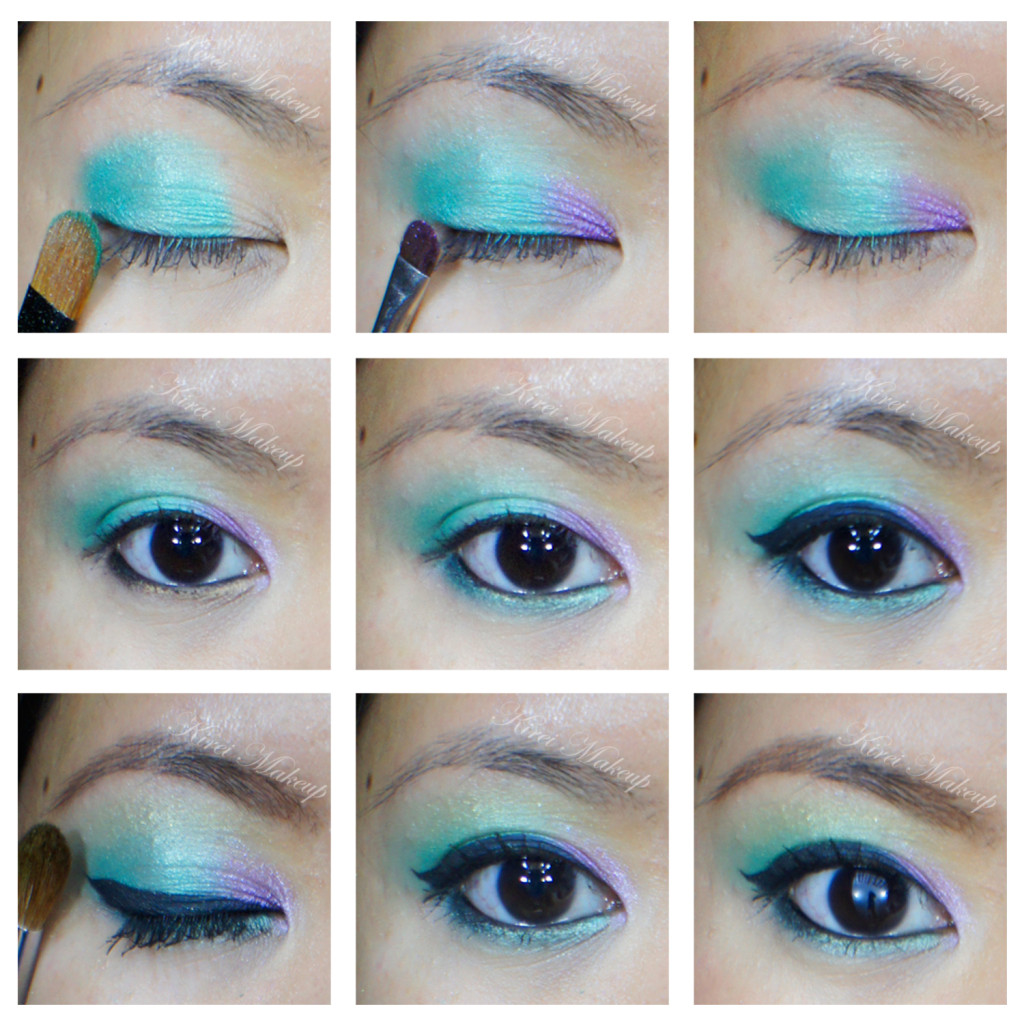
1. Using a flat eyeshadow brush, I applied Green Iguana from Sleek Makeup Snapshot palette on the eyelid, leaving the inner third of the lid empty.

2. (not in picture) I used a clean fluffy brush to blend the crease so there’s no harsh edge.

3. Using a small shader brush, I applied MAC Butterfly Party Crushed Metal Pigment on the inner third of the lid.

4. Using another clean small shader brush, I blended the edge where the 2 eyeshadows meet.

5. I lined my waterline using L’oreal Voluminous Smoldering eyeliner.

6. Using an angled eyeliner brush, I applied Green Iguana eyeshadow on the lower lid.

7. I lined the upper lash line using Clinique gel liner, creating a winged/cat-eyeliner.

8. Using a big clean fluffy brush, I applied Kiwi Flower just above the crease for an extra wash of color.

9. I applied Maybelline Volume Express Turbo Boost mascara on both upper and lower lashes.

10. I filled my brows in using Shu Uemura brow pencil.

sleek makeup snapshot

11. On the face, I applied MUFE HD Foundation using my fingers.

12. I contoured my cheeks using MAC Shadowy and NARS Ita Kabuki brush.

13. On the cheeks, I applied MAC Peaches blush.

14. On the lips, I applied Chanel Levres Scintillantes in Volupte.

green and purple makeup

Pearlescent

Another smoky tutorial! This time, I wanted to show you guys another way of doing a smoky eye. This look highlights the center of the eyelid, instead of the usual highlight on the inner corner. I like doing this smoky eyes more than the other ones since I find that the eyes catch the light when you blink or look down. It’s something different than the classic sooty, dark grey smoky eyes. Obviously, you can do this with any color. I’ve done this type of look using cranberry and blue eyeshadow in my Peek a Blue post.

How-to:

1. Using a synthetic art brush, I applied Smashbox Stone cream eyeshadow on the inner and outer corner of the eyes, leaving the center part of the lid bare.

2. Using a flat eyeshadow brush, I applied Urban Decay Dark Horse eyeshadow on top of the cream eyeshadow. Again, leave the middle part of the lid empty.

3. Using another clean synthetic art brush, I applied Chanel Illusion D’ombre in Emerveille in the middle of the lid.

4. Using a clean flat eyeshadow brush, I applied Urban Decay Sidecar eyeshadow on top of Chanel Emerveille cream shadow.

5. Using a clean small fluffy brush, I blended the edges where the dark and the light eyeshadow meet.

6. I applied UD Darkhorse on the outer half of the lower lid and UD Sidecar on the inner half.

7. I lined my waterline, tightline and upper lashline using L’oreal Voluminous Smoldering eyeliner.

8. I curled my lashes and applied Maybelline Express Volume Turbo boost mascara on my lashes.

9. I filled my brows in using Shu Uemura brow pencil.

asian smoky eyes

10. On my face, I applied MUFE HD foundation in 118 all over using IPKN Auto Wave makeup.

11. I contoured my cheeks using MAC Shadowy.

12. On the cheeks, I applied MAC Peaches blush.

13. On the lips I applied Chanel Confidentielle lipstick.

asian smoky eyes

Smoky Pink

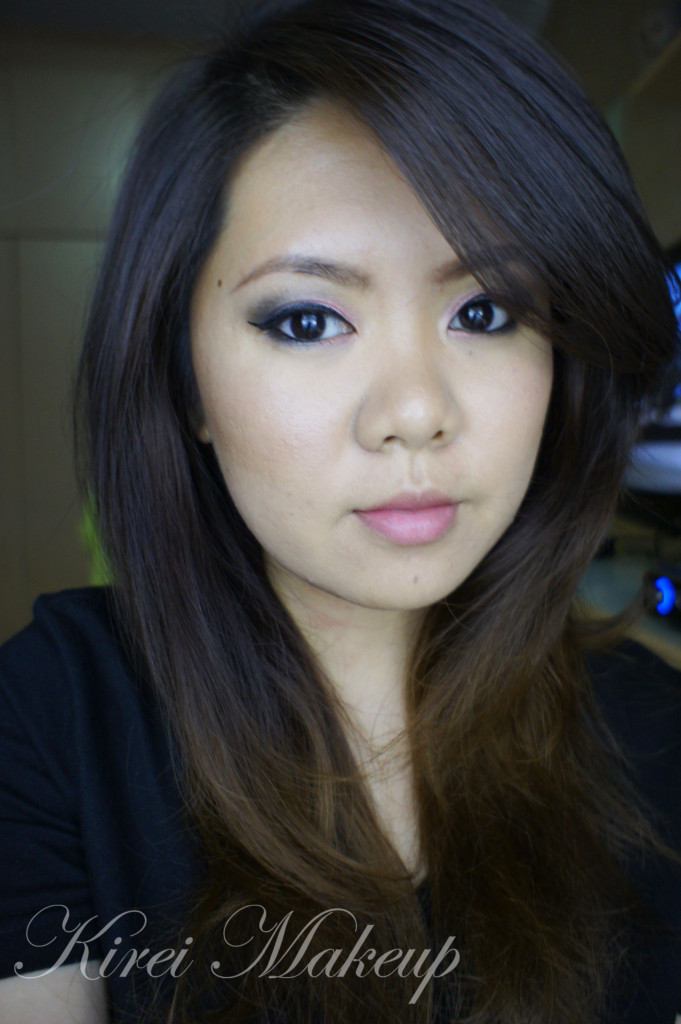
This is a requested look by one of my Twitter followers, @Cara_ev! She requested for a pink smoky look using black eyeshadow instead of brown. I’ve done something similar using peach eyeshadow in Smoking Peach, and mint in Smoky Mint, and silver in Silver Smoke…well you get the gist! All my smoky eyes tutorials are listed under Tutorials –> Smoky Eyes.

asian smoky eyes

How-to:

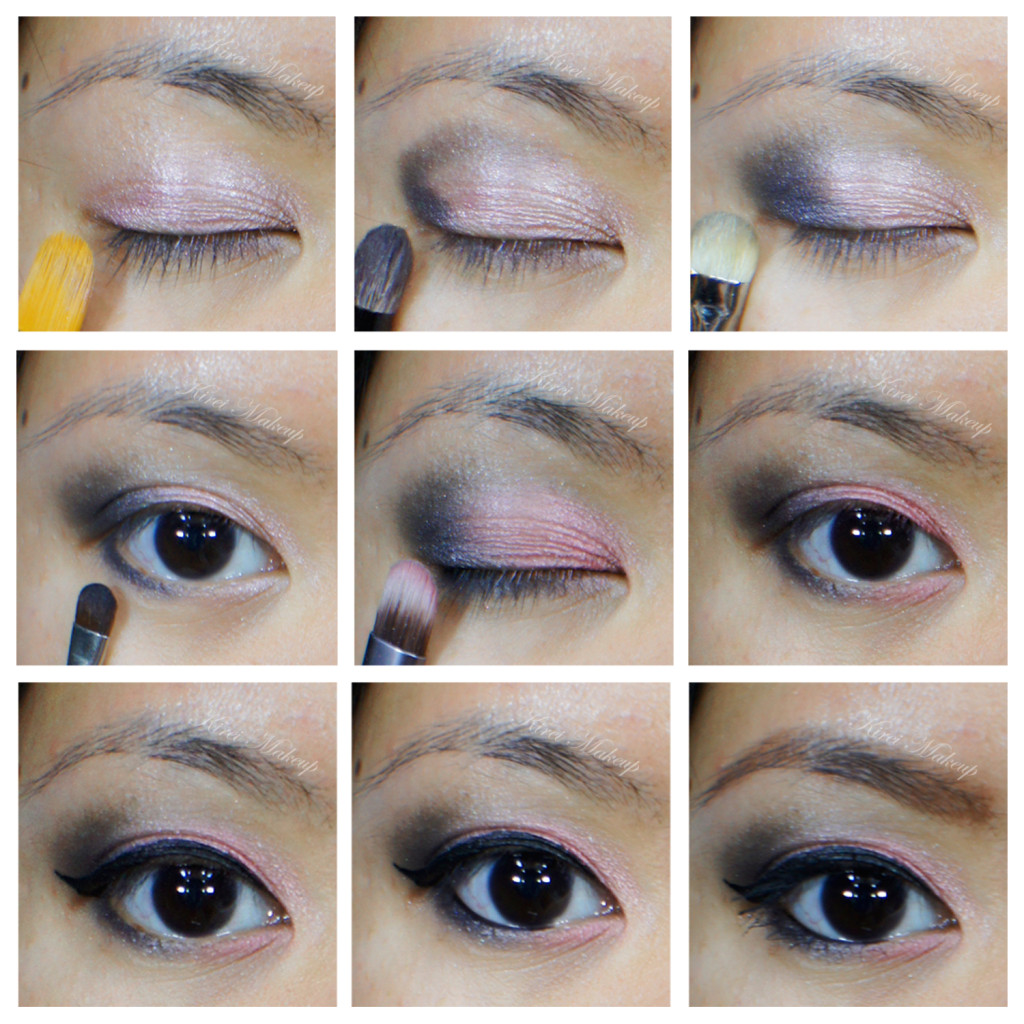
1. Using a synthetic art brush, I applied Maybelline Inked in Pink color tattoo all over my eyelid. You can substitute this with any cream base or eye primer of your choice.

2. Using Smashbox Bullet Brush, I applied Urban Decay Blackout eyeshadow (from Naked 2 palette) on the outer V.

3. Using a clean blending brush (emphasis on the CLEAN), I blended Blackout towards the center of the lid.

4. Repeat step 2-3 several times until you reach enough intensity from the black eyeshadow to your own liking.

5. I applied Blackout underneath the outer half of the lower lid using a small shader brush.

6. Using a clean flat eyeshadow brush, I applied L’oreal Infallible eyeshadow in Sweet Strawberry.

7. I applied L’oreal Sweet Strawberry infallible eyeshadow on the inner corner of the lower lid using an angled eyebrow brush.

8. Using Kate Sharp eyeliner, I created a winged liner along the upper lash line. You can skip this if you’d like.

9. I lined my waterline and tightline using L’oreal Voluminous Smoldering eyeliner.

10. I curled my lashes using Shu Uemura eyelash curler.

11. I applied Clinique lash building primer on top and lower lashes, and then applied Maybelline Express Volume Turbo Boost mascara on top of it.

12. I filled in my brows using Shu Uemura brow pencil. I applied MAC Brule under the brows.


asian smoky eyes

13. On my face, I applied MUFE HD foundation no. 118 using a foundation brush starting from the center of my face blending it outwards.

14. I also applied MUFE HD concealer no. 335 under the eyes.

15. On the cheekbones and bridge of the nose, I applied MAC strobe cream using a clean foundation brush.

16. I also applied MAC mineralized skinfinish in deep as contour powder.

17. I applied MAC Cubic very lightly on the cheeks.

18. For the lips, I applied YSL Pur Couture rouge no. 17 using a lip brush.

bridal pink smoky eyes

For the hair, I applied hot rollers all over, and I straightened my hair using Chi hair straightener for the first photo. On the second photo, I curled my hair using curling irons (curling it all outwards), in big sections.

Sleek Makeup i-Divine Swatches

If you have been on my Twitter or Instagram, you should know that I’ve just received my Sleek Makeup palettes that I purchased from Luxola. I got my hands on it this weekend when I was in Bali, so I have yet to play with it. I wanted to swatch these palettes first before I do any tutorials with them. I’ve heard so much raves about these palettes on the blogsphere and youtube, that I was so excited when I get received them!

First of all, let me mention how great the Staff at Luxola are! I am affiliated with Luxola, but what I’m going to tell you guys is 100% based on my experience. You guys should know by now that I would never recommend anything that, in my personal and professional opinion, is below standard and expectations. Let me tell you what happened before we proceed to the swatches itself.

I bought (yes, bought! with my own money) several products from Luxola website. I’ve checked out and paid for all the items in my cart at end of March. I was told that my products would arrive between 5-8 business days. I was happy and excited to get the products before my trip to Japan. 8 days later, my shipment was nowhere to be found! I contacted Luxola, checked my tracking number and found out that my shipment was stuck at Indonesian customs! I tried calling Indonesian post to find out what’s going on, even went on their twitter asking questions but no answer.

I was devastated. I contacted Luxola regarding the issue and they tried to help me by contacting the courier service that they’ve used over in Singapore. Luxola Staff patiently replied to every single one of my emails promptly. I went to Japan, came back just to find out that customs isn’t releasing my shipment. No letters, no contact information, nothing to assist me to get the shipment out of customs! I almost gave up. That’s $100 worth of products that I’m not going to receive ever.

However, an email came through from Luxola. They messaged me saying that they will ship a new set of products (of whatever that I’ve bought) to my bff in Singapore. I was so thrilled when I read the message!

I was so happy! To be honest, I had the same issue with another online store at the same time, and they weren’t even as helpful or offered any assistance like Luxola. By this time, I was jumping up and down, and told my bff to keep the package for me till we meet again. Not even 2 days after, my package arrived at my bff’s and she was holding it for me! I mean, talking about fast and amazing services! So, thank you Luxola for the great service and assistance that you’ve offered.

Ok, let’s get on the swatches!

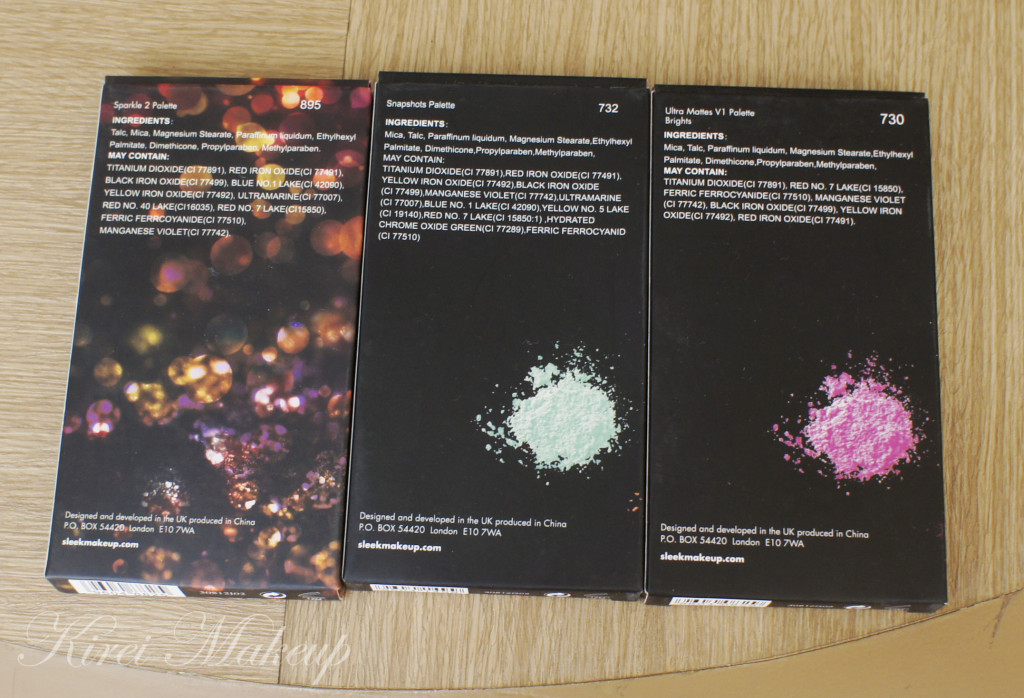
I bought 3 Sleek Makeup palettesSparkle 2, Snapshots and Ultra Mattes V1 Brights.
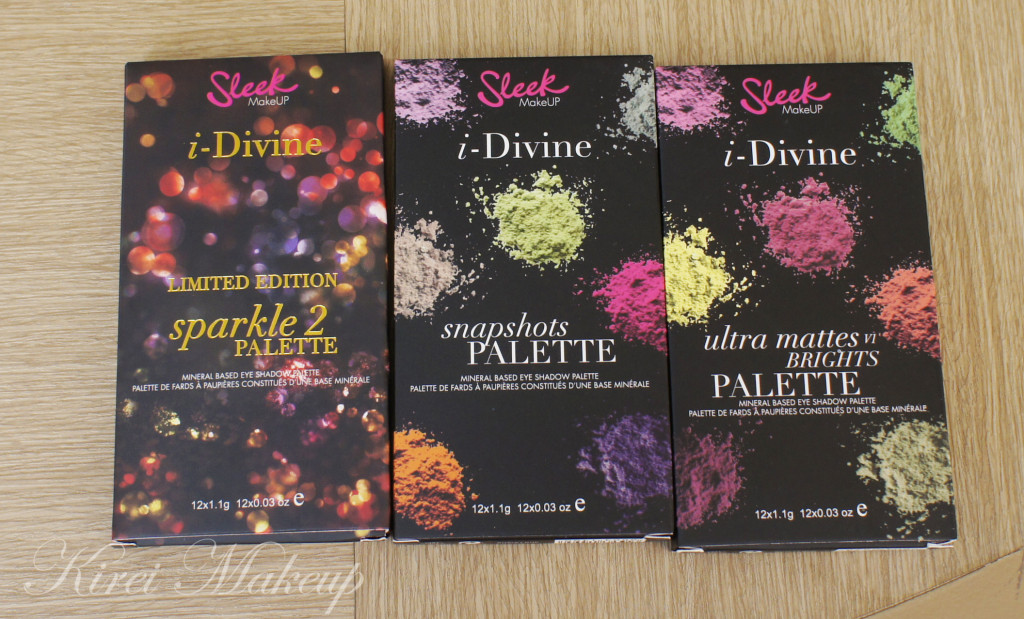
Sleek Makeup palettes

sleek sparkle palette

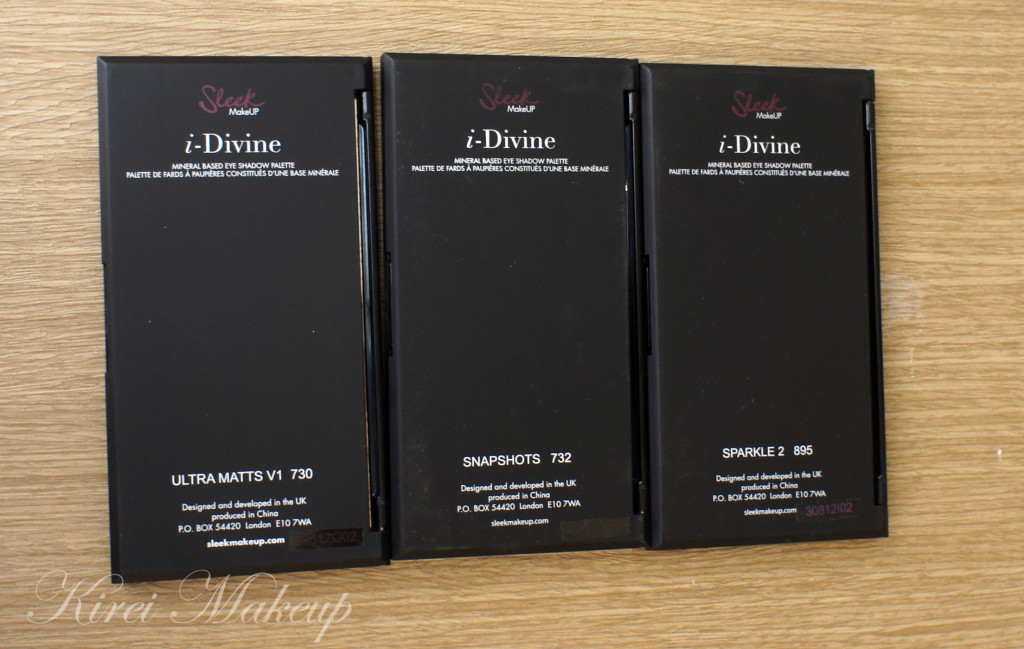
It comes in a black casing. Very light and small. The boxes above actually remind me of chocolate bars for some reason. Oh just to let you guys know, the reason why I bought these 3 palettes is because these 3 cannot be shipped to U.S.A or Canada (according to Sleek Makeup website). I wanted to buy them when I was in Canada, but since it cannot enter the country, I decided to buy them here.

Each palette costs IDR Rp. 157,000. From Sleek Makeup website it costs £7.99/palette.
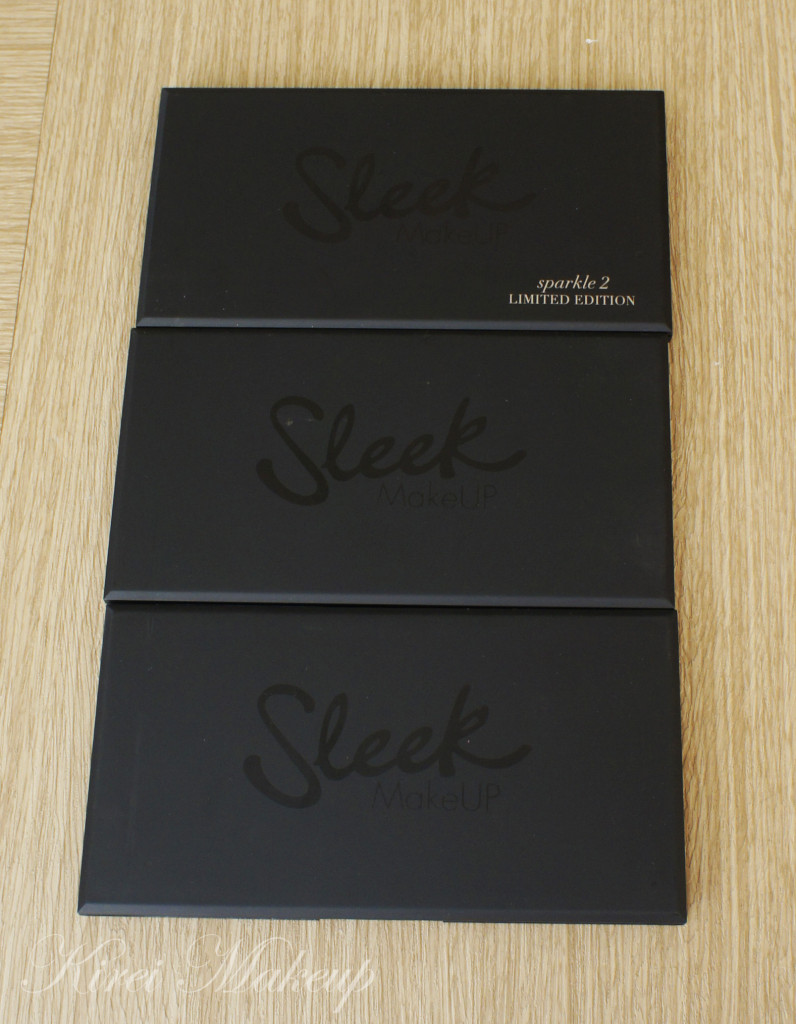
sleek makeup

sleek makeup

The Sparkle 2 palette is a limited edition palette. My first impression when I opened the palette was “that’s a lot of sparkle”..well it is called the Sparkle palette. I didn’t expect the sparkle to be so huge! I’m a little afraid that the sparkle might be rough and hurt my eyelid. I’m also a bit skeptical on how much sparkles going to stay on the lid. I’ve worked with glitters and sparkles before, I find that I’ve to use some sort of “adhesive”, let it be cream or liquid to make it stick to the skin. I guess I just have to try it, right? 😉
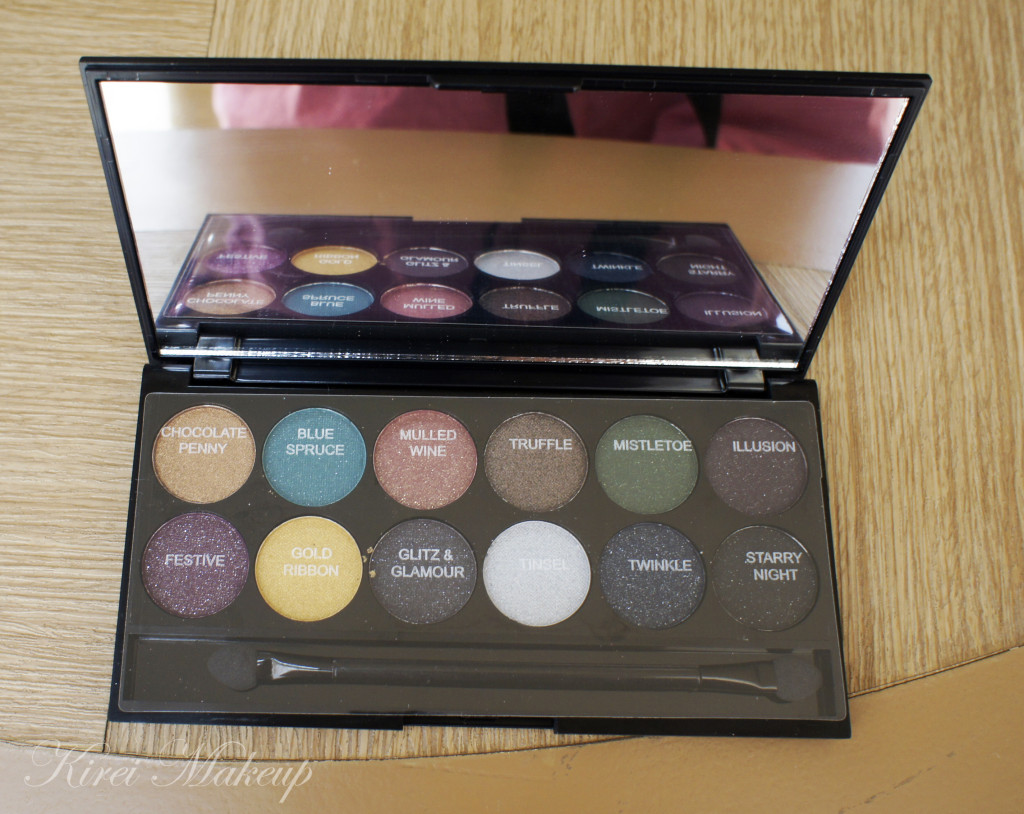
sleek sparkle 2 palette

The Sparkle 2 Palette comes with 12 shades. 4 of which are shimmery, while the other 8 has glitter/sparkles in them. The 4 shimmery eyeshadows are Chocolate Penny, Gold Ribbon, Truffle and Tinsel. The 8 glittery ones are Festive, Blue Spruce, Mulled Wine, Glitz & Glamour, Mistletoe, Twinkle, Illusion and Starry Night.
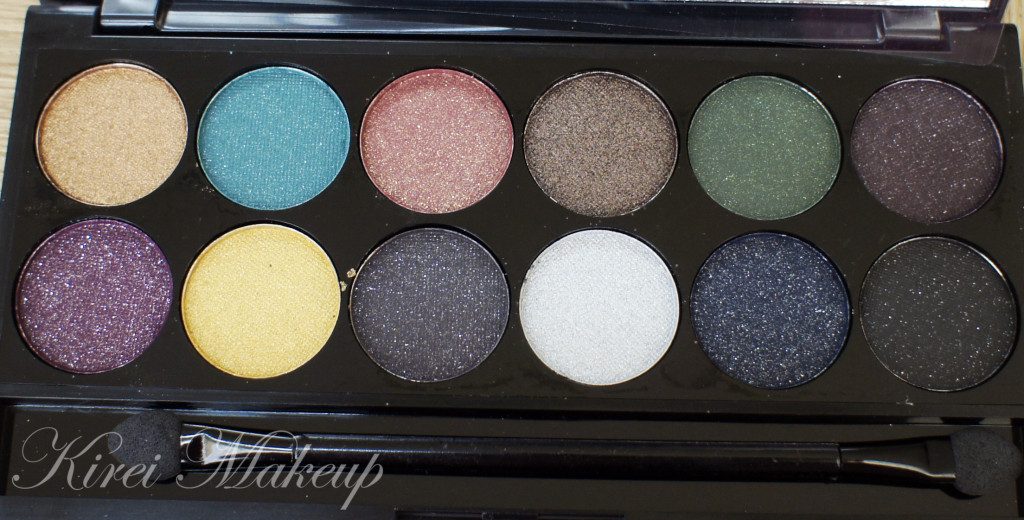
sleek sparkle 2 palette

On the top part (L-R)

  • Chocolate Penny – golden bronze.
  • Blue Spruce – a turquoise with silver sparkles. Feels dry when touch, and surprisingly does not swatch very well considering how vivid the color is.
  • Mulled Wine – crimson with gold glitter.
  • Truffle – deep rich chocolate metallic color. Very buttery and has a lot of pigments.
  • Mistletoe – forest green with silver glitter.
  • Illusion – an eggplant purple eyeshadow with silver glitter.

On the bottom part (L-R)

  • Festive – plum eyeshadow with silver glitter (the only one you can see with sparkles on the swatch below)
  • Gold Ribbon – bright golden yellow with shimmer.
  • Glitz & Glamour – grey with silver sparkles.
  • Tinsel – silver shimmery eyeshadow.
  • Twinkle – navy blue with silver sparkles.
  • Starry Night – black with silver glitters.
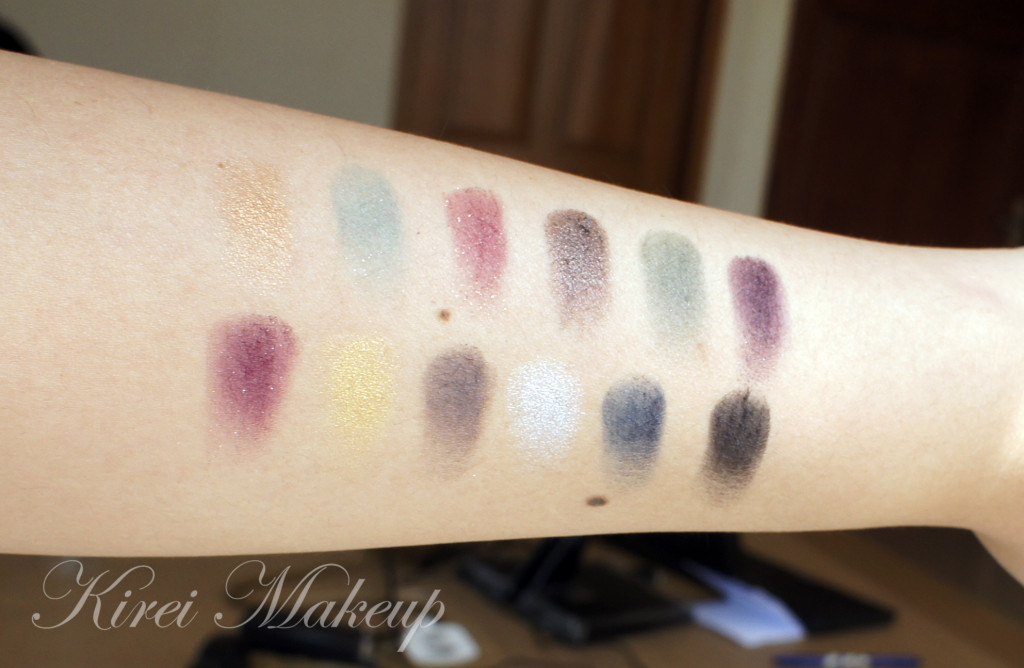
sleek sparkle 2 palette swatch

The Snapshot palette is one that I really wanted to get. It has a combination of matte and shimmer eyeshadows. It has a whole loads of bright eyeshadows, and some neutral ones. I absolutely love and adore this palette.

In this palette there’s 5 matte eyeshadows and 7 shimmer eyeshadows. The 5 matte ones are Summer Breeze, Sand Walker, Washed Ashore, Purple Haze and Magenta Madness. The 7 shimmery ones are Martini, Kiwi Flower, Sunset, Lotus Folower, Green Iguana, Humming Bird and Tequila Sunrise.

Sleek snapshot palette

During the swatching process, I found that Sand Walker does not show up on my arm because, it’s pretty much the same color as my skin. That shadow probably would work as a great base for my eyelid.

I also find that the shades on this palette turns out to be more on the medium shades range on my skintone. Nothing too dark for contour or crease color. Perhaps using a primer/base under the eyeshadows will make the shades brighter.
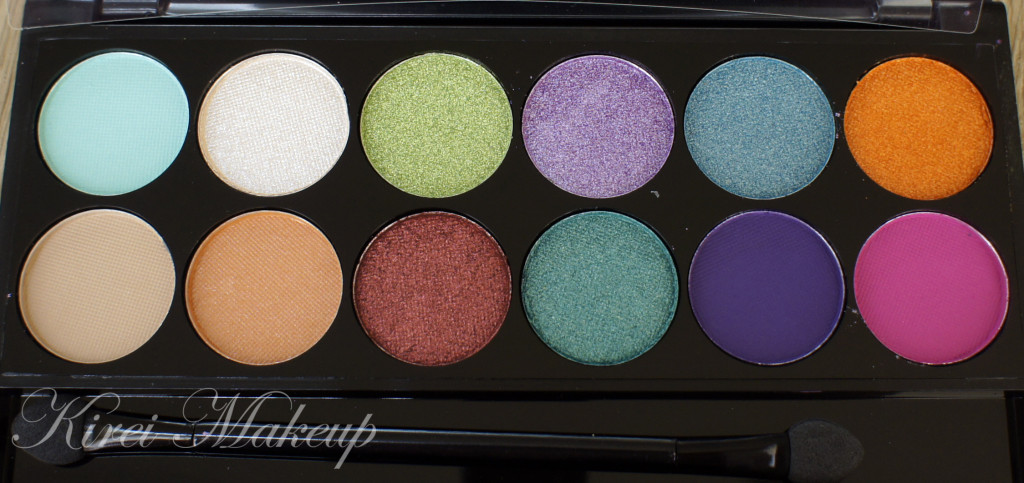
Sleek snapshot palette

From the Top (L-R):

  • Summer Breeze – matte cyan.
  • Martini – shimmery vanilla.
  • Kiwi Flower – shimmery chartreuse green.
  • Lotus Flower – shimmery lavender.
  • Humming Bird – shimmery deep turquoise blue.
  • Tequila Sunrise – shimmery orange.

On the bottom (L-R):

  • Sand Walker – matte beige nude shade.
  • Washed Ashore – matte light orange.
  • Sunset – shimmery copper.
  • Green Iguana – green teal shimmer.
  • Purple Haze – matte purple with cool undertone.
  • Magenta Madness – fuschia pink matte shade.
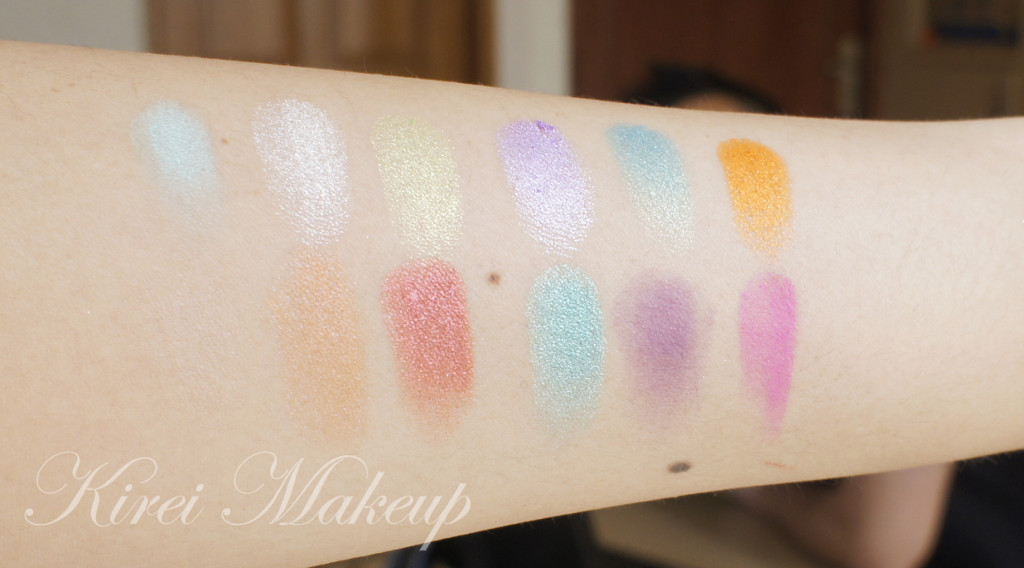
 

Sleek snapshot palette swatch

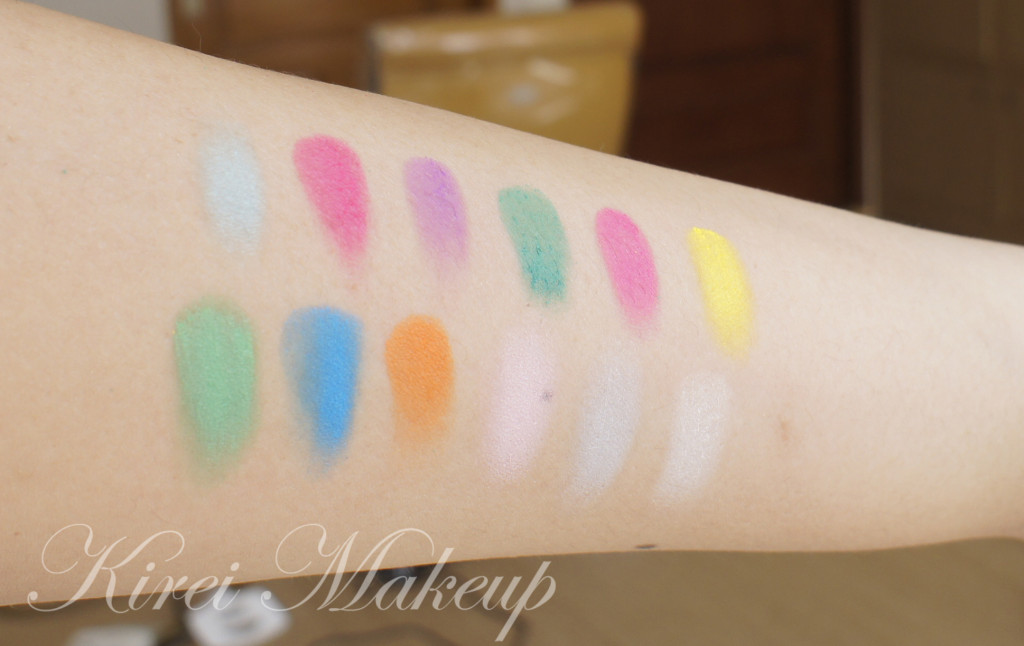
The last palette is the Ultra Mattes V1 Brights, which is a very popular palette. I’ve heard raves about this palette on how great the colors were even though they are mattes. When I first opened the palette, my eyes immediately went to Dragon Fly shade. It’s soooo beautiful! It’s bright, it’s gorgeous and it’s so creamy when touched. The shades just seem to glide on the skin smoothly.
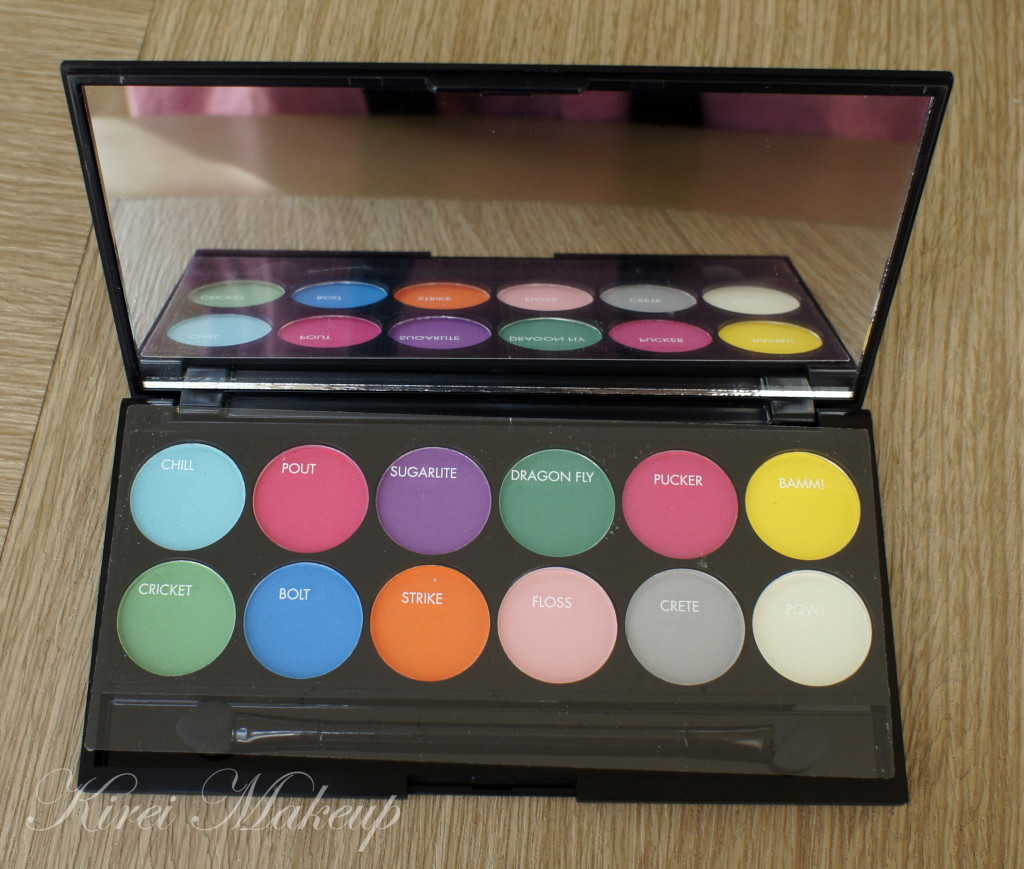
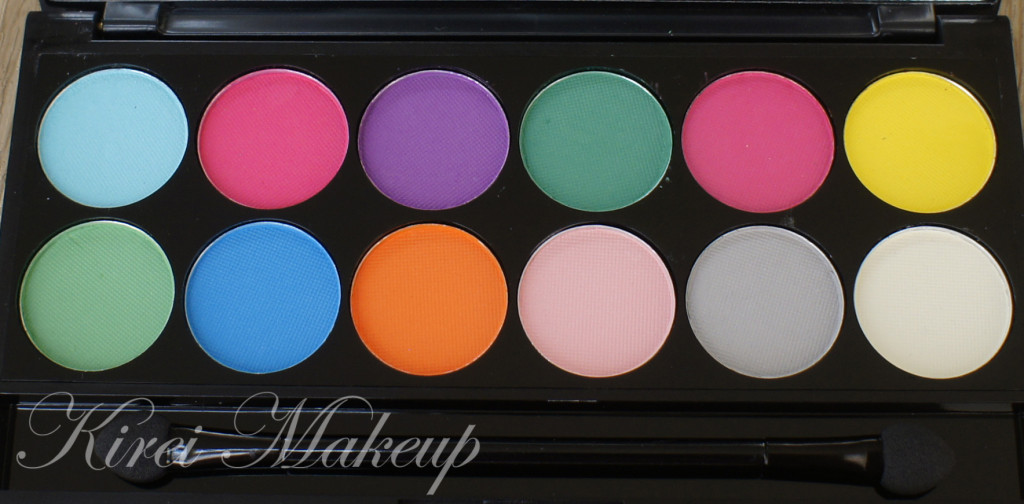
sleek ultra mattes V1 brights


sleek ultra mattes V1 brights

All the colors on this palette are matte. It does not feel chalky at all, instead it has a creamy, velvety texure to it. Most of the colors look pretty good without a primer when swatched. Even the lighter ones like pink, grey and white, though it might look light and chalky, you can still see the slight difference in hue on my arm.

On the top layer (L-R):

  • Chill  – aqua blue.
  • Pout – hot pink.
  • Sugarlite – purple with red undertone.
  • Dragonfly – jungle green (yes, it is a color, I did not make this up).
  • Pucker- another hot pink shade. I think this shade is very similar to Pout, but slightly lighter.
  • Bammi – true yellow.

On the bottom layer (L-R):

  • Cricket – grass green.
  • Bolt – electric blue.
  • Strike – orange (similar to that in Pantone’s).
  • Floss – ballerina pink
  • Crete – soft grey.
  • Pow – vanilla.sleek ultra mattes V1 brights swatch

All in all, I think all 3 palettes are pretty awesome. It’s a tad more expensive than the original price from Sleek, but I still think it’s a good price by Luxola. I’m one happy gal!
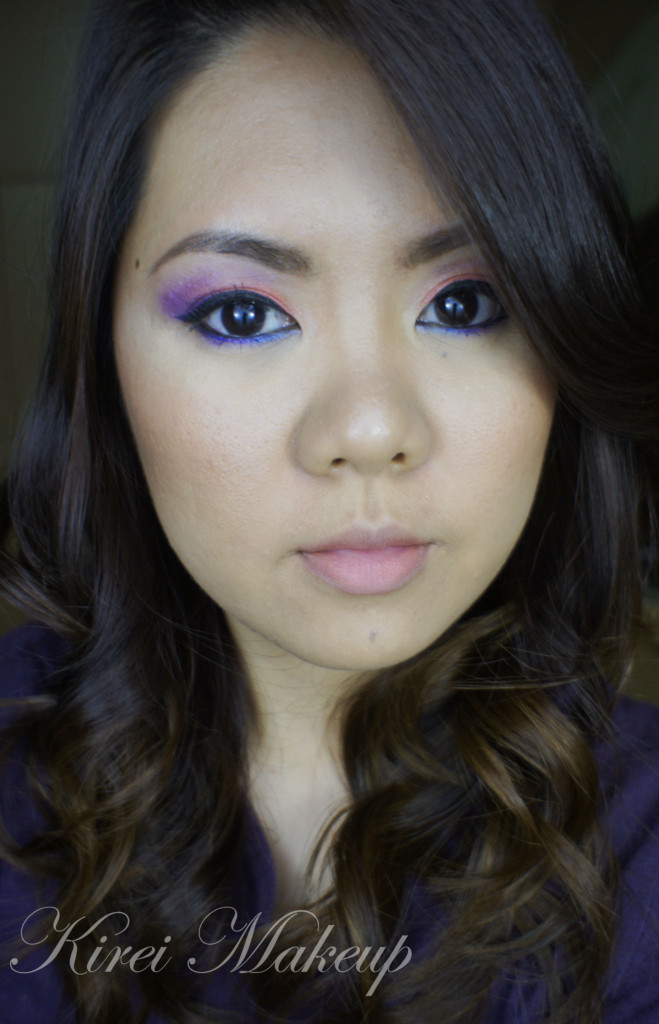
Sunset Inspired

I’ve been wanting to do a sunset inspired makeup for a while, but couldn’t find the right colors to do it. Well, ever since I got my hands on that MUFE Aqua Cream no. 9, I couldn’t resist playing with that color. I think it’s probably one of my favorite colors so far. I just want to use it all the time!

If you see anything that’s underlined and bold in the sentences below, it means that I’ve link it to another tutorial/review that I’ve done in this blog. The links are not spam nor will it lead you to another site.

How-to:

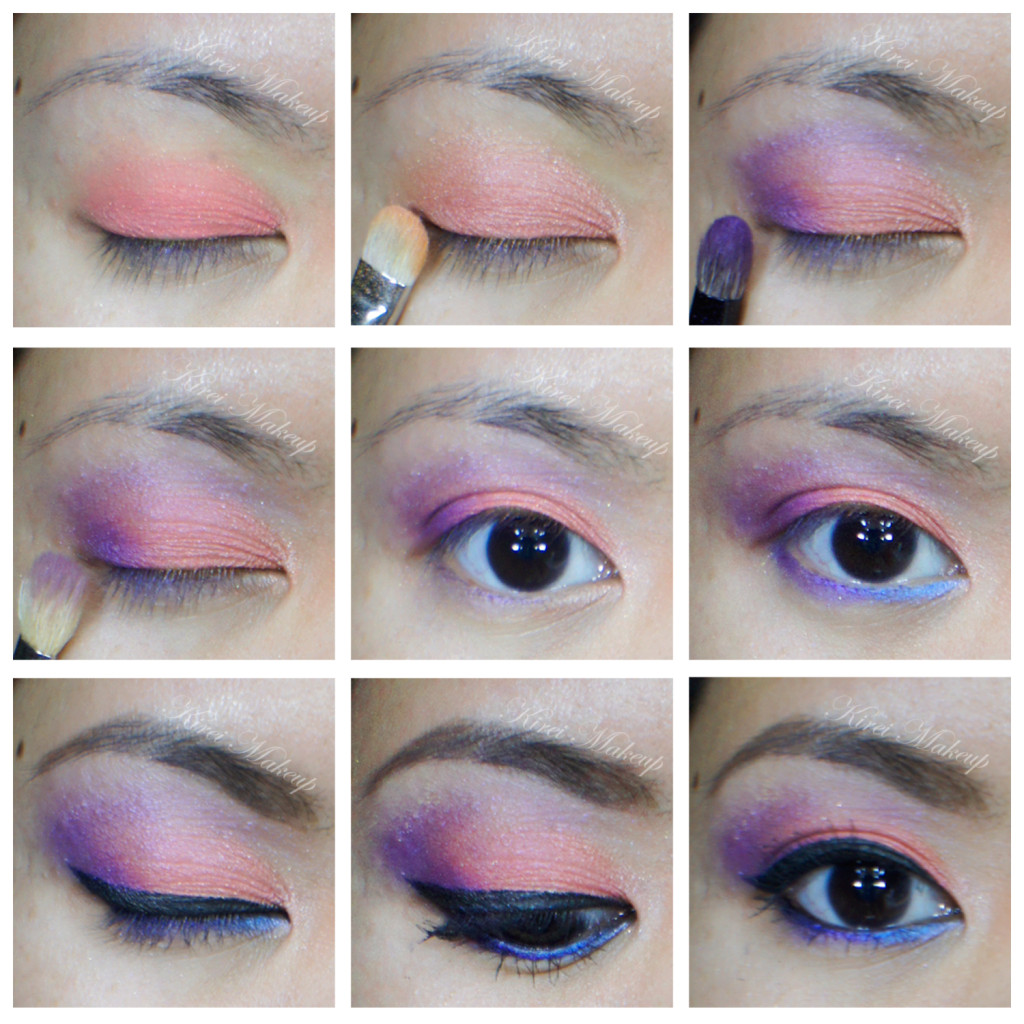
1. I applied MUFE Aqua Cream Shadow no. 9 all over my lid using my finger. (for other tutorials using this color please refer to Coral and Blue, and Candiliscious)

2. Using a flat eyeshadow brush, I applied Smashbox Soft Shimmering Coral from the Admire Me palette on top of the aqua cream.

3. Using Smashbox bullet brush, I applied purple eyeshadow from Sariayu’s Karimunjawa palette.

4. I blended the edge of the shadow using a clean blending brush.

5. Using an angled eyebrow brush, I applied Lancome All Made Up eyeshadow on the inner corner of the lower lid, and the purple eyeshadow from step 3 on the outer half.

6. Using a Kate Super Sharp liquid eyeliner (bought from a Japanese drugstore during my trip), I created a winged liner along the upper lash line.

7. I lined the outer third of my lower lid using the same eyeliner and used an angled brush to smudge the liner slightly.

8. I filled my brows using a mixture of MAC Omega and MAC Brun using an angled eyeliner brush.

9. I curled my lashes and applied L’oreal Double Extender Curl mascara.

10. I applied my face powder right below my brows.

coral and purple makeup

11. Under the eyes, I applied the yellow corrector from MAC Pro Conceal/Correct palette in Medium.

12. On my face, I applied MUFE HD foundation using a Sigma Round Kabuki brush.

13. I powdered my face using Cinema Secret loose powder.

14. I applied MAC Shadowy to contour my face and MAC Peaches blush on my cheeks (for my contouring tutorial please refer to Subtle Contour/Highlight/Blush).

15. On my lips, I applied Revlon Mauve It Over lipstick.

sunset makeup

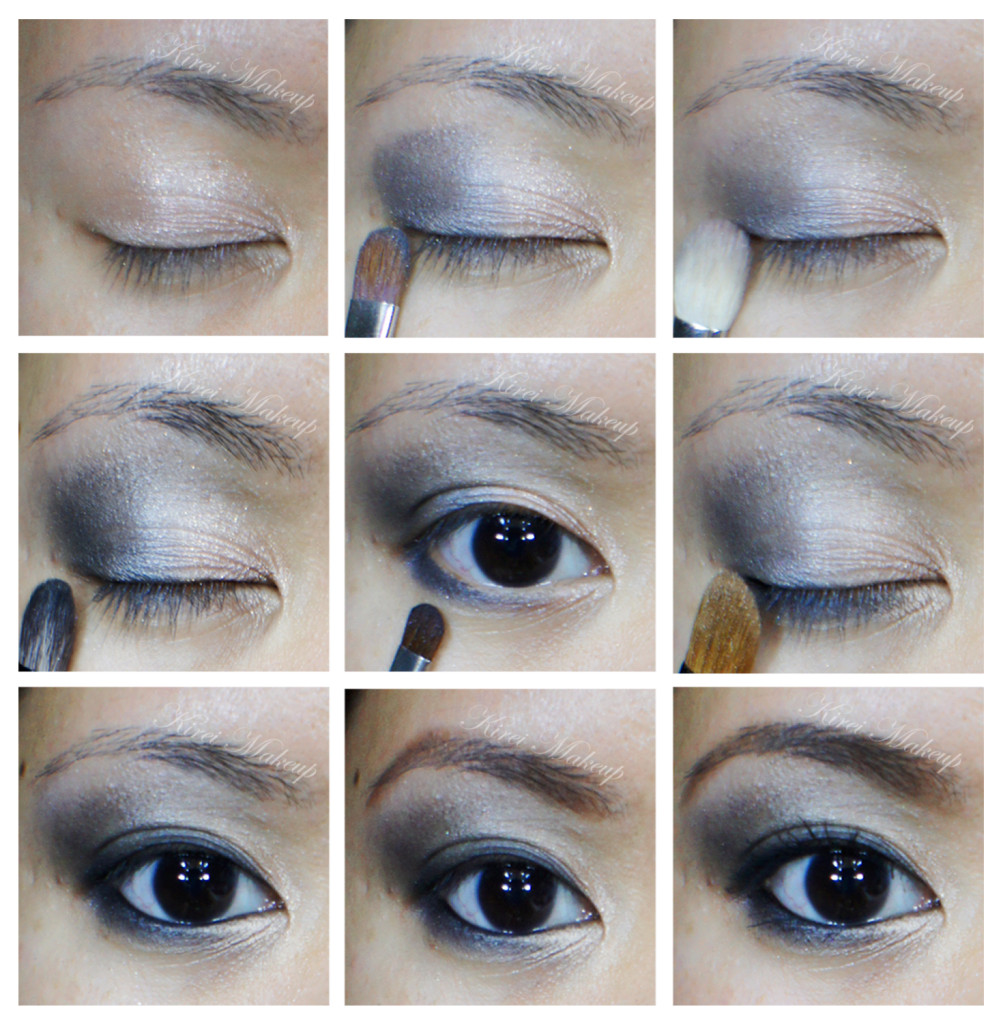
Silver Smoke

Please do forgive me for the unrully brows. I’ve been trying to grow them out so I can try out BrowHaus at Grand Indonesia, but I’m dying to tweeze them myself! *breathe in breathe out* Hopefully by the end of the week I can get them waxed!

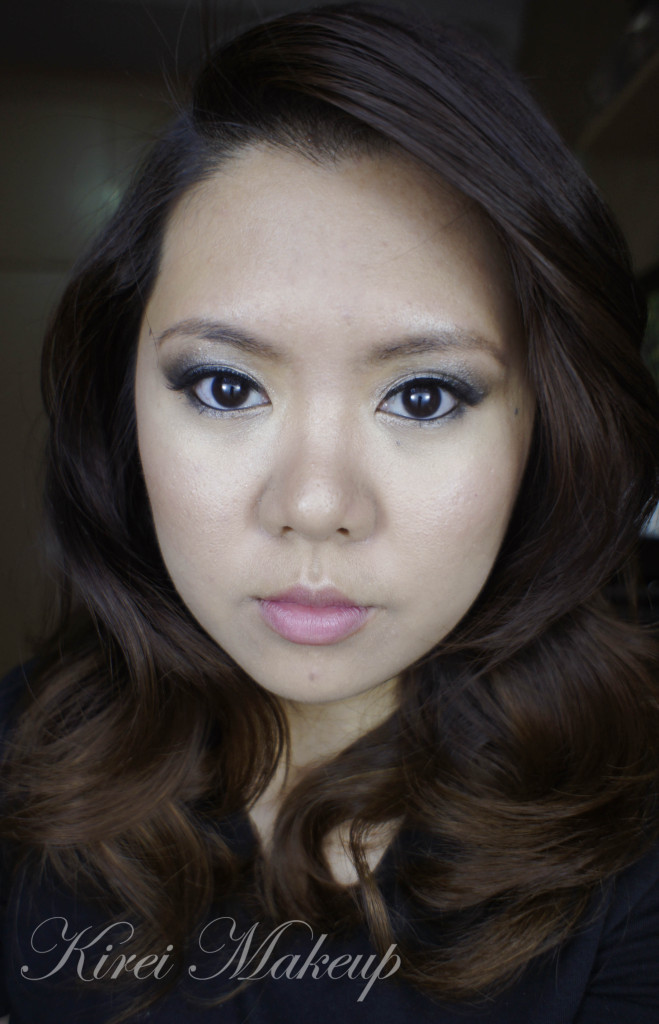
If you read my tweets (follow my twitter: @KireiMakeup), I’ve wanted to do a tutorial using my Urban Decay Naked 2 Palette. Today’s look is a silver smoky makeup. I think the look would look great on brides and those who prefer smoky makeup for prom/parties. Lots of drama on this look. Very intense! Lots of silver, lots of shimmer and very dark around the lashes and outer V.

If you aren’t too comfortable with blending or applying eyeshadow on the outer V, alternatively what you can do is to apply silver all over the lid and create a heavy liner on upper and lower lashes with black eyeliner (as well as on the waterline). Top it off with lots and lots of mascara.

With this look, try to “wing” the smoky eyes slightly for an uplifting effect. You need a good blending brush (or two) for the smoky effect.

How-to:

1. I prepped my eyelid using Urban Decay Primer Potion in Sin.

2. On the lid, I applied Pistol from UD Naked 2 palette using a flat eyeshadow brush.

3. On the inner part of the lid, I applied Suspect from UD Naked 2 palette using a flat eyeshadow brush (not in picture).

4. Using a small fluffy blending brush, I applied  Blackout from UD Naked 2 palette on the outer V and slightly on the crease.

5. Using Smashbox bullet brush, I blended the crease out to ensure there’s no harsh line.

6. Using an angled eyebrow brush, I applied Suspect on the inner half of the lower lid and Blackout on the outer half.

7. Using Blackout, I created a winged liner along the upper lashline, making the liner thicker on the outer part and thinner on the inner part.

8. I lined my waterline using L’oreal Voluminous Smoldering eyeliner.

9. I curled my lashes and applied Maybelline Volume Express Turbo Boost mascara on both top and bottom lashes.

10. I filled my brows using Dollywinked brow pencil. I applied Foxy from Naked 2 palette under the brows.

11. (optional), I applied Ardell Demure and 110 false eyelashes on the upper lashes.

silver smoky eyes

12. For the face, I applied Estee Lauder double wear light foundation using a foundation brush from the center of the face blending it towards the outer perimeter of the face.

13. Under the eyes, I applied YSL Touche Eclat and blended it using my finger.

14. On the cheeks, I applied MAC Cubic.

15. I applied MAC Shadowy on the sides of the nose.

16. For the lips, I applied Chanel Confidentielle lip rouge.

urban decay naked 2