Neutral Smokey Eyes using Urban Decay Naked Palette

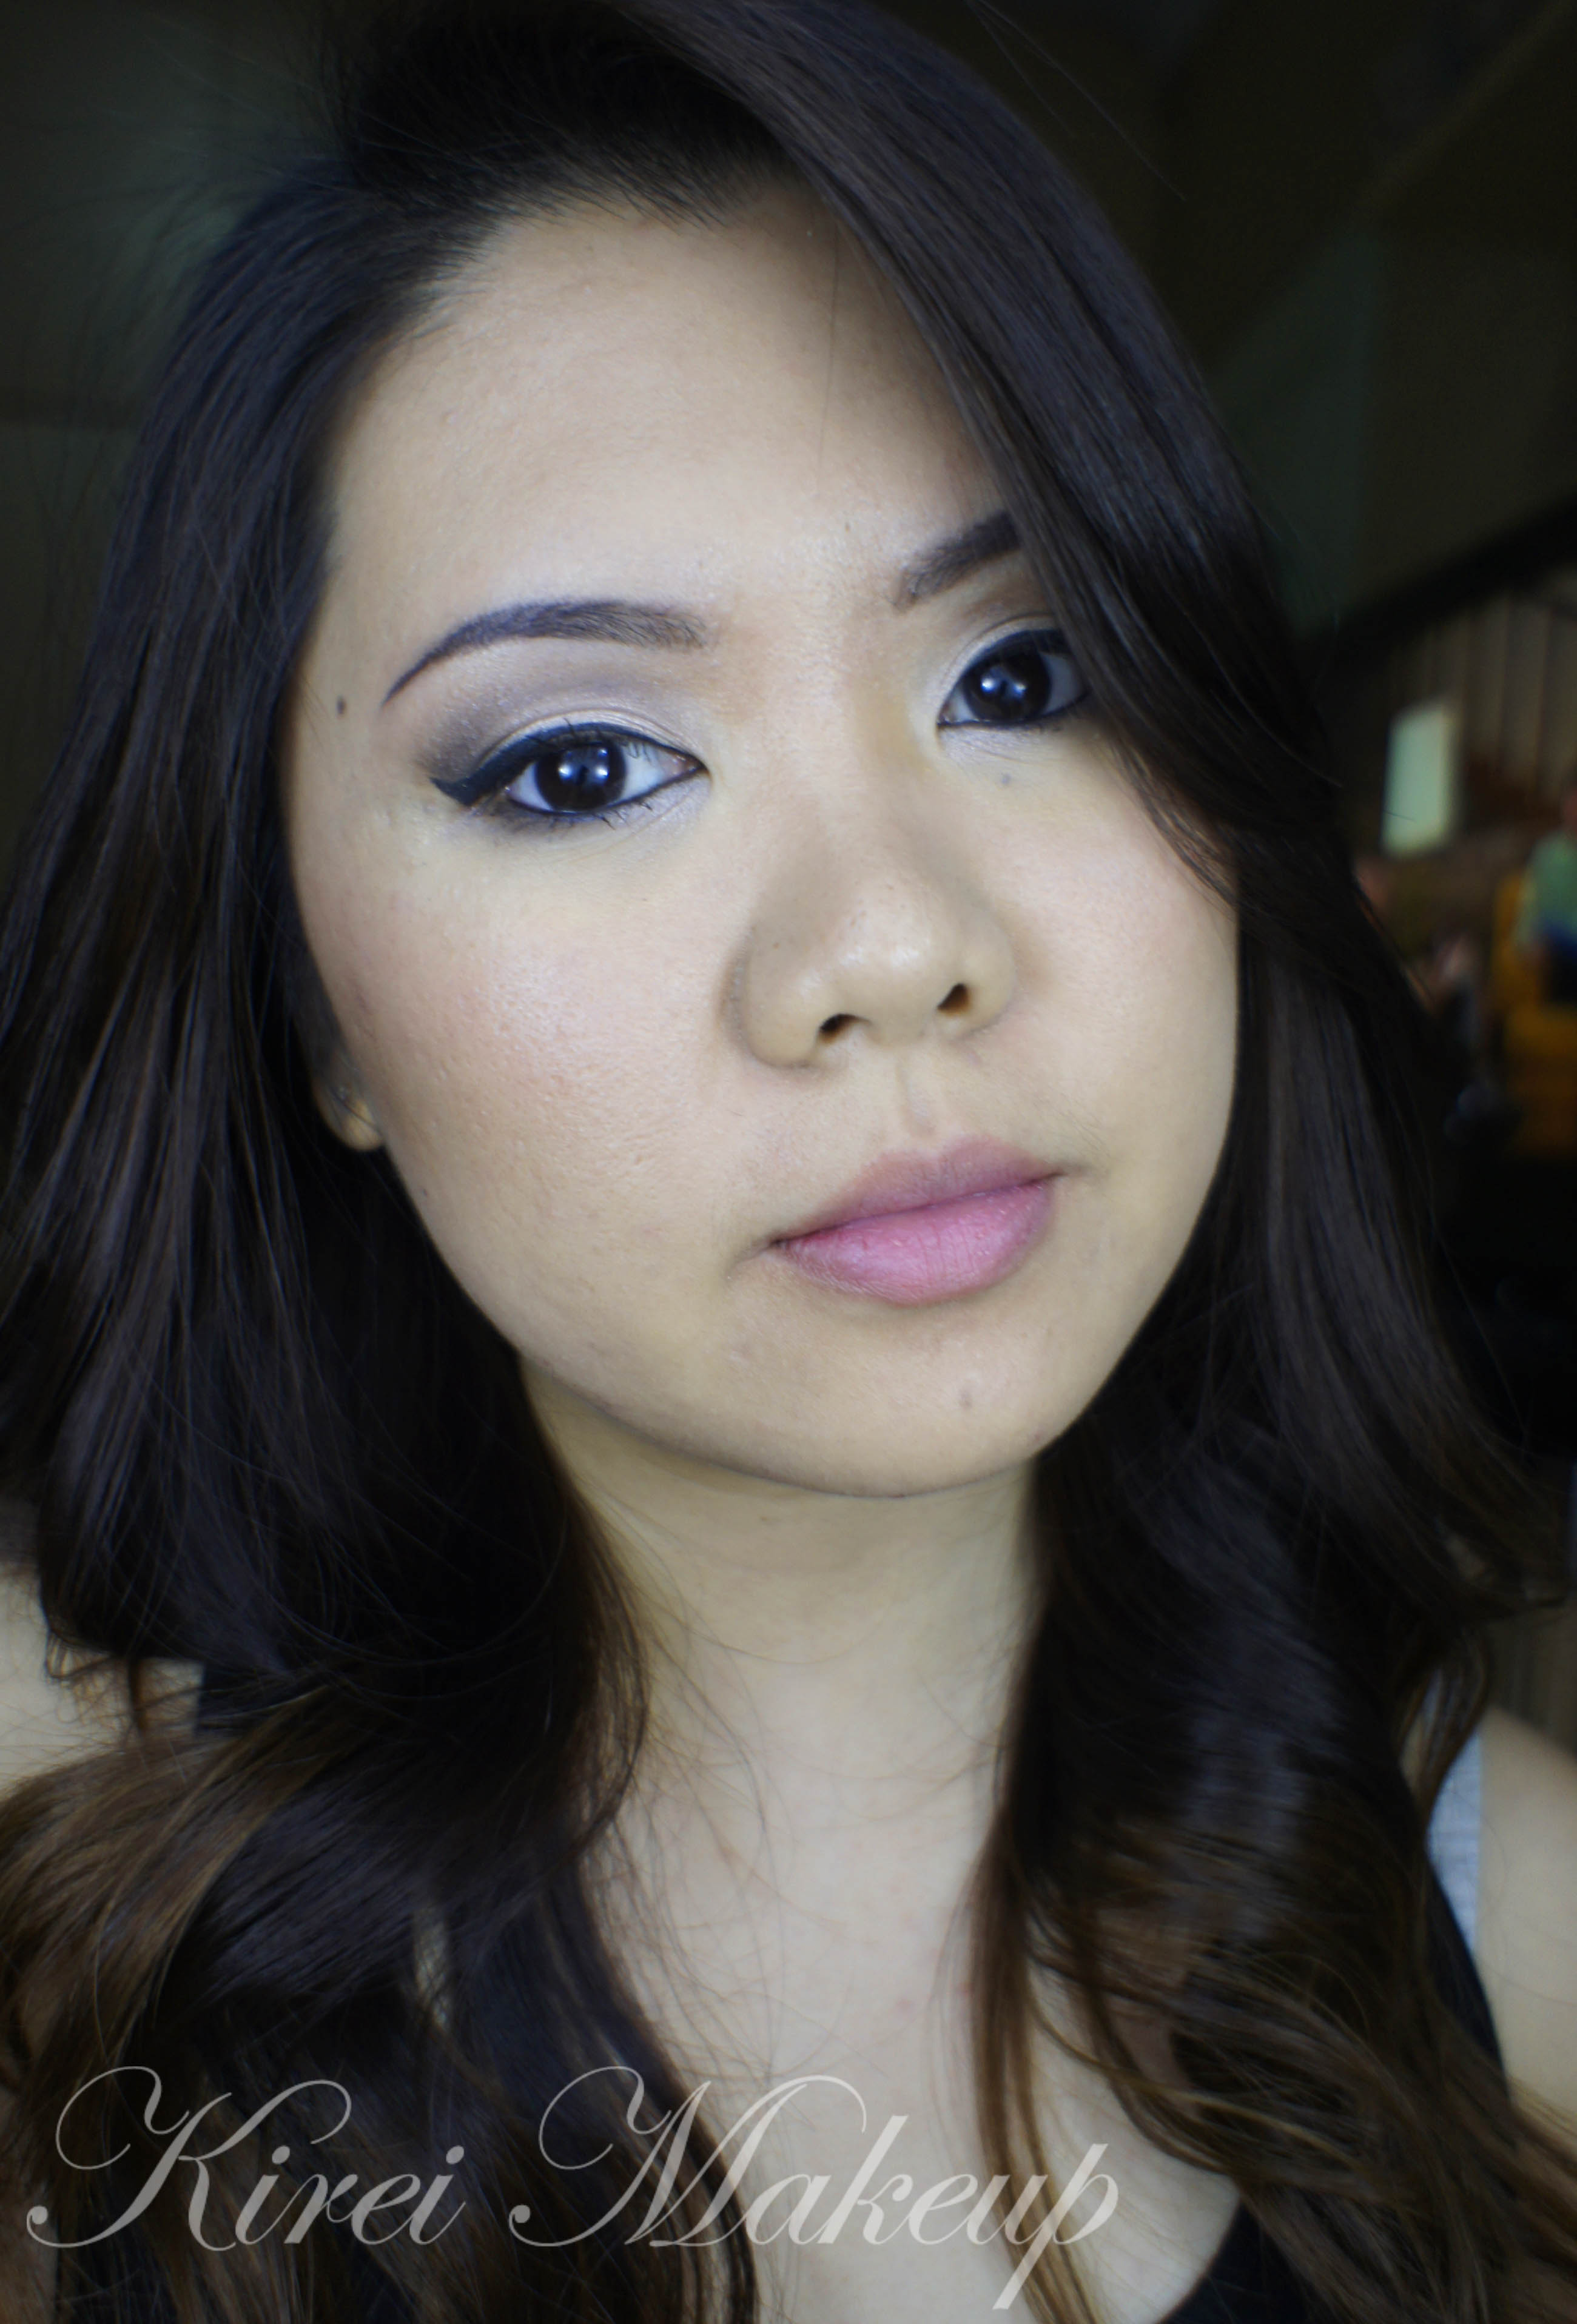
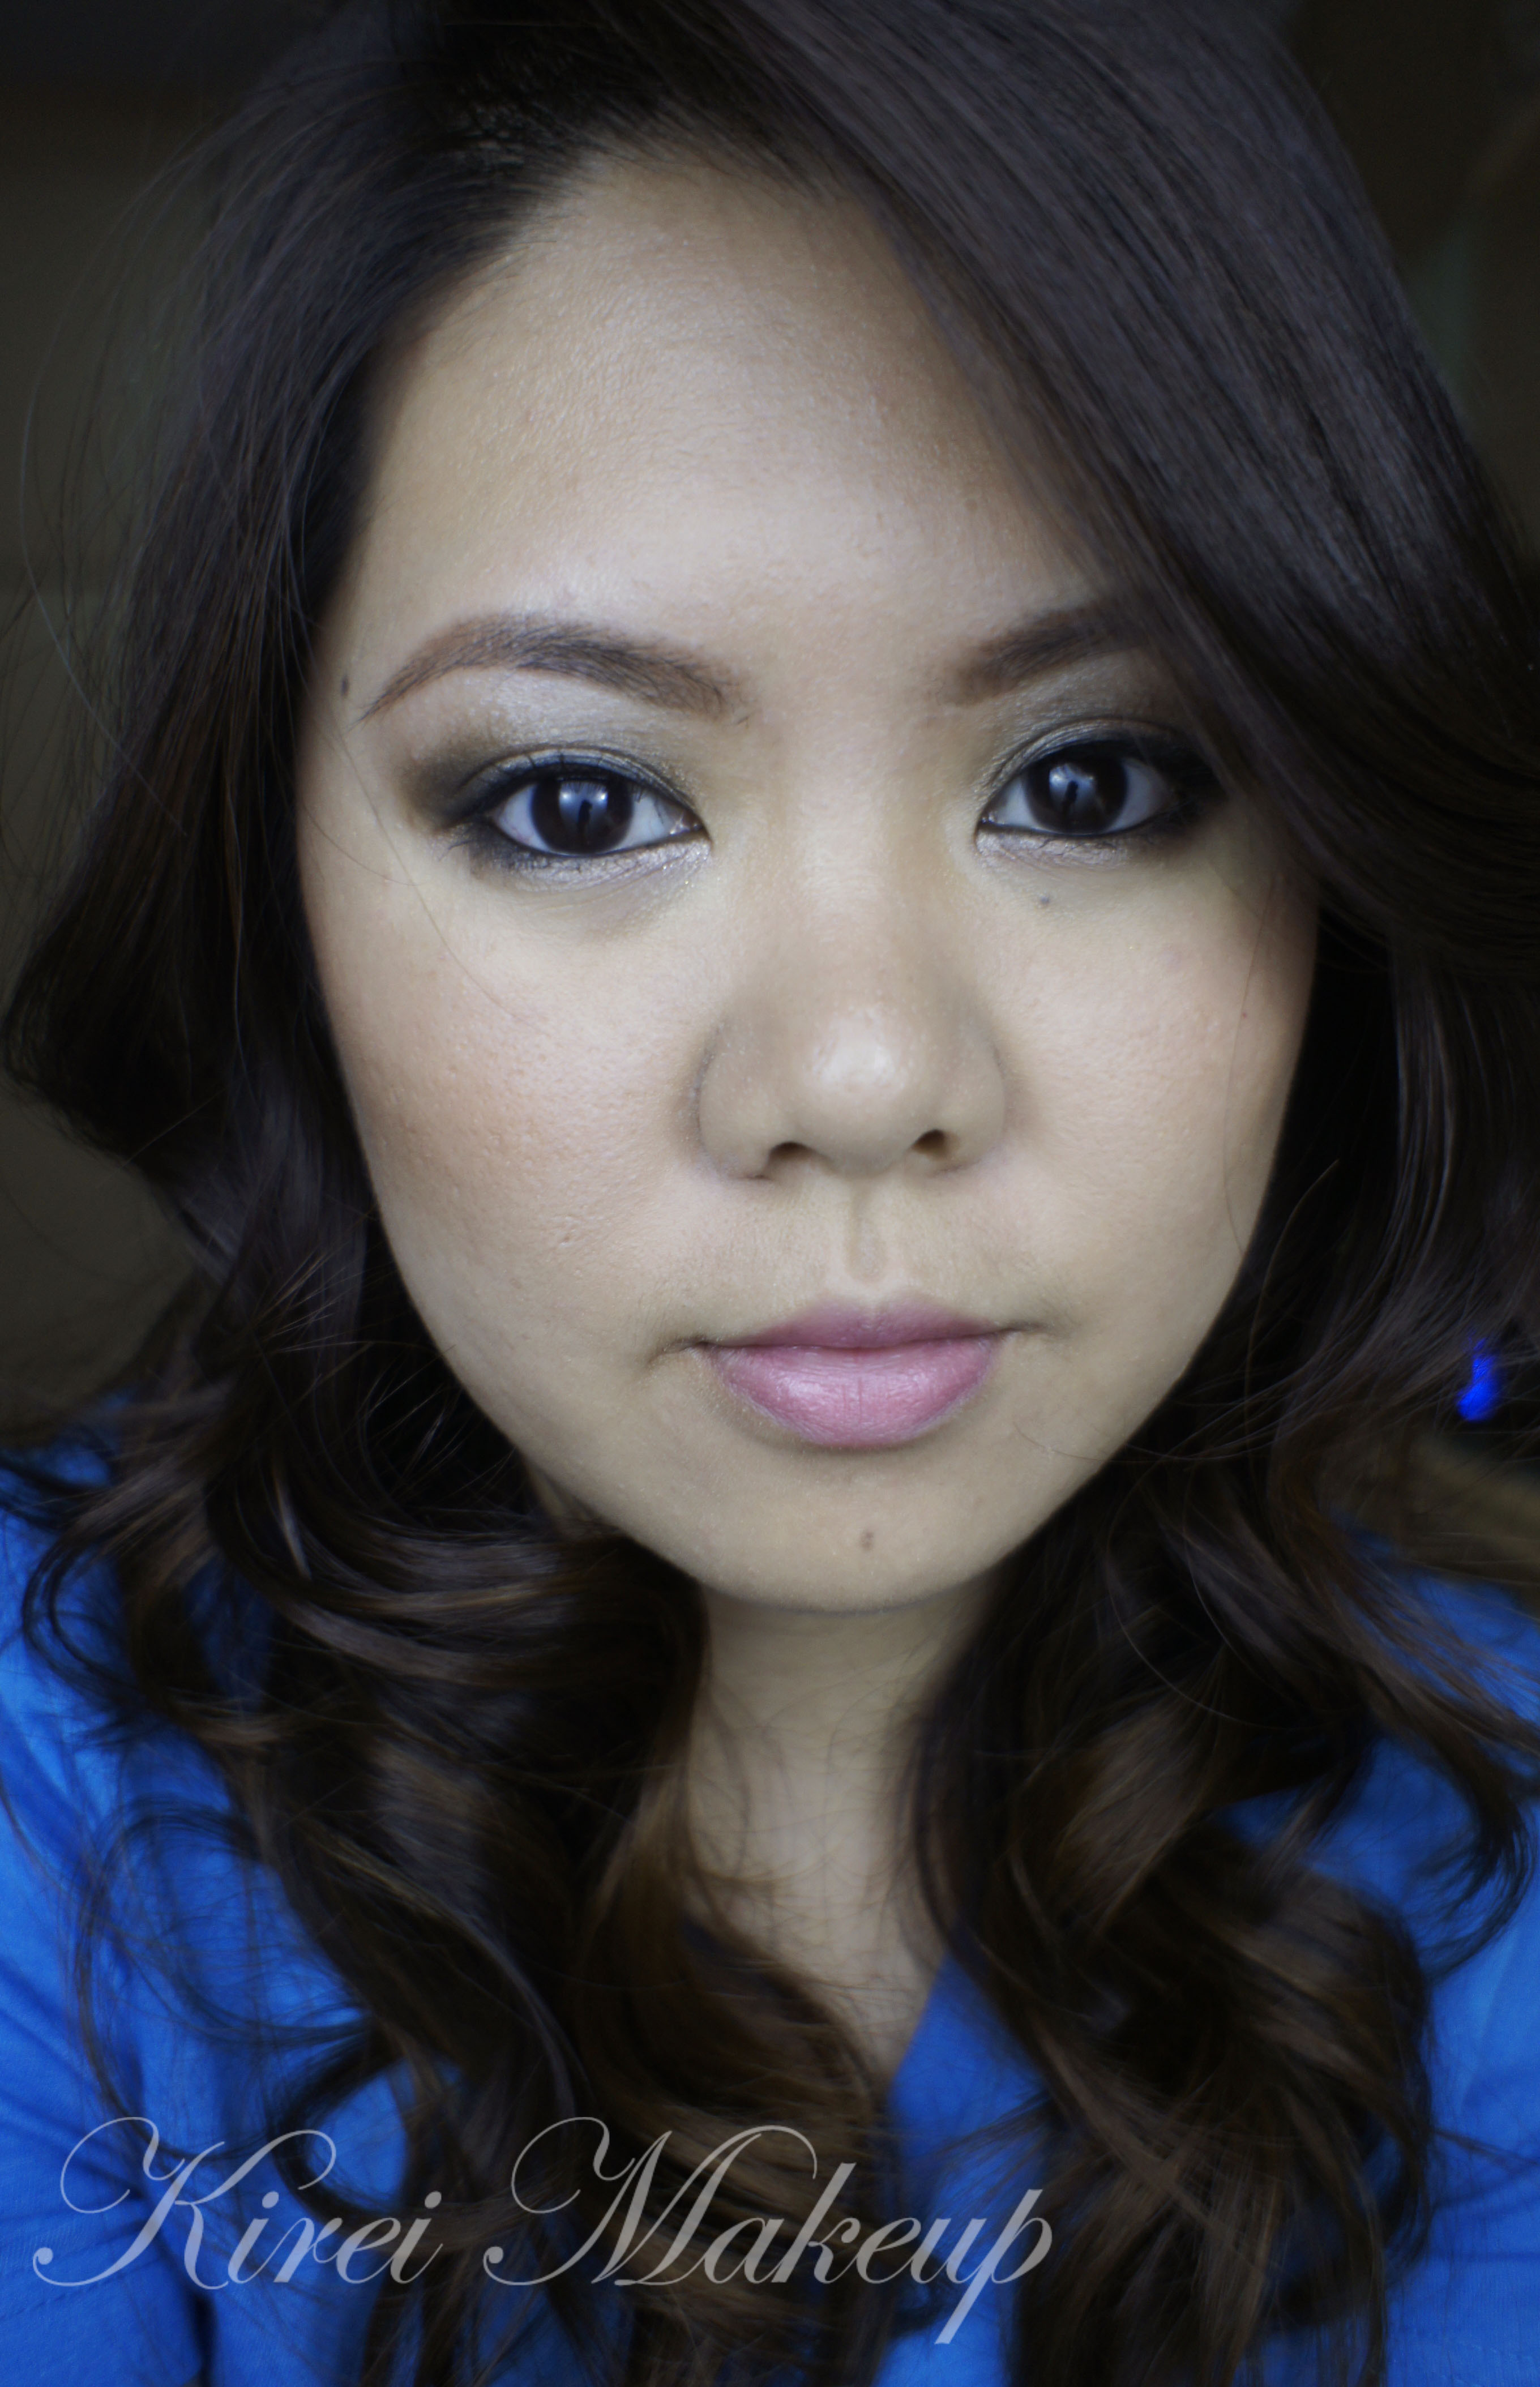
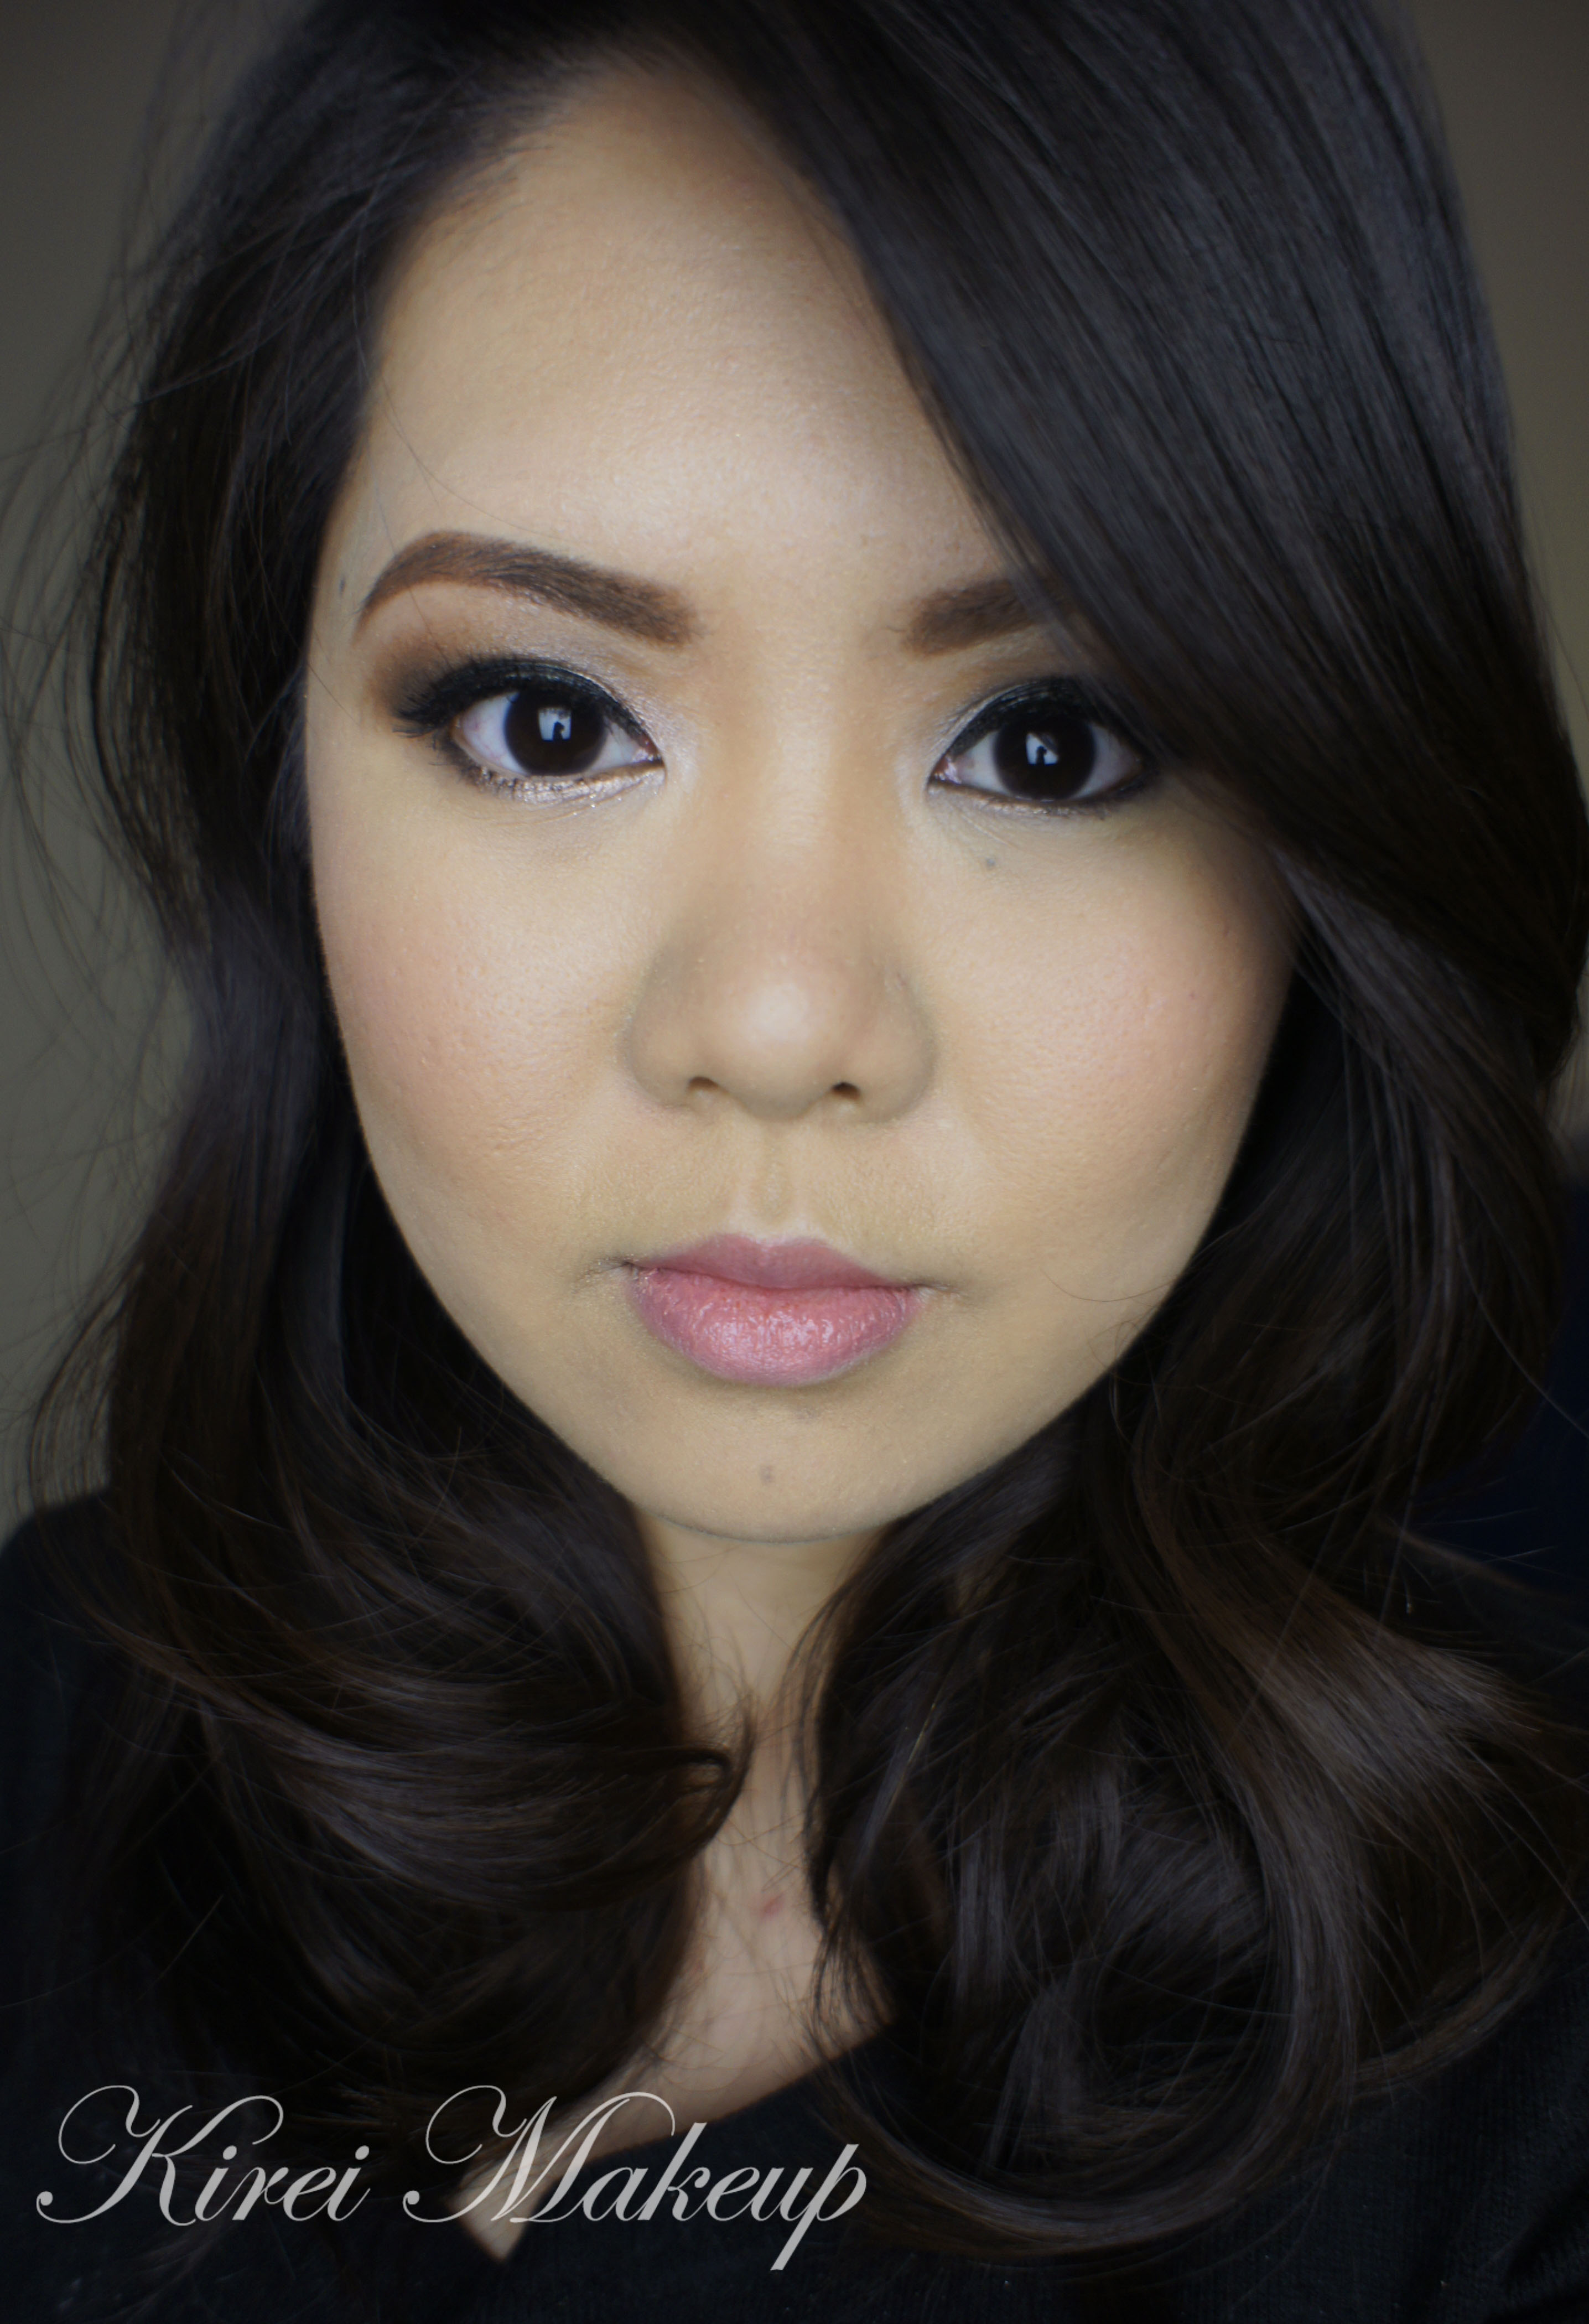
Another Urban Decay Naked palette post again?! Yes it is! I’ve been showcasing my love for the Urban Decay Naked 3, and I did a tutorial using the Naked 2, so I though that it was time to get in touch with the original Naked palette. For this tutorial, I wanted to do a neutral smokey eyes tutorial, which is perfect for any occasion from party, night-out, date (for Valentine’s) etc.

How-to:

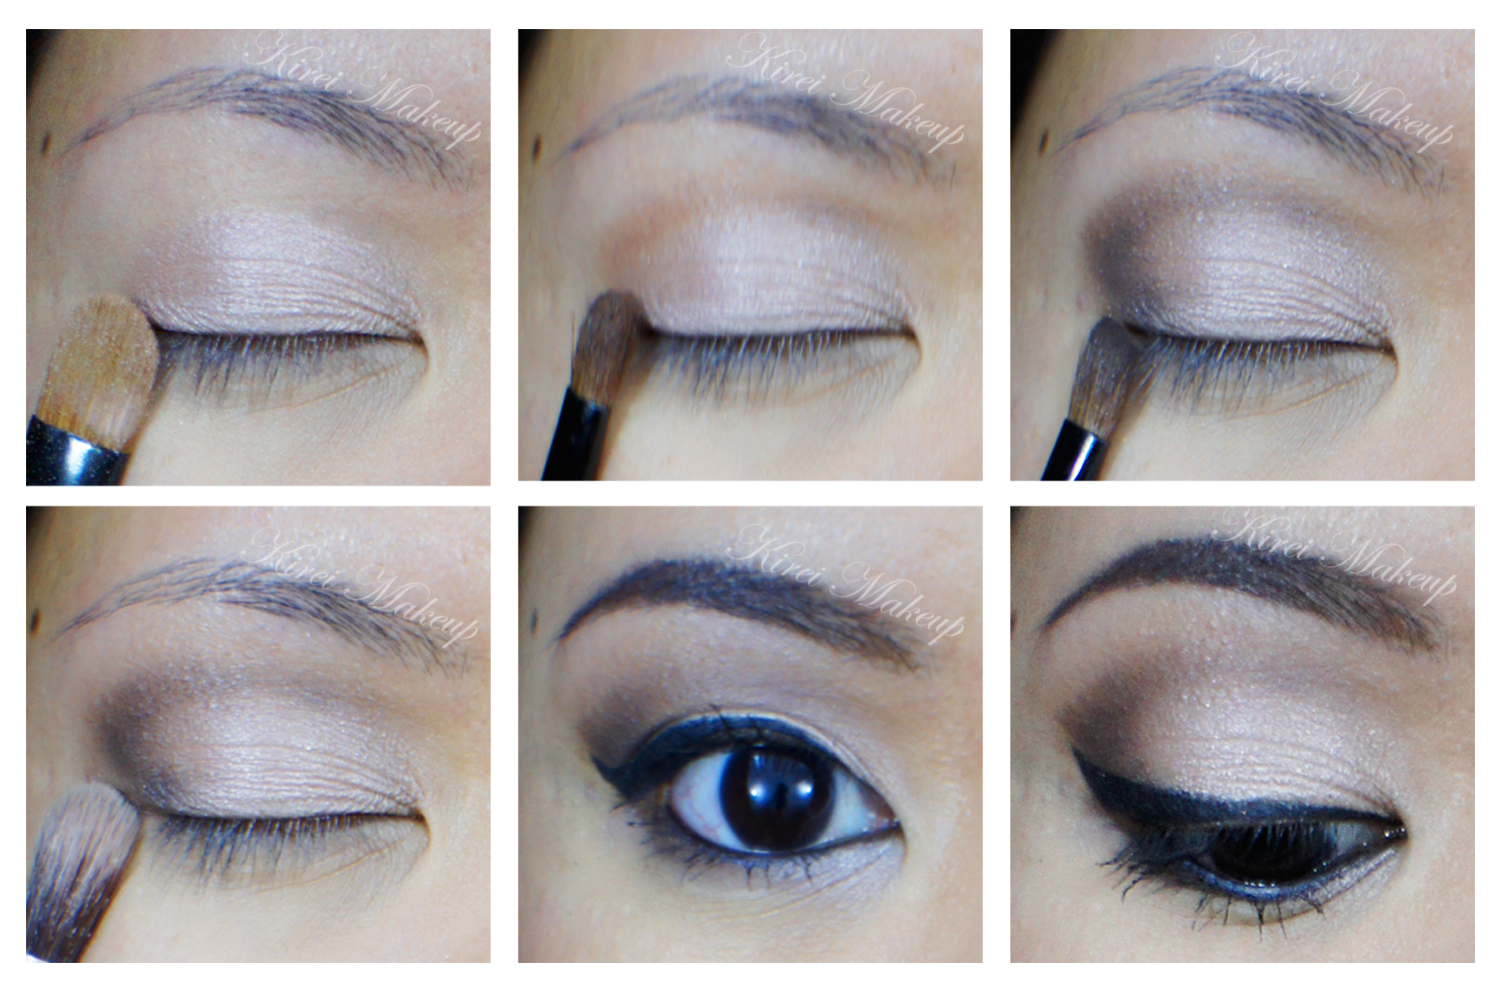
1. I prepped my eyelids using Urban Decay Primer Potion in Sin.

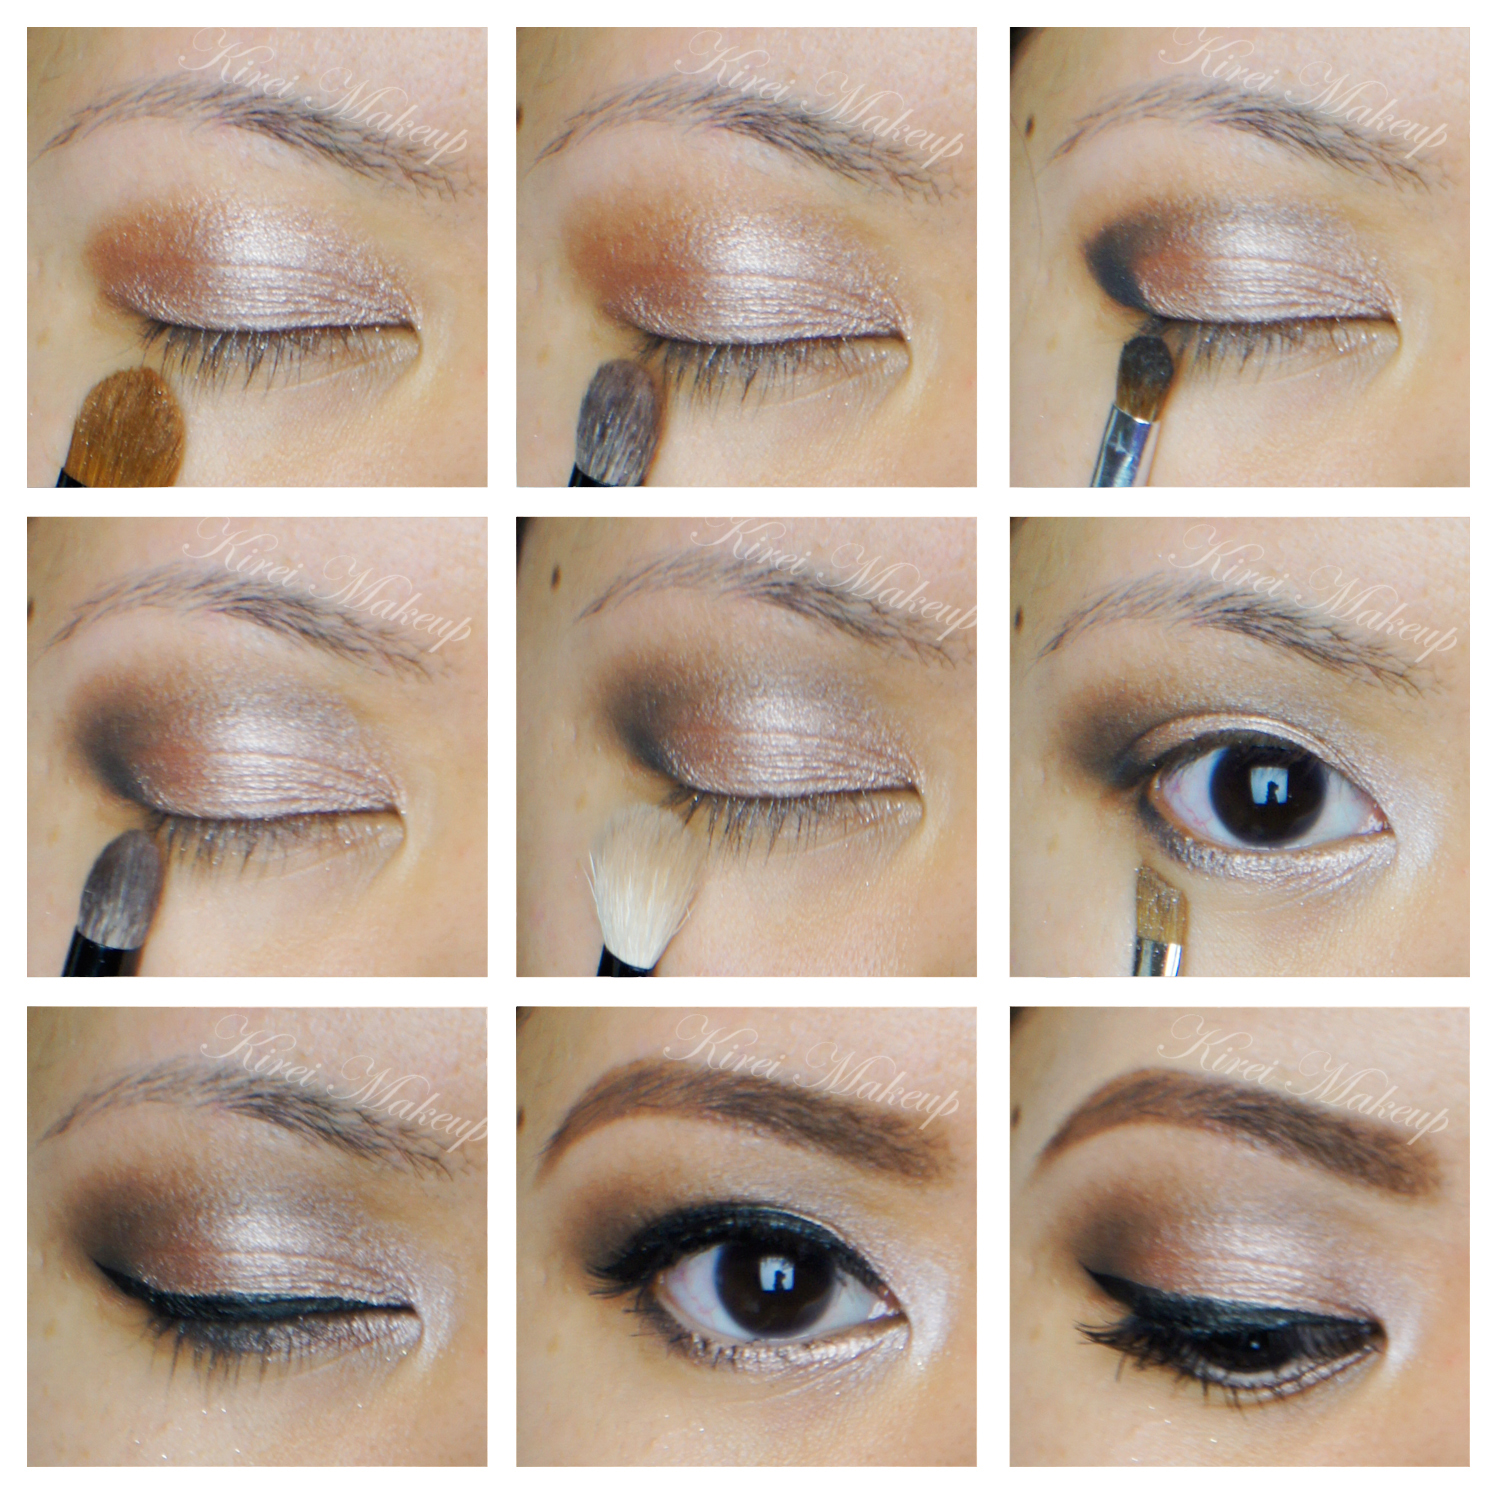
2. Using a flat eyeshadow brush, I applied Sidecar all over the eyelid.

3. I applied Buck on my crease using Smashbox Bullet Crease brush.

4. Using a small shader brush, I applied Creep on the outer V and lightly dragging it to the crease.

5. Using the same Smashbox Bullet Crease brush that I used on step 3, I blended my crease.

6. I applied Naked lightly under the brow, and Sin on the inner corner of my eyes.

7. I applied Creep on the outer half of my lower lid, and Sidecar on the inner half using an angled eyeliner brush.

8. I created a winged eyeliner using Kanebo Kate Super Sharp eyeliner. On my waterline, I used MAC Chromagraphic eyeliner in NC15.

9. I filled my brows using Anastasia Duo Brow Powder in Brunette.

10. I curled my lashes, and applied Buxom Lash mascara on both top and bottom lashes.

11. I also applied Gwiyomi Gillian false eyelashes.

urban decay naked tutorial

12. For my face, I applied CoverFX Cream foundation in G40 using CoverFX cream foundation brush.

13. On my cheeks, I applied Chanel Blush de Horizon.

14. On my lips, I applied Revlon Socialite lipstick.

coverfx cream foundation review g40Products used

Eyes – Urban Decay Primer Potion Sin, Urban Decay Naked palette, Kanebo Kate Super Sharp eyeliner, Buxom Lash mascara, Anastasia Brow Powder Brunette, Gwiyomi Gillian false eyelashes.

Face – Cover FX Cream foundation, Chanel Blush de Horizon, Revlon Socialite lipstick.

Neutral

I wanted to do a pretty makeup, something that will be good for brides, or prom goers, or just for anyone who wants an extra something something..bahahahaha..anyways! I love how it ended up and I think this look is perfect for brides, if they don’t want anything too smoky.

Anyways, I love how I’ve been using UD Naked palette more lately. I think I might do more tutorials using the Naked and Naked 2 palettes. Also, how do you like my brows? I managed to fix it today. Lately, I’ve played around with the MUFE Aqua Brow gel and I have to say, I’m loving it! More on that later on during the week.

How-to:

1. I applied UD Sin eyeshadow all over the lid using a flat eyeshadow brush.

2. On the crease, I applied UD Buck eyeshadow using a small blending brush.

3. Using the same brush, I applied MAC Brun on the outer V.

4. I clean the edge of the crease using a clean blending brush.

5. Using a small shader brush, I applied Sin on the inner corner of the lower lid and MAC Brun on the outer corner.

6. I created a winged liner along the upper lashline using MUFE Aqua Black gel liner and an angled eyeliner brush.

7. I lined my waterline using L’oreal Voluminous Smoldering eyeliner.

8. For my lashes, I applied MUFE Smoky Lash mascara on both top and lower lashes.

9. I filled my brows in using MUFE Aqua Brow.

natural makeup with urban decay naked palette

10. For the face, I applied UD Naked foundation using a foundation brush.

11. Under the eyes, I applied MAC Pro Conceal/Correct concealer in Medium.

12. I applied MAC Shadowy as a light contour and then MAC Cubic on my cheeks as blush.

13. For the lips, I filled it in using MAC Dervish lipliner.

asian bridal makeup

Pearlescent

Another smoky tutorial! This time, I wanted to show you guys another way of doing a smoky eye. This look highlights the center of the eyelid, instead of the usual highlight on the inner corner. I like doing this smoky eyes more than the other ones since I find that the eyes catch the light when you blink or look down. It’s something different than the classic sooty, dark grey smoky eyes. Obviously, you can do this with any color. I’ve done this type of look using cranberry and blue eyeshadow in my Peek a Blue post.

How-to:

1. Using a synthetic art brush, I applied Smashbox Stone cream eyeshadow on the inner and outer corner of the eyes, leaving the center part of the lid bare.

2. Using a flat eyeshadow brush, I applied Urban Decay Dark Horse eyeshadow on top of the cream eyeshadow. Again, leave the middle part of the lid empty.

3. Using another clean synthetic art brush, I applied Chanel Illusion D’ombre in Emerveille in the middle of the lid.

4. Using a clean flat eyeshadow brush, I applied Urban Decay Sidecar eyeshadow on top of Chanel Emerveille cream shadow.

5. Using a clean small fluffy brush, I blended the edges where the dark and the light eyeshadow meet.

6. I applied UD Darkhorse on the outer half of the lower lid and UD Sidecar on the inner half.

7. I lined my waterline, tightline and upper lashline using L’oreal Voluminous Smoldering eyeliner.

8. I curled my lashes and applied Maybelline Express Volume Turbo boost mascara on my lashes.

9. I filled my brows in using Shu Uemura brow pencil.

asian smoky eyes

10. On my face, I applied MUFE HD foundation in 118 all over using IPKN Auto Wave makeup.

11. I contoured my cheeks using MAC Shadowy.

12. On the cheeks, I applied MAC Peaches blush.

13. On the lips I applied Chanel Confidentielle lipstick.

asian smoky eyes