Purple and Peach Spring Makeup ft. KVD Pastel Goth

I shared this look on my Instastory a while back when Spring was around the corner. I knew I wanted to create this Purple and Peach spring makeup, but I also wanted to create something more fun along with it. So for this look, I did 3 variations – the original and 2 graphic liners look. This was fun to create and I hope you enjoyed this look as much as I did.

purple and peach spring makeup using KVD pastel goth palette
Read More

Easy Spring Makeup ft. Dose of Colors Eyescream Palette

As I’m typing this, it’s snowing AGAIN here in Hamilton. I need my Spring back, please?! Anyways, today’s Easy Spring Makeup tutorial is a talk-through tutorial (say what?!). Yes, a talk-through tutorial. I’m trying to get comfortable talking in front of a camera, I feel like it is one of the challenges that I want to work on this year. Anyways, I do apologize if I’m awkward as ever.

For pictorial and product list, as always, read more below.

Read More

Colourpop Donut Liquid Lipstick Look

https://youtu.be/vz9TZiZQ00U

Lately I’ve been into a very bright, bold and matte lip look for Spring, and since recently I purchased Colourpop Donut Liquid Lipstick, I decided that I should to a fun look with this lipstick. I really love how the whole look turned out and I hope you guys enjoyed this tutorial as much as I do.

Read More

Bright Raspberry Lips Makeup

https://youtu.be/mioFTJMYqsU

Spring is just around the corner, and I couldn’t wait! This bright raspberry lips would be just the perfect look to welcome spring, don’t you think? Pair this bright lips with simple eye makeup, for a wearable look.

Read More

Shu Uemura Pastel Fantasy Makeup Tutorial #1

https://youtu.be/yHUFLJ3lUio

The newest Shu Uemura Pastel Fantasy Collection for Spring/Summer 2016 is to die for! These pastel colors are so pretty!!!! To be honest I thought when I bought the products I was going to end up with chalky eyeshadows, but nooope I was totally wrong. Anyways, I hope you guys will enjoy this Shu Uemura Pastel Fantasy makeup tutorial, and if you haven’t please do subscribe to my Youtube Channel! I upload 2 videos every week for you guys! If you have any request just leave me a comment.

Read More

Urban Decay Vice 3 Tutorial for Spring Look

Have you guys find out the pro tips given by Ludovic Engrand (Shu Uemura MUA) on my Instagram yet? If not, don’t forget to check it out! Anyways, for today’s Urban Decay Vice 3 tutorial, I wanted to create a spring look using just this one palette. I realized that I haven’t used this palette much, and I don’t know why I don’t use it as much since the eyeshadows are so buttery and creamy! This look is for someone who isn’t afraid of colors!

Of course, you can skip the orange-gold eyeshadow on my eyelid for something more neutral if you feel that this look is too colorful. I’ve done other tutorials using just a pop of color and neutrals in my other posts. So, check those out – Too Faced Chocolate Bar #3Kat Von D Monarch tutorial #2 and Cobalt Blue, Adding Color to eye makeup and a Hint of Mint.

I’ve also recently purchased a Stila brow pen (All Day Waterproof Brow Color), and I used it for the first time in this look. What do you guys think? I personally find this slightly harder to use at first. I’ve used it twice now, and I’m starting to really like the end result this product gives! I’ll try to do a review soon.

UD Vice 3 tutorial

Products used

Eyes

  • Primer – Urban Decay Primer Potion “original”
  • Eyelid – Urban Decay Vice 3 “Lucky
  • Outer corner – Urban Decay Vice 3 “Reign
  • Inner corner (tear duct) – Urban Decay Vice 3 “Last Sin
  • Lower lash line & Crease – Urban Decay Vice 3 “Defy
  • Waterline – Urban Decay Vice 3 “Dragon
  • Eyeliner – Kat Von D Tattoo Liner “Trooper”
  • Brows – Stila All Day Waterproof Brow Color “Dark”
  • Mascara – Cover Girl Lash Blast
  • Falsies – Gwiyomi boutique #3 lashes

UD Vice 3 look

Face/Cheeks

  • Primer – Kat Von D foundation primer
  • Foundation – MUFE HD Foundation #120
  • Concealer – MAC Pro Longwear concealer “NC25”
  • Setting powder – CoverFX translucent setting powder
  • Contour – MAC “Sculpt” powder
  • Blush – MAC “Cubic” blush

Lips

  • L’oreal Extraordinaire Color Riche “Blushing Harmony”

UD Vice 3 tutorial

Kat Von D Esperanza Tutorial #1

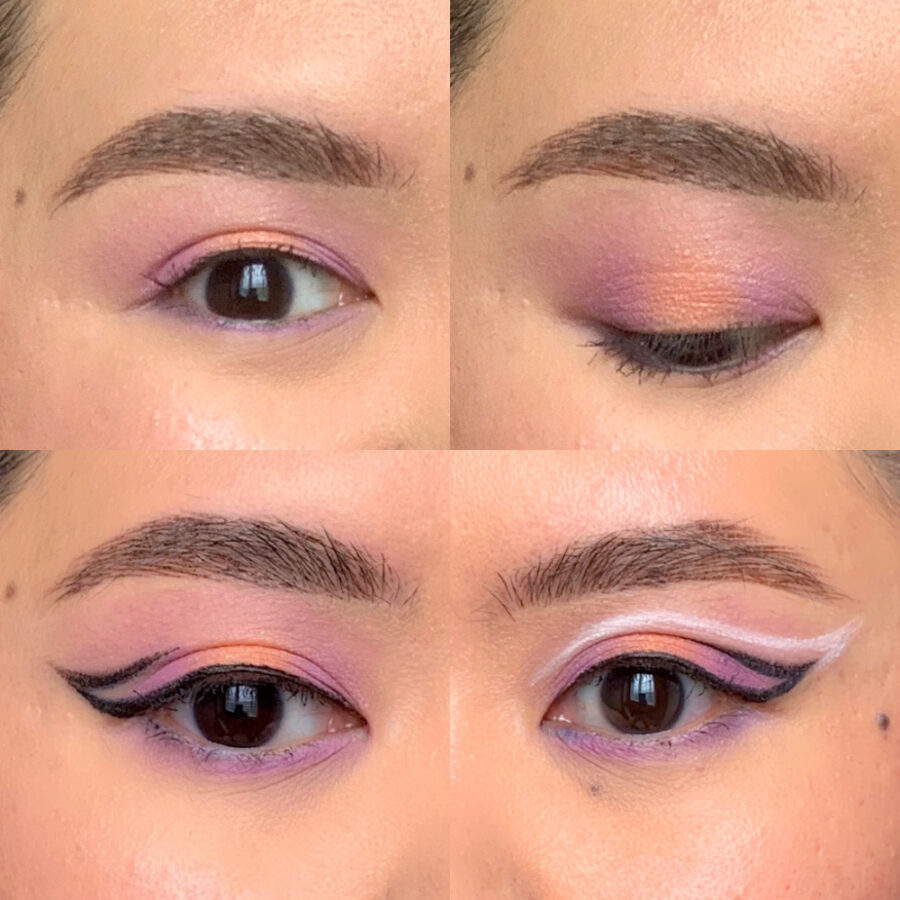
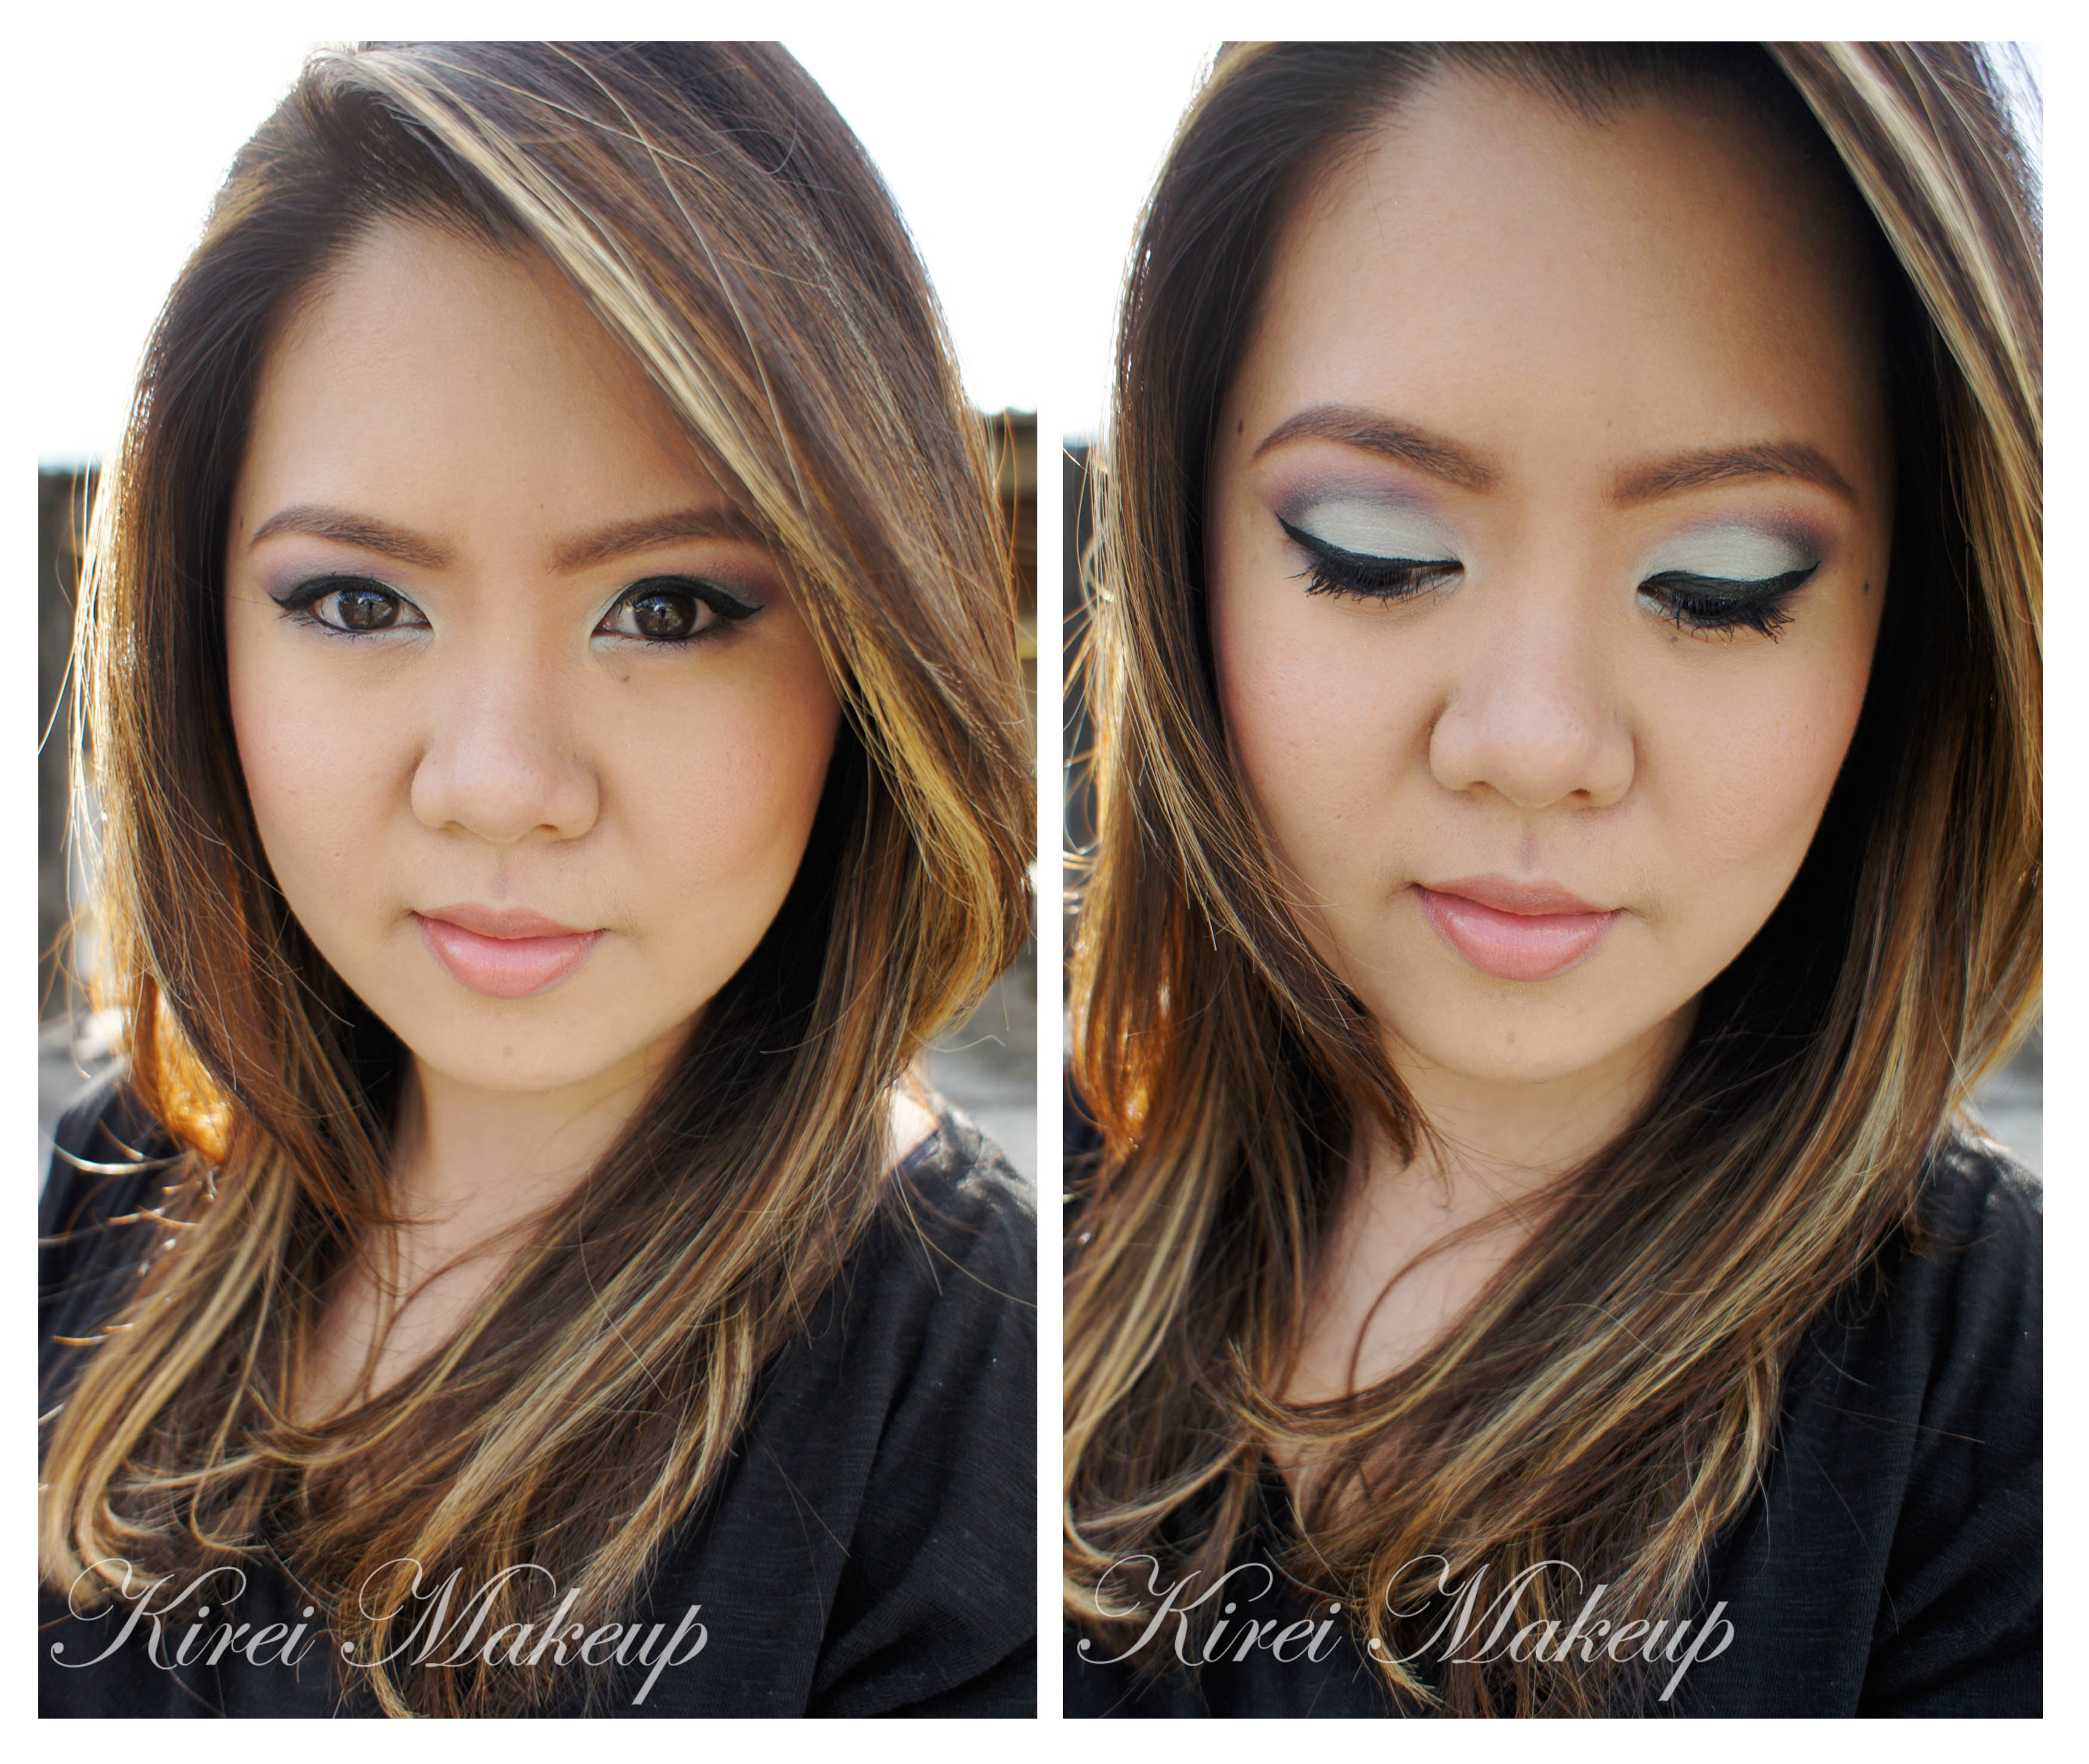
If you guys follow me on Instagram (you should, btw!), you would know that I’ve posted a little sneak peek on today’s tutorial there. Today, I wanted to do my first Kat Von D Esperanza tutorial, using the mint eyeshadow as the main focus. If you are wondering why the pictures on the step-by-step is a bit off in terms of the color, it’s because the Sun was playing hide and seek with me today. Luckily, the sky cleared up, and I managed to get good shots for the final looks!

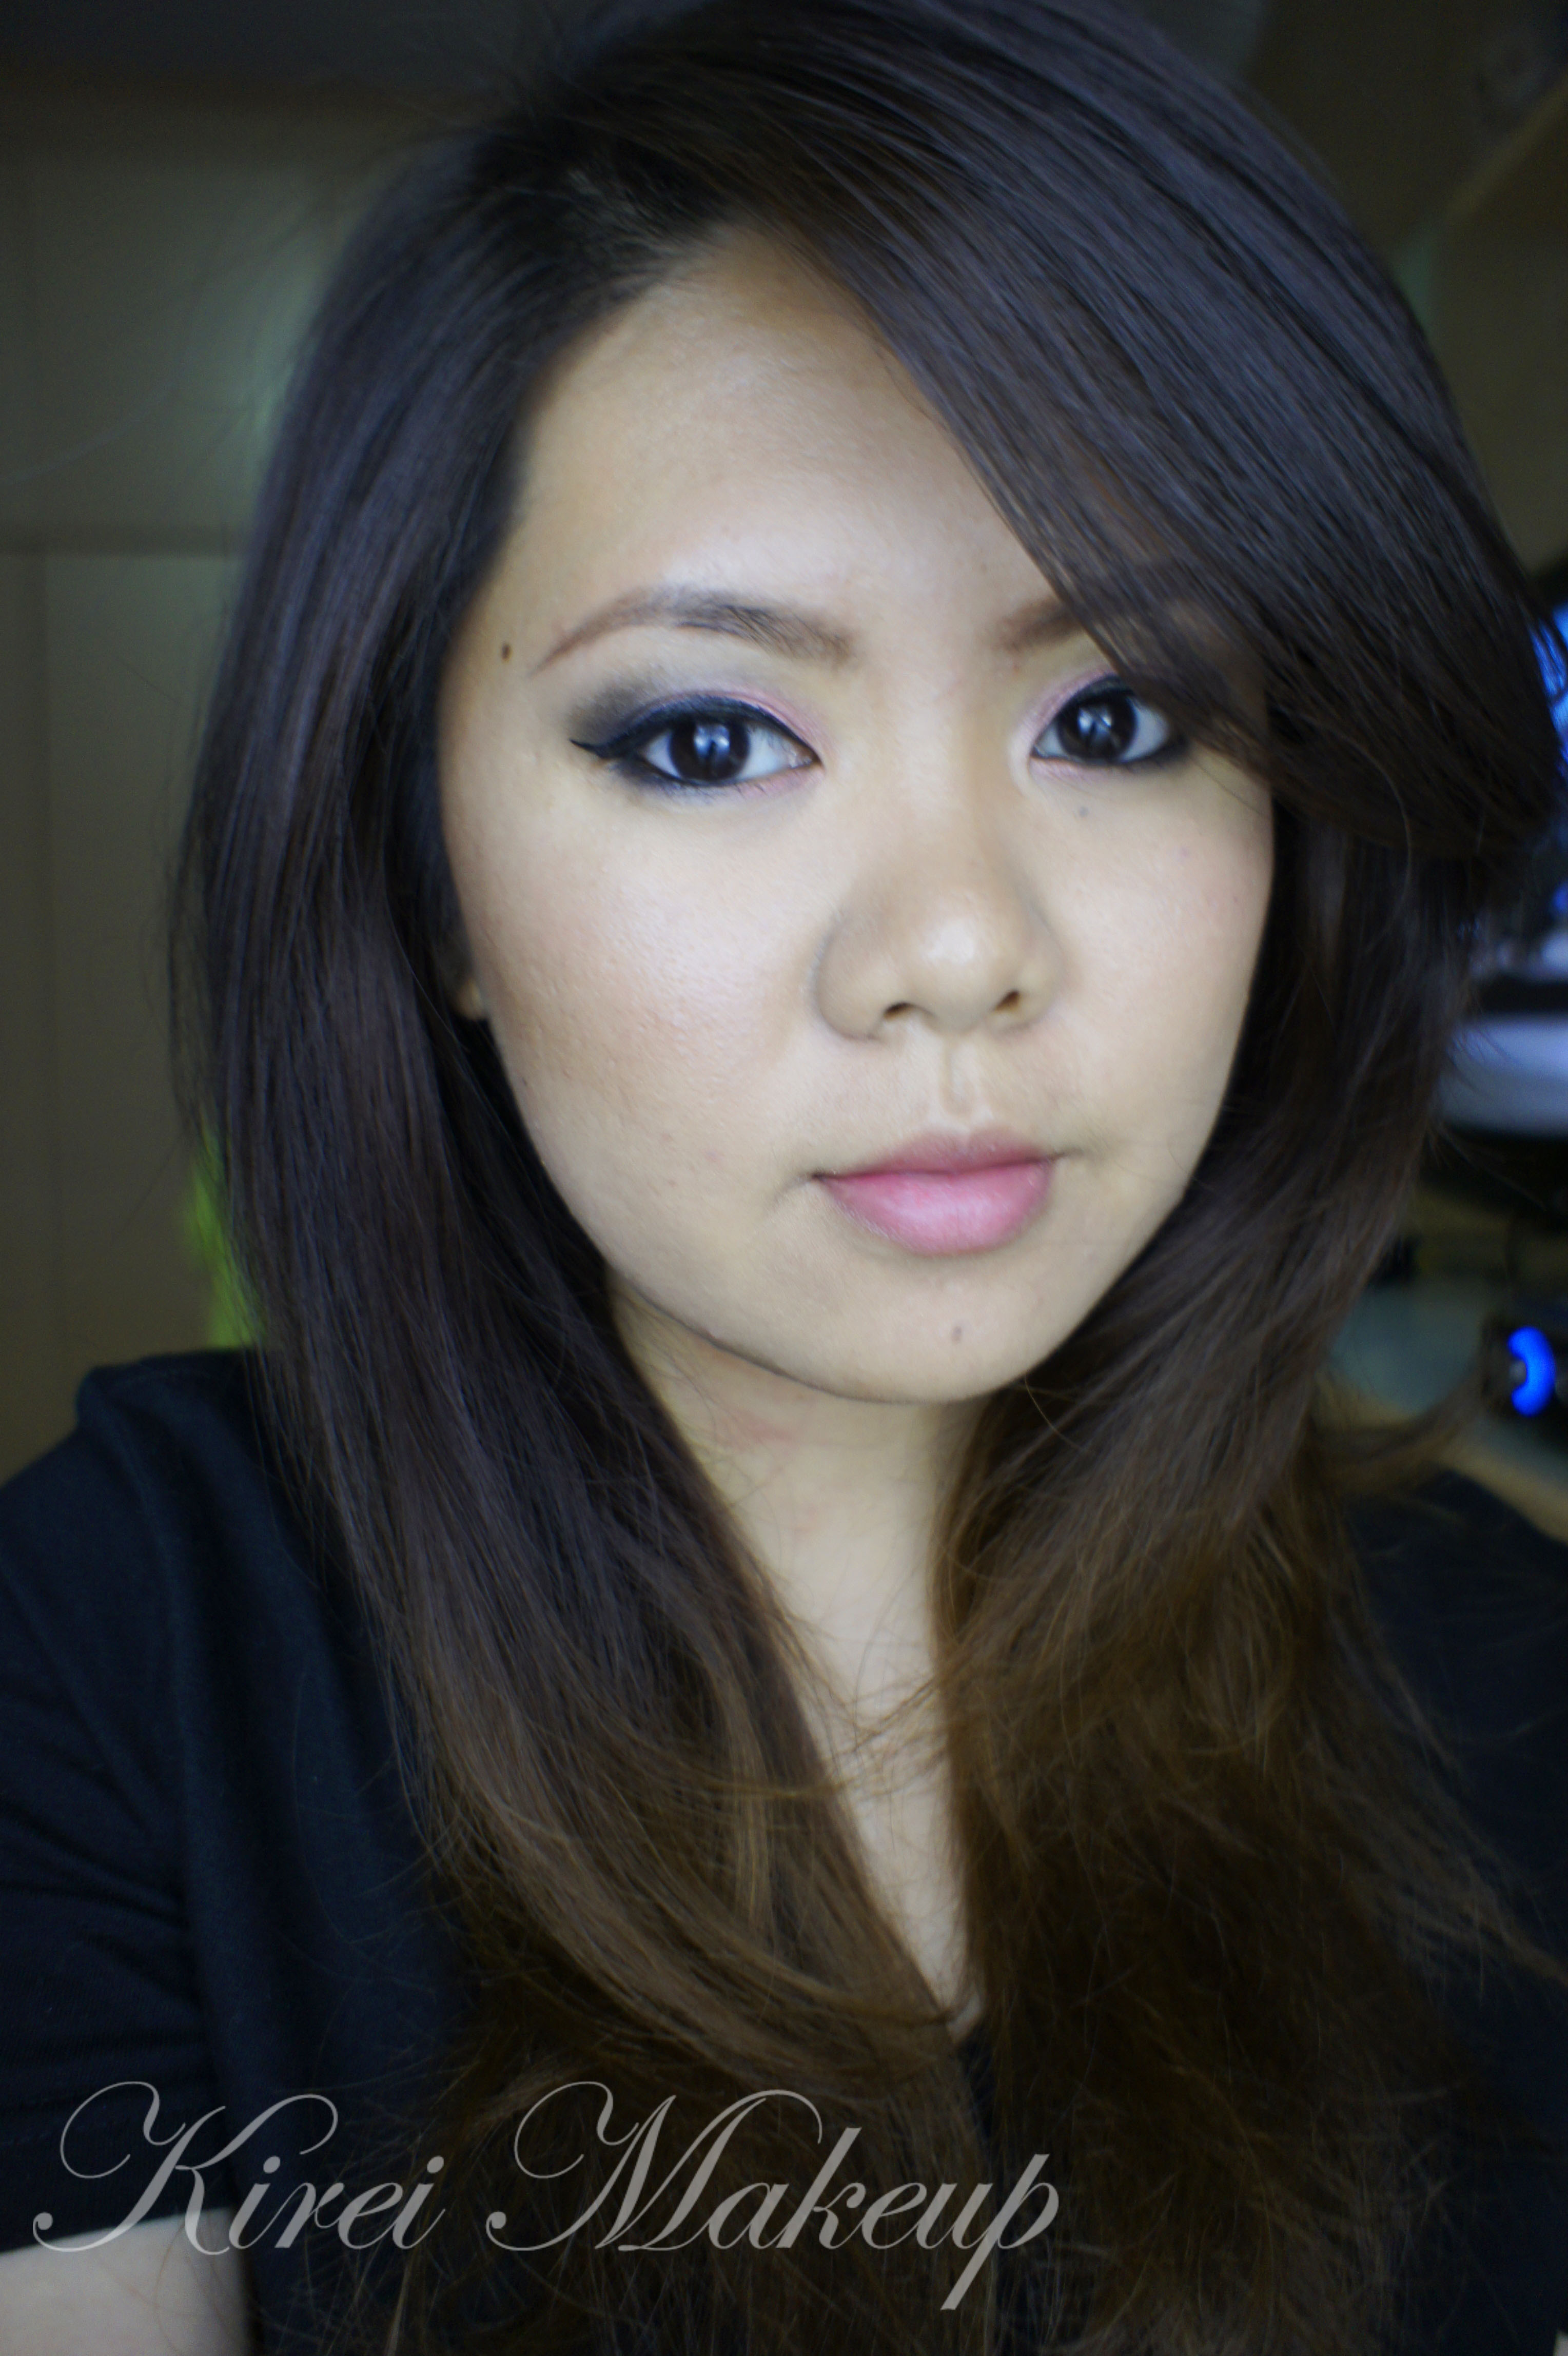
I’ll try to post a review for this palette some time this week. I prepped my eyelids using UD Primer Potion, which I think didn’t work too well for this look. May be for future tutorial, I might use a white-colored base (i.e. NYX Jumbo Pencil in Milk) OR a mint-colored base for the lid. I feel that the mint eyeshadow that I used doesn’t have much color on it, and look slightly chalky.

All eyeshadows mention are from Kat Von D Esperanza palette. If you want to find out the product I used and skip the how-to, scroll all the way down.

How-to:

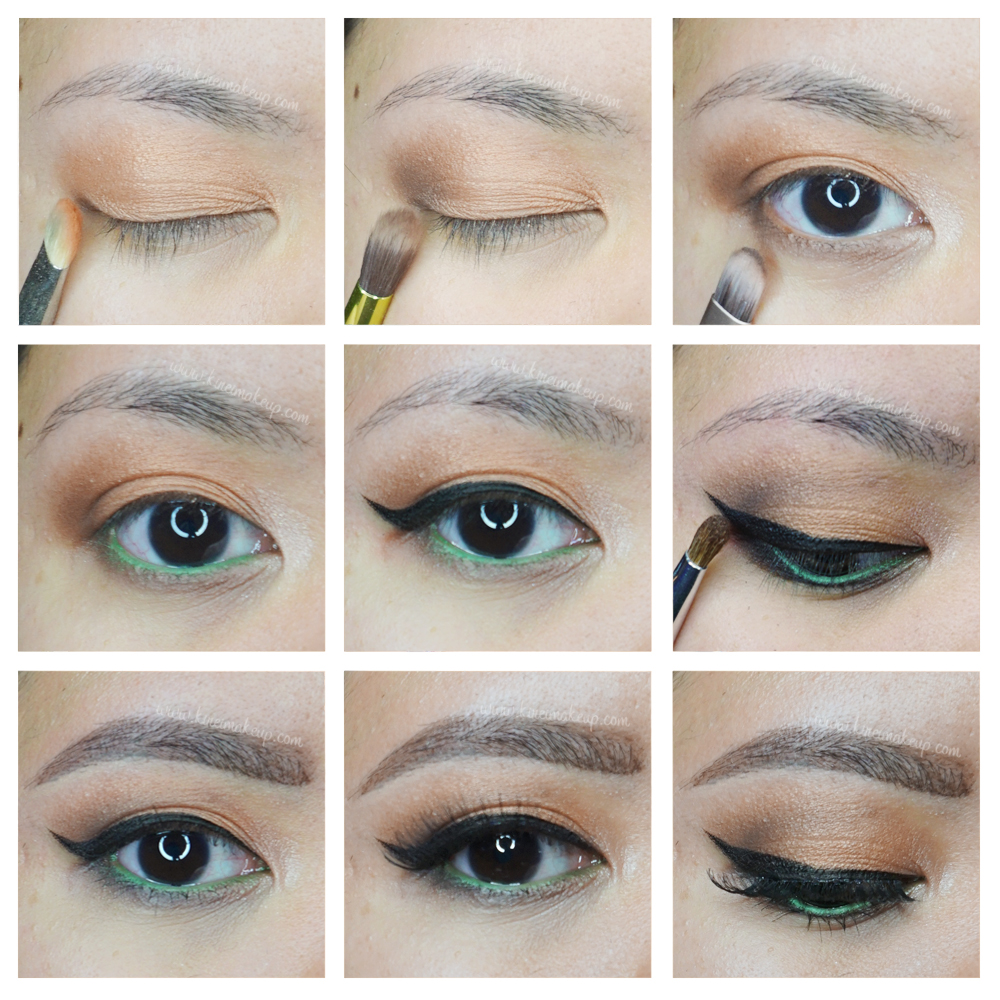
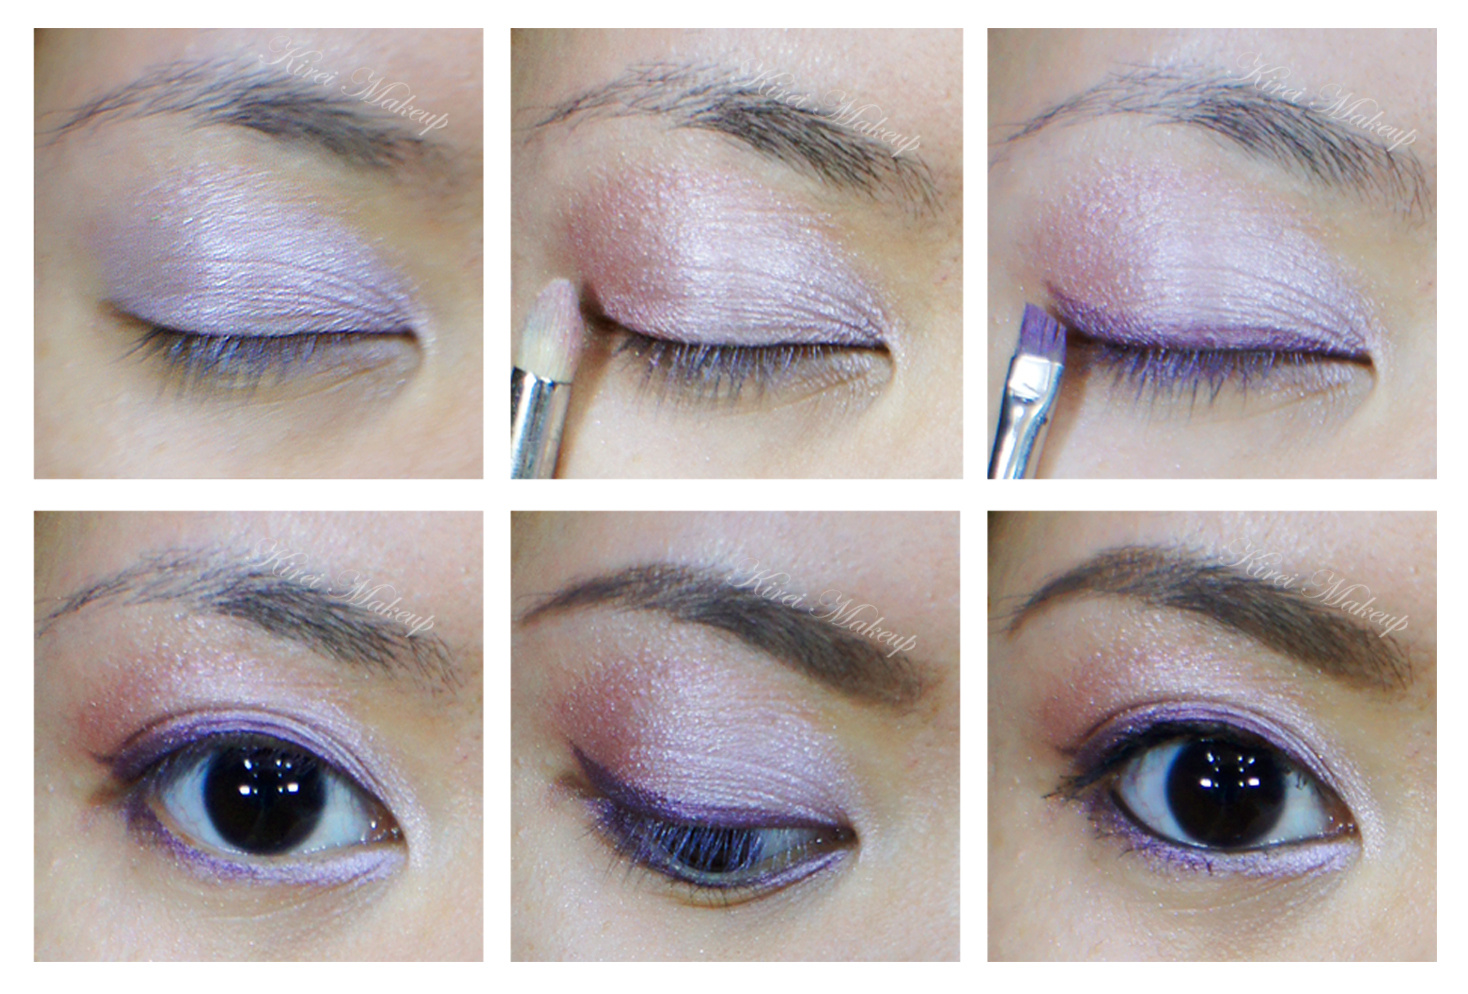
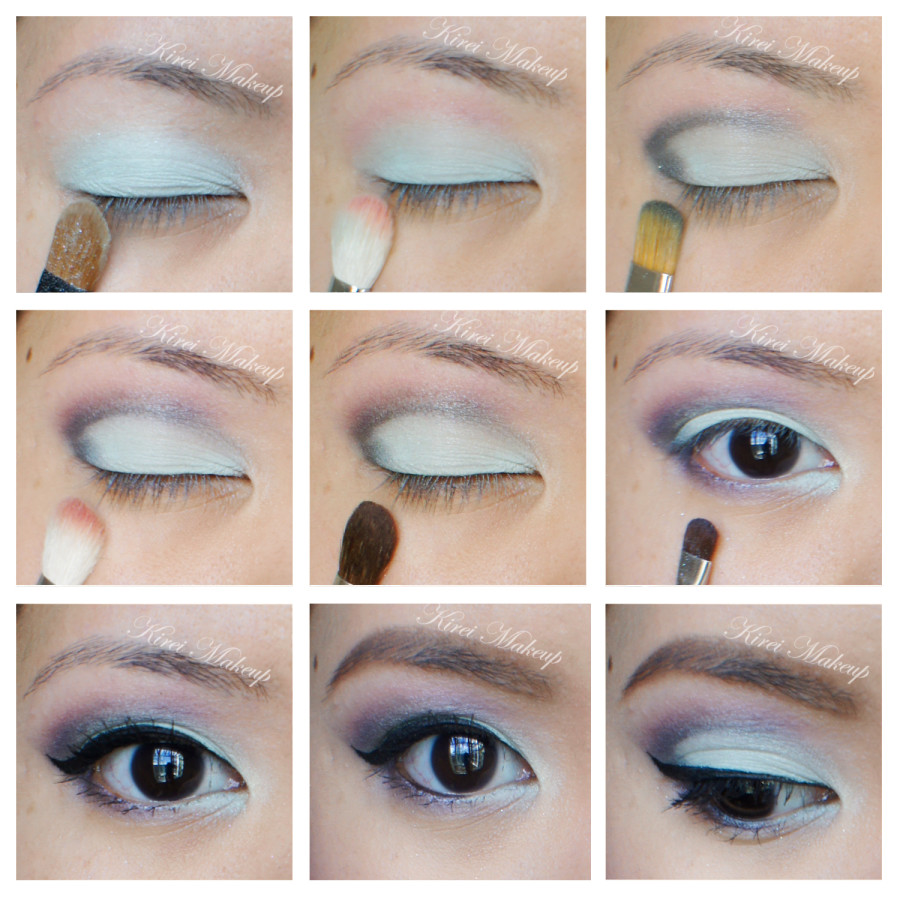
1. After prepping my lid using UD Primer Potion, I applied Archangel using a flat eyeshadow brush.

2. Using Sigma E25 Blending Brush, I applied Placebo slightly above the crease.

3. Using the tip of a flat eyeshadow brush (like the Sigma E54 Medium Shader brush), I applied Santeria on the crease and outer V.

4. Using the same Sigma E25 blending brush that I used on step 2, I blended out Santeria.

5. Using a fluffy blending brush (like the Sigma E38 Diffused Crease brush), I applied South under the brow. I also buffed South slightly on to my crease.

6. Using a small shader brush, I applied Archangel on the inner corner of the lower lid, and Selena on the outer corner.

7. (not in picture), I applied Danglo on top of Archangel using a flat eyeshadow brush.

8. I created a winged eyeliner using Kanebo Kate Super Sharp eyeliner, and lined my waterline using L’oreal Voluminous Smoldering eyeliner.

9. I curled my lashes and applied Cover Girl Lash Blast Mascara.

10. I filled my brows using Anastasia Brow Wiz in Ash Blonde, and then I set it using Faint eyeshadow from the Naked Basic palette.

Kat Von D Esperanza makeup tutorial

11. On my face, I applied UD Naked Skin foundation using a damped makeup sponge.

12. I set my face using NARS Setting Powder.

13. I lightly contoured my face and nose using MAC Blunt.

14. On my cheeks, I applied Chanel Blush de Horizon.

15. Lastly, on my lips, I applied L’oreal Color Riche lipliner in Beyond Pink, top it off with Revlon Socialite suede lipstick and a little tiny bit of clear lip balm from L’occitane.Kat Von D Esperanza eye makeup

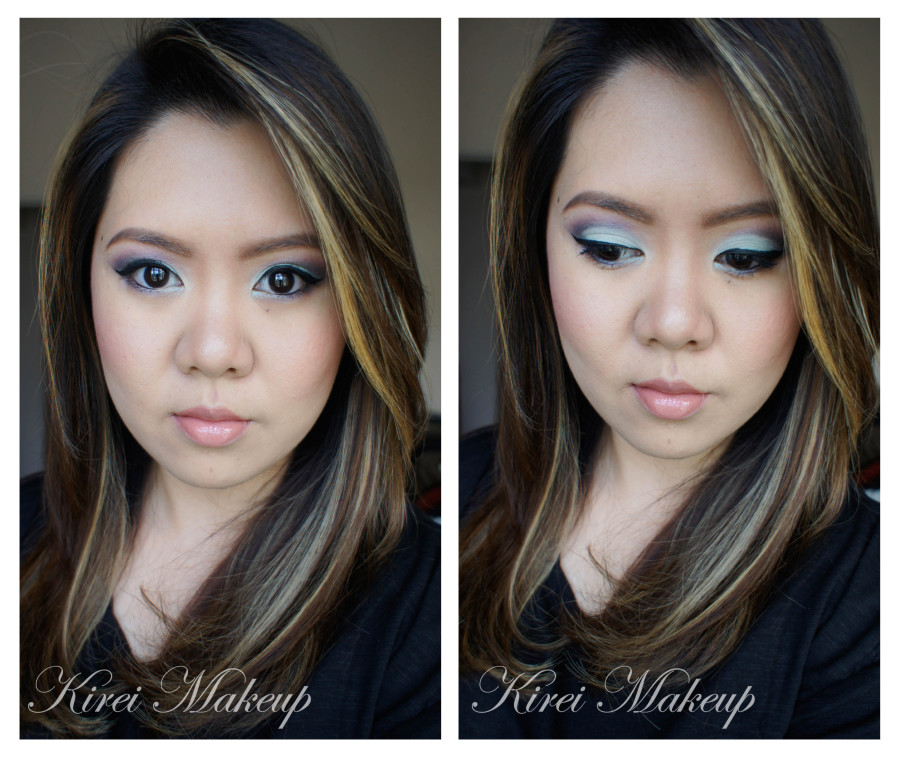
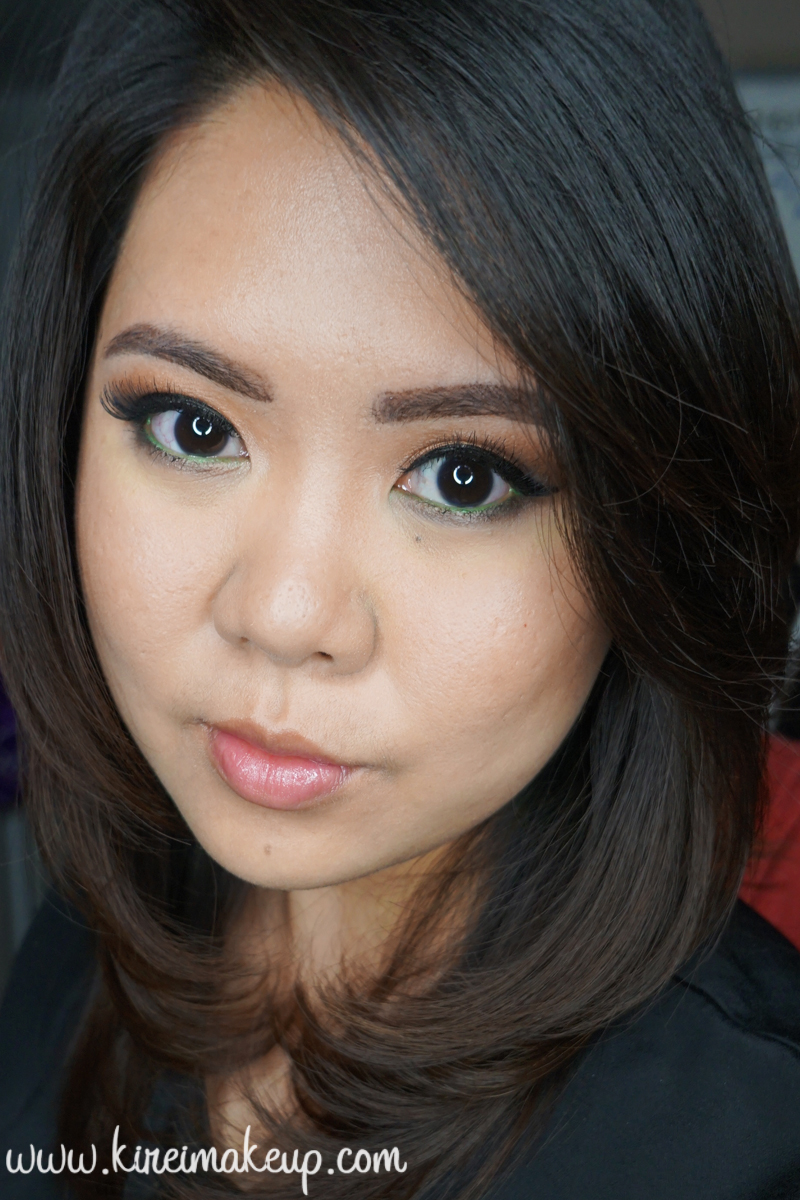
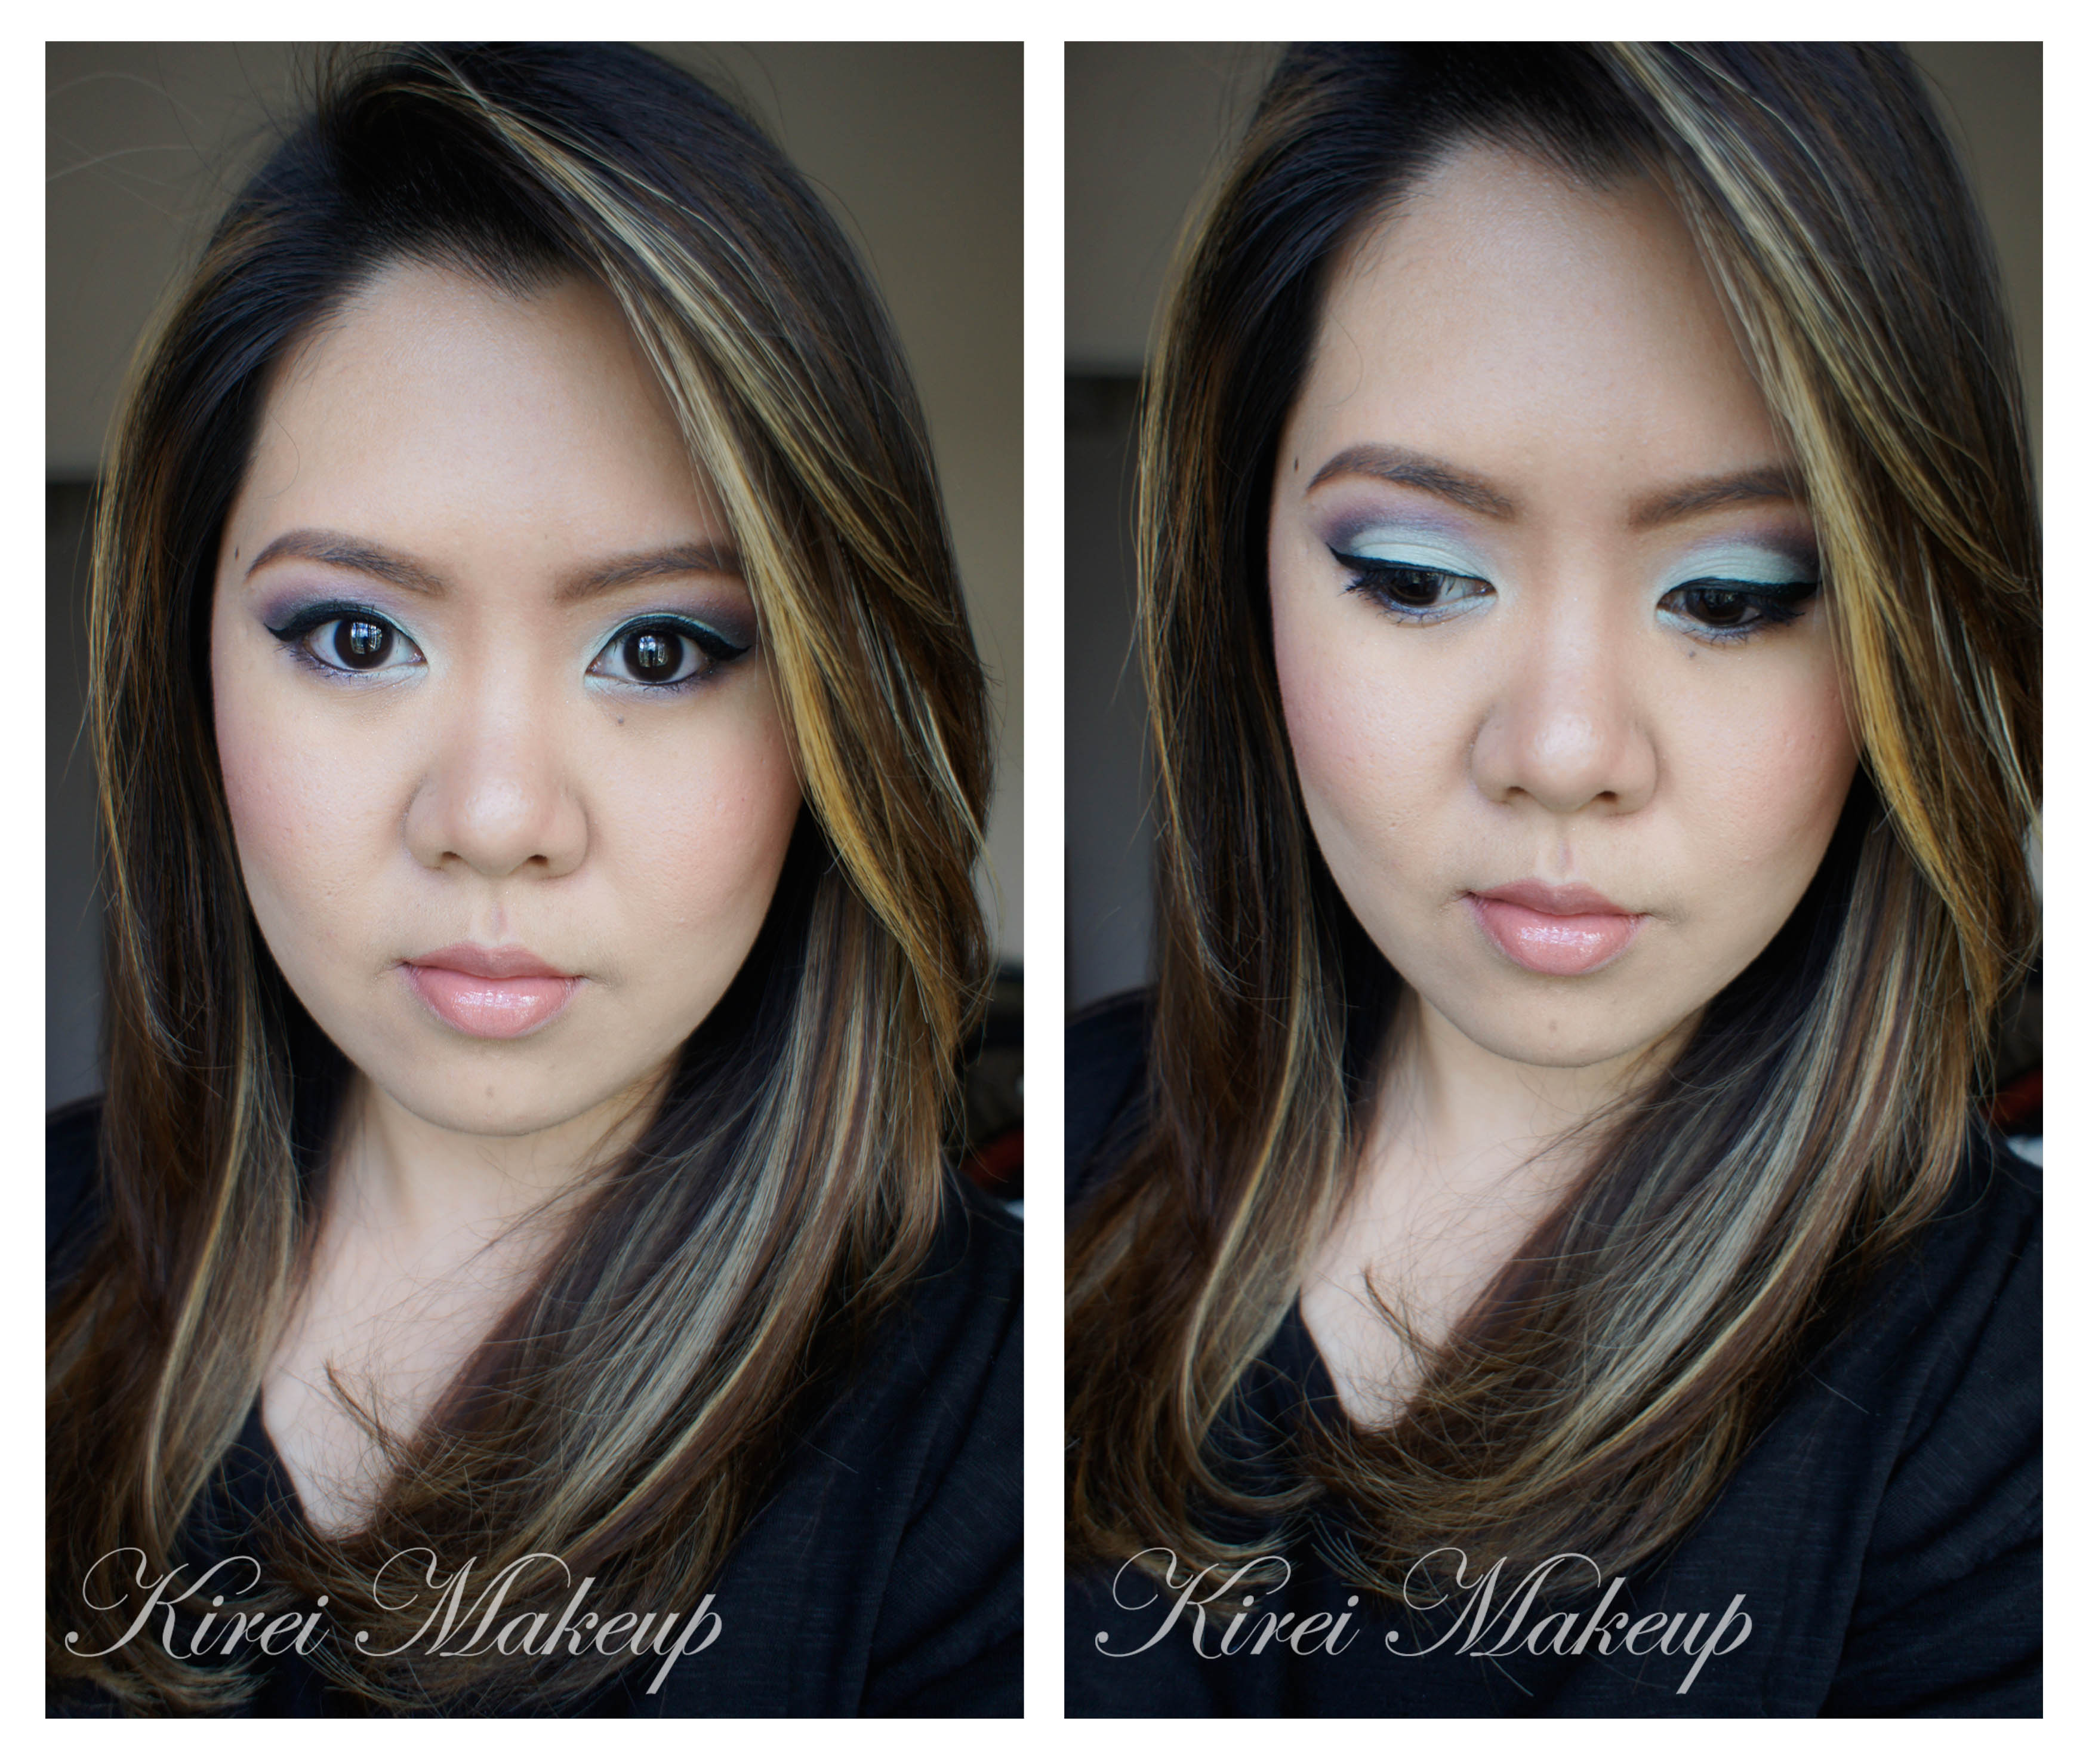
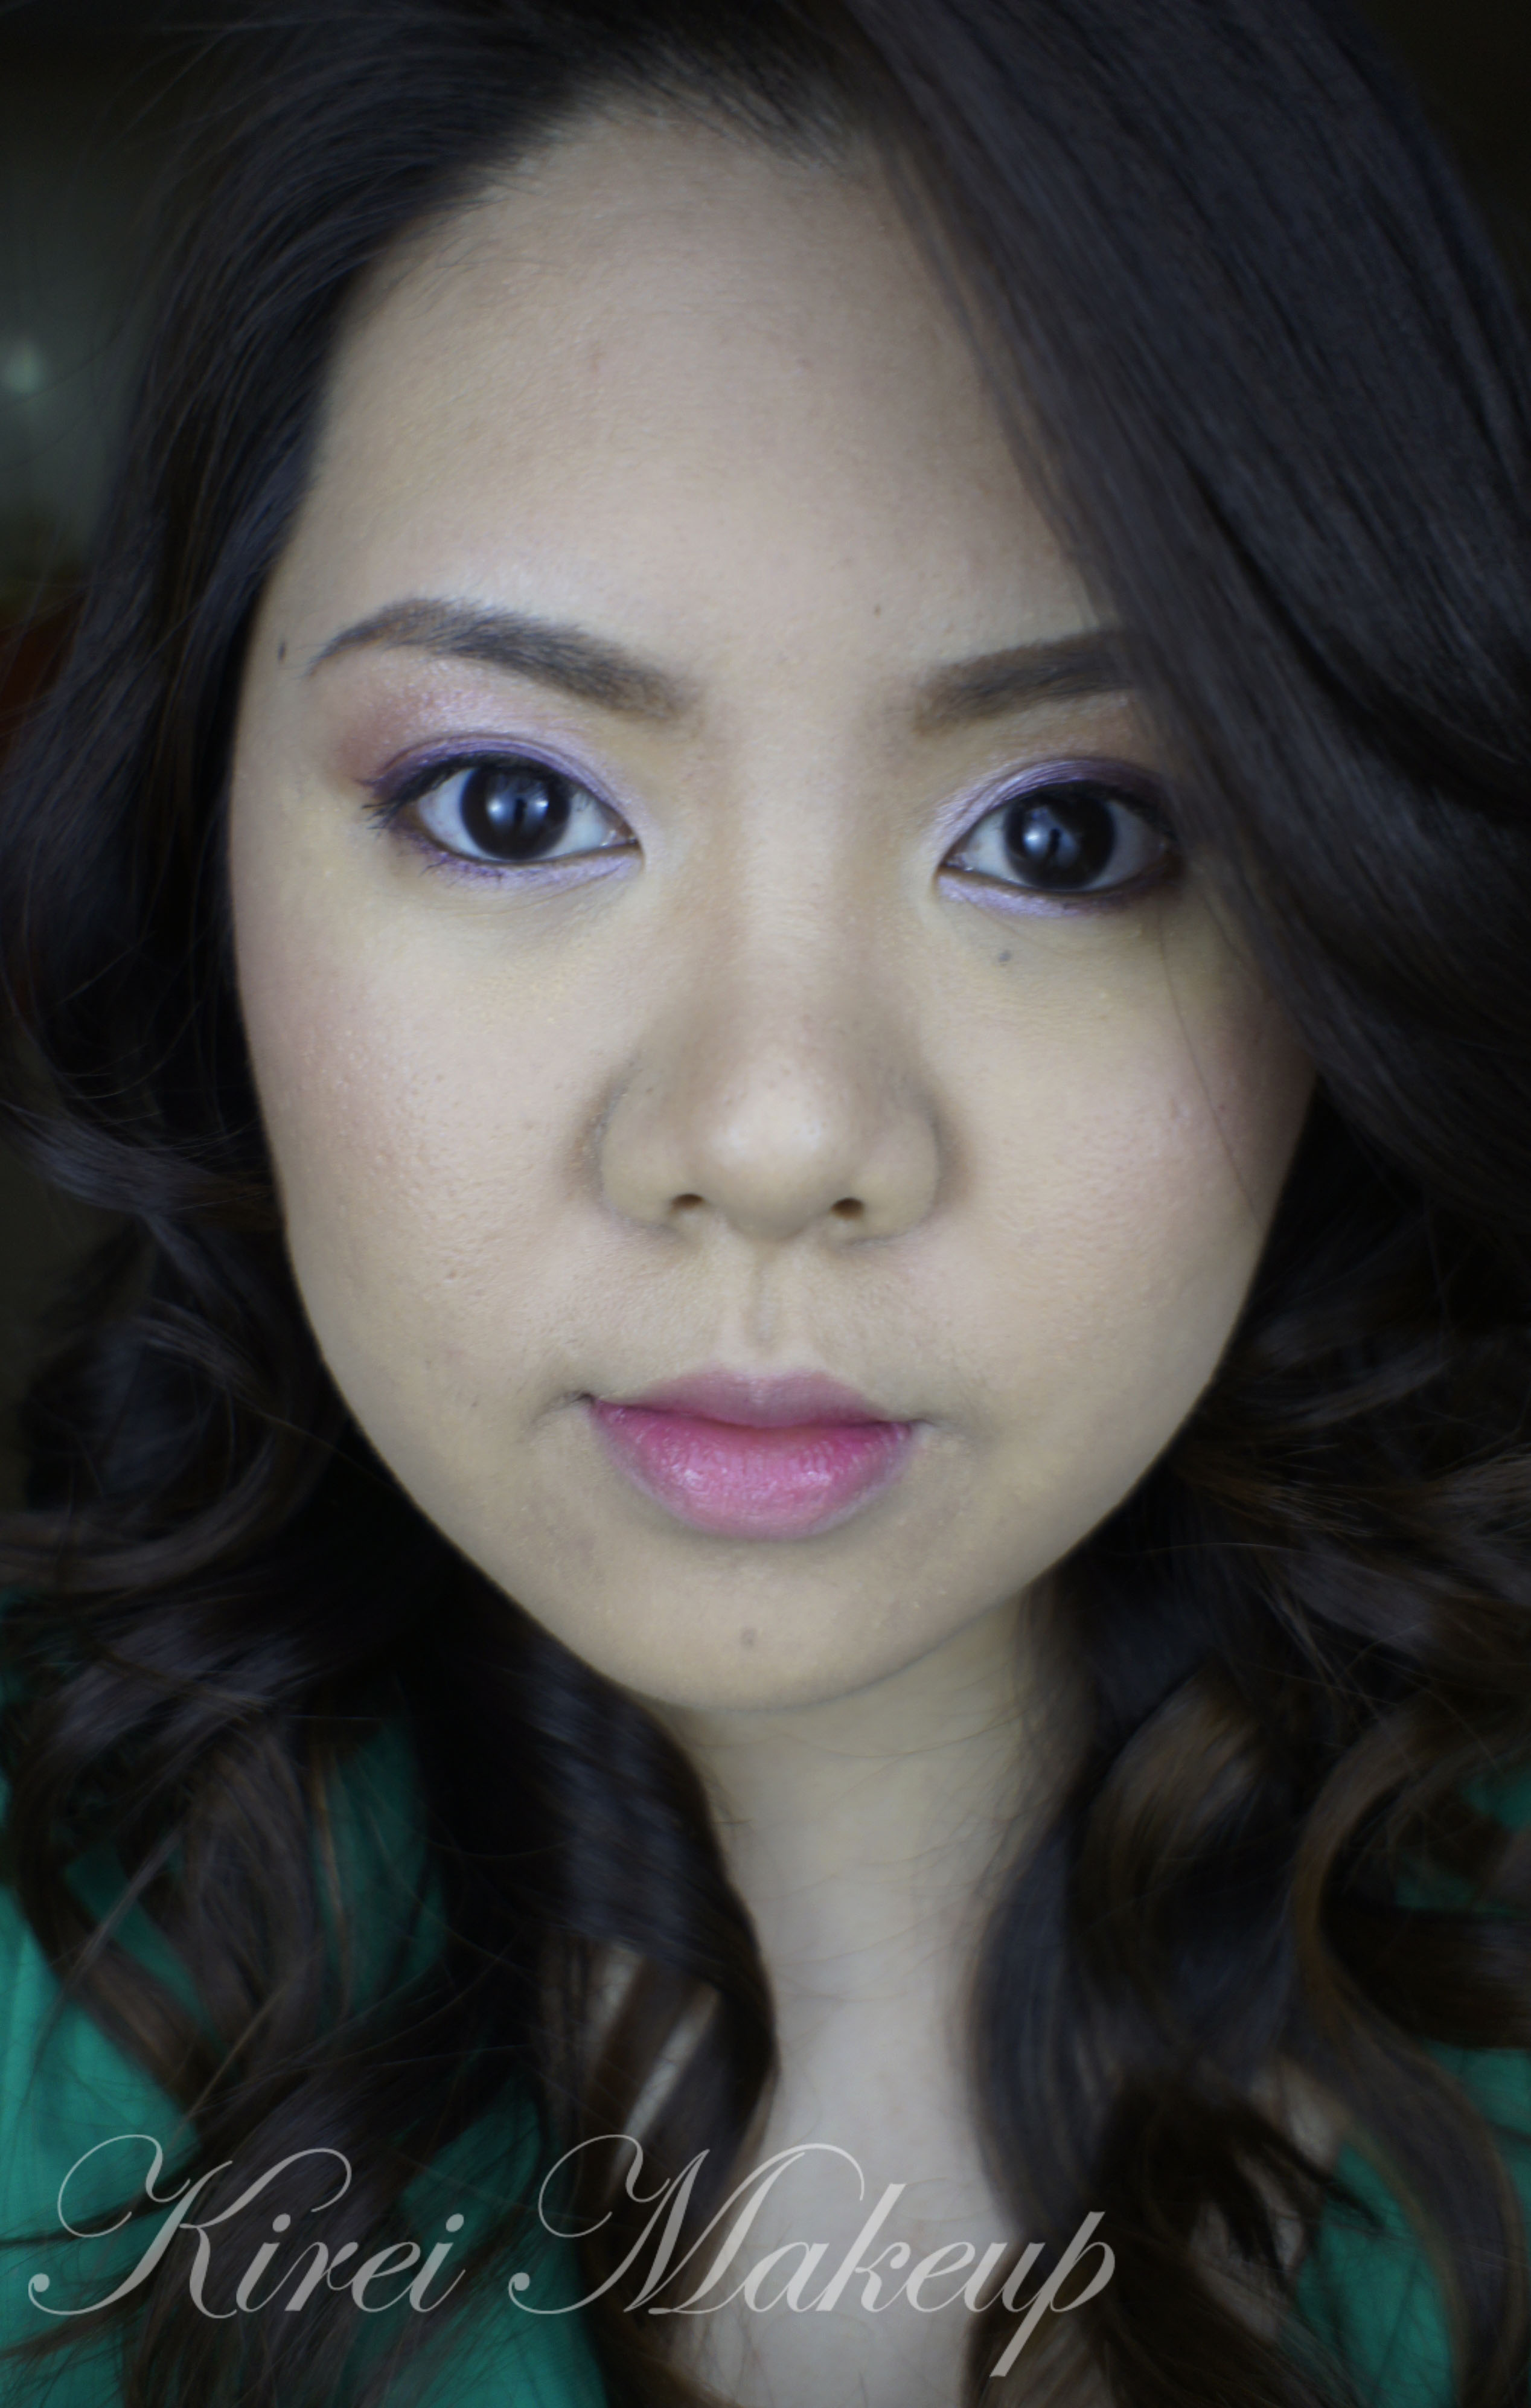
I took the pictures above in a room with big windows and natural day light. For the pictures below, I actually stepped out of the house and took the pictures outdoor with the Sun somewhat behind me. As you can see, in both pictures, my makeup is not heavy at all, esp. for the face. The focus is still on the eyes, while the skin is left pretty natural looking.

If you are curious about my hair, please check my post on Highlights for Brunette.

Kat Von D Esperanza tutorial

Products used:

Eyes – Kat Von D Esperanza palette; Kanebo Kate Super Sharp eyeliner; L’oreal Voluminous Smoldering eyeliner; Cover Girl Lash Blast Mascara; Anastasia Brow Wiz in Ash Blonde; Faint eyeshadow (Naked Basic palette).

FaceUD Naked Skin foundation; NARS Setting Powder; MAC Blunt; Chanel Blush de Horizon.

Lips – L’oreal Color Riche lipliner in Beyond Pink; Revlon Socialite suede lipstick; clear lip balm from L’occitane.

Recommended Sigma brushes – Sigma E25 Blending Brush; E54 Medium Shader brush; Sigma E38 Diffused Crease brush.

Disclaimer: clicking on the Sigma link will take you to my Sigma affiliate page. Any purchase you make on Sigma from my website will help in this blog’s maintenance. Rest assured, I only recommend products that I honestly love and use on myself. Thank you for your support!

Smoky Pink

This is a requested look by one of my Twitter followers, @Cara_ev! She requested for a pink smoky look using black eyeshadow instead of brown. I’ve done something similar using peach eyeshadow in Smoking Peach, and mint in Smoky Mint, and silver in Silver Smoke…well you get the gist! All my smoky eyes tutorials are listed under Tutorials –> Smoky Eyes.

asian smoky eyes

How-to:

1. Using a synthetic art brush, I applied Maybelline Inked in Pink color tattoo all over my eyelid. You can substitute this with any cream base or eye primer of your choice.

2. Using Smashbox Bullet Brush, I applied Urban Decay Blackout eyeshadow (from Naked 2 palette) on the outer V.

3. Using a clean blending brush (emphasis on the CLEAN), I blended Blackout towards the center of the lid.

4. Repeat step 2-3 several times until you reach enough intensity from the black eyeshadow to your own liking.

5. I applied Blackout underneath the outer half of the lower lid using a small shader brush.

6. Using a clean flat eyeshadow brush, I applied L’oreal Infallible eyeshadow in Sweet Strawberry.

7. I applied L’oreal Sweet Strawberry infallible eyeshadow on the inner corner of the lower lid using an angled eyebrow brush.

8. Using Kate Sharp eyeliner, I created a winged liner along the upper lash line. You can skip this if you’d like.

9. I lined my waterline and tightline using L’oreal Voluminous Smoldering eyeliner.

10. I curled my lashes using Shu Uemura eyelash curler.

11. I applied Clinique lash building primer on top and lower lashes, and then applied Maybelline Express Volume Turbo Boost mascara on top of it.

12. I filled in my brows using Shu Uemura brow pencil. I applied MAC Brule under the brows.


asian smoky eyes

13. On my face, I applied MUFE HD foundation no. 118 using a foundation brush starting from the center of my face blending it outwards.

14. I also applied MUFE HD concealer no. 335 under the eyes.

15. On the cheekbones and bridge of the nose, I applied MAC strobe cream using a clean foundation brush.

16. I also applied MAC mineralized skinfinish in deep as contour powder.

17. I applied MAC Cubic very lightly on the cheeks.

18. For the lips, I applied YSL Pur Couture rouge no. 17 using a lip brush.

bridal pink smoky eyes

For the hair, I applied hot rollers all over, and I straightened my hair using Chi hair straightener for the first photo. On the second photo, I curled my hair using curling irons (curling it all outwards), in big sections.

Spring Lilac

I couldn’t resist to try my new Sleek Makeup iDivine Snapshot palette that I bought from Luxola! Oh, just to let you know, there’s a 10%  15% off if you use the code LXBLOG when you check out over at Luxola (over $25 purchase) 😉 For swatches on the iDivine palettes, please check Sleek Makeup iDivine Swatches post.

Anyways, so I wanted to try the Lotus Flower and Green Iguana shadows for this look since those 2 eyeshadows were the ones that caught my attention the most. I LOVE…let me repeat, I LOVE Lotus Flower! Amazing color, so perfect for Spring/Summer! Green Iguana too is oh so prettyy! For some reason, my camera doesn’t pick the green, instead it might look bluish on your screen.

How-to:

1. Using a flat eyeshadow brush, I applied Lotus Flower from Sleek Makeup iDivine Snapshot palette on the inner half of my upper eyelid.

2. Using another flat eyeshadow brush, I applied Green Iguana on the outer half.

3. Using a clean blending brush, I blended the edge and the crease to remove any hard line.

4. Using a small fluffy brush, I applied Urban Decay Hijack on the outer V and crease.

5. Using a clean blending brush, I blended UD Hijack.

6. Using a small shader brush, I applied Lotus Flower on the inner half of the lower lid and Green Iguana on the outer half.

7. I created a tiny winged liner along my upper lashline using Kat Von D Trooper eyeliner.

8. I lined my waterline and tightline using L’oreal Voluminous Smoldering eyeliner.

9. I curled my lashes using Shu Uemura eyelash curler and applied L’oreal Double Extender Curl mascara on both top and lower lashes.

10. I filled my brows in using Shu Uemura brow pencil.

sleek makeup lotus flower

11. I applied MUFE HD foundation all over my face.

12. Under my eyes, I applied Bobbi Brown peach corrector.

13. On the cheeks, I applied Benefit Hoola and Benefit Coralista.

14. On the lips, I applied Chanel Confidentielle lipstick.

sleek makeup green iguana

Spring Lilac

Aye, if you’ve read my previous post, you know this tutorial is coming, right? Right! As I’ve said previously, the colors from this Bodyshop Lily Cole Shimmer Cube are a lot more pigmented when applied with a flat eyeshadow brush. So, don’t be surprised when you see that the colors here are a lot more pigmented than the ones that I swatched on my hand.

Now, I added an extra full front photo of myself with my eyes looking down. You might notice that the eyeliner on the other eye is way thicker, that’s because one of my eye is smaller than the other one. So, I have to draw a thicker eyeliner on the other eye so when I opened both eyes, the eyeliner looked equal. Also, the bigger eye has a lot more folds/lines. The small eye has an almond shape while the bigger one is more rounded. Ugh, there’s a reason why I have the bangs covering that eye! hahaha..Anyways, doesn’t matter. I can’t really help it, so I just make the best out of it!

Repeat after me, people: my imperfections make me perfect and unique 😉

So this look will suit almost everyone! I’m not sure how this will show up on those with darker skin than mine. I think darker skin might be able to use the 2 dark colors, but might not be able to use the lighter ones. This cube works for any eye colors! The look is very spring. It’s a great look if you dare to wear colors during the day.

Anyhow, let’s get the tutorial started! I prep my eyelids by applying Maybelline Inked in Pink 24hr Color Tattoo.

Lilac makeup

How-to:

1. Using a flat eyeshadow brush, I applied Live Lilac all over the lid.

2. With a pencil brush, I applied Think Pink on the outer V and on the crease.

3. I blended the crease by applying a clean blending brush.

4. Using an angled eyeliner brush, I dipped the brush in water and then to Go Violet eyeshadow. I created a winged liner on the upper lid. I also lined my waterline using black eyeliner from Annabelle.

5. Using whatever is left on the brush, I applied Go Violet on the lower lashline. I also applied Live Lilac on the inner corner of the lower lid.

6. I filled in my brows using Anastasia Brow Powder in Brunette.

7. I curled my lashes and applied L’oreal Curl Impact Collagen mascara on both top and lower lashes.

bodyshop lily cole shimmer cube

8. I applied MAC Matchmaster foundation on my face using MAC Stippling brush. This foundation is quite matte, and I purposely chose it because the eyes are quite frosty.

9. I powdered my T-zone using a loose powder.

10. I contoured the side of my nose and the hollow of the cheeks using MAC Shadowy.

11. For the cheeks, I applied MAC Well Dressed blush.

12. For the lips, I applied Revlon Just Bitten lip balm in Crush on the center of the lid and blended it outwards using my finger. On top of it, I applied a clear lipgloss and blot excess off.

spring makeup 2013