My Travel Makeup Essentials

HAPPY NEW YEAR! Hello, everyone! I am back! I wish you all a great year ahead of you and may 2015 fulfill all your wishes! Anyways, I’m glad to be back blogging, it’s been a while, but the holiday was awesome! I was quite confused as to which post do I want to publish as my first post of 2015, wasn’t sure if you guys want to see another tutorial, or review and what not. Then, I remembered, I wanted to share with you my travel makeup essentials, since I did just came back from traveling and I do quite travel a lot.

I have to be honest, I am quite lazy when it comes to doing my own makeup, especially when I travel, and I do travel a lot. I try to keep my makeup bag small, and basic. I don’t bother wearing makeup at all when I travel, heck, I barely wear any on a daily basis unless I’ve important meetings/events to attend.

travel makeup essentials

As you can see in the picture above, there’s my makeup bag! I usually do carry this bag with me when I travel, or another makeup pouch, but this year I’ve been using this one. The bag is just the perfect size for me when I travel. It’s not too big, as you can see, it is as wide as my palm. That’s all I need, or even less.

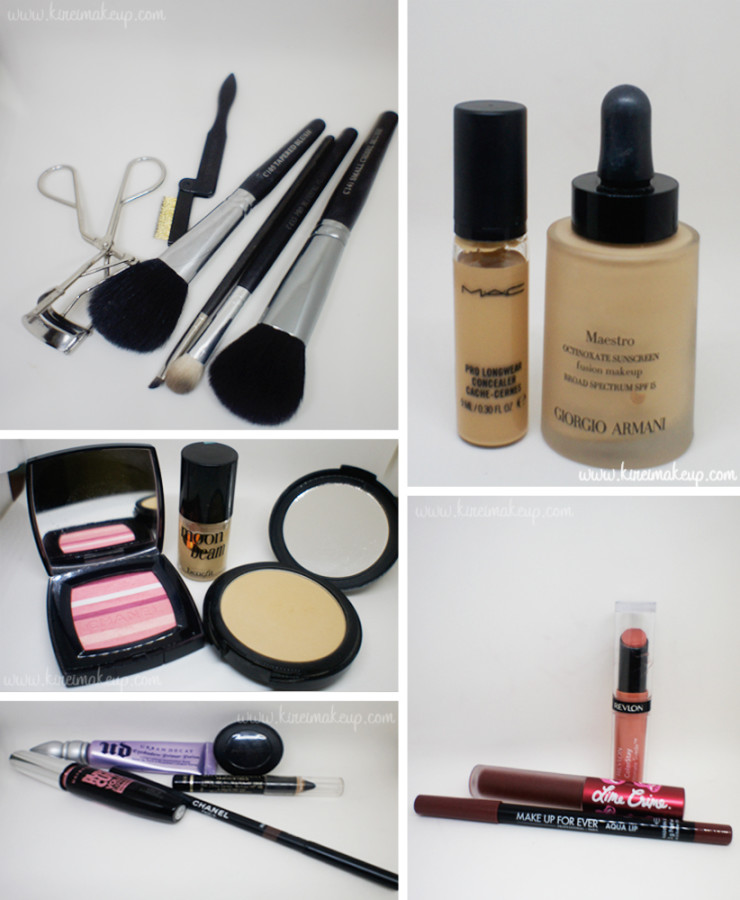
Below, you can find all the makeup I bring with me when I travel. Let me list it for you:

  • Tools – (R-L) Blush brush, blending brush, angled eyeliner brush, powder brush, eyelash comb, and eyelash curler.
  • Base – Giorgio Armani Maestro Foundation, and MAC Pro Longwear Concealer.
  • Cheeks – Chanel Soft Glow Blush (Blush de Horizon), Benefit Moon Beam, and Make Up For Ever Pro Finish powder.
  • Eyes – Urban Decay Primer Potion, MAC Carbon eyeshadow, L’oreal Voluminous Smoldering eyeliner pencil, Chanel Brow Pencil, and Maybelline Volume Express Turbo Boost mascara.
  • Lips – Revlon Colorstay Ultimate Suede lipstick in Socialite, Make Up For Ever Aqua Lip pencil in 11C, and Lime Crime Velvetine lipstick in Wicked.

If you noticed, I don’t have colored eyeshadows/palettes, that’s because I don’t use them. Sometimes I carry my Chanel eyeshadow quad or UD Naked Basic, it will still fit in the bag.

For the brows and lipsticks, I usually change what I bring. For brows, I alternate between Anastasia Brow Wiz, Shu Uemura Hard Formula brow pencil, or my Chanel brow pencil. For the lipsticks, I do bring several shades with me when I travel – most of the time I bring my YSL glossy stain #27, MAC Russian Red, and MAC Diva. However, last month, I recently purchased the MUFE #11c lip pencil, and Lime Crime Wicked, so I carried those when I traveled to Taiwan this Holiday season.

travel makeup essentials

How-to:

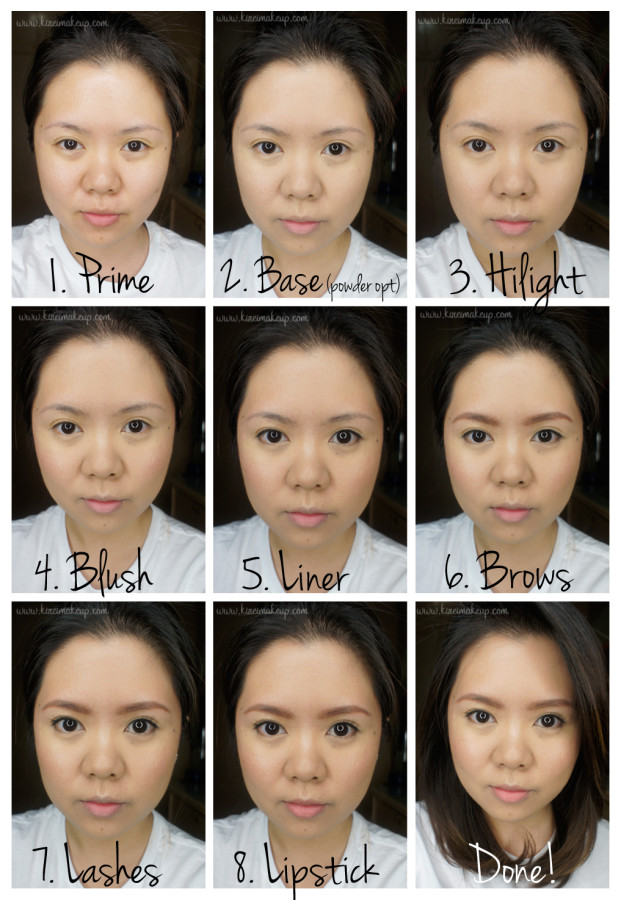
1. I prepped my skin by applying a good amount of moisturizer. I do 2 layers of moisturizer, let that sit and soak into my skin. At this point, you can also apply primer to your skin if you’d like. I usually apply MUFE HD Elixir, but I don’t usually bring it when I travel, so I just moisturize.

2. At this moment, I either apply my powder foundation or the liquid foundation. For this tutorial, I applied my Giorgio Armani Maestro Foundation using my fingertips – from the center of my face blending it to the outer edge.

  • The great thing about this foundation is that it’s a serum-type of foundation. Very liquid-y, and what’s even great about it is the fact that it dries out powder. This foundation is perfect for those with oily skin.
  • I also lightly apply concealer on my imperfections – under eyes, blemishes, redness etc if needed. I don’t usually bring concealer, but I had huge zit on the left cheek (right if you’re looking on your screen), which now has dried out.
  • You can lightly powder your face at this step if you don’t have any more “cream” products to be applied to your face.

3. I applied highlighter (yes, I know, I spelt “hilight”…”highlight” was too long to fit into the box) on some parts of my face – bridge of nose, under my eyebrows, cheekbones, and cupid’s bow.

4. Using my blush brush, I applied Chanel Soft Glow blush on my cheeks.

5. I lined my upper lash line, as close to the roots of my lashes as possible. This helps to make the lashes appear fuller.

  • Using an angled eyeliner brush and MAC Carbon, I set the eyeliner along the upper lash line.
  • Using whatever was left on the brush, I ran the liner lightly on the outer half of my lower lash line.

6. I filled my brows using my brow pencil.

  • The Chanel brow pencil does have a reddish undertone, but I’ve already bought it at an airport, and had no way of returning it so I decided to just use it till it’s done. However, as you can see on the final photo, my hair does have some warm brown colors, so it turned out ok.
  • I recommend going for a more taupey shade like the Anastasia Brow Wiz in Taupe or Brunette if you are Brunette.

7. I curled my lashes and applied mascara.

8. Lastly, I applied my peachy nude lipstick and we are done!

makeup for traveling

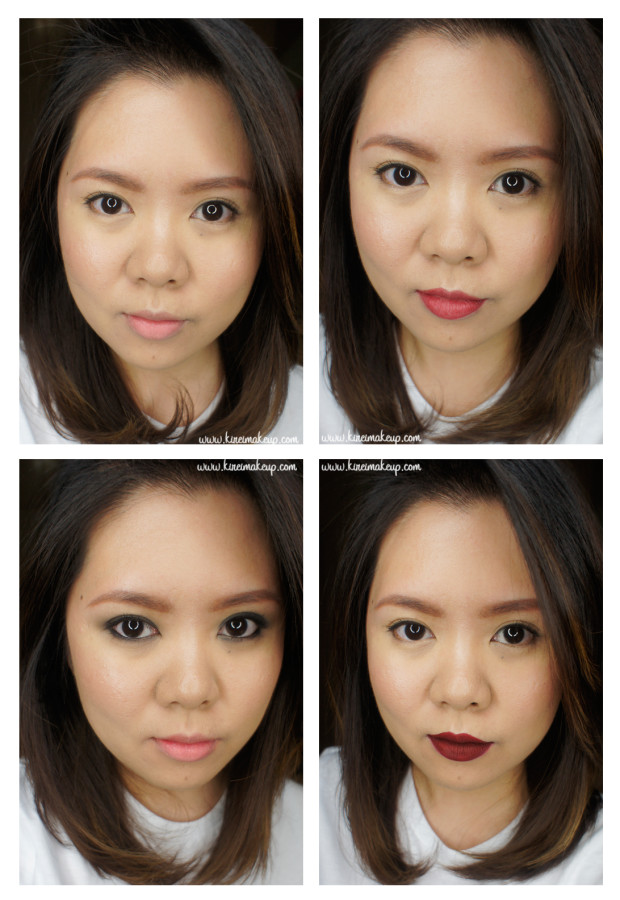
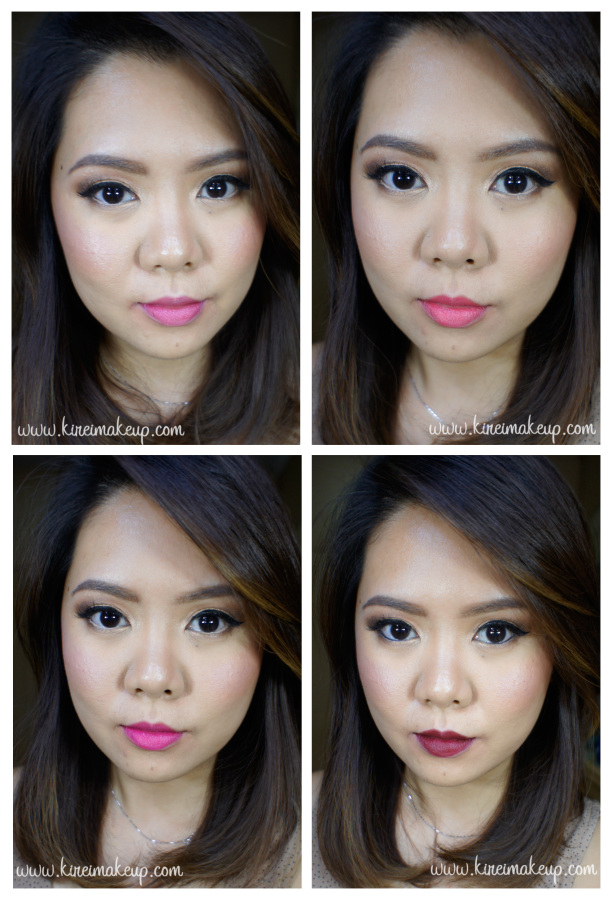
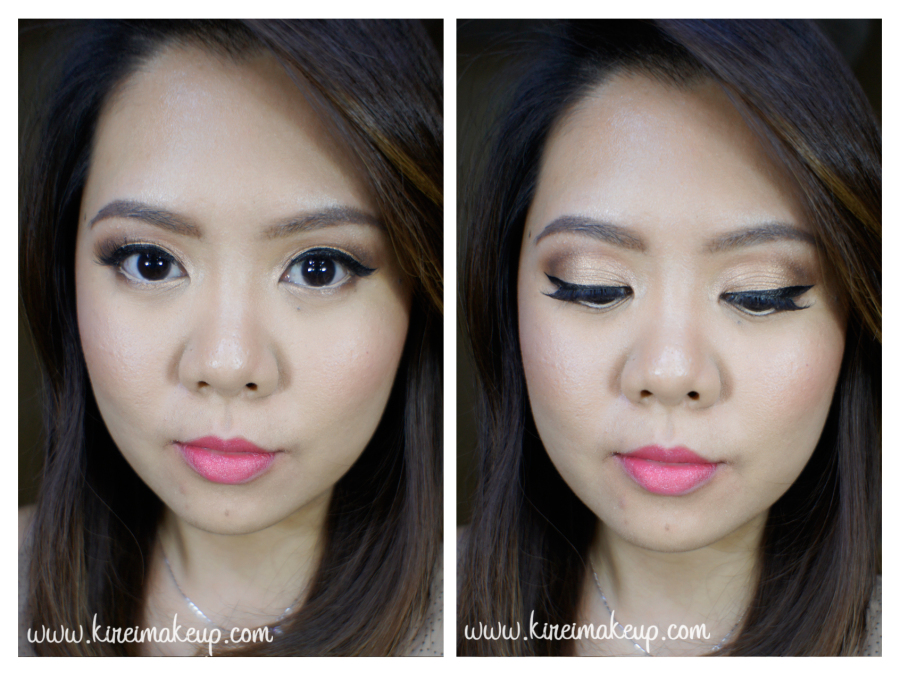
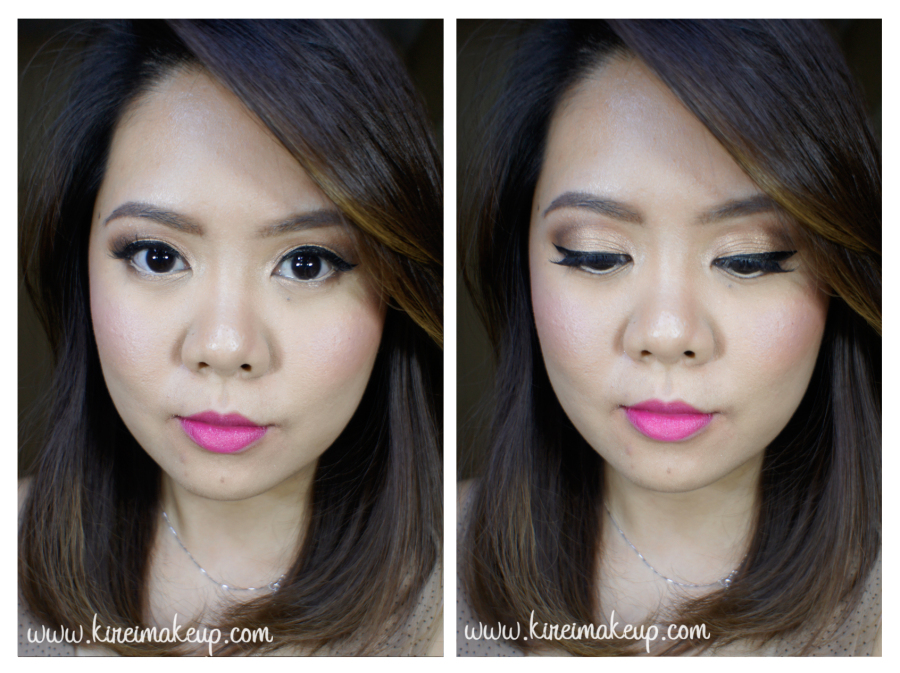
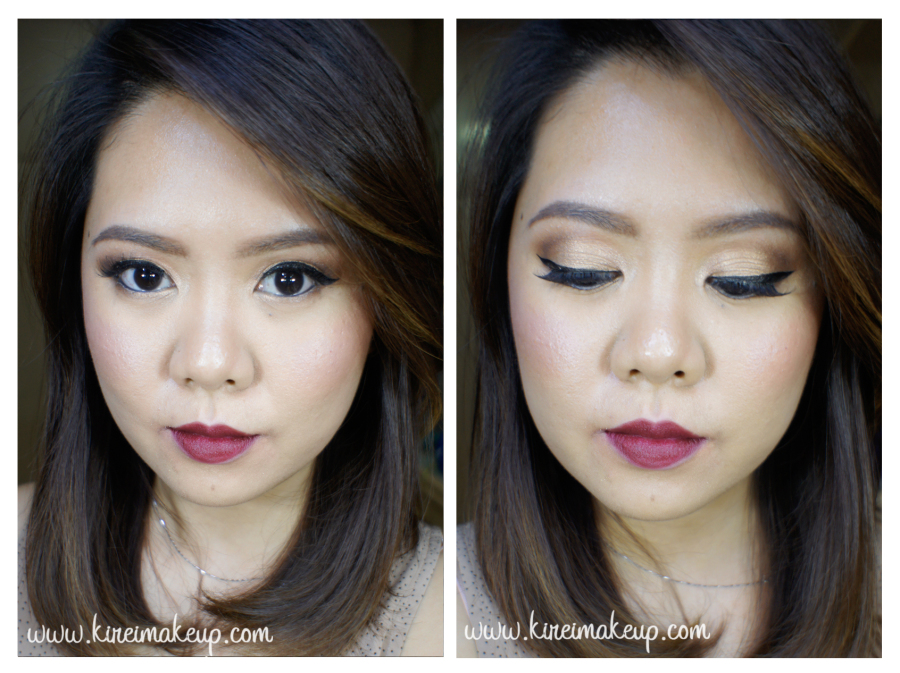
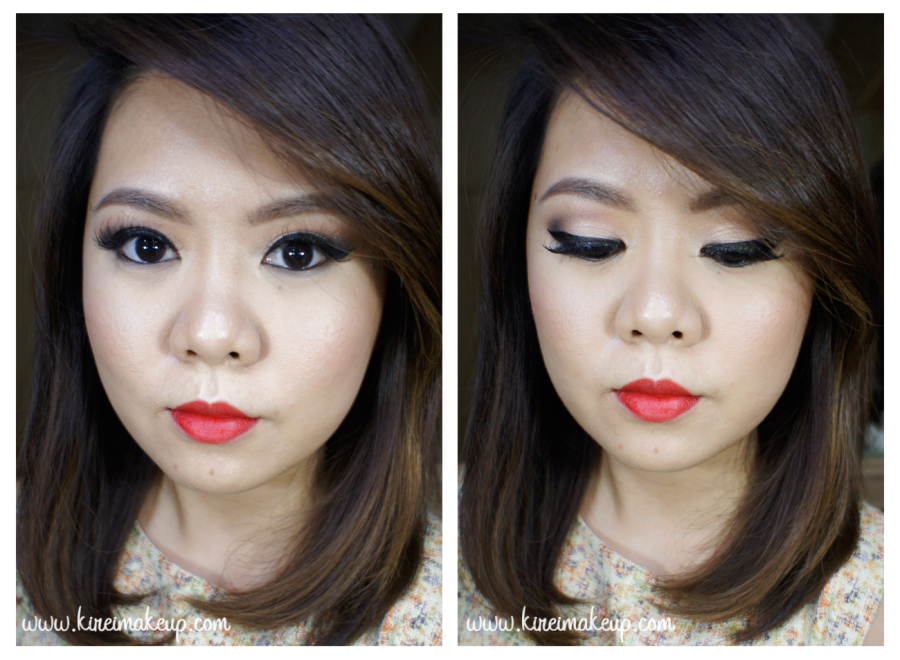
Let me just show you, with whatever I have in that bag, I can create 4 different looks! Actually I can create more, but I decided to just show you what I normally do.

Top left – no-makeup makeup…or as I’d called it “barely there” makeup.

Top right – Added MUFE aqua lip pencil #11c if I have to go for a brunch meeting (yes, somtimes traveling = work)

Bottom left – smoky eyes using eyeliner pencil (all over the lid, blended using fingertips) and MUFE pro finish powder (applied all over the lid on top of the pencil) using blending brush. I’d wear this for a night out if I don’t feel like doing bold lips.

Bottom right – added Lime Crime Velvetines Wicked. This is the look I’d wear for a dinner/night out if I don’t feel like doing smoky eyes.

travel makeup essentials

Anyhow, I hope this was helpful! I think you don’t have to carry a ton of makeup products and brushes when you travel. Find the right products that work for you!

Holiday Party Makeup #4 – Glitter Liner Tutorial

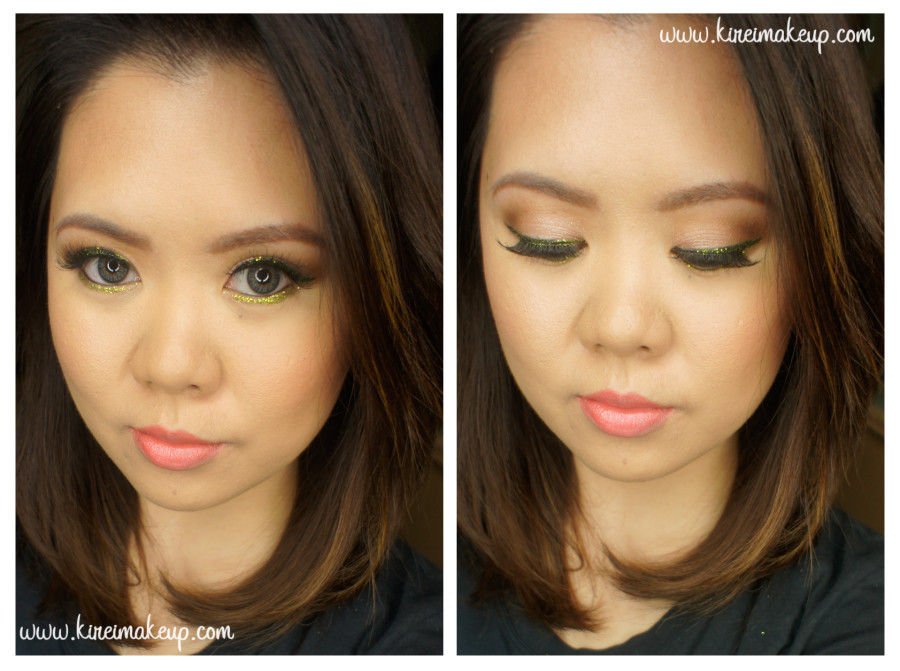
Almost NEW YEAR! I wish everyone a great year ahead! 2014 was fun, it was a bit rocky for me, but nevertheless a good year. 2014 has passed, and here to a great 2015! Hopefully in 2015 everything will go even better! I cannot wait to start 2015, and I have a feeling it’ll be an awesome year! Anyways, since the New Year is almost here, this is my last post of 2014 – a glitter liner tutorial. Last year, for NYE, I did a silver smoky makeup, this time I opted for more glitter!
I wanted to do a slightly more silver glitter, but couldn’t find any, so I decided to do this neon green glitter. Keep in mind that some glitters are not meant for the eye area! The one that I used for this tutorial actually is NOT for the eye area. I decided to use it because I know it won’t irritate my eyes. If you are not sure whether to use glitter or not, please consult the makeup artist/sales person who’s selling you the glitter. Also please be careful if you’re wearing contacts and using glitter on your eyes!

As I said in my previous post, I will not be posting the step-by-step instruction, instead you’ll get the usual photos and product list only. This is a scheduled post, so for any questions, go to my Instagram if you need a quick response.

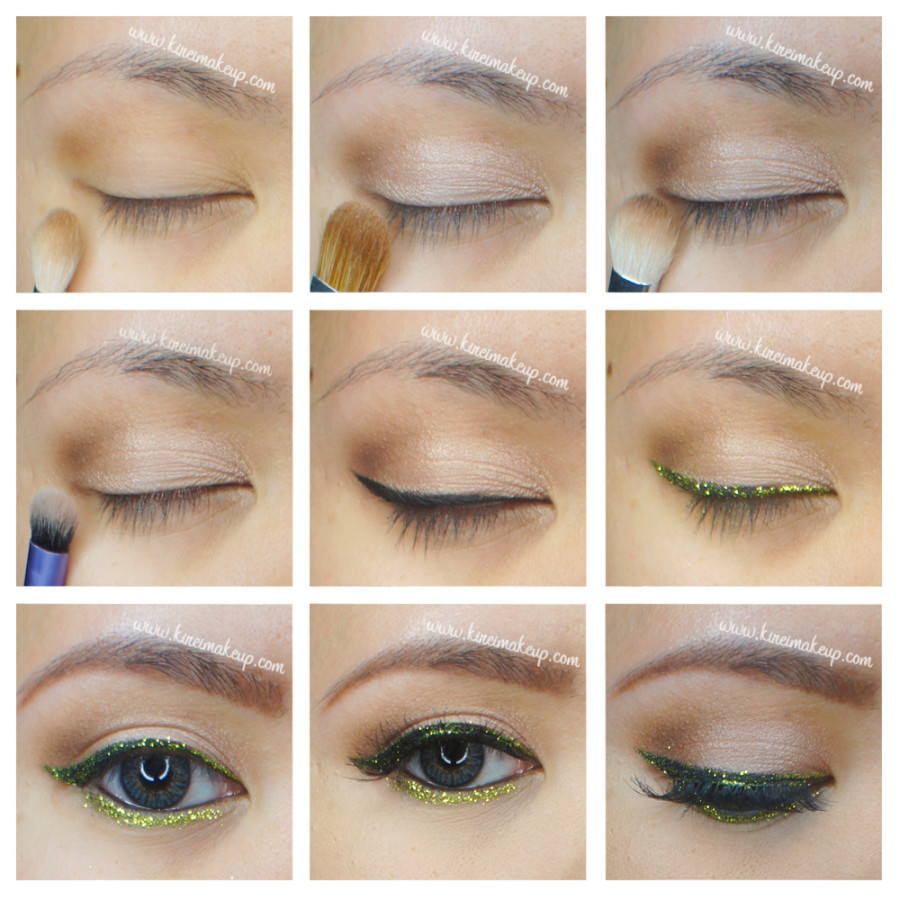
For the glitter, I applied it onto my eyes using a wet angled eyeliner brush. However, if you can find a mixing medium (e.g. MAC), that’d probably be better since I found that when the water evaporated from the glitter, it became apparent that the glitter started to fall all over my lashes and then to my face.

Another tip when using glitter and it falls on your face, use a tape to pick it up – just press it lightly to your face and it’ll pick up all the fallen glitters. If you have no tape around, use a CLEAN SPOOLY (aka mascara wand) to get rid of the glitter – just brush it in places where the glitter has fallen, use the tip of the wand if it is a stubborn one.

glitter new year makeup tutorialPlease check out my how-to winged eyeliner tutorial if you need help. I also have another glitter eyeliner tutorial that’s slightly easier and simpler.

If you prefer a full on glitter makeup, please check out my Christmas inspired makeup, and last year’s gold glitter makeup tutorial.

Products used

Eyes – Urban Decay Primer Potion; Make-Up Store Smog eyeshadow (crease), Make-Up Store Desert eyeshadow (transition color); Too Faced Chocolate Bar Palette (outer v – Triple Fudge); MUFE Aqua Black; L’oreal Voluminous Smoldering eyeliner; Make-Up Store Northern Lights glitter; Gwiyomi False Eyelashes; Chanel brow pencil

Face – MAC Pro Long-Wear foundation and concealer; MUFE Pro Finish powder.

Cheeks – Chanel Universal Bronzer; Smashbox Halo Blush in In Bloom.

Lips – MUFE Aqua lip pencil #18C

glitter eyeliner makeup tutorial


Christmas Makeup Tutorial

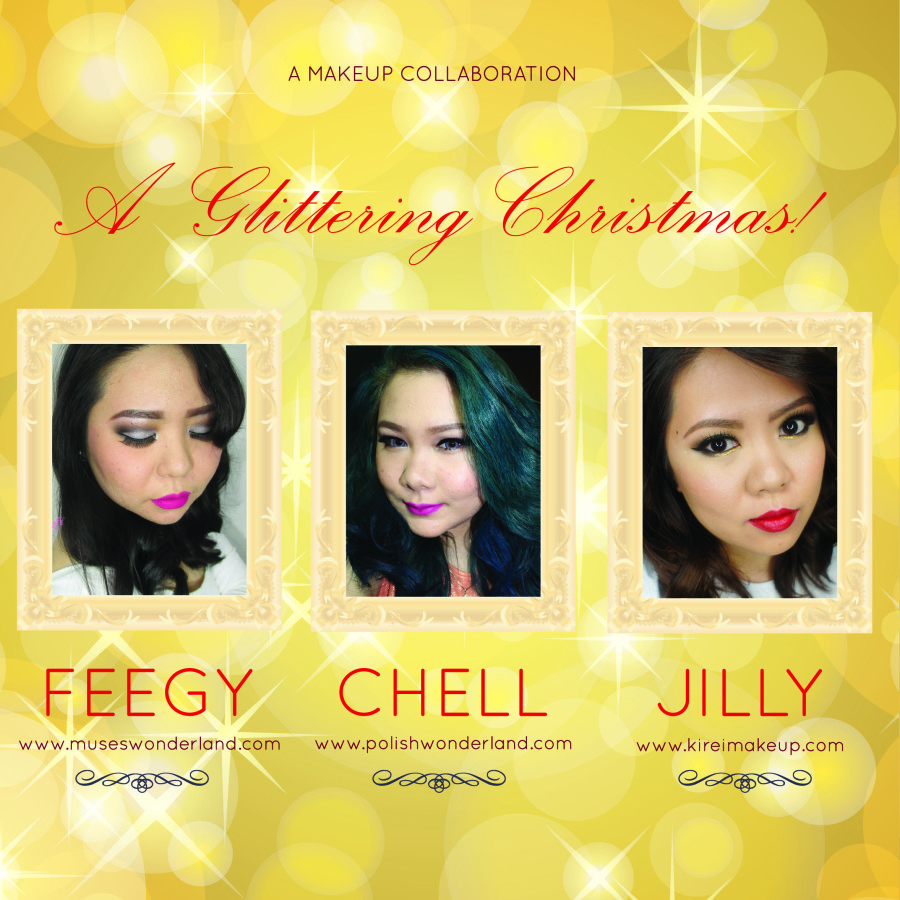
Are you guys ready for the Holiday season?! For those of you who are celebrating Christmas, I hope you’ll enjoy this Christmas Makeup tutorial! This is a makeup collaboration with fellow Indonesian Beauty Bloggers – Feegy from Muses Wonderland, Chell from Polish Wonderland, and myself (not from any wonderland *wink* hahaha). So, don’t forget to check their tutorial out!

We collaborated in creating a Christmas look with a little bit of glitter ya’know, because it’s Christmas! We need glitters, hon! Sparkles everywhere! Feegy created a silver glitter smoky eyes, and Chell went on the nude glitter eyes. For me, I went all out with green, gold and glitters! Hey, it’s Christmas, I might as well make full use of all the Christmas colors!

makeup collaboration

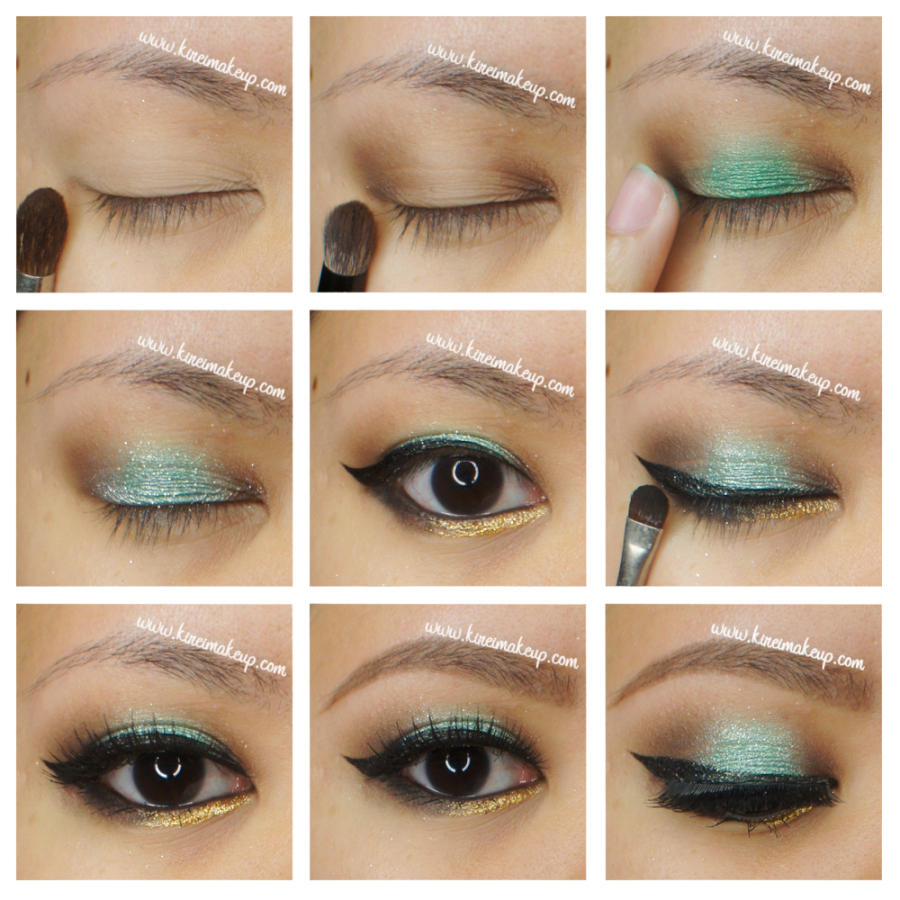
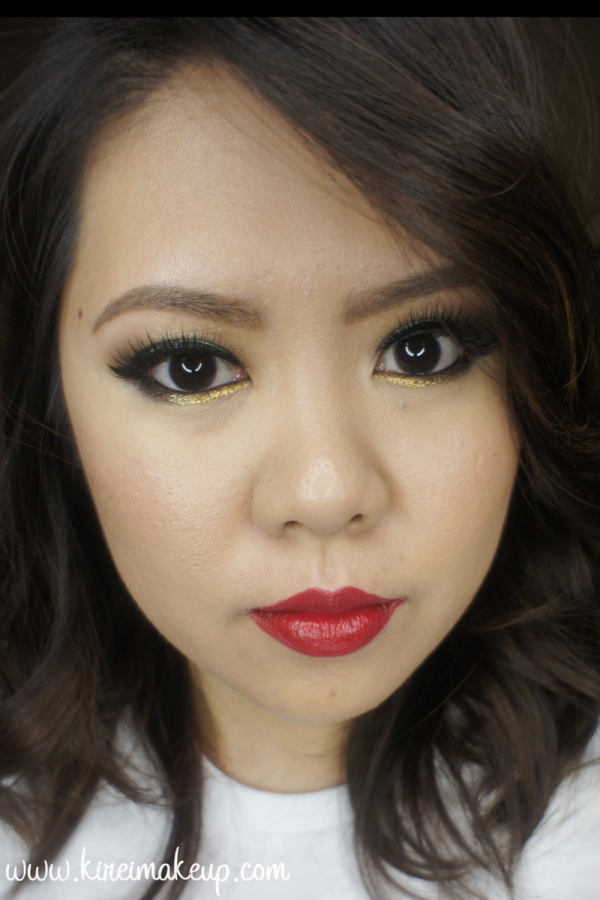
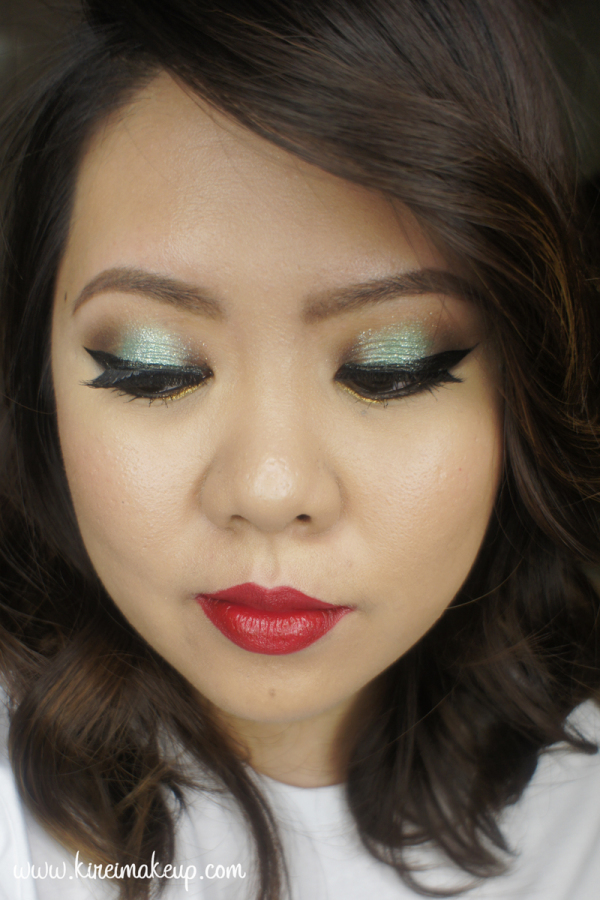
For my look, even though it’s pretty bold and colorful, it is still wearable if you aren’t afraid of colors. The placement of the colors are quite important so you don’t go looking all crazy, you get what I’m saying? Instead of green, gold and glitter everywhere, I focused these 3 products on specific location on my eyes. This way, the colors work well together, and you don’t look like a glittery mess.

The green is located on the center of the eyelids only so that when you blink, that gorgeous color will pop along with a teensy bit of crushed metallic pigment. You can use glitter if you don’t have the crushed pigment. The gold glitter is on the inner half of the lower lid, this will brighten and open up your eyes.

The key is to apply the bright color and glitter lightly. Notice I used my finger to apply the green shade, I also use my finger just to press the crushed pigment very lightly all over my lid. This way, the colors and glitters aren’t all over the place. By combining bright colors with neutrals, your whole look will be pulled together.

holiday party makeup

My eyelids are prepped using Urban Decay Primer Potion.

How-to:

1. I applied Urban Decay Buck eyeshadow above my crease, as my transition color, using a crease blending brush.

2. Using Smashbox bullet crease brush, I applied Kat Von D Shadow Box (Monarch palette) on the outer and inner V of the eyes.

3. I applied MUFE Aqua Cream no. 52 on the center of my eyelid using my ring finger.

4. Using the same ring finger, I VERY lightly tapped MAC Metallic Crushed Pigment in Moss Garden all over my lid. I just want a little bit of the crushed metallic pigment for shine, not for the color.

5. I lined my upper lash line using Kat Von D Trooper eyeliner. On the waterline, I applied MAC Smolder kohl eyeliner.

6. On the lower lash line, I applied PAC eyeliner liquid in Bazaar Gold on the inner half. On the outer half, I applied Kat Von D Deadhead eyeshadow (Monarch palette) using a smudger brush.

7. Using the same smudger brush as step no. 5, I applied whatever was left on that brush on the outer and inner V of my eyes (on top of Shadow Box), just to add a bit of depth.

8. I applied Gwiyomi Annabelle lashes for extra drama.

9. I filled my brows using Anastasia Beverly Hills Brow Wiz in Taupe and Brunette.

christmas party makeup

10. On my face, I applied Diorskin Star foundation using Real Technique foundation brush.

11. I also applied MAC Pro Long-Wear concealer under my eyes, and any areas I need to cover.

12. I set my face using CoverFX Translucent powder.

13. I applied Smashbox bronzing powder from the contour kit to warm my face up slightly. Then, I applied Chanel Blush de Horizon on my cheeks.

14. On my lips, I lined and filled it with MAC Brick lip pencil. Then, I applied OCC Vintage lip tar on top of it.

holiday party makeup

Products used

Eyes – Urban Decay Primer Potion; Kat Von D Monarch Palette (Shadow Box, Deadhead), Make Up For Ever Aqua Cream no. 52; Kat Von D Trooper eyeliner; PAC eyeliner liquid in Bazaar Gold; Gwiyomi falsies in Annabelle; Anastasia Beverly Hills Brow Wiz in Taupe and Brunette.

Face – Diorskin Star Foundation 030; MAC Pro Long-Wear concealer NC25; CoverFX translucent powder.

Cheeks – Smashbox contour kit (bronzer); Chanel Blush de Horizon.

Lips – MAC Brick lip pencil; OCC Vintage lip tar.

GlamGlow Super Mud Review

This week started out with a GlamGlow Super Mud review post since I’ve been holding in back last week! I was going to post it on the weekend, but I was invited to join GlamGlow Power Mud product launch, so I decided to compile everything for today’s post. If you followed me on Instagram (if you haven’t please do!), you’d noticed that I’ve posted a few photos regarding the mask and the event. I’ll post more photos from the event on Instagram, so please do follow me there!

Glam Glow Super Mud

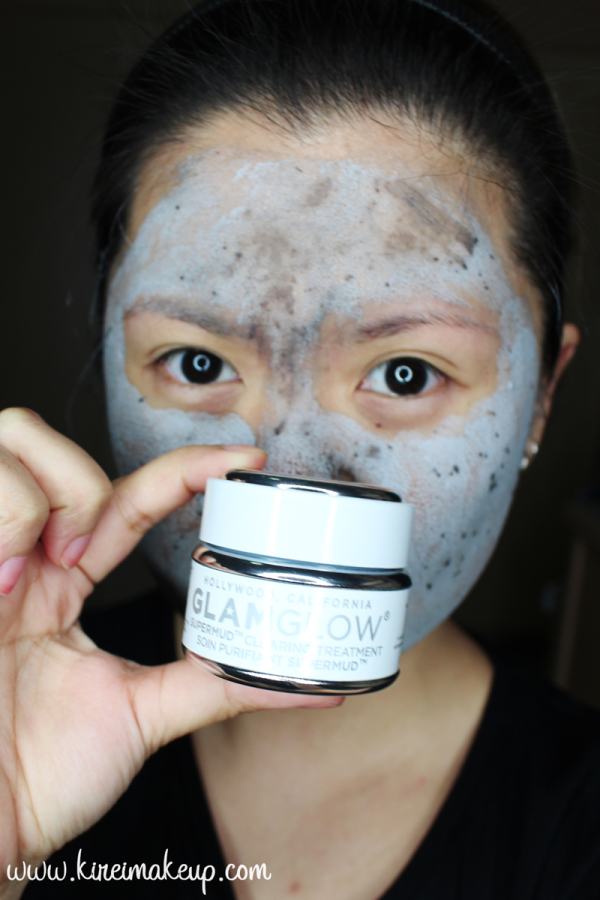
Everyone knows about GlamGlow right? The masks that took Hollywood by storm, the masks that everyone talks about, THE MUD MASK that’s in everyone’s wish list! Finally, I decided to BUY it last week and gave it a try. I was having issues with breakouts and clogged pores, so I decided to grab the GlamGlow SuperMud.

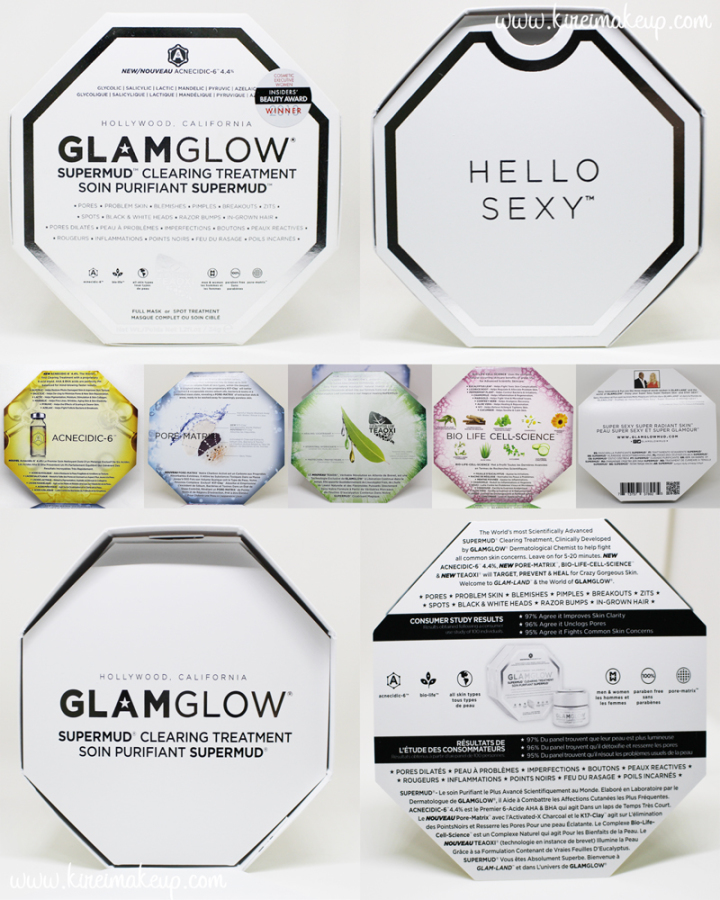
Let’s unbox the SuperMud together! Photo below as reference.

  1. So the SuperMud came in a beautiful white box.
  2. When you open the cover, you’ll notice their tagline “Hello Sexy”
  3. Then, you’ll receive a pamphlet that talks about the benefits of each ingredients in the mask, as well as a few words about the creators.
  4. You’ll get a jar of mask in the middle of the box.
  5. The back of the box talks about instructions, ingredients etc.

Glam Glow Super Mud review

Curious yet??? So, what exactly is GlamGlow SuperMud Clearing Treatment?

What it is:
A scientifically advanced SUPERMUD™ clearing treatment to target, prevent, and heal problem skin.

What it is formulated to do:
This formula was clinically developed by GLAMGLOW® dermatological chemists to help fight all common skin concerns including breakouts, discoloration, black and white heads, razor bumps, and in-grown hair. Powerful, skin-clearing mud visibly draws out dirt and congestion while a proprietary six-acid blend dramatically brightens and softens skin. It works to magnetically draw out dirt and pores with Activated-X Charcoal, leaving skin smooth and healthy-looking.

What it is formulated WITHOUT:
– Parabens
– Sulfates
– Phthalates

Research results:
Based on consumer trials:
After 1 day of use:
– 94% felt their skin looked renewed
– 91% saw an improvement in skin clarity
– 94% felt it gently cleared their skin

On day 7 after using it 3 times in a week:
– 98% felt their skin looked renewed
– 97% saw an improvement in skin clarity
– 97% felt it gently cleared their skin

Sephora Canada, 2014

Glam Glow Super Mud

Ingredients:

ACNECIDIC-6™ 4.4%: A proprietary six-acid blend of AHA and BHA acids perfectly PH balanced to deal with damaged skin, de-clog, and minimize pores, pigmentation, scaring, and breakouts.
Activated-X Charcoal: An extreme absorption carbon, attracting toxic substances into its mass up to 500 times its volume from all skin types.
K17-Clay™: Extracts and encapsulates excess sebum oils, bacteria, and toxins in a controlled stasis state.
TEAOXI™: Delivers daily fresh natural eucalyptol, natural-linalool oil, and powerful flavonoids direct into the formula from real pieces of eucalyptus leaf.

Water, Kaolin, Magnesium Aluminum Silicate, Sodium Hydroxide, Eucalyptus Globulus, Mandelic Acid, Charcoal, Parfum [Benzyl Benzoate, Linalool], Glycolic Acid, Lactic Acid, Azelaic Acid, Pyruvic Acid, Salicylic Acid, Xanthan Gum, Aloe Barbadensis Leaf Juice, Maltodextrin, Iron Oxides, Peppermint Oil, Butylene Glycol, Glycyrrhiza Glabra Root Extract, Glycerin, Chamoilla Recutita Flower Extract, Calendula Officinalis Flower Extract, Cucumis Sativus Fruit Extract, Hendera Helix Extract, Symphytum Officinale Leaf Extract, Phenoxyethanol, Ethylhexylglycerin, Caprylyl Glycol, Hexylene Glycol, Methylchloroisothiazolinone, Methylisothiazolinone.

Sephora Canada, 2014

Glam Glow Mud Mask

Impression and Verdict

So, I’ve only tried this mask once as an overall mask, and once as a spot treatment. Both times, I loved it! The mask has a minty smell to it, it doesn’t really give much sensation when you apply it all over your face. I applied my mask using a clean foundation brush, you can use your finger if you want.

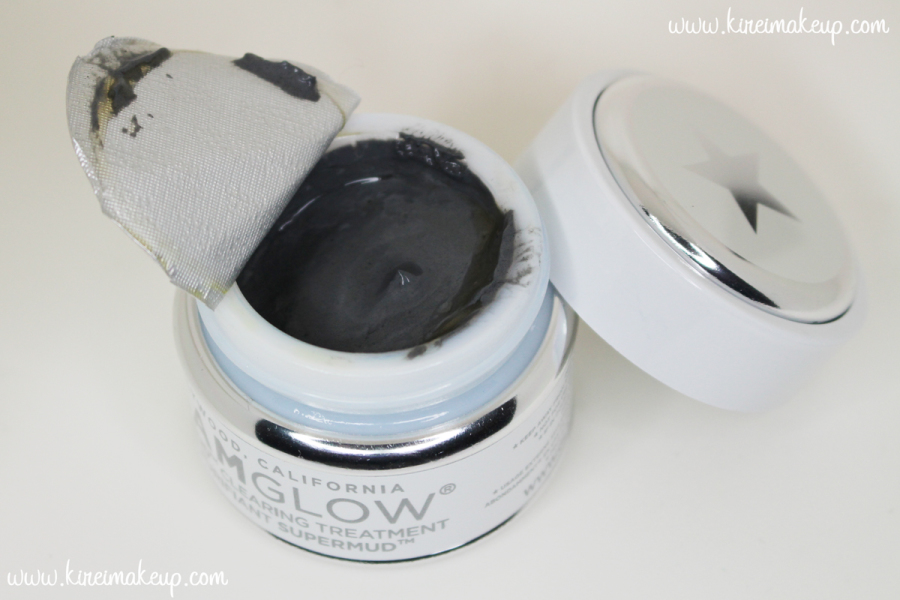
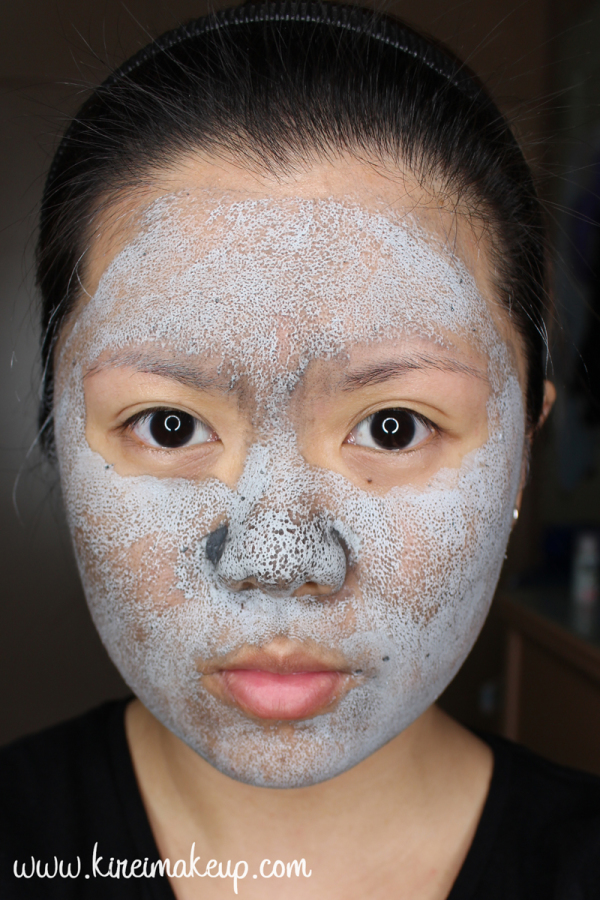
The mask is of a dark grey color when it’s wet (you can see it on the side of my nose), and when it dries, it hardens and turns into a light grey color. If you notice my nose area, you’ll see there’s a few spots, that’s all oil. Yep, I’ve oily nose, and those oil started to secrete onto my skin when the mask was drying out. The oil was absorbed by the mask.

Glam Glow Super Mud

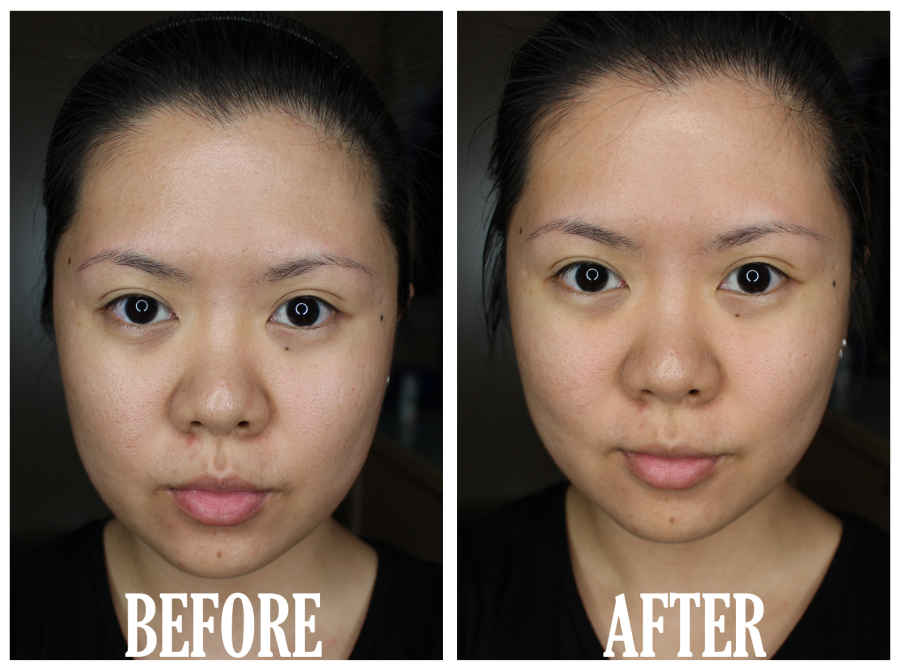
After leaving the mask on my skin for 10-minute, I went to wash my face, then continued with my normal skincare routine. My face felt fresh, a little bit tight, but my skin looks a bit brighter than before. My sis even commented how good my skin looks the day AFTER, even though she didn’t know I’ve tried the mask. She said my skin looks smoother than before. So, YAY!

I think the biggest difference before and after the mask is my pores. It doesn’t feel clogged anymore. I felt cleaner, fresher, and definitely feel my skin looks brighter. I have yet to notice any big difference in my skin yet, but that’s probably I’ve only tried this product once. When doing the spot treatment, I left the mask on my zits and leave it overnight. The next morning I noticed the swelling has reduced.

I definitely would buy this mask again, and probably would try their other masks! This mask is great for weekly treatment. The price is a bit steep though. For a jar (1.7 oz) it costs IDR 780K in Sephora Jakarta, and CAD$76 (before tax) in Canada. It’s a luxury item, not a must have.

If you live in Indonesia, you can grab the GlamGlow mud masks at Sephora Indonesia or Glam Glow Studio both located in Plaza Indonesia, Jakarta. If you do go to the Glam Glow Studio, you can ask them to let you try the mask first!

Glam Glow Super Mud

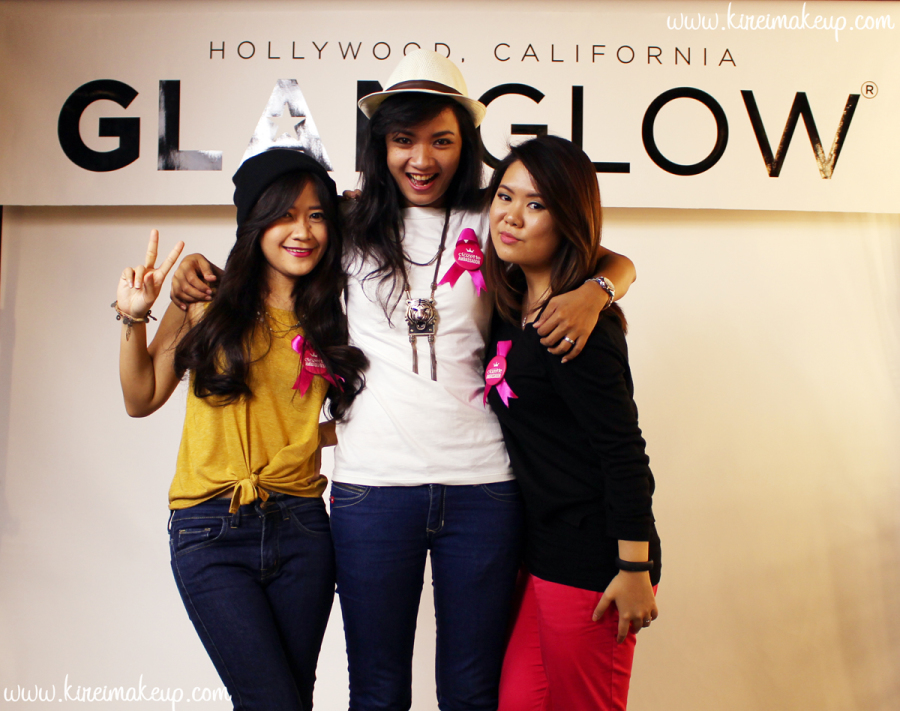
So, AFTER I bought the mask, I was invited to join Glam Glow PowerMUD product launch event as a Clozette Ambassador. Curious what a Clozette Ambassador is? Check out my Clozette Indonesia post!

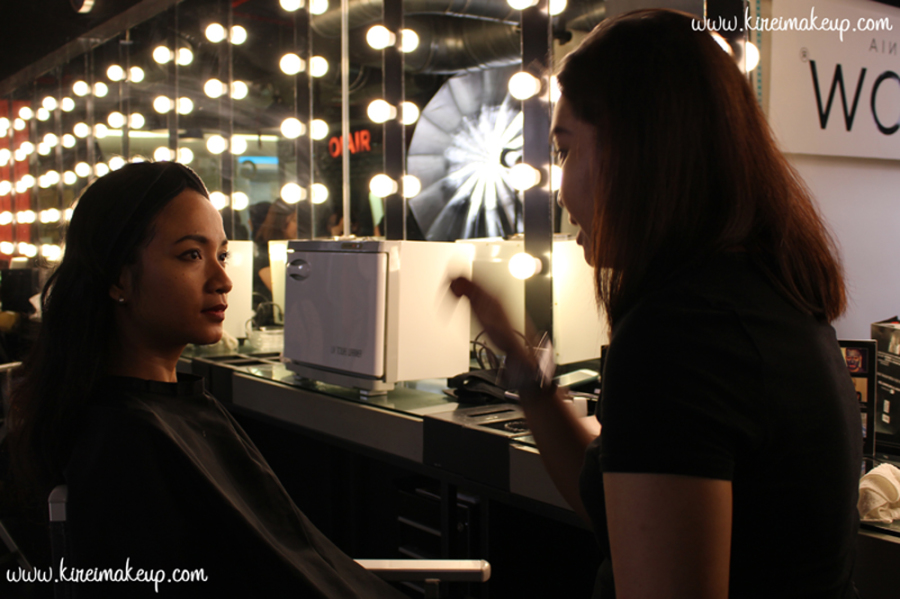
Anyways, so on Saturday I went to the product launch event along with fellow Clozette Ambassadors and bloggers. There, we were given a chance to try out the PowerMud mask. I didn’t give it a try since I was in a rush for another appointment, but I did take a lot of photos with the other bloggers! So, please do go over to my Instagram to check them out!

Glam Glow Power Mud

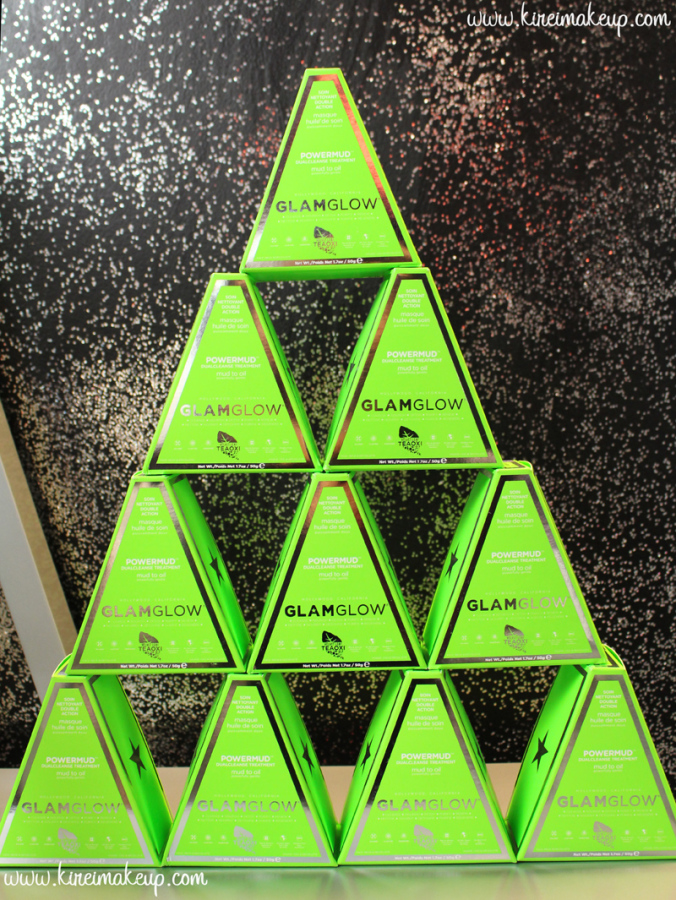
The POWERMUD mask is a mask I wished I had bought earlier! I wished this mask was there when I bought the SuperMud. Nothing wrong with the SuperMud, but the PowerMud is infused with cleansing oil. This mud mask is meant to be used after you remove your makeup. It also contained exfoliators and astringents which help to deep clean your skin! I do love the SuperMud, but I feel like the SuperMud would be an excellent mask to deep cleanse the skin weekly to remove makeup build up.

I did open up the tester jar for the PowerMud and it smells amazing! Smells like apples or pears, can’t really quite put my finger on the smell, but smells so good! It also has bits of scrubs which will help to exfoliate your skin. I received 5 sample size PowerMud, and can’t wait to give it a try!

Glam Glow Power Mud

Again, don’t forget to sign up at Clozette Indonesia, and if you become Clozette Ambassadors, you might just see us on the next event! Can’t wait to see everyone again!

xoxo

Glam Glow Power Mud


Fall Makeup Tutorial

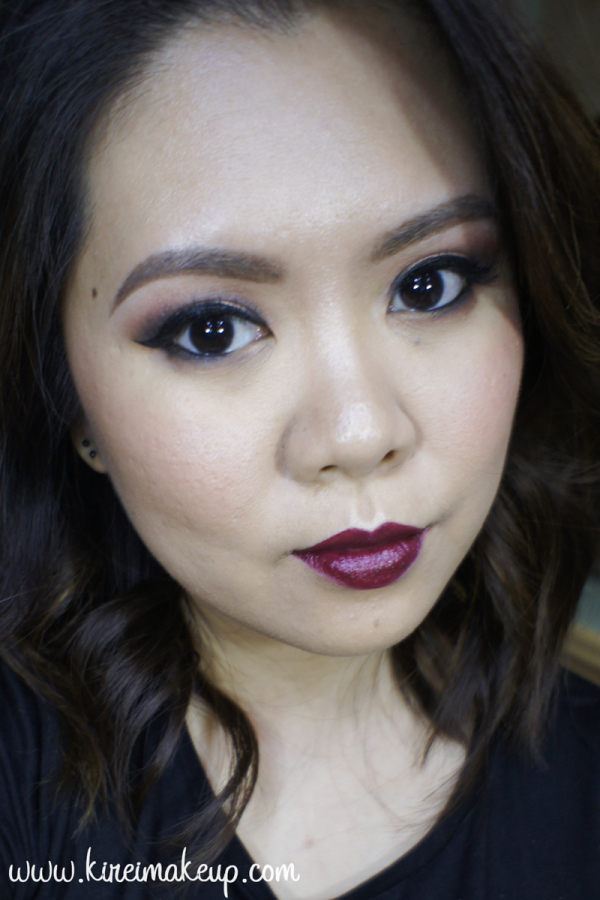
Fall is almost over I heard! How I miss those beautiful leaves turning yellow, orange, and red! Anyways, since I’ve been reminiscing about Fall, I decided to do a Fall Makeup Tutorial, inspired by the beautiful maple leaves that turn red during the season. I’ve done a review on the lipstick that I’ll be wearing for this tutorial too! You guys should check Revlon Black Cherry out if you are looking for a dark lipstick for this Fall/Winter season.

I usually don’t do bold lips and eyes at the same time like on this post, but I like to break the rules some times, so hey why not?! Anyways, enough with the chit-chat, let’s get on the tutorial!

For product list, scroll all the way to the bottom!

*Check out my tutorial on how to have a long lasting lipstick*

My eyelids are prepped using Urban Decay Primer Potion.

How-to:

1. I applied MAC Pro Longwear Paint Pot in Perky all over the eyelid.

2. Using a flat eyeshadow brush, I applied The Balm Meet Matt(e) Nude Matt Rosen on the inner and outer third of my eyelid.

3. I applied Kat Von D Esperanza Placebo just slightly above my crease as the transition color.

4. On the crease, I used a small brush and applied The Balm Meet Matt(e) Hung.

5. I applied MAC Artistic License eyeshadow on the eyelid using a flat eyeshadow brush.

6. I lined my upper lash line using Shu Uemura Calligraphy Ink eyeliner, and created a winged liner. I also added MAC Carbon on the outer and inner third of my eyelid, and on my crease. I decided to add MAC Carbon to add extra intensity and depth.

7. I applied MAC Carbon lightly along my lower lash line.

8. I lined my waterline using L’oreal Voluminous Smoldering eyeliner.

9. My brows are filled using Anastasia Brow Wiz in Taupe and Brunette. My falsies are Gwiyomi false eyelashes no. 3

peach smoky eyes

10. I applied Diorskin Star foundation all over my face using Real Technique buffing brush.

11. I applied MAC Conceal/Correct palette in Medium under my eyes.

12. I set my face using Cover FX translucent powder.

13. I lightly contoured my face using Smashbox contour kit powder.

14. I applied The Balm Mary Lou manizier highlighter on my cheekbones, nose and cupid’s bow.

15. I applied The Balm Instain blush in Houndstooth on my cheeks.

16. On my lips, I applied Revlon Black Cherry lipstick using a lipbrush.

Revlon Black Cherry makeup tutorial

Product list

Eyes – Urban Decay Primer Potion; MAC Perky Pro Longwear Paint Pot; The Balm Meet Matt(e) Nude (Matt Rosen: lid, Matt Hung: Crease); Kat Von D Esperanza Palette (Placebo: upper crease); MAC Artistic License eyeshadow (lid); MAC Carbon eyeshadow  (lid & crease) ; Shu Uemura Calligraphy Ink pen liner; Anastasia Beverly Hills Brow Wiz (Taupe and Brunette); Gwiyomi False Lashes no. 3

Face – Diorskin Star foundation; MAC Conceal/Correct palette in Medium; CoverFX translucent powder.

Cheeks – Smashbox contour kit; The Balm Mary-Lou manizier highlighter; The Balm Instain Houndstooth blush.

Lips – Revlon Black Cherry lipstick.


Fall Makeup dark lips

White Sugar Skull Makeup

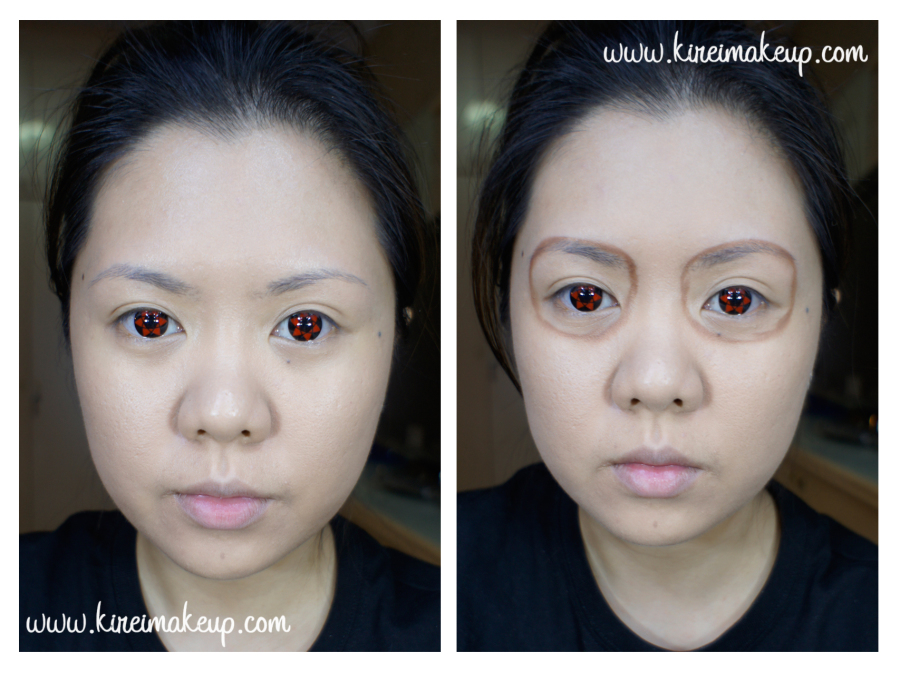
As Halloween is fast approaching, I’m trying to squeeze in as many Halloween Looks as I can! This is my 5th Halloween tutorial for 2014, and I think this year I created the most Halloween tutorials compared to previous years! Anyways, for the 5th tutorial, I wanted to do a Sugar Skull makeup, but I wanted to create something different than the usual sugar skull. I’ve done a sugar skull makeup before on models using colors and black lines. So, while I was browsing for inspiration, I found this video on youtube by one of my favorite youtube gurus, Samantha from Batalash. I loved how she did hers using white and mainly brown colors. I decided to use her video as my inspiration and create this look.

I was running out of white pencil eyeliner while I was doing this look, so I switched to a white water-activated face paint by Snazaroo. Due to this, you might see some part of the makeup looks whiter than the others, that’s because of the change in medium (pencil to paint).

What you need for this look:

  • Foundation
  • Setting powder
  • Eyeshadows – light brown, dark brown, black
  • White pencil eyeliner or face paint
  • Brushes
  • Contact lens – optional

For a list of all the brands that I’ve used in this tutorial, please check it at the end of the tutorial.

*Check out my other Halloween Tutorials*

white sugar skull makeup

How-to:

1. I applied foundation all over my face, and set it using a setting powder.

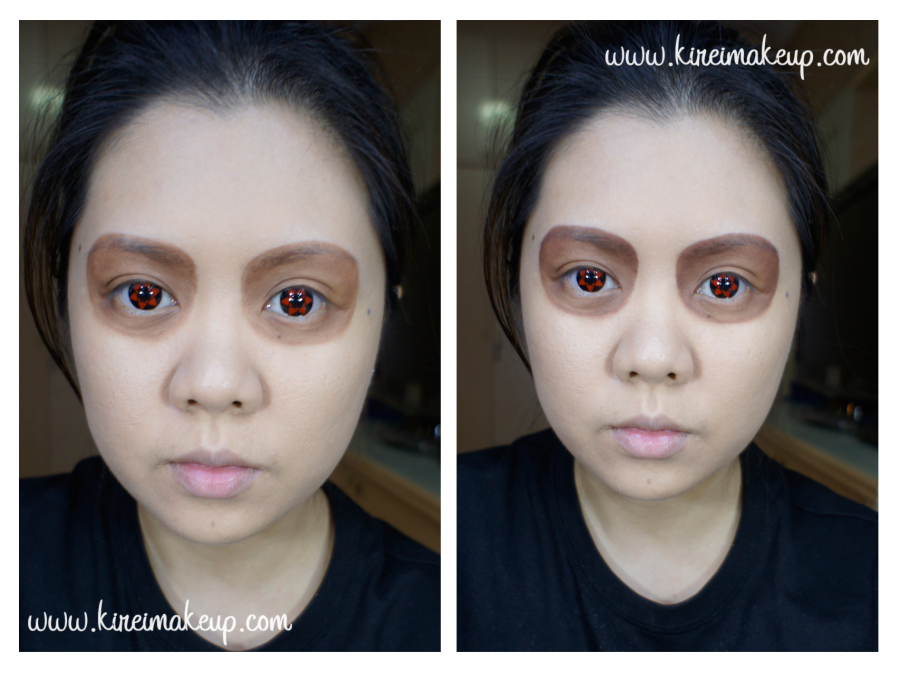
2. Using the tip of a very firm flat eyeshadow brush, I applied a light brown eyeshadow around my eye socket.

white sugar skull makeup

3. Using a flat eyeshadow brush, I filled my eye area using the same brown eyeshadow as step 2.

4. Again, using the tip of a firm flat eyeshadow brush, I applied a darker brown eyeshadow, lightly blending it towards the center of my eyes.

easy sugar skull makeup

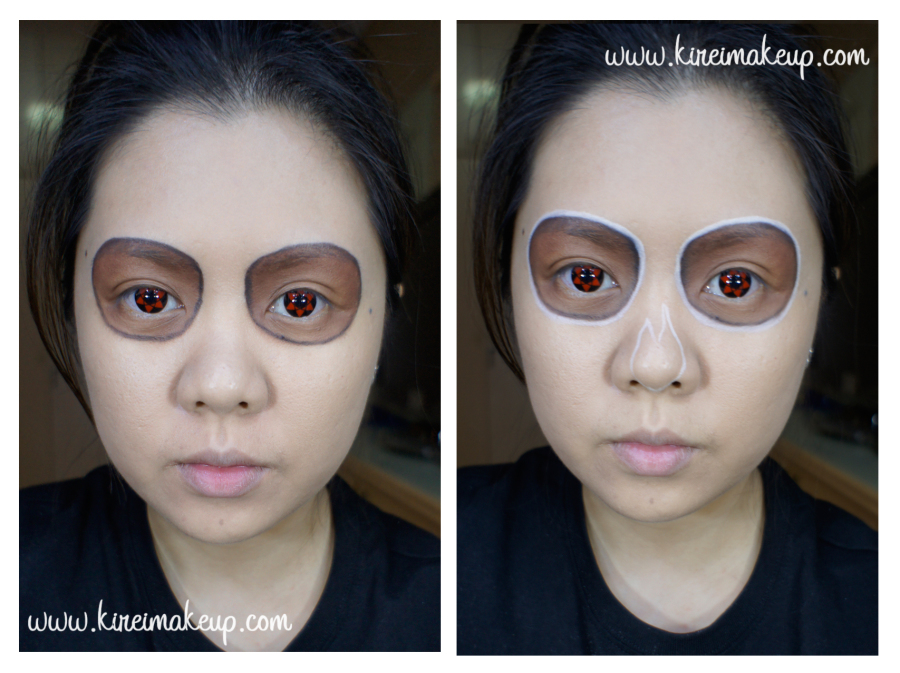
5. Using an angled eyeliner brush, I applied a black eyeshadow as an outline of my eyesocket. I lightly blend it inwards.

6. Again, I outlined my eye socket using a white pencil eyeliner. You want to sharpen this eyeliner and clean the tip every now and then to prevent the color from getting muddy.

white sugar skull makeup

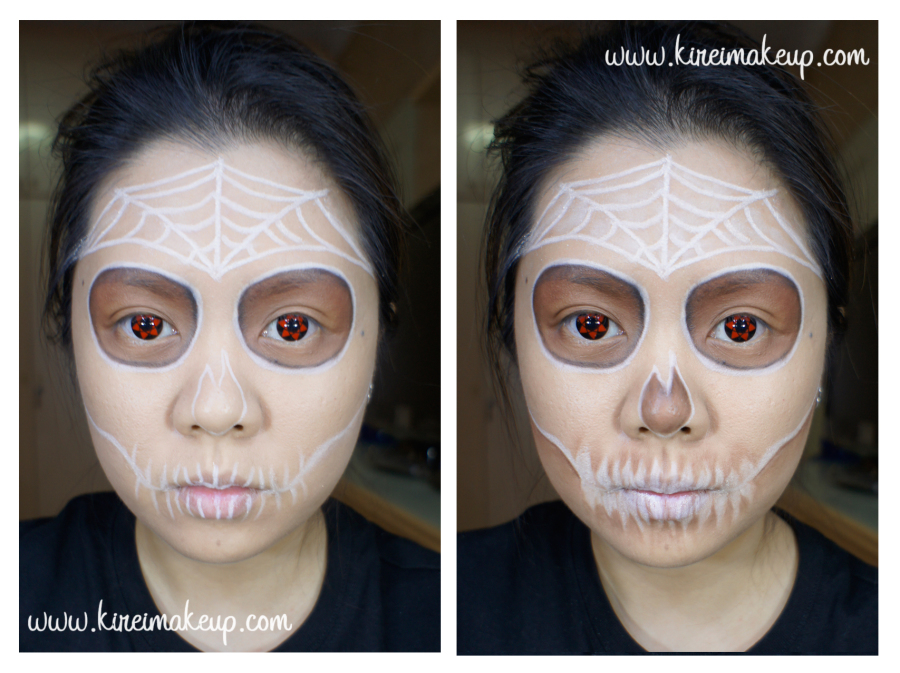
7. Using the same white pencil eyeliner, I created the outline and spider web design on my face.

  • I created a wide spider web on my forehead.
  • I outlined where I’d like the hollow of my nose going to be.
  • I also created a line on the hollow of my cheeks towards the corner of my mouth.
  • I created vertical lines over my mouth to outline where my teeth are going to be.

8. Next, I used the brown eyeshadow to filled in my nose and create some shadows in between my teeth, as well as the hollows of my cheeks.

9. On the nose, I also lightly applied a black eyeshadow just  at the edge where the white and the brown meets to create depth.

easy sugar skull makeup

10. Using a white face paint, I created some dots on my face.

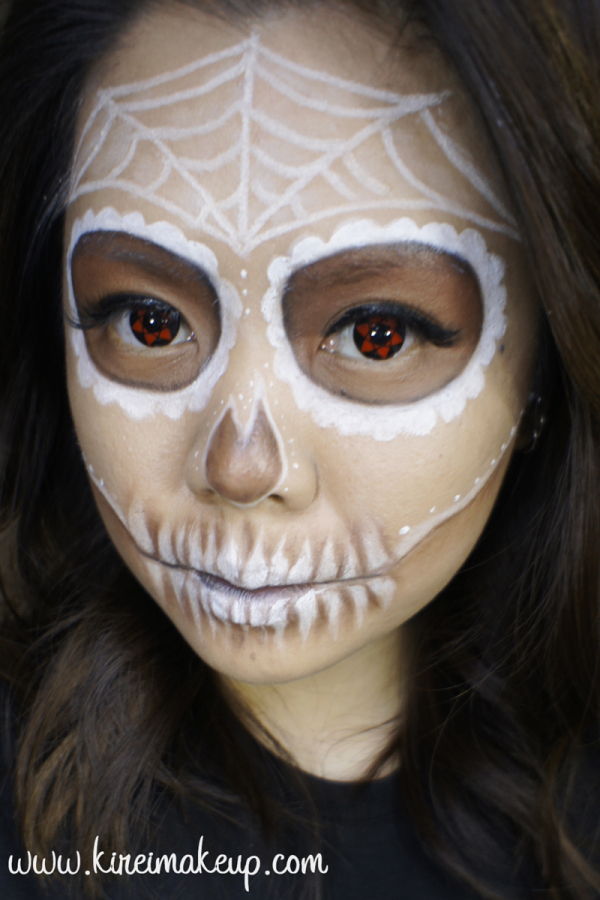
11. I also created flower petals around the eye socket, and lighten up the teeth to make it stand out even more.


Products used

  • Foundation – Diorskin Star foundation
  • Setting powder – Cinema Secret Loose powder (Transparent)
  • Eyeshadows – The Balm Meet Matt(e) Nude
    • Light brown – Matt Rosen
    • Dark brown – Matt Garcia
  • Black eyeshadow – MAC Carbon
  • White pencil eyeliner  – Revlon Carbon Cleopatra photoready eyeliner
  • White face paint – Snazaroo classic white

*Check out my other Halloween Tutorials*

  • 4 Bridal Makeup Looks

    I collaborated with Lover.ly to create a bridal makeup look. I was shown 3 photos of the bridal gowns, and I chose my favorite as below for my post. While I was thinking of to create a look for this gown, I decided to create not one, but FOUR bridal makeup looks to suit the gown! I created 4 looks since I knew that most brides would have their own interpretation of their makeup, some chose to be more on the natural side, while others might not be afraid to go bold!

    I also took into consideration of the whole outfit and hair. As you can see, the gown that I chose has a very demure neckline, along with a very elegant lace details. With this in mind, in my opinion, I think brides who chose this type of gown would be very classy, lady-like and conservative.

    wedding gown

    Since the hair is pulled back, so not to clash with the neckline, I didn’t want to create a heavy dark smoky eyes. I think with this gown and hairstyle, a simple warm eyes would suffice. I feel that a heavy, dark smoky eyes would be too heavy and might clash with the high neckline. Of course, you can go on the dark smoky eyes look, but I prefer going light on the eyes and play on the lips.

    So, for this tutorial, I created 1 eye makeup which can be paired with 4 different lips look. Usually for bridal makeup, I tend to choose the warmer neutrals (think browns and gold) since I think it looks very flattering on everyone. Very rarely I do a black smoky eyes, unless the client asked for it, and/or during change of makeup from morning to evening. Even then, I’ll still add some warmth on the smoky eyes.

    To compliment the lace and the gown’s off-white color, I decided to use a beautiful gold on the eyelids from the Too Faced Chocolate Bar eye palette called Creme Brulee. This gold isn’t too yellow, nor it is too shimmery. It has a somewhat satin finish, which makes it perfect for this look so it doesn’t clash with the texture of the gown.

    Since this gown doesn’t have shiny finish, I decided to keep the face semi-matte to avoid looking too dewy. I feel that this gown has a grown-up feeling to it, so I try to avoid the dewy/glowing finish since it can make the bride looking too youthful. Semi-matte is the right choice for this look.

    bridal makeup tutorial

    In all of the 4 looks I created, I only added extra blush on the bottom looks (both left and right), and added a black waterline on the look with the dark lips. Otherwise, everything is exactly the same (brows, foundation, highlight, contour etc).

    No, I do NOT contour my face heavily with cream foundation. You can if you want, but I prefer not to. I like very subtle highlight/contour so my clients look still like themselves in the photos instead of looking like someone else. HOWEVER, IF or WHEN the client asks for heavy contouring (i.e. Kim K contouring), I’ll still provide the cream contouring for her.

    If you’d like to see me do a glam Bridal makeup (i.e. smoky eyes, contour, and the whole nine yards), do let me know by leaving comments here or on my Instagram page!

    Natural bridal eye makeup

    Eyelids are prepped using Urban Decay Primer Potion. Face is primed using MUFE HD Elixir.

    How-to:

    1. I applied Salted Caramel from Too Faced Chocolate Bar eye palette on my crease using a clean blending brush.

    2. On the outer V, I applied a mixture of Triple Fudge and Semi Sweet (both from Too Faced Chocolate Bar palette) using a Smashbox Bullet Crease brush.

    3. Then, using the same brush as step 1, I blended out the edge of my crease.

    4. Using a flat eyeshadow brush, I applied Creme Brulee (from Too Faced Chocolate Bar palette) on my eyelid.

    5. I lined my waterline using MAC Chromagraphic pencil eyeliner in NC15 (or L‘oreal Voluminous Smoldering eyeliner for the dark lips version).

    6. I also applied Triple Fudge/Semi Sweet mix on the outer half of the lower lash line. Then, I applied Creme Brulee on the inner half of the lower lid. I used the edge of a flat eyeshadow brush to do this.

    7. I created a winged liner using Shu Uemura Calligraphy:ink liquid liner pen along the upper lash line.

    8. I filled my brows using Anastasia Brow Wiz in Taupe FIRST, then I darkened the tail and any sparse area using Anastasia Brow Wiz in Brunette.

    9. I curled my lashes and applied Gwiyomi no. 3 false lashes.

    10. On my face, I applied MUFE HD foundation all over using a foundation brush.

    11. I set my face using CoverFX translucent setting powder.

    12. I lightly contour my face using Smashbox contour kit powder, and highlight my face using The Balm Mary-Lou highlighter. If you have oily skin, I’d suggest skipping highlighting using Mary-Lou. Instead, you can use a matte powder which is a shade or two lighter than your skin, or the highlight powder from Smashbox contour kit.

    13. I applied Chanel Blush de Horizon on my cheeks.

    natural bridal makeup

    14a. For this blushing bride look, I applied Lancome Color Design in Vintage Rose Sheen.

    This look is perfect for those brides who prefer to have a natural look. The rose lipstick has just enough color to brighten up the face. This bridal makeup look is great for Summer Wedding!

    blushing bride makeup

    14b. For this youthful bridal look, I added YSL Rouge Pur Couture no. 52. I applied it using a lip brush.

    This lipstick is pretty much sold out in Indonesia! When applied lightly on the lips, this YSL no. 52 really lives up to its popularity! It deposits enough pigment without looking too bright on the lips. This gorgeous coral lips is also great for Summer Wedding makeup, but I think it’d be perfect for Spring Wedding where all the flowers are just blooming, and the weather isn’t quite warm yet. This bridal makeup look would instantly gives the bride the most beautiful smile on her big day!blushing bride makeup

    14c. I applied MAC Girl About Town on the lips using a lip brush. I had to add a bit more blush to avoid my face looking washed out for this look since the lips are quite bold.

    This is another look which would look great for Spring/Summer Wedding. For brides who are a bit more adventurous, but not into red lips, this is definitely a look to try. What I love about MAC Girl About Town lipstick is that the color is not too fuchsia. It still has enough warm undertone to make it wearable for a wedding, and at the same time bright enough to give a punch of color.

    fall bridal makeup

    14d. For this lovely deep red, I first lined my lips using L’oreal Color Riche Anti-Feathering lip liner in True Burgundy. Then, I applied MAC Diva lipstick on top of it. (The blush was the same as 14c)

    Last but not least, we have the makeup look for a Fall/Winter wedding. Of course you can choose the other lip colors for Fall/Winter wedding, but I really love this deep red lips look. Personally, this is my favorite look out of the 4. I chose to darken my waterline to compliment the deep red lips.

    So, that’s all folks! I think everything is pretty self-explanatory from the photos. I’d like to say that  yes, you CAN wear all these makeup looks even if you aren’t a bride! Obviously some steps for bridal makeup are different than daily makeup, but that’s for next time! Yes, you can wear this look to a wedding party, or if you’re bridesmaids etc. Again, like I said, the way I applied and steps taken for bridal makeup is slightly different than daily or party makeup. You can tweak it to your preference!


    Products used

    Eyes – Urban Decay Primer potion; Too Faced Chocolate Bar eye palette (crease: Salted Caramel, outer V & lower lid: Triple Fudge/Semi Sweet, eyelid & lower lashline: Creme Brulee); Shu Uemura Calligraphy:ink liquid liner; MAC Chromagraphic pencil liner NC15 or L’oreal Voluminous Smoldering eyeliner; Anastasia Brow Wiz in Taupe and Brunette; Gwiyomi no. 3 falsies.

    Face – MUFE HD elixir; MUFE HD foundation; Cover FX Translucent Powder.

    Cheeks – Smashbox Contour kit; The Balm Mary-Lou; Chanel Blush de Horizon

    Lips – Lancome Color Design Vintage Rose Sheen (a); YSL Pur Rouge Couture no. 52 (b); MAC Girl About Town (c); L’oreal Color Riche lipliner in True Burgundy and MAC Diva (d)

    Classic Red Lips Makeup

    Hello, everyone! How are you guys doing? I am back! Super busy at work, haven’t have the time to take a breather yet. Anyways, I’ve been trying to post 2 tutorials/review up every week, so since this Classic Red Lips makeup would be the first one for this week, hopefully I can squeeze another tutorial (perhaps a Halloween tutorial), or a product review by Sunday. I do have a few products lined up to be reviewed, and also a few more Halloween looks before the 31st.

    Anyways, for this tutorial, I actually wore this look out for my friend’s wedding on Sunday. I’m sure you’ve seen what I wore with this makeup over on Instagram! Anyways, I used mostly newly bought products – The Balm Meet Matt(e) Nudes & Mary-Lou highlighter, Too Faced Chocolate Bar palette (smells heavenly), along with Shu Uemura Calligraphy Ink eyeliner & Shu Uemura Dear Matte Rouge Unlimited Diva Red lipstick.

    If you are of an Asian descent and looking for the perfect red lipstick, you might want to check out Shu Uemura Dear Matte Rouge Unlimited lipstick in Diva Red. It’s a really pretty red lipstick with a warm (orange) undertone, which will compliments nicely the yellow undertone in our skin. If you prefer a cooler (blue) undertone red lipstick, check out MAC Russian Red.

    Anyways, let’s get on the tutorial!

    How-to:

    1. I prepped my eyelid using Urban Decay Primer Potion. Then, I applied Matt Singh from The Balm Meet Matt(e) Nude palette on my crease blending it upwards towards the brow bone.

    2. I layered in Matt Rossen, again from The Balm Meet Matt(e) Nude palette, on top of Matt Singh. This time, I focused most of the color on the outer part of the crease, blending the color inwards.

    3. To add an extra depth, I applied Matt Wood right on the crease. The color was concentrated on the outer part of the crease, and blended inwards.

    4. I applied MAC Carbon just on the outer V of the eyelid.

    5. Using a flat eyeshadow brush, I applied Marzipan from Too Faced Chocolate Bar Eye palette on my eyelid.

    6. I lightly applied MAC Carbon on my lower lash line and blended it out using a pencil brush.

    7. I lined my waterline using L’oreal Voluminous Smoldering eyeliner, and applied a thick winged liner using Shu Uemura Calligraphy Ink eyeliner.

    8. I filled my brows using Anastasia Brow Wiz in Taupe.

    9. I applied Lavie Lash false eyelashes in Bluebell.

    Thick winged eyeliner

    10. On my face, I applied MUFE HD Foundation.

    11. I also applied MUFE HD concealer under my eyes.

    12. I set my base using Cover FX translucent powder.

    13. I very lightly applied The Balm Mary Lou highlighter on the bridge of my nose, cupid’s bow and cheek bones.

    14. I lightly contoured my face using Smashbox Contour Kit – sides of my nose, temples, jawline and hollows of the cheeks.

    15. For the cheeks, I applied Smashbox Halo blush in In Bloom.

    16. On my lips, I applied Shu Uemura Dear Matte Rouge Unlimited lipstick in Diva Red straight from the tube. I did this because I was pressed for time, and I have the lipstick on my clutch for the night, so I can easily touch it up. However, if you want a long lasting lipstick with very little need to touch up, please check out my How-to apply Red lipstick tutorial!

    Classic hollywood glam makeup

    Products used:

    Eyes – Urban Decay Primer Potion (original); The Balm Meet Matt(e) Nude (crease: Matt Singh, Matt Rosen, Matte Wood); MAC Carbon (outer v); Too Faced Chocolate Bar Eye palette (eyelid: Marzipan); Shu Uemura Calligraphy Ink eyeliner; L’oreal Voluminous Smoldering eyeliner; Anastasia Brow Wiz (Taupe); Lavie Lash (Bluebell).

    Face – MUFE HD foundation; MUFE HD concealer; The Balm Mary-Lou highlighter; Smashbox contour kit; Smashbox In Bloom blush; Cover FX translucent powder.

    Lips – Shu Uemura Dear Matte Rouge Unlimited lipstick in Diva Red.

    L’oreal Colour Riche Moist Matte in Lincoln Rose

    I was watching Kat Von D video tutorial on Sephora’s youtube channel, and I absolutely love how she created the ombre dotted eyeliner, similar to pointilism. I think it’s a pretty cool way to get creative with your eyeliner while keeping it simple. You can pair this dotted eyeliner with a rich-colored lips, like the L‘oreal Colour Riche Moist Matte in Lincoln Rose to brighten up your look.

    As promised on my L’oreal Colour Riche Moist Matte swatches, I wanted to show you guys how the lipsticks look on my skin. This time I played around with Lincoln Rose, but I’ll try to work on the other shade next time. I’m quite surprise at how bright the lipstick shade is on my lips. I did not line my lips at all for this tutorial since I want to see how the real color is against my skintone. I think if you have a medium or dark complexion, this would work really well on you. I personally find this shade to be a little bit overpowering.

    The shade itself is a very interesting red. It does have quite a warm undertone to it. I think it’s a very pretty shade for summer, or for us in the Tropics where everyday is pretty much summer. Very warm, bright, and tropical. I applies very smoothly on the lips. Although it is a “matte” line, it doesn’t dry out your lips like some other brands “matte” lipsticks are. It is still creamy, while the finish is matte. Overall, I think the L’oreal Colour Riche Matte line is worth a try. I definitely am going to look for another one or two the next time I go to the mall!

    how-to dotted winged liner

    How-to:

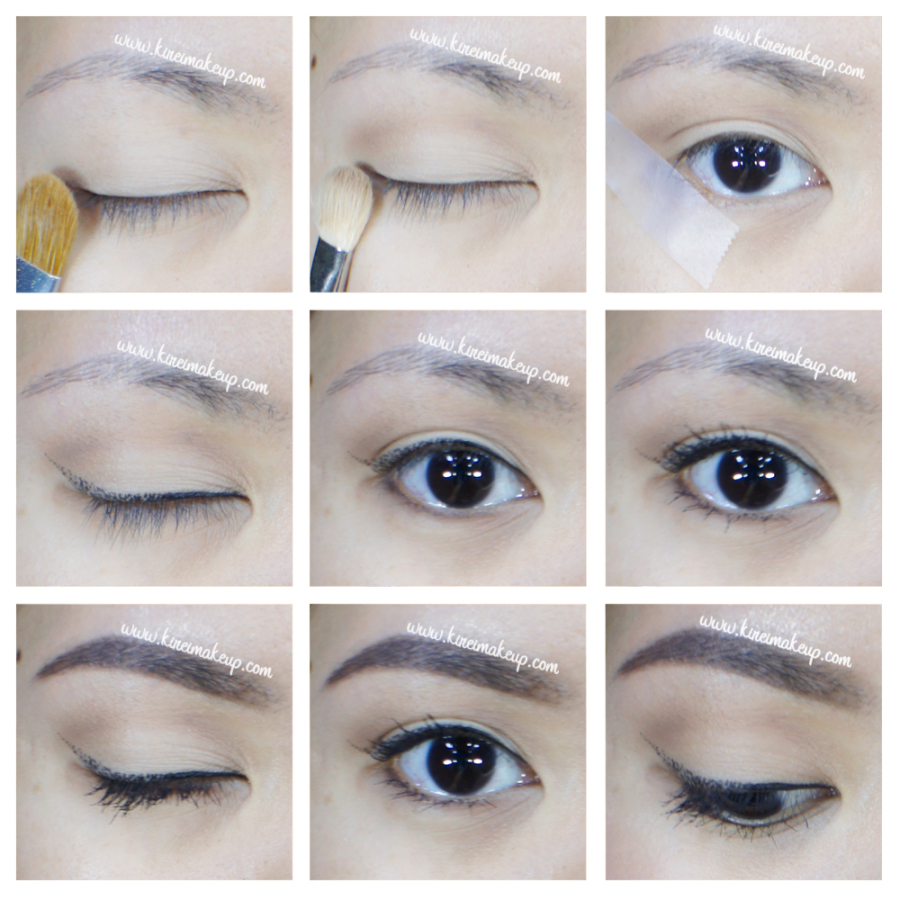
    1. I applied a nude eyeshadow on my eyelid, all the way to the brow bone using a flat eyeshadow brush. For this look, I used Entomology from Kat Von D Monarch palette.

    2. On the crease, I applied Vanish from Kat Von D monarch palette, using a clean fluffy blending brush.

    3. I placed a tape on where I want my “wings” to be as my eyeliner. You can skip this step if you have steady hand.

    4. Using Kat Von D Trooper tattoo ink eyeliner, I started drawing a solid line from the inner corner to the middle of my lash line.

    5. Then, using the tip of the eyeliner, I started drawing dots from the middle to the end-tip of the eyeliner. I placed more dots on the middle, and it gets more spaced out as it approaches the end of the wing.

    6. I ran Vanish slightly on the lower lash line using an angled eyeliner brush.

    7. I curled my lashes and applied MUFE Aqua Smoky Lash mascara on both upper and lower lashes.

    8. On my brows, I filled it in using Anastasia Brow Wiz in Medium Ash.

    L'oreal Colour Riche Matte Rose Bud

    9. On my face, I applied Giorgio Armani Maestro foundation.

    10. I applied Smashbox Halo blush in In Bloom.

    11. On my lips, I applied L’oreal Colour Riche Matte in Lincoln Rose.

    Halloween #1- Monster Teeth

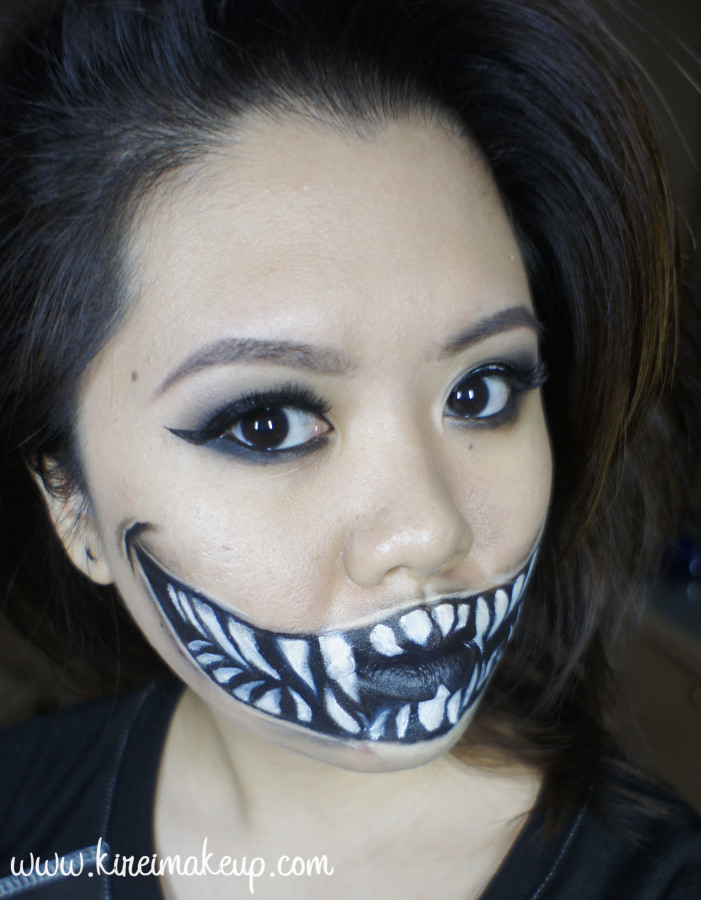
    Alright! I finally decided to start my Halloween tutorials early this year! I’m super pumped since my parents are setting up a haunted house at work for everyone to enjoy! Anyways, you can be sure I’m going to be there with full makeup on! For my first tutorial, I decided to do a Monster Teeth or monster smile, since I always find difficulty creating these teeth. I’m not that happy with the result, but oh well, I think it worked pretty well.

    One tip that I should keep in mind for myself, is to use water-based white paint for the teeth instead of cream face paint. I think the cream is hard to work with since it moves around so easily, but that’s just my preference. Also, funny story (not so funny when it happened), I was so close to finishing the whole look, and I decided to “fix” the two teeth on the bottom lip, then my hand slip and smudged everything. I had to remove the 2 teeth and just created 1 since it was getting late, and I had to go to bed.

    *For Killer Clown tutorial please check out my latest post*

    *Please check out my other Halloween post*

    Ok, let’s get this whole thing started!

    How-t0:

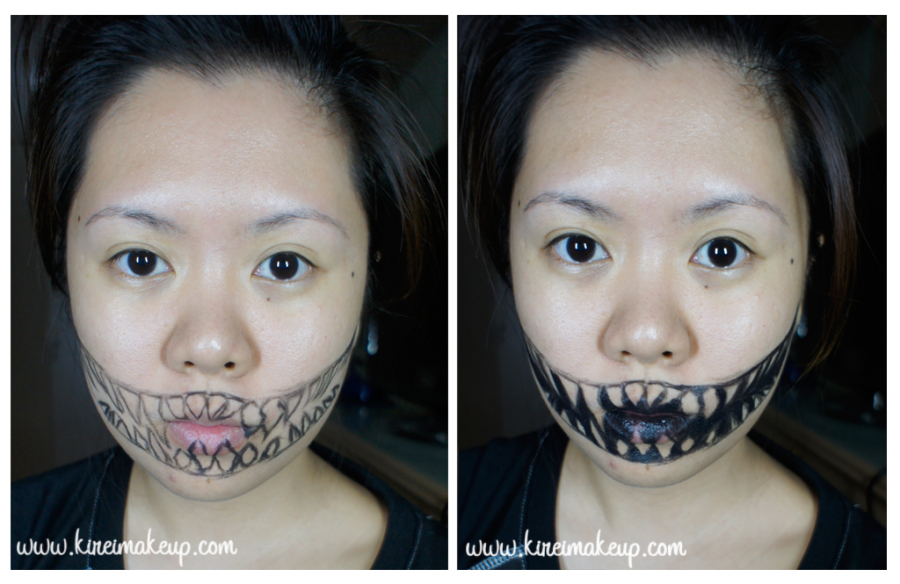
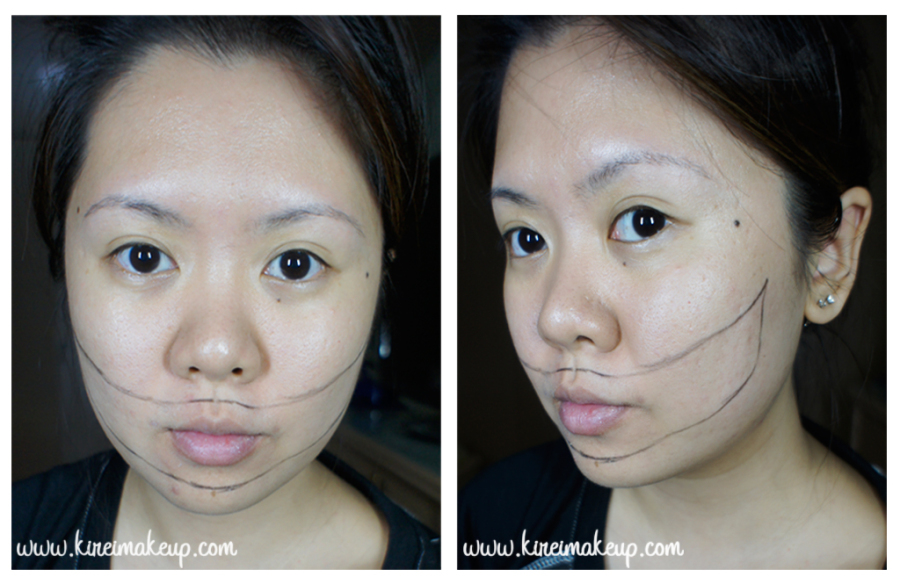
    1. I started out by drawing an outline of the smile using a black eyeliner pencil.

    halloween makeup tutorial

    2. Using the same eyeliner pencil, I started drawing the outline of the teeth. It doesn’t have to be pretty, it can be as sharp or as big as you want. I drew the teeth at the back of the mouth a little bit curved in to create an eerier smile.

    3. Using a small synthetic artist brush, I applied black cream face paint outside the teeth area.

    halloween makeup tutorial

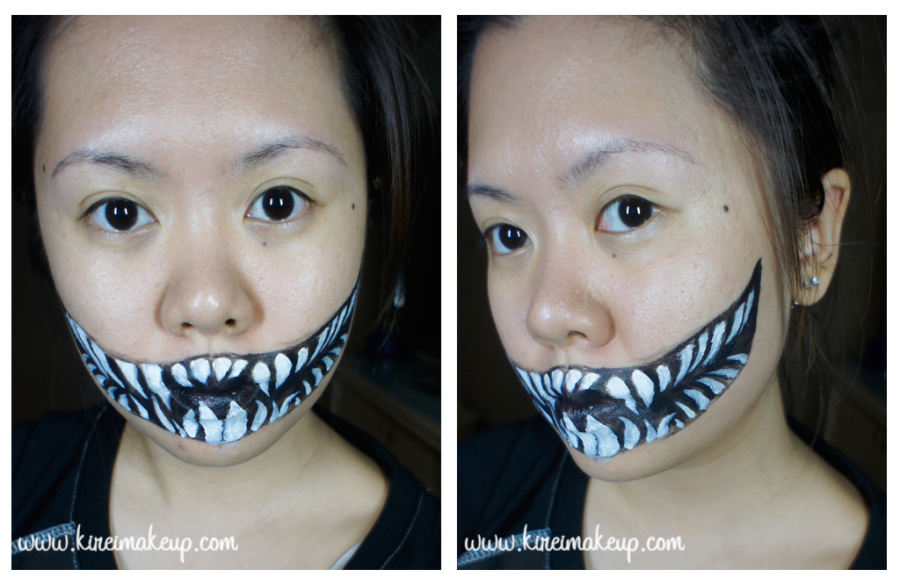
    4. Using a clean synthetic artist brush, I applied white cream face paint inside the teeth.halloween makeup tutorial

    5. To create some depth, I created some smile lines at the end of the monster mouth, above and below the monster lips.

    6. Using an angled eyeliner brush, I blended the lines down for the lines on below the lips, and upwards for the lines above the lips. This will create an illusion of depth.

    halloween makeup tutorial

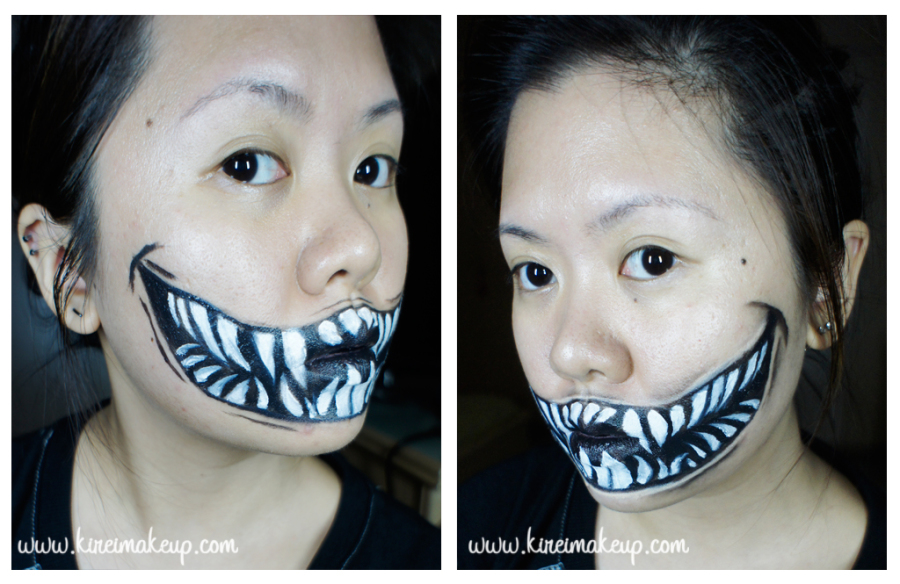
    7. For the rest of the face, I applied foundation and smoky eyes just for fun.

    8. I also set the cream face paint using eyeshadow of similar colors – black for the black areas, and white mixed with beige for the teeth.

    halloween makeup tutorial

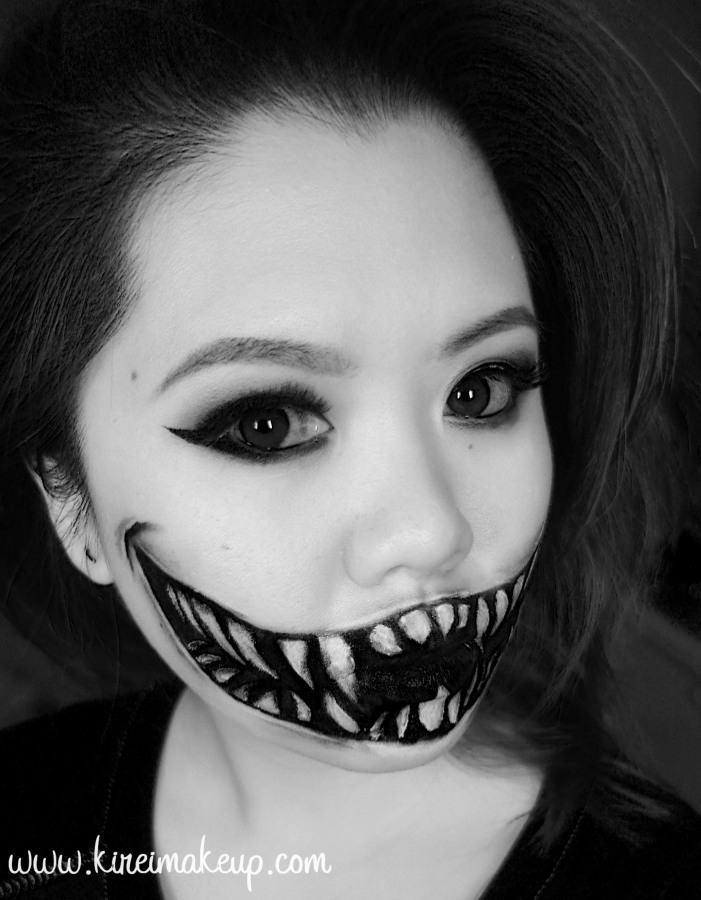
    It looks really good in black and white!

    halloween makeup tutorial

    Ta-daaaah! So, let me know if you have any request for Halloween, ‘kay?!


    xoxo