Soft Romantic Makeup (Revisited)

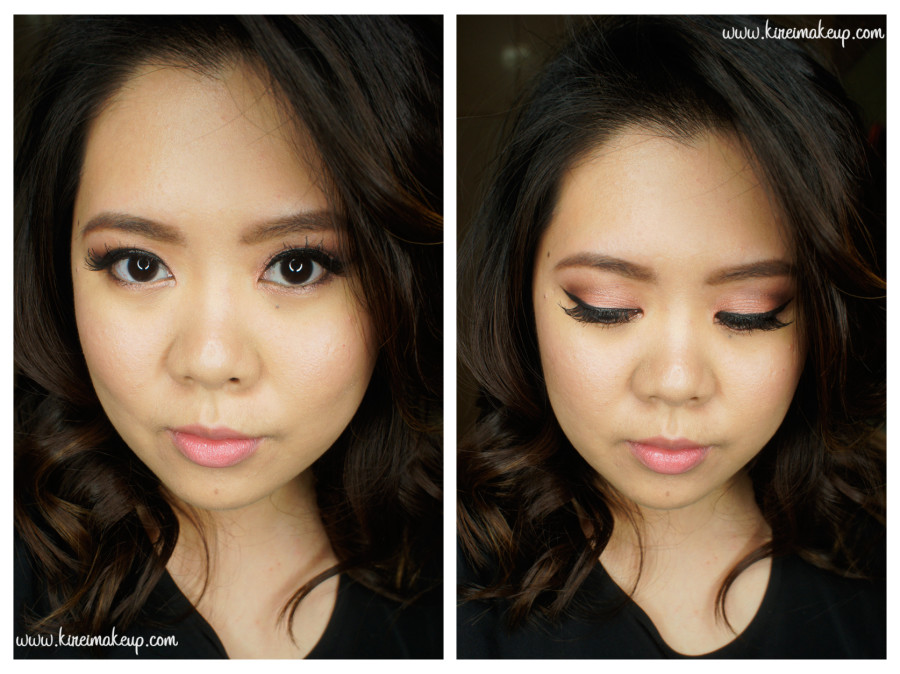
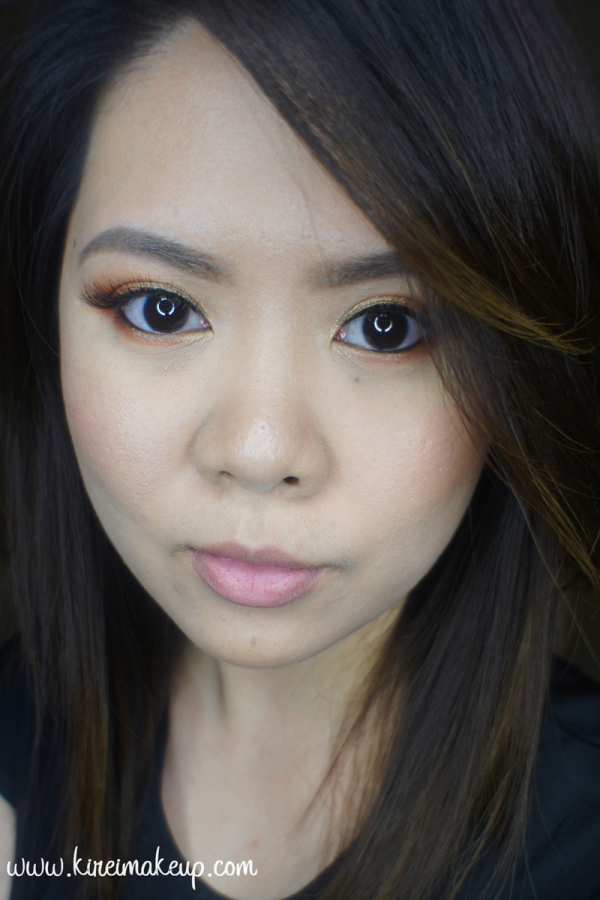
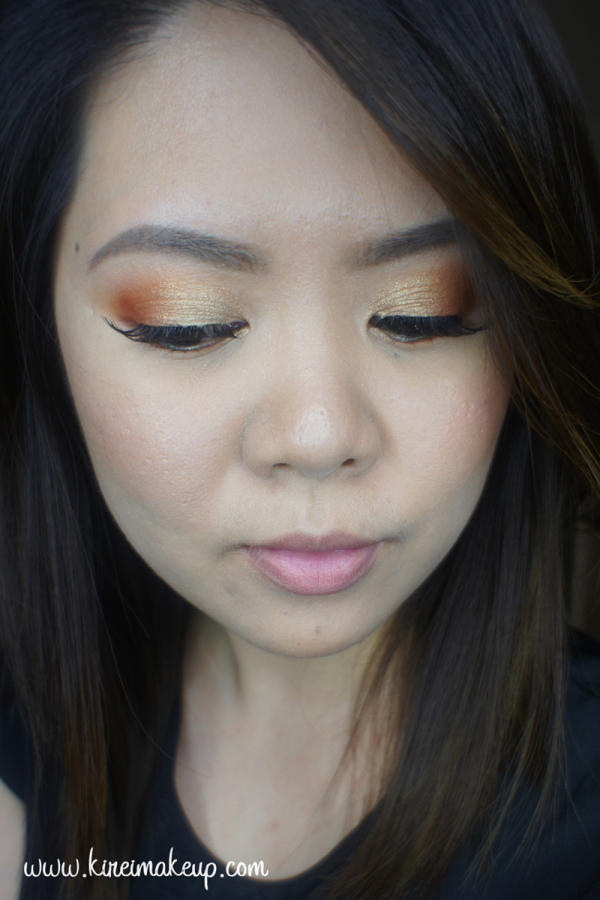
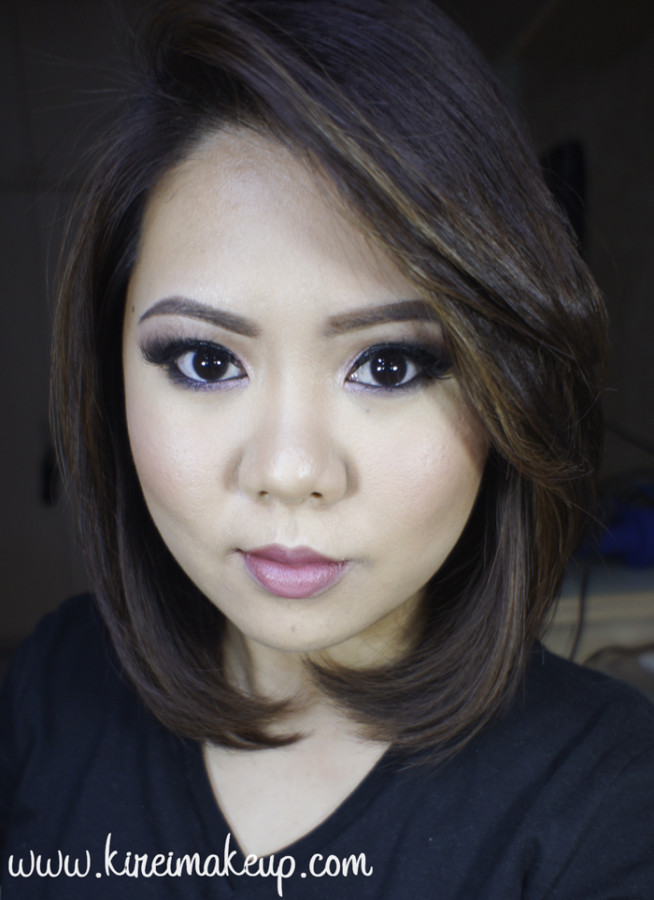
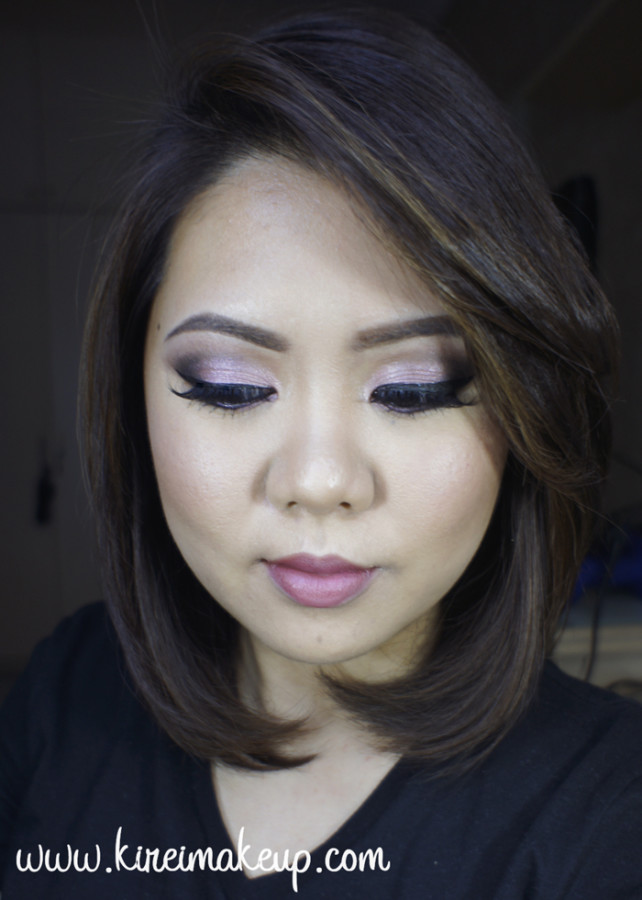
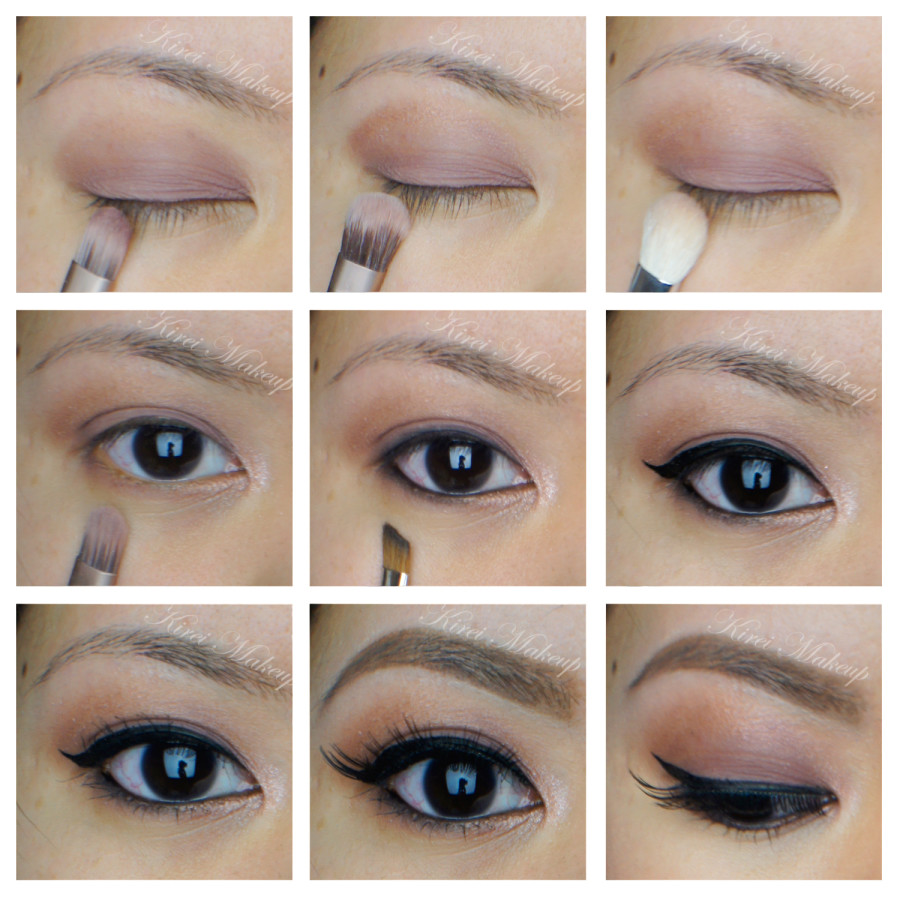
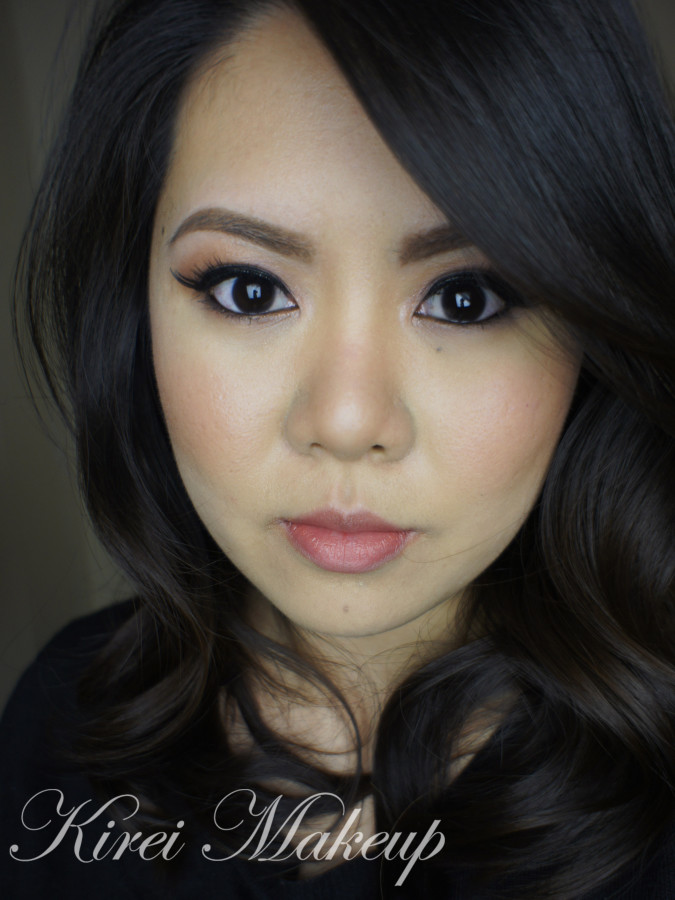
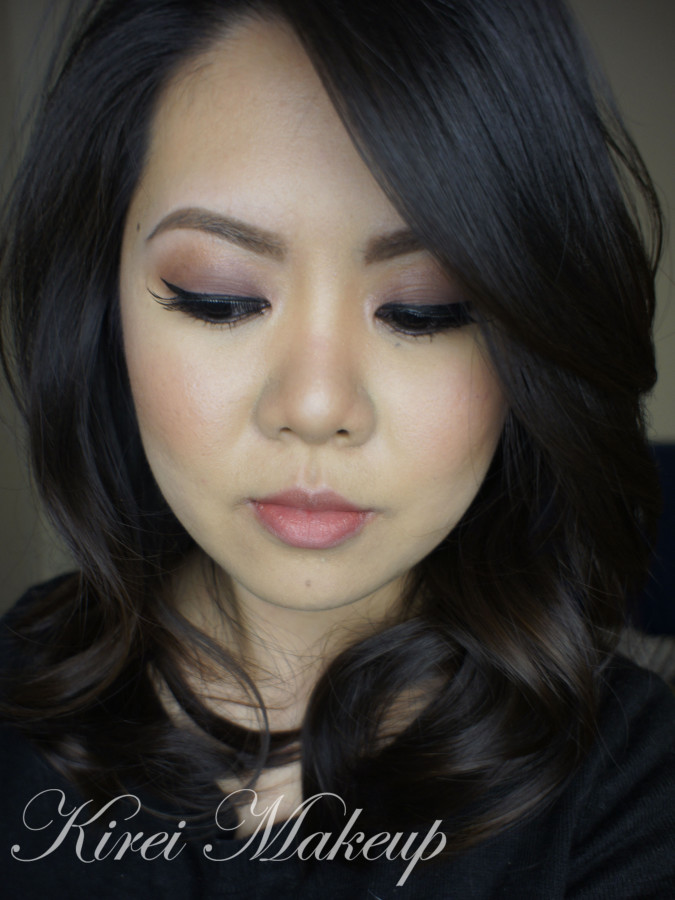
I’ve done a lot of UD Naked 3 makeup tutorials, and though most of them are smoky eyes, I do have a few non-smoky eyes tutorials. I was looking back on those tutorials, and I’ve decided to revisit this Soft Romantic Makeup post. I actually liked how I did my makeup in that post, but I felt that I wanted to redo it, and added more intensity to the shadows. Which one do you prefer? This tutorial or the original one? Let me know on the comments below!

I’d also like to mention that I’ve changed the way I filled my brows for this tutorial – it’s thicker, and more natural looking. I think I prefer this brow, even though it might look “less polished” than the “carved out” brows (aka concealer on top and bottom of my brows), I do like how it looks more organic. What do you guys think?

I apologize if the photos are slightly too warm, I didn’t realize my camera’s white balance setting was on the “warming filter” option. I tried to neutralize it using photoshop, but this is all I can do for now (besides trying to neutralize the yellow shade, I did not do anything else – no airbrushing whatsoever). I’ll be more careful next time.

*Check out my other UD NAKED 3 TUTORIALS*

soft smokey eyes tutorial

How-to:

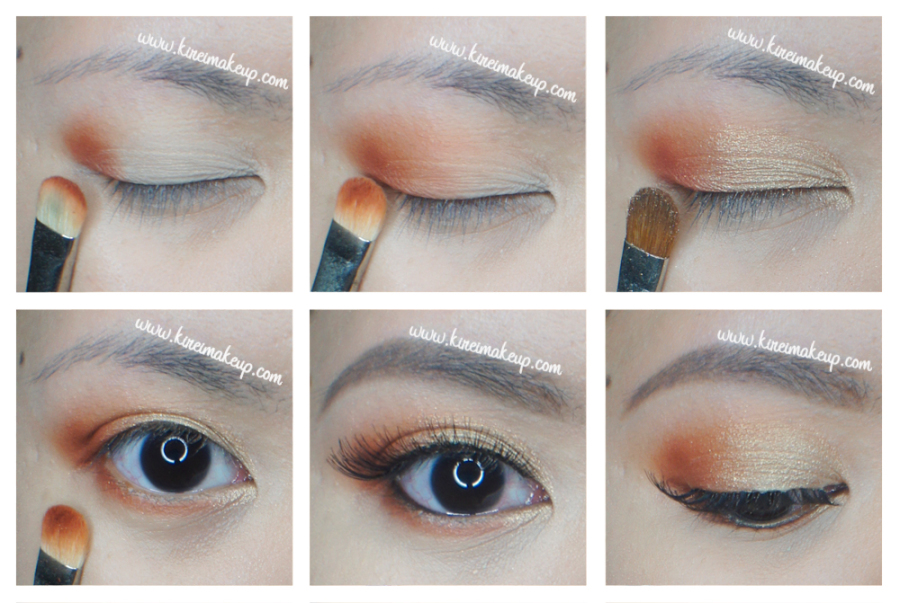
1. I applied MAC Perky paint pot all over my (mobile) eyelid using my ring finger.

2. Using a small blending brush, I applied UD Naked 3 Darkside on the outer V.

3. Using the blending brush that came with the palette, I applied Nooner on the crease. I used this shade to blend out the edge of Darkside.

4. I applied Trick on the eyelid, using the flat eyeshadow brush that came with the palette.

5. Using a small shader brush, I applied Burnout on the inner corner of the lower lid, and Darkside on the outer half.

6. I, very lightly, applied a teeeensy bit of Blackheart right on the roots of the lower lashes (just the outer half).

7. I lined my waterline using MAC Chromagraphic eyeliner in NW25/NC30. Along the upper lash line, I created a winged liner using L’oreal 24H Lacquer Liner and an angled eyeliner brush.

8. I filled my brows using Anastasia Brow Wiz in Taupe and Brunette.

9. Curled my lashes, and applied Gwiyomi False lashes no. 3.

ud naked 3 soft smoky tutorial

10. I applied Benefit Porefessional primer all over my face.

11. While letting the primer set, I applied Bobbi Brown Peach Corrector underneath my eyes (my dark circles are getting prominent lately!)

11. Then, I applied MUFE HD Foundation in 120 using Real Technique Expert Face brush.

12. I applied MAC Pro Longwear Concealer under my eyes, as well as on the bridge of my nose (just between the brows).

13. I also applied L’oreal Visible Lift blush in Rose Gold on my cheeks.

14. I set my face using NARS Setting Powder.

15. On my lips, I applied MAC Please Me lipstick and a few dabs of clear gloss.


Products used

Eyes – MAC Perky paint pot; Urban Decay Naked 3 palette (eyelid: Trick, outer V/lower lashline: Darkside, inner corner of lower lid: Burnout; roots of lashes: Blackheart); MAC Chromagraphic liner NW25/NC30; L’oreal 24H Lacquer Liner in Blackest Black; Anastasia Beverly Hills Brow Wiz in Taupe and Brunette; Gwiyomi False lashes no. 3

Face – Benefit Porefessional primer; MUFE HD Foundation in 120; Bobbi Brown Peach Corrector; MAC Pro Longwear concealer; NARS Setting Powder.

Cheeks – L’oreal Visible Lift Blush in Rose Gold.

Lips – MAC Please Me lipstick; L’occitane clear lip balm.

Holiday Makeup 2014 #1

Hello everyone! I’m back with a new Holiday Makeup tutorial! Christmas is just around the corner, and I want to be able to squeeze in couple holiday makeup looks before it’s here. For this year’s first holiday makeup series, I wanted to create a very warm eye makeup with a bit of color. So, I decided to use my beloved Kat Von D Monarch palette and some loose gold pigment.

Since the eyes are so strong, the rest of the face is kept simple and on the down low. We want the attention to be on the bold eyes. No liners, you can if you want, but I wanted to keep the focus on the colors since it’s so gorgeous. The lashes are optional to, but I think the lashes help to make the eyes look bigger.

gold and orange makeup tutorial

*Check out my other tutorials using Kat Von D Monarch palette*

How-to:

1. I prepped my eyelids using Urban Decay Primer Potion. I dusted Tiny Death from Kat Von D Monarch palette all over my eyes, all the way up to the brow bone.

2. Using a flat eyeshadow brush, I applied Wrath from the Kat Von D monarch on the outer V, blending it inwards towards the inner corner.

3. Using another flat eyeshadow brush, I applied a L’oreal HIP High Intensity Pigment in Visionary on the inner half of the eyelid.

4. Using the same shader brush as step 2, I applied Wrath on the lower lash line.

5. I filled my brows using Anastasia Brow Wiz in Taupe and Brunette.

6. I applied Mata Nona falsies no. 015  on my upper lashes.

7. I lined my waterline, just the outer half, using MAC Smolder kohl eyeliner pencil.

kat von d monarch tutorial

8. On my face, I applied Etude House BB cream.

9. I applied MAC Pro Long-Wear concealer under my eyes and my on blemishes.

10. I set my face using Cover FX Translucent powder.

11. I applied NARS Orgasm blush on my cheeks.

12. Lightly, I dusted The Balm Mary Lou Manizer on my cheekbones, nose and cupid’s bow.

14. I also dusted a little bit of MAC Mineralized Skinfinish in Deep on the outside perimeter of my face to warm my face up slightly.

13. I applied Revlon Socialite lipstick on my lips.

holiday makeup

Dr. Who The Waters of Mars Makeup

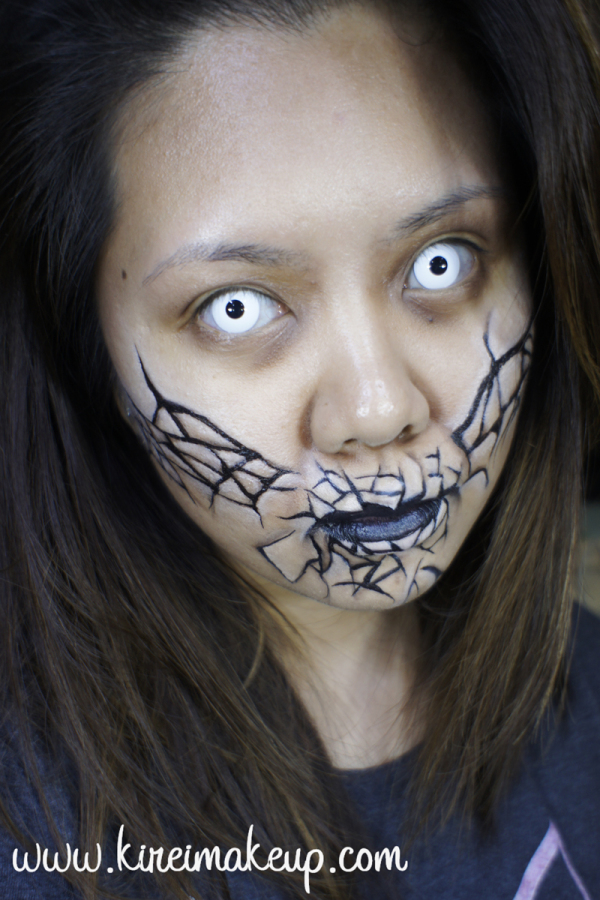
Alright! So, another quick Halloween makeup tutorial for those who don’t feel like buying overpriced costumes, or have time to make one! I was actually running out of ideas on what kind of last minute Halloween makeup looks I should do, so I asked N for advice and since he’s a Whovian, I knew he was going to say Weeping Angels. Instead, he surprised me and told me to check out Dr. Who The Waters of Mars makeup on Google. I did an image search and I absolutely love it!

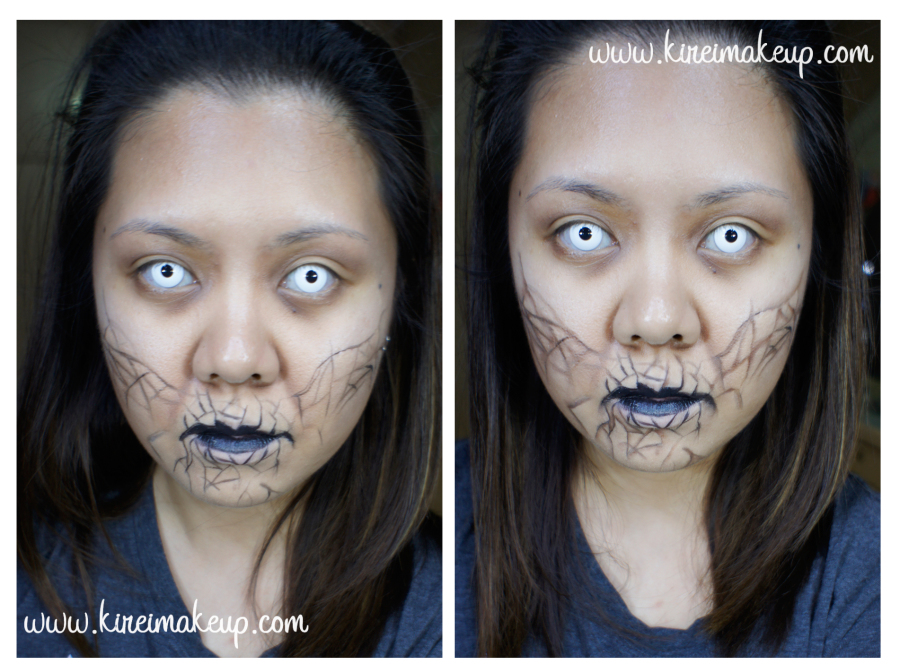
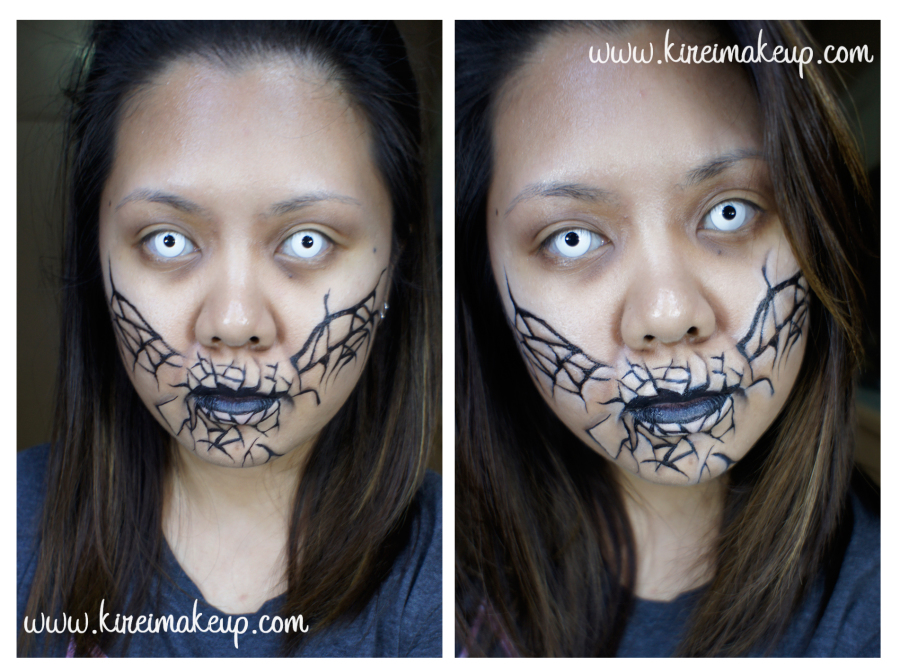
By no means the Waters of Mars virus makeup was easy if you want to replicate the exact look since they used prosthetic piece in the show. I used a picture I found on the Tardis Wiki and Bleeding Cool websites as references. Again, let me repeat myself by saying I could not replicate the makeup exactly on how the photos look like – I couldn’t really figured out how to get those super thin line using face paint, but still create an illusion of the skin sunken in or risen. I ended up creating depth on the cracks by creating a thicker line. Nevertheless, I was quite happy with the result!

If you’re a Whovian, and don’t think this looks like the makeup on the show, I do sincerely apologize! I wish I can recreate to look exactly like the pictures just by face painting, but alas I couldn’t. Anyways, I hope everyone does enjoy this tutorial! Even if you don’t know the show, you can still recreate this look into a “Cracked skin” look or “broken doll” since it’s a similar concept!

*Don’t forget to check out my other Halloween tutorials!*

the waters of mars makeup

I’m going to list all the products you need below, and all the brands I used at the bottom of the page.

What you need for this tutorial:

  1. White contact lenses – optional
  2. Foundation, preferably a matte finish.
  3. Setting powder.
  4. Eyeshadows – light & dark brown, purple, and grey eyeshadows.
  5. Black face paint – it can be cream or water-based, or even a liquid eyeliner.
  6. Beige face paint or a light-colored (a few shades lighter than your skin) foundation/concealer as highlight.
  7. Brushes
    • Foundation – Sigma Angled Kabuki brush.
    • Eyes – Sigma Blending brush.
    • Face contour – Sigma angled brush.
    • Lines – Sigma Eyeliner brush.
    • Contour – flat eyeshadow brush.
    • Highlight – Sigma Pencil Eyeliner brush.
    • Lips – lipstick brush (unnamed – similar to Sigma Lip Brush).

*You can substitute all the brushes mentioned above to any art brushes you can find in bookstores or art stores.

*Don’t forget to check out my other Halloween tutorials!*

the waters of mars makeup

How-to:

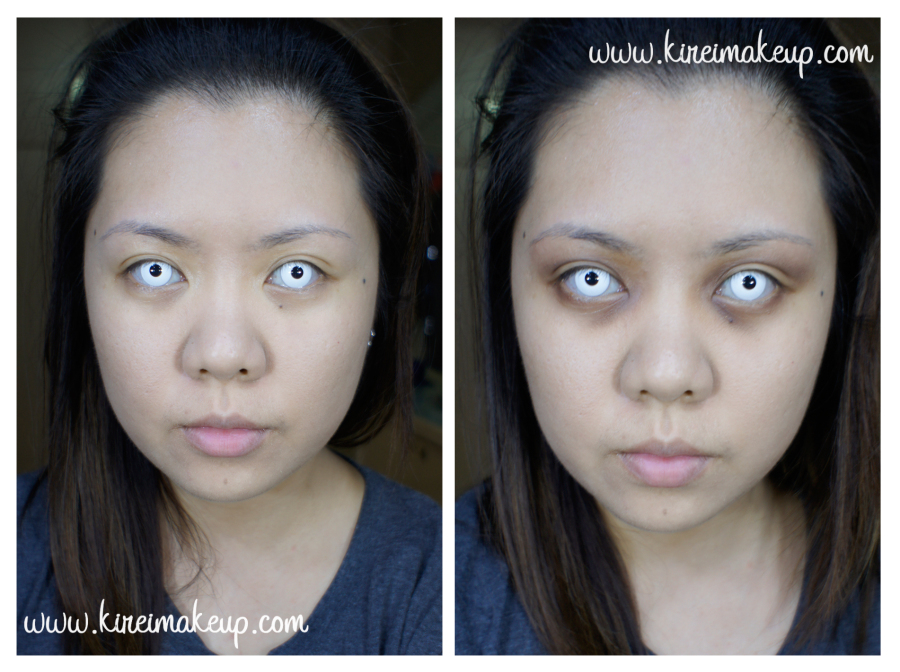
1. I applied a matte foundation all over my face using a Sigma Kabuki Angled brush.

  • I used a matte foundation since I want to look very matte and sickly.
  • You can even apply a lighter colored foundation if you prefer to look even paler.

2. I set my foundation using a loose transparent powder and a powder brush.

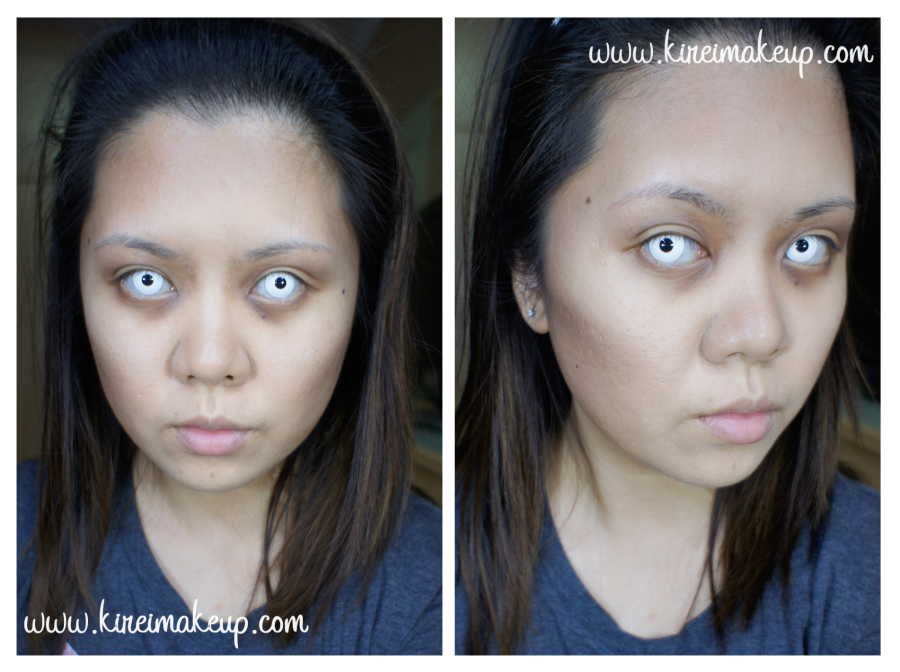
3. Using a blending brush, I mixed light and dark brown eyeshadow and applied it under my eyes, around the inner part of the eye socket, along the lower lash line, and on the crease. The idea is to make the eyes look sunken in since you’re infected with the virus and sick.

4. I added a mix of purple and grey eyeshadow on top of the brown eyeshadow to create more depth.

  • The reason why you need a purple and grey eyeshadow is because under your skin you have blood vessels, which aren’t getting enough oxygen due to the virus (or you being sick).
  • So, those vessels on my skin will look purplish, while on others they might look more on the blue end.
  • How you find out if you have purple or blue vessels? Take a look at your wrist and see if you have a bluish vein or a purplish one.

Dr. Who The Waters of Mars

5. Using an angled face contour brush, I applied a mixture of dark brown and grey eyeshadow on the hollows of my cheeks to make my cheeks look sunken in.

  • I blended the contour down to make my cheeks look even more sunken in.

6. I also applied some of the same powder along my temples and sides of my nose.

Dr. Who The Waters of Mars

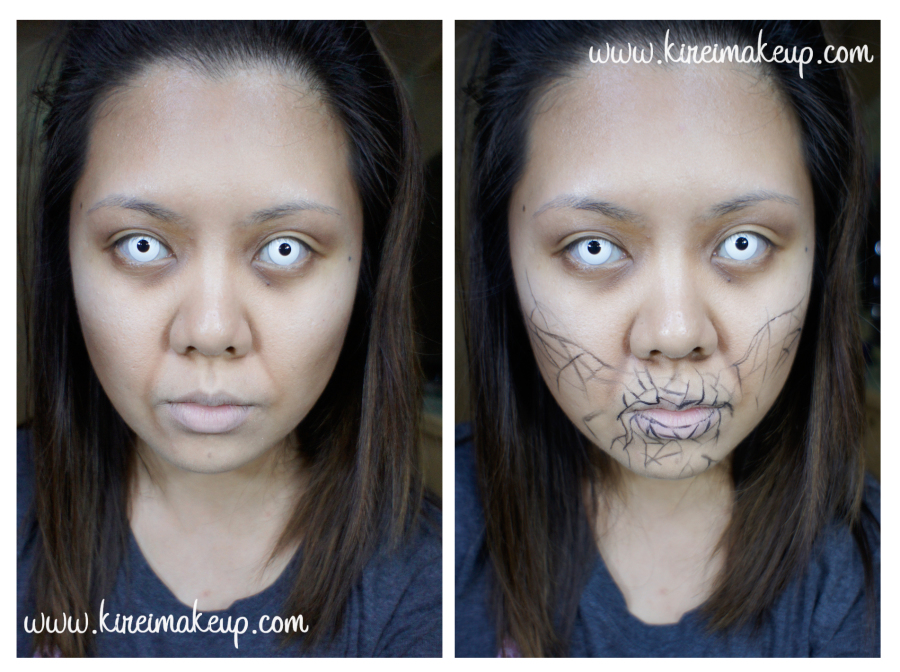
7. Using a flat eyeshadow brush, I applied a mixture of the light and dark brown eyeshadow on the folds of my cheeks.

  • You can skip this step altogether if you don’t feel like doing it.
  • I did it because I wanted to create an even more eerie feeling to the whole look.

8. Using the pictures I found on the Tardis Wiki and Bleeding Cool, I created the outlines of the cracked skin using a black face paint and eyeliner brush.

the waters of mars makeup

9. I filled in my lips with black face paint and a lip brush.

10. I used the same dark brown eyeshadow as I’ve used in the previous steps to darken the edge of the lines.

  • While applying the eyeshadow, I keep in mind how to make these lines look deeper and sunken in.

the waters of mars makeup

11. Using a liquid eyeliner pen, I deepened the cracks by tracing the lines from step no. 8.

  • On some part of the cracks, I even colored some bits and pieces black altogether so I can create an illusion of depth.

12. Lastly, I highlighted some part of the skin to make it look like it’s popping out from the face, and to make the lines look even deeper.

  • I used a light colored cream concealer for this and a pencil brush.


Products used

  • Foundation – MUFE HD Foundation.
  • Setting powder – Cinema Secret loose powder (transparent)
  • Shadows for eyes and face – The Balm Meet Matt(e) Nude palette.
    • Light Brown – Matt Rosen
    • Dark Brown – Matte Wood
    • Purple – Matt Hung
    • Grey – Matt Johnson
  • Lines – Snazaaro Black Face Paint; Shu Uemura Calligraphy Ink eyeliner pen.
  • Highlight – Motives Sculpt Palette in Ice (the lightest shade).
  • Lips – Snazaroo black face paint.

*Don’t forget to check out my other Halloween tutorials!*

Pink Smokey Eyes Tutorial with UD Naked 3

If you guys followed my Instagram account, you’d have known that last night I was doing a tutorial, yes? Anyways, today’s look is a Pink Smokey Eyes tutorial using Urban Decay Naked 3 palette. Yes, again! Naked 3 again! I know you guys might have gotten bored with Naked 3, but I have not. I loved this palette and wanted to make use of this palette as much as I can. If you want to check out my other Naked 3 tutorials, please take a look at Urban Decay Naked 3, and UD Naked 3.

I created this look since I wanted a more girly take on the smoky eyes. At the same time, I wanted a darker, more glam, and sultrier looking smoky eyes using the Naked 3 palette. Check out my review on the naked 3 palette.

I would like to mention that I absolutely love how my skin looks like in this tutorial. I, for some reason, love how MAC Pro Longwear foundation photographs. It makes my skin looks absolutely flawless, at the same time it doesn’t feel heavy at all. I really should give this foundation more compliment. I’ll try to do a review of this foundation next time.

rose smoky eyes

How-to:

1. My eyelids are primed using Maybelline Inked in Pink cream eyeshadow.

2. Using a flat eyeshadow brush, I applied Blackheart on the outer third of the eyelid, extending it slightly on to my crease.

3. Using a small fluffy blending brush, I applied Nooner on my crease to blend Blackheart out.

4.  I applied Buzz on the eyelid using a flat eyeshadow brush.

5. To add extra sparkles, I applied Dust using a small eyeshadow brush on the inner corner, and in the middle of my eyelid.

6. I created a winged liner along my upper lash line using Kanebo Kate Super Sharp eyeliner, and lined my waterline using L’oreal Voluminous Smoldering eyeliner.

7. I also applied Blackheart along the lower lash line, and Buzz on the inner third of the lower lash line.

8. I curled my lashes and applied Buxom Lash mascara. I, then, applied Lavie Lash Bluebell falsies.

9. I filled my brows using Anastasia Brow Wiz in Brunette.

naked 3 makeup tutorial

10. I applied MAC Pro Longwear foundation all over my face using MAC Masterclass brush Oval 6.

11. I lightly contoured and highlight my face using Motives Fire sculpting palette.

12. On my cheeks, I applied Maybelline Master Glaze in Make A Mauve.

13. I set everything using CoverFX Translucent powder.

14. I filled my lips using MAC Whirl lip liner. Next, I applied Revlon Just Bitten Kissable lip balm in Honey Douce just in the center of my lips. I blended the 2 shades together by pursing my lips.

naked 3 smoky eyes look

I forgot to take pictures of the products, so I’m just going to list them here.

Products used:

Eyes – Maybelline Inked in Pink; Urban Decay Naked 3 (eyelid: Buzz, outer V: Blackheart, inner corner: Dust); Kanebo Kate Super Sharp eyeliner; L’oreal Voluminous Smoldering eyeliner; Buxom Lash mascara; Lavie Lash Bluebell falsies; Anastasia Brow Wiz in brunette.

Face – MAC Pro Longwear foundation; Motive Fire sculpting palette; Maybelline master glaze in Make A Mauve; Cover FX Translucent setting powder.

Lips – MAC Whirl lip pencil; Revlon Just Bitten Kissable Lip Balm in Honey Douce.

World Cup 2014 Brazil Inspired Makeup

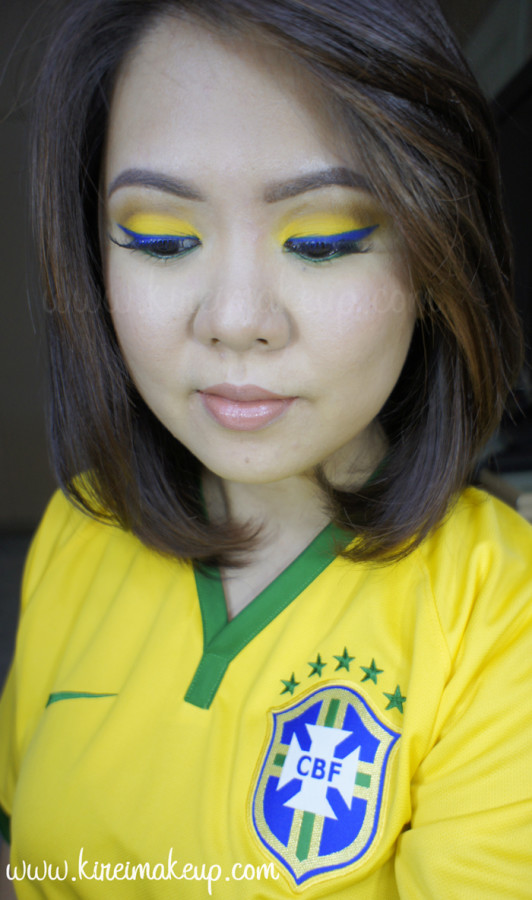
Are you guys following FIFA World Cup 2014?! I sure did, and I’m rooting for Brazil! Go Brazil!!! Anyways, since I’m showing my support for Brazil, I decided to do this Brazil Inspired Makeup. I’d probably do a World Cup inspired makeup series for the next couple weeks just for fun! I wanted to post this tomorrow, but decided to do it today.

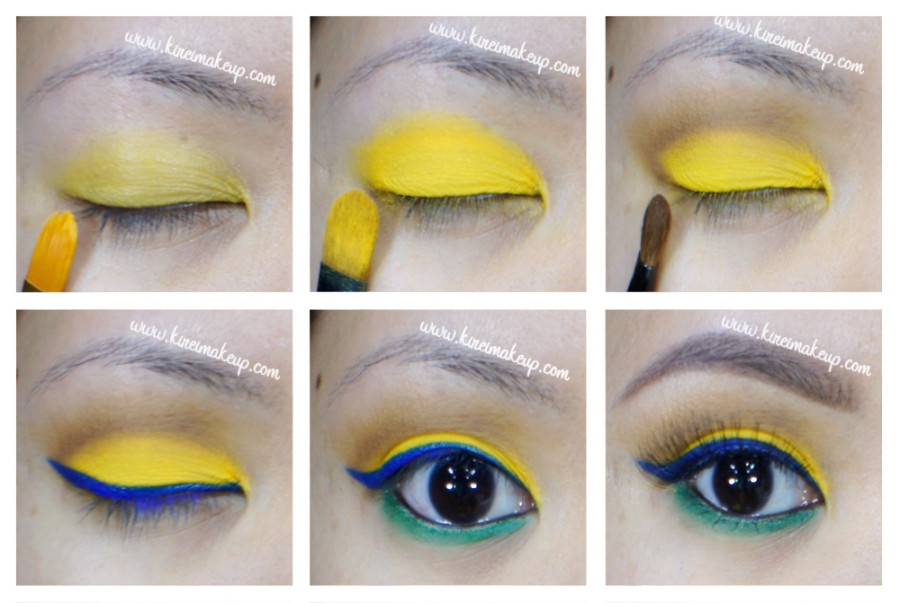
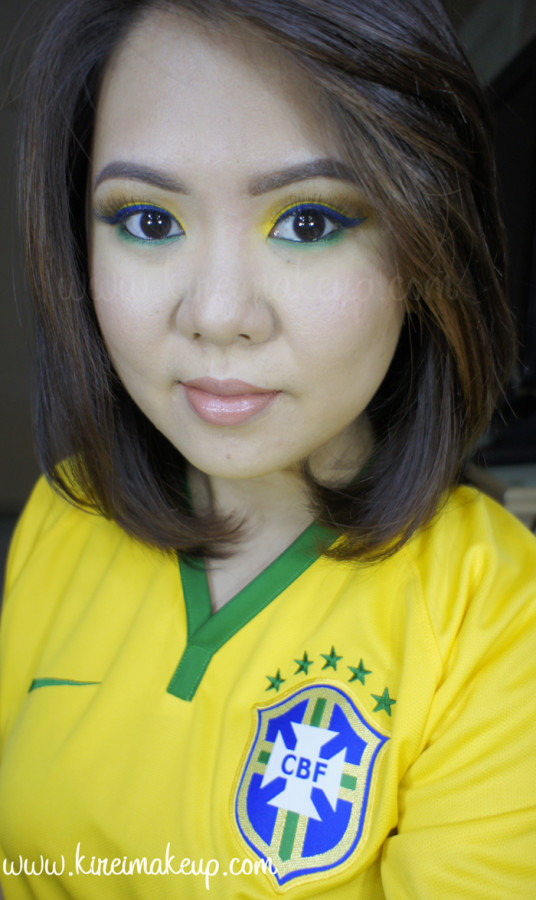
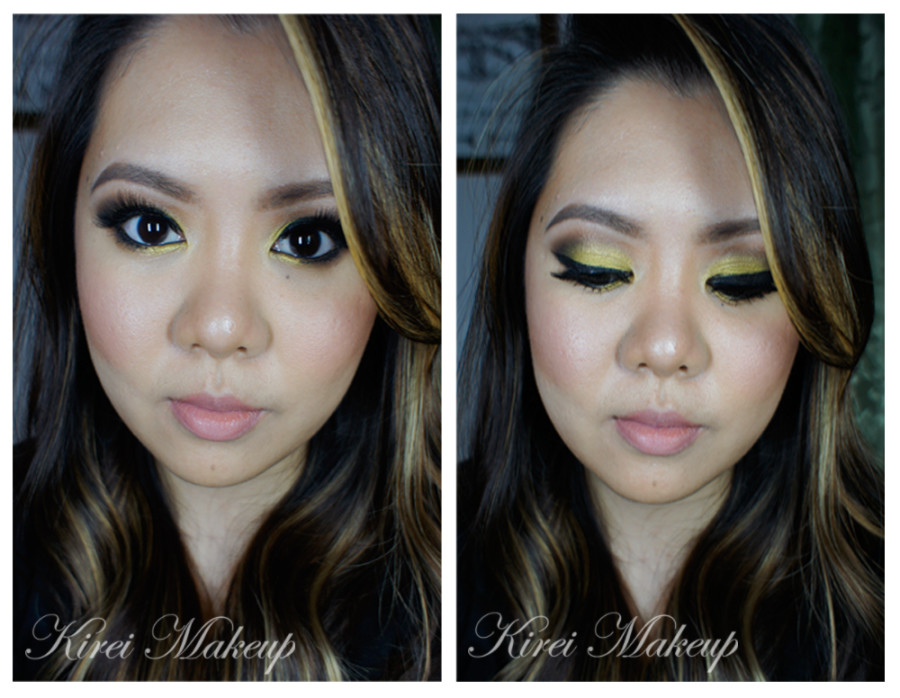
Anyhow, for this Brazil Inspired Makeup tutorial, I wanted to create a wearable look that uses the colors of the team’s jersey – mainly yellow, a little bit of green and blue (as you can see from the jersey that I wore for today’s tutorial). I love the result, and I especially love that blue eyeliner! If you do re-create this look please TAG ME on twitter or instagram, and hashtag your work with #kireimakeup.

Since the eyes are so bright and bold, I decided to tone it down on my face. My face is kept very minimal, no contouring. My lips, I decided to go with a nude lip, with my new favorite lip pencil, MAC Spice. Since my lips were quite dry, I added Clinique Heaping Hazelnut chubby lip balm to keep it moist. I do apologize if my face doesn’t look that flawless, you can see a bit of breakout here and there, since my immune system is currently down. As you can see, I do not airbrush my face, so what you see is what I actually look like! 😉

brazil inspired makeup

How-to:

1. I applied a yellow cream face paint as a base all over my eyelid. For this tutorial, I used PAC , an Indonesian brand, but you can use any yellow cream base (e.g. MUFE Flash Palette), OR a white base (e.g. NYX Milk Jumbo Pencil in Milk). A good base is necessary so the yellow pops even more.

2. Using a flat eyeshadow brush, I applied MUFE eyeshadow no. 71 all over my eyelid.

3. Using a small blending brush, I applied Urban Decay Buck on outer V and extended it into the crease.

4. Using a dark blue cream face paint from PAC and an angled eyeliner brush, I created a winged liner along the upper lash line.

5. *VERY IMPORTANT STEP* I SET the cream eyeliner using Urban Decay Chaos with another clean eyeliner brush. If you don’t set your cream face paint, it’ll crease.

6. On the bottom lash line, I applied Dragon Fly from Sleek Makeup iDivine Ultra Matte V1 Brights.

7. I lined my tightline and waterline using L’oreal Voluminous Smoldering eyeliner.

8. I curled my lashes, applied mascara, and applied Ardell Demi Luvies falsies.

9. I filled my brows using Anastasia Brow Wiz in Medium Ash.

world cup inspired makeup brazil

10. For my face, I decided to keep it simple. I applied Marc Jacobs Gel foundation using CoverFX cream foundation brush.

11. I applied a little bit of yellow corrector from MAC Conceal/Correct palette in Medium under my eyes.

12. I dusted MAC Mineralized Skinfinish powder all over my face.

13. I applied Smashbox Halo Blush powder in In Bloom.

14. I lined and filled my lips using MAC Spice lip liner. On top of it, I applied Clinique Chubby lip balm in Heaping Hazelnut.

brazil inspired makeup


Sleek Makeup Candy Palette Giveaway!

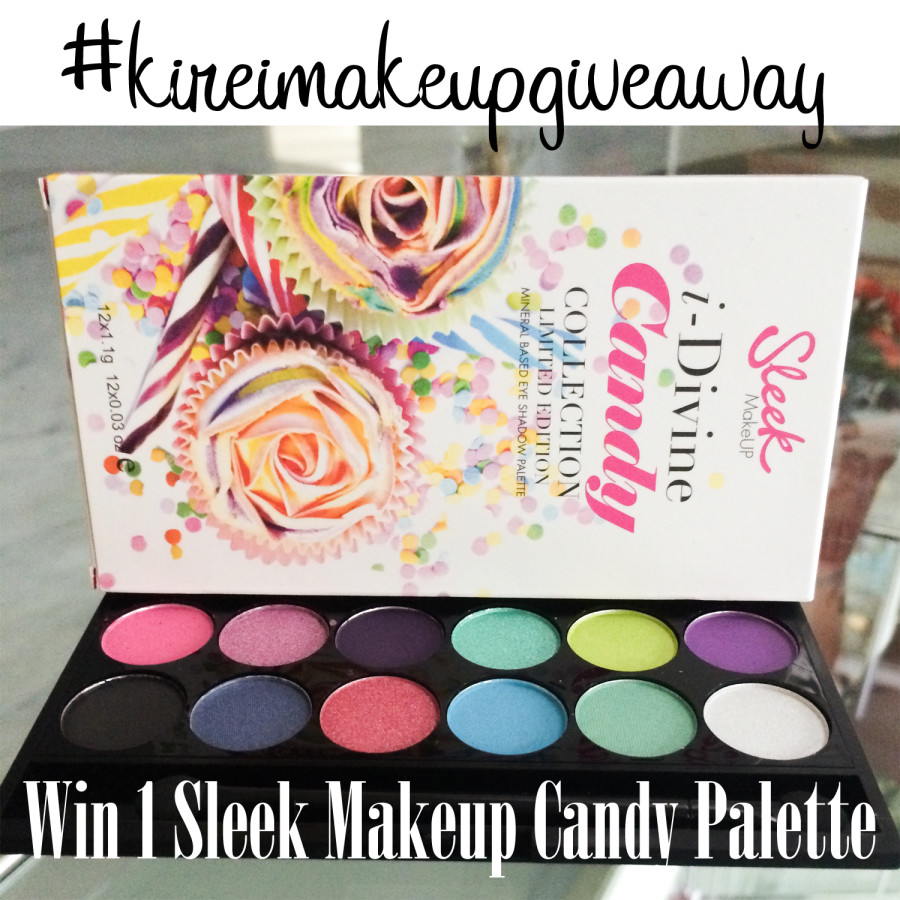
Hello makeup junkies in Indonesia! Today I want to share a GIVEAWAY for my INDONESIAN FOLLOWERS! I will be posting a tutorial using this LIMITED EDITION Sleek Makeup Candy palette on my next post!

Currently, I have 1 FREE SLEEK MAKEUP IDIVINE CANDY PALETTE up for grab! This contest is open for anybody who are currently living in Indonesia. This limited edition palette is so beautiful, full of colors, and very pigmented! Check out my next tutorial if you want to see how gorgeous this palette is!

Interested in joining my Sleek Makeup iDivine Candy Palette Giveaway? Keep reading!

Rules & Regulations:

1. Subscribe to my blog – enter your email address on the “Subscribe To Us” box on the left sidebar.

2. Comment below when you’ve done subscribing – only comments posted on THIS giveaway page is valid.

3. Follow me on Instagram (handle name: @KireiMakeup), REPOST my giveaway picture (pic below) with #kireimakeupgiveaway.

4. Open only to those living in Indonesia currently.

5. I will pick a winner at random next Thursday (June 12, 2014) by 11.59pm.ONE winner will be announced on Friday (June 13, 2014) via Instagram and on my blog!

6. Only 1 entry per person.

7. Another winner will be picked at random if the first person I picked does not reply me within 24hr.sleek makeup candy palette


Disclaimer:

This giveaway is not sponsored by Sleek Makeup nor Luxola. I personally purchased this palette.

How to: Winged Eyeliner

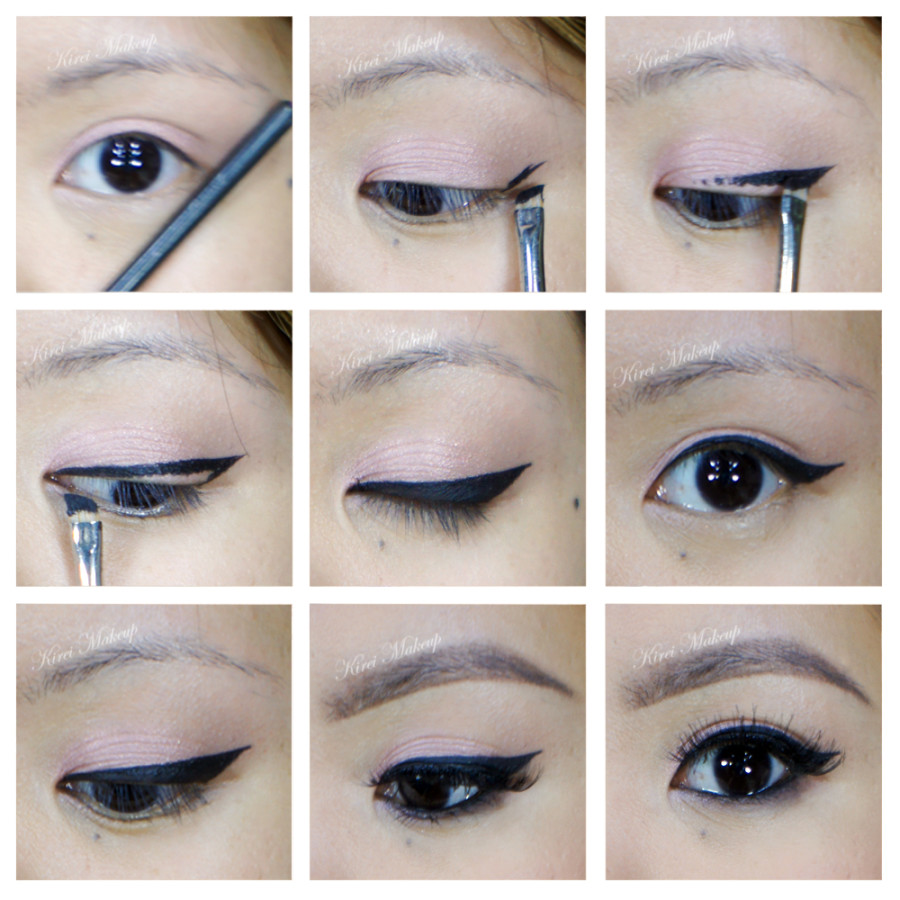
I finally got around to post this tutorial. Sorry for being M.I.A this week, I was busy and I got really sick. Anyways, this how to winged eyeliner tutorial was a request from a former student of mine. I’ve done something similar in my Sugar and Spice tutorial. You can use a tape, yes scotch tape, to help create that clean straight line.

I use an angled eyeliner brush (MAC 208) because it has a sharp angle that will help you to create that “wing”. Please note on how I drag the brush from outer or inner part towards the center of my eyelid.

The trick is to let the brush guide you. Also, it’ll be easier if you tilt your chin up and look down to your mirror – that will allow the skin on your eyelid to stretch (just like in my photo).

You can also use a liquid eyeliner, or a straight brush like MAC 209 brush. I, personally, find the angled brush is easier for beginner. That sharp angle really helps in creating the wing. Yes, I know I sound like a broken record, but trust me, yes? 🙂

2 products you’ll need:

1. MAC 208 brush.

2. Any black gel eyeliner – I used L’oreal Infallible Gel Lacquer in Blackest Black.

How-to:

1. Create an imaginary angle for your wing. I usually line the outer corner to the tail of my brow.

2. Using MAC 208 and gel eyeliner, I drew an angle. I suggest just placing the brush down to mark it. If you want to make it longer, you can extend it later.

3. Drag the brush towards the center of the eyelid.

4. Flip your brush so the longer end is on the inner part of the eyelid. Drag the brush towards the center of the eyelid so the lines meet.

5. Once the triangle is complete, fill in the rest of the empty area.

6. At this moment, if you want to extend your tip, you can.

7. You can also use a wet wipe, or a q-tip dipped in makeup remover (non-oily) to clean up the edge of the wing if needed.

8. I filled my brows in, applied some falsies and voila! Done!

how to winged eyelinerow-

Summer Makeup using MAC Sweet and Punchy

Last night, I put up a sneak preview on today’s tutorial on my Instagram account! I was super pumped to do this tutorial since I can show you guys how you can use the previous tutorial technique and incorporate other color into the look. Don’t you just love that bright green-yellow eyeshadow?! It’s actually MAC Sweet and Punchy eyeshadow, which was from the old MAC collection. If you can’t find this eyeshadow, you can substitute it for MAC Rated R which is exactly the same color.

Anyways, I also want to mention that I’ll start doing “repost” or “regram” on my Instagram account if you follow me and tag your beautiful makeup works with #kireimakeup. I’d love to see your works, especially if you re-create one of my looks! So, please do follow and tag me on Instagram!

As always, scroll all the way down if you want to skip the how-to, and get on the list of products used for this look.

bright green makeup tutorial

How-to:

1. My eyelids were prepped using Urban Decay Primer Potion in Sin. Next, I applied Smashbox Full Exposure eyeshadow in M1 using a blending brush on my crease.

2. Using a Sephora bullet crease brush, I applied Smashbox Full Exposure eyeshadow in M7 on the outer V.

3. Using a clean blending brush, I blended out my crease so there’s no harsh line.

4. I applied MAC Sweet and Punchy using a flat eyeshadow brush on my eyelid area.

5. Using a small shader brush, I applied MAC Sweet and Punchy on the inner part of my lower lid, and then I applied Smashbox Full Exposure M7 eyeshadow on the outer corner.

6. I created a thick winged eyeliner using a small angled eyeliner brush and L’oreal Infallible Gel Lacquer Liner 24H in Blackest Black.

7. Using whatever was left on the brush on step 6, I applied the gel liner on my waterline as well as the outer half of my lower lid.

8. I curled my lashes, applied Cover Girl Lash Blast mascara, and then I added Gwiyomi “Putri” false eyelashes.

9. I filled my brows using Anastasia Brow Wiz in Ash Blonde and Brunette (I filled my brows slightly differently this time, might do a tutorial on how I filled it in next time).mac sweet and punchy tutorial

10. On my face, I applied CoverFX cream foundation in G40 using a Sigma Tapered Kabuki brush.

11. I added a little bit of CoverFX N110 cream foundation along my jawline, underneath my cheeks and sides of my nose using a damped sponge.

12. I set my face using CoverFX translucent powder.

13. On my cheeks, I applied Benefit Hervana. I also added Benefit Coralista just on the apples of my cheeks.

14. On my lips, I applied L’oreal Color Riche lip liner in Beyond Pink.

Products used

Eyes – Urban Decay Primer Potion in Sin; MAC Sweet and Punchy eyeshadow; Smashbox Full Exposure palette (M1 on the crease; M7 on outer V); Cover Girl Lash Blast mascara; L’oreal Infallible Gel Lacquer 24Hr in Blackest Black; Gwiyomi “Putri” false eyelashes; Anastasia Brow Wiz in Ash Blonde and Brunette.

Face – CoverFX cream foundation (G40 as base, N110 as contour); CoverFX translucent powder; Benefit Hervana blush; Benefit Coralista blush.

Lips – L’oreal Color Riche lip liner in Beyond Pink.

Disclaimer: Please note that links to Sigma Beauty will land you to my affiliate page. However, I strive to recommend only the best products for you, and ones that I love myself, so you know you are in good hands. Your support in purchasing through these links will go towards the maintenance of this website, and to keep the blog updated and running. Thank you for your support!

Orange Lips with MAC Lady Danger

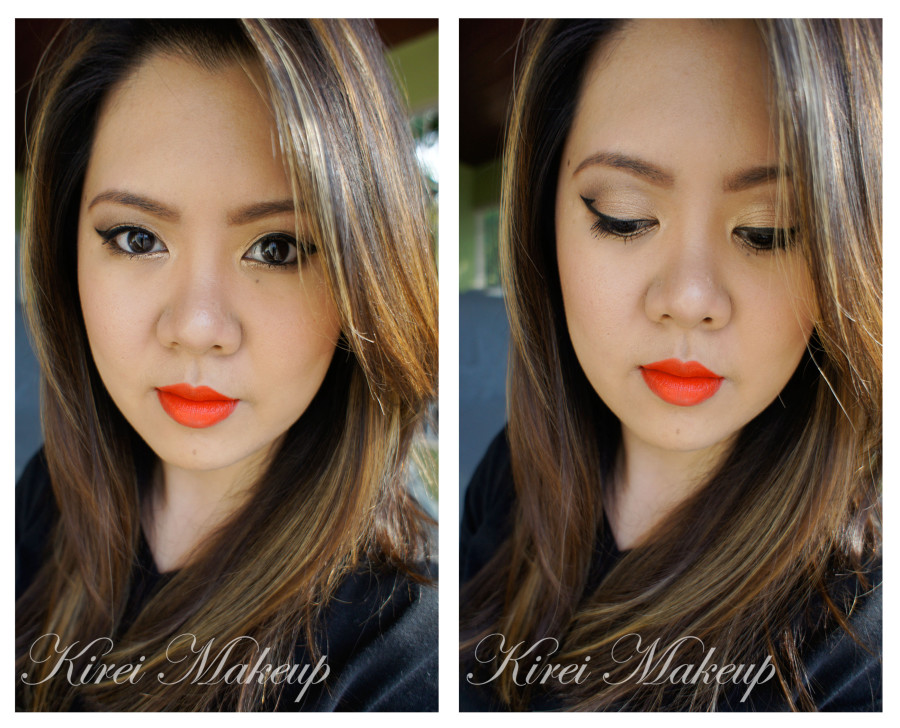
Today I want to share this orange lips makeup with you as we welcome the arrival of Spring, or if you’re in the tropics, then to welcome the heat wave…lol… I do have to say that this MAC Lady Danger lipstick might go into my favorite lipstick collection. The color is so pretty, and it will look great on any skin tone. Definitely something that you should look into if you want a bold lip look. It’s a great alternative to the usual red lips, or pink lips.

Let me just, also, tell you that today’s tutorial is full of sweat and screams of frustration due to power outage, and the Sun’s sudden disappearance from the sky. I can’t tell you how much I want my lights with me, but oh well, that’s what happened when I travel so much. So, please forgive me for the quality of the step-by-step picture.

Anyways, I was watching Kat Von D video on the Sephora’s youtube channel, and I wanted to recreate the way she create her eyeliner. I love how it looks! It’s so different, yet at the same time, so very wearable. I think I might re-do the eyeliner next time.

Scroll all the way to the bottom for full  product list.

Urban Decay naked 2 daytime makeup

How-to:

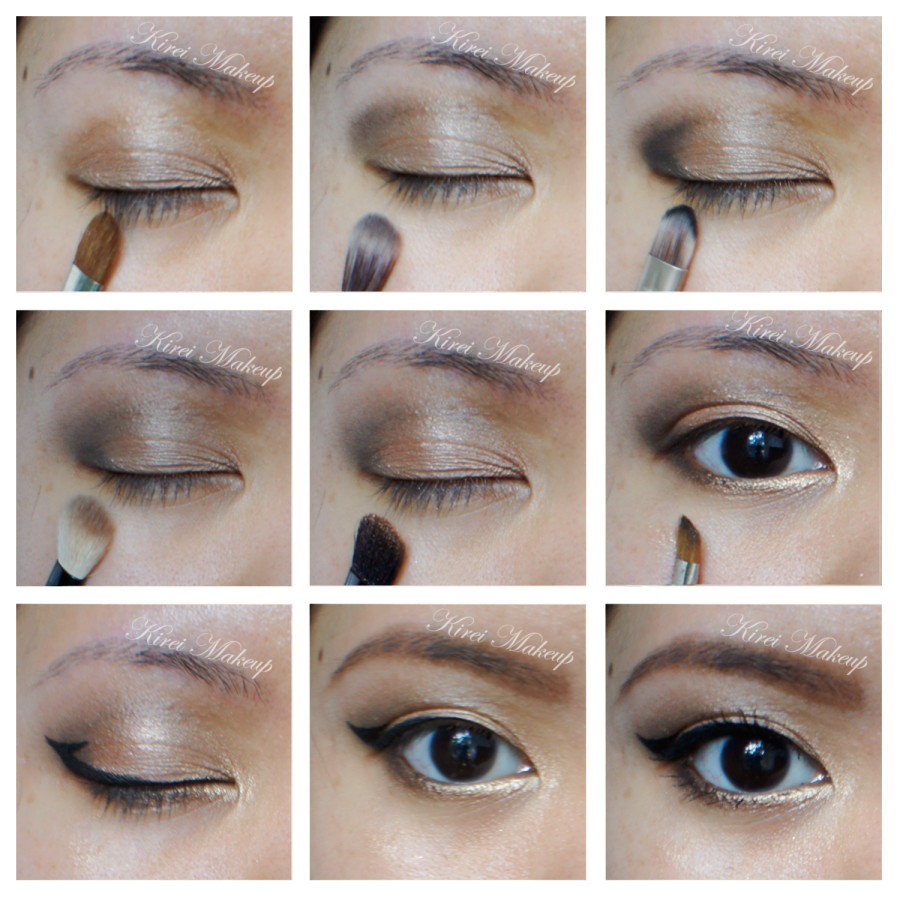
1. I applied MAC Groundwork paint pot all over my lid using my ring finger.

2. Using a flat eyeshadow brush, I applied Suspect from UD Naked 2 palette all over my eyelid.

3. Using a blending brush, I applied Busted from UD Naked 2 on the crease.

4. Using a flat eyeshadow brush, I applied Blackout from UD Naked 2 on the outer V.

5. I blended out Blackout using a clean blending brush.

6. I applied Chopper from UD Naked 2 on the eyelid using a flat eyeshadow brush.

7. I applied Half-Baked on the inner part of the lower lid, and Snakebite on the outer part using an angled eyebrow brush.

8. On the upper lid, I created a triangle-shaped eyeliner using Kanebo Kate Super Sharp Eyeliner.

9. I filled my brows using UD Faint eyeshadow and an angled eyeliner brush.

10. I curled my lashes and applied Cover Girl Lash Blast mascara on the upper and lower lashes.MAC Lady Danger

11. I applied UD Naked Skin foundation using a damped sponge.

12. I contoured my face very lightly using MAC Blunt.

13. I applied MAC Dainty blush on my cheeks.

14. I applied MAC Entertain Me lip liner on my lips first, and then applied MAC Lady Danger lipstick on top of it. If you want to find out how I fill my lips, please check my How-to Apply Lipstick post.

If you want to see the other lip makeup looks that I’ve created please check my Lips Tutorials.

For other UD Naked 2 tutorials, please use the search bar on the right side bar.

Products used

Eyes – MAC Groundwork paint pot; UD Naked 2 (eyelid: Suspect and Chopper, crease: Busted, outer V: Blackout, lower lid: Half-Baked and Snakebite); Kanebo Kate Super Sharp Eyeliner; Faint eyeshadow from UD Naked Basic; Cover Girl Lash Blast mascara.

Face – UD Naked Skin foundation; MAC Blunt; MAC Dainty.

Lips – MAC Entertain Me lip liner; MAC Lady Danger.

Rosy Mauve Makeup using Urban Decay Naked 3

Today’s tutorial is a requested look from one of my followers on Instagram through direct message. She wanted an Urban Decay Naked 3 look that’s not too smoky. I created this rosy mauve makeup using Urban Decay Naked 3 for her, so I hope everyone will enjoy it!

The look is very simple. However, I decided to add the winged liner and Gwiyomi lashes for some added drama for the camera. I also, recently, just bought CoverFX cream foundations, so I decided to play around with it for highlighting and contouring as well. I’m going to do a review soon for the CoverFX products.

Anyways, let’s get the tutorial started! You can skip the winged liner and eyelashes, feel free to omit some of the steps to make it suitable for you!

soft makeup using ud naked 3

How-to:

1. I prepped my eyelid using UD Primer Potion. Then, I applied Nooner on my eyelid using the flat eyeshadow brush that comes with the UD Naked 3 palette.

2. I applied Liar on the crease using the blending brush end from the Naked 3 palette.

3. Using Crown Brush Pro Blending Fluff C433, I blended out the edge of Liar so there’s no harsh edge.

4. Using the tip of the flat eyeshadow brush from UD Naked 3 palette, I applied Nooner on the lower lid. I also applied Trick on the inner corner of my eyes.

5. I lined my waterline, tightline, and upper lash line using Urban Decay  24/7 Glide-on Eyeliner in Perversion.

6. Using an angled eyeliner brush, I applied Blackheart along the upper and lower lash line. If I wear this makeup to go out I definitely would stop here and go on to mascara and my eyebrows.

7. I created a winged eyeliner using L’oreal Super Liner Ultra Sharp Tip.

8. I curled my lashes and applied Cover Girl Lash Blast mascara on both top and bottom lashes.

9. I applied Gwiyomi Sarah false eyelashes, and filled in my brows using Anastasia Brow Wiz in Ash Blonde and Brunette.soft makeup using ud naked 3

10. On my face, I applied CoverFX Cream Foundation in G40 using their cream foundation brush.

11. I highlight using CoverFX G20, and contoured using N110 (will do a tutorial on how to do this next time).

12. I set my face using NARS Setting Powder.

13. I applied Benefit Hervana on my cheeks as blush.

14. On my lips, I applied Clinique Chubby Stick Lip Balm in Mega Melon.

urban decay naked 3 tutorial

Products used

Eyes – UD Naked 3 palette, UD 24/7 Glide-on eyeliner in Perversion, L’oreal Super Liner Ultra Sharp Tip, Cover Girl Lash Blast mascara, Gwiyomi Sarah false eyelashes, and Anastasia Brow Wiz (Ash Blonde+Brunette)

Face – CoverFX Cream foundation (G40, G20, N110), NARS Setting Powder, Benefit Hervana blush, and Clinique Chubby Stick Lip Balm Mega Melon.