How to: Winged Eyeliner

I finally got around to post this tutorial. Sorry for being M.I.A this week, I was busy and I got really sick. Anyways, this how to winged eyeliner tutorial was a request from a former student of mine. I’ve done something similar in my Sugar and Spice tutorial. You can use a tape, yes scotch tape, to help create that clean straight line.

I use an angled eyeliner brush (MAC 208) because it has a sharp angle that will help you to create that “wing”. Please note on how I drag the brush from outer or inner part towards the center of my eyelid.

The trick is to let the brush guide you. Also, it’ll be easier if you tilt your chin up and look down to your mirror – that will allow the skin on your eyelid to stretch (just like in my photo).

You can also use a liquid eyeliner, or a straight brush like MAC 209 brush. I, personally, find the angled brush is easier for beginner. That sharp angle really helps in creating the wing. Yes, I know I sound like a broken record, but trust me, yes? 🙂

2 products you’ll need:

1. MAC 208 brush.

2. Any black gel eyeliner – I used L’oreal Infallible Gel Lacquer in Blackest Black.

How-to:

1. Create an imaginary angle for your wing. I usually line the outer corner to the tail of my brow.

2. Using MAC 208 and gel eyeliner, I drew an angle. I suggest just placing the brush down to mark it. If you want to make it longer, you can extend it later.

3. Drag the brush towards the center of the eyelid.

4. Flip your brush so the longer end is on the inner part of the eyelid. Drag the brush towards the center of the eyelid so the lines meet.

5. Once the triangle is complete, fill in the rest of the empty area.

6. At this moment, if you want to extend your tip, you can.

7. You can also use a wet wipe, or a q-tip dipped in makeup remover (non-oily) to clean up the edge of the wing if needed.

8. I filled my brows in, applied some falsies and voila! Done!

how to winged eyelinerow-

Available for Bookings in Jakarta, Indonesia

Hi all!

I just wanted to share my current works with you, while I’m in Jakarta. Just to let you know, I am available for makeup, eyelash extension, as well as beauty workshop bookings in Indonesia.

If you have followed me on Instagram, and Facebook, you’d probably already seen these pictures! If you want to find out what’s the story behind each of these lovely ladies, and which products I used for their makeup, please check my Instagram page! It’s all in the description box.

Again, I’m available in Jakarta for bookings! For more pictures of my work please check my Photos page.

jakarta makeup artist

jakarta makeup artist

mature skin makeup makeup artist jakarta

Urban Decay Electric Palette Review

Finally, I managed to upload this Urban Decay Electric Palette review! Since my week starts on Monday, this is still counted as being posted on this week! I tried to upload it earlier today, but my internet at home wasn’t working. Anyways, let’s get back to this review, shall we?!

From Urban Decay website

“Chaos-inducing color—in ten VELVETY shades. Inspired by Chaos (a brilliant matte blue from The Vice Palette), we created the ultimate fix for color addicts—packed with ten of the brightest, most amazing shades you’ve ever laid eyes on, plus a double-ended brush. In addition to Chaos (yes, it’s back!), this palette marks the return of Revolt (a silver standout from our Anarchy Face Case). All the other shades are NEW!

From ultra-smooth mattes to highly dimensional shimmers, each VELVETY shade delivers insane color payout. Why do a Pressed Pigment Palette? Using pressed pigments was the only way we could create heavily saturated brights with the intense pigment load we craved. Traditional pressed pigment formulas just wouldn’t cut it. To achieve shades like these, we had to develop an entirely new formula!

We carefully crafted the formula on every shade to make sure each one would apply with a soft and creamy texture and deliver serious color payout. Each shade features our Pigment Infusion System™, the proprietary blend of ingredients that gives each shade its velvety texture, rich color, serious staying power and blendability.

The case is as cool as the shades inside. Emblazoned with “ELECTRIC,” this slim, sleek palette features a vivid, dimensional, multilayered smoke-screen print reminiscent of the shades inside. And the mirror is huge!

Electric Pressed Pigment Palette also includes a cruelty-free, double-ended pressed pigment brush (an all-black brush with bright purple synthetic brush fibers). On one end: a compact precision brush that’s perfect for applying color with amazing control. On the other end: a small pigment brush.

(WARNING: Slowburn, Savage, Jilted and Urban contain a colorant that is not approved for the eye area in the US, Canada and Brazil.)

UD Electric palette review

Packaging

I absolutely hate the packaging. I love the cover, and its beautiful artwork, however I hate the bulkiness of it. This is one of the bigger, heavier palette in my kit. Not to mention, this one doesn’t have a latch/clasp when the palette is closed. I can’t actually place one of my little kitchen mat to protect the eyeshadows when I travel – the magnet is not strong enough to hold the palette together when I placed the mat in between.

Longevity/Blendability/Pigmentation

Worn with Urban Decay primer or NYX Milk Jumbo pencil, the shades last for around 8-hour with very minimal creasing. Colors stay well on the lid with primer on. I’ve never tried it with no primer, so I can’t say anything about that.

All of the eyeshadows blend very well, very smooth, and I have no problem whatsoever. They are so pigmented, that even with no primer, you can still get the true colors on your eyelids. However, I find that the matte shades are slightly thinner than the shimmers. The matte shades need a real good packing if you don’t use primer underneath (check out my swatches below to see what I mean).

Also, just FYI, a few of my blending brushes (my MAC 217s) are now permanently stained with Savage and Slowburn. I’ve washed them several times with a Beauty Blender solid soap, no luck in getting rid of those stain. Oh well, just know that you’ve been warned!

UD Electric palette review

Shades & Finish

Top row (L-R)

  • Revolt – bright metallic silver shimmer w/silver glitter.
  • Gonzo – bright turquoise matte w/ floating tonal pearl.
  • Slowburn – bright red-orange matte w/floating pearl.
  • Savage – bright hot pink matte.
  • Fringe – bright metallic teal.

Bottom Row (L-R)

  • Chaos – bright blue matte w/floating tonal pearl.
  • Jilted – bright metallic fuchsia w/blue shift.
  • Urban – bright metallic purple.
  • Freak – bright green w/gold shift.
  • Thrash – bright lime green matte w/floating gold pearl.

(All shades/finish info is taken from Urban Decay, 2014)

UD Electric palette review

Price

USD$49 for 10 shades (0.04oz)

Pros

  • Great pigmentation
  • Smooth and easily blendable
  • Bright, bold, fun colors
  • Can be used as hair-chalking pigment
  • Long lasting
  • Colors stay true (what you see is what you get)
  • You get a good mix of matte and shimmer
  • Price is pretty good compared to other UD eyeshadows

Cons

  • 4 out of the 10 shades cannot be used on the eyes
  • Packaging is not optimal for travel
  • A little bit pricy compared to other brand

So, I know everyone has been raving about this UD Electric Palette, even I was raving about it before the palette was released. When I finally bought it couple weeks a go when I was in Toronto, I thought it was an over-hype. I saw the colors, and I thought to myself that there’s a lot of other companies that make similar palettes to this, for example, the Sleek Makeup iDivine Snapshot palette, which honestly cost a lot less than the UD Electric palette. You can definitely find similar shades in other brands, like MAC, Sleek Makeup, NYX etc.

If you can’t get this palette, don’t worry too much about it. You can definitely find similar shades by other brands. If you are a fan of Urban Decay’s products, then by all means get this palette, esp. if you love bright, bold colors.

My personal opinion is that this is a great palette (plus it’s cruelty-free) to have if you have the extra cash. Not necessarily needed, but nice to own. Since 4 out of the 10 shades on the palette aren’t recommended for eyelid application, really and truly, if you are worried, I say don’t bother getting it. Go to MAC, and you’ll find eyeshadows that are very similar in shade with this.


Soft Rose Smokey Eyes tutorial using UD Naked 3

Here I am with a new Soft Rose Smoky Eyes tutorial using UD Naked 3 (again)! I do apologize for missing for almost a week without any tutorials. I’ve been having some difficulties with the internet at home. However, if you do follow me on Twitter or Instagram, you’d have gotten a little bit of update here and there every day.

In another news, I was very excited to find out that Urban Decay has used one of my pictures that I did on their email newsletter! I’m not sure if you guys subscribe to their mailing list, but I was so surprised to see my face on it. It’s small, but I’m so happy! If you want to recreate that look, please take a look at my Rose Smoky III tutorial.

Don’t forget to check out my other UD Naked 3 tutorials (pictorials and video)!

Urban Decay

So, for today’s tutorial, I wanted to use my Urban Decay Naked 3 again to create a much softer rosy smoky eyes, something that most people can recreate and do it on themselves. This look would be great for those with medium to darker skin tone as well. If you like a very light eyelid, you can apply Burnout or Dust instead of Buzz.

Scrolls all the way down if you want to skip the how-to, and go straight to the product list.

urban decay naked 3 rose smoky

How-to:

  1. I prepped my eyelids using Urban Decay Primer Potion in Sin.
  2. I applied Buzz on the inner half of my upper eyelid, and Liar on the outer half, using a flat eyeshadow brush.
  3. On the crease, I lightly applied Limit using a blending brush.
  4. Using a bullet crease brush, I applied Blackheart on the outer V.
  5. I blended out the outer V using the same blending brush I used on Step 3.
  6. On the lower lid, I applied Blackheart using an angled brow brush.
  7. I also applied Buzz on the inner corner of the lower lid.
  8. I lined my waterline using L’oreal Voluminous Smoldering eyeliner.
  9. I applied a winged eyeliner along the upper lash line using Kanebo Kate Super Sharp eyeliner.
  10. I curled my lashes, and applied Clinique High Impact mascara. Then, I added false lashes.
  11. I outlined my brows using Anastasia Brow Wiz in Ash Blonde, and filled it with Anastasia Brow Powder in Brunette.

urban decay naked 3 makeup tutorial

  1. I applied Cover FX cream foundation in G20 under my eyes, on the bridge of my nose, chin, and forehead using a clean foundation brush.
  2. I then applied Cover FX cream foundation in N110 on my temples, sides of my nose, on the hollows of my cheeks and on my jawline using a clean foundation brush.
  3. I blended the 2 foundation using a damped sponge.
  4. I set my face using Cover FX translucent powder.
  5. I applied Chanel Blush de Horizon on my cheeks.
  6. On my lips, I applied Tarte Lipsurgence in Lively.


Products used

Eyes – Urban Decay Naked 3 (eyelid: Buzz & Liar, crease: Limit, outer V: Blackheart); L’oreal Voluminous Smoldering eyeliner; Kanebo Kate Super Sharp eyeliner; Ardell false lashes no. 109; Anastasia Brow Wiz in Ash Blonde; Anastasia Duo Brow Powder in Brunette.

Face – Cover FX cream foundation in G20 & N110; Cover FX translucent powder; Chanel Blush de Horizon.

Lips – Tarte lipsurgence in Lively.

Orange Lips with MAC Lady Danger

Today I want to share this orange lips makeup with you as we welcome the arrival of Spring, or if you’re in the tropics, then to welcome the heat wave…lol… I do have to say that this MAC Lady Danger lipstick might go into my favorite lipstick collection. The color is so pretty, and it will look great on any skin tone. Definitely something that you should look into if you want a bold lip look. It’s a great alternative to the usual red lips, or pink lips.

Let me just, also, tell you that today’s tutorial is full of sweat and screams of frustration due to power outage, and the Sun’s sudden disappearance from the sky. I can’t tell you how much I want my lights with me, but oh well, that’s what happened when I travel so much. So, please forgive me for the quality of the step-by-step picture.

Anyways, I was watching Kat Von D video on the Sephora’s youtube channel, and I wanted to recreate the way she create her eyeliner. I love how it looks! It’s so different, yet at the same time, so very wearable. I think I might re-do the eyeliner next time.

Scroll all the way to the bottom for full  product list.

Urban Decay naked 2 daytime makeup

How-to:

1. I applied MAC Groundwork paint pot all over my lid using my ring finger.

2. Using a flat eyeshadow brush, I applied Suspect from UD Naked 2 palette all over my eyelid.

3. Using a blending brush, I applied Busted from UD Naked 2 on the crease.

4. Using a flat eyeshadow brush, I applied Blackout from UD Naked 2 on the outer V.

5. I blended out Blackout using a clean blending brush.

6. I applied Chopper from UD Naked 2 on the eyelid using a flat eyeshadow brush.

7. I applied Half-Baked on the inner part of the lower lid, and Snakebite on the outer part using an angled eyebrow brush.

8. On the upper lid, I created a triangle-shaped eyeliner using Kanebo Kate Super Sharp Eyeliner.

9. I filled my brows using UD Faint eyeshadow and an angled eyeliner brush.

10. I curled my lashes and applied Cover Girl Lash Blast mascara on the upper and lower lashes.MAC Lady Danger

11. I applied UD Naked Skin foundation using a damped sponge.

12. I contoured my face very lightly using MAC Blunt.

13. I applied MAC Dainty blush on my cheeks.

14. I applied MAC Entertain Me lip liner on my lips first, and then applied MAC Lady Danger lipstick on top of it. If you want to find out how I fill my lips, please check my How-to Apply Lipstick post.

If you want to see the other lip makeup looks that I’ve created please check my Lips Tutorials.

For other UD Naked 2 tutorials, please use the search bar on the right side bar.

Products used

Eyes – MAC Groundwork paint pot; UD Naked 2 (eyelid: Suspect and Chopper, crease: Busted, outer V: Blackout, lower lid: Half-Baked and Snakebite); Kanebo Kate Super Sharp Eyeliner; Faint eyeshadow from UD Naked Basic; Cover Girl Lash Blast mascara.

Face – UD Naked Skin foundation; MAC Blunt; MAC Dainty.

Lips – MAC Entertain Me lip liner; MAC Lady Danger.

Kat Von D Esperanza Palette Review

Happy Friday (or Saturday depending on which time zone you are in), everyone! I wanted to actually do a tutorial today but the Sun is hiding behind the cloud, so I decided to fulfill my promise from my last post to put up my Kat Von D Esperanza Palette review. I hope when the Sun decides to come out again, I can do a fun tutorial for the upcoming week! Don’t forget to follow me on Instagram and Twitter to find out what I’m up to daily, and also like my Facebook page so you can get notification on facebook whenever I upload a new post (or subscribe if you prefer email notification!).

Anyways, let’s get down to the review!

Kat Von D Esperanza palette review

What is the Kat Von D Esperanza palette?

“A fresh palette of eight long-wear, full coverage shadows that deliver matte, pearl, and high-glitter finishes, plus one transformative color veil.

Inspired by the transformative spirit of spring, this luxurious eye shadow palette contains a variety of shades ranging from subtle mattes to bold shimmers and pearls. The transformer shade, Dayglo, can layer on to each color to add a unique dimension. A built-in mirror helps you create an abundance of on-the-go eye looks.

Palette is infused with rose extract to moisturize delicate eyelid area.”

(Sephora, 2014)

First impression – what a gorgeous coveeeer! I want it! I have to have iiiit! *while standing in front of the cashier, and without any shame asking her if she can get the palette from behind her*. Pretty much that sums up how I felt about the palette when I first saw it at Sephora…hahahaha…So, yeeep! There you go, I’m a sucker for any pretty packaging!

I actually have owned several Kat Von D products before – liquid eyeliner (Trooper), and Beethoven palette. I’ve loved those products, and have re-bought them several times, especially the Trooper liquid eyeliner. So, I expected quite a few things from this palette – great pigments, long-lasting, easily blendable etc. I’m pretty happy to see that Kat Von D finally released a palette with pastels and colors for Spring. However, this palette is just OK. I think you’ll be better off buying her True Romance palettes than this one, unless you like the pastels in this palette.

Keep reading to see why this palette didn’t make it to my Product of the Week!

Kat Von D Esperanza palette review

Packaging

The Esperanza palette comes in a carton box. As you can see, there’s a beautiful art work in the cover, very reminiscent of the Sugar Skull. Inside, you get a mirror on one side, and 8 eyeshadows on the other side.

To be honest, I’m quite disappointed with the packaging, since I find it quite flimsy, considering the other True Romance palettes come in a hard plastic package with a clasp.

Longevity/Blendability/Pigmentation

As with most of the other Kat Von D palettes, the shadows in this palette last really well. I’ve worn it with UD Primer Potion for 6-hour with no creasing.

The eyeshadows are so soft and buttery; it blends so easily. I do have to say that if you have a skin tone like me (or darker), Archangel might look a little chalky (although I love this shade so much!). I find that Santeria and Dog Roses have the most pigment pay-off out of all the 8. I also love Dayglo, which can work really well as a transition color on the eyelid if you have 2 or more shades on the lid. It also gives a nice iridescent finish whether you wear it alone or on top of any shadow.

I do have to mention that there’s a significantly more fall-out from this palette compared to the other Kat Von D palettes.

Kat Von D Esperanza palette swatches

Shades & Finish

Top (L-R)

  • Selena (glitter purple)
  • Dayglo (transformer shade, iridescent white)
  • Galore (pearl peach)
  • Placebo (matte peony pink)

Bottom (L-R)

  • Santeria (glitter greenish grey)
  • Archangel (sparkle seafoam green)
  • South (matte beige)
  • Dog Roses (sparkle bronze)

*shades description taken from Sephora*

Kat Von D Esperanza palette review

Price

CA$43 for 0.035 oz x 8 eyeshadows. It is a limited edition palette, so I’ve expected it to be a bit more expensive. The other Kat Von D palettes (the True Romance) are also $43/each, but you get 0.05 oz x 8 shades (with better packaging). I think this palette is slightly more expensive, but if you love pastels and light colors then this would be a great palette for you.

Pros

  • What is so great about this palette is that the colors work with each other very well in any combination!
  • Love all the soft, spring colors.
  • Easily blended and great pigment pay-off.
  • Beautiful cover.
  • Paraben free.

Cons

  • Flimsy packaging.
  • Some of the lighter shades might look chalky on medium to dark skin tone.
  • Quite a few fall-out.
  • Pricy considering you pay the same price as the other Kat Von D palettes, but you get less product and flimsier packaging.


Disclaimer: I am not affiliated nor sponsored to do this review. I bought this palette out of my own pocket, and I do not gain any monetary profit out of it.

Adding Color to Eye Makeup

Hello, everyone! I hoped you guys had a great Valentine’s and Family day weekend, yes? I had quite a blast this weekend, so I do wish that all of you had an awesome time too! I just want to let you guys know that I might not be able to update my blog this week. I’ll be traveling again, and if you want to find out where’s my next destination, follow me on Instagram!

For today’s post, I want to show you how you can add color to your eye makeup. I’ve done a “pop of color” tutorials throughout my blog – using eyeliner, on the inner corner, or on the lower lid. This time, I added the color on the outer part of my eyelid. I think it’s cute, and different, totally  unexpected! This look would be great for those who would like to try out colored eyeshadow, but doesn’t want to go full on colors with it.

For the neutral shades, I used my Smashbox Full Exposure palette, but obviously you can use any palettes you’d like. In addition, for the face makeup, I actually used it to do my Highlight, Blush, Contour (bacon) post. So, head over there to find out how I contour my face.

Scroll all the way to the bottom to find out which products I’ve used for this post – this is a new thing I’m trying to do, so you don’t have to read the step-by-step list to figure out what I’m using.

neutral smoky eyes with color

How-to:

1. I applied MUFE Aqua Cream no. 13 on my eyelid using my finger. Then I buffed the cream eyeshadow out using a clean fluffy blending brush.

2. I applied M3 eyeshadow from Smashbox Full Exposure palette on my crease using a crease blending brush.

3. Using Sephora bullet crease brush, I applied M1 from Smashbox Full Exposure palette on the outer V, dragging it ever so slightly towards the crease.

4. Using a clean blending brush, I blended out any harsh edge.

5. I applied S3 from Smashbox Full Exposure palette on my eyelid using a flat eyeshadow brush.

6. Using a clean flat eyeshadow brush (I used UD eyeshadow brush), I applied Dragon Fly from Sleek Makeup Ultra Mattes V1 Brights next to M1. I patted this eyeshadow on the outer corner, carefully blending it towards S3.

7. I lined my waterline and tightline using L’oreal Voluminous Smoldering eyeliner.

8. I applied M1 on the outer part of the lower lid, and S3 on the inner part.

9. I curled my lashes and applied Buxom Lash mascara on both upper and lower lashes.

10. I filled in my brows using Anastasia Brow Wiz.

day smoky eyes with color

11. I applied CoverFX Cream foundation in G40 as base, G20 as highlight, and N110 as contour.

12. On my cheeks, I applied Maybelline Master Glaze in Make a Mauve.

13. I set my face using CoverFX Translucent Loose powder.

14. On my lips, I applied Clinique Chubby Stick lip pencil in Bountiful Blush.

Products used:

Eyes – Smashbox Full Exposure Palette in M3 (crease), M1 (outer V), S3 (eyelid); Sleek Makeup Ultra Mattes V1 Bright (Dragonfly); L’oreal Voluminous Smoldering eyeliner; Buxom Lash Mascara; Anastasia Brow Wiz in Brunette and Ash Blonde.

Face – Cover FX Cream foundation in G20, G40, N110; Maybelline Master Glaze in Make a Mauve; Cover FX Translucent Loose Powder; Clinique Chubby Stick Lip Pencil in Bountiful Blush.

Coral Eyes with Sleek Makeup Showstoppers

Alright! So, I’ve been wanting to do another tutorial using Sleek Makeup Showstoppers palette (if you are in Southeast Asia region, you can buy it from Luxola). I wanted to use the coral shade since it’s so pretty! I’ve done another tutorial using the same palette in my Smoky Purple post.

Oh also, I’ve done some research regarding the names of the eyeshadows in this palette. Apparently, there was a misprint on the labels that came inside this palette. The correct names for each shade is as the picture below. Thanks to Gloria from Beautiful with Brains for clarifying it on her blog!

sleek-makeup-Showstoppers-Shades

Please note that on picture in the bottom left corner, my eyeliner might look weird but I can assure you it is not. It’s because the camera couldn’t focus on my eyelashes, which is so frustrating! Anyways, I might have to invest in a better lens.

Anyways, my eyelids are prep using Smashbox eyelid primer.

How-to:

1. I applied Oh So Special all over my eyelid using a flat eyeshadow brush.

2. Using a clean blending brush, I applied Sunset above my crease.

3. I packed on Noir on the outer V using an angled eyeshadow brush. Lightly, I dragged Noir on to my crease.

4. Using another clean blending brush, I blended Noir out using a small circular motion.

5. I applied Noir using an angled eyebrow brush on the outer half of my lower lash line. I also applied Sunset on the lower lash line on the inner half.

6. Using a small shader brush, I applied Storm on the inner corner of my eyes.

7. I also created a winged eyeliner using Kanebo Kate Super Sharp eyeliner.

8. I lined my waterline using L’oreal Voluminous Smoldering eyeliner.

9. I curled my lashes and applied Cover Girl Lash Blast mascara, and applied false eyelashes.

10. I filled my brows using Anastasia Brow Wiz in Brunette.

sleek showstoppers makeup

11. On my face, I applied Smashbox Halo foundation using Sigma Round Kabuki brush.

12. I concealed my under eyes using MUFE Concealer palette no. 3 – the salmon colored shade.

13. I applied contour on my nose and under my cheeks using L’oreal Super-Blendable Crayon Concealer in W6-7-8. I blended it out using CoverFX cream foundation brush.

13. On my cheeks, I applied Maybelline Face Studio Master Glaze in Make a Mauve, blending it out using my finger.

14. I set my face using MUFE Pro finish powder.

15. I applied Revlon Mauve It Over matte lipstick on my lips.

sleek showstoppers makeup

Dr. Jart+ Sambut V7, Multivitamin Pencerah Wajah Untuk Semua Gender [Press Release]

Brand Dermatologis Global Korea Garap Pasar Indonesia

Tiap pria dan wanita ingin bebas dari kulit kusam, pigmentasi, flek dan spot hitam. Akan tetapi faktor usia, genetis dan kondisi lingkungan kerap menjadi penyebab munculnya berbagai problem pada kulit wajah. Ditambah lagi, saat ini berbagai golongan usia kerap menghadapi masalah serupa. Maka dari itu, bertempat di Upperroom Annex Building, Dr. Jart+, brand dermatologis global terkemuka Korea hari ini meluncurkan seri pencerah wajah terbaru yaitu V7. Merupakan seri pencerah kulit wajah yang akan mengembalikan rona wajah anda yang kusam akibat sinar matahari maupun polusi udara dengan memberikan 7 vitamin meliputi vitamin A, B3, B5, C, E, F dan H.

Dr. Jart+ berfokus terhadap keamanan produk dengan melarang penggunaan bahan-bahan yang dapat menimbulkan iritasi kulit dengan prinsip bebas aroma buatan, bebas pewarna buatan, bebas pengawet buatan, dan bebas alkohol. Hadir memberikan solusi yang aman dan terpercaya, Dr. Jart+ telah melalui beragam tes untuk kulit hiper-sensitif maupun berbagai macam jenis kulit sensitif.

Vera Liono, Brand Manager Dr. Jart+ Indonesia menuturkan, “Sebagai pionir brand dermatologis global, Dr. Jart+ menghadirkan V7 yaitu produk pencerah pertama dengan kandungan vitamin terbanyak yang berfungsi mengencangkan, menenangkan, memutihkan, kaya akan anti oksidan, menjaga elastisitas dan regenerasi sel aktif. Sejak diluncurkan tahun 2004, Dr. Jart+ mendapat respon yang sangat baik di dunia perawatan kulit wajah internasional dengan angka penjualan tercepat dalam waktu singkat. Setelah melebarkan sayapnya ke berbagai negara seperti Jepang, Hong Kong, Amerika Serikat, Inggris, Thailand, Filipina dan Singapura, sekarang kami hadir di Indonesia. Kini penggemar kosmetik dapat menemukan produk perawatan wajah yang aman dan teruji klinis. Outlet kami dapat ditemukan di Alam Sutera, Matahari Departmen Store Taman Anggrek dan Lotte Shopping Avenue.”

“Merupakan sebuah kebanggan bagi kami untuk merilis Dr. Jart+ di Indonesia. Sejak diluncurkan tahun 2004, Dr. Jart+ menjadi produk perawatan dermatologis terkemuka di Korea. Melalui komitmen dan kinerja berkesinambungan, kami optimis Dr. Jart+ akan menjadi brand skincare terbaik dan terpercaya oleh banyak pelanggan di Indonesia seperti halnya di Korea dan dunia. Kami pun akan terus berkontribusi dalam menjaga serta memberi rasa aman pada kehidupan Anda dengan menghadirkan produk dermatologis No.1. Kami yakin, sekarang pelanggan kosmetik tidak perlu kuatir dan dapat langsung memilih produk perawatan wajah terbaik langsung dari ahlinya” ungkap Lee Jin-Wook, CEO Dr. Jart+ menambahkan.


Saat ‘cantik’ bertemu dengan ‘seni’

Nama Dr.Jart+ tercipta dari inisial pendirinya ‘J’ dan kata ‘Art’ yang dalam bahasa Inggris berarti seni, yang menjadikan konsepnya berbeda dari konsep produk perawatan kulit kebanyakan. Karena mengusung visi nya sebagai merek yang memfokuskan pada pemulihan dan perbaikan kulit sebagai hasil penelitian bionik terbaru, Dr. Jart+ telah membangun merek yang terpercaya dengan harapan akan menunjukkan sisi artistik dari perawatan kulit.

Dr.Jart+ mengedepankan teknologi ilmiah dalam meracik produk-produknya dari bahan alami serta dikemas menggunakan sistem berteknologi tinggi yang mengoptimalkan fungsi dari setiap bahan yang digunakan. Hal ini dilakukan dengan tujuan dapat menciptakan tampilan kulit wajah yang cantik dan sehat serta menjadikan Dr.Jart+ sebuah merek terpercaya.

Solusi cerdas untuk kulit hiper-sensitif

Dr. Jart+ fokus terhadap keamanan produk dengan melarang penggunaan bahan-bahan yang dapat menimbulkan iritasi kulit dengan prinsip bebas aroma buatan, bebas pewarna buatan, bebas pengawet buatan, dan bebas alkohol. Dr. Jart+ memberikan solusi yang aman dan dipercaya serta sudah melalui beragam tes untuk kulit hiper-sensitif dan berbagai macam jenis kulit sensitif.


Rangkaian Produk Dr.Jart
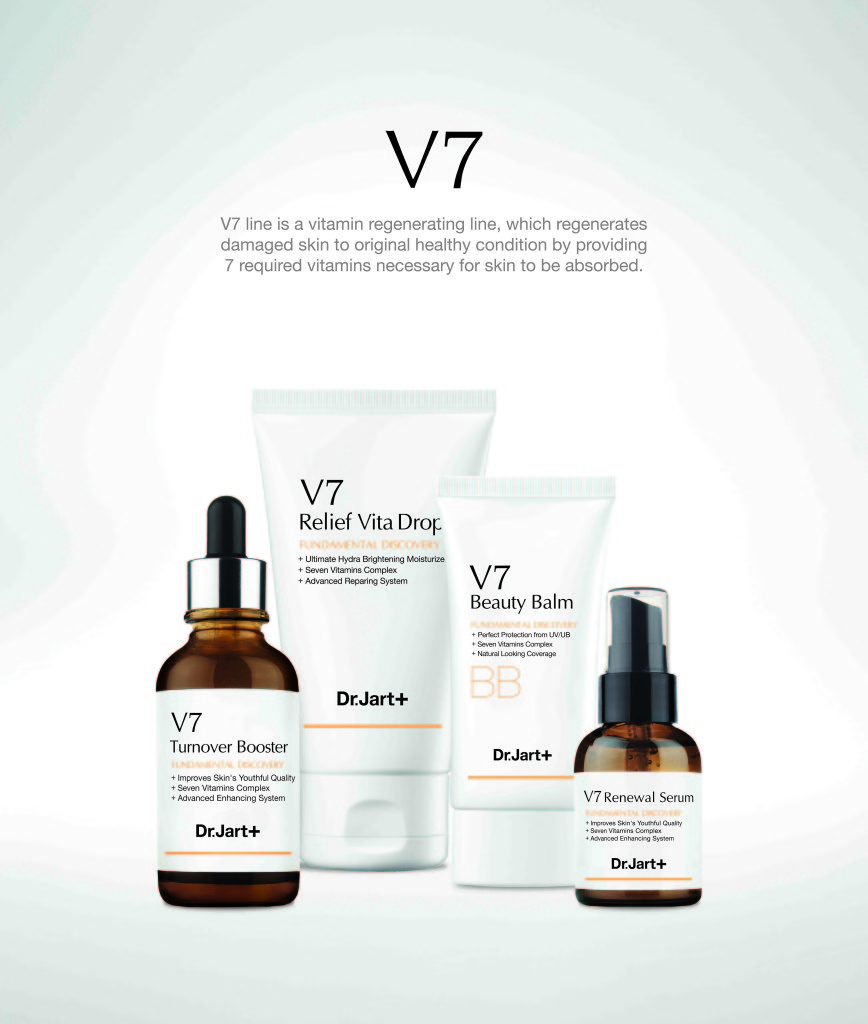
V7
Varian seri V7 merupakan seri dengan kandungan vitamin, yang meregenerasi kulit rusak sehingga kembali seperti sedia kala dan sehat melalui kandungan 7 macam vitamin yang dibutuhkan kulit.
Noda dari pigmentasi, jerawat, atau masalah kulit lainnya akibat stres dan kebiasaan buruk sehari-hari dapat diperbaiki dengan adanya kandungan regenerasi vitamin tersebut. Rangkaian V7 Terdiri dari:
* V7 Turnover Booster (Toner): Rp 508.000,-
* V7 Renewal Serum: Rp 638.000,-
*V7 Relief Vita Drop (Emulsion): Rp 458.000,-
*V7 Vitacream (Spot treatment): Rp 578.000,-
*V7 Beauty Balm (Make Up): Rp 488.000,-
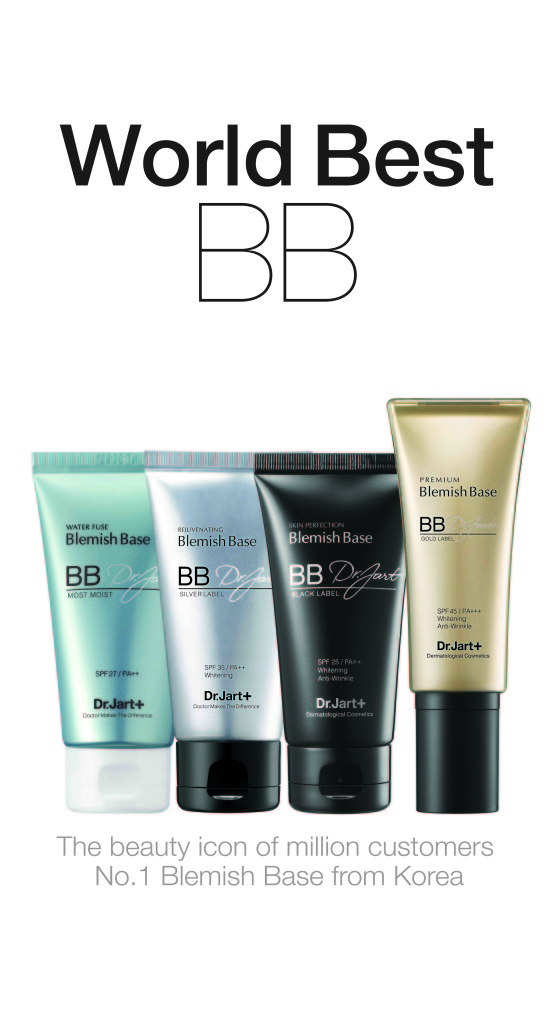
 

Dr. Jart V7

BB Cream

Satu-satunya BB Cream dengan varian terlengkap sesuai dengan warna kulit, tipe kulit, dan fungsi. Temukan BB Cream yang sesuai dengan karakter kulit Anda. Tersedia dalam beragam jenis:

* Rejuvenating Blemish Base (Silver Label): Kulit sensitif: Rp 408.000,-
* Skin Perfection Blemish Base (Black Label): Kulit kering: Rp 488.000,-
* Premium Blemish Base: Kulit kering dan menua: Rp 648.000,-
* Regenerating Blemish Balm: Whitening: Rp 528.000,-
* Renewalist Blemish Balm: Kulit menua: Rp 278.000,-
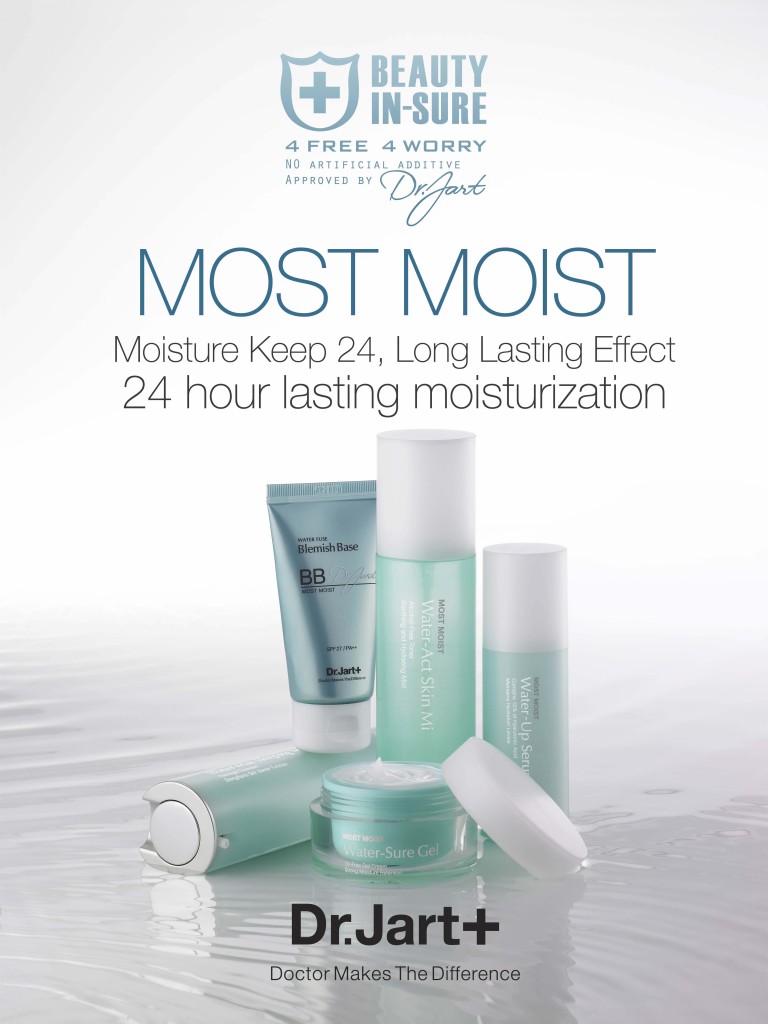
Dr. Jart BB creams

Most Moist

Seri pelembab pertama yang bebas pengawet buatan, melainkan menggunakan pengawet alami dari KIMCHI. Meminimalkan hilangnya kelembaban dan menjaga kelembaban tersebut agar tetap bertahan pada kulit selama 24 jam.

Varian Most Moist terdiri dari:

* Most Moist Water Act Skin Mist: Rp 328.000,-
* Most Moist Water Up Serum: Rp 548.000,-
* Most Moist Water Sure Gel Cream: Rp 458.000,-
* Most Moist Water Max Sleeping Mask: Rp 458.000,-
* Most Moist Waterfull Hydrogel Mask: Rp 488.000,-
* Most Moist Water Fuse Blemish Base: RP 458.000,-
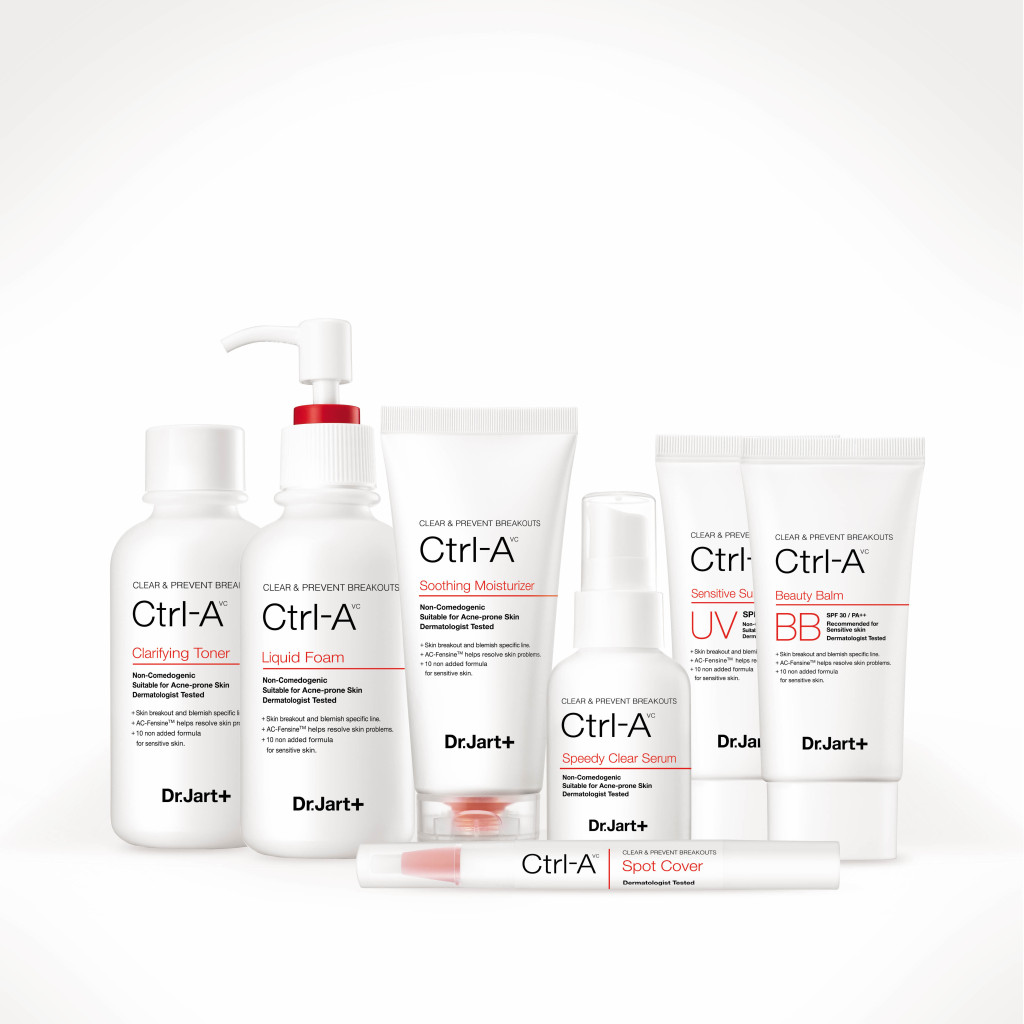
Dr. Jart Most Moist

Ctrl+A

Seri perawatan dengan bahan aktif AC-Fensine untuk kulit berjerawat ini bekerja dengan meningkatkan sistem pertahanan/perlindungan kulit terhadap bakteri jerawat untuk membantu kulit memperbaiki jerawat dengan sendirinya dan mencegah timbulnya jerawat baru.

Varian Ctrl-A terdiri oleh:

* Drying Spot Corrector: Rp 378.000,-
* Sensitive Sun Protector: Rp 338.000,-
* Spot Out: Rp 338.000,-
* Soothing Moisturizer: Rp 348.000,-
* Clarifying Toner: RP 328.000,-
* Speedy Clear Serum: Rp 458.000,-
* Liquid Foam: Rp 338.000,-
* Spot Cover: Rp 298.000
* Beauty Balm: Rp 448.000,-

Dr. Jart Ctrl-A Line


MAC Russian Red

As you all know from my Twitter, I’ve been looking forward to use my M.A.C Russian Red lipstick again. I know, I know, it seems like this week is a MAC week. Well, can’t be helped, I’m trying to fall in love with MAC again! Afterall, MAC was one of the reasons why I went into makeup in the first place.

So, talking about MAC Russian Red, this is the best true-red lipstick. If you want a cooler red, you can try MAC Ruby Woo instead. I also love how this lipstick has a matte finish to it. I’m not a big fan of shiny or glossy lips, so I love how even though this lipstick has a matte finish, it is not drying. It also helps if you prep your lips before application to ensure your lips aren’t chapped.

I purchased this Chanel quads in Intuition in February and didn’t have the chance to play with it, so I had to use it for this look. I love how soft and pretty the eyes look. If you are looking for a neutral, day makeup, do try the eye-look and you can skip the red lipstick.

I’ve done a similar look in Battle of the Classics.

How-to:

1. Using a flat eyeshadow brush, I applied the gold eyeshadow from the Chanel Intuition quad.

2. Using a fluffy blending brush, I applied the deep brown shade from the same quad on my  outer V and on the crease. I used whatever was left on the brush and swept it along the lower lash line.

3. I blended out the crease using a clean fluffy brush.

4. Using an angled eyeliner brush, I created a winged liner along the upper lashline.

5. I applied MAC Chromagraphic liner in NC30 on my tightline.

6. Using a small flat shader brush, I applied the pink highlighter shade from Chanel Intuition quad on the inner corner of the lower lid and under the brow.

7. I curled my lashes and applied Maybelline Volume Express mascara on both upper and lower lashes.

8. I filled my brows in using MUFE Aqua Brow Gel.

9. For extra drama, I applied Quo false eyelashes.

natural wedding makeup

10.  For the face, I applied MUFE HD Foundation using a foundation brush.

11. Using whatever was left on the brush, I swept it across my lips.

12. I lined and filled my lips using MAC Redd lip pencil.

13. Using a lip brush, I applied MAC Russian Red on my lips.

14. I powdered my face using a loose translucent powder.

15. I contoured my face using MAC Shadowy and applied MAC Fleur Power on the cheeks as blush.

asian red lips