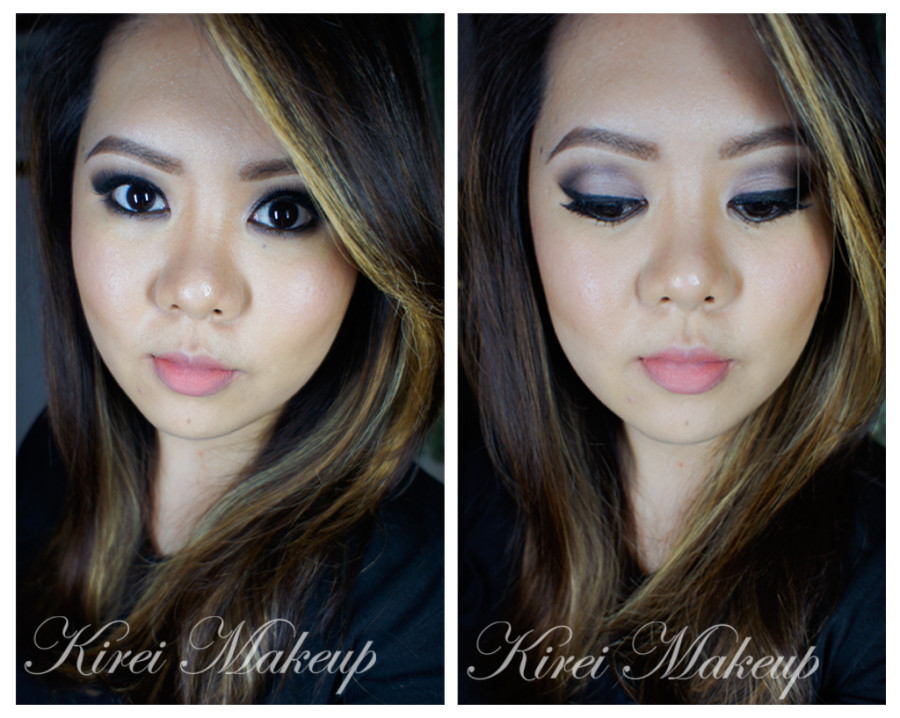
Lavender Grey using NARSissist Palette

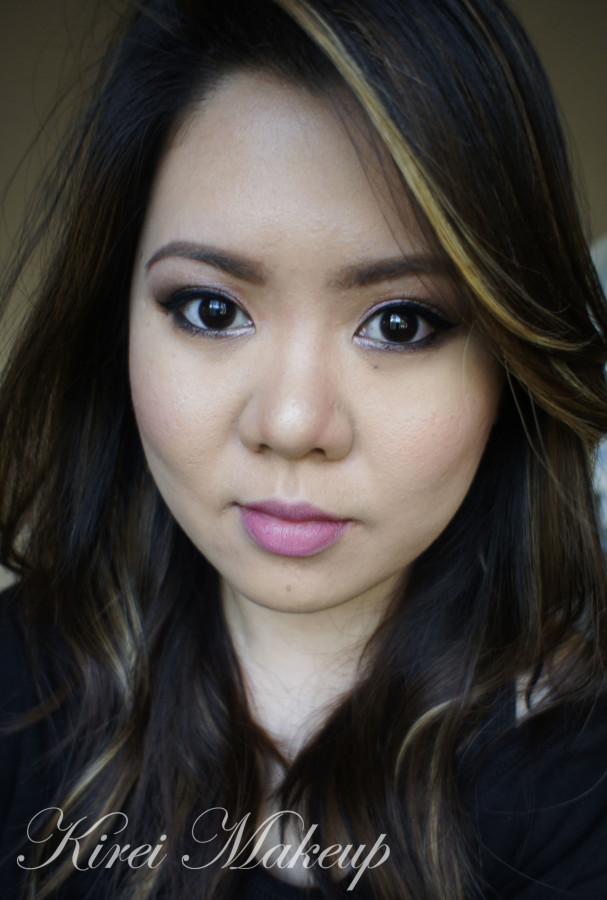
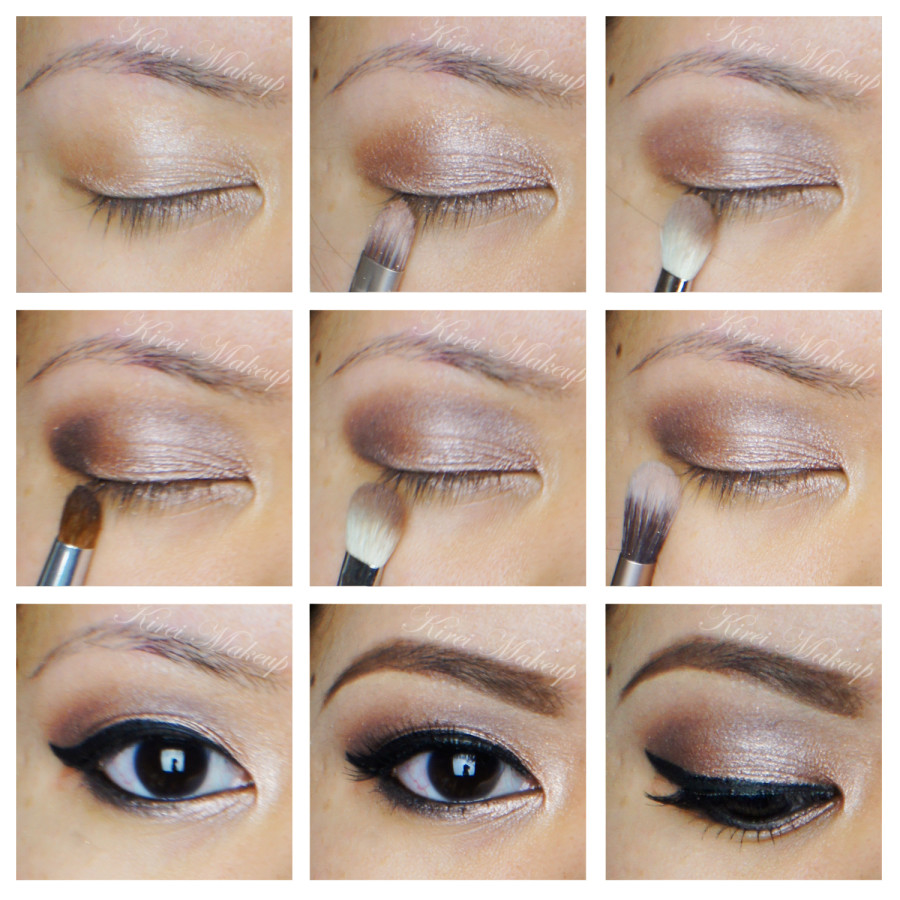
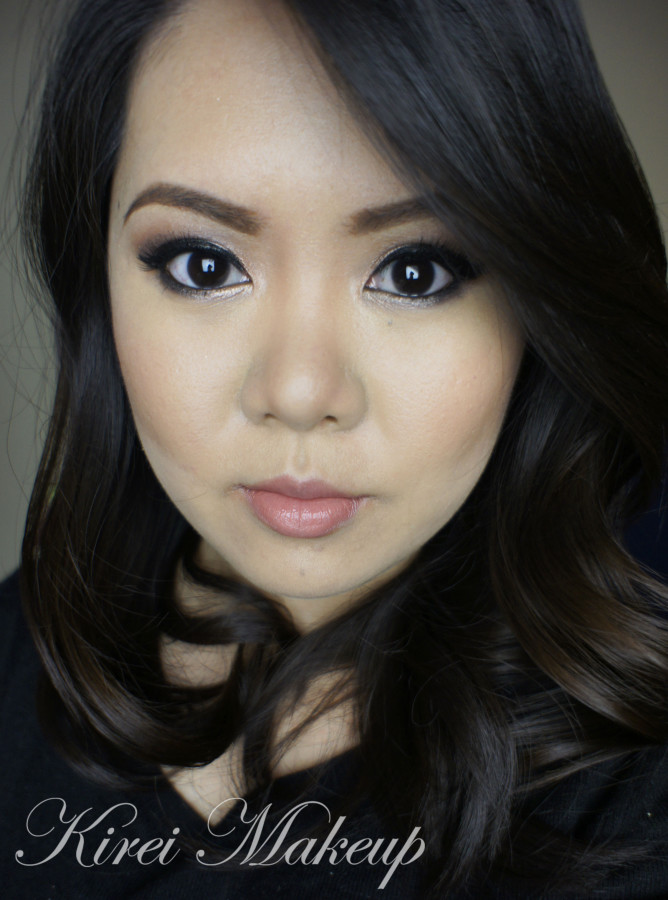
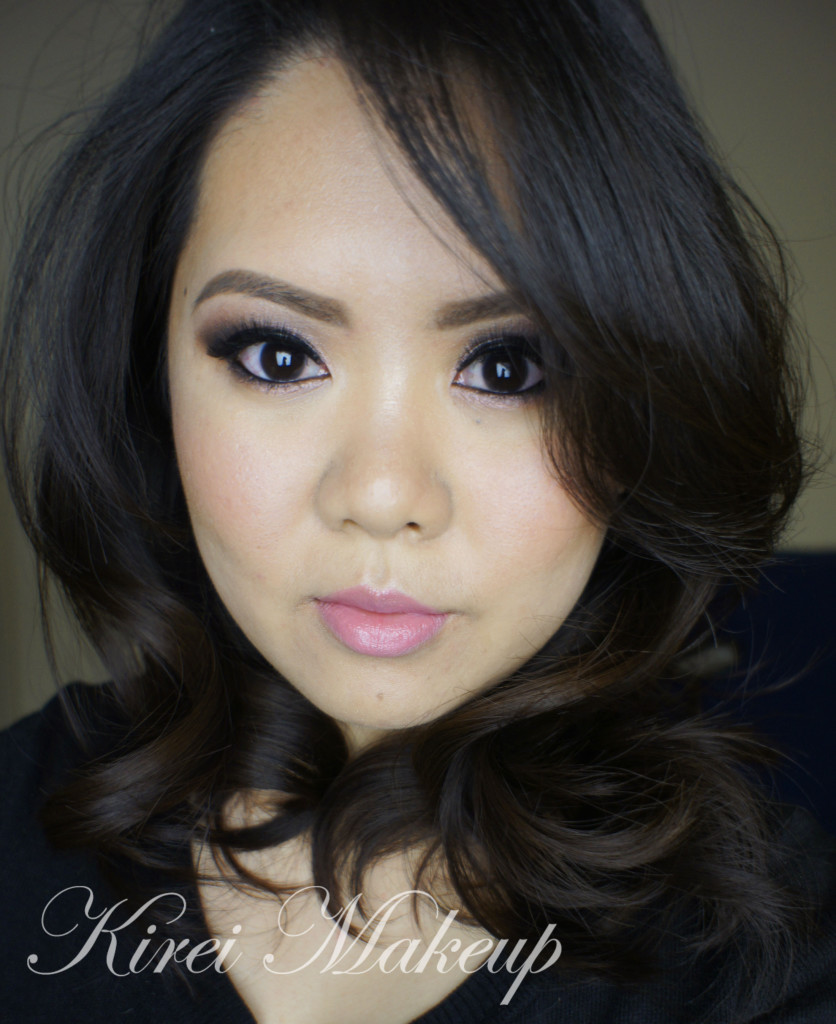
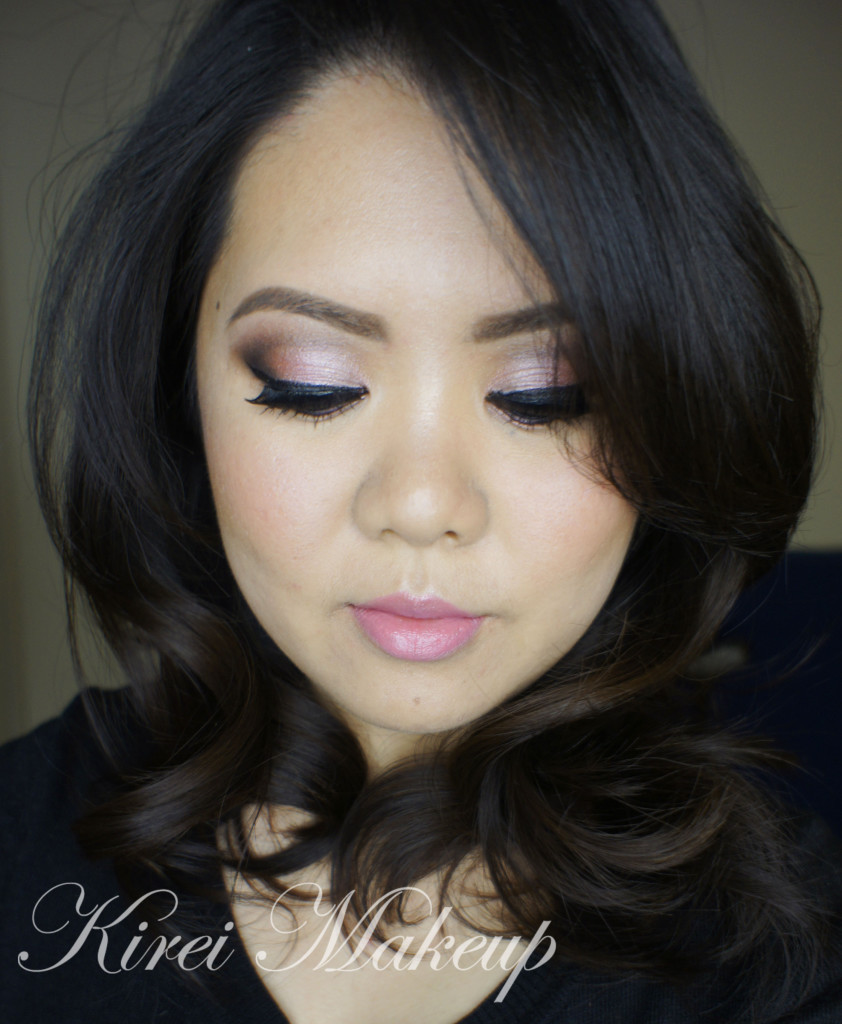
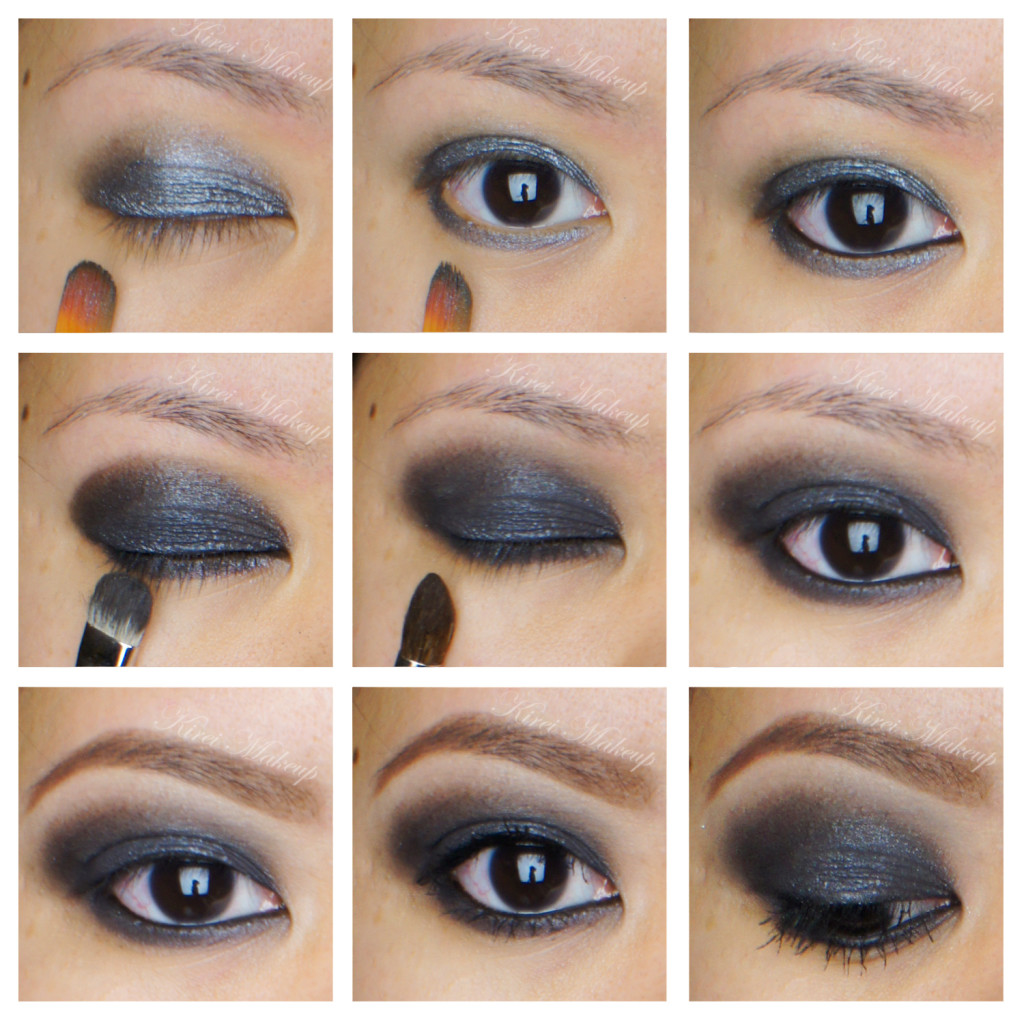
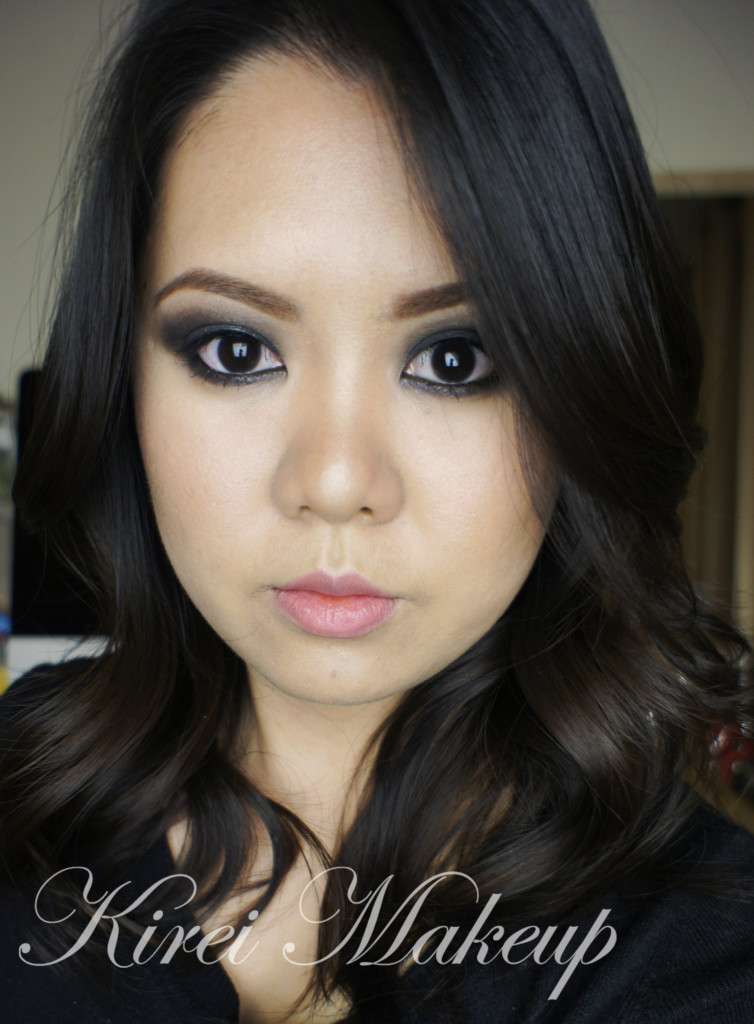
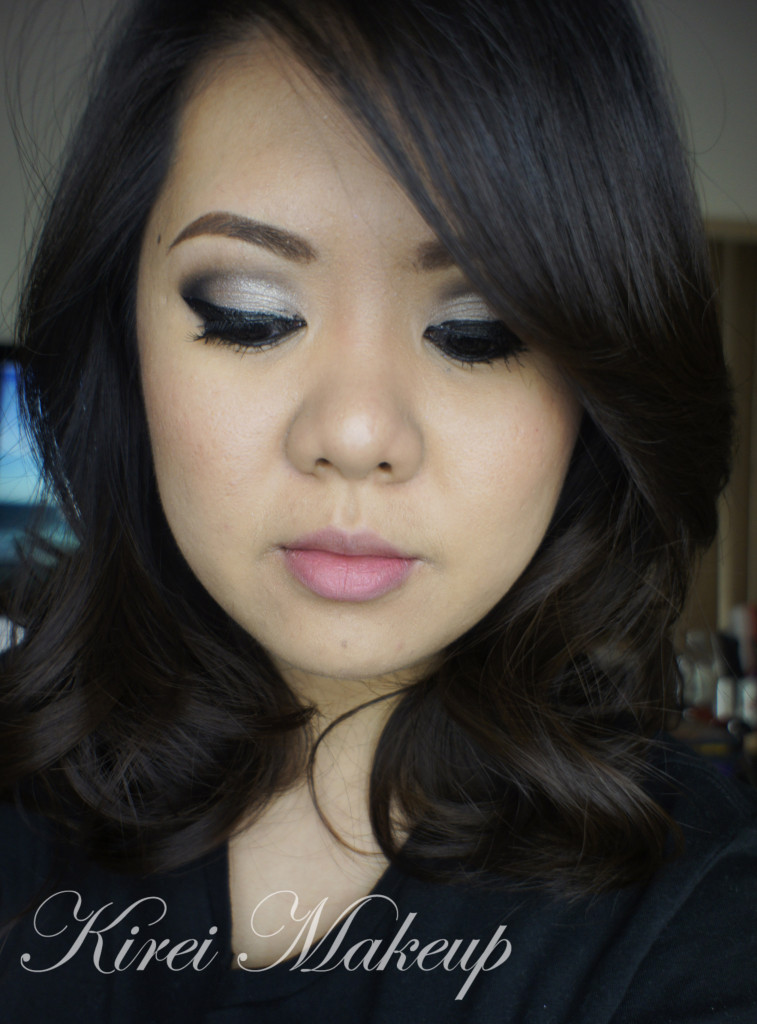
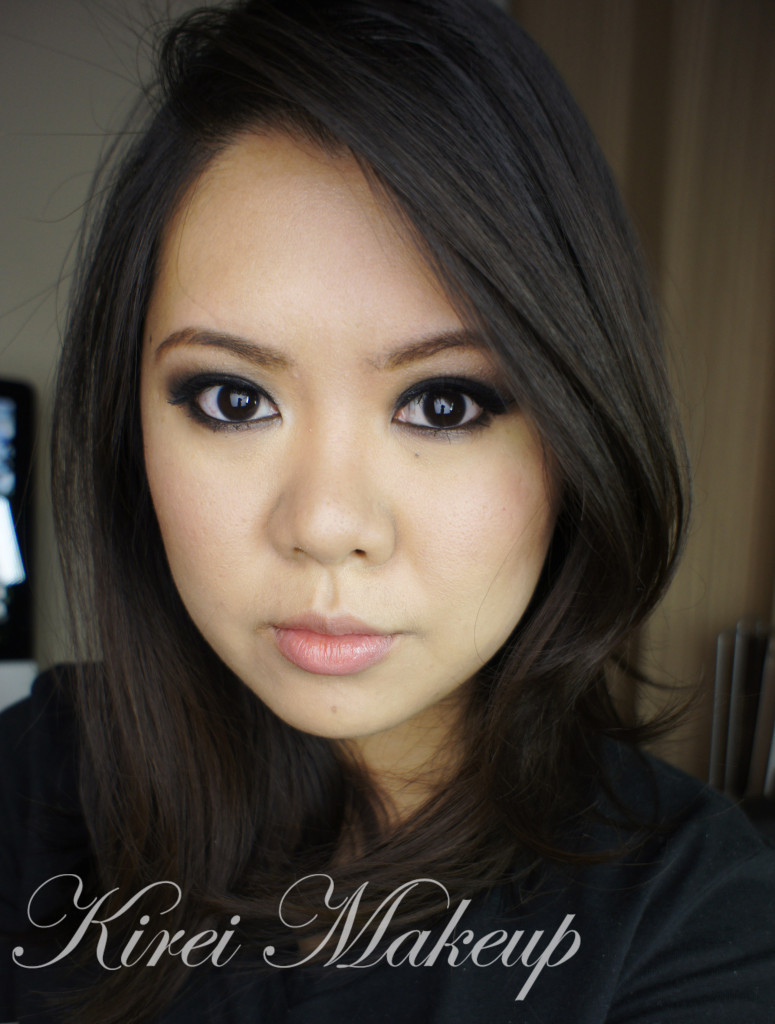
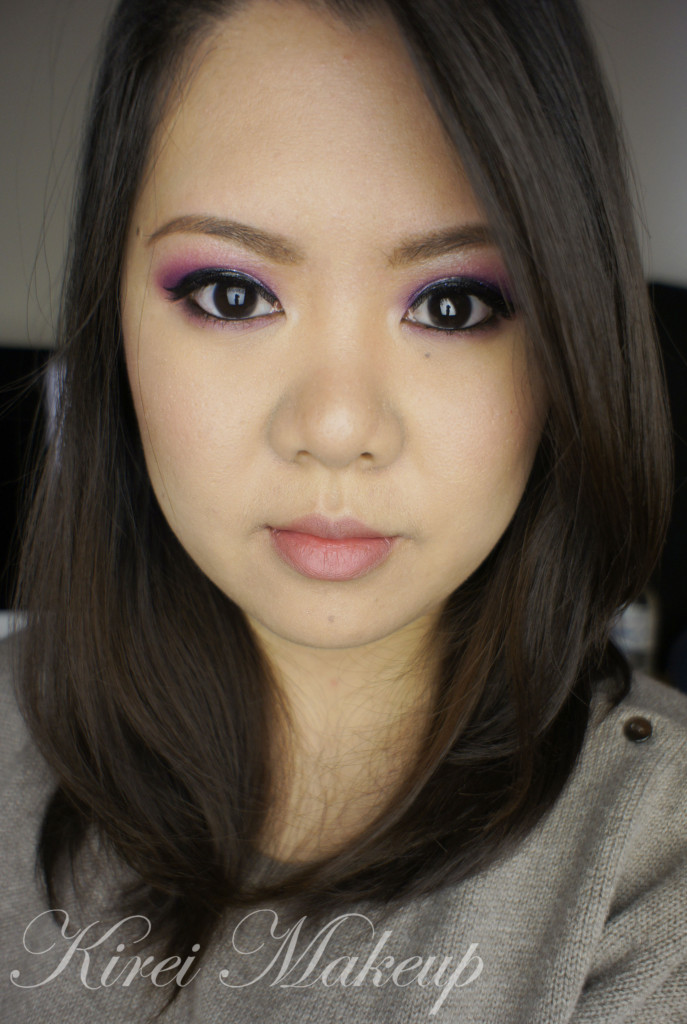
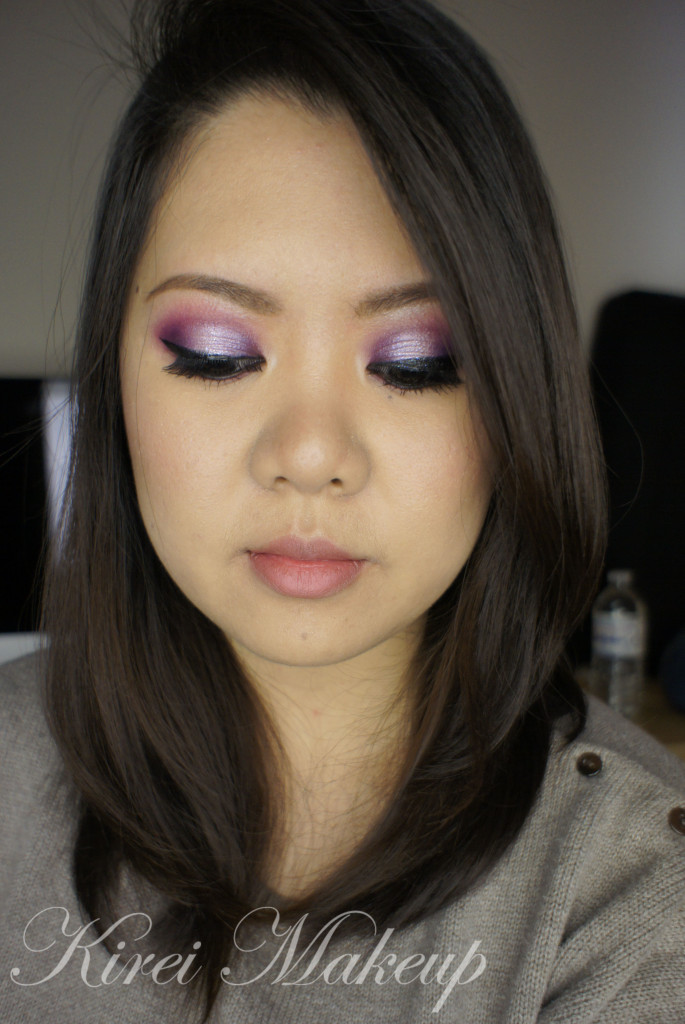
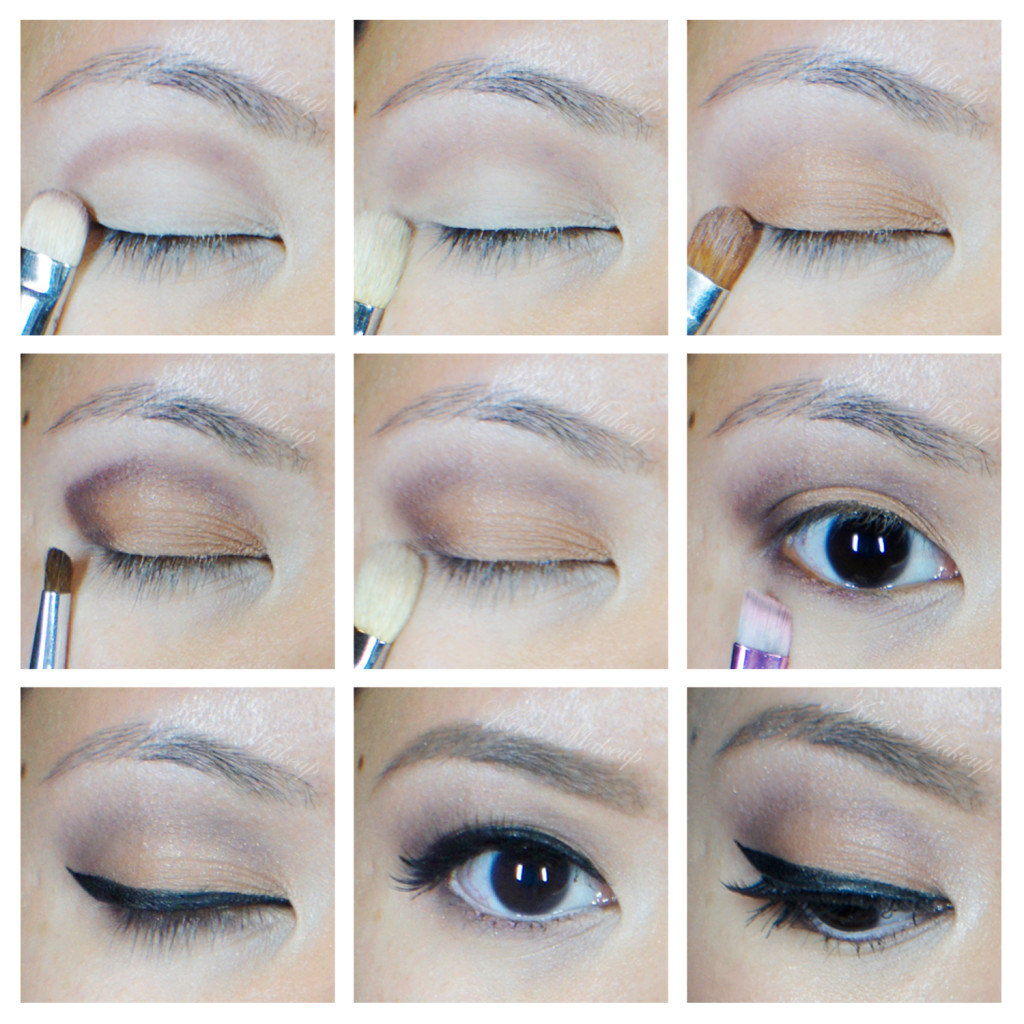
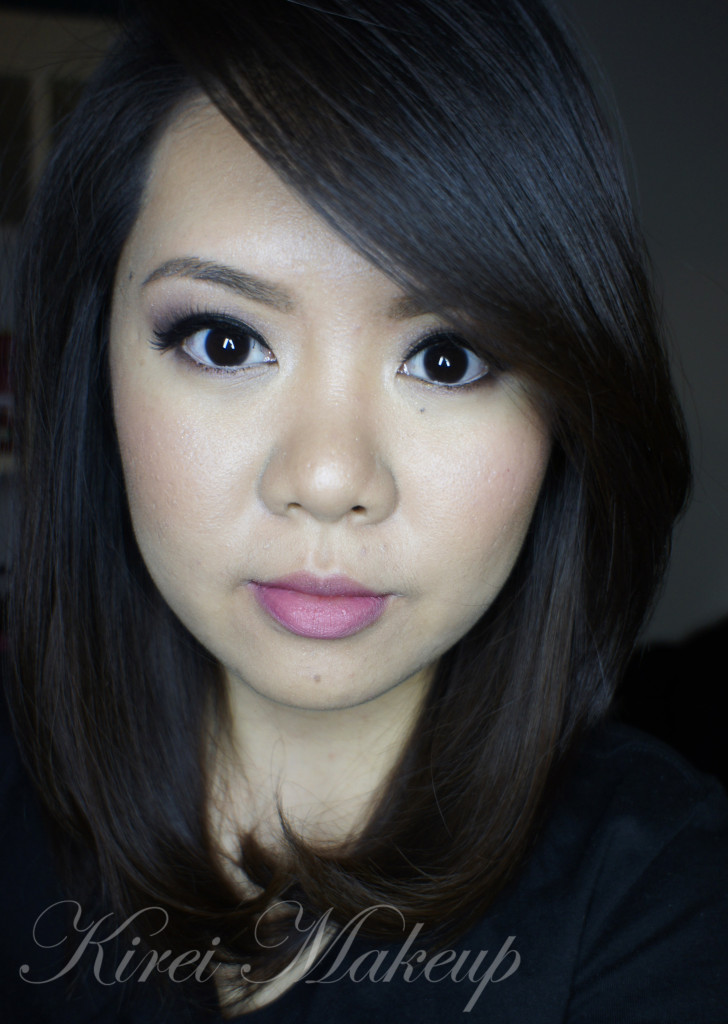
For this week’s tutorial, I decided to use my NARSissist Palette again! I fell in love with this palette all over again. I feel like it’s such a great palette with a more mature color option. For today’s tutorial, I picked out my favorite shades which were in the range of grey, lavender, and violet. I know the picture doesn’t show much of the lavender/violet on the lid, but I assure you it’s such a pretty grey with very subtle hint of lavender/violet in it. If you’re one not to wear color, and prefer a much neutral option, this would be a great addition to your makeup wardrobe.

Oh, just to let you guys know, I have been trying to update my Instagram daily. I’m going to try to do a weekly “Monday Makeup Inspiration”, and regram/repost-ing every look that YOU guys do if you FOLLOW me (@kireimakeup) and add #kireimakeup to your Instagram pictures! I’d love to see your makeup and/or your re-creation of any of my looks!

narsissist smoky eyes

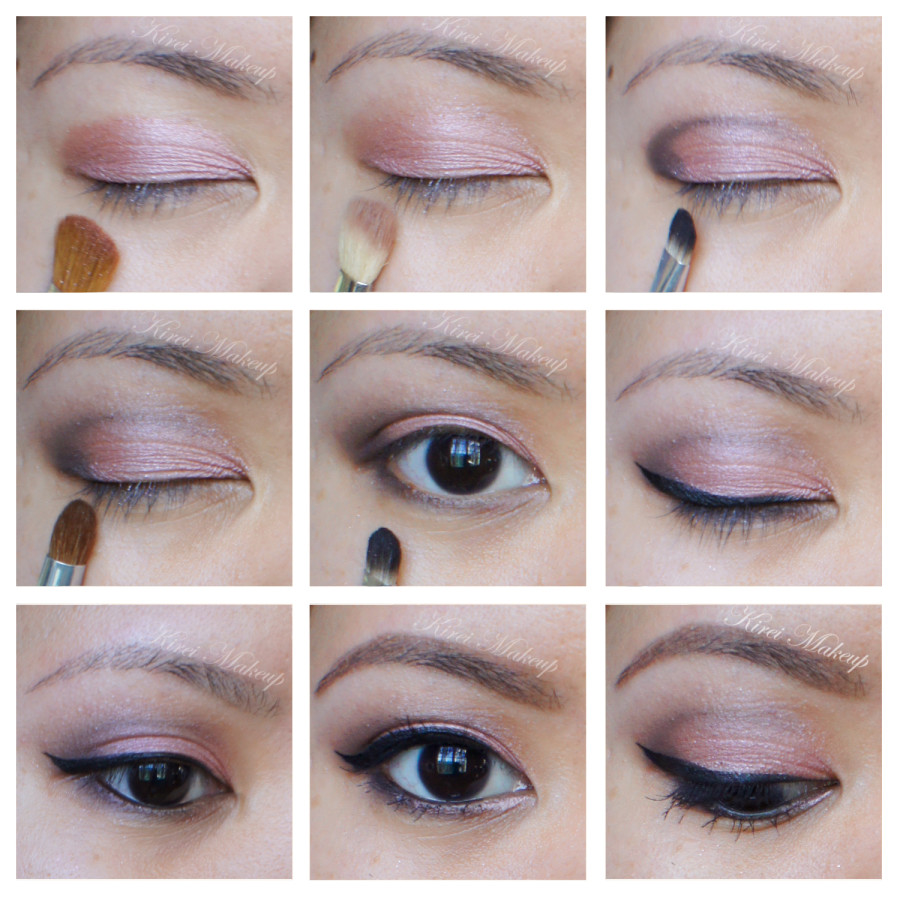
How-to:

1. I’ve prepped my eyelid using Urban Decay Primer Potion in original. Using a blending brush (from UD Naked 3 palette), I applied NARS Brousse II on my crease.

2. Using a small shader brush, I applied NARS Pandora II on the outer V of my eyelid.

3. I blended my crease by applying NARS Madrague I using a clean blending brush. I used this shade as a transition color.

4. I applied NARS Ashes to Ashes on my entire eyelid using a flat eyeshadow brush. I also added a little bit of NARS Lhasa on top of it.

5. I created a winged liner along my upper lash line using L’oreal Infallible Gel Lacquer 24hr in Blackest Black and an angled eyeliner brush. Using whatever was left on the brush, I ran it along the lower lash line, and waterline.

6. I also used a small shader brush and applied NARS Ashes to Ashes along my lower lid.

7. I filled my brows using Anastasia Brow Wiz in Ash Blonde and Brunette. I cleaned up the edges of my brows using Cover FX G20 cream foundation. If you want to know how I fill my brows, please check my brow tutorial.

8. I curled my lashes and applied Cover Girl Lash Blast mascara. I also applied falsies (Korean’s falsies, not sure what it’s called since the brand is not in English).

NARSissist Lavender Grey smoky eyes

9. On my face, I applied Cover FX Cream Foundation in G40 using MAC Masterclass Brush Oval 6.

10. I lightly applied highlight and contour using CoverFX cream foundations in G20 & N110. Check out my BACON post to find out how I used CoverFX to do my highlight and contour.

11. On my cheeks, I applied Revlon cream blush in Pinched.

12. On my lips, I applied Revlon Mauve it Over matte lipstick.

Urban Decay Naked 3 Rosy Eye Makeup Revisited

Hello, everyone! Finally I’m back with a post after a week of hiatus. I’m actually in Jamaica at the moment, so yay me! What a beautiful place, with nice people, great food and loads of sun. At this moment, I’ll be staying in Jamaica for an indefinite period of time, so follow me on Twitter and Instagram to find out what I’m up to, and where I’m heading next. My life has been a great adventure so far, and I’m so thankful for all these opportunities to travel to different countries.

Anyways, since today was a really great day, I wanted to do a quick tutorial. However, since I’ve been living out of my luggage, I couldn’t find my palettes (all buried underneath my clothes probably). The few palettes that were on my sight were the Naked (1, 2, 3, and basic). Obviously, I’ve to pick the Urban Decay Naked 3 palette for today’s makeup.

My original Rose Smoky Eyes post have received 4,000++ repins on Pinterest and I’m so thankful for that! However, upon looking back at the tutorial, I wasn’t too thrilled with the result. So, I wanted to re-do that post in a slightly different manner. This Rosy eye makeup can be worn as a day makeup, or night makeup. It’s one of those looks that goes really well for anytime!

Please note that all the pictures below are taken using natural daylight, thus might look different than my usual pictures.

urban decay naked 3 makeup tutorial

How-to:

1. I prepped my eyelid using UD Primer Potion (original).

2. Using a flat eyeshadow brush, I applied Buzz from UD Naked 3 all over my eyelid.

3. Using a fluffy blending brush, I applied Nooner from UD Naked 3 on the crease.

4. I applied Blackheart from UD Naked 3 on the crease and outer V using a small shader brush.

5. I blended Blackheart using a clean crease bullet brush.

6. I applied Blackheart on the lower lid using a small shader brush.

7. I lined my upper lash line using Kate Kanebo Super Sharp Eyeliner. I also lined my waterline using L’oreal Voluminous Smoldering eyeliner.

8. I curled my lashes and applied Cover Girl Lash Blast mascara on both upper and lower lashes.

9. I filled my brows using Anastasia Brow Wiz in Brunette.

urban decay naked 3 makeup tutorial

10. On my face, I applied Urban Decay Naked Skin foundation using Sigma Round Kabuki brush.

11. I contoured my face using NARS Ita kabuki brush and MAC Blunt powder.

12. On my cheeks, I applied MAC Dainty blush.

13. Finally, on my lips I applied Tarte Lipsurgence in Lively.

urban decay naked 3 makeup tutorial

For this last picture (above), N actually took it for me outdoor since the sun was setting, and we couldn’t resist to snap a few shots. I decided to add YSL Glossy Stain no. 27 on my lips for the shot. Just ignore my eye bags, I was trying to hold my laughter.

Product used:

Eyes – Urban Decay Primer Potion; Urban Decay Naked 3 (eyelid: buzz, crease: nooner, outer v: blackheart); Kanebo Kate Super Sharp Eyeliner; L’oreal Voluminous Smoldering eyeliner; Cover Girl Lash Blast mascara; Anastasia Brow Wiz.

Face – Urban Decay Naked foundation; MAC Blunt powder; MAC Dainty blush; Tarte Lipsurgence in Lively.

Disclaimer: some of the links provided on this post link back to my other posts. However, the links on Sigma Beauty products are affiliated links, therefore if you click on the link I might be compensated for it. Please note that any sort of compensation that I received from affiliated links will go to the maintenance of this website.

Soft Smokey Eyes using Urban Decay Naked 2

Happy Lunar New Year, everyone! I hope this year will bring more luck, health, and prosperity for you! Oh, how I miss being home for Lunar New Year, all those yummy food and family gathering together!

Anyways, for this tutorial, I wanted to use my Urban Decay Naked 2 palette to create a soft smokey eyes. Ever since I’ve been using my Naked 3, I felt that the Naked 2 and 1 were being left out in the corner, crying for my attention.

I also wanted to practice some contouring and highlight using my Kryolan HD Foundation palette, and I do have to say the foundation is so creamy and it blends so nicely into the skin. If you don’t like the heavy makeup on this tutorial, feel free to skip the contour/highlight part.

easy smoky eyes for asian

How-to:

1. I applied MUFE Aqua Shadow in 28E all over my lid, blending it out using my finger.

2. Using a flat eyeshadow brush, I applied YDK from UD Naked 2 on my eyelid.

3. Using a fluffy blending brush, I applied Tease from UD Naked 2 on my crease.

4. I applied Busted from UD Naked 2 on the outer V using a crease brush.

5. I blended Busted using the brush I used on step 3.

6. Using a clean blending brush, I applied Foxy from UD Naked 2 under the brow.

7. On my lower lid, I applied Chopper from UD Naked 2 on the inner half and UD Blackout on the outer half.

8. I lightly applied Verve from UD Naked 2 on the inner corner of my eyelid using a clean fluffy blending brush.

9. I created a winged liner using L’oreal Infallible Gel Lacquer Liner in Blackkest Black.

10. I lined my waterline using L’oreal Voluminous Smoldering eyeliner.

11. I curled my lashes and applied Cover Girl Lash Blast mascara on both upper and lower lashes.

12. I applied Gwiyomi false eyelashes (sold in Jakarta, please check my Instagram)

13. I filled my brows using Anastasia Duo Brow Powder.

urban decay naked 2 tutorial

14. On my face, I applied Urban Decay Naked Skin foundation using a Sigma Round Kabuki Brush.

15. I contoured and highlight my face using Kryolan HD Foundation palette.

16. I applied MAC Fleur Power on my cheeks.

17. For the lips, I applied Revlon Mauve It Over matte lipstick, and dabbed L’occitane clear lip balm on top of it.

Products used:

Eyes – MUFE Aqua Shadow 28 E, UD Naked 2, L’oreal Infallible Gel Lacquer Liner in Blackkest Black, L’oreal Voluminous Smoldering Eyeliner, Cover Girl Lash Blast mascara, Gwiyomi False Eyelashes, Anastasia Brow Powder.

Face – UD Naked Skin foundation, Kryolan HD Foundation palette, MAC Fleur Power blush, Revlon Mauve it Over lipstick, L’Occitane lip balm.

Rose Smokey Eyes III with UD Naked 3

I think I’ve made my obsession with UD Naked 3 palette pretty clear – I’m in love with it! The colors are wonderful, the pigments are so easy to blend, the double-ended brush is pretty amazing. What’s not to love?! So, to show another appreciation for this palette, I’ve decided to do another the third Rose Smoky Eyes tutorial. This look is far more intense and darker than the first rose smokey eyes that I did. I also think this one is prettier than the 2nd smoky eyes that I did with Naked 3. If you prefer a more natural looking one, I do have a post for you in my Berry Lips post.

I’ve also added a Youtube Video tutorial using UD Naked 3 palette!

This look is perfect for those who’re not afraid to play with the darker color, and already feel comfortable with blending. You can make it even darker and more intense if you’d like by adding a matte black eyeshadow (i.e. MAC Carbon) on the outer V. I like doing it this way since I want to showcase the Rose eyeshadow.

I hope you enjoy this look! I know a lot of people on Pinterest enjoyed my first tutorial! I’m so grateful that it’s getting 700+ repins on Pinterest.

I know I’ve said I was going to do a review, I’ll try to do it soon. It’s just so cold in Canada right now, it caused me to go on hibernation mode..hahaha..In all seriousness, though, -40 deg. Celsius is not a joke!

rose smoky eyes

How-to:

1. I prepped my eyelids using Urban Decay Primer Potion in Sin.

2. I applied Burnout on the inner third of my eyelid using the flat-end of the brush.

(I wiped away excess shadow on the brush on a clean towel before step 3)

3. Using the same brush, I applied Liar on the middle of the eyelid.

(I wiped away excess shadow on the brush on a clean towel before step 4 )

4. Again, using the same brush, I applied Mugshot on the outer third of my eyelid.

5. Using the blending-end of the brush, I blended the edge of the eyeshadow.

6. I applied Blackheart using a small crease brush on the outer V.

7. After wiping excess eyeshadow from the crease brush I used on step 6, I dragged Blackheart on to my crease, and blended it out.

urban decay naked 3

8. Using a fluffy brush, I applied Limit right at the edge where Blackheart meets with my skin. This helps to blend out Blackheart, and make a nice transition to my skin.

9. I lined my waterline and tightline using L’oreal Voluminous Smoldering eyeliner. On the lower lid, I applied Mugshot using an angled eyeliner brush, then Blackheart very close to the roots of the lower lashes.

10. Then, I created a winged eyeliner on the upper lash line using L’oreal Super Liner Ultra Sharp Tip.

11. I curled my lashes and applied Buxom Lash mascara on both top and bottom lashes.

12. For extra drama, I added false lashes for extra length and volume. These falsies were samples from my friend, which is currently in production.

13. I filled my brows using a mix of Anastasia Brow Wiz in Ash Blonde and Brunette.

rose smoky eyes

14. I applied Giorgio Armani Maestro foundation on my face, blending it using my fingers.

15. On my cheeks, I applied Revlon Cream Blush in Charmed Enchantment using a foundation brush.

16. Then, I applied MAC cream base in Pearl on top of my cheekbones, bridge of my nose, and cupid’s bow using my finger.

17. I applied MAC Please Me lipstick on my lips using a lip brush. Then, I added a little bit of L’occitane lip balm just to keep my lips moist since it’s so cold here in Canada!!!

18. My hair was set using a velcro rollers set and 1.5in Chi curling iron.

Black Smokey Eye Tutorial

Today black smokey eye tutorial is a requested look by  Nurina, who asked for a Taylor Momsen look. I decided to do Taylor’s signature look – the black smokey eyes. Anyways, I’ve done something similar to this look in my Classic Smoky Eyes using UD Naked post.

Since this tutorial is a bit more intense, I brought the black eyeshadow up above the crease. Taylor Momsen signature smoky eyes look is very messy, very dark and sometimes she paired it with red lips. You can pair it with red lips, or dark red lips to make it more goth-like.  However, I prefer to go with a peachy lips instead, keeping the focus just on the eyes.

Keep in mind this is an inspired look, so I’ve modify it to suit my face as well as my style. Taylor Momsen’s smoky eye sits too low on the lower lid to my liking. Be warn if the black eyeshadow is very low on the lid, it might make you look older, or it can make you look like you have panda eyes! As cute as pandas are, I’m sure you don’t want to look like you have panda eyes, right?!

black smoky eyes

How-to:

1. I applied MUFE Aqua Cream #1 Anthracite using a synthetic paint brush on both upper and lower lid. I’ve decided to use this so I can get interesting texture on the eyes. If you want to use a matte eyeshadow only, please check my Classic Smoky Eyes post.

2. I lined my waterline and tightline using a black kohl pencil eyeliner by Annabelle.

3. Using a shader brush, I applied Crave eyeshadow from UD Naked Basics palette on top of my eyelid. I extended the eyeshadow to slightly above the crease.

4. Using a clean blending brush, I applied Foxy eyeshadow from UD Naked Basics right at the edge of the black eyeshadow.

5. I applied Crave eyeshadow from UD Naked Basics palette on the lower lid.

6. I filled my brows using Shu Uemura Hard Formula brow pencil, and then set it using Anastasia Brow Powder in Brunette.

7. I curled my lashes and applied L’oreal Carbon Black mascara on both lower and upper lashes.

taylor momsen makeup tutorial

8. I applied UD Naked Skin foundation using a Sigma Flat Top Kabuki Brush.

9. I contoured and highlight my face using Smashbox Contour kit.

10. I applied Chanel Blush de Horizon very lightly on my cheeks.

11. On my lips, I applied Revlon Colorstay Ultimate Suede lipstick in Socialite, and add a few dabs of YSL Glossy Stain in Pêche Cerra-Cola (27).

NYE Makeup Using Smashbox Full Exposure Palette

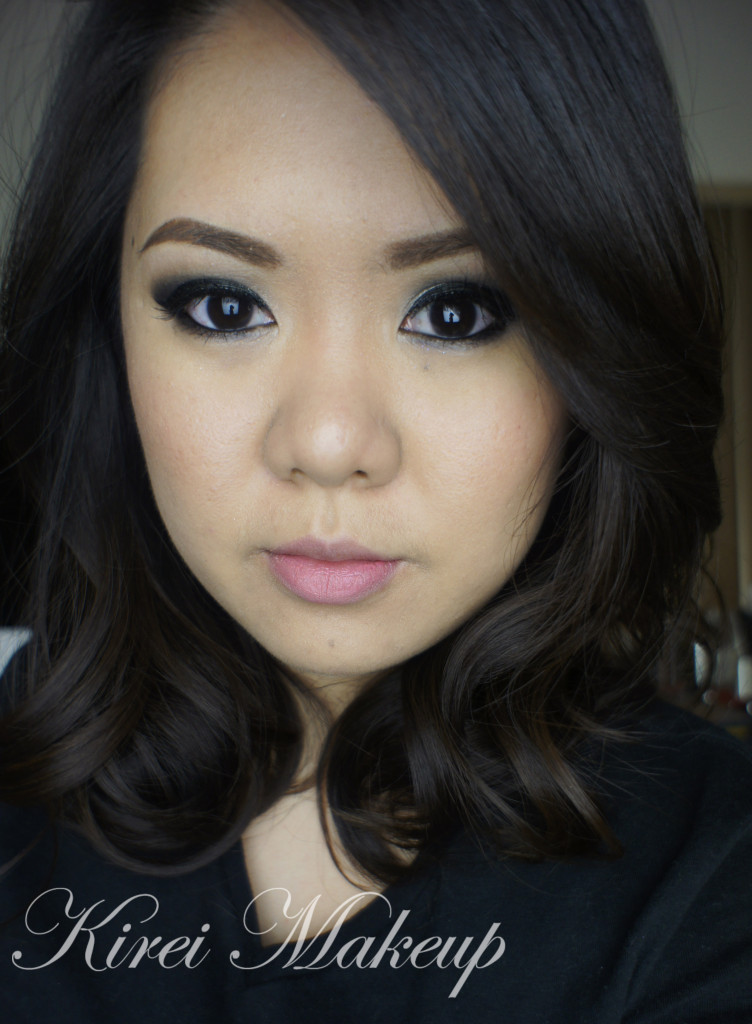
For this NYE Makeup tutorial, I decided to use my Smashbox Full Exposure palette, which I love! I’ve done a review/swatch post on Smashbox Full Exposure Palette Review. I’ve also done a few tutorial using the same palette in Smashbox Full Exposure Look #1 and Smokey Eyes using Smashbox Full Exposure Palette.

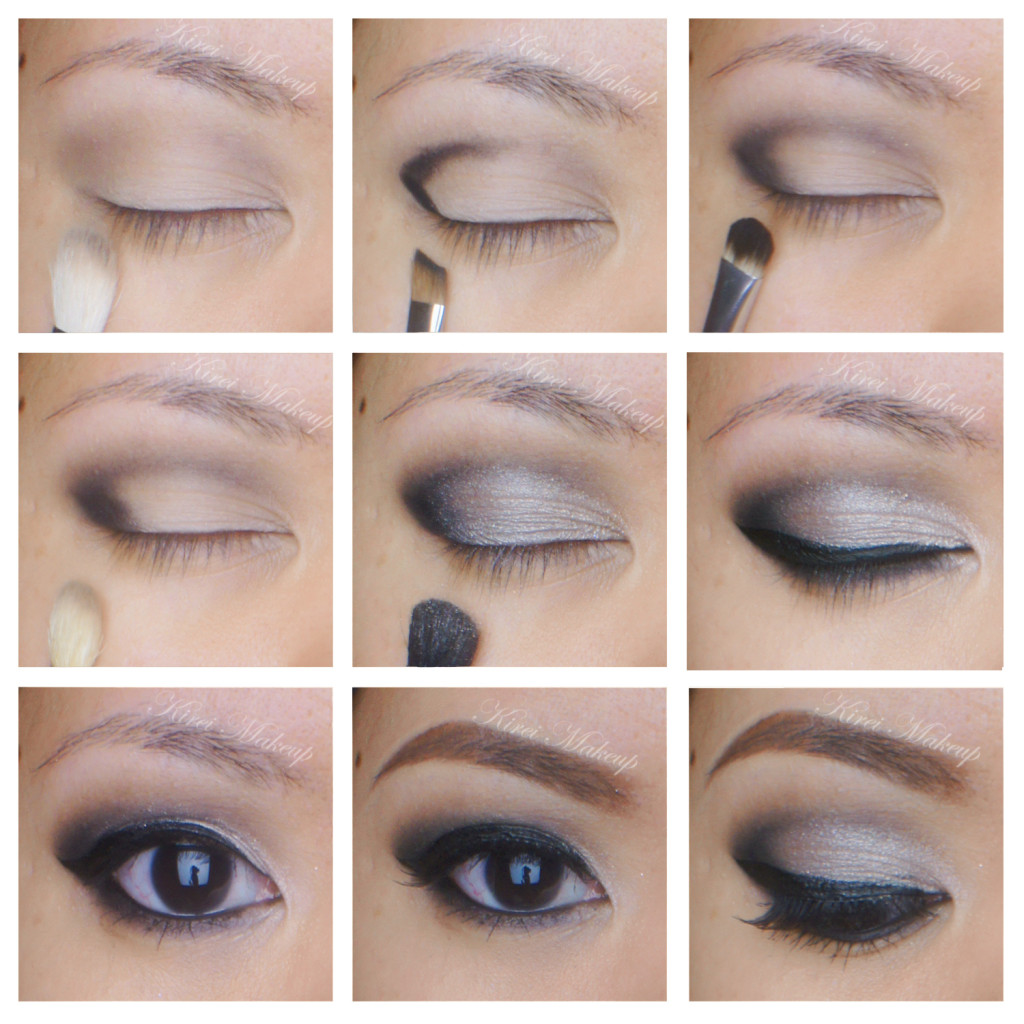
I wanted to create a more cat-eye effect with this smoky eye look, so if you want to create a more rounded smoky eyes please check my Glitter Holiday Makeup. My step-by-step picture looks slightly out of focus, that’s because I did not realize that my lens was dirty! So, my apologies if the pictures are not clear.

Smashbox Full Exposure tutorial

How-to:

1. I prepped my lids using UD Primer Potion.

2. I applied M6 on the crease using a blending brush.

3. Using an angled eyebrow brush, I applied M7 on the outer V.

4. Using a clean small shader brush, I blended M7 towards the inner part of the eyes.

5. I repeated step 3 and 4 until I get that outer V really dark.

6. Using a fluffy blending brush, I applied M5 slightly above the crease.

7. Using a flat eyeshadow brush, I applied S6 on the eyelid, and S4 just on the inner tear duct.

8. I created a thick winged eyeliner using Kanebo Kate Super Sharp eyeliner.

 Smashbox Full Exposure tutorial

9. Using an eyeliner brush, I lined my lower lid using M7.

10. I lined my waterline using L’oreal Voluminous Smoldering eyeliner.

11. I curled my lashes and applied Tarte Lights, Camera, Flashes mascara on both upper and lower lashes. I also applied false eyelashes.

12. I filled my brows using Anastasia Brow Powder in Brunette.

13. I applied Marc Jacobs Gel Foundation on my face using CoverFX Cream Foundation.

14. I applied MAC Dainty blush on my cheeks.

15. I also applied Revlon Socialite lipstick on my lips.

Smashbox Full Exposure tutorial


Classic Smoky Eyes using Urban Decay Naked Basics

I’ve been wanting to do a classic black smoky makeup tutorial, but I ran out of my MAC Carbon eyeshadow. Then, I remembered I have Urban Decay Naked Basics, and I wanted to give the palette another try. I wasn’t sure how the black eyeshadow from this palette is going to work, since I do find black eyeshadow to be a bit harder to blend. Not to mention, the skin around my eyelid is quite dry, so lots of factor going on here.

I know this tutorial uses a lot of blending brush, which I have on my kit. If you only have 1 blending brush, just make sure you wipe the brush on a clean towel or tissue before trying to blending the eyeshadow.

Also, let me just mention how much I love the YSL glossy stain! I thought it was just a big hype, but now I see why people love it. I’ll do a review soon!

How-to:

1. Using a flat eyeshadow brush,I applied Crave from Urban Decay Naked Basics all over my eyelid, stopping just right on the crease.

2. Using a clean fluffy brush, I blended the crease.

3. Using another fluffy brush, I applied a mix of Faint and Naked 2 on the crease, and slightly above it.

4. Using another clean blending brush, I blended out the edge of the crease.

5. I applied black pencil eyeliner on my waterline and tightline.

6. Then, using an angled eyebrow brush, I applied UD Crave eyeshadow on the lower lid.

7. I created a winged eyeliner using an angled eyeliner brush and L’oreal Infallible Lacquer Liner 24H in Blackest Black.

8. I curled my lashes and applied L’oreal Butterfly mascara on both upper and lower lashes.

9. I filled my brows using Anastasia Brow powder in Brunette.

(optional: appplied false eyelashes)

10. I applied Venus from Urban Decay Naked Basics on the inner corner of my eyes.

Urban Decay Naked Basics

11. I applied MAC Pro Longwear foundation on my face.

12. I contoured my face slightly using MAC Blunt.

13. On my cheeks, I applied Benefit Hervana blush.

14. On lips, I applied YSL Glossy Stain in Pêche Cerra-Cola (27).

Classic Smoky Eyes

Sleek Makeup Showstoppers – Smoky Purple Tutorial

I’ve bought several Sleek Makeup iDivine palettes back when I was in Jakarta from Luxola website. I love the iDivine palettes, and have used some of the palettes regularly for my makeup job. Today, I want to showcase the Sleek Makeup Showstoppers palette since I haven’t do a tutorial using this palette yet.

I’ll try to do a review and swatches of the Sleek Makeup Showstoppers next time. I love the combination of sparkles, matte and shimmers in this palette. For today’s tutorial, I wanted to use some colors since I’ve been doing quite an earthy, brown, neutrals on my previous tutorials.

I’ve done a similar tutorial like this one using a more wearable color in my Pearlescent post. I love having the highlight in the center of the lid. It looks so gorgeous when you blink. You can obviously do this tutorial with any colors you like. I’ll try to do another tutorial using another color, something more wearable.

Anyways, let’s get to the tutorial!

Sleek Makeup iDivine ShowstopperHow-to:

1. I applied Sparkle from Sleek Makeup Showstoppers palette on the outer corner, and the inner corner of my eyelid using a flat eyeshadow brush. I also applied the eyeshadow on the crease as well. Leave the center of the lid empty.

2. Using a clean flat eyeshadow brush, I applied Bad Girl eyeshadow from Sleek Makeup Showstoppers on the center of my eyelid.

3. Using a fluffy blending brush, I picked Oh So Special from the Showstoppers palette and applied it to the crease. Do it very lightly at first, and add more color if needed.

4. Using the flat eyeshadow from step 2, I blended out Bad Girl eyeshadow. Do not add anymore eyeshadow at this time. Just use whatever is left on the brush.

5. Using a small angled eyebrow brush, I applied Sparkle on the lower lid.

6. I created a cat eyeliner on the upper lash line using Kanebo Kate Super Sharp eyeliner.

7. I lined my waterline and tightline using L’oreal Voluminous Smoldering eyeliner.

8. I filled in my eyebrows using Anastasia Duo Brow Powder, and an angled eyeliner brush.

9. I applied L’oreal Carbon black mascara on both upper and lower lashes, then I applied false eyelashes (haphazardly because I was rushing…sorry).

Sleek Makeup Showstopper

10. I applied MUFE HD Foundation in 118 all over my face.

11. I applied Blush Horizon de Chanel on my cheeks.

12. On the lips, I applied MAC Whirl lip liner and then Revlon Socialite lipstick on top.

Sleek Makeup iDivine Showstopper

Chanel Kaska Beige re-visited

Hello, everyone! It’s been a while since my last post. I do apologize for the lack of post. Things have been going really crazy in my personal life, and I can barely catch my breath. Anyways, let’s put those things aside, and get back to this whole blogging things back on track!

Today’s tutorial used one of my all-time favorite palette from Chanel, called Kaska Beige. I’ve actually used this palette before in my Chanel Kaska Beige tutorial. This tutorial has a little bit more of a smokier feel than the older post, however still wearable for party, wedding, prom, night-out, pageant etc.

I also added a white eyeliner on the tightline to make my eyes look bigger, and heavier lashes for a doll-eye look. I applied more blush on the cheeks, just to complete the whole “doll” look. I love to add extra pinch of blush esp. in the winter when the colors are grey, and my skin feels blaaaah.

Oh, I also used the new MAC Masterclass Brush Oval 6 on my face, and I’ve to say I love it! I’ll post a review later.

earthy plum makeup

How-to:

1.  My eyelid was prep using Urban Decay Primer Potion.

2. I applied eyeshadow 2 (refer to picture below) on my crease using a shader brush (MAC 239).

3. Using a clean blending brush (MAC 217) to blend the edge off.

4. Using a flat eyeshadow brush, I applied eyeshadow 4 on my eyelid.

5. I applied eyeshadow 3 on the outer V using a small angled shader brush.

6. Using a clean blending brush (MAC 217), I blended the outer V.

7. I applied eyeshadow 3 along the lower lash line using an angled eyebrow brush.

8. I created a winged liner using L’oreal Infallible Super Slim Liquid Eyeliner.

9. I applied Tarte Light, Camera and Lashes mascara, and also false eyelashes (sample from a friend) on the upper lashes.

10. I lined my tightline using a white eyeliner from Revlon PhotoReady Kajal Intense Eye Liner + Brightener in Carbon Cleopatra.

11. I filled my eyebrows using a mixture of Anastasia Brow Wiz in Medium Ash and Brunette.

12. I applied eyeshadow 1 under my brows and in the inner corner of my eyes.

chanel kaska beige

13. I applied MUFE HD Elixir to prime my face using MAC Masterclass Brush Oval 6.

14. Using the same brush, I applied MUFE HD foundation all over my face.

15. I applied MAC Pro Conceal/Correct in Medium under my eyes.

16. I set my foundation using MUFE Pro Finish powder.

17. I contoured my face slightly using MAC Shadowy and NARS Ita Kabuki brush.

18. I applied MAC Dainty blush along my cheeks using MAC 219 brush.

19. Then, I applied NARS Mata Hari right on the apples of my cheeks using MAC 219 brush.

20. I filled my lips using MAC Dervish lip liner, and then top it off using Revlon Colorstay Ultimate Suede lipstick in Socialite.

asian wedding makeup

Neutrally Blue

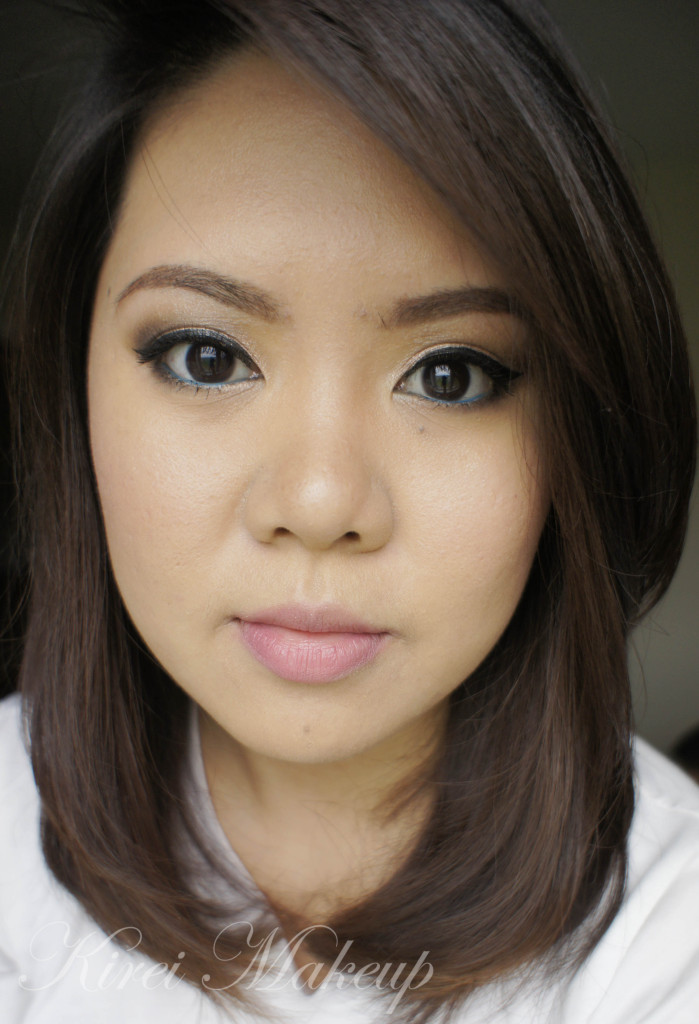
I LOVE Urban Decay Naked Basics Palette! There, I said it! At first I thought that the UD Naked Basics is just another hype. I mean, I like my UD Naked 1 and 2, but I didn’t love it. I thought that the Naked Basics would be another palette that’s just so-so. Boy, was I wrong or what?!

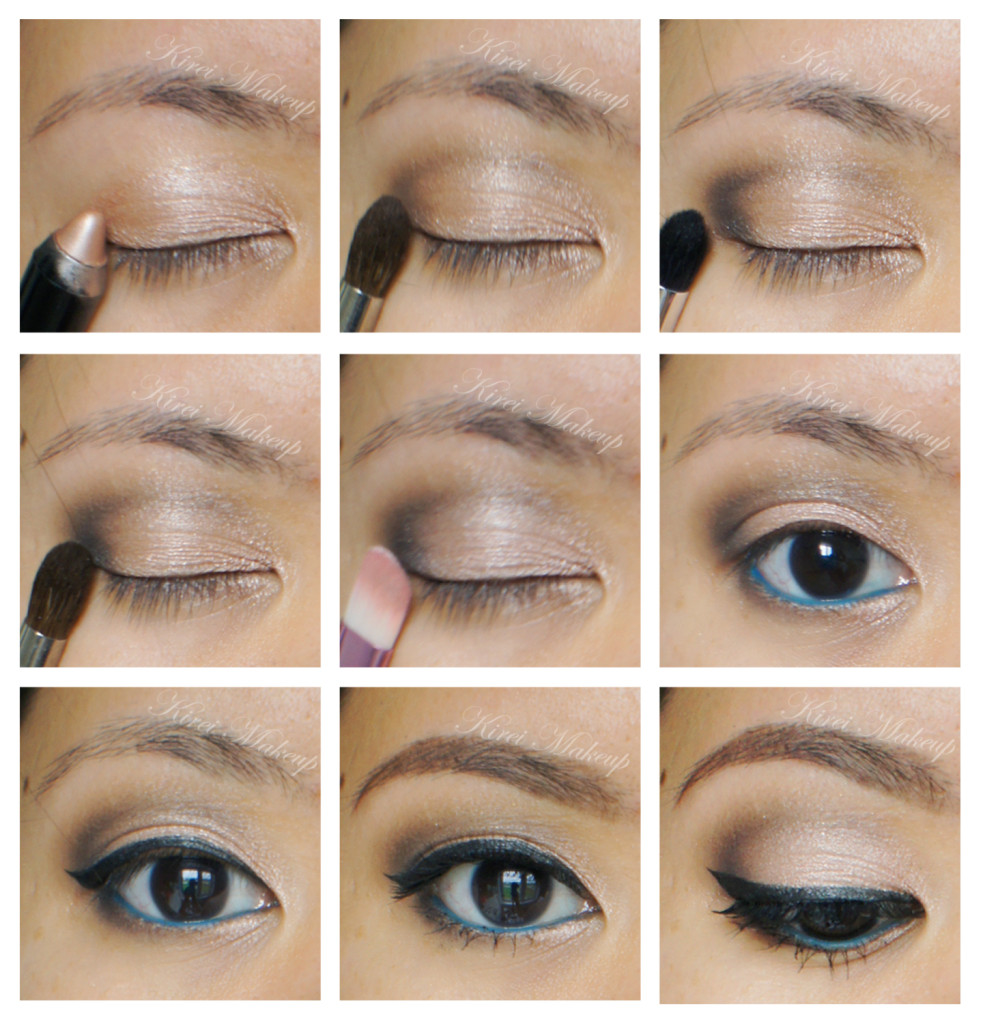
I’ll talk more about the palette itself on my review, but today I wanted to share this look with you. The overall look is very soft and feminine. This look can be worn during the day if you want some definition on your eyes, or for engagement pictures. Obviously you can skip the blue eyeliner on the tightline and change it to beige/white/black instead.

The reason why I chose to wear the Stila Cobalt Blue eyeliner on the waterline is to show you guys that you can add color into your makeup without having to wear it on your lid. This is a good way to incorporate color, especially if you are not used to it. Not to mention, the blue eyeliner makes the white part of your eyes look whiter, thus making you look more awake.

How-to:

1. I applied MUFE Aqua Shadow in 28E all over my lid.

2. Using a clean blending brush, I applied UD Naked Basics in Faint on the crease.

3. Using a Sephora Bullet Crease (no. 221) brush, I applied UD Naked Basics in Crave on the outer V.

4. Using the same brush as step 2, I blended the eyeshadow on the crease.

5. I applied UD Sin eyeshadow all over the lid, focusing the color on the center of the eyelid using a flat eyeshadow brush.

6. Using a small shader brush, I applied Faint on the inner half of the lower lid and then Crave on the outer half.

7. I lined my waterline using Stila Cobalt Blue eyeliner.

8. I created a winged liner along the upper lash line using Kanebo Kate Super Sharp Liner.

9. I curled my lashes and applied L’oreal Carbon Black mascara on both upper and lower lashes.

10. I also applied false eyelashes sample given to me by a friend (currently not for sale to public).

11. I filled my brows in using Anastasia Brow Wiz in Brunette.

12. Using a clean fluffy blending brush, I applied Venus from UD Naked Basics palette under the brow.

Stila Cobalt Blue eyeliner

13. I applied MUFE HD foundation using Shiseido foundation brush all over my face.

14. I applied MAC Shadowy powder as contour, and Benefit Hervana blush on my cheeks.

15. On the lips, I applied Tarte Lipsurgence in Hope.

Natural makeup using Urban Decay Naked Basics