Rose Smokey Eyes III with UD Naked 3

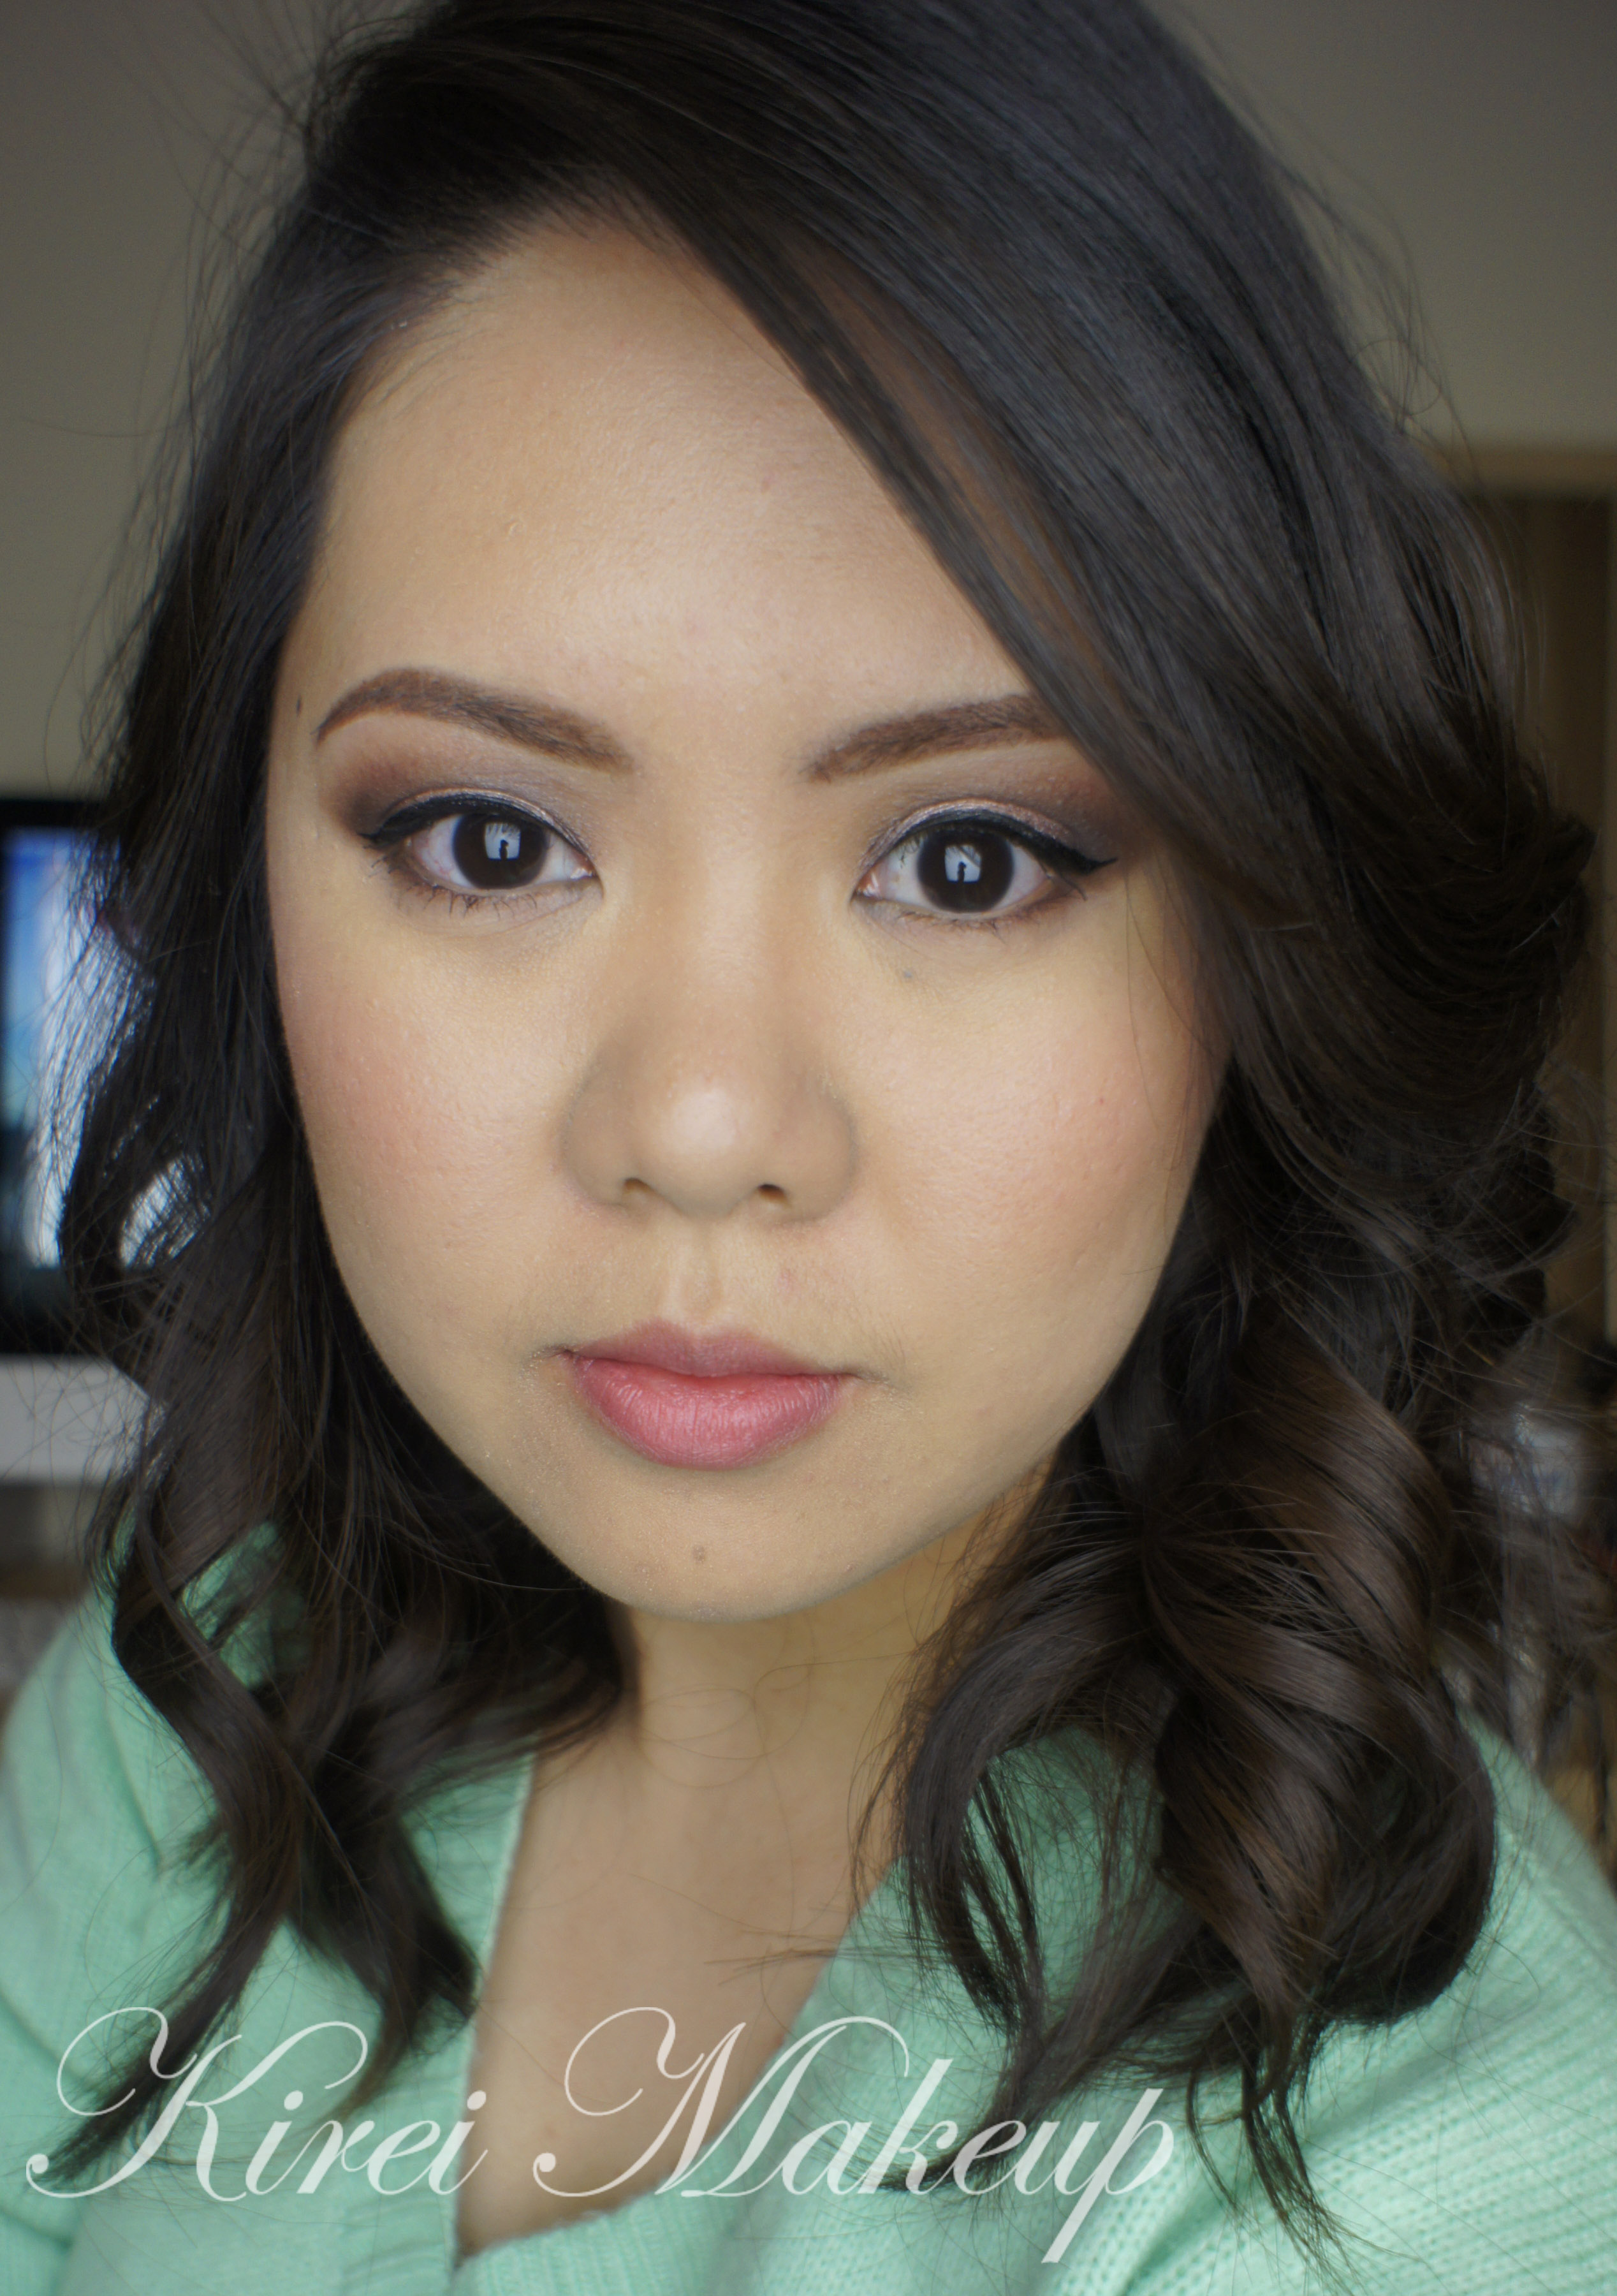
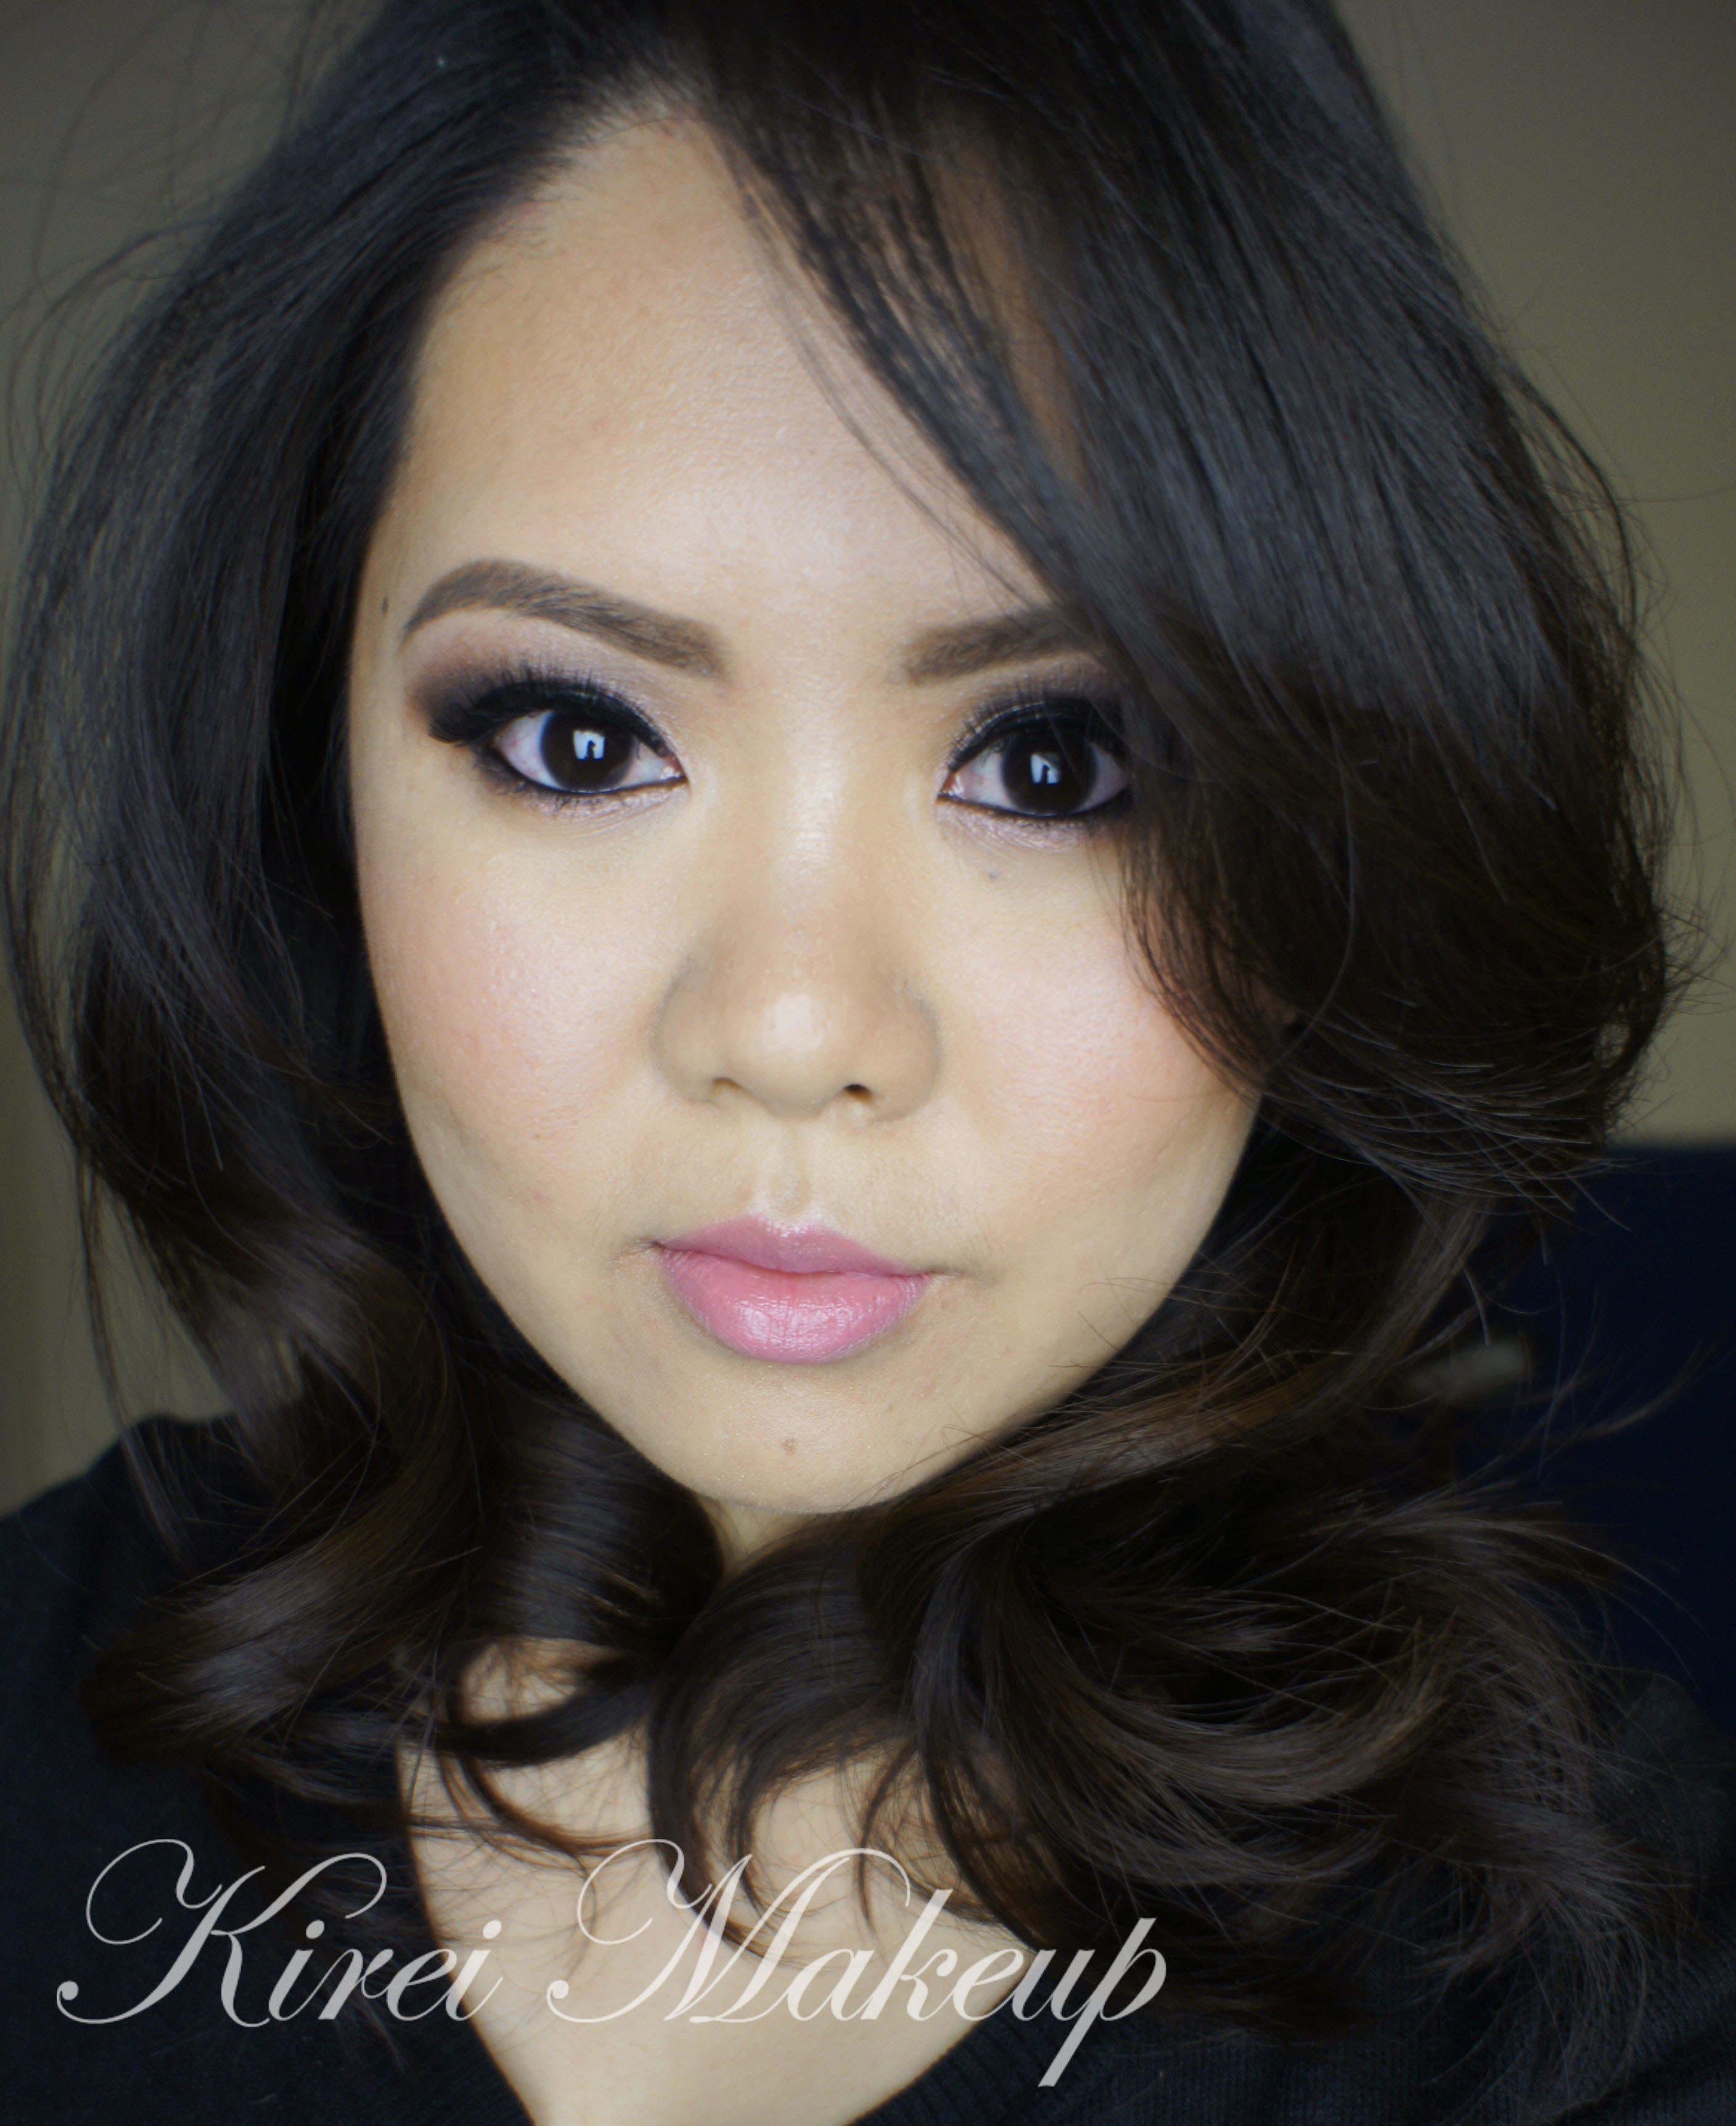
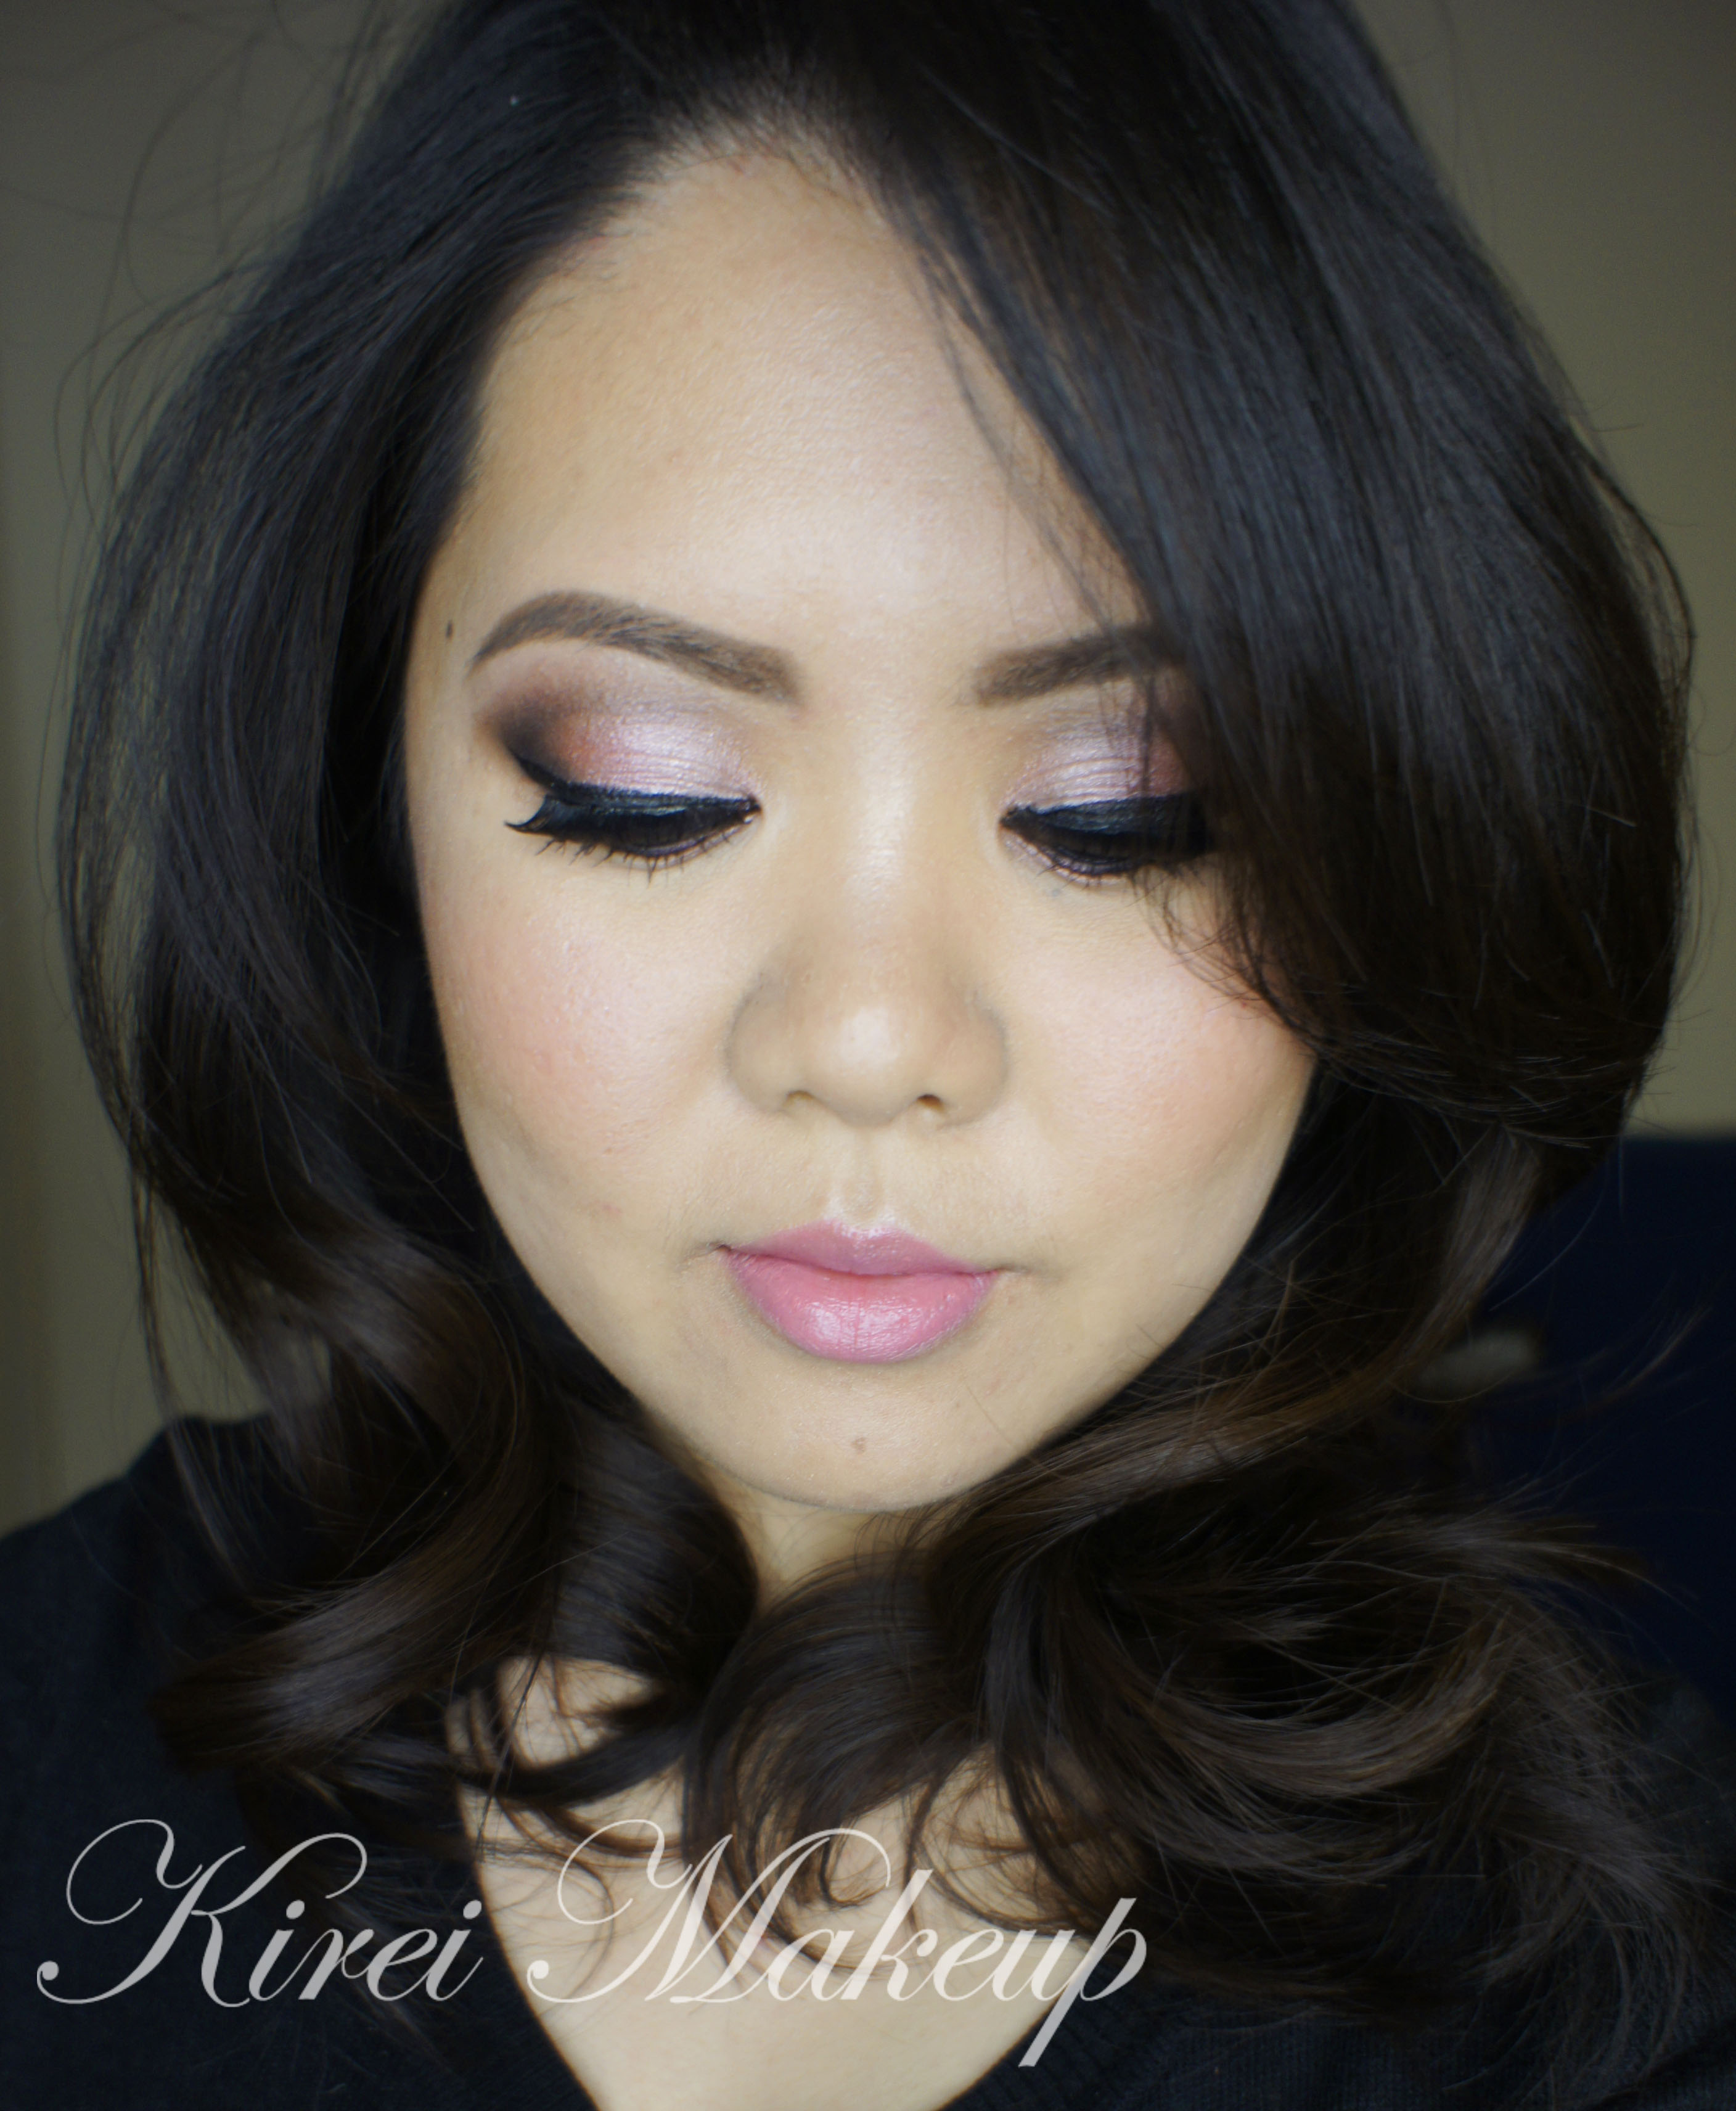
I think I’ve made my obsession with UD Naked 3 palette pretty clear – I’m in love with it! The colors are wonderful, the pigments are so easy to blend, the double-ended brush is pretty amazing. What’s not to love?! So, to show another appreciation for this palette, I’ve decided to do another the third Rose Smoky Eyes tutorial. This look is far more intense and darker than the first rose smokey eyes that I did. I also think this one is prettier than the 2nd smoky eyes that I did with Naked 3. If you prefer a more natural looking one, I do have a post for you in my Berry Lips post.

I’ve also added a Youtube Video tutorial using UD Naked 3 palette!

This look is perfect for those who’re not afraid to play with the darker color, and already feel comfortable with blending. You can make it even darker and more intense if you’d like by adding a matte black eyeshadow (i.e. MAC Carbon) on the outer V. I like doing it this way since I want to showcase the Rose eyeshadow.

I hope you enjoy this look! I know a lot of people on Pinterest enjoyed my first tutorial! I’m so grateful that it’s getting 700+ repins on Pinterest.

I know I’ve said I was going to do a review, I’ll try to do it soon. It’s just so cold in Canada right now, it caused me to go on hibernation mode..hahaha..In all seriousness, though, -40 deg. Celsius is not a joke!

rose smoky eyes

How-to:

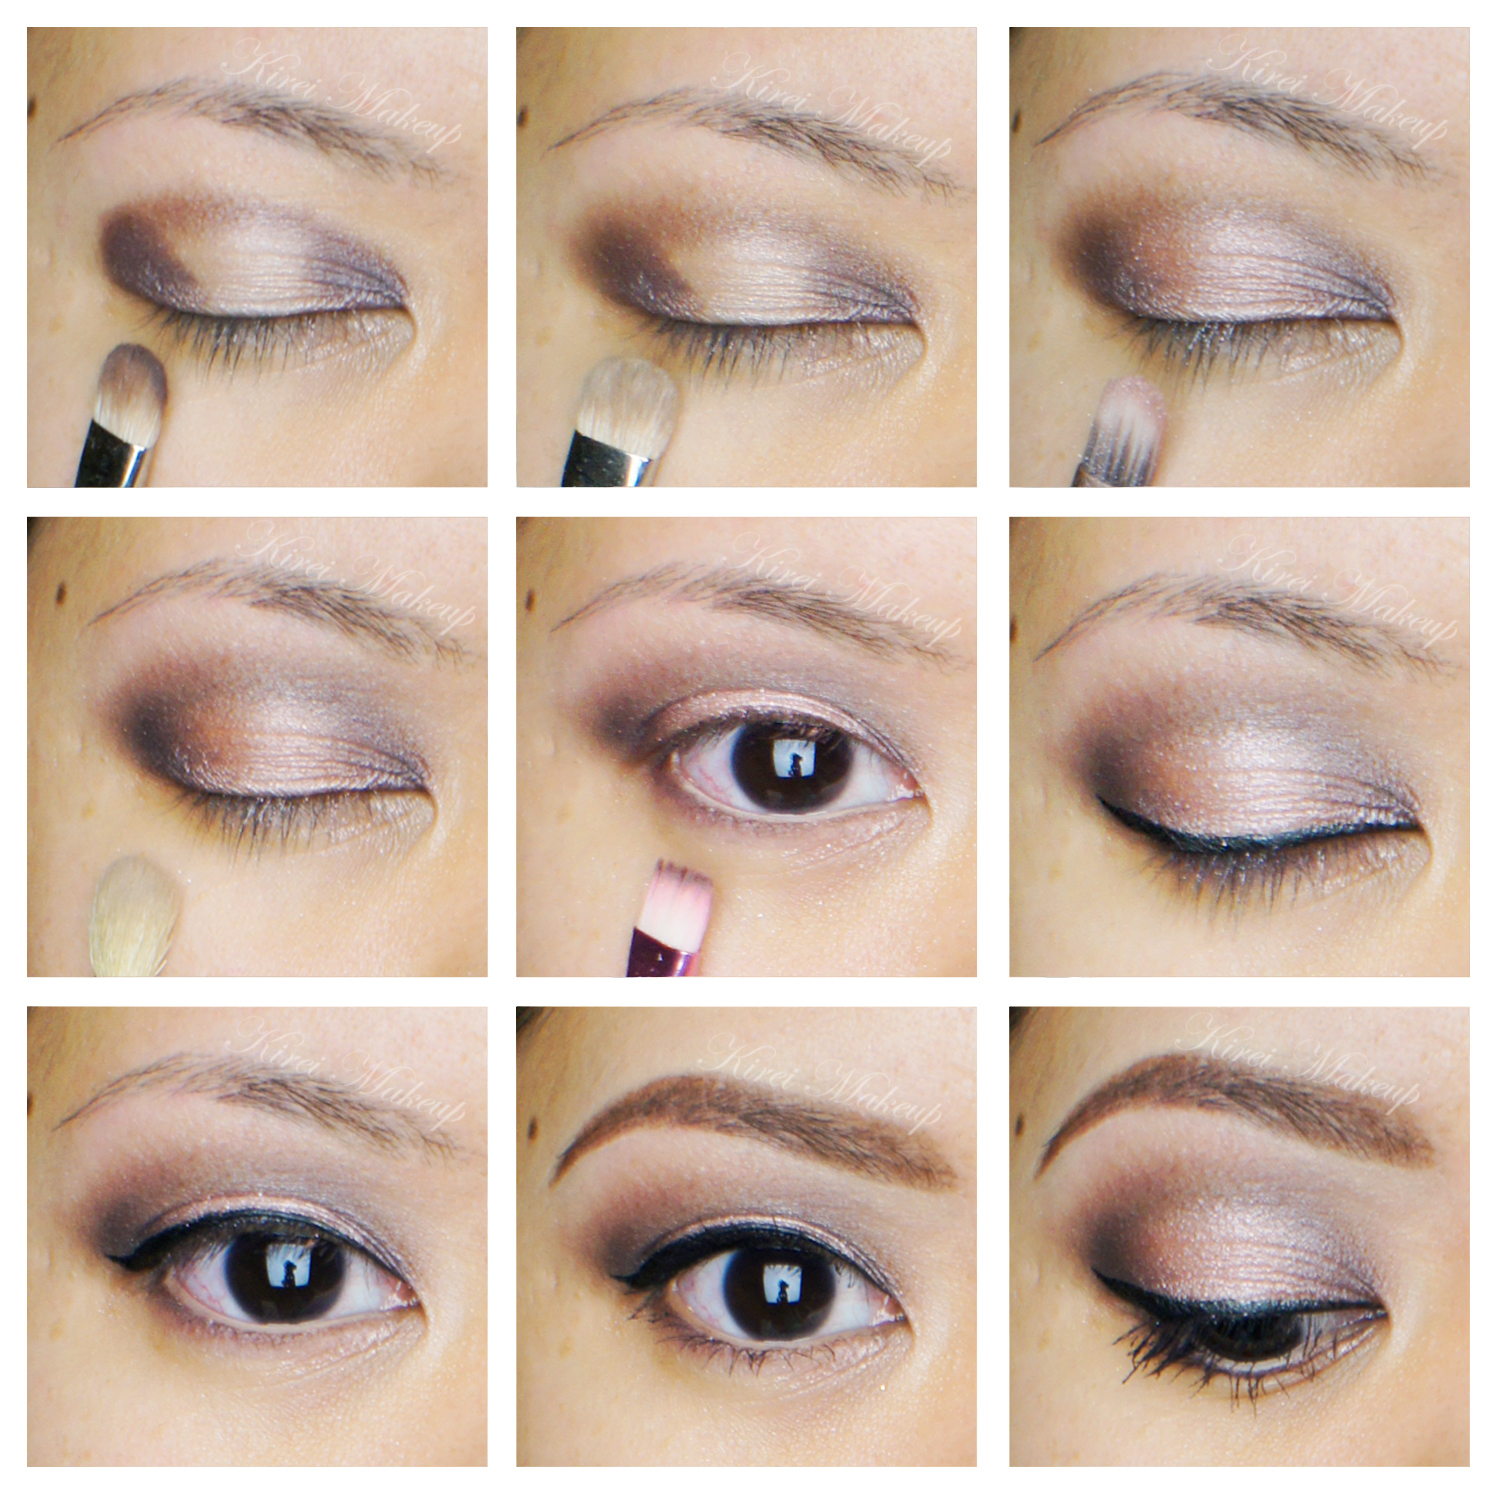
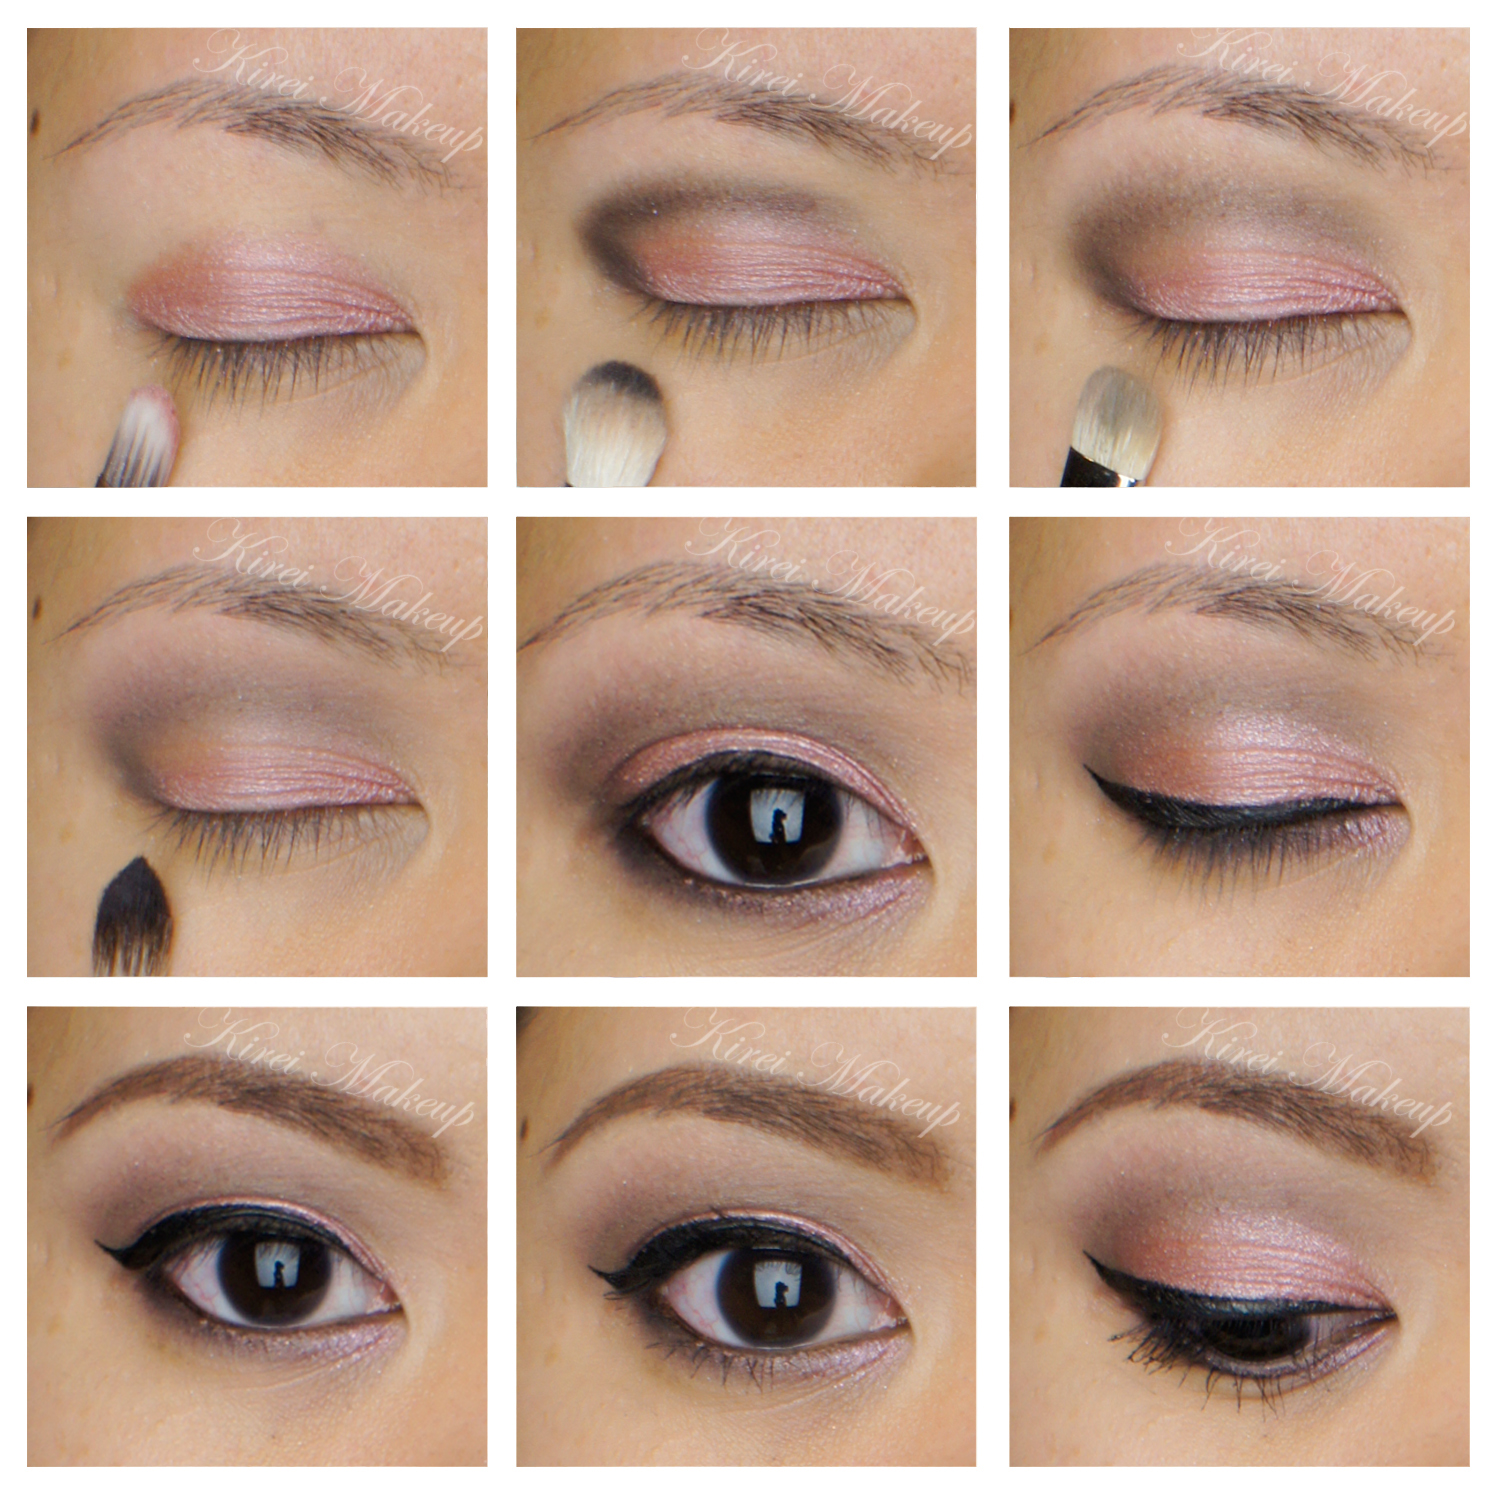
1. I prepped my eyelids using Urban Decay Primer Potion in Sin.

2. I applied Burnout on the inner third of my eyelid using the flat-end of the brush.

(I wiped away excess shadow on the brush on a clean towel before step 3)

3. Using the same brush, I applied Liar on the middle of the eyelid.

(I wiped away excess shadow on the brush on a clean towel before step 4 )

4. Again, using the same brush, I applied Mugshot on the outer third of my eyelid.

5. Using the blending-end of the brush, I blended the edge of the eyeshadow.

6. I applied Blackheart using a small crease brush on the outer V.

7. After wiping excess eyeshadow from the crease brush I used on step 6, I dragged Blackheart on to my crease, and blended it out.

urban decay naked 3

8. Using a fluffy brush, I applied Limit right at the edge where Blackheart meets with my skin. This helps to blend out Blackheart, and make a nice transition to my skin.

9. I lined my waterline and tightline using L’oreal Voluminous Smoldering eyeliner. On the lower lid, I applied Mugshot using an angled eyeliner brush, then Blackheart very close to the roots of the lower lashes.

10. Then, I created a winged eyeliner on the upper lash line using L’oreal Super Liner Ultra Sharp Tip.

11. I curled my lashes and applied Buxom Lash mascara on both top and bottom lashes.

12. For extra drama, I added false lashes for extra length and volume. These falsies were samples from my friend, which is currently in production.

13. I filled my brows using a mix of Anastasia Brow Wiz in Ash Blonde and Brunette.

rose smoky eyes

14. I applied Giorgio Armani Maestro foundation on my face, blending it using my fingers.

15. On my cheeks, I applied Revlon Cream Blush in Charmed Enchantment using a foundation brush.

16. Then, I applied MAC cream base in Pearl on top of my cheekbones, bridge of my nose, and cupid’s bow using my finger.

17. I applied MAC Please Me lipstick on my lips using a lip brush. Then, I added a little bit of L’occitane lip balm just to keep my lips moist since it’s so cold here in Canada!!!

18. My hair was set using a velcro rollers set and 1.5in Chi curling iron.

Urban Decay Naked 3 Look #2

I hope everyone is enjoying their holiday! 🙂 I’m sorry if I’m not too active on the social media platforms, such as Twitter, Instagram, Facebook and Pinterest these days since I’m enjoying some time off with my loved ones. Aaah, who am I to kid, I’m still very much active on Pinterest..hehehe..I’m addicted to Pinterest!

Anyways, today’s tutorial is another look using Urban Decay Naked 3 palette! I have to say I do love this palette a lot more than the other 2. May be it’s just my obsession with anything Rose Gold! Anyways, this tutorial is an evening look, that’s not too smoky, but at the same time not too light either. If you want to make it smokier, you can use Blackheart from the palette instead of Darkside.

I’ve done other tutorials using similar technique in Pearlescent and Smoky Purple posts. The other tutorial using the same Urban Decay Naked 3 palette is on the Rose Smoky post.

ud naked 3 smoky eyesHow-to:

1. I prepped my lids using UD Primer Potion in Sin.

2. Using a shader eyeshadow brush, I applied Darkside on the outer third of the lid, the inner third, as well as on the crease.

3. I blended the crease using a clean shader eyeshadow brush.

4. Using a flat eyeshadow brush, I applied Trick in the middle of the lid, and then added Dust on top of it.

5. I lightly applied Nooner above my crease, and run it along the lower lash line.

6. I created a very thin feline flick using Kanebo Kate Super Sharp Liner.

7. I lined my waterline using MAC Chromagraphic pencil eyeliner in NC30.

8. I filled my brows using Anastasia Brow Wiz in Brunette.

9. I curled my lashes, and applied Clinique High Impact mascara on both upper and lower lashes.

urban decay naked 3

10. I applied Giorgio Armani Maestro foundation on my face using my fingers.

11. I contoured my face using Smashbox Contour palette.

12. On my cheeks, I applied MAC Danity blush.

13. On the lips, I applied Revlon Socialite and then added a touch of clear lipbalm on top of it.

urban decay naked 3

Rose Smoky Eyes using Urban Decay Naked 3

Happy Holiday, everyone! Merry Christmas for those who are celebrating, and I hope everyone is having a blast! I know it might be a day too early for my North American readers, but it’s already the 25th in Indonesia.

Anyways, I wanted to post this tutorial up just because I recently gotten my hands on the Urban Decay Naked 3 (you’d know if you follow me on Instagram!!! ;). I actually didn’t want to get one, but I decided to since the shades are gorgeous!

I didn’t want to do a super dark smoky eyes, as I prefer a much softer side for this look. This rose smoky eyes look is very wearable, and so easy to do! I love how the pink eyeshadow has a gold undertone, so you won’t look sickly.

If you want to check out a more intense smoky eyes, check my post Rose Smoky eyes III, and if you prefer a more subtle, low-key look please check my Berry Lips post!

rose smoky eyes

How-to:

1. I applied Buzz all over the lid using a flat eyeshadow brush.

2. Using a fluffy blending brush, I applied Blackheart on the outer V and crease.

3. Using a clean shader brush, I blended the edge of my crease.

4. I applied Limit using a clean blending brush just above the crease as a transition color.

5. I lined my waterline and tightline using UD 24/7 Glide-on pencil eyeliner in Perversion.

7. Using an angled eyeliner brush, I applied Blackheart on the outer half of the lower lid, and Buzz on the inner half.

8. I created a winged liner using L’oreal Super Liner Ultra Sharp Tip.

9. I filled my brows using Anastasia Brow Wiz in Brunette.

10. I curled my lashes and applied Buxom Lash mascara on both top and lower lashes.

rose smoky eyes

11. For my face, I applied Giorgio Armani Maestro foundation using Sigma Angled Kabuki Brush.

12. I contoured my face using Smashbox Contour/Highlight trio palette.

13. On the cheeks, I applied Chanel Brush de Horizon.

14. I applied MAC Please Me lipstick on my lips.