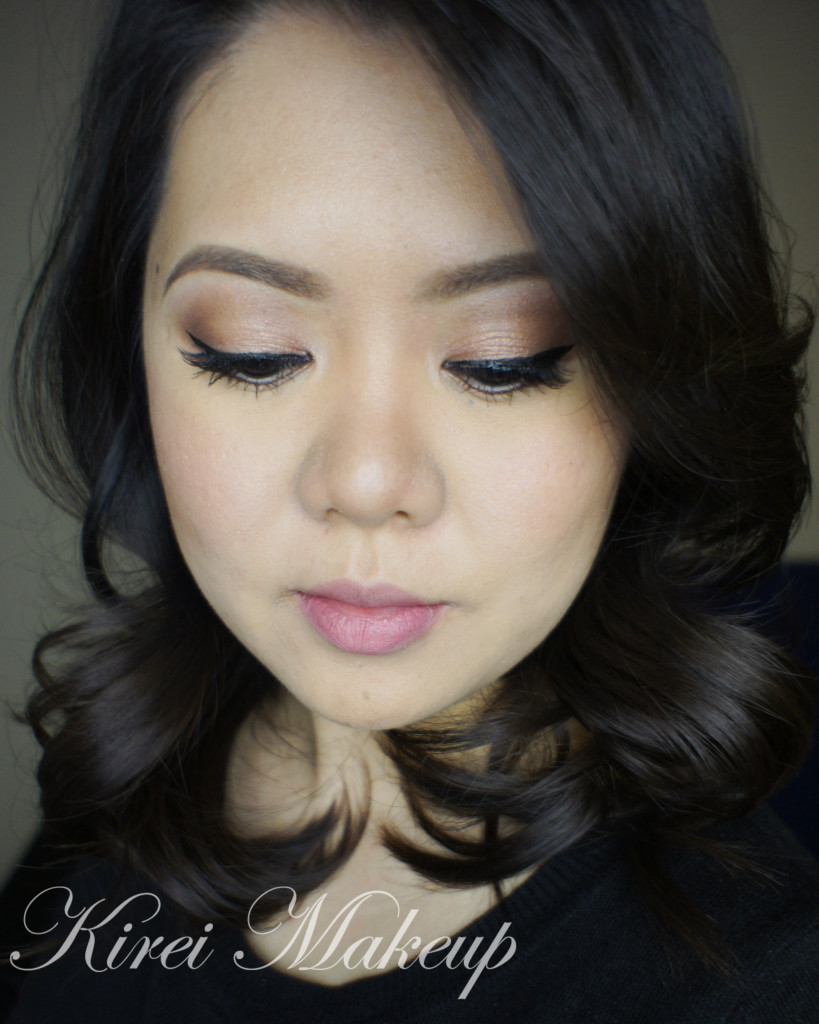
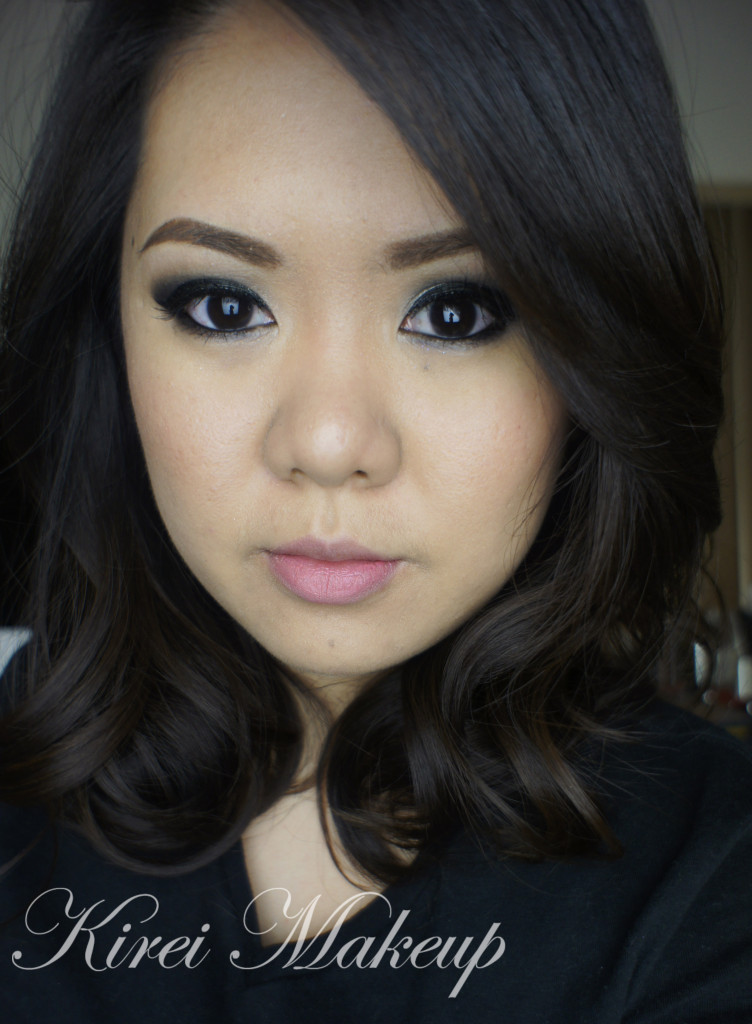
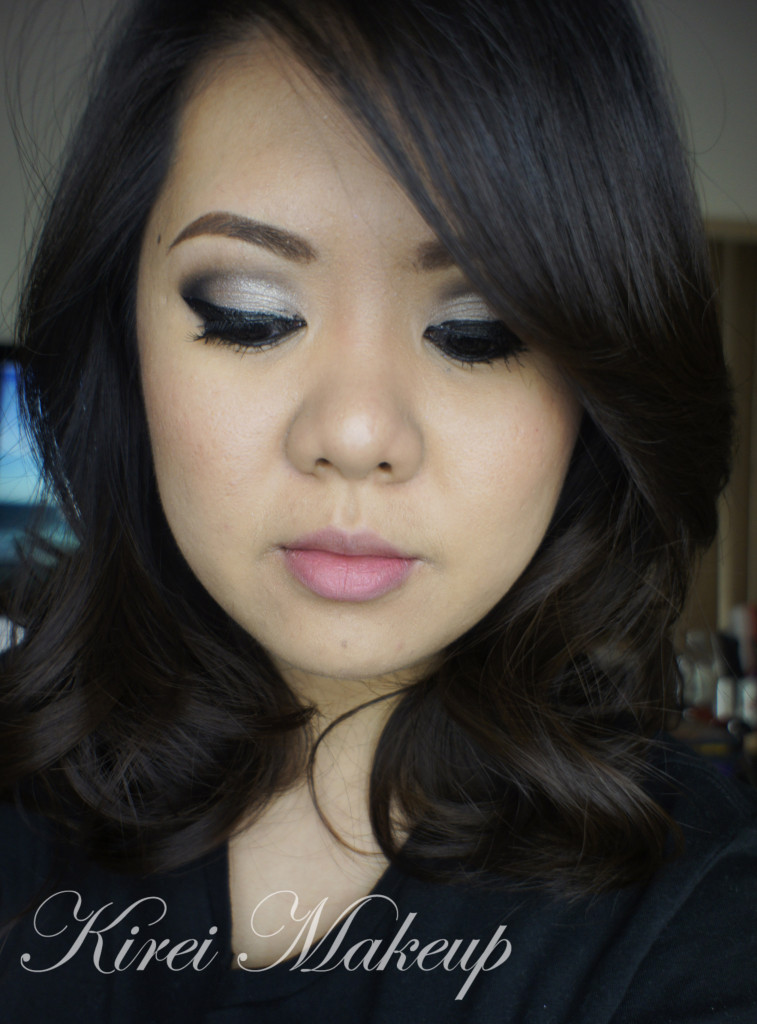
Kat Von D Esperanza Tutorial #1

If you guys follow me on Instagram (you should, btw!), you would know that I’ve posted a little sneak peek on today’s tutorial there. Today, I wanted to do my first Kat Von D Esperanza tutorial, using the mint eyeshadow as the main focus. If you are wondering why the pictures on the step-by-step is a bit off in terms of the color, it’s because the Sun was playing hide and seek with me today. Luckily, the sky cleared up, and I managed to get good shots for the final looks!

I’ll try to post a review for this palette some time this week. I prepped my eyelids using UD Primer Potion, which I think didn’t work too well for this look. May be for future tutorial, I might use a white-colored base (i.e. NYX Jumbo Pencil in Milk) OR a mint-colored base for the lid. I feel that the mint eyeshadow that I used doesn’t have much color on it, and look slightly chalky.

All eyeshadows mention are from Kat Von D Esperanza palette. If you want to find out the product I used and skip the how-to, scroll all the way down.

How-to:

1. After prepping my lid using UD Primer Potion, I applied Archangel using a flat eyeshadow brush.

2. Using Sigma E25 Blending Brush, I applied Placebo slightly above the crease.

3. Using the tip of a flat eyeshadow brush (like the Sigma E54 Medium Shader brush), I applied Santeria on the crease and outer V.

4. Using the same Sigma E25 blending brush that I used on step 2, I blended out Santeria.

5. Using a fluffy blending brush (like the Sigma E38 Diffused Crease brush), I applied South under the brow. I also buffed South slightly on to my crease.

6. Using a small shader brush, I applied Archangel on the inner corner of the lower lid, and Selena on the outer corner.

7. (not in picture), I applied Danglo on top of Archangel using a flat eyeshadow brush.

8. I created a winged eyeliner using Kanebo Kate Super Sharp eyeliner, and lined my waterline using L’oreal Voluminous Smoldering eyeliner.

9. I curled my lashes and applied Cover Girl Lash Blast Mascara.

10. I filled my brows using Anastasia Brow Wiz in Ash Blonde, and then I set it using Faint eyeshadow from the Naked Basic palette.

Kat Von D Esperanza makeup tutorial

11. On my face, I applied UD Naked Skin foundation using a damped makeup sponge.

12. I set my face using NARS Setting Powder.

13. I lightly contoured my face and nose using MAC Blunt.

14. On my cheeks, I applied Chanel Blush de Horizon.

15. Lastly, on my lips, I applied L’oreal Color Riche lipliner in Beyond Pink, top it off with Revlon Socialite suede lipstick and a little tiny bit of clear lip balm from L’occitane.Kat Von D Esperanza eye makeup
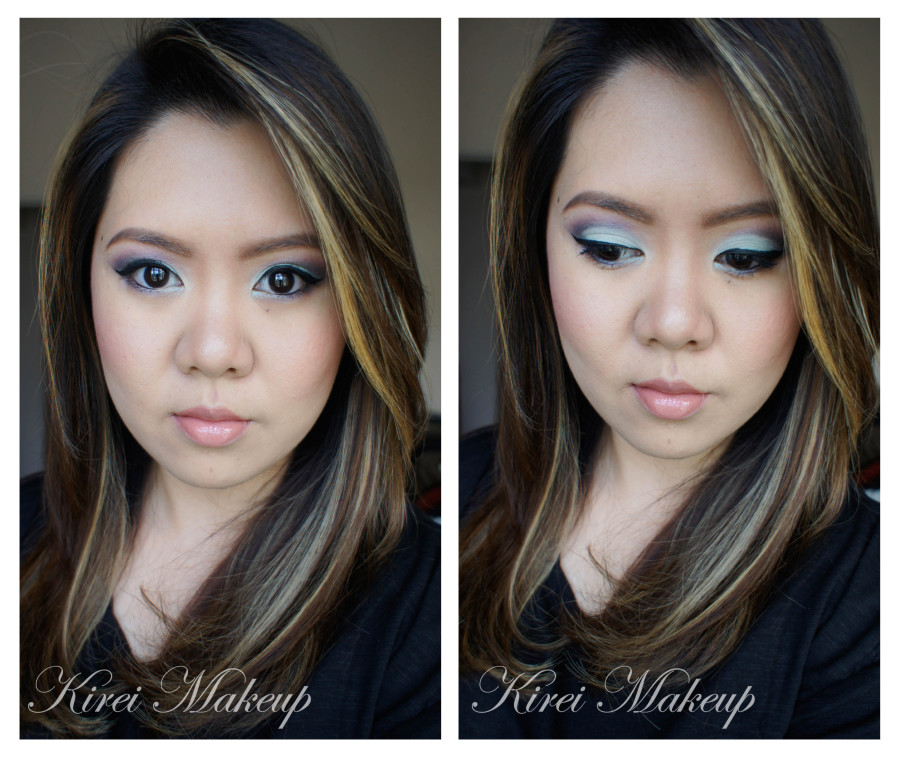
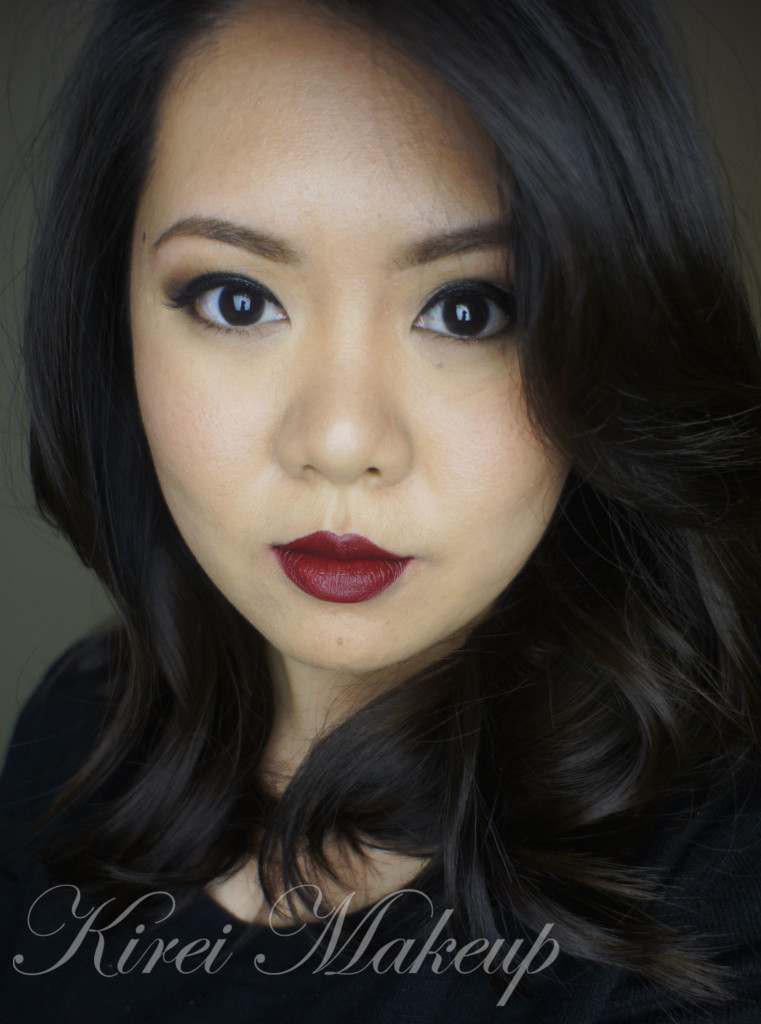
I took the pictures above in a room with big windows and natural day light. For the pictures below, I actually stepped out of the house and took the pictures outdoor with the Sun somewhat behind me. As you can see, in both pictures, my makeup is not heavy at all, esp. for the face. The focus is still on the eyes, while the skin is left pretty natural looking.

If you are curious about my hair, please check my post on Highlights for Brunette.

Kat Von D Esperanza tutorial

Products used:

Eyes – Kat Von D Esperanza palette; Kanebo Kate Super Sharp eyeliner; L’oreal Voluminous Smoldering eyeliner; Cover Girl Lash Blast Mascara; Anastasia Brow Wiz in Ash Blonde; Faint eyeshadow (Naked Basic palette).

FaceUD Naked Skin foundation; NARS Setting Powder; MAC Blunt; Chanel Blush de Horizon.

Lips – L’oreal Color Riche lipliner in Beyond Pink; Revlon Socialite suede lipstick; clear lip balm from L’occitane.

Recommended Sigma brushes – Sigma E25 Blending Brush; E54 Medium Shader brush; Sigma E38 Diffused Crease brush.

Disclaimer: clicking on the Sigma link will take you to my Sigma affiliate page. Any purchase you make on Sigma from my website will help in this blog’s maintenance. Rest assured, I only recommend products that I honestly love and use on myself. Thank you for your support!

Eyeliner Brushes!

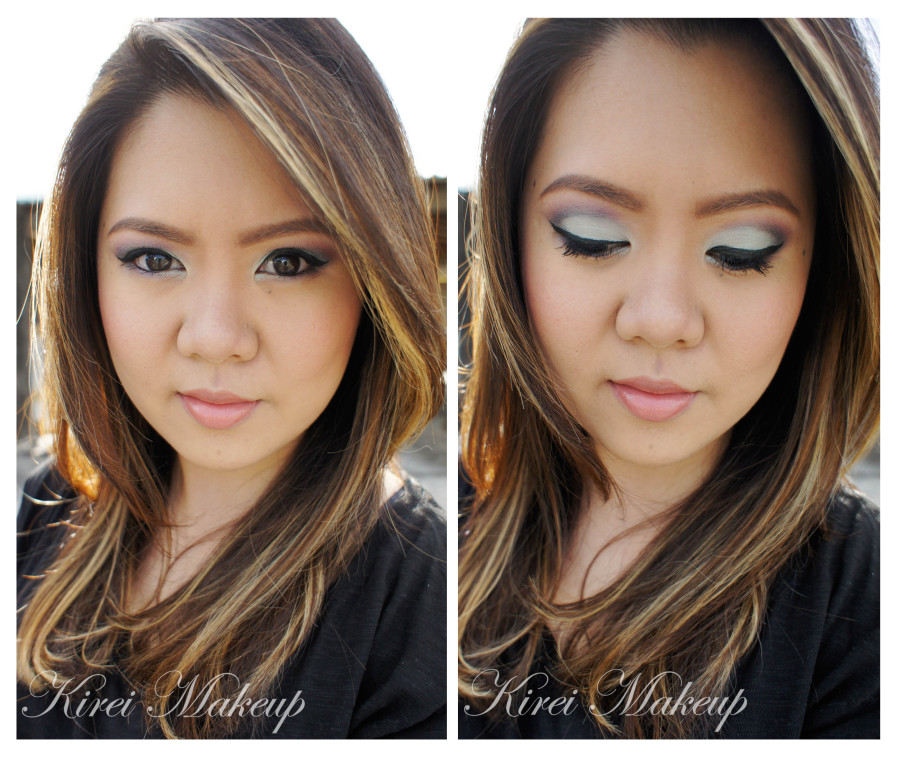
Alright! Let’s talk brushes! I’d like to share an infographic by Sigma Beauty regarding eyeliner brushes and the effects it creates. See, the thing with makeup is you can achieve whatever effect you like depending on the tools and products you are using.

I don’t believe that there’s a specific rule on which brush to use for makeup, but the infographic below would be a useful guide, especially if you just beginning to learn about makeup.

Personally, my all-time favorite is the E75 Angled Brow brush for any type of eyeliner products (gel, liquid, pencil, powder). I have more control, and it can creates a sharper line. Not to mention, if you have shaky hand, or can’t seem to get the line straight, this E75 brush is perfect for you. I started out using this brush too when I first learn about makeup! I think the fact that this brush has an angled edge helps with the contour of your eyes. I just love this brush for eyeliner and eyebrow application!

Oh, just an extra thing, but E15 Flat Definer Brush is actually what I love to use to define my eyebrows! Check my post on How to Fill in Eyebrows to see what I’m talking about.

*Don’t forget to use the code MAR2014 during check-out for 10% off*

Below is an idea on how to achieve the looks that you might be looking for!How to apply eyeliner

Winged

Precise

Soft

Smudge

*Don’t forget to use the code MAR2014 during check-out for 10% off*

Disclaimer: Please note that links above will land you to my affiliate page. However, I strive to recommend only the best products for you, and ones that I love myself, so you know you are in good hands. Your support in purchasing through these links will go towards the maintenance of this website, and to keep the blog updated and running. Thank you for your support!
UPDATE 2020:  As of 2020, I’ve removed all affiliate links related to Sigma Beauty. This post is no longer affiliated.

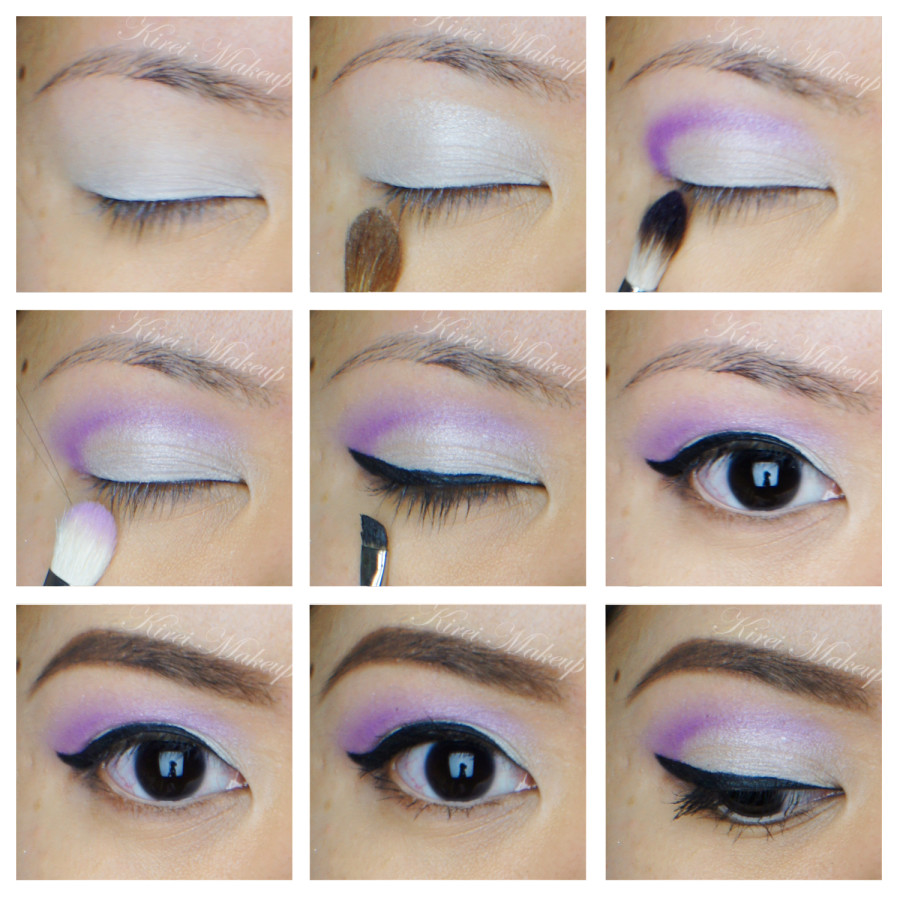
Wearable Purple Eye Makeup

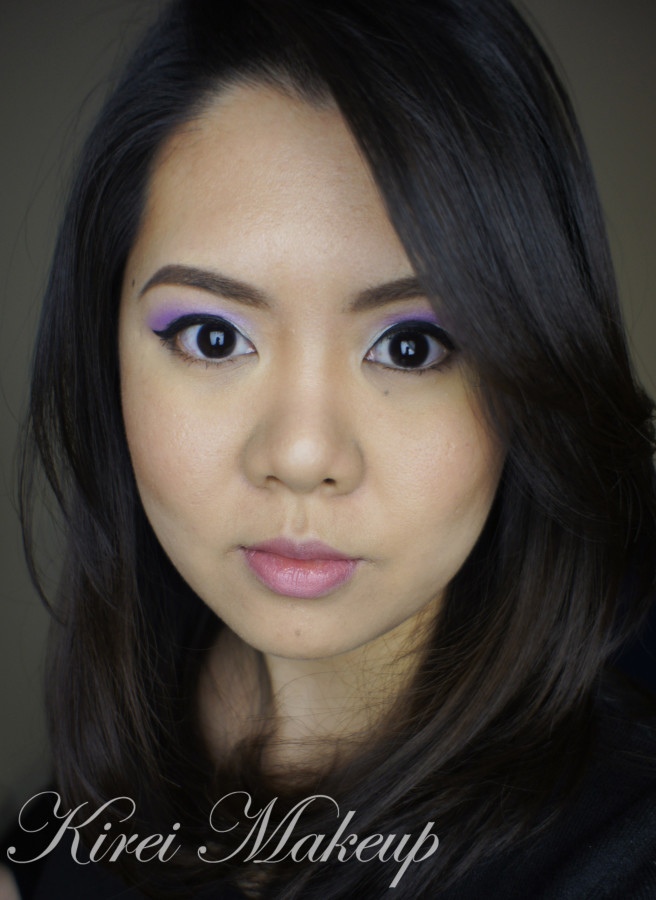
How is everyone this week? It’s been really cold here in Canada! If you are anywhere in the colder region, keep yourself warm, yes?! Anyways, due to the cold gloomy weather, I wanted to create a look in which I incorporated a little bit of colour. I’ve decided to do a wearable purple eye makeup. It’s super simple and easy, you can use any colour of your liking on the crease. I chose purple just because I think it’ll look great on every eye colours.

The trick to this light colored eye makeup is to use a black mascara and eyeliner to tie the whole look together. Black mascara and eyeliner are a must with this look since the eyeshadows used in this tutorial is quite light, and I didn’t use any contour colour on the crease.

Wearable purple makeup

How-to:

1. I applied NYX jumbo eyeshadow pencil in Milk all over my eyelid using my finger.

2. Using a fluffy blending brush (or you can use a flat eyeshadow brush), I applied Bad Girl from Sleek Makeup Showstoppers palette all over the lid.

3. Using a clean fluffy crease brush, I applied MUFE purple eyeshadow no. 92 on the crease.

4. I blended the purple eyeshadow slightly using a clean blending brush, blending the eyeshadow upwards above the crease.

5. I created a winged eyeliner using an angled eyeliner brush and L’oreal Infallible Gel Lacquer Liner in Blackkest Black.

6. Using a clean angled eyeliner brush, I applied UD Faint eyeshadow along the lower lash line.

7. I also lined my waterline using MAC Chromagraphic pencil eyeliner in NC15.

8. I filled my brows using Anastasia Duo Brow Powder in Brunette.

9. I curled my lashes, and applied Clinique High Impact Mascara on both upper and lower lashes.

Feel free to add false eyelashes to make your eyes look more wide awake. I ran out of falsies, so I didn’t apply any.

Jlo american idol sf audition makeup

10. On my face, I applied Smashbox Halo foundation all over using Sigma Flat Kabuki brush.

11. I applied MAC Pro Conceal/Correct palette in yellow corrector under my eyes, and on the bridge of my nose.

12. I lightly contour my face using MAC Skinfinish natural in Medium Deep.

13. I applied MAC Dainty blush on my cheeks.

14. On my lips, I applied Revlon Colorstay Ultimate Suede lipstick in Socialite, and added a few dabs of YSL Glossy Stain in Peche Cerra-Colla (27).

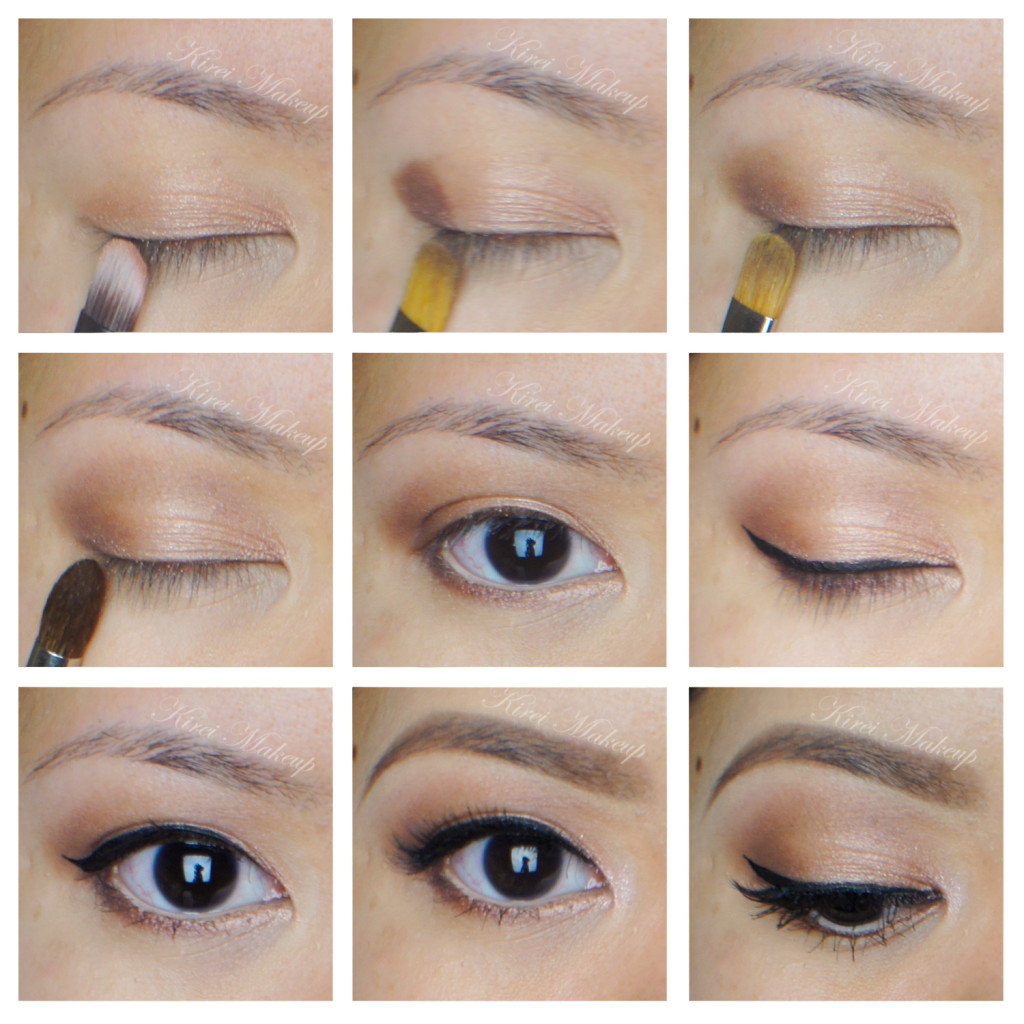
Soft Romantic Makeup using UD Naked 3

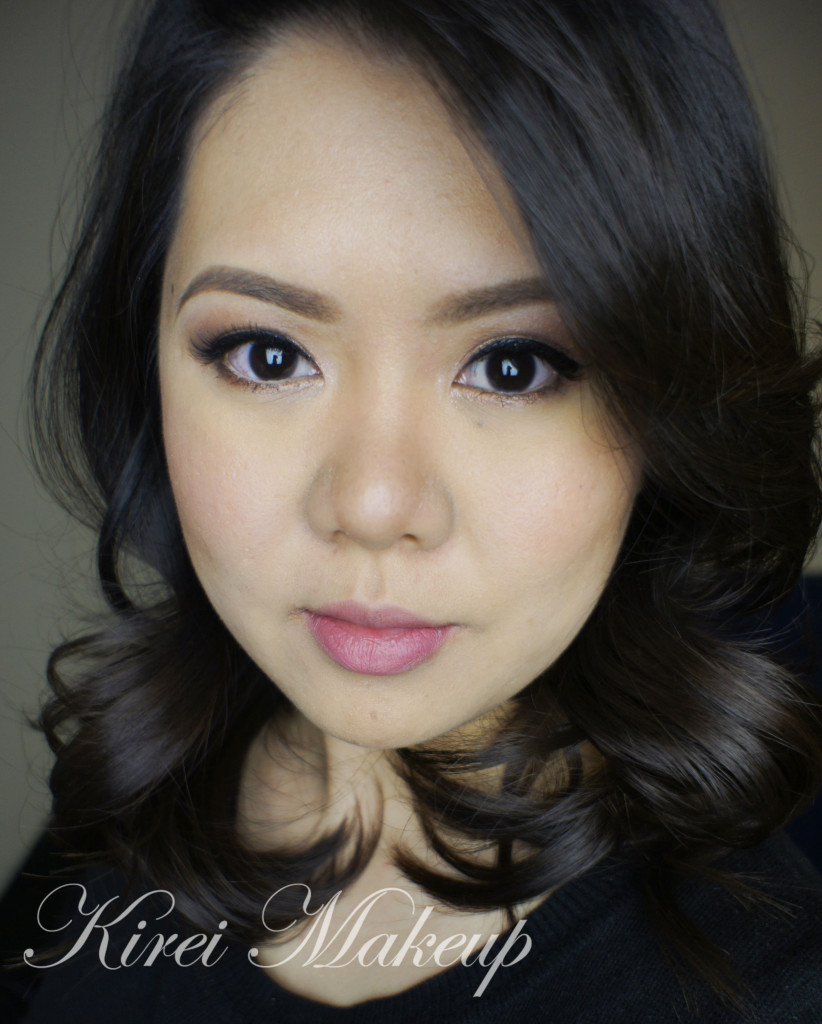
I’m sure you guys are getting tired of my UD Naked 3 obsession, but I have to share this look with you just to show how versatile this palette is. Today tutorial, I’m using UD Naked 3 to create a soft romantic makeup which can be used for daily makeup, date makeup, and even bridal makeup.

This look is very pretty and natural looking. The eyes are made to look brighter and bigger looking, while the rest of the face is kept fresh and slightly flushed. I also skip the glossy lips, and opt for a natural looking lip color. Everything about this makeup is about keeping everything to the minimal.

I’ve done something similar to this look in my Chanel Kaska Beige re-visited post. If you prefer a stronger, more intense eye look, please do check my other tutorials using the UD Naked 3 palette

I’ve also added a Youtube Video tutorial using UD Naked 3 palette!

urban decay naked 3

My eyes are prepped using UD Primer Potion, and my face is prepped using Smashbox foundation primer.

How-to:

1. I applied Trick all over my eyelid using a flat eyeshadow brush.

2. Using another clean flat eyeshadow brush, I patted Factory on the outer third of my eyes.

3. I removed excess from the flat eyeshadow brush I used on step 2, and blended Factory towards the center part of the eyes.

4. Using a clean blending brush, I applied Nooner on the crease.

5.  I applied Factory along the lower lash line using an angled eyeliner brush.

6. I also applied Dust on the inner corner of the lower lash line using an angled eyeliner brush.

7. I lined my waterline using MAC Chromagraphic pencil eyeliner in NC 15.

8. On my upper lash line, I created a winged eyeliner using Kanebo Kate Super Sharp eyeliner.

9. I curled my lashes and applied Maybelline Great Lash mascara on both upper and lower lashes.

10. I added false eyelashes on the upper lashes to make my eyes appear open and larger.

11. I filled my brows using Anastasia Brow Wiz in a mix of Ash Blonde and Brunette.

ud naked 3

12. On my face, I applied Giorgio Armani Maestro foundation and blended it using my fingers.

13. I lightly contoured my face using MAC Shadowy powder.

14. On my cheeks, I applied MAC Well Dressed blush.

15. I added Smashbox Halo wand highlighter in Gold as highlighter.

16. On my lips, I applied Revlon Colorstay Ultimate Suede Lipstick in Socialite.

bridal romantic makeup

Neutral Eyes & MAC Diva Lipstick

I was asked to do a “Bella Twilight” inspired tutorial. I don’t watch Twilight since I don’t like it, so I had to google up some images of Bella. Her makeup is mostly very natural, with very little blush. I decided to use Bella’s eye makeup as an inspiration for the eyes.

However, I changed the lips since I like more colors on my face. I added extra eyeliner as well just to define my eyes, but you can skip the step altogether. I don’t think the overall look is too inspired by Bella, but the eyes are quite close to how she has it on the Breaking Dawn poster.

Anyhow, I’ve decided to go with MAC Diva lipstick for the lips since I like this lipstick, and I want to wear it more for tutorials. I absolutely love MAC Diva! It’s not too dark, not too light, and it’s perfect for winter. I have done another post using MAC Diva lipstick but with a glitter cat eyeliner in “Holiday Makeup using MAC Diva”. If you’re not used in creating cat eyeliner, this is a good alternative.

I added the liquid liner after I applied my falsies since I didn’t decide to apply the liner after I completed the whole look. You can skip the liquid liner altogether if you want.

smashbox filter trio eyeshadow

How-to:

1. I applied MAC Omega eyeshadow all over my eyelid using a flat eyeshadow brush.

2. Using Smashbox bullet brush, I applied Sable from Smashbox Filter photo-op trio.

3. I applied Sumatra from Smashbox Filter photo-op trio on the outer V using a crease brush.

4. I blended Sumatra out to remove any harsh lines.

5. Using an angled eyeliner brush, I applied UD Blackout eyeshadow along my upper and lower lash lines.

6. I curled my lashes and applied Maybelline Great Lash mascara on both upper and lower lashes.

7. I filled my brows using a mixture of MAC Omega and MAC Brun.

8. I applied falsies, and then lined it using Kanebo Kate Super Sharp Liner.

9. I applied Vanilla from Smashbox Filter photo-op trio under the brows.

natural look using mac diva

10. On my face, I applied Smashbox Halo foundation using a Sigma Flat Kabuki Brush.

11. On my cheeks, I applied Maybelline Face Studio Master Glaze in Make a Mauve, blending out using my finger.

12. I contoured my face using MAC Shadowy powder and NARS Ita kabuki brush.

13. I also applied Smashbox Halo Highlighting Wand in Gold as highlighter.

14. On my lips, I lined it using L’oreal Colour Riche in Truly Burgundy and then applied MAC Diva lipstick on top.

If you want to know how to apply lipstick to make it last, please check my How-to apply red lips post.

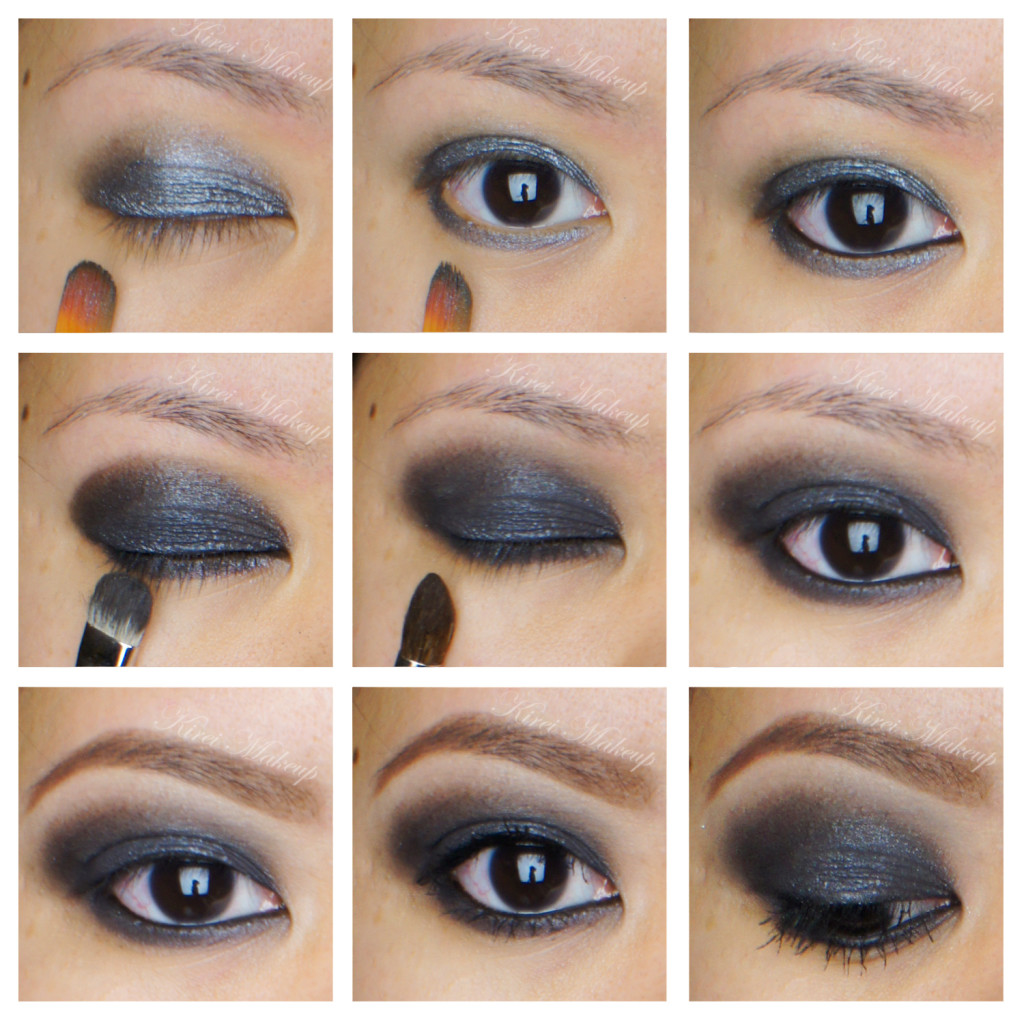
Black Smokey Eye Tutorial

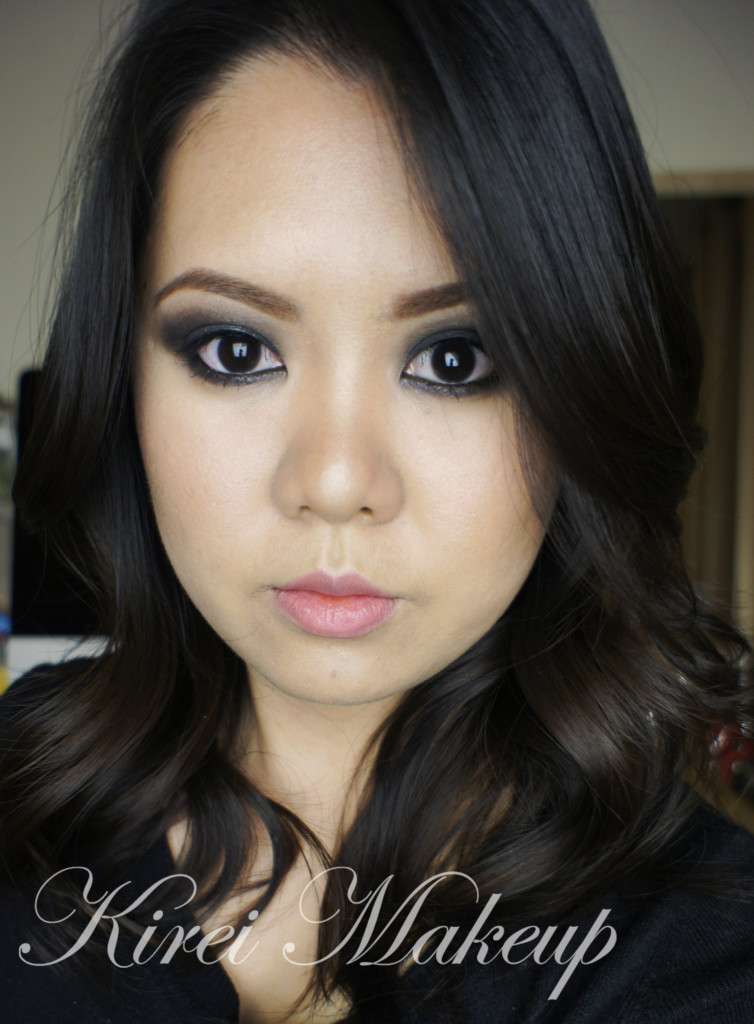
Today black smokey eye tutorial is a requested look by  Nurina, who asked for a Taylor Momsen look. I decided to do Taylor’s signature look – the black smokey eyes. Anyways, I’ve done something similar to this look in my Classic Smoky Eyes using UD Naked post.

Since this tutorial is a bit more intense, I brought the black eyeshadow up above the crease. Taylor Momsen signature smoky eyes look is very messy, very dark and sometimes she paired it with red lips. You can pair it with red lips, or dark red lips to make it more goth-like.  However, I prefer to go with a peachy lips instead, keeping the focus just on the eyes.

Keep in mind this is an inspired look, so I’ve modify it to suit my face as well as my style. Taylor Momsen’s smoky eye sits too low on the lower lid to my liking. Be warn if the black eyeshadow is very low on the lid, it might make you look older, or it can make you look like you have panda eyes! As cute as pandas are, I’m sure you don’t want to look like you have panda eyes, right?!

black smoky eyes

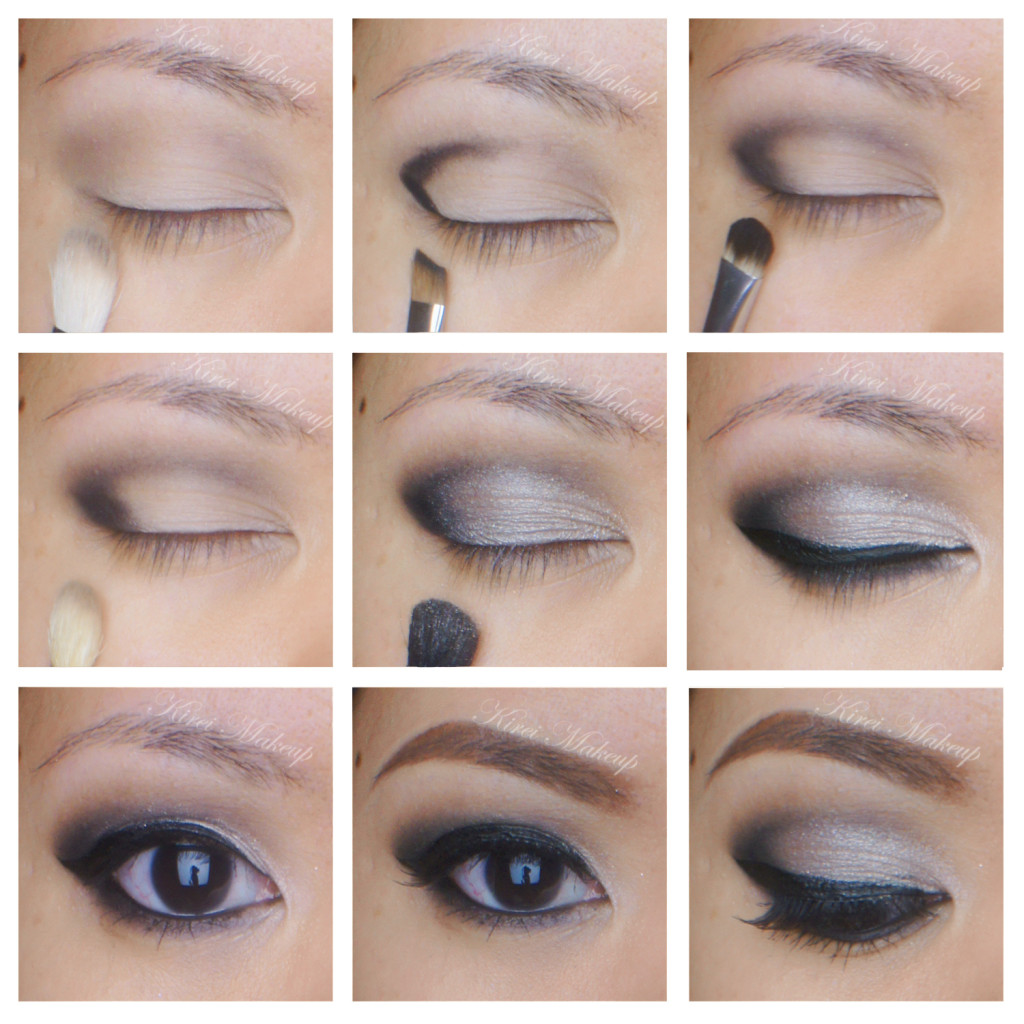
How-to:

1. I applied MUFE Aqua Cream #1 Anthracite using a synthetic paint brush on both upper and lower lid. I’ve decided to use this so I can get interesting texture on the eyes. If you want to use a matte eyeshadow only, please check my Classic Smoky Eyes post.

2. I lined my waterline and tightline using a black kohl pencil eyeliner by Annabelle.

3. Using a shader brush, I applied Crave eyeshadow from UD Naked Basics palette on top of my eyelid. I extended the eyeshadow to slightly above the crease.

4. Using a clean blending brush, I applied Foxy eyeshadow from UD Naked Basics right at the edge of the black eyeshadow.

5. I applied Crave eyeshadow from UD Naked Basics palette on the lower lid.

6. I filled my brows using Shu Uemura Hard Formula brow pencil, and then set it using Anastasia Brow Powder in Brunette.

7. I curled my lashes and applied L’oreal Carbon Black mascara on both lower and upper lashes.

taylor momsen makeup tutorial

8. I applied UD Naked Skin foundation using a Sigma Flat Top Kabuki Brush.

9. I contoured and highlight my face using Smashbox Contour kit.

10. I applied Chanel Blush de Horizon very lightly on my cheeks.

11. On my lips, I applied Revlon Colorstay Ultimate Suede lipstick in Socialite, and add a few dabs of YSL Glossy Stain in Pêche Cerra-Cola (27).

NYE Makeup Using Smashbox Full Exposure Palette

For this NYE Makeup tutorial, I decided to use my Smashbox Full Exposure palette, which I love! I’ve done a review/swatch post on Smashbox Full Exposure Palette Review. I’ve also done a few tutorial using the same palette in Smashbox Full Exposure Look #1 and Smokey Eyes using Smashbox Full Exposure Palette.

I wanted to create a more cat-eye effect with this smoky eye look, so if you want to create a more rounded smoky eyes please check my Glitter Holiday Makeup. My step-by-step picture looks slightly out of focus, that’s because I did not realize that my lens was dirty! So, my apologies if the pictures are not clear.

Smashbox Full Exposure tutorial

How-to:

1. I prepped my lids using UD Primer Potion.

2. I applied M6 on the crease using a blending brush.

3. Using an angled eyebrow brush, I applied M7 on the outer V.

4. Using a clean small shader brush, I blended M7 towards the inner part of the eyes.

5. I repeated step 3 and 4 until I get that outer V really dark.

6. Using a fluffy blending brush, I applied M5 slightly above the crease.

7. Using a flat eyeshadow brush, I applied S6 on the eyelid, and S4 just on the inner tear duct.

8. I created a thick winged eyeliner using Kanebo Kate Super Sharp eyeliner.

 Smashbox Full Exposure tutorial

9. Using an eyeliner brush, I lined my lower lid using M7.

10. I lined my waterline using L’oreal Voluminous Smoldering eyeliner.

11. I curled my lashes and applied Tarte Lights, Camera, Flashes mascara on both upper and lower lashes. I also applied false eyelashes.

12. I filled my brows using Anastasia Brow Powder in Brunette.

13. I applied Marc Jacobs Gel Foundation on my face using CoverFX Cream Foundation.

14. I applied MAC Dainty blush on my cheeks.

15. I also applied Revlon Socialite lipstick on my lips.

Smashbox Full Exposure tutorial


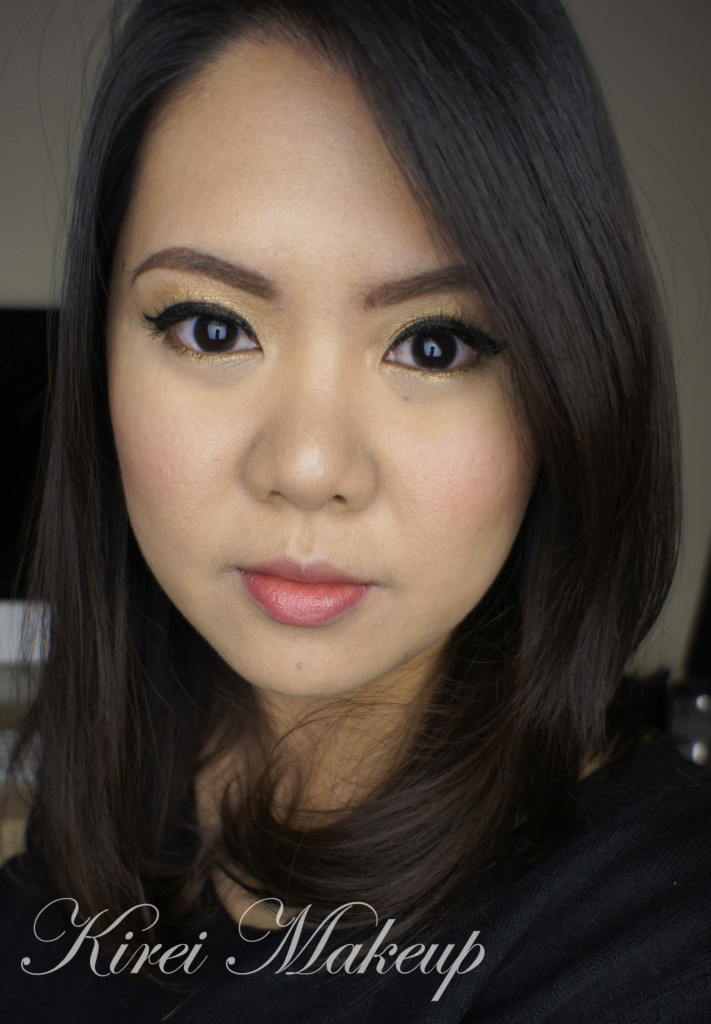
Fresh Dewy Makeup Look

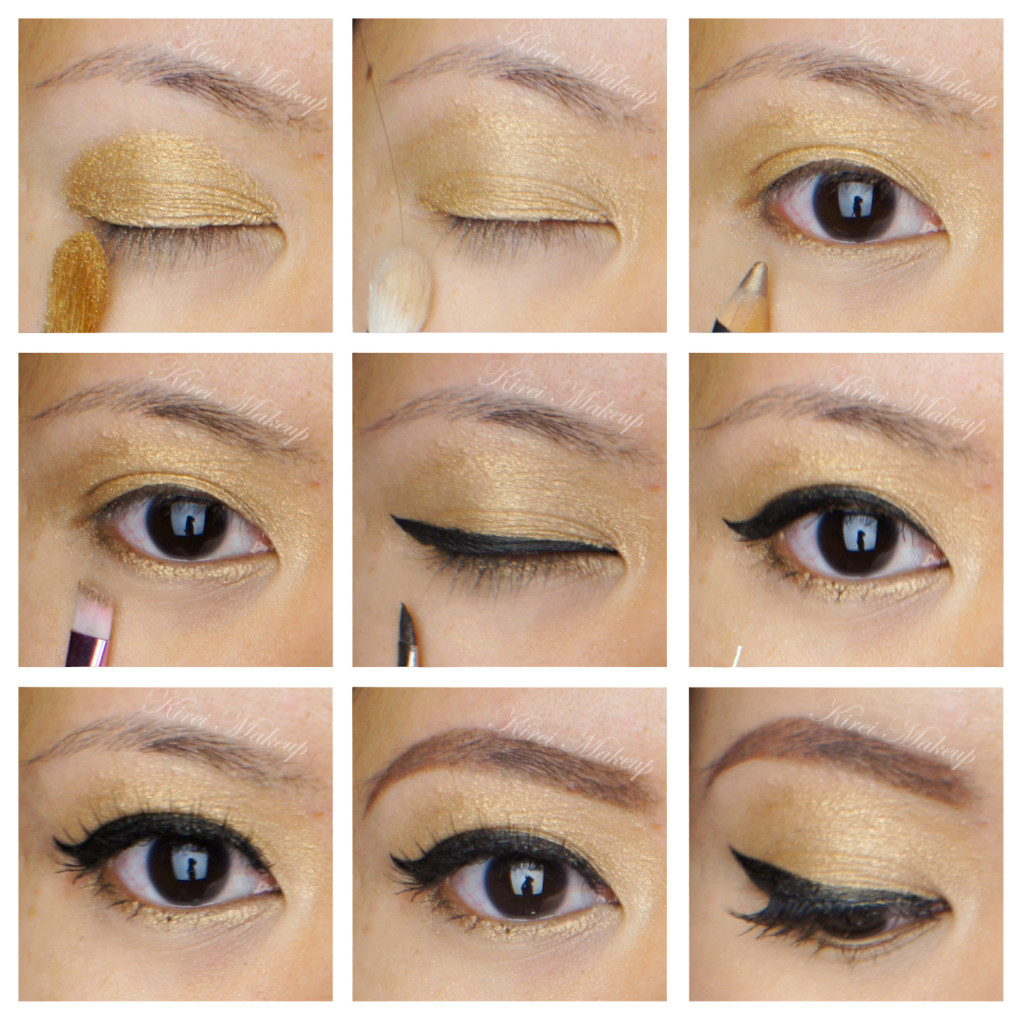
Having a bold makeup is always nice, but I usually wear this type of makeup on my daily life. I barely wear makeup on a day-to-day basis, because I used to have a really bad case of acne and I just get used to not wear makeup at all. However, when I do feel like wearing makeup, I usually go for the easiest look. I used to wear this look a lot when I was younger, and I don’t even know why I stopped wearing it. It’s so easy, and the only thing that take time is the eyeliner. However, once you master the winged liner, it’s so fast and simple.

This look is really good for beginners who want to practice blending and creating the cat-eyeliner (or also called winged liner). The gold eyeshadow in this tutorial can be replaced with any eyeshadow color. I chose NARS Etrusque because I just love the color, and it has just enough shimmers to brighten up your eyes.

The rest of the face is kept very fresh and dewy, afterall it is called Fresh Dewy Makeup look! This face is super simple, the keys are to use cream products, and to lightly powder the oily areas only. For me, I powdered under my eyes to set my concealer only for this tutorial. Why, you ask? That’s because my skin in the winter is quite dry and doesn’t actually get oily at all. If you are oily, just powder the oily areas (usually T-zone or just the cheeks). If you’re oily everywhere, feel free to powder your face, and use a powder highlighter to create the dewy look.

I just feel so young and fresh! I also love the blush I used for this tutorial. I added a touch more than I usually does, just to make my cheeks look like it’s flushing from the inside. I think the blush helps with the whole youthful appearance. This look is so appropriate for everything, from day makeup to party makeup! If you’re planning to wear it during the day, you can create a thinner line or even skip in altogether. If you like it smokier, add black eyeliner on the tightline. It’s so versatile!

Ok, enough of my rambling, let’s get on it!

NARS Etrusque

How-to:

1. I prepped my eyelids using UD Primer Potion (original).

2. I applied NARS Etrusque eyeshadow all over my eyelid using a flat eyeshadow brush.

3. Using a clean fluffy brush, I blended the eyeshadow so there’s no harsh edge.

4. I lined my waterline, and lower lash line using MAC Powersurge pencil eyeliner. (You can use black, white, beige eyeliner if you like)

5. I applied NARS Etrusque on the lower lash line using an angled eyeliner brush.

6. Using a clean angled eyeliner brush, I applied L’oreal Infallible Lacquer Liner 24Hr in Blackest Black on the upper lash line creating a winged eyeliner.

7. I curled my lashes and applied Tarte Lights, Camera and Flashes mascara on both upper and lower lashes.

8. I applied false eyelashes (sample) on my upper lashes.

9. I filled my brows in using Anastasia Brow Wiz in Brunette.

Fresh, dewy makeup

10. For the face, I applied MAC Pro Longwear foundation in NC30 using CoverFX cream foundation brush.

11. I applied the concealer from MAC Pro Correct/Conceal palette in Medium under my eyes, as well as below the brows.

12. I set the concealer using CoverFX translucent powder.

13. I contoured my face very lightly using Smashbox contour powder palette (discontinued).

14. I applied Revlon Charmed Cream Blush on my cheeks using a clean foundation brush, and then blending it to my skin using my finger.

15. I highlighted the bridge of my nose, chin, cupid’s bow and top of cheekbones using Benefit Moon Beam.

16. I filled my lips using MAC Dervish lip liner, and then YSL Glossy Stain in Pêche Cerra-Cola (27) on top of it.

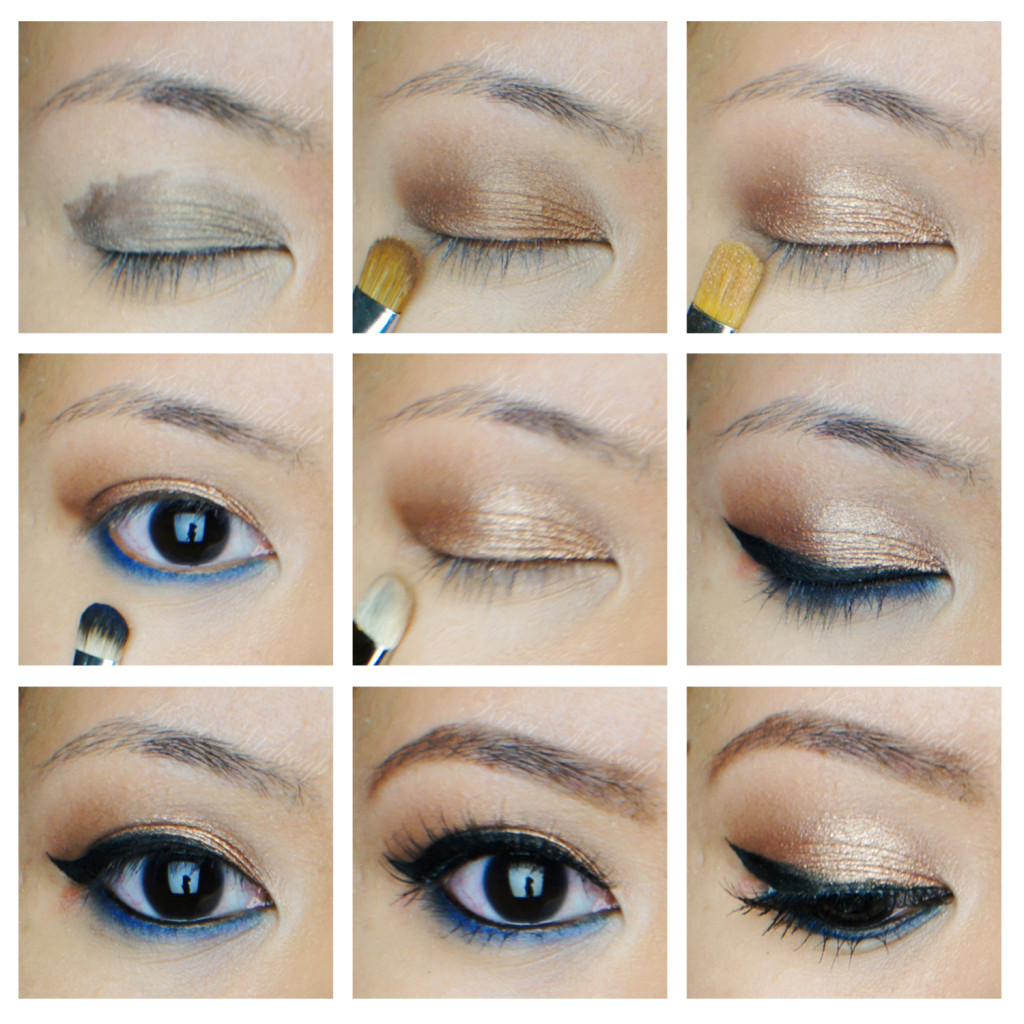
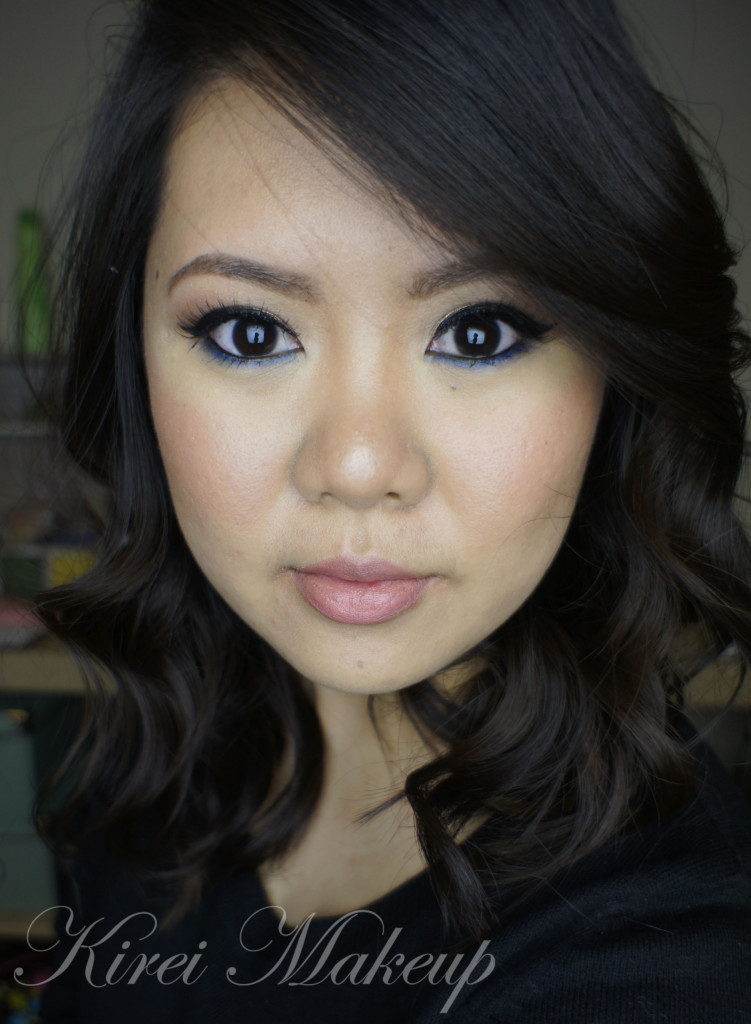
Cobalt Blue

If you have always wondered how can you wear a blue eyeshadow without looking like you’re stuck in the 80s, this tutorial is definitely for you! I love doing this type of makeup in the winter, whenever I want to add a pop of color to my makeup wardrobe. This cobalt blue makeup will make the white part of your eyes look whiter and brighter!

For this tutorial, I used L’oreal All Night Blue on top of Stila Cobalt blue eyeliner. You can change it up using purple, green, etc whatever color you want! It’s such an easy way to add color without going overboard.

How-to:

1. I prepped my eyes using Urban Decay Primer Potion all over my lid using my ring finger.

2. I applied  MAC Powersurge pencil eyeliner all over my eyelid. I blended out the edge using my ring finger.

3. Using a flat eyeshadow brush, I applied MAC Bronze on top of MAC Powersurge eyeliner. I applied this eyeshadow slightly above the crease.

4. Using another clean flat eyeshadow brush, I applied MAC Honey Lust on the inner half of my eyelid.

5. On the lower lid, I first lined my lower lash line using Stila Cobalt blue eyeliner.

6. Then, I applied L’oreal Infallible eyeshadow in All Night Blue using a small shader brush on the lower lash line.

7. Using a MAC 239 (eye shader) brush, I blended the edge of the crease.

8. I created a winged liner using Kanebo Kate Super Sharp Eyeliner on the upper lash line.

9. I lined my waterline using L’oreal Voluminous Smoldering eyeliner.

10. I curled my lashes and applied L’oreal Butterfly mascara. Then, I applied Quo false eyelashes.

11. I filled my brows using Anastasia Brow Wiz in Brunette.

Stila Cobalt blue eyeliner

11. I applied MUFE HD Foundation 118 using Shiseido foundation brush.

12. Under my eyes, I applied concealer from MAC Pro Correct/Conceal palette in Medium.

13. I contoured my face using MAC Shadowy powder.

14. I applied MAC Dainty blush on my cheeks, and Diorskin Shimmer Star Amber Diamond as highlighter.

15. For the lips, I applied L’oreal Infallible lipliner in Rose.

Stila Cobalt Blue eyeliner

Neutrally Blue

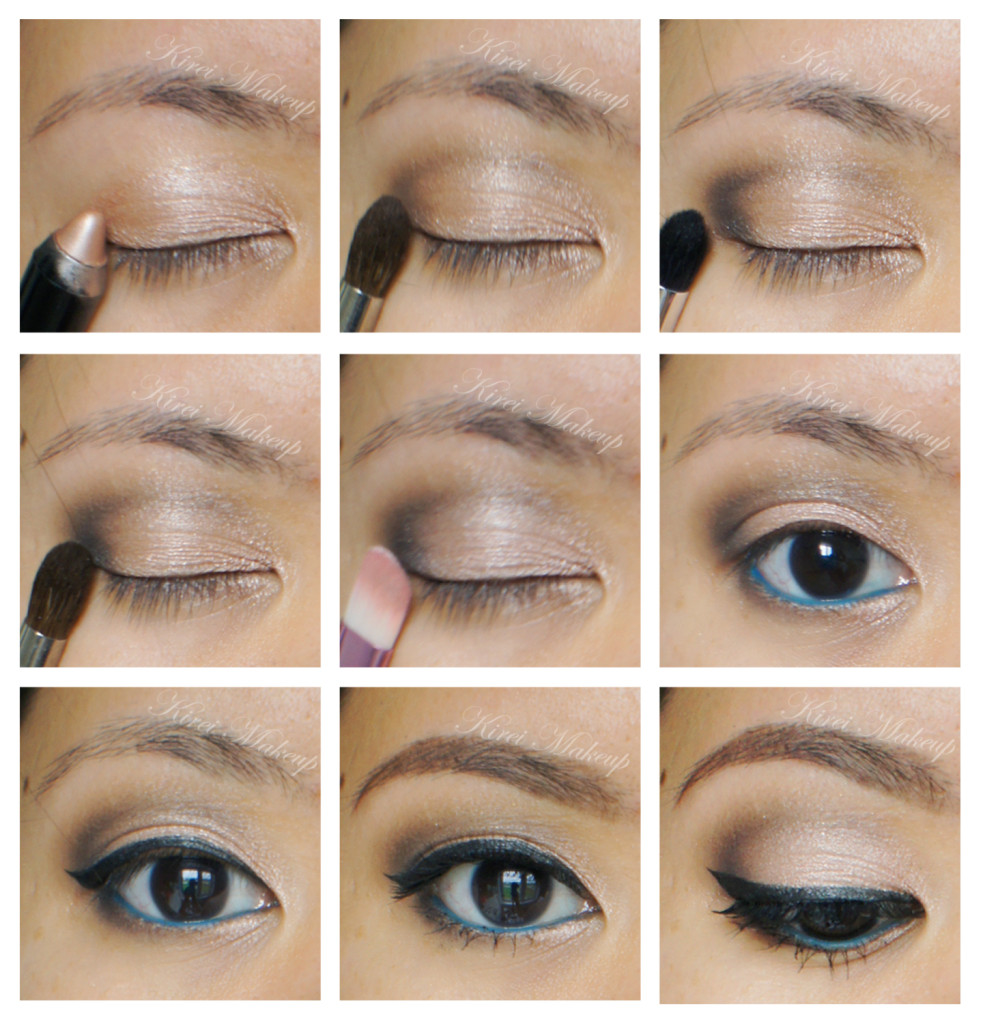
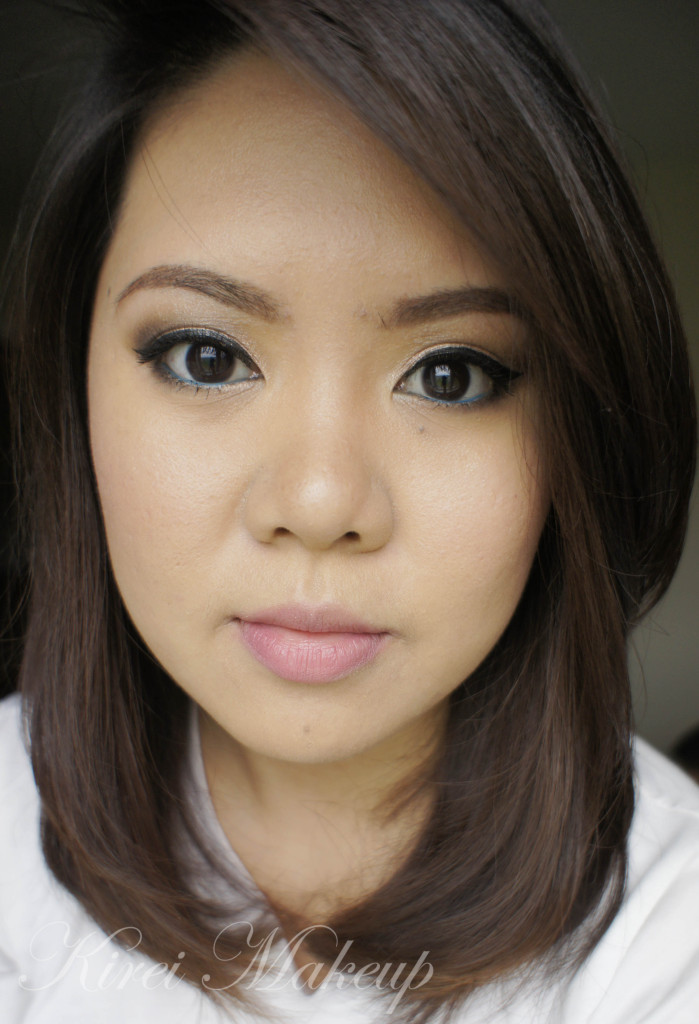
I LOVE Urban Decay Naked Basics Palette! There, I said it! At first I thought that the UD Naked Basics is just another hype. I mean, I like my UD Naked 1 and 2, but I didn’t love it. I thought that the Naked Basics would be another palette that’s just so-so. Boy, was I wrong or what?!

I’ll talk more about the palette itself on my review, but today I wanted to share this look with you. The overall look is very soft and feminine. This look can be worn during the day if you want some definition on your eyes, or for engagement pictures. Obviously you can skip the blue eyeliner on the tightline and change it to beige/white/black instead.

The reason why I chose to wear the Stila Cobalt Blue eyeliner on the waterline is to show you guys that you can add color into your makeup without having to wear it on your lid. This is a good way to incorporate color, especially if you are not used to it. Not to mention, the blue eyeliner makes the white part of your eyes look whiter, thus making you look more awake.

How-to:

1. I applied MUFE Aqua Shadow in 28E all over my lid.

2. Using a clean blending brush, I applied UD Naked Basics in Faint on the crease.

3. Using a Sephora Bullet Crease (no. 221) brush, I applied UD Naked Basics in Crave on the outer V.

4. Using the same brush as step 2, I blended the eyeshadow on the crease.

5. I applied UD Sin eyeshadow all over the lid, focusing the color on the center of the eyelid using a flat eyeshadow brush.

6. Using a small shader brush, I applied Faint on the inner half of the lower lid and then Crave on the outer half.

7. I lined my waterline using Stila Cobalt Blue eyeliner.

8. I created a winged liner along the upper lash line using Kanebo Kate Super Sharp Liner.

9. I curled my lashes and applied L’oreal Carbon Black mascara on both upper and lower lashes.

10. I also applied false eyelashes sample given to me by a friend (currently not for sale to public).

11. I filled my brows in using Anastasia Brow Wiz in Brunette.

12. Using a clean fluffy blending brush, I applied Venus from UD Naked Basics palette under the brow.

Stila Cobalt Blue eyeliner

13. I applied MUFE HD foundation using Shiseido foundation brush all over my face.

14. I applied MAC Shadowy powder as contour, and Benefit Hervana blush on my cheeks.

15. On the lips, I applied Tarte Lipsurgence in Hope.

Natural makeup using Urban Decay Naked Basics