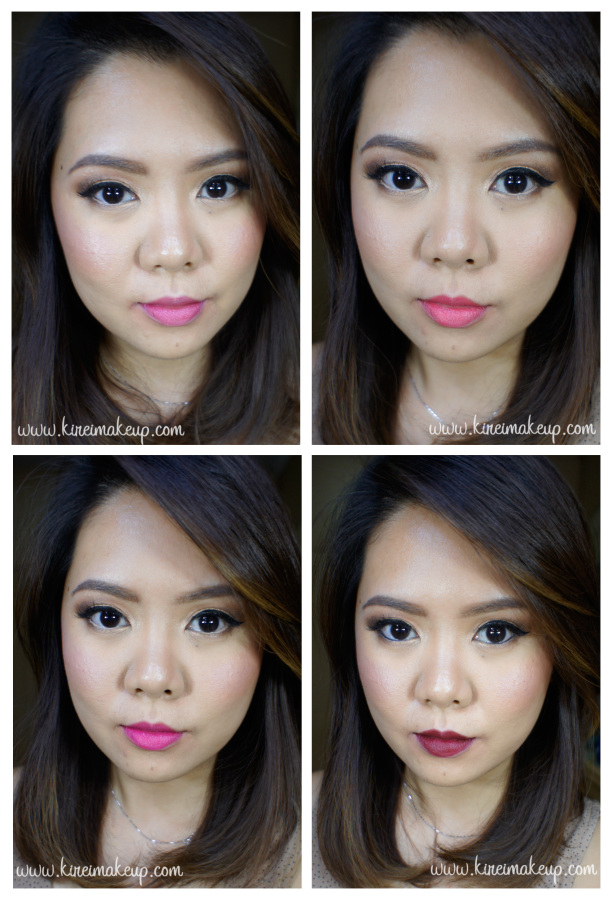
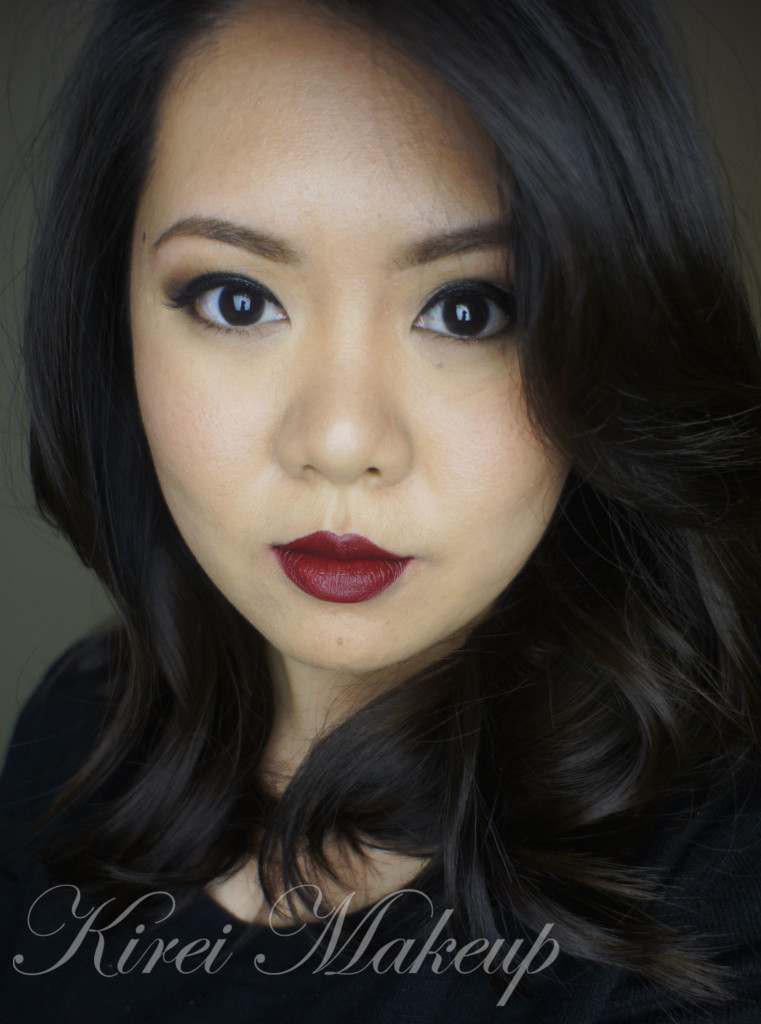
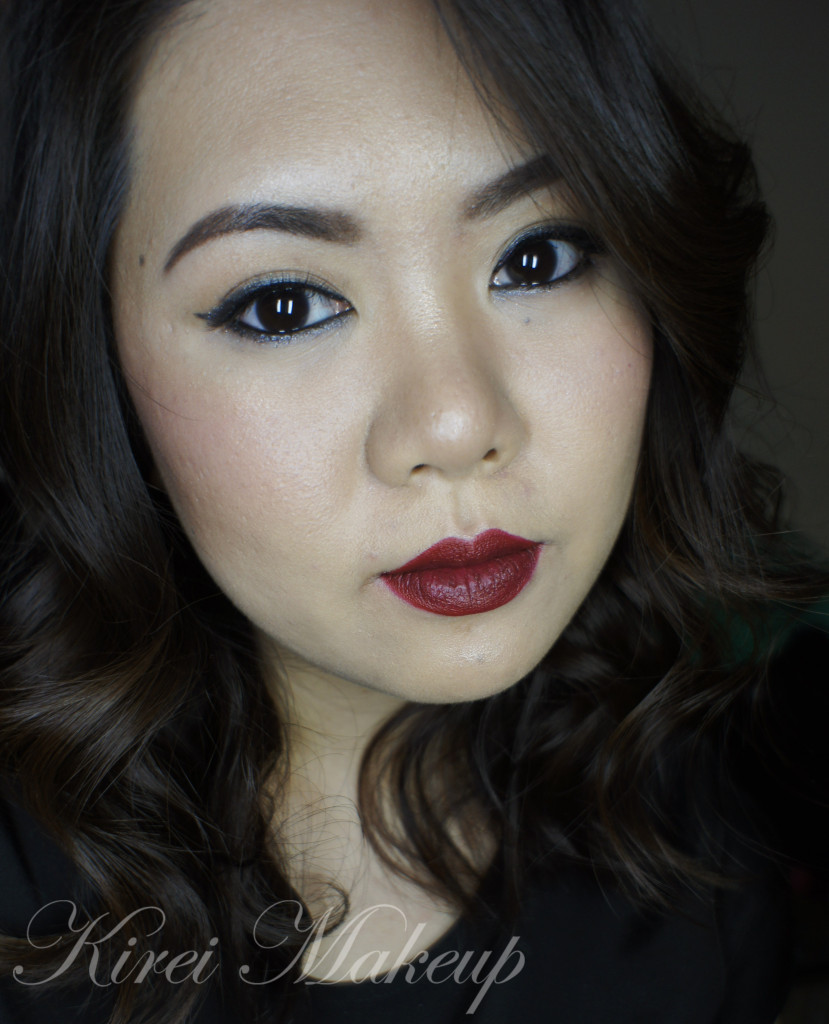
I collaborated with Lover.ly to create a bridal makeup look. I was shown 3 photos of the bridal gowns, and I chose my favorite as below for my post. While I was thinking of to create a look for this gown, I decided to create not one, but FOUR bridal makeup looks to suit the gown! I created 4 looks since I knew that most brides would have their own interpretation of their makeup, some chose to be more on the natural side, while others might not be afraid to go bold!
I also took into consideration of the whole outfit and hair. As you can see, the gown that I chose has a very demure neckline, along with a very elegant lace details. With this in mind, in my opinion, I think brides who chose this type of gown would be very classy, lady-like and conservative.
Since the hair is pulled back, so not to clash with the neckline, I didn’t want to create a heavy dark smoky eyes. I think with this gown and hairstyle, a simple warm eyes would suffice. I feel that a heavy, dark smoky eyes would be too heavy and might clash with the high neckline. Of course, you can go on the dark smoky eyes look, but I prefer going light on the eyes and play on the lips.
So, for this tutorial, I created 1 eye makeup which can be paired with 4 different lips look. Usually for bridal makeup, I tend to choose the warmer neutrals (think browns and gold) since I think it looks very flattering on everyone. Very rarely I do a black smoky eyes, unless the client asked for it, and/or during change of makeup from morning to evening. Even then, I’ll still add some warmth on the smoky eyes.
To compliment the lace and the gown’s off-white color, I decided to use a beautiful gold on the eyelids from the Too Faced Chocolate Bar eye palette called Creme Brulee. This gold isn’t too yellow, nor it is too shimmery. It has a somewhat satin finish, which makes it perfect for this look so it doesn’t clash with the texture of the gown.
Since this gown doesn’t have shiny finish, I decided to keep the face semi-matte to avoid looking too dewy. I feel that this gown has a grown-up feeling to it, so I try to avoid the dewy/glowing finish since it can make the bride looking too youthful. Semi-matte is the right choice for this look.
In all of the 4 looks I created, I only added extra blush on the bottom looks (both left and right), and added a black waterline on the look with the dark lips. Otherwise, everything is exactly the same (brows, foundation, highlight, contour etc).
No, I do NOT contour my face heavily with cream foundation. You can if you want, but I prefer not to. I like very subtle highlight/contour so my clients look still like themselves in the photos instead of looking like someone else. HOWEVER, IF or WHEN the client asks for heavy contouring (i.e. Kim K contouring), I’ll still provide the cream contouring for her.
If you’d like to see me do a glam Bridal makeup (i.e. smoky eyes, contour, and the whole nine yards), do let me know by leaving comments here or on my Instagram page!
Eyelids are prepped using Urban Decay Primer Potion. Face is primed using MUFE HD Elixir.
How-to:
1. I applied Salted Caramel from Too Faced Chocolate Bar eye palette on my crease using a clean blending brush.
2. On the outer V, I applied a mixture of Triple Fudge and Semi Sweet (both from Too Faced Chocolate Bar palette) using a Smashbox Bullet Crease brush.
3. Then, using the same brush as step 1, I blended out the edge of my crease.
4. Using a flat eyeshadow brush, I applied Creme Brulee (from Too Faced Chocolate Bar palette) on my eyelid.
5. I lined my waterline using MAC Chromagraphic pencil eyeliner in NC15 (or L‘oreal Voluminous Smoldering eyeliner for the dark lips version).
6. I also applied Triple Fudge/Semi Sweet mix on the outer half of the lower lash line. Then, I applied Creme Brulee on the inner half of the lower lid. I used the edge of a flat eyeshadow brush to do this.
7. I created a winged liner using Shu Uemura Calligraphy:ink liquid liner pen along the upper lash line.
8. I filled my brows using Anastasia Brow Wiz in Taupe FIRST, then I darkened the tail and any sparse area using Anastasia Brow Wiz in Brunette.
9. I curled my lashes and applied Gwiyomi no. 3 false lashes.
10. On my face, I applied MUFE HD foundation all over using a foundation brush.
11. I set my face using CoverFX translucent setting powder.
12. I lightly contour my face using Smashbox contour kit powder, and highlight my face using The Balm Mary-Lou highlighter. If you have oily skin, I’d suggest skipping highlighting using Mary-Lou. Instead, you can use a matte powder which is a shade or two lighter than your skin, or the highlight powder from Smashbox contour kit.
13. I applied Chanel Blush de Horizon on my cheeks.
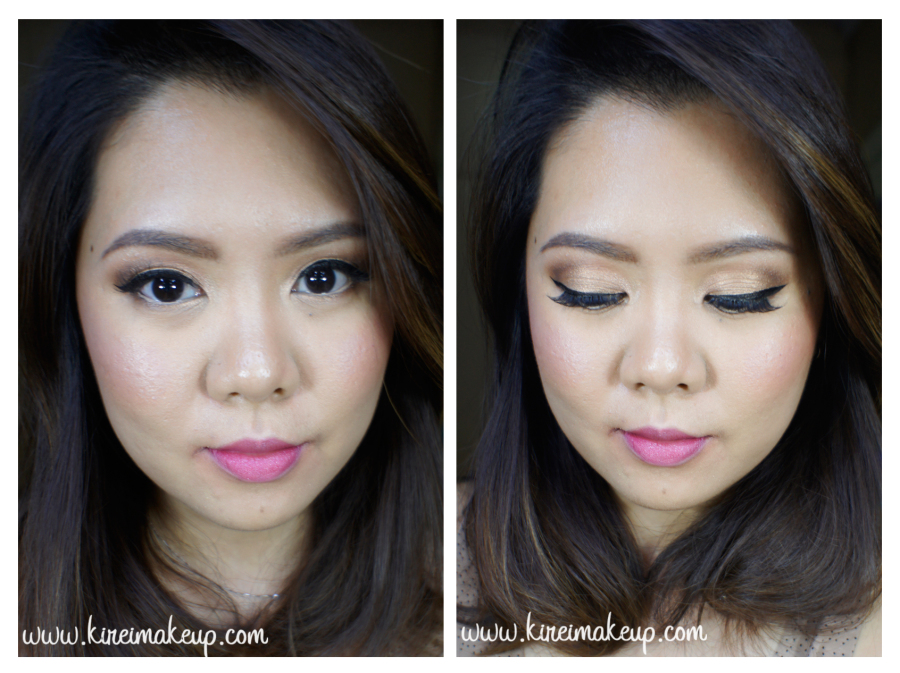
14a. For this blushing bride look, I applied Lancome Color Design in Vintage Rose Sheen.
This look is perfect for those brides who prefer to have a natural look. The rose lipstick has just enough color to brighten up the face. This bridal makeup look is great for Summer Wedding!
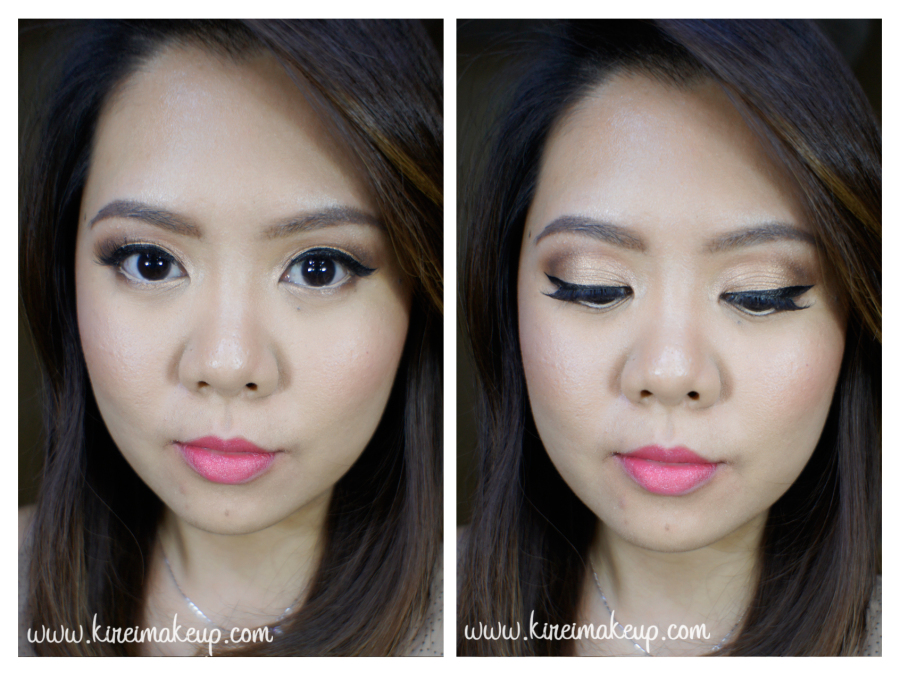
14b. For this youthful bridal look, I added YSL Rouge Pur Couture no. 52. I applied it using a lip brush.
This lipstick is pretty much sold out in Indonesia! When applied lightly on the lips, this YSL no. 52 really lives up to its popularity! It deposits enough pigment without looking too bright on the lips. This gorgeous coral lips is also great for Summer Wedding makeup, but I think it’d be perfect for Spring Wedding where all the flowers are just blooming, and the weather isn’t quite warm yet. This bridal makeup look would instantly gives the bride the most beautiful smile on her big day!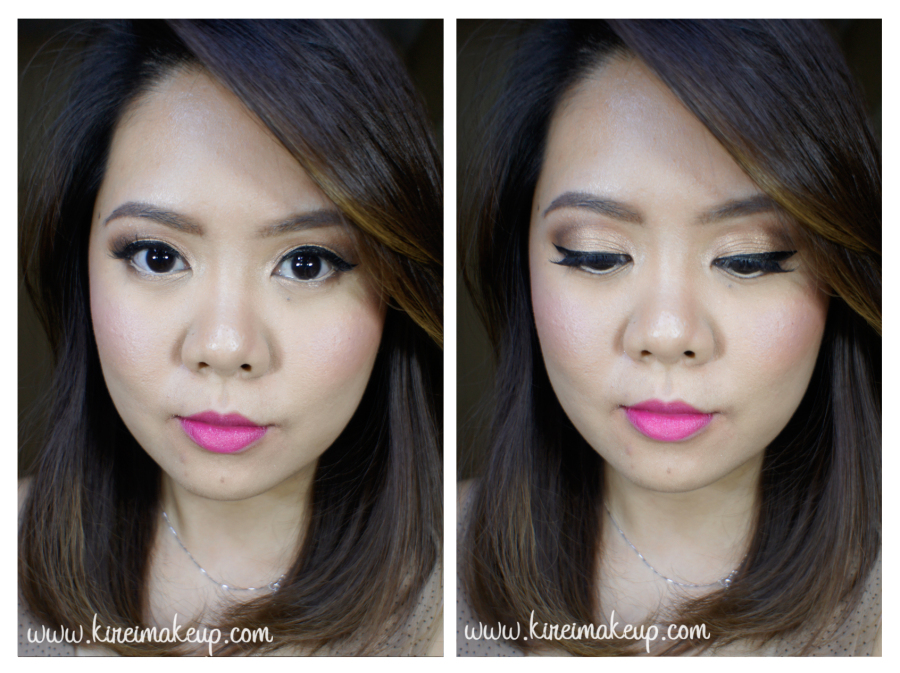
14c. I applied MAC Girl About Town on the lips using a lip brush. I had to add a bit more blush to avoid my face looking washed out for this look since the lips are quite bold.
This is another look which would look great for Spring/Summer Wedding. For brides who are a bit more adventurous, but not into red lips, this is definitely a look to try. What I love about MAC Girl About Town lipstick is that the color is not too fuchsia. It still has enough warm undertone to make it wearable for a wedding, and at the same time bright enough to give a punch of color.
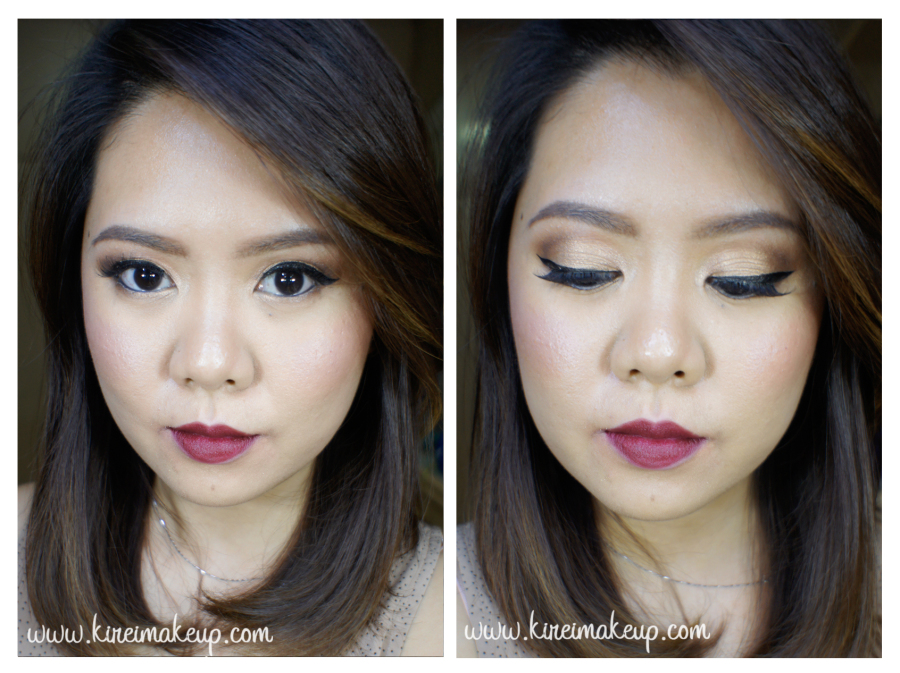
14d. For this lovely deep red, I first lined my lips using L’oreal Color Riche Anti-Feathering lip liner in True Burgundy. Then, I applied MAC Diva lipstick on top of it. (The blush was the same as 14c)
Last but not least, we have the makeup look for a Fall/Winter wedding. Of course you can choose the other lip colors for Fall/Winter wedding, but I really love this deep red lips look. Personally, this is my favorite look out of the 4. I chose to darken my waterline to compliment the deep red lips.
So, that’s all folks! I think everything is pretty self-explanatory from the photos. I’d like to say that yes, you CAN wear all these makeup looks even if you aren’t a bride! Obviously some steps for bridal makeup are different than daily makeup, but that’s for next time! Yes, you can wear this look to a wedding party, or if you’re bridesmaids etc. Again, like I said, the way I applied and steps taken for bridal makeup is slightly different than daily or party makeup. You can tweak it to your preference!
Products used
Eyes – Urban Decay Primer potion; Too Faced Chocolate Bar eye palette (crease: Salted Caramel, outer V & lower lid: Triple Fudge/Semi Sweet, eyelid & lower lashline: Creme Brulee); Shu Uemura Calligraphy:ink liquid liner; MAC Chromagraphic pencil liner NC15 or L’oreal Voluminous Smoldering eyeliner; Anastasia Brow Wiz in Taupe and Brunette; Gwiyomi no. 3 falsies.
Face – MUFE HD elixir; MUFE HD foundation; Cover FX Translucent Powder.
Cheeks – Smashbox Contour kit; The Balm Mary-Lou; Chanel Blush de Horizon
Lips – Lancome Color Design Vintage Rose Sheen (a); YSL Pur Rouge Couture no. 52 (b); MAC Girl About Town (c); L’oreal Color Riche lipliner in True Burgundy and MAC Diva (d)

