How to: Winged Eyeliner

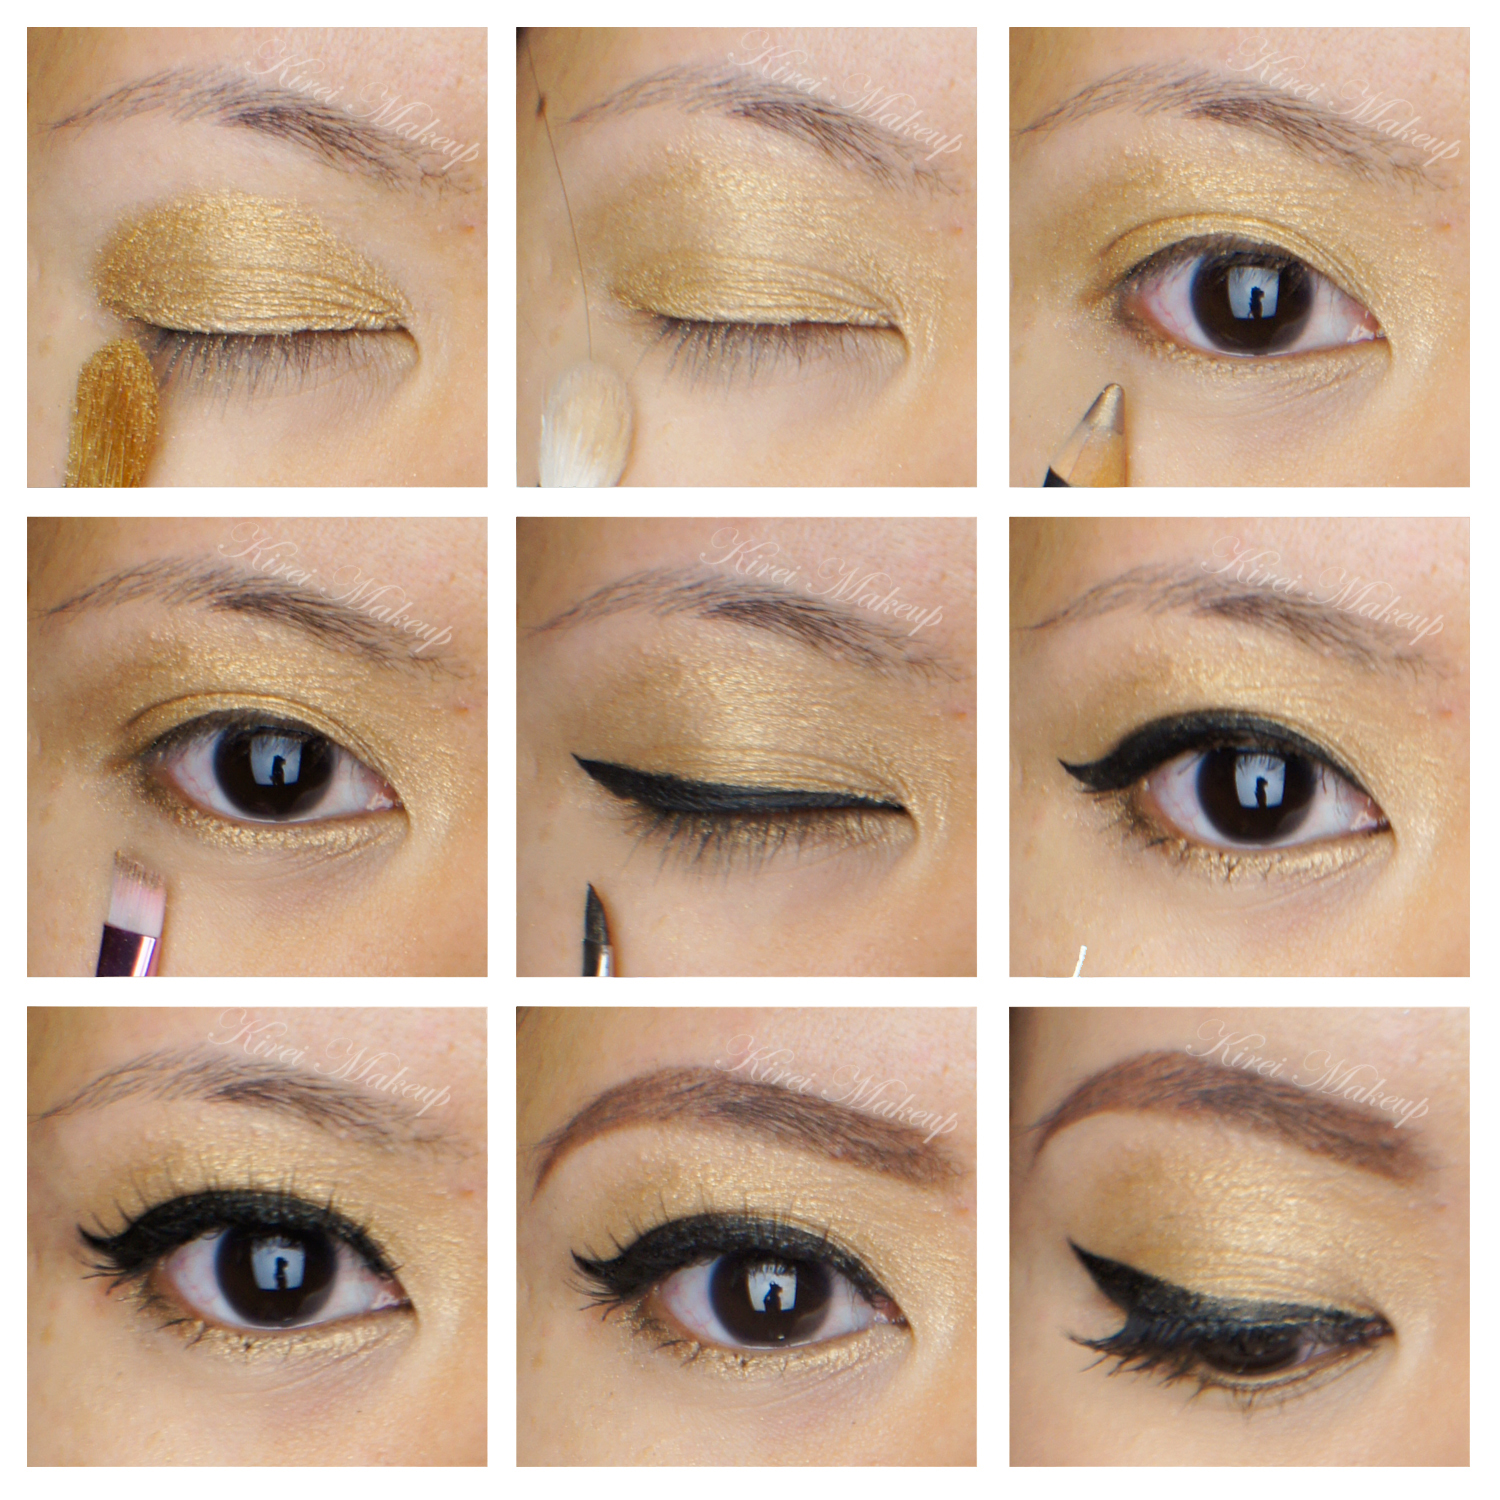
I finally got around to post this tutorial. Sorry for being M.I.A this week, I was busy and I got really sick. Anyways, this how to winged eyeliner tutorial was a request from a former student of mine. I’ve done something similar in my Sugar and Spice tutorial. You can use a tape, yes scotch tape, to help create that clean straight line.

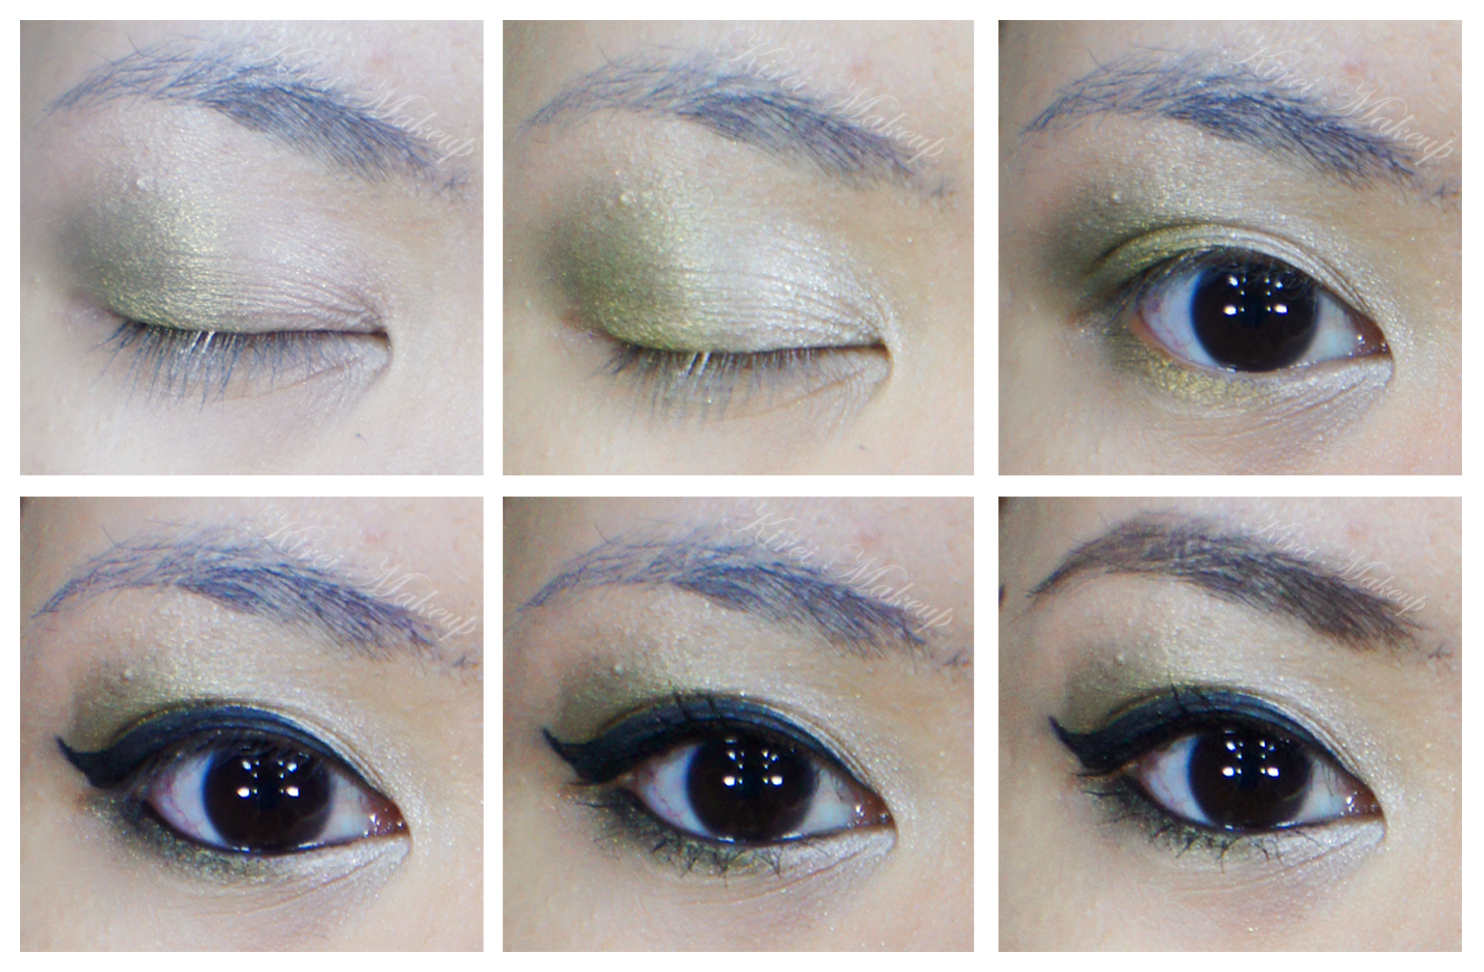
I use an angled eyeliner brush (MAC 208) because it has a sharp angle that will help you to create that “wing”. Please note on how I drag the brush from outer or inner part towards the center of my eyelid.

The trick is to let the brush guide you. Also, it’ll be easier if you tilt your chin up and look down to your mirror – that will allow the skin on your eyelid to stretch (just like in my photo).

You can also use a liquid eyeliner, or a straight brush like MAC 209 brush. I, personally, find the angled brush is easier for beginner. That sharp angle really helps in creating the wing. Yes, I know I sound like a broken record, but trust me, yes? 🙂

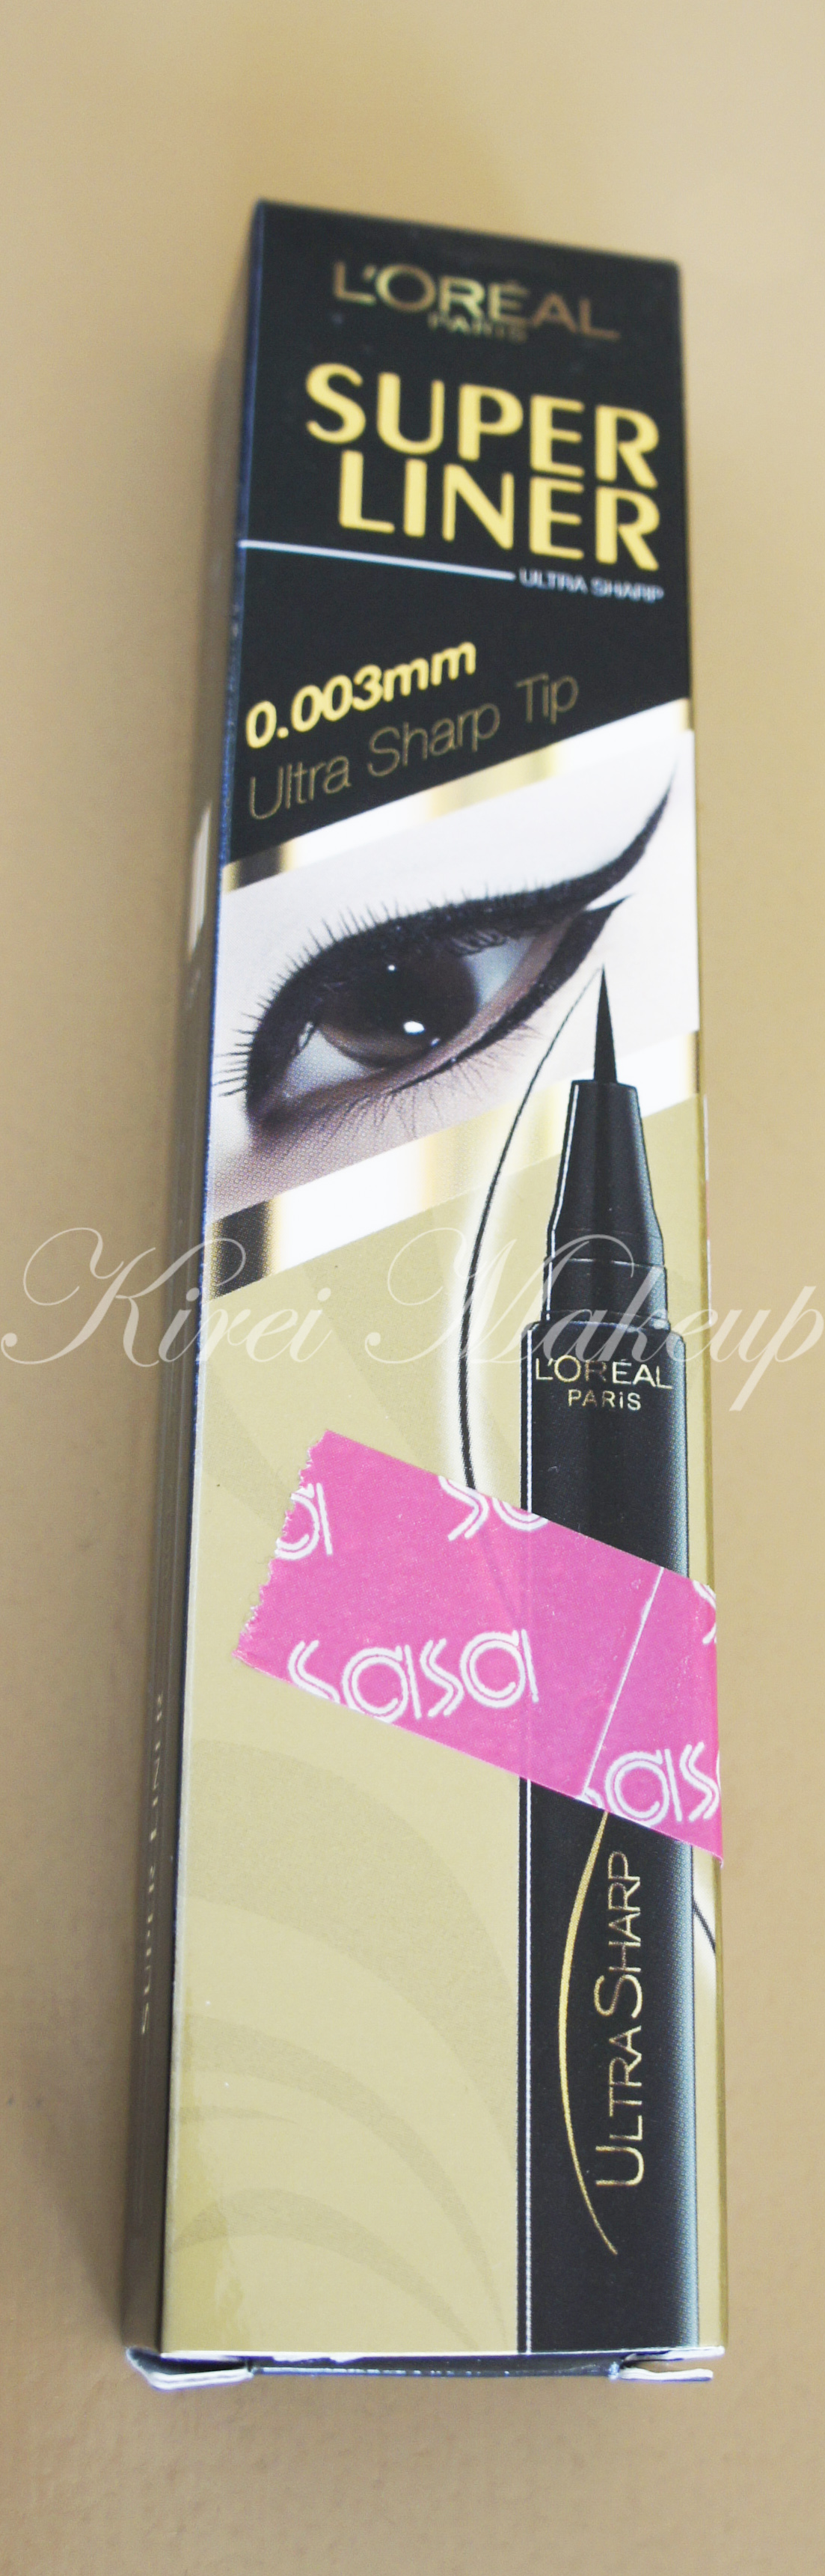
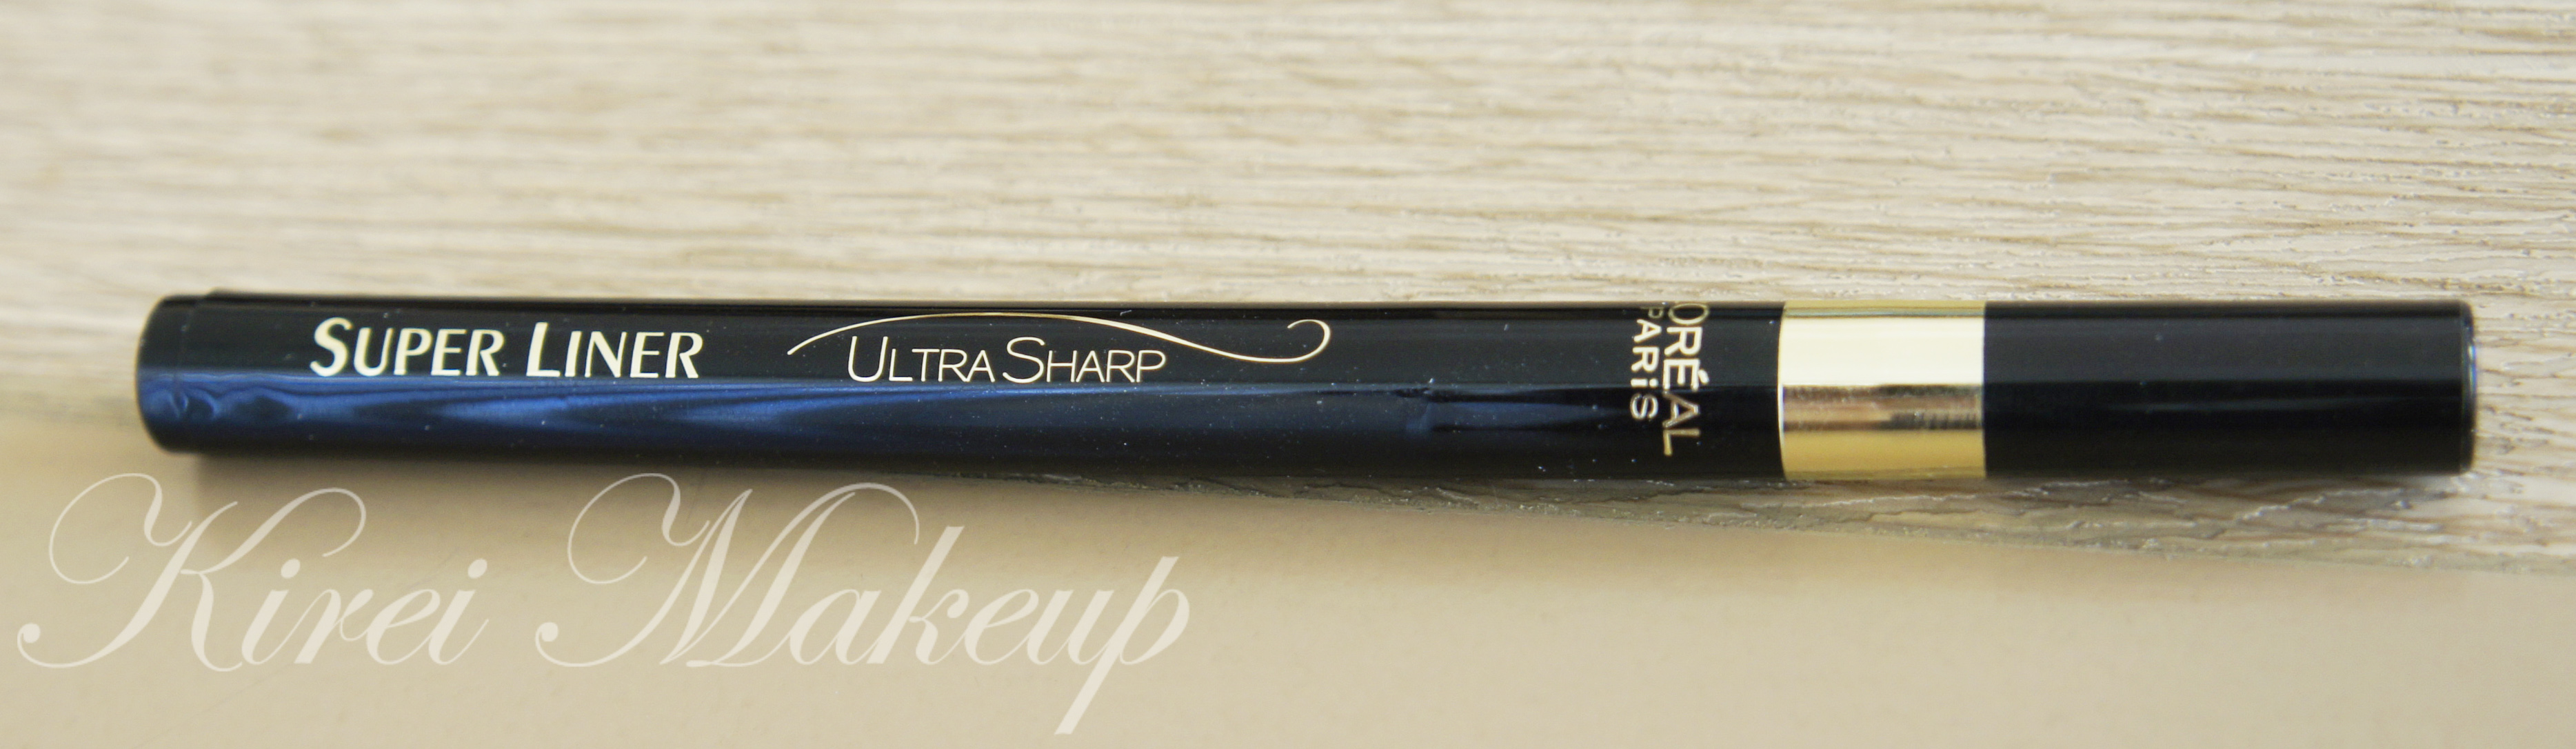
2 products you’ll need:

1. MAC 208 brush.

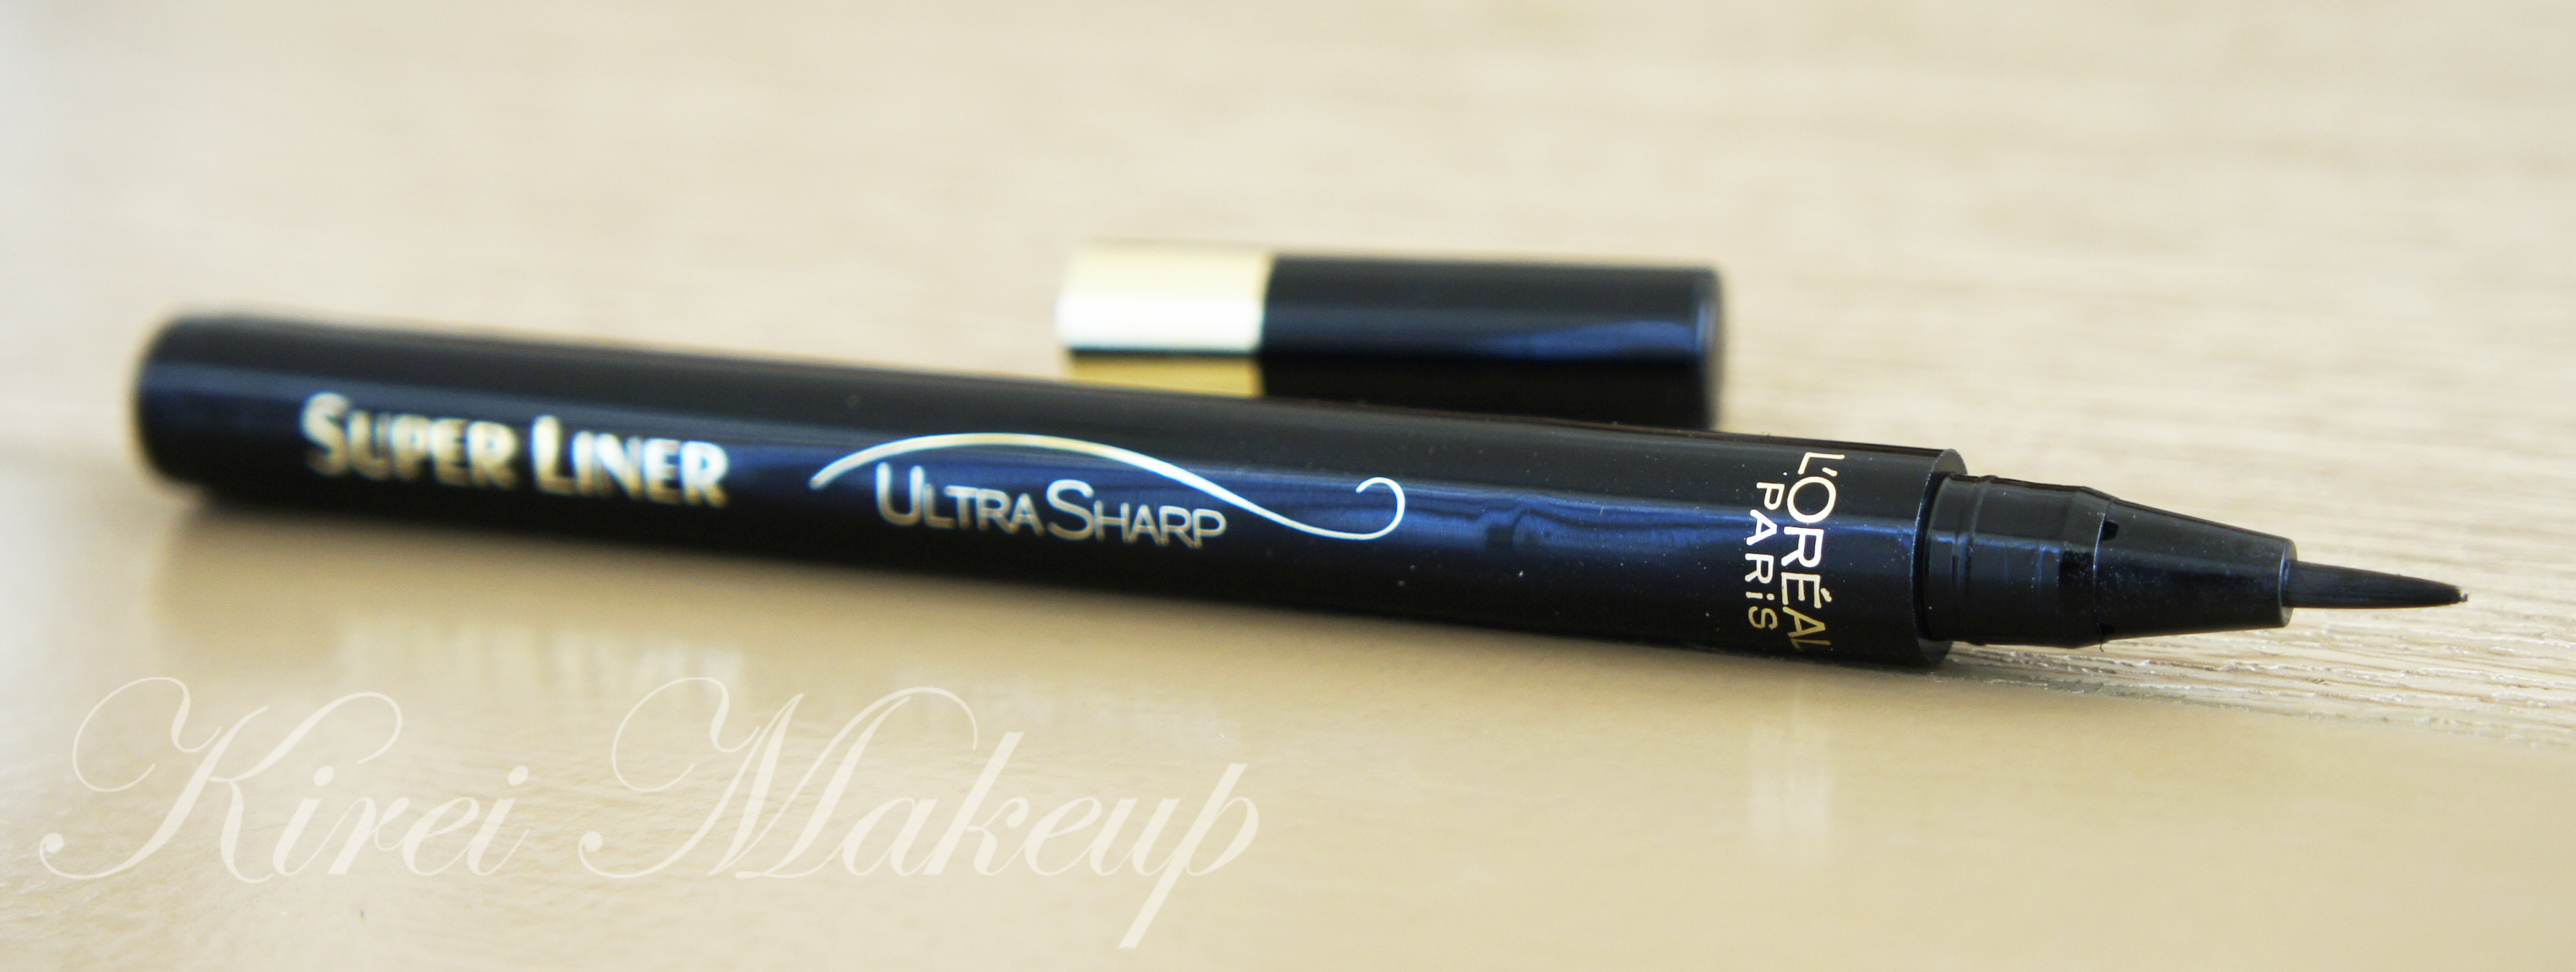
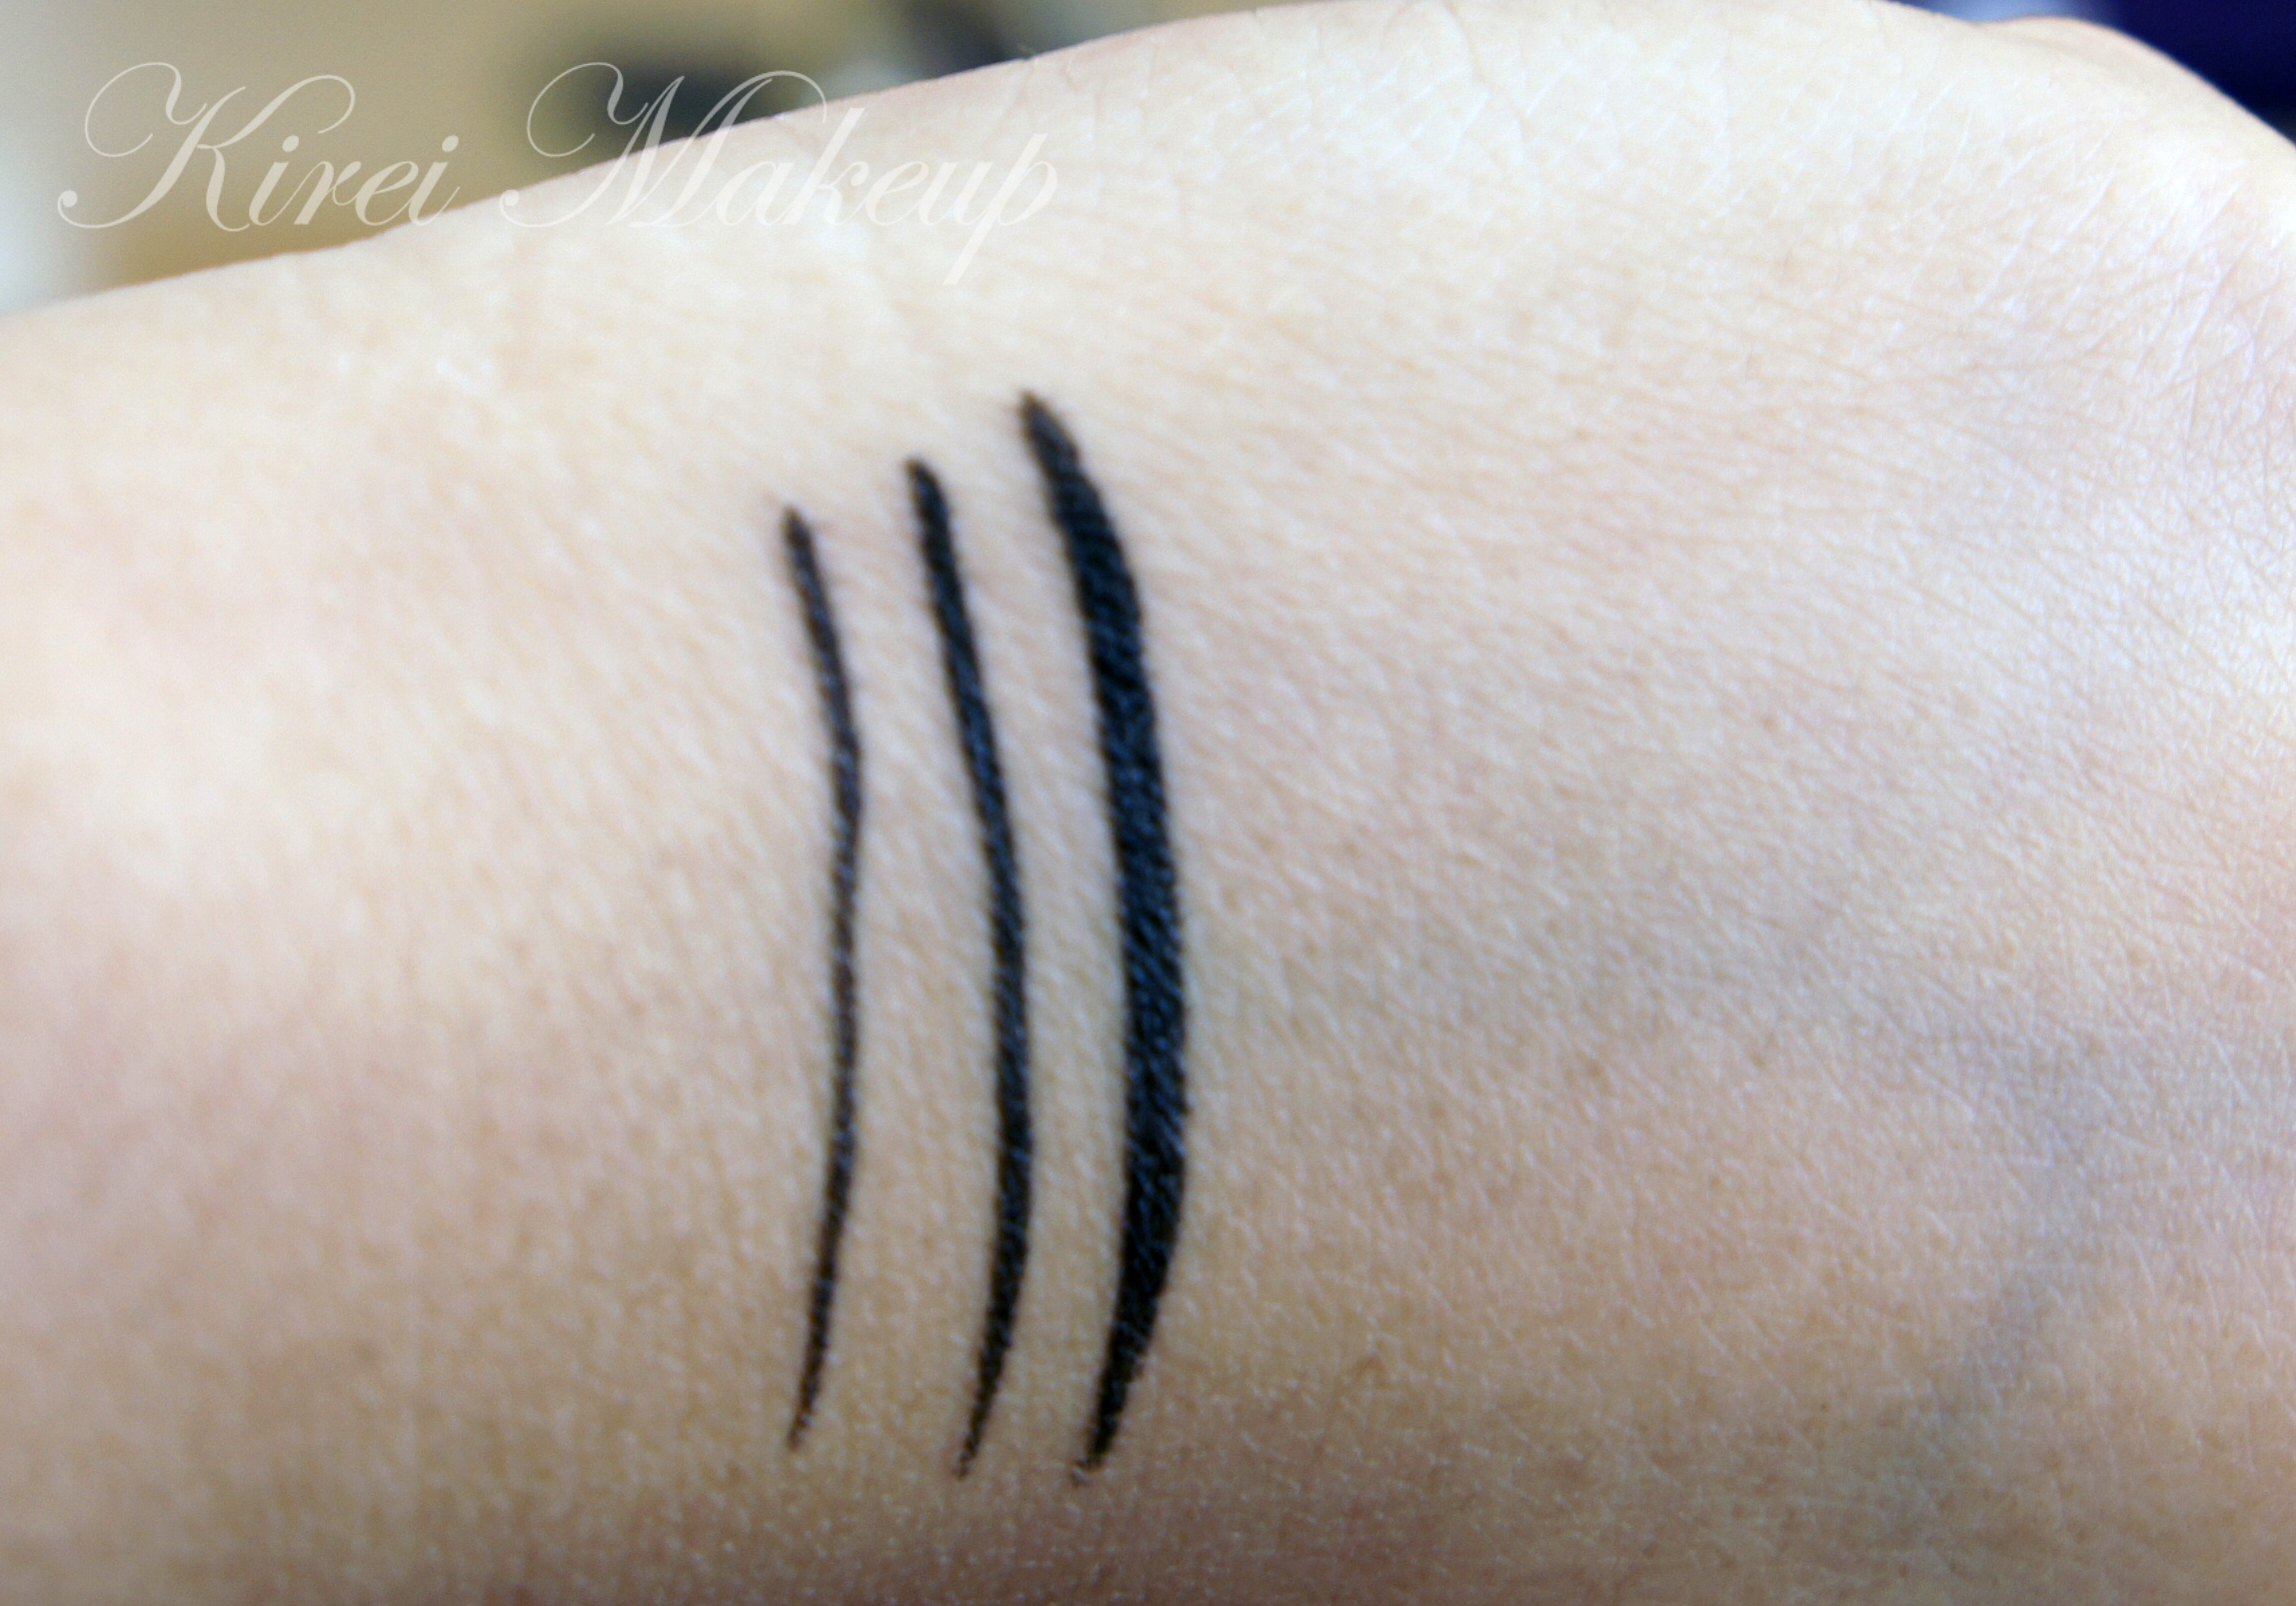
2. Any black gel eyeliner – I used L’oreal Infallible Gel Lacquer in Blackest Black.
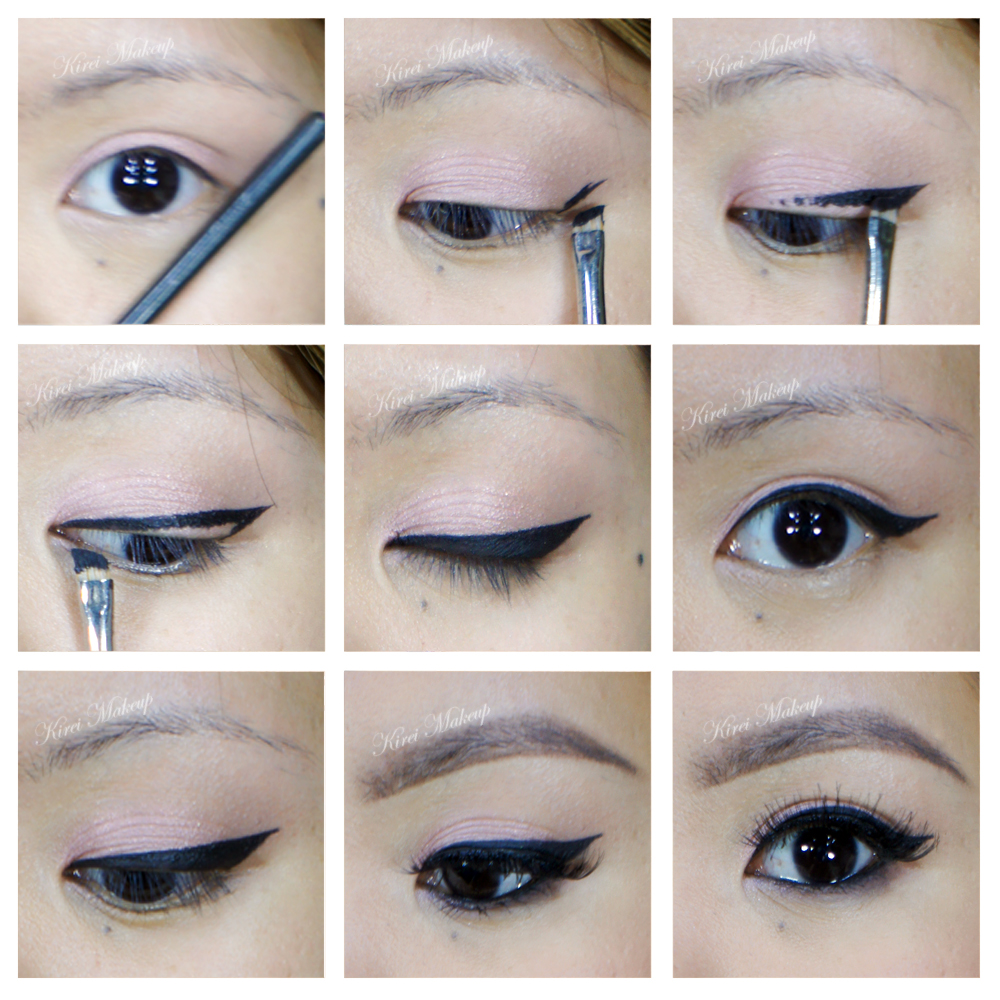
How-to:

1. Create an imaginary angle for your wing. I usually line the outer corner to the tail of my brow.

2. Using MAC 208 and gel eyeliner, I drew an angle. I suggest just placing the brush down to mark it. If you want to make it longer, you can extend it later.

3. Drag the brush towards the center of the eyelid.

4. Flip your brush so the longer end is on the inner part of the eyelid. Drag the brush towards the center of the eyelid so the lines meet.

5. Once the triangle is complete, fill in the rest of the empty area.

6. At this moment, if you want to extend your tip, you can.

7. You can also use a wet wipe, or a q-tip dipped in makeup remover (non-oily) to clean up the edge of the wing if needed.

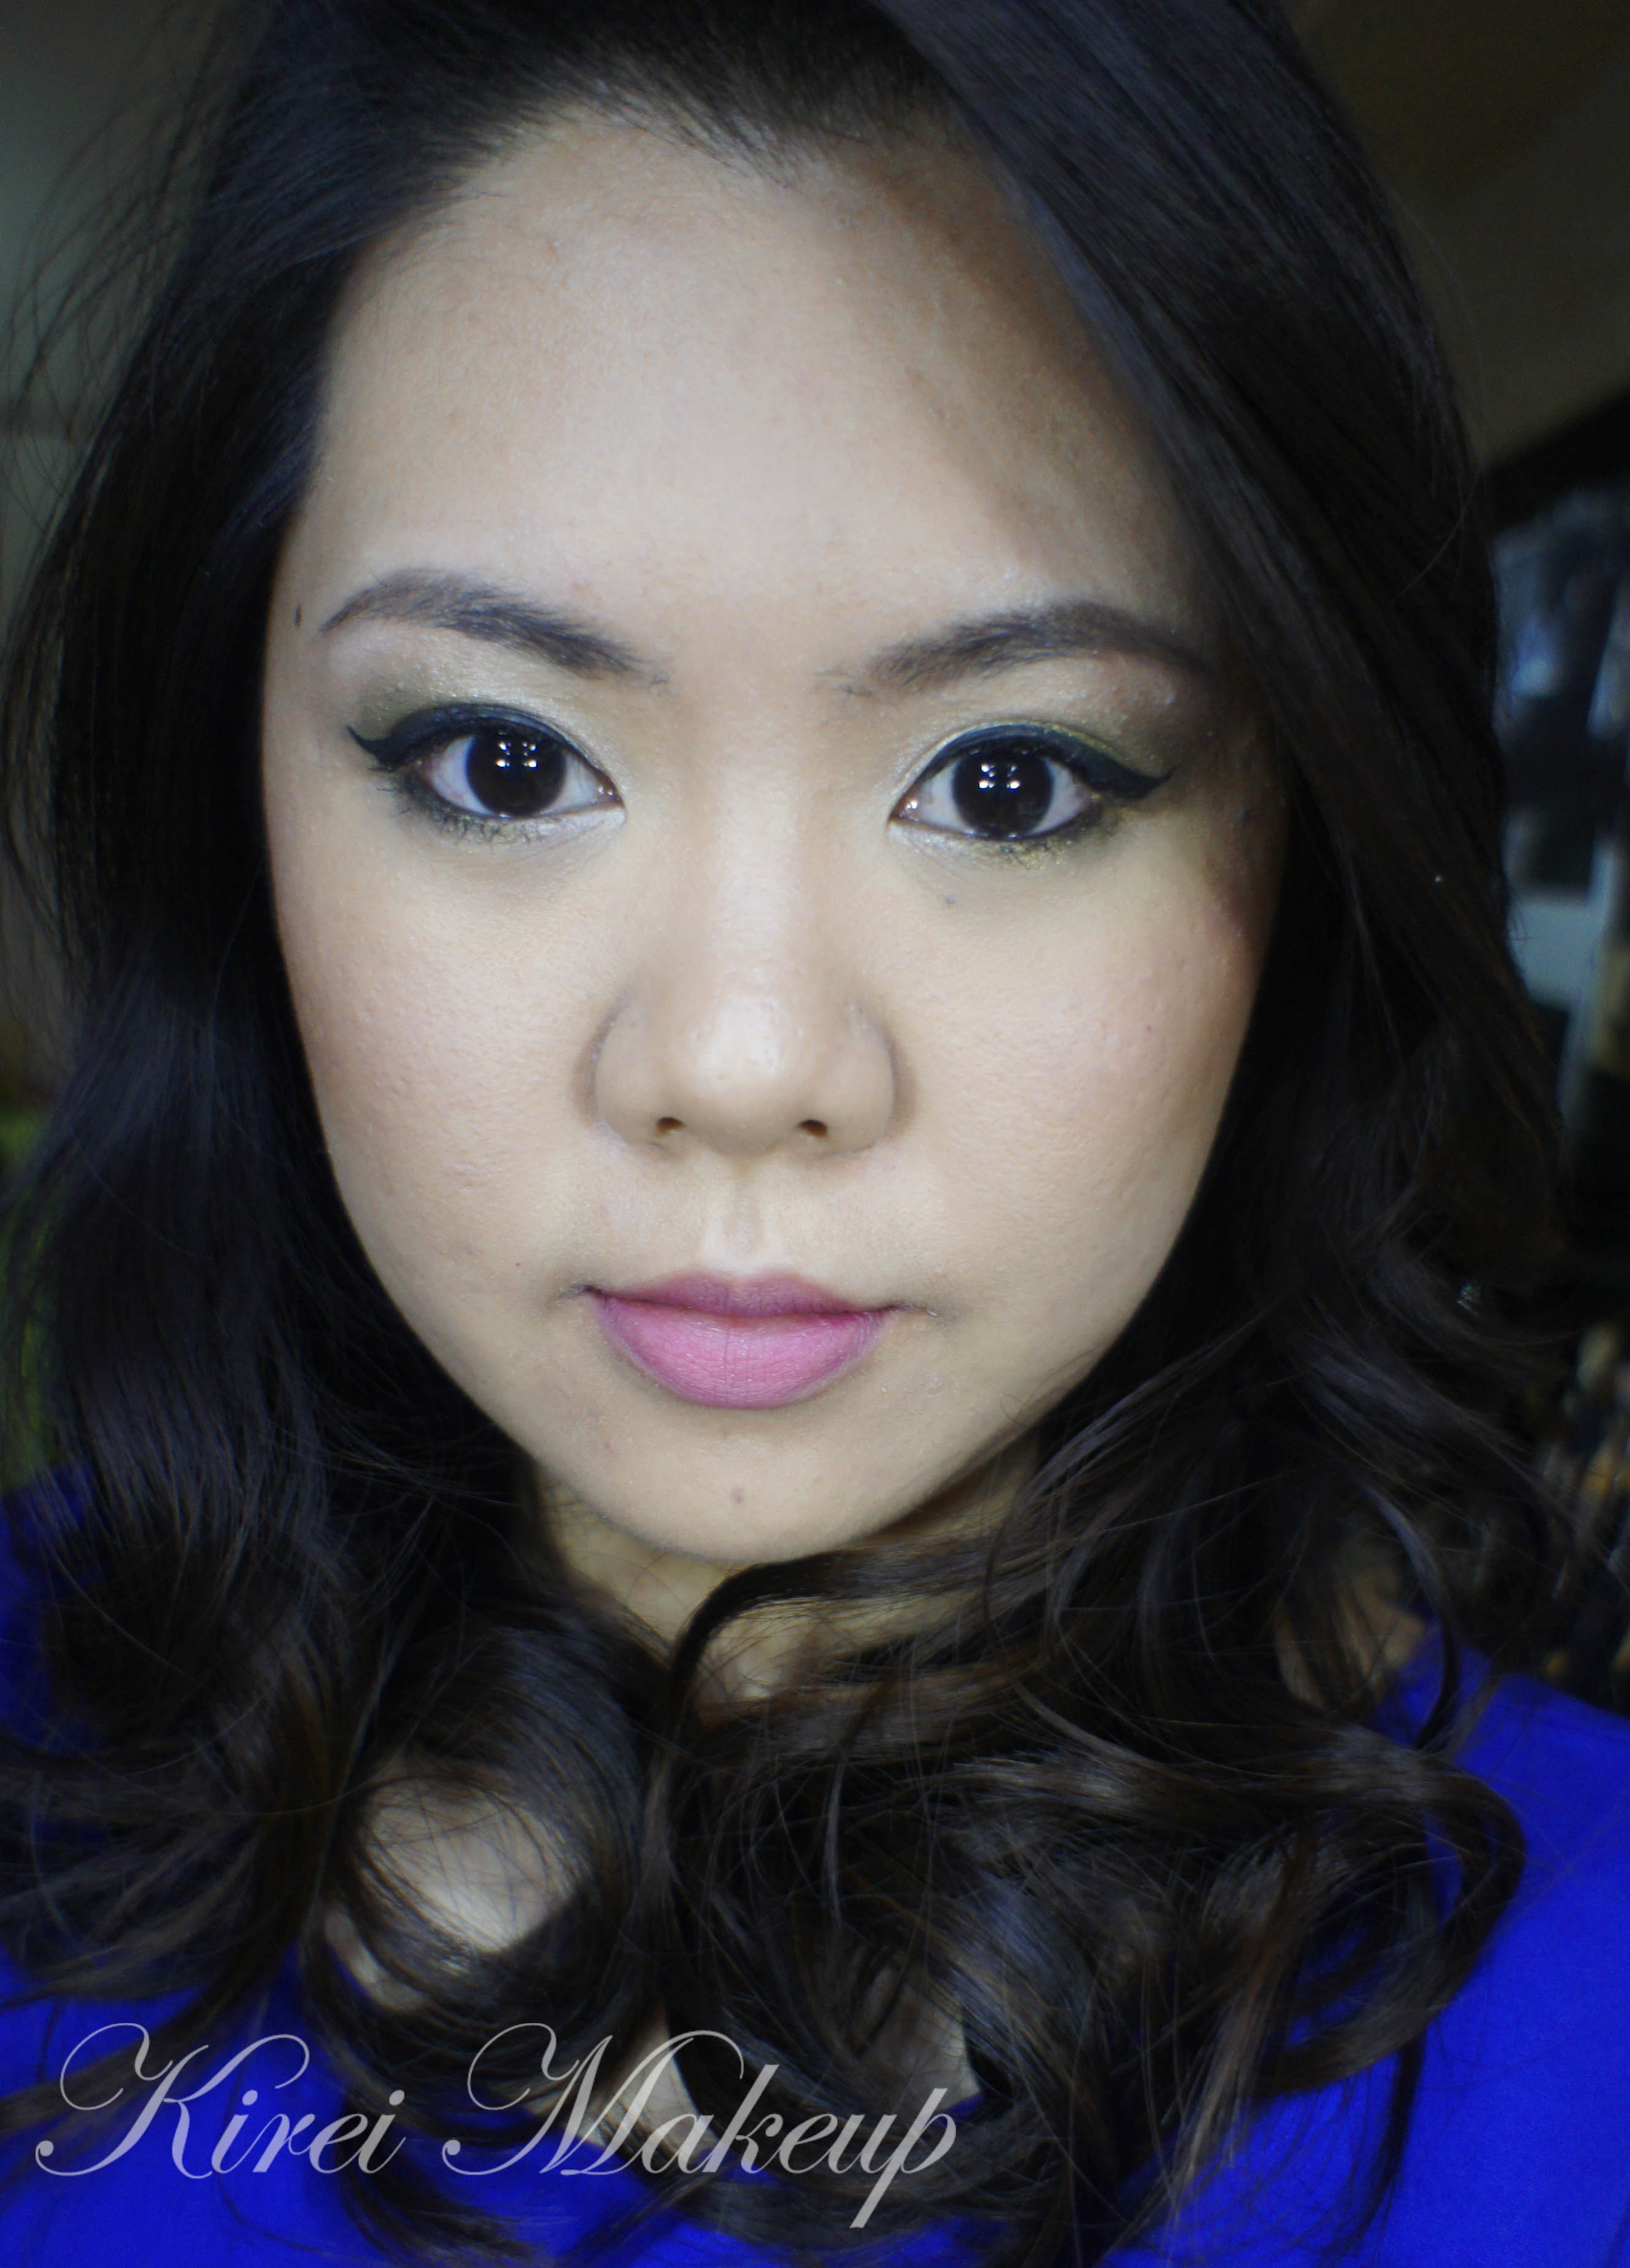
8. I filled my brows in, applied some falsies and voila! Done!

how to winged eyelinerow-

Fresh Dewy Makeup Look

Having a bold makeup is always nice, but I usually wear this type of makeup on my daily life. I barely wear makeup on a day-to-day basis, because I used to have a really bad case of acne and I just get used to not wear makeup at all. However, when I do feel like wearing makeup, I usually go for the easiest look. I used to wear this look a lot when I was younger, and I don’t even know why I stopped wearing it. It’s so easy, and the only thing that take time is the eyeliner. However, once you master the winged liner, it’s so fast and simple.

This look is really good for beginners who want to practice blending and creating the cat-eyeliner (or also called winged liner). The gold eyeshadow in this tutorial can be replaced with any eyeshadow color. I chose NARS Etrusque because I just love the color, and it has just enough shimmers to brighten up your eyes.

The rest of the face is kept very fresh and dewy, afterall it is called Fresh Dewy Makeup look! This face is super simple, the keys are to use cream products, and to lightly powder the oily areas only. For me, I powdered under my eyes to set my concealer only for this tutorial. Why, you ask? That’s because my skin in the winter is quite dry and doesn’t actually get oily at all. If you are oily, just powder the oily areas (usually T-zone or just the cheeks). If you’re oily everywhere, feel free to powder your face, and use a powder highlighter to create the dewy look.

I just feel so young and fresh! I also love the blush I used for this tutorial. I added a touch more than I usually does, just to make my cheeks look like it’s flushing from the inside. I think the blush helps with the whole youthful appearance. This look is so appropriate for everything, from day makeup to party makeup! If you’re planning to wear it during the day, you can create a thinner line or even skip in altogether. If you like it smokier, add black eyeliner on the tightline. It’s so versatile!

Ok, enough of my rambling, let’s get on it!

NARS Etrusque

How-to:

1. I prepped my eyelids using UD Primer Potion (original).

2. I applied NARS Etrusque eyeshadow all over my eyelid using a flat eyeshadow brush.

3. Using a clean fluffy brush, I blended the eyeshadow so there’s no harsh edge.

4. I lined my waterline, and lower lash line using MAC Powersurge pencil eyeliner. (You can use black, white, beige eyeliner if you like)

5. I applied NARS Etrusque on the lower lash line using an angled eyeliner brush.

6. Using a clean angled eyeliner brush, I applied L’oreal Infallible Lacquer Liner 24Hr in Blackest Black on the upper lash line creating a winged eyeliner.

7. I curled my lashes and applied Tarte Lights, Camera and Flashes mascara on both upper and lower lashes.

8. I applied false eyelashes (sample) on my upper lashes.

9. I filled my brows in using Anastasia Brow Wiz in Brunette.

Fresh, dewy makeup

10. For the face, I applied MAC Pro Longwear foundation in NC30 using CoverFX cream foundation brush.

11. I applied the concealer from MAC Pro Correct/Conceal palette in Medium under my eyes, as well as below the brows.

12. I set the concealer using CoverFX translucent powder.

13. I contoured my face very lightly using Smashbox contour powder palette (discontinued).

14. I applied Revlon Charmed Cream Blush on my cheeks using a clean foundation brush, and then blending it to my skin using my finger.

15. I highlighted the bridge of my nose, chin, cupid’s bow and top of cheekbones using Benefit Moon Beam.

16. I filled my lips using MAC Dervish lip liner, and then YSL Glossy Stain in Pêche Cerra-Cola (27) on top of it.

Holiday Makeup using MAC Diva

I’m on a mission to use my new Smashbox Full Exposure palette as much as I can, and in as many tutorials as possible. I will mention that I’ll be doing Smashbox Full Exposure palette review and swatches in my next post!

I’ve recently bought MAC Diva lipstick, which is a retro matte dark red lipstick. So, I wanted to start creating a holiday makeup tutorial that has a little bit of a classic look, with a modern twist. I decided to do this tutorial, which consisted of dark red lips and shimmery cat eyeliner.

Keep in mind that the glitters from Smashbox Full Exposure palette S7 eyeshadow might create a lot of fall-out. You might want to do your eye makeup first before doing the rest of the face.

If you want to see a tutorial using the Smashbox Full Exposure palette, please check my Smashbox Full Exposure Look #1 post. If you want to find out how to apply red lipstick, please check my How-To Apply [red] Lipstick post.

cat eyeliner

How-to:

1. I applied Urban Decay Primer Potion all over my eyelid using my ring finger.

2. Using Smashbox Full Exposure palette M5 eyeshadow, I applied it all over my lid using a flat eyeshadow brush.

3. I created a cat-eyeliner along the upper lash line using MAC 266 brush and Smashbox Full Exposure palette S7 eyeshadow.

4. Using the same brush and eyeshadow from Step 3, I applied the eyeshadow on my lower lash line.

5. I used L’oreal Voluminous Smoldering eyeliner on my waterline and tightline.

6. I filled my brows using MUFE Aqua Brow gel and a clean MAC 266 brush.

7. I curled my lashes and applied Physician’s Formula Organic mascara on both upper and lower lashes.

8. Then, I applied Eyeme false eyelashes on the upper lashes.

Holiday Makeup Tutorial

9. I applied MAC Pro Longwear foundation in NC30 all over my face.

10. I applied Benefit Erase Paste under my eyes.

11. I set the base using Cover FX Translucent powder.

12. Using Diorskin Shimmer Star Amber Diamond as highlighter.

13. I used MAC Shadowy as contour, and NARS Mata Hari on the cheeks.

14. On the lips, I applied MAC Brick lip liner and then applied MAC Diva on top of it.


Product of the Week: L’oreal Super Liner Ultra Sharp Tip

This week in Product of the Week, I’d like to introduce L’oreal Paris Super Liner Ultra Sharp! I bought this when I was in Hong Kong. There’s a Sephora-like store in Hong Kong called Sasa, and it carries a variety of makeup, skincare etc just like Sephora, but they also carry a lot of Asian products from Japan, Korea, China etc. Anyways, one of the few things that I bought there is this eyeliner.

L'oreal SUper Liner Ultra Sharp

As you all know, I love myKat Von D Trooper eyeliner, as well as my Kanebo Kate Super Sharp eyeliner. However, Trooper isn’t available in Indonesia, and neither is Kate. This L’oreal Super Liner, however, is available in Indonesia. I’ve seen it in several department store as well as online store (zalora, lazada etc). Since I was already in Sasa, I decided to buy it and give it a try.

This Super Liner only comes in Black when I was in store. I don’t think it comes in any other color. What is so special about this eyeliner is the fact that the bristle is very slim! Only 0.003mm tip. It’s very sharp, pointy and you can create a thin line.

L'oreal SUper Liner Ultra Sharp

Anyways, getting back to this Super Liner, I’m not sure if the ones sold in Indonesia is the 0.003mm tip. I know there’s a few other tips from this line which is 0.05mm and 0.8mm. This 0.003mm is the smallest I’ve found so far.

I love the packaging, I think the pen is very sleek and slim. The fact that it’s a pen eyeliner makes it even more appealing to me. I don’t have to carry seperate brush, and it makes it so much easier to travel with.

I’ve worn this eyeliner for about 6 hours, and it stays the whole day. I don’t think this eyeliner is waterproof, but it’s definitely smudge-proof. This eyeliner takes a while to dry, so you want to make sure you close your eyes (or look down) after application. If not, you might end up with some product on your lid. However, since it does take a while to dry, it makes it easier to be fixed should you make a mistake.

L'oreal SUper Liner Ultra Sharp

This eyeliner cost HKD$99 (around USD$14). I believe this product is not available in N. America. I think the N. America counterpart of this product is the L’oreal Paris Infallible Super Slim eyeliner, which is a felt tip eyeliner. This one is a brush tip.

This eyeliner costs Rp. 149,000 in Zalora and Lazada. I’m not sure how much it is in store. (I am not affiliated nor endorsed by zalora or lazada).

L'oreal SUper Liner Ultra Sharp review

In terms of application, you can create thin, medium and even a thick line if you prefer. Such an easy way to use and apply. The color is very black, yet it doesn’t end up shiny like my Kat Von D Trooper liner. Since it’s soooo thin, I can get it to the most inner corner part of my eyes.

Nevertheless, I still find Kanebo Kate Super Sharp liner creates a much thinner line than this one.

L'oreal SUper Liner Ultra Sharp

Pros:

  • Easy to use
  • Price is mid-range
  • Very travel-friendly
  • Smudge-proof
  • Very black
  • Long lasting

Cons:

  • Not as thin as Kanebo Kate eyeliner
  • Takes a while to dry

Conclusion:

I chose this as my product of the week because should I run out of my 2 favorite eyeliners, I’ll probably stash this one up in my kit. It’s definitely a lot more affordable than the other 2 (Kat Von D and Kanebo Kate), and definitely more widely available where I am living right now.

I’m giving this Super Liner a 4 stars out of 5


Olive Twist

I always have this soft spot for olive colored eyeshadows cause they are just so lovely and pretty. This MAC Duo Mineralized eyeshadow in Bright Side/Gallery Gal is one of my favorite. You can apply the eyeshadows wet or dry, and you can do smoky, neutral, color anything you like! A simple duo eyeshadow can be used in so many ways!

The tutorial showed how to use the eyeshadows together in a very simple way, and you can wear this as a day look, or a night out. If you’re feeling brave, pair this up with a red lip, if you’re going to a party, apply false eyelashes. Make it your own! This classic liner look is getting a little twist from the olive-colored eyeshadow!

How-to:

1. I applied Shiseido primer all over my face.

2. Using a flat eyeshadow brush, I applied MAC Gallery Gal (the olive side) on the outer half of the lid.

3. Using another flat eyeshadow brush, I applied MAC Bright Side (the champagne side) on the inner half, blending it towards the olive.

4. Applied the same sequence of eyeshadow on the lower lid using a pencil brush.

5. Using an angled eyeliner brush, I applied MUFE Aqua Black gel liner and created a winged/cat-eyeliner on the upperlash line.

6. Using whatever was left on the brush, I applied MUFE Aqua Black along the waterline.

7. I curled my lashes and applied Dior Overcurl mascara on both top and bottom lashes.

8. I filled in my brows using a mixture of MAC Omega and Brun.

MAC mineralized eyeshadow

9. For the face, I applied Estee Lauder Double Wear Light foundation.

10. For contouring, I applied MAC Shadowy on the temples as well as hollows of the cheeks using a face fan brush. I also applied it on the sides of the nose using Sigma Angled Precision brush.

11. For the cheeks, I applied MAC Cubic blush.

12. On the lips, I applied Tarte Lipsurgence in Hope.

Everyday makeup - Kirei Makeup