Last night, I put up a sneak preview on today’s tutorial on my Instagram account! I was super pumped to do this tutorial since I can show you guys how you can use the previous tutorial technique and incorporate other color into the look. Don’t you just love that bright green-yellow eyeshadow?! It’s actually MAC Sweet and Punchy eyeshadow, which was from the old MAC collection. If you can’t find this eyeshadow, you can substitute it for MAC Rated R which is exactly the same color.
Anyways, I also want to mention that I’ll start doing “repost” or “regram” on my Instagram account if you follow me and tag your beautiful makeup works with #kireimakeup. I’d love to see your works, especially if you re-create one of my looks! So, please do follow and tag me on Instagram!
As always, scroll all the way down if you want to skip the how-to, and get on the list of products used for this look.
How-to:
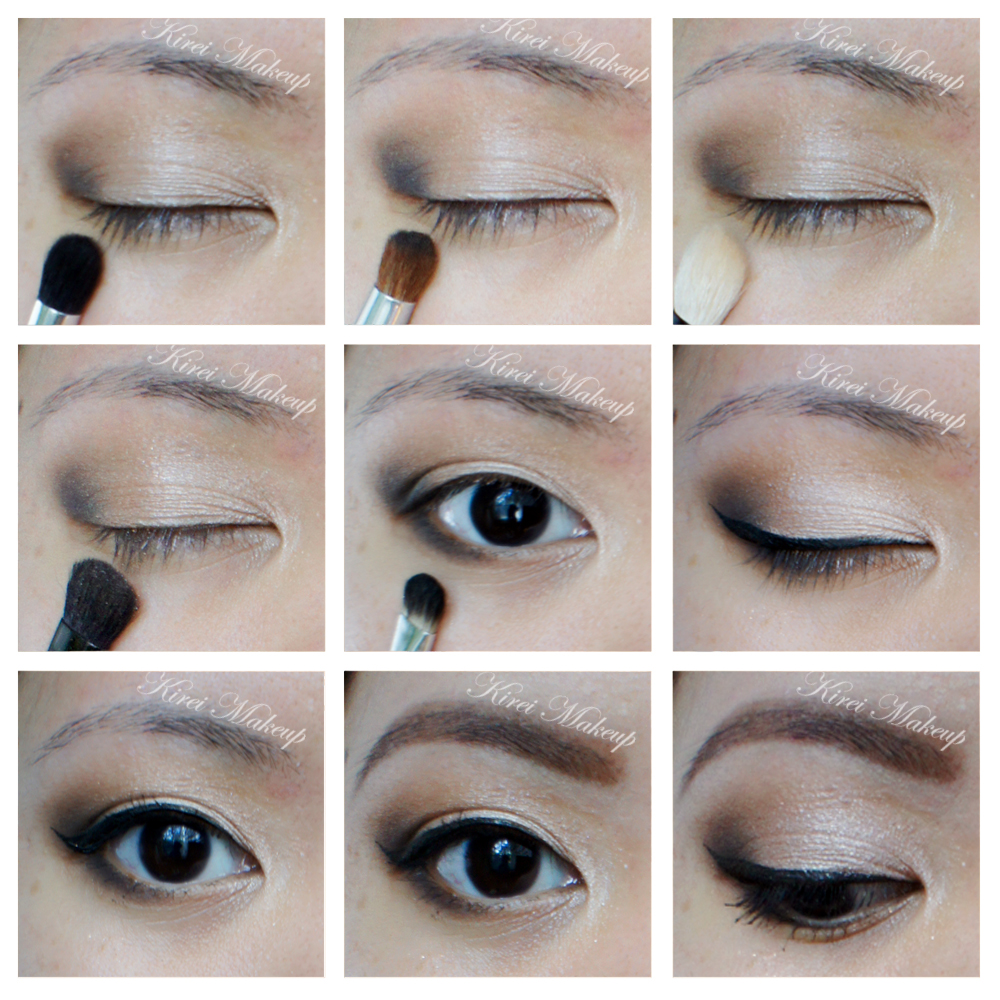
1. My eyelids were prepped using Urban Decay Primer Potion in Sin. Next, I applied Smashbox Full Exposure eyeshadow in M1 using a blending brush on my crease.
2. Using a Sephora bullet crease brush, I applied Smashbox Full Exposure eyeshadow in M7 on the outer V.
3. Using a clean blending brush, I blended out my crease so there’s no harsh line.
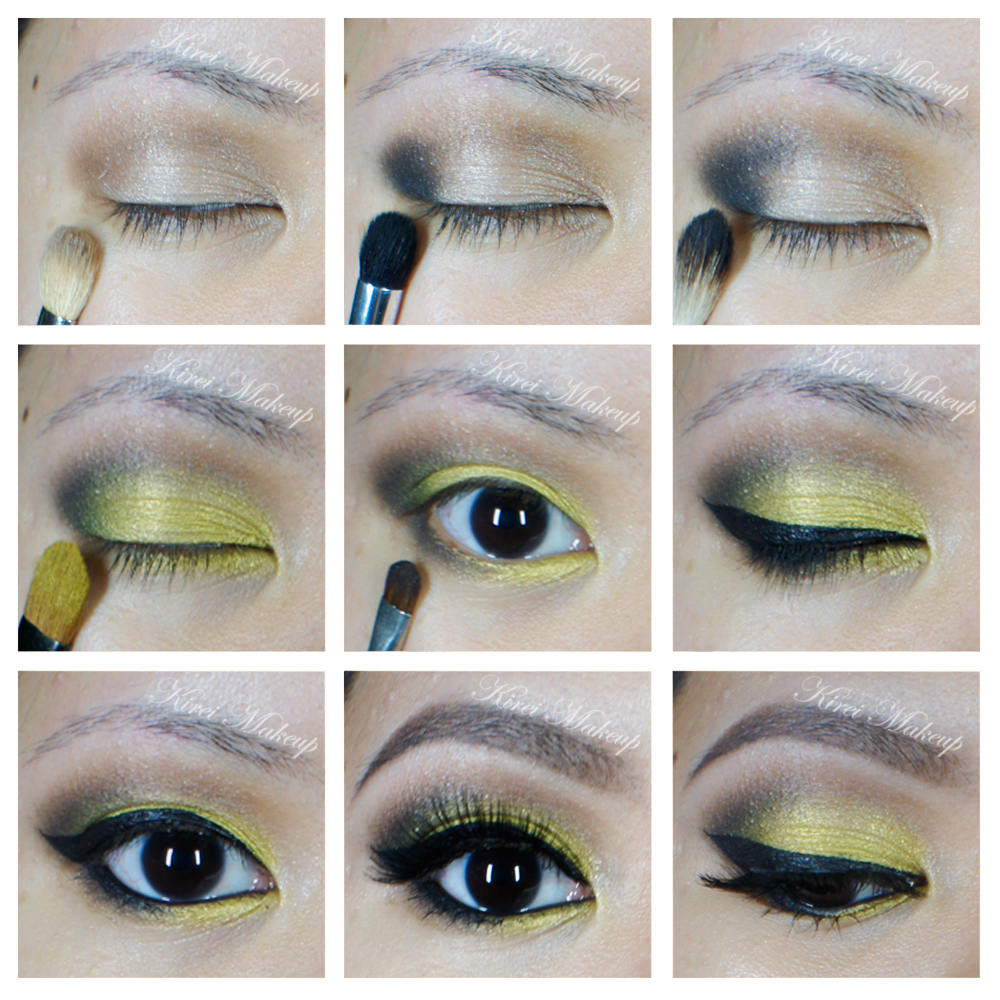
4. I applied MAC Sweet and Punchy using a flat eyeshadow brush on my eyelid area.
5. Using a small shader brush, I applied MAC Sweet and Punchy on the inner part of my lower lid, and then I applied Smashbox Full Exposure M7 eyeshadow on the outer corner.
6. I created a thick winged eyeliner using a small angled eyeliner brush and L’oreal Infallible Gel Lacquer Liner 24H in Blackest Black.
7. Using whatever was left on the brush on step 6, I applied the gel liner on my waterline as well as the outer half of my lower lid.
8. I curled my lashes, applied Cover Girl Lash Blast mascara, and then I added Gwiyomi “Putri” false eyelashes.
9. I filled my brows using Anastasia Brow Wiz in Ash Blonde and Brunette (I filled my brows slightly differently this time, might do a tutorial on how I filled it in next time).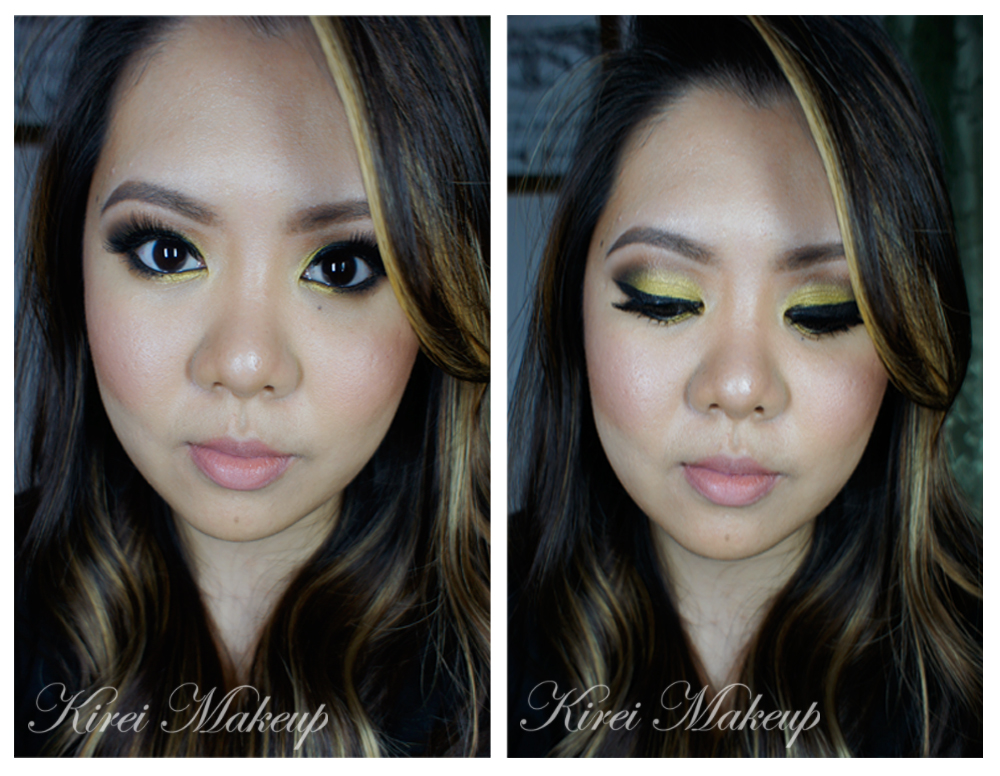
10. On my face, I applied CoverFX cream foundation in G40 using a Sigma Tapered Kabuki brush.
11. I added a little bit of CoverFX N110 cream foundation along my jawline, underneath my cheeks and sides of my nose using a damped sponge.
12. I set my face using CoverFX translucent powder.
13. On my cheeks, I applied Benefit Hervana. I also added Benefit Coralista just on the apples of my cheeks.
14. On my lips, I applied L’oreal Color Riche lip liner in Beyond Pink.
Products used
Eyes – Urban Decay Primer Potion in Sin; MAC Sweet and Punchy eyeshadow; Smashbox Full Exposure palette (M1 on the crease; M7 on outer V); Cover Girl Lash Blast mascara; L’oreal Infallible Gel Lacquer 24Hr in Blackest Black; Gwiyomi “Putri” false eyelashes; Anastasia Brow Wiz in Ash Blonde and Brunette.
Face – CoverFX cream foundation (G40 as base, N110 as contour); CoverFX translucent powder; Benefit Hervana blush; Benefit Coralista blush.
Lips – L’oreal Color Riche lip liner in Beyond Pink.
Disclaimer: Please note that links to Sigma Beauty will land you to my affiliate page. However, I strive to recommend only the best products for you, and ones that I love myself, so you know you are in good hands. Your support in purchasing through these links will go towards the maintenance of this website, and to keep the blog updated and running. Thank you for your support!