L’oreal Cookies and Cream

Finally! A tutorial, whaaat?! Well, beauty lovers, I hope this will satisfy you for a while. I do have a few more stuffs lining up, but one by one, shall we?

So, I’ve owned this L‘oreal Cookies and Cream palette for a while (please check my post for the swatches here). However, I didn’t really get the chance to play with until now. For the tutorial below, I followed the instruction from the back of the palette. Personally I won’t do it this way since I find that it’s not smoky enough for me.

Also, I recommend everyone to use a primer on the lid before eyeshadow application. Although the pigments are pretty good, the eyeshadows didn’t really have any staying power. The reason why I didn’t apply any primer is because I was testing for creasing and such. If you have an oily lid, you’d probably want to apply primer.

How-to:

1. I applied the 2nd lightest eyeshadow (a silver) from the palette all over the lid.

2. On the crease, I applied the medium (silver grey) eyeshadow using a fluffy blending brush.

3. Using Smashbox bullet brush, I applied the darkest eyeshadow (graphite) on the outer V.

4. I blended the outer V using a clean blending brush.

5. Using a clean blending brush, I applied the highlighter color (vanilla) under the brow.

6. I applied the medium color (silver grey) along the lower lash line using an angled brush, and the darkest color on the outer half of the lower lash line.

7. I created a slight winged liner using L’oreal Super Slim Liquid Eyeliner along the upper lash line.

8. I also lined my waterline using L’oreal Smoldering Voluminous pencil liner.

9. I curled my lashes and applied mascara.

10. I also applied false eyelashes Fleur Fleur in 201.

11. I filled my brows using Shu Uemura Hard Formula no. 9.

Asian Smoky Eyes

12. For the face, I applied UD Naked foundation.

13. On the cheeks, I applied L’oreal Rose Gold Visible Lift blush.

14. Slightly contoured my nose using Smashbox contour/highlight trio palette (discontinued).

15. On the lips, I filled it in using L’oreal Infallible lipliner in Rose.

Asian Smoky Eyes

Product of The Week: M.A.C “Melon” Pigment Color Powder

I know, I know..I’ve been a bad blogger..missing so many days of posting, not to mention forgetting to post last week’s Product of the Week…Oh well…Last week wasn’t a good week for me in my personal life, not to mention all the heavy rain cause a lot of laziness and procrastination..I haven’t even work out for a week! hahahaha..

Anyways, since I missed last week’s Product of the Week, I’ve decided to put this week’s installment on Monday. I’ll try to do another one this Wednesday, but no promises since my lover (aka bff), Liz, is coming to see me!!! I’m gonna be busy for a while…

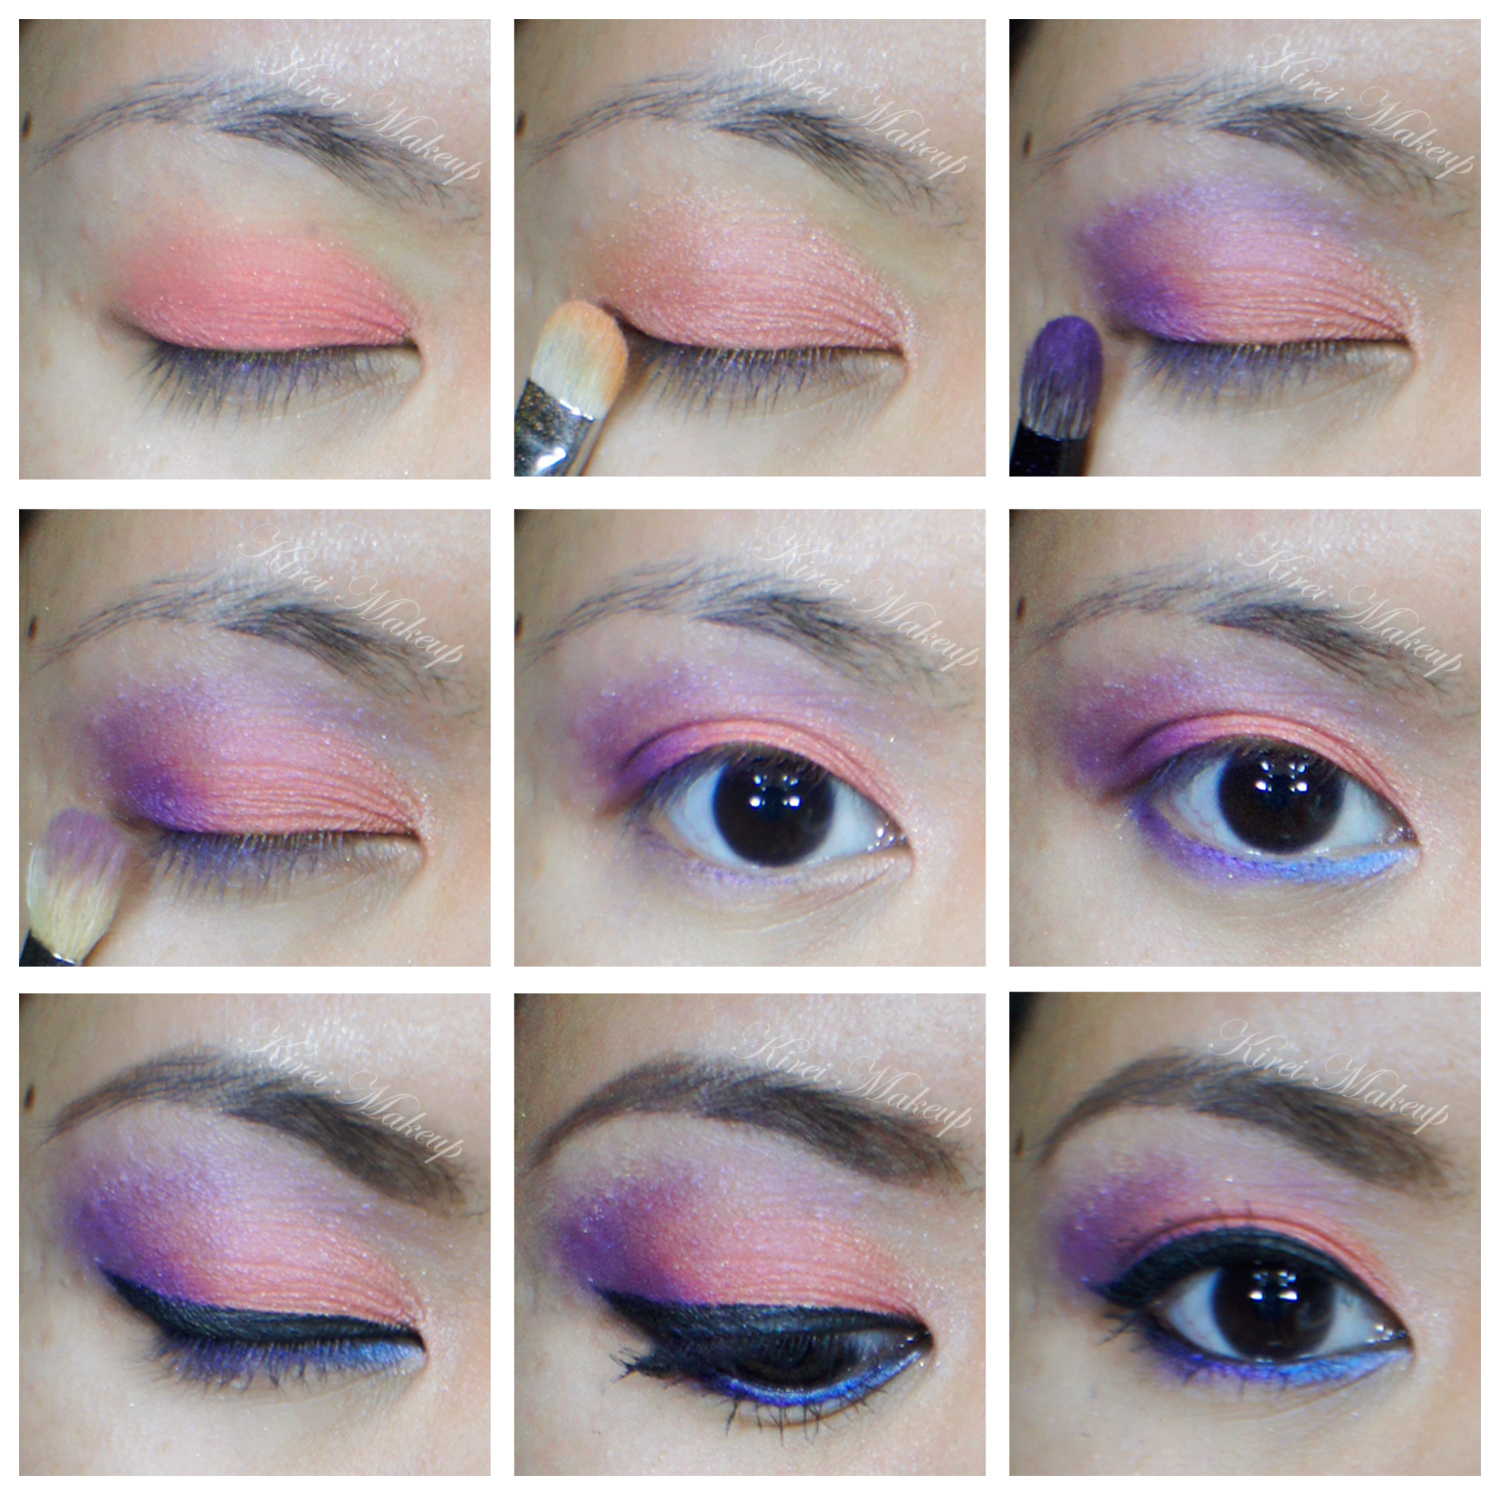
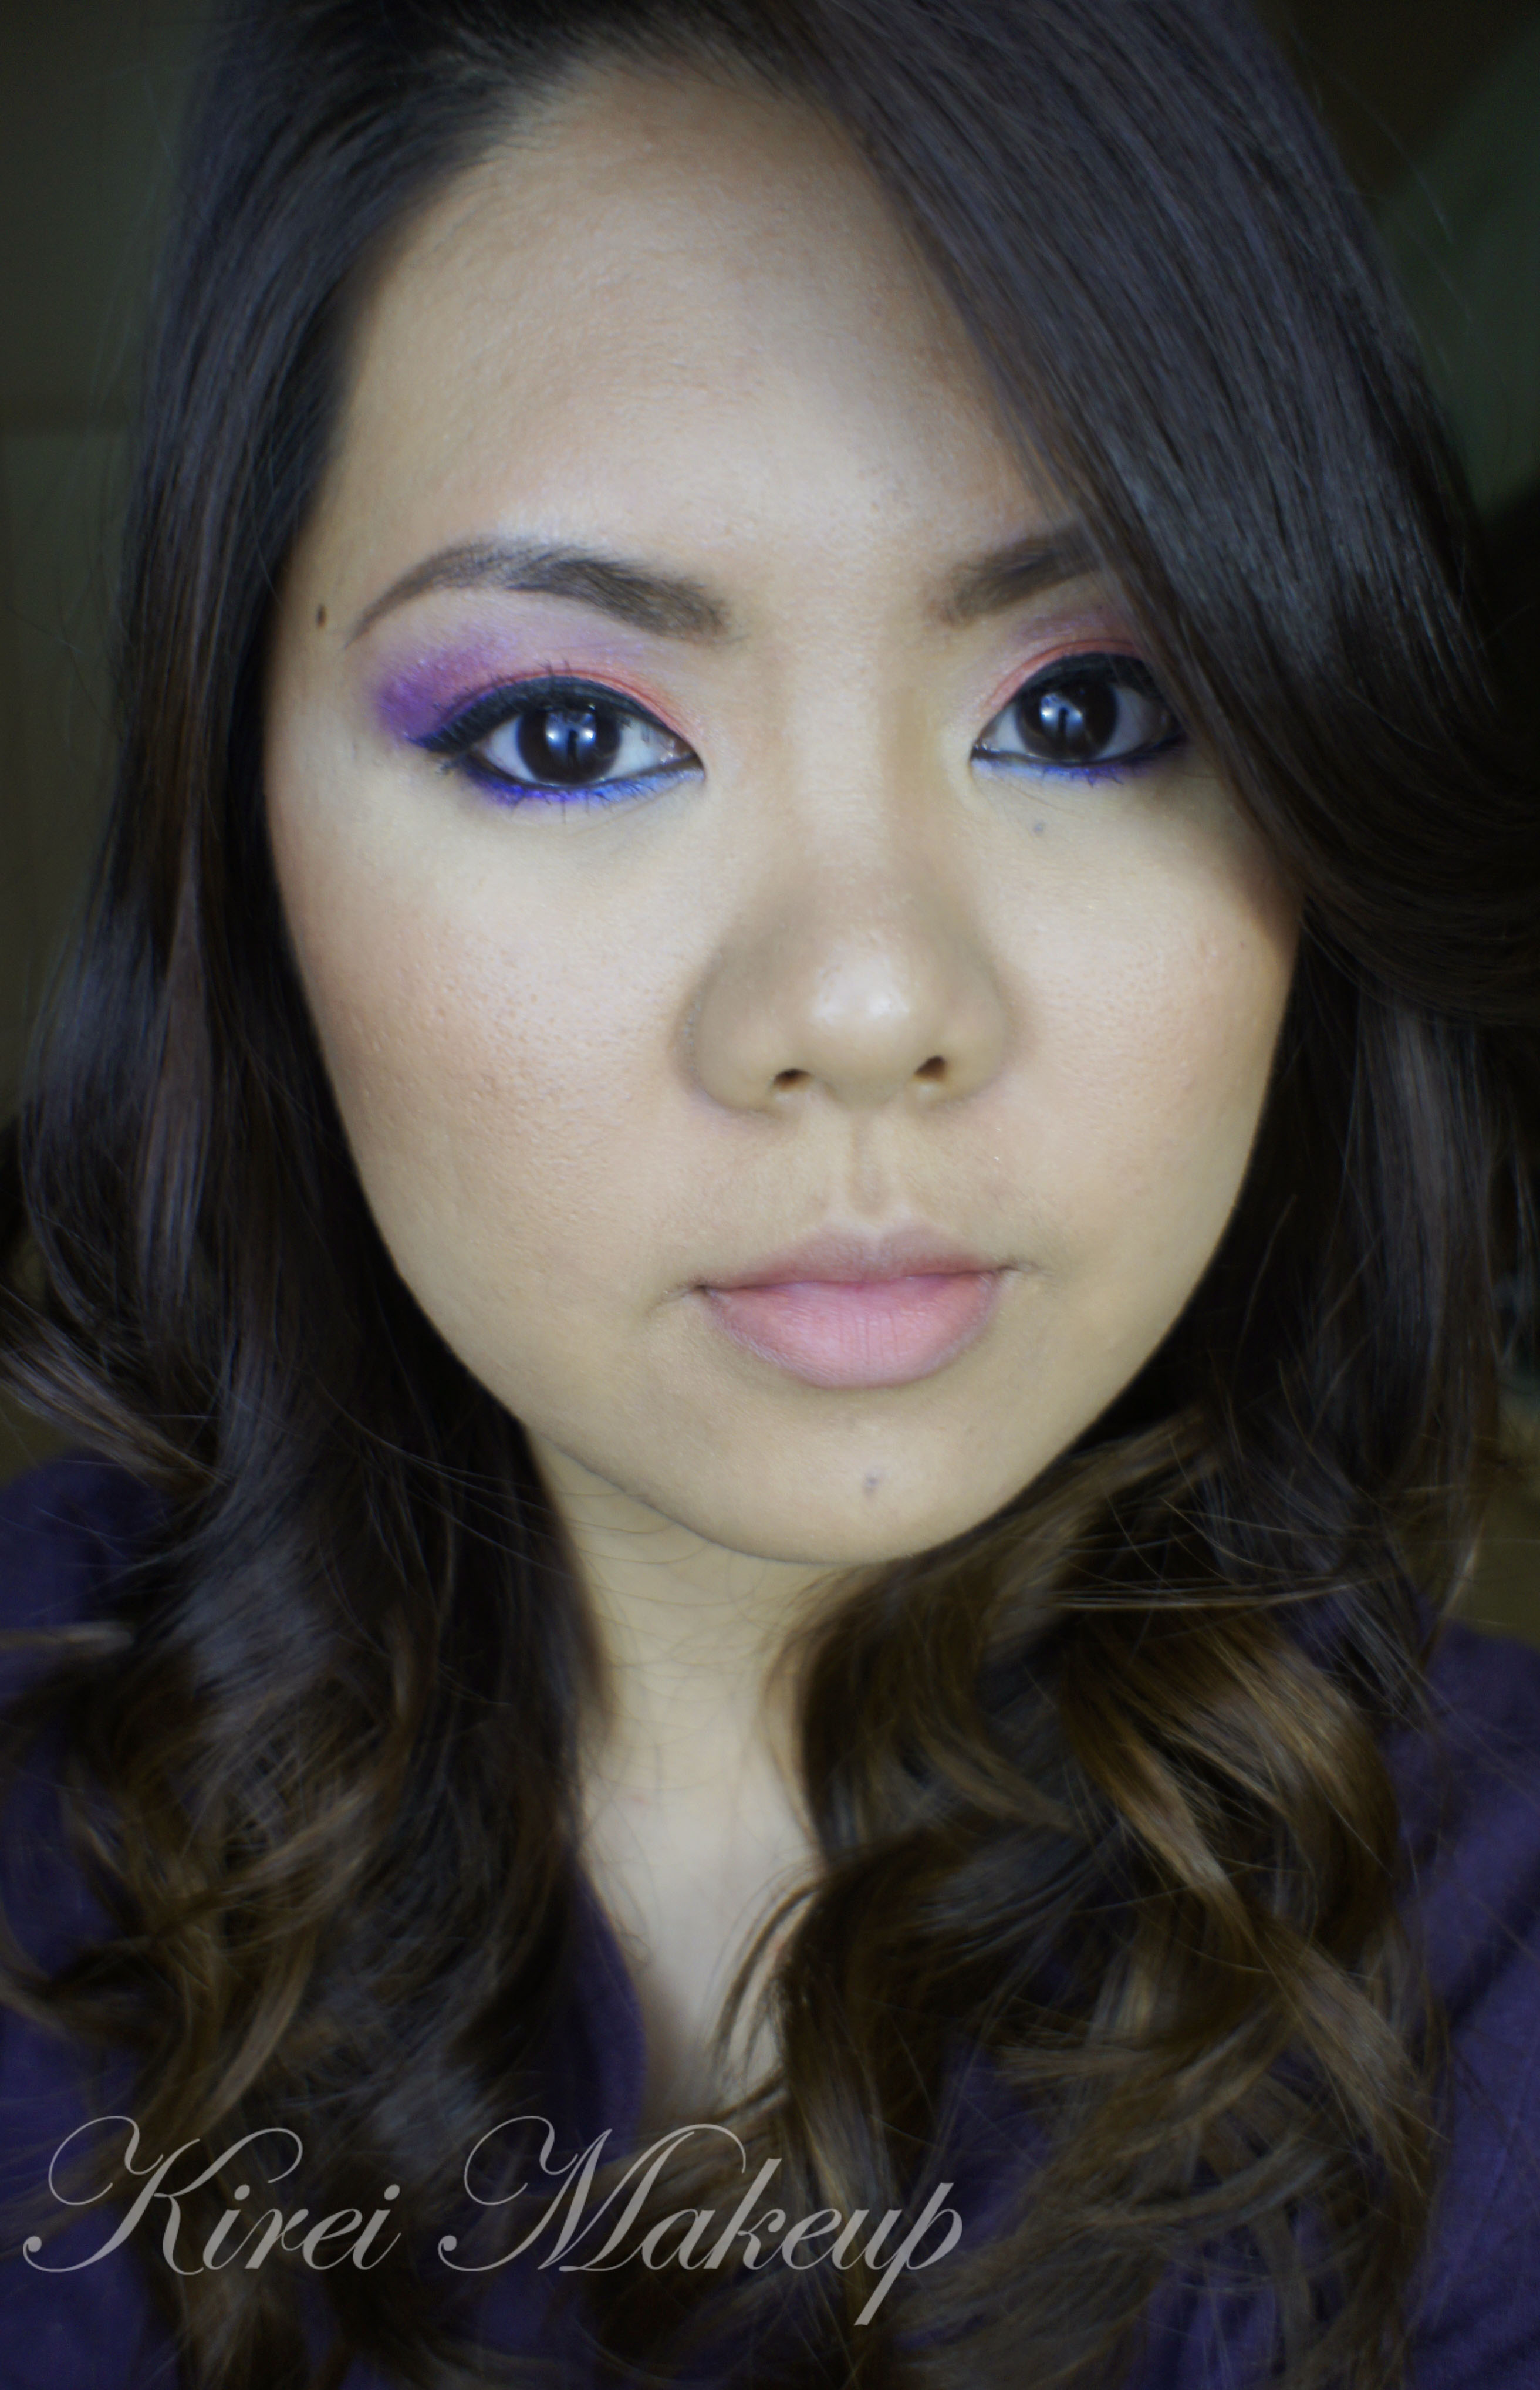
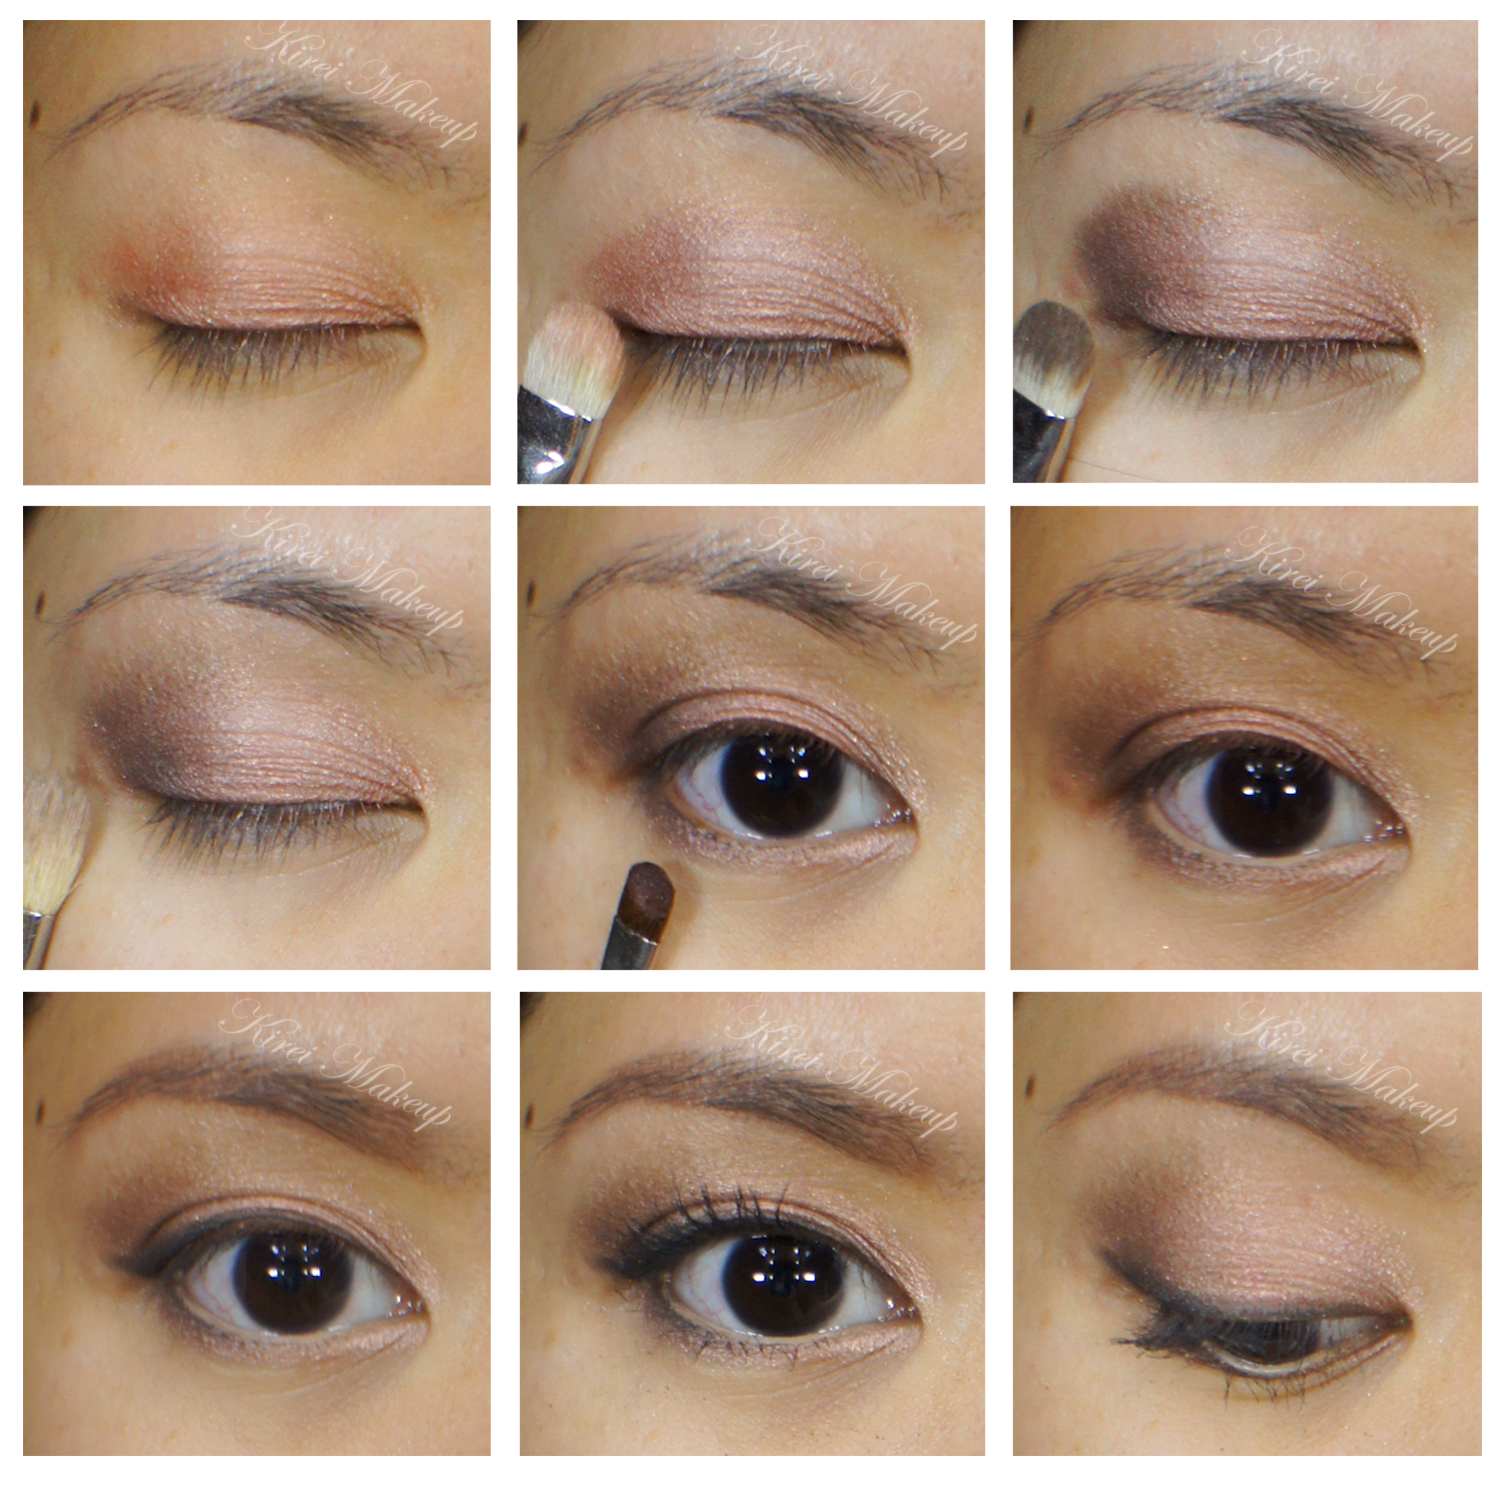
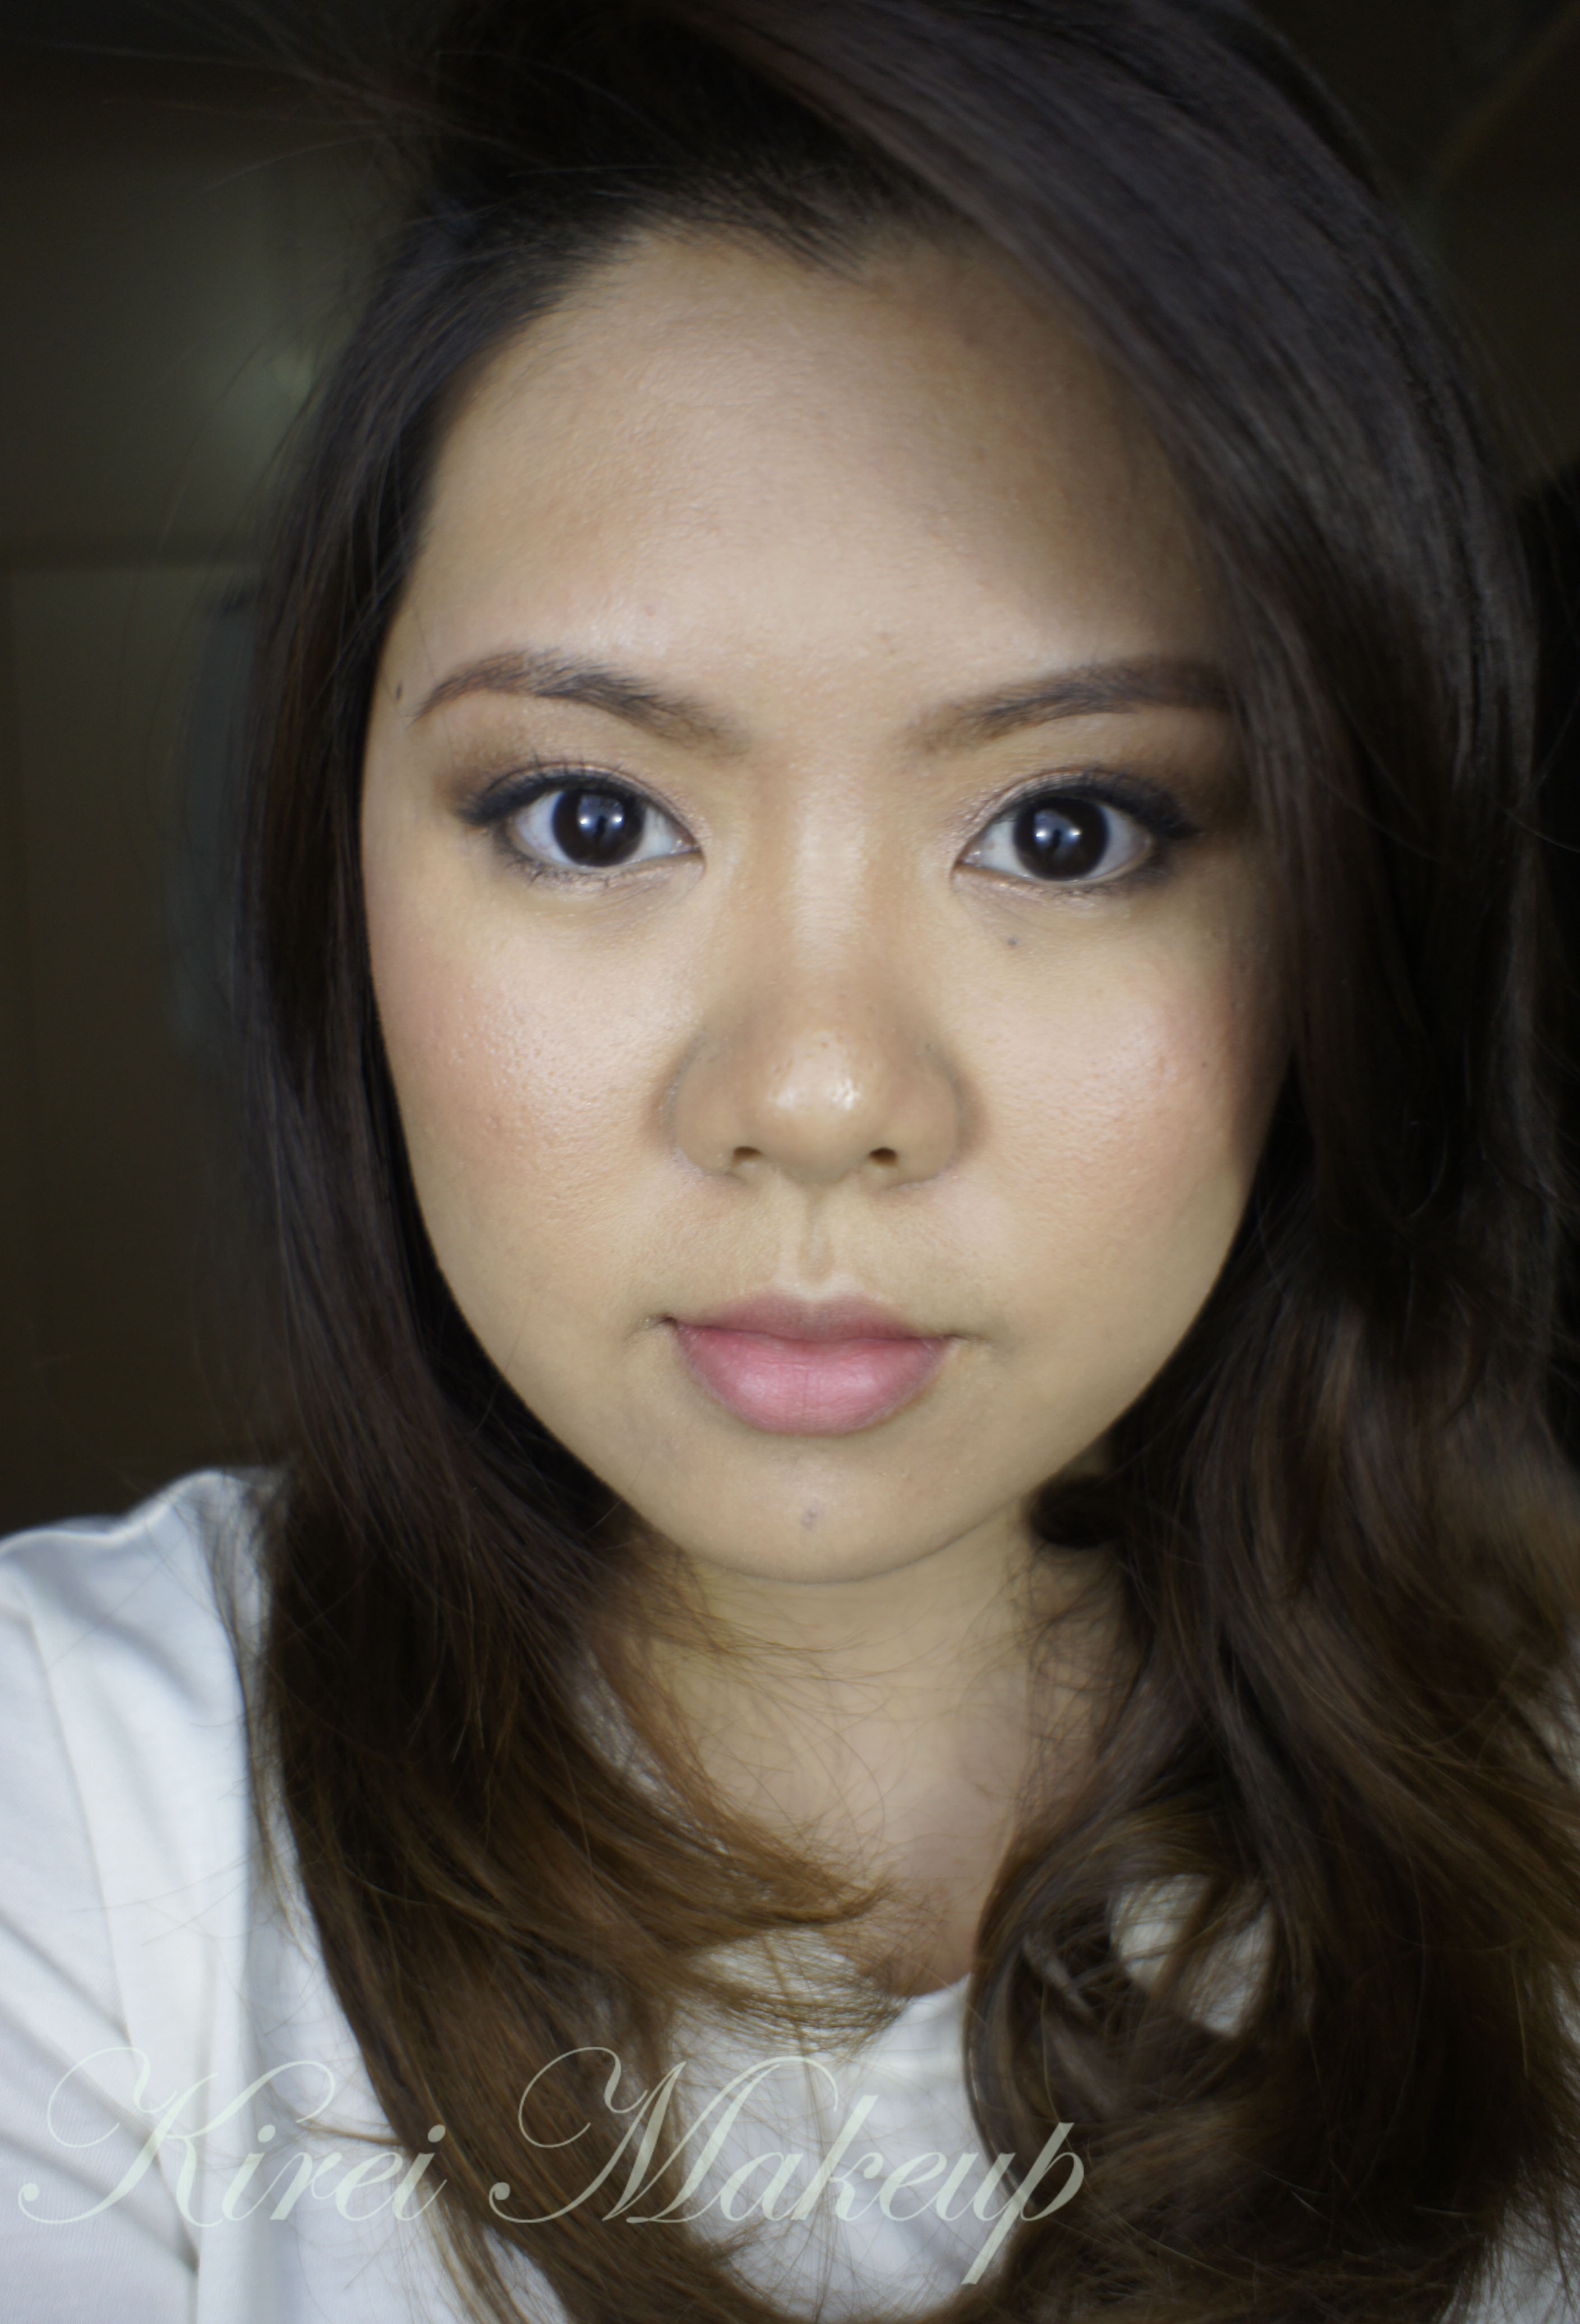
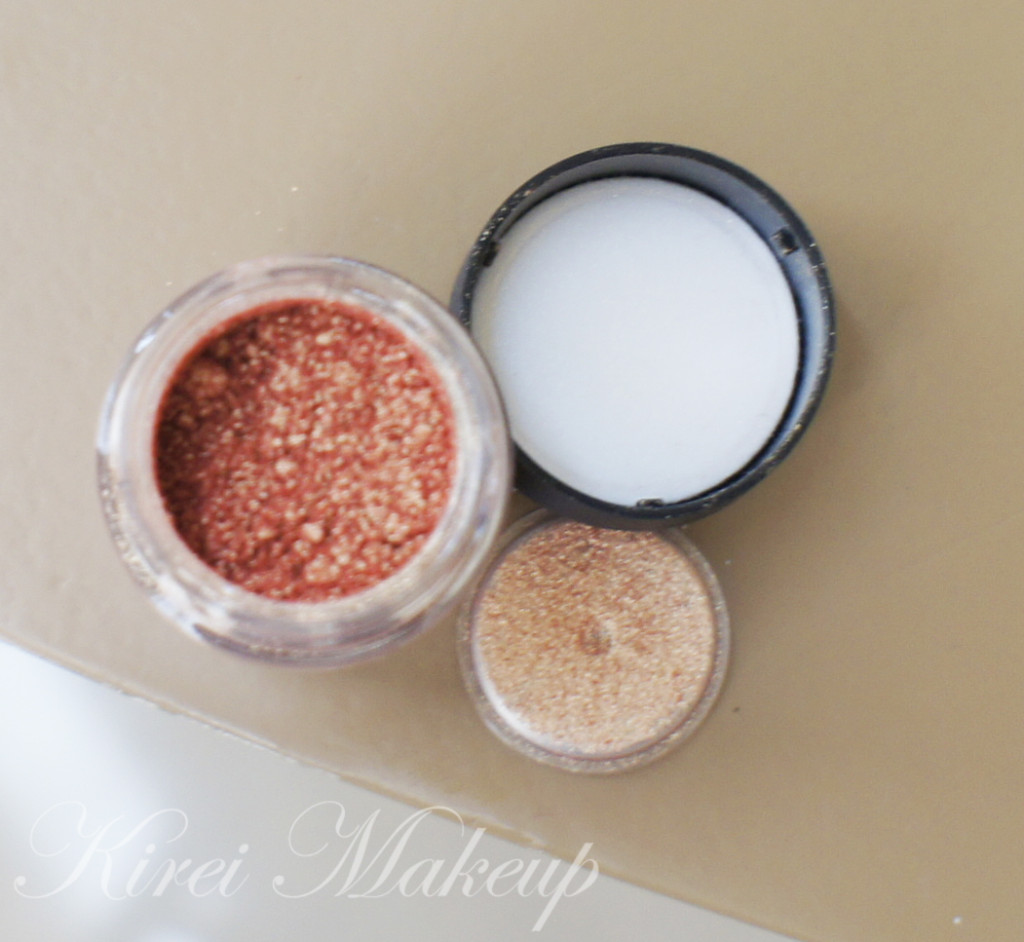
So, in this week’s installment, I want to show you guys M.A.C Melon Pigment Color Powder.

What is MAC Pigment Color Powder?

Pigment is a highly concentrated loose colour powder that contains ingredients to help it adhere to the skin. Create a subtle wash of colour or an intense effect. Does not streak or cake. Easy to blend and long-lasting. Please note: Pigments are sold by weight not volume. Containers can appear to be less than full due to settling of the product. 

M.A.C Cosmetics, 2013

MAC Melon Pigment

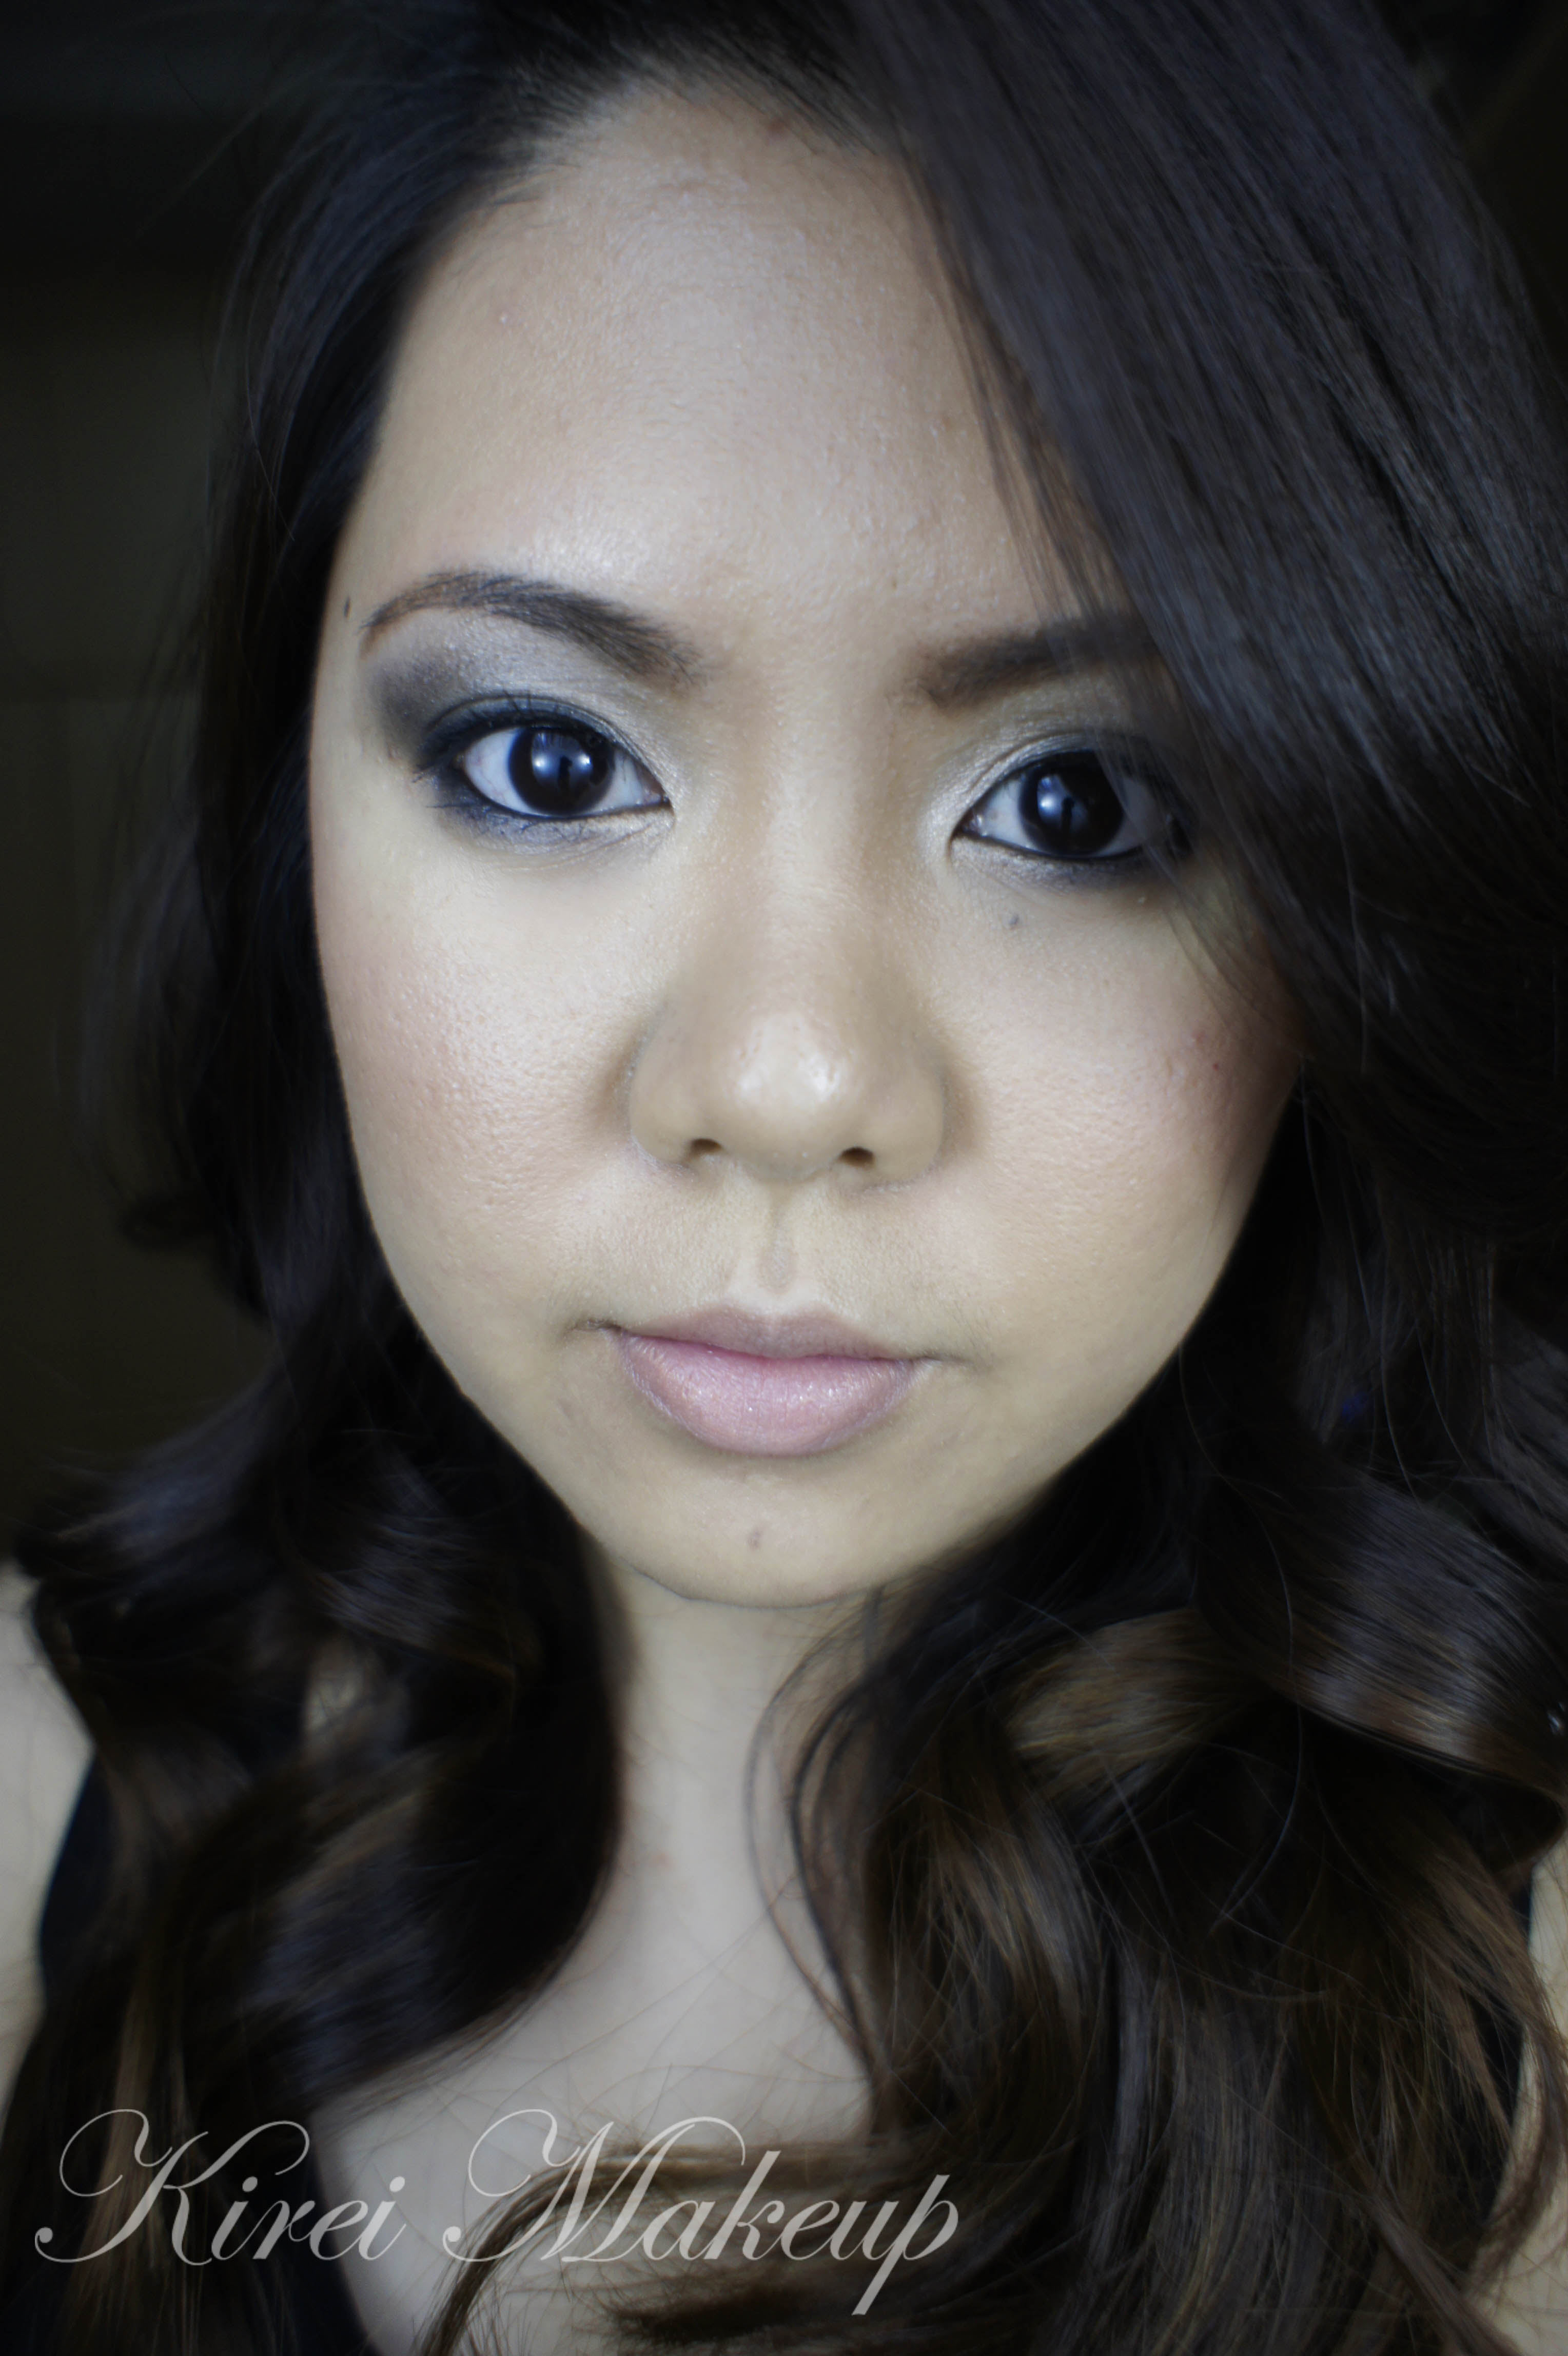
Let me just say that I have been using this pigment for a looong time. Like I said in my Summer Splash post, I always go back to this pigment for my Summer makeup. Now that I’m in the Tropics, I tend to wear this a lot more than other eyeshadow. I have quite a small collection of M.A.C loose pigments, but this shade, Melon, is definitely my favorite.

M.A.C Melon (is?) was a Pro Product. I’m not sure if this product is still being sold. I took a look at the MAC Cosmetics website and this shade is no longer in their pigment list. I know that some stores might still carry them until their stock is finish. If you can’t find it, you may want to try NYX loose pearl eyeshadow for the dupe.

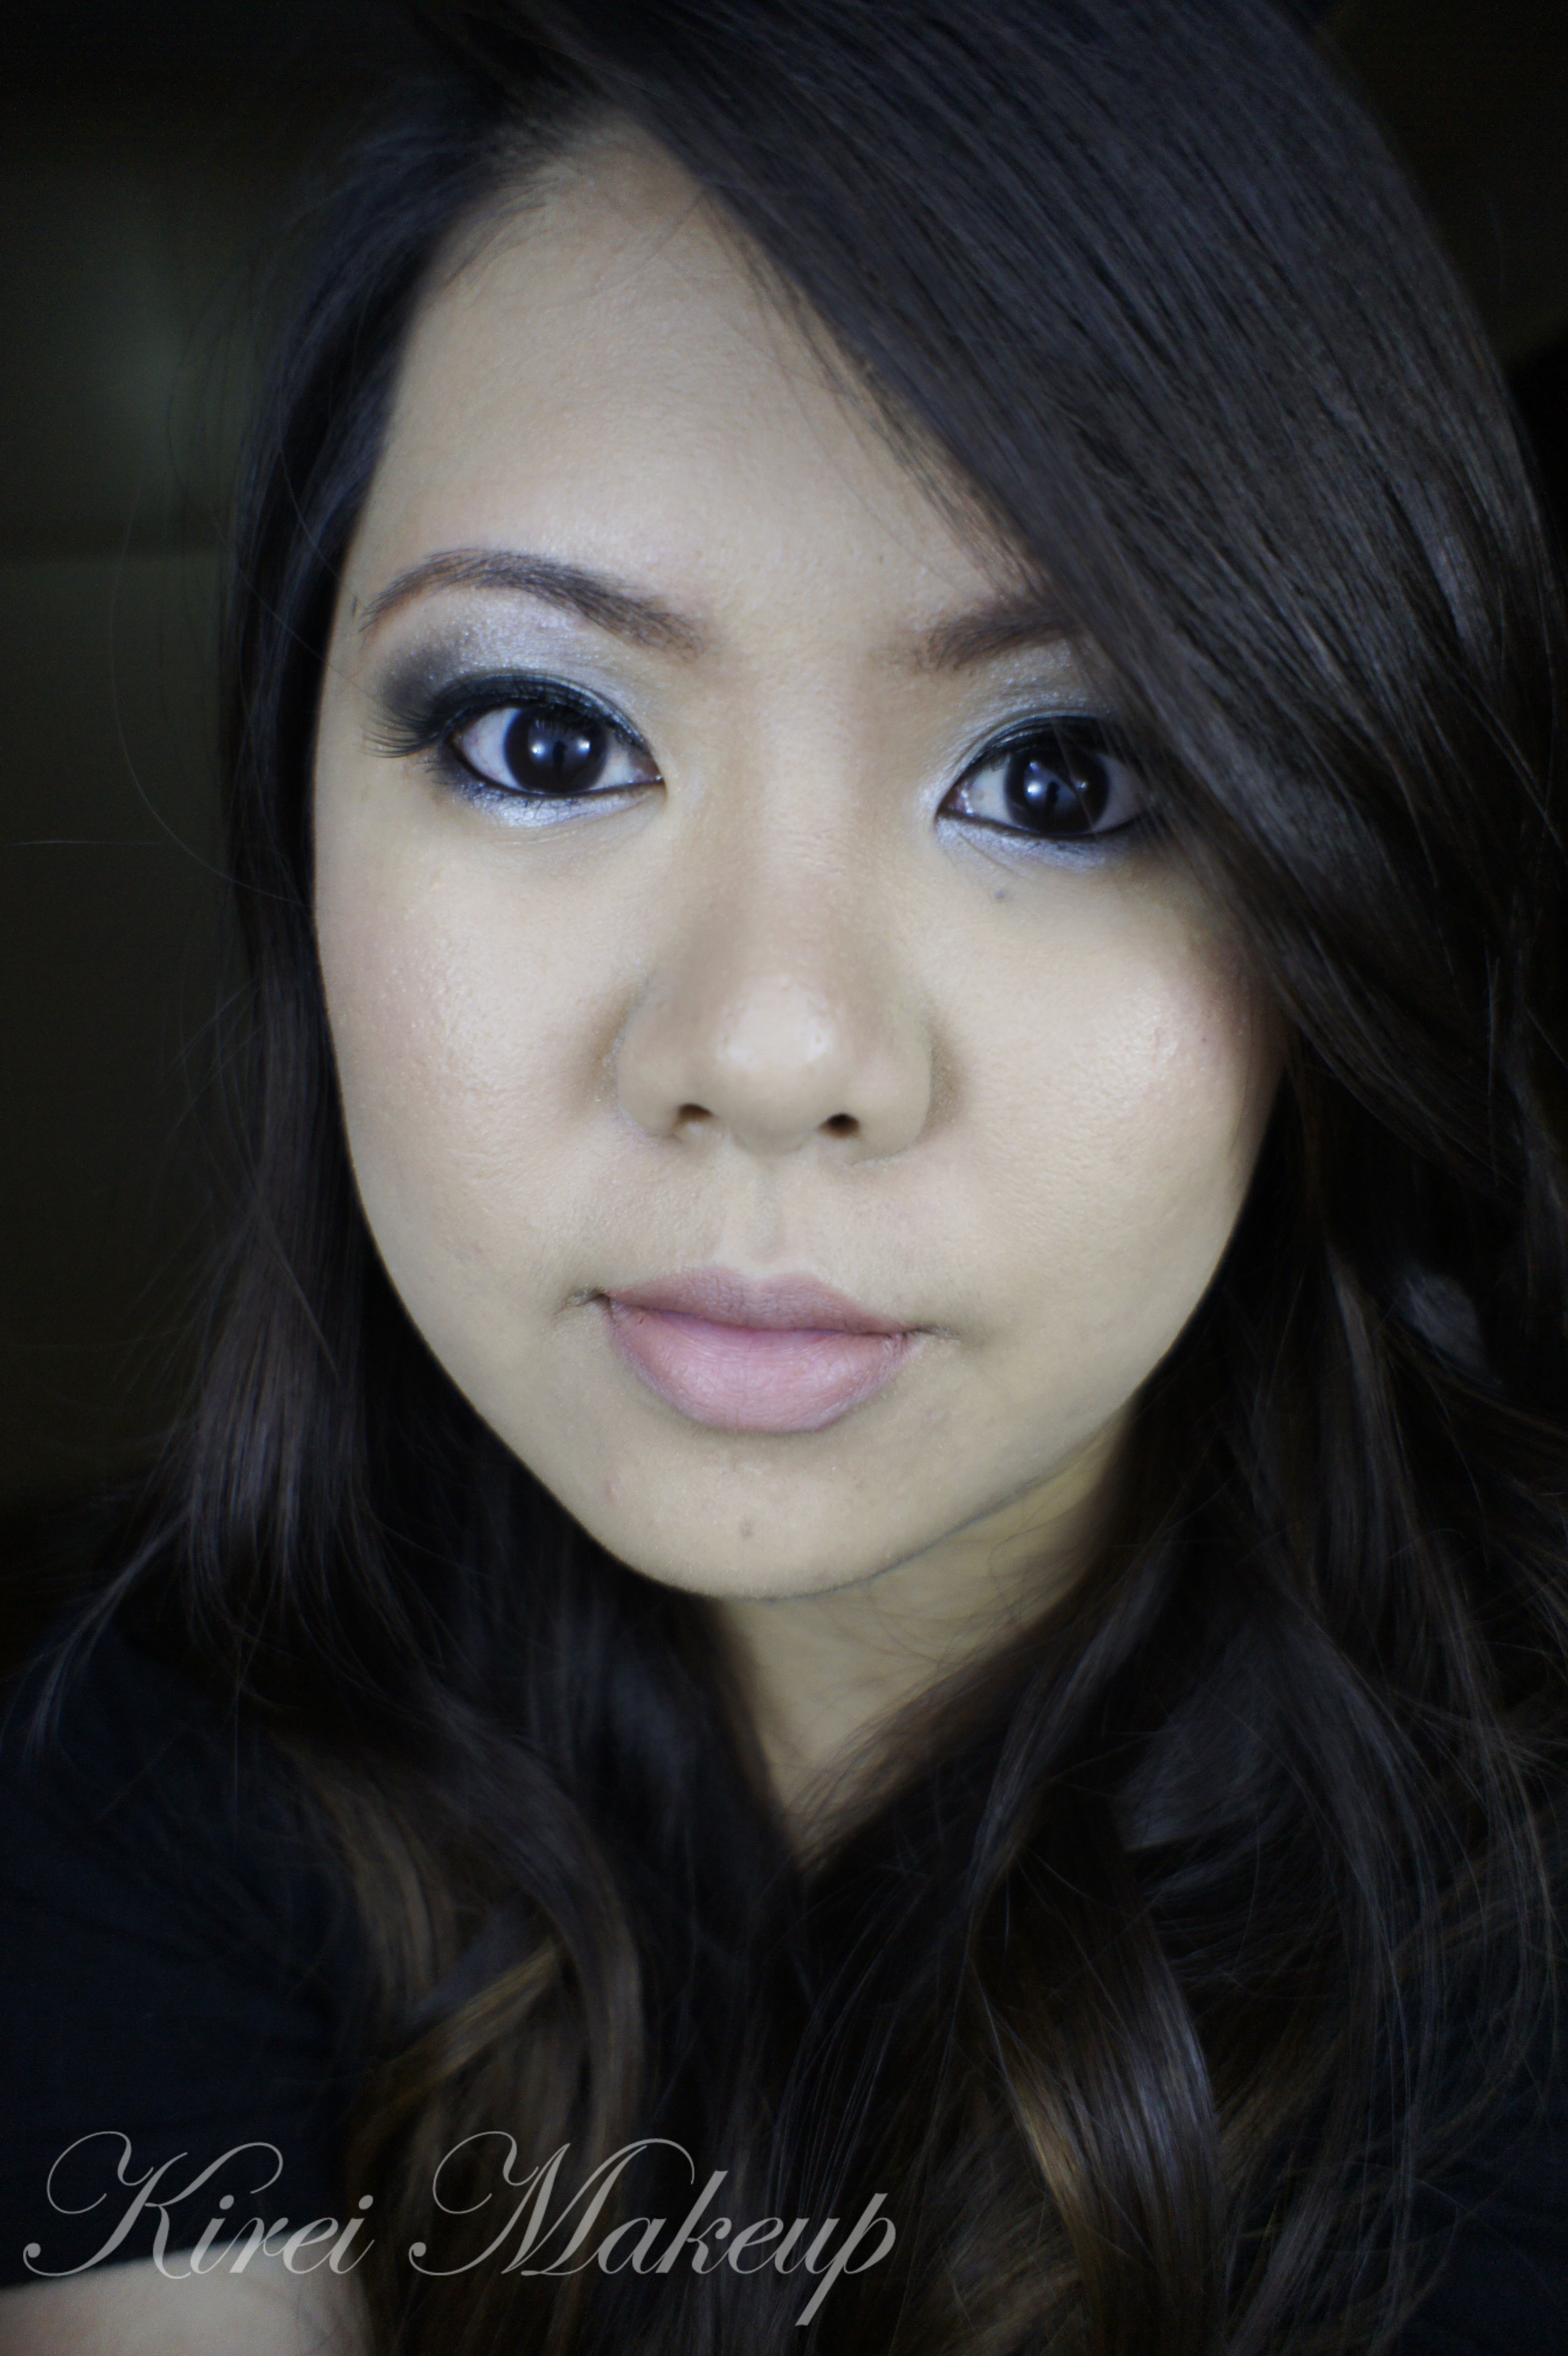
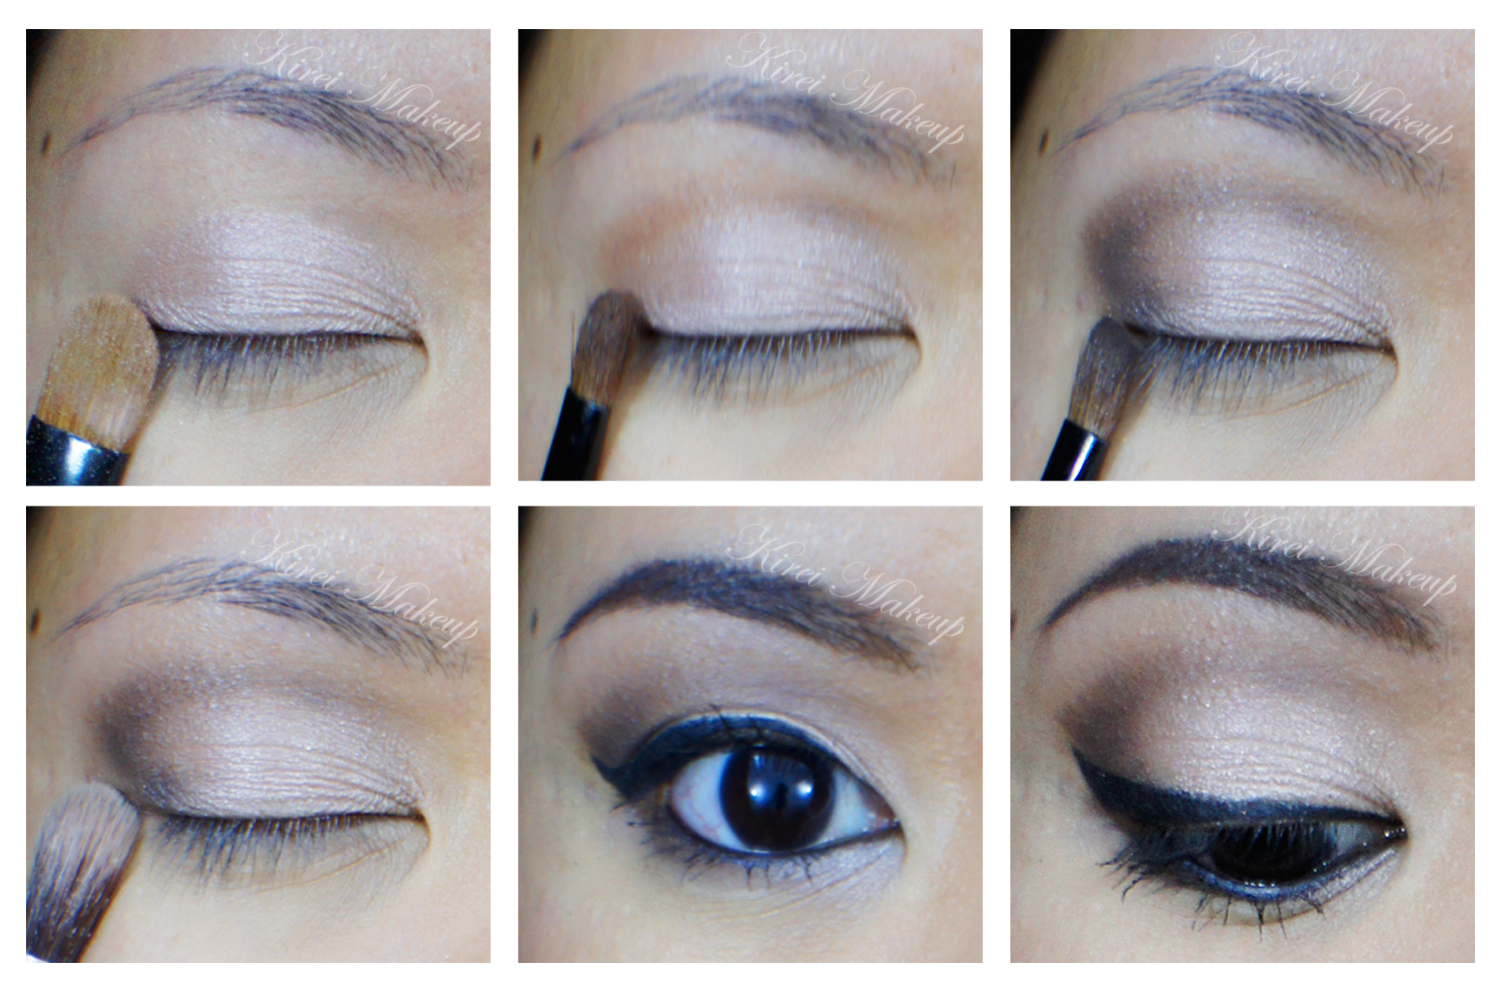
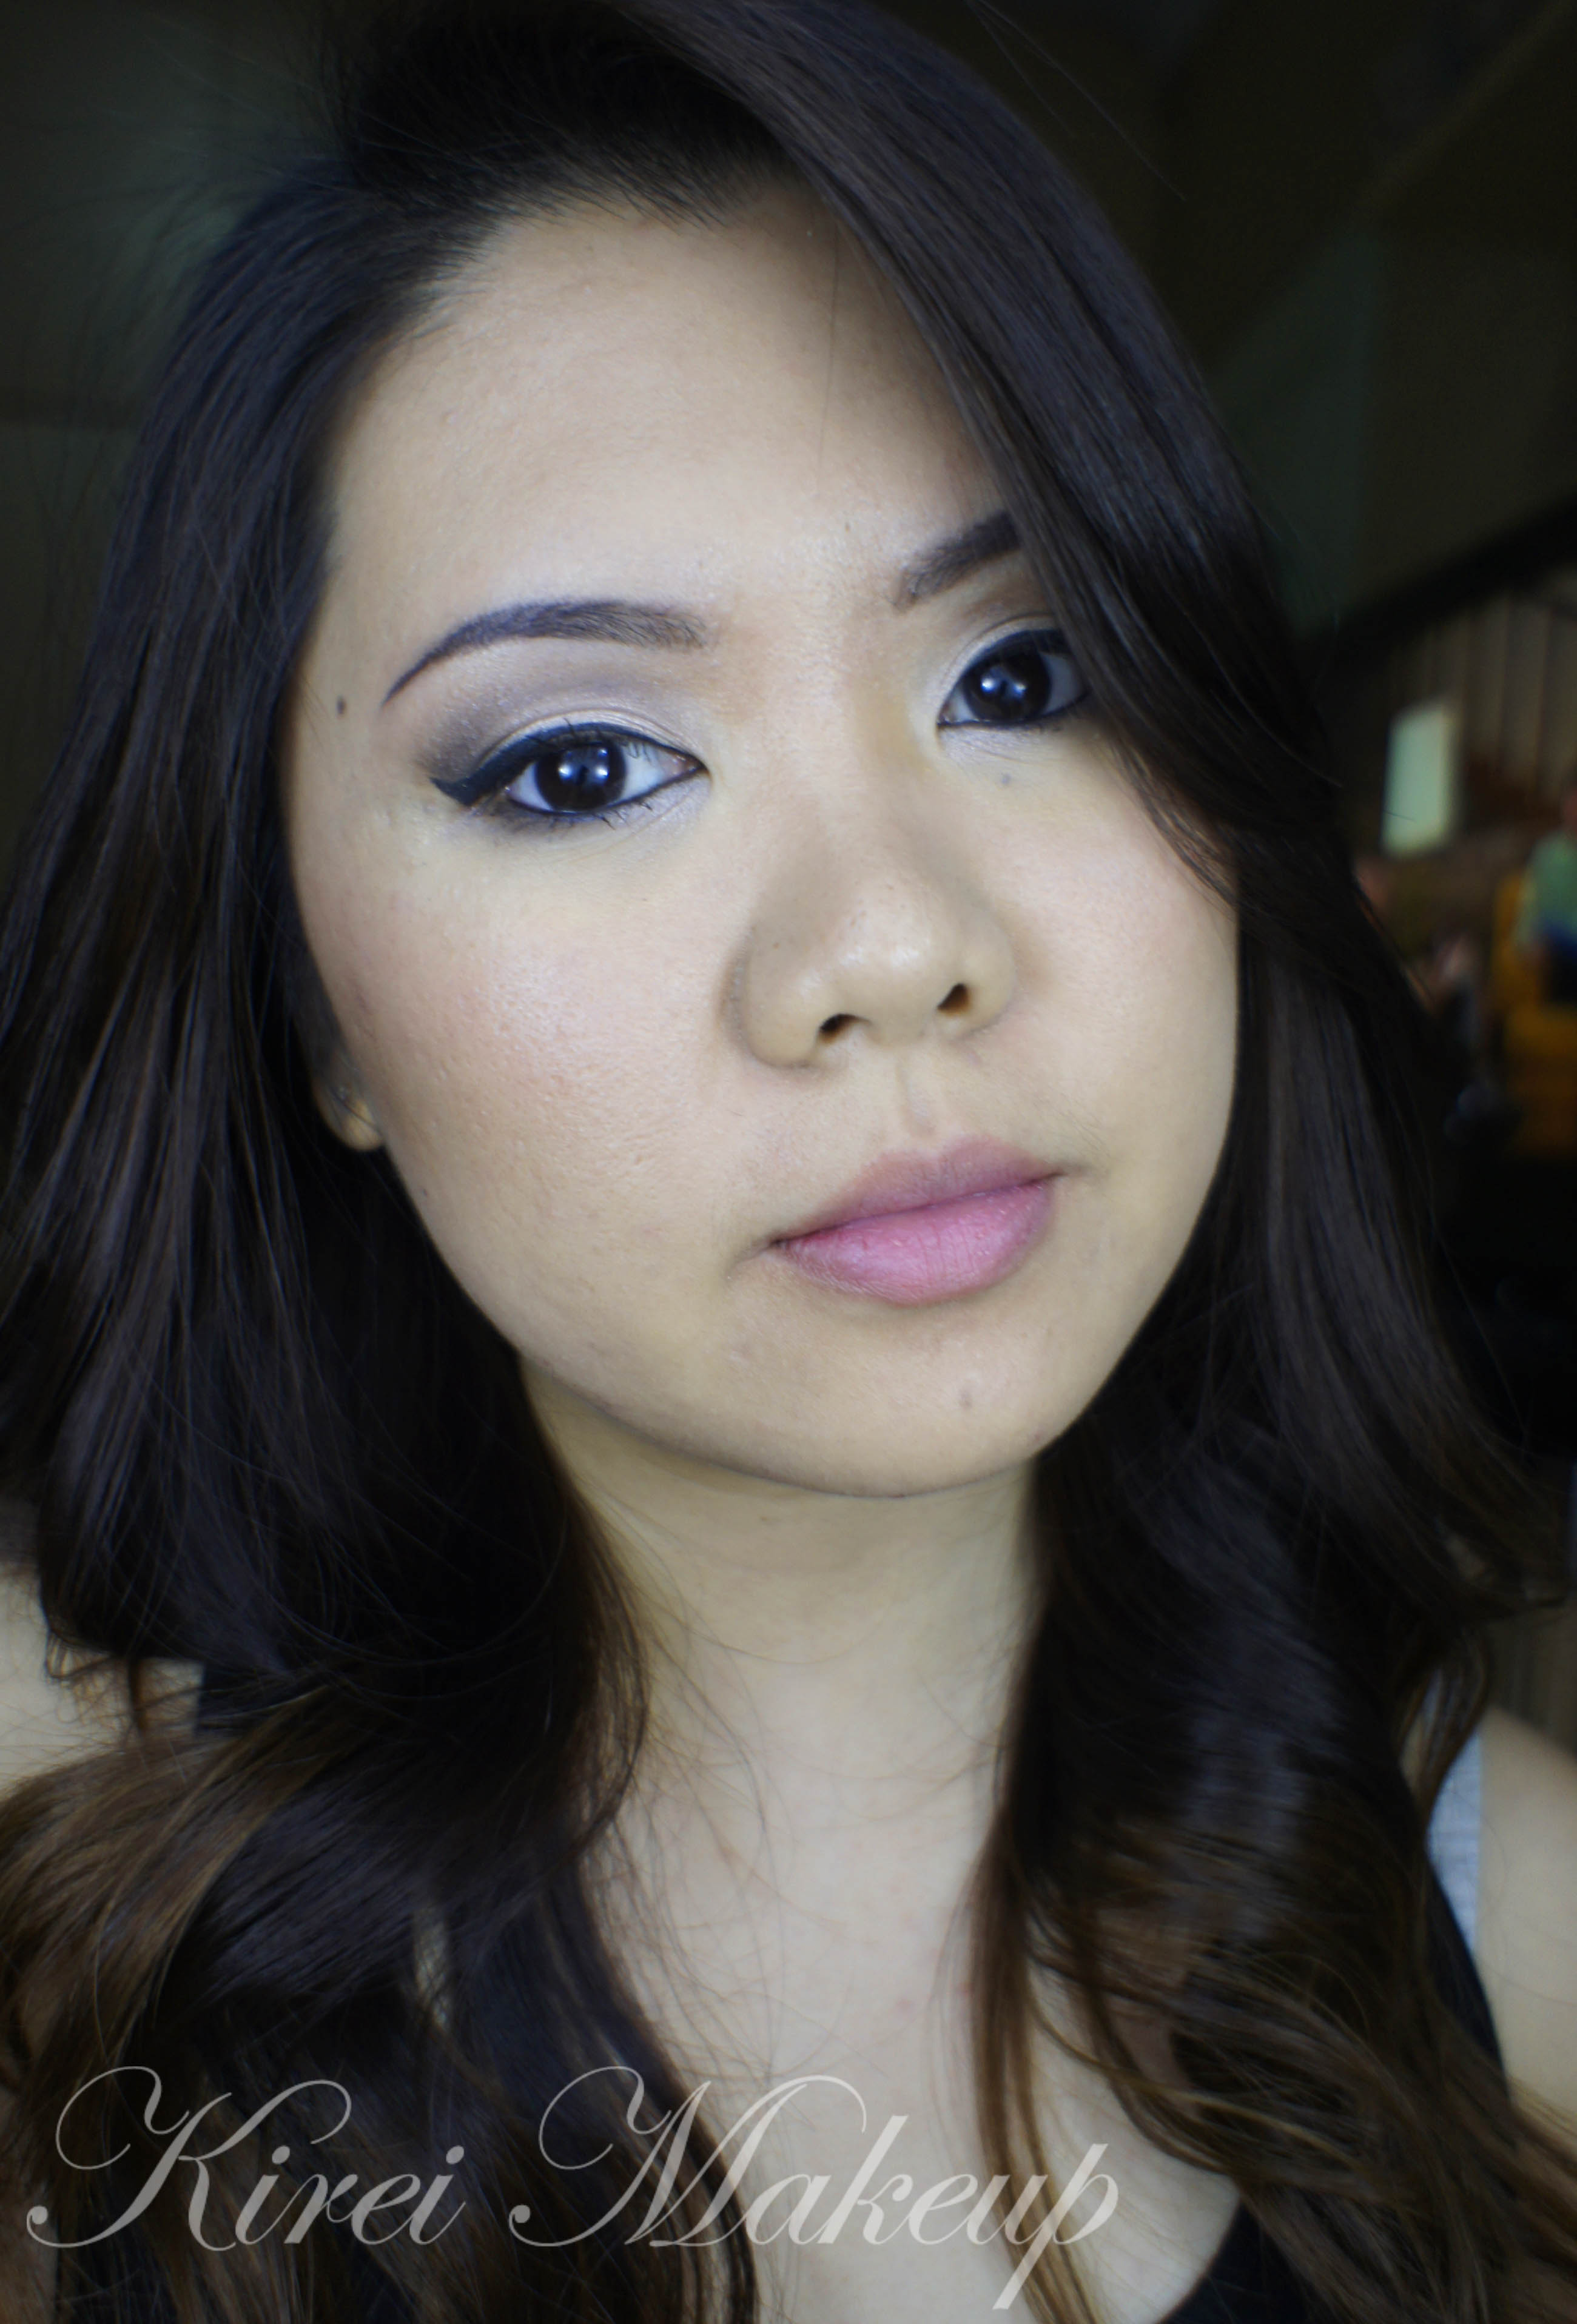
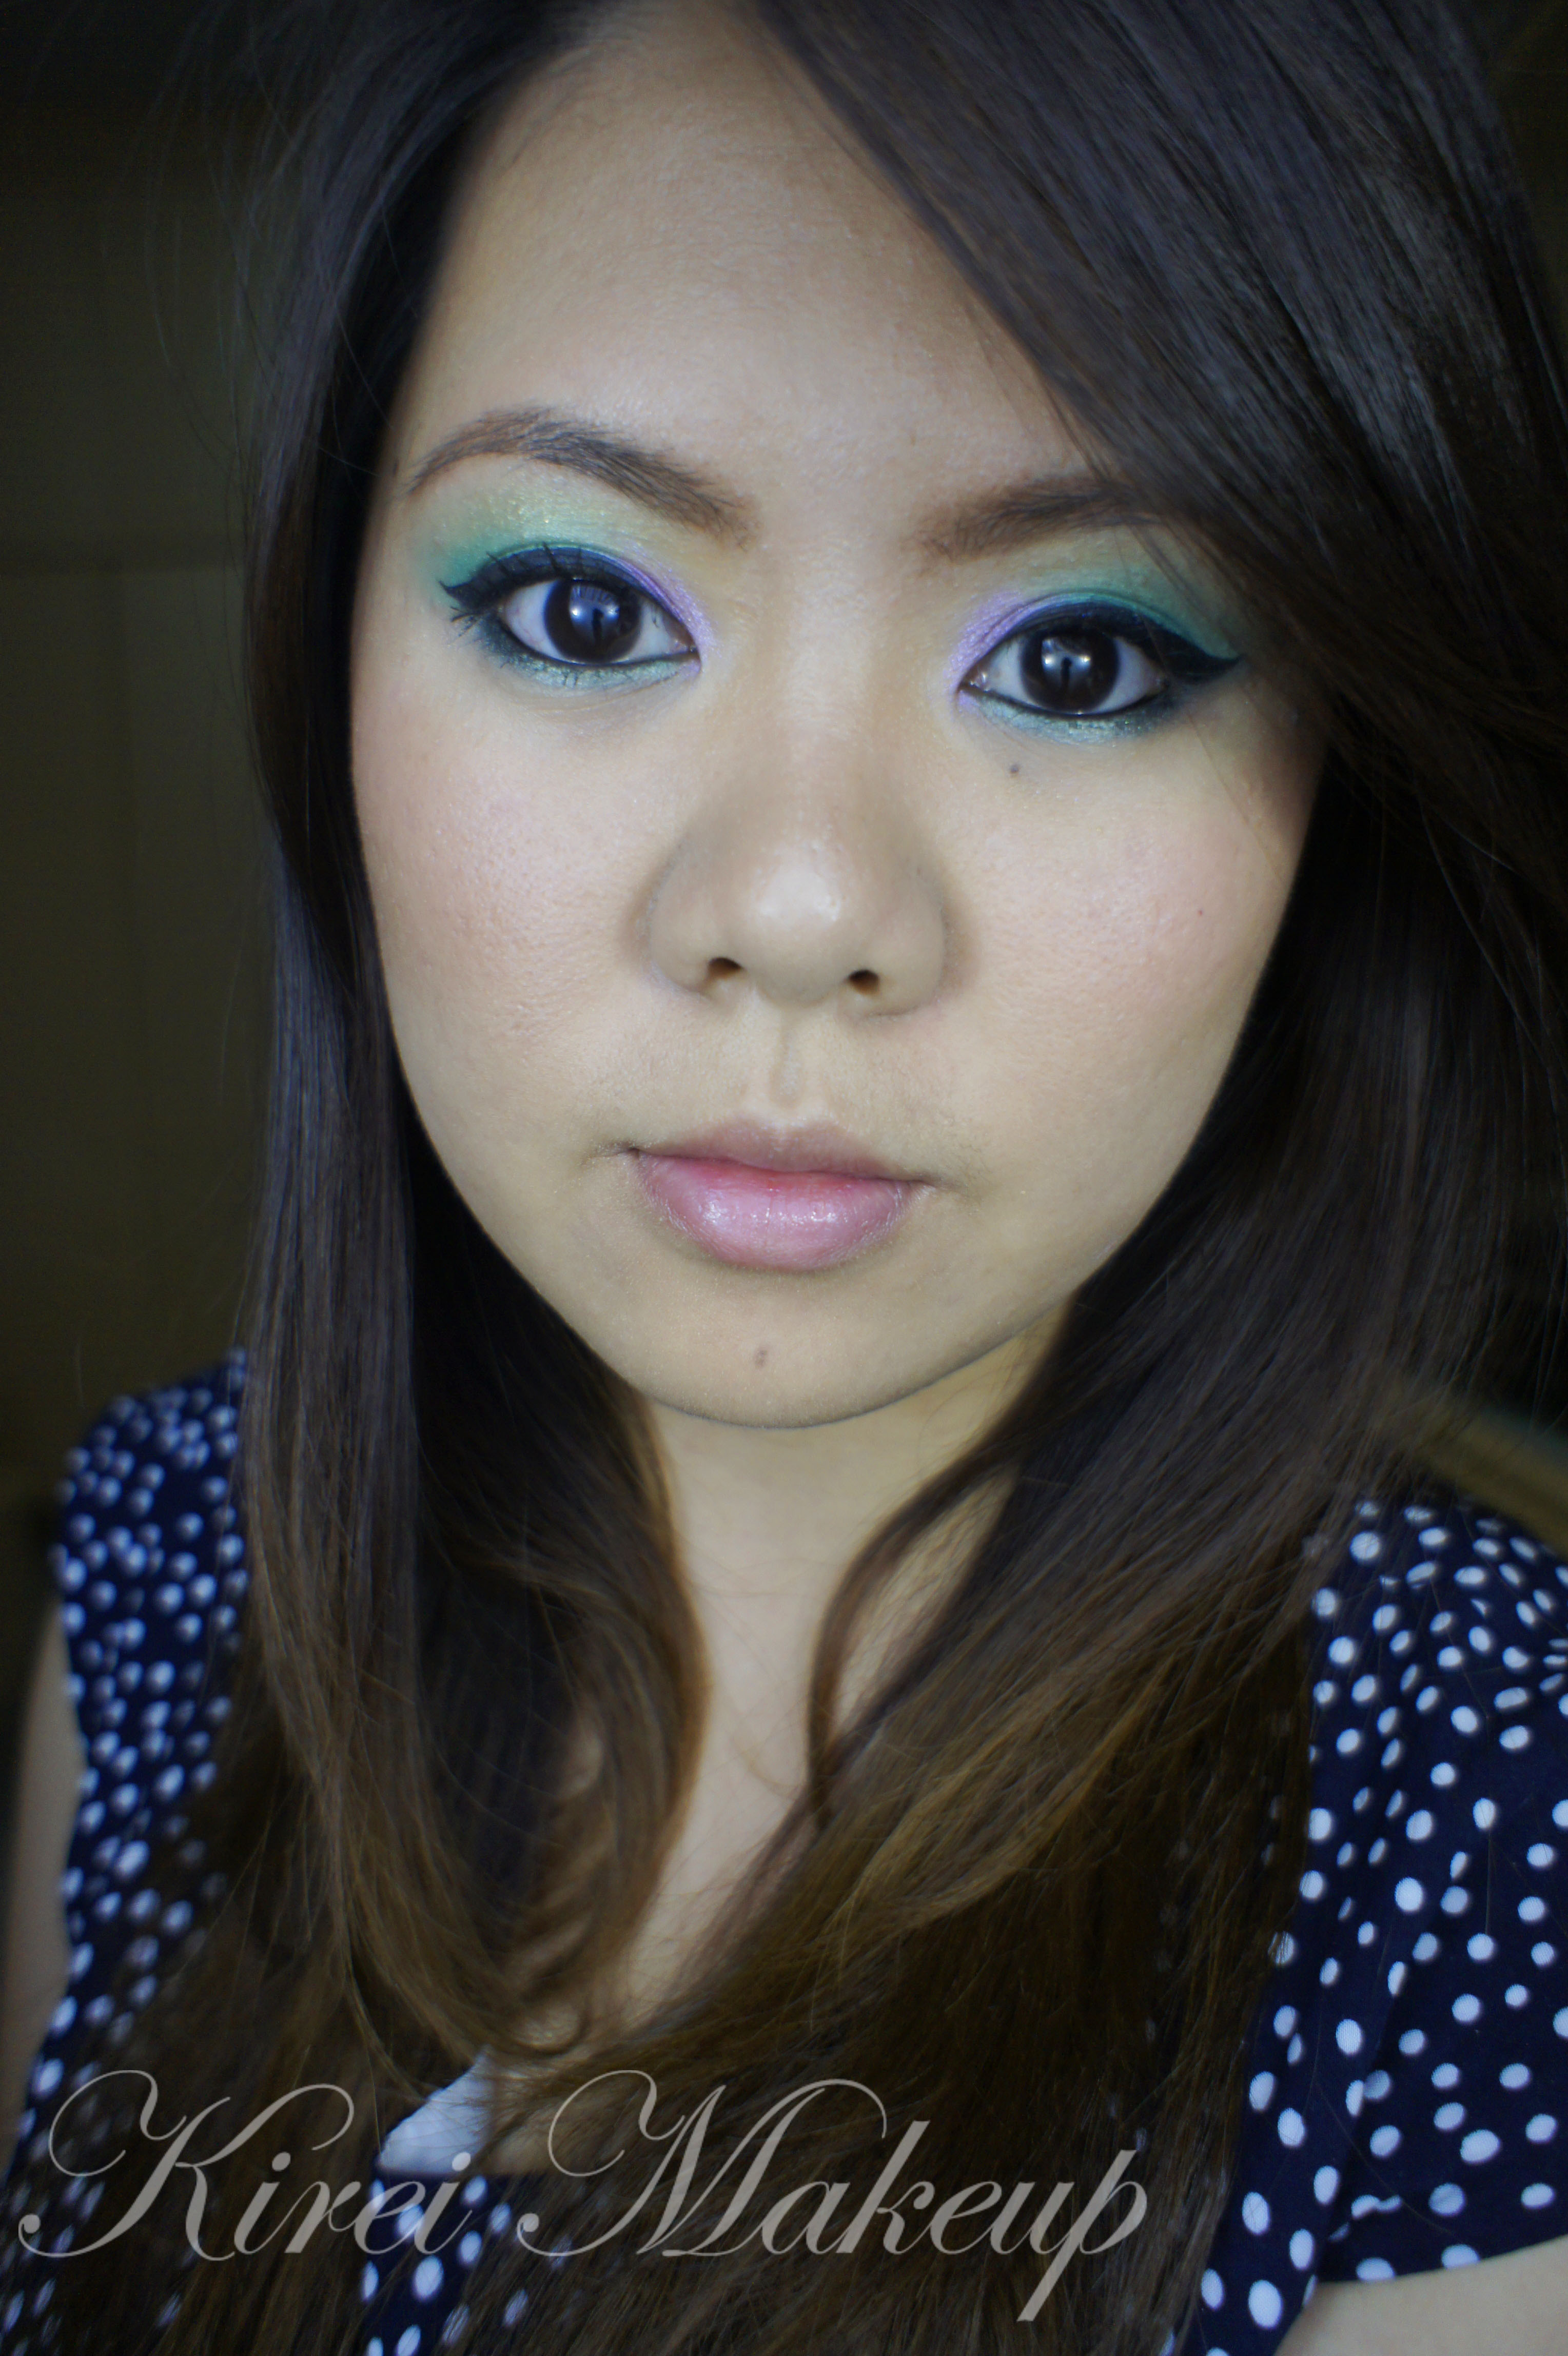
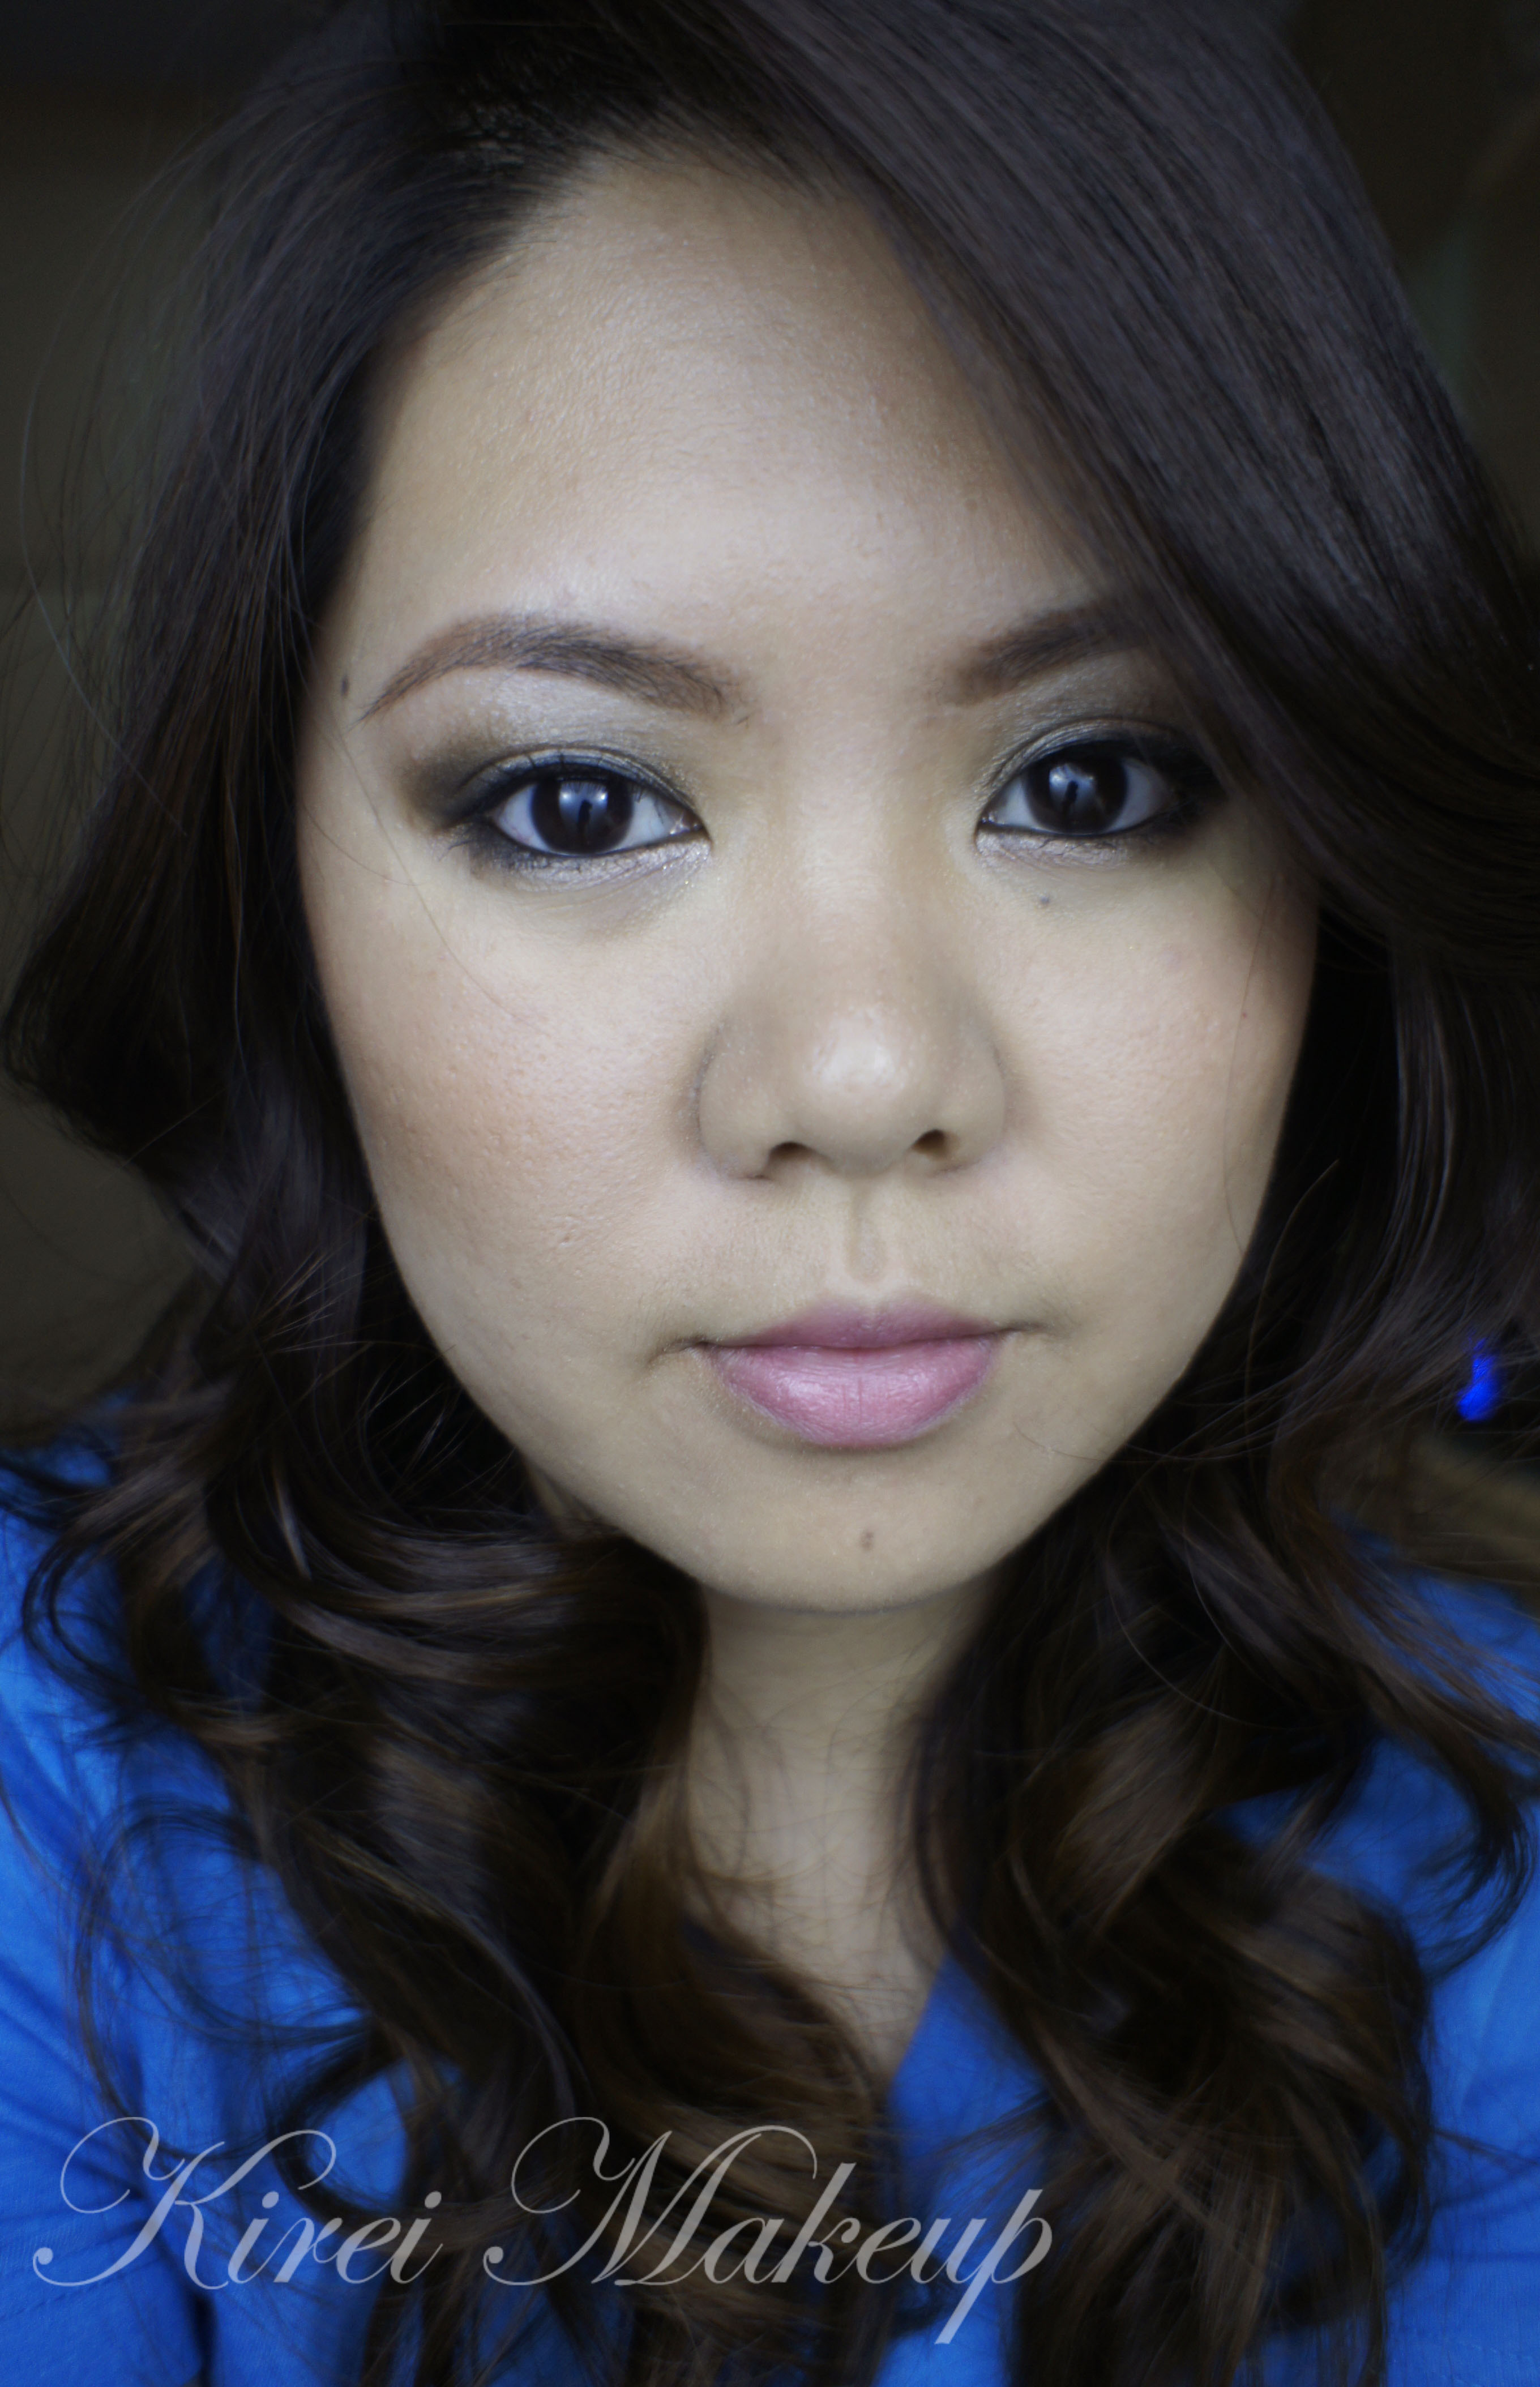
In my opinion, M.A.C Melon is a gorgeous shimmering peachy gold shade. It’s very peachy and warm, which works very well in most skintone. For those with lighter and medium skin tone this would be a good medium color. Wear it alone with a lot of mascara on the lid for a good light wash of color. For those with darker skin tone, this would be a good highlighter color.

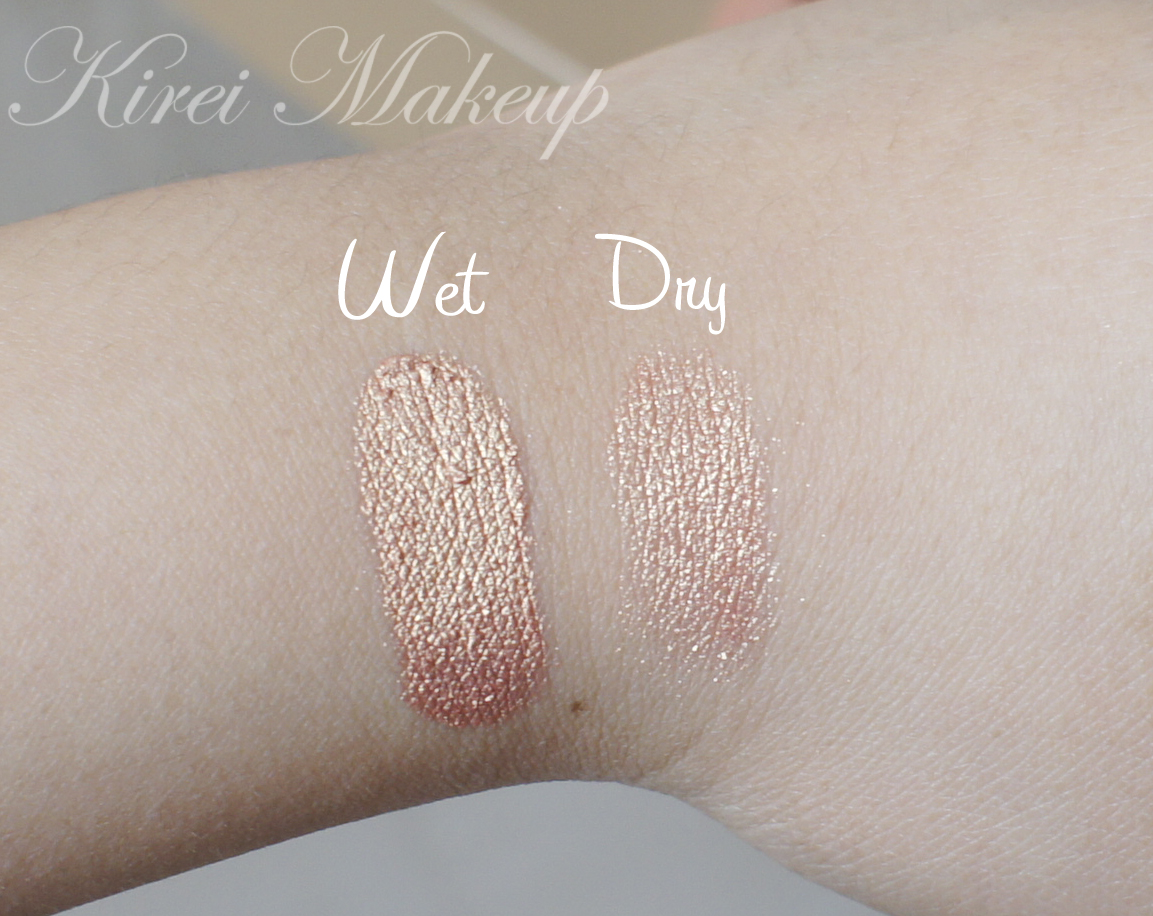
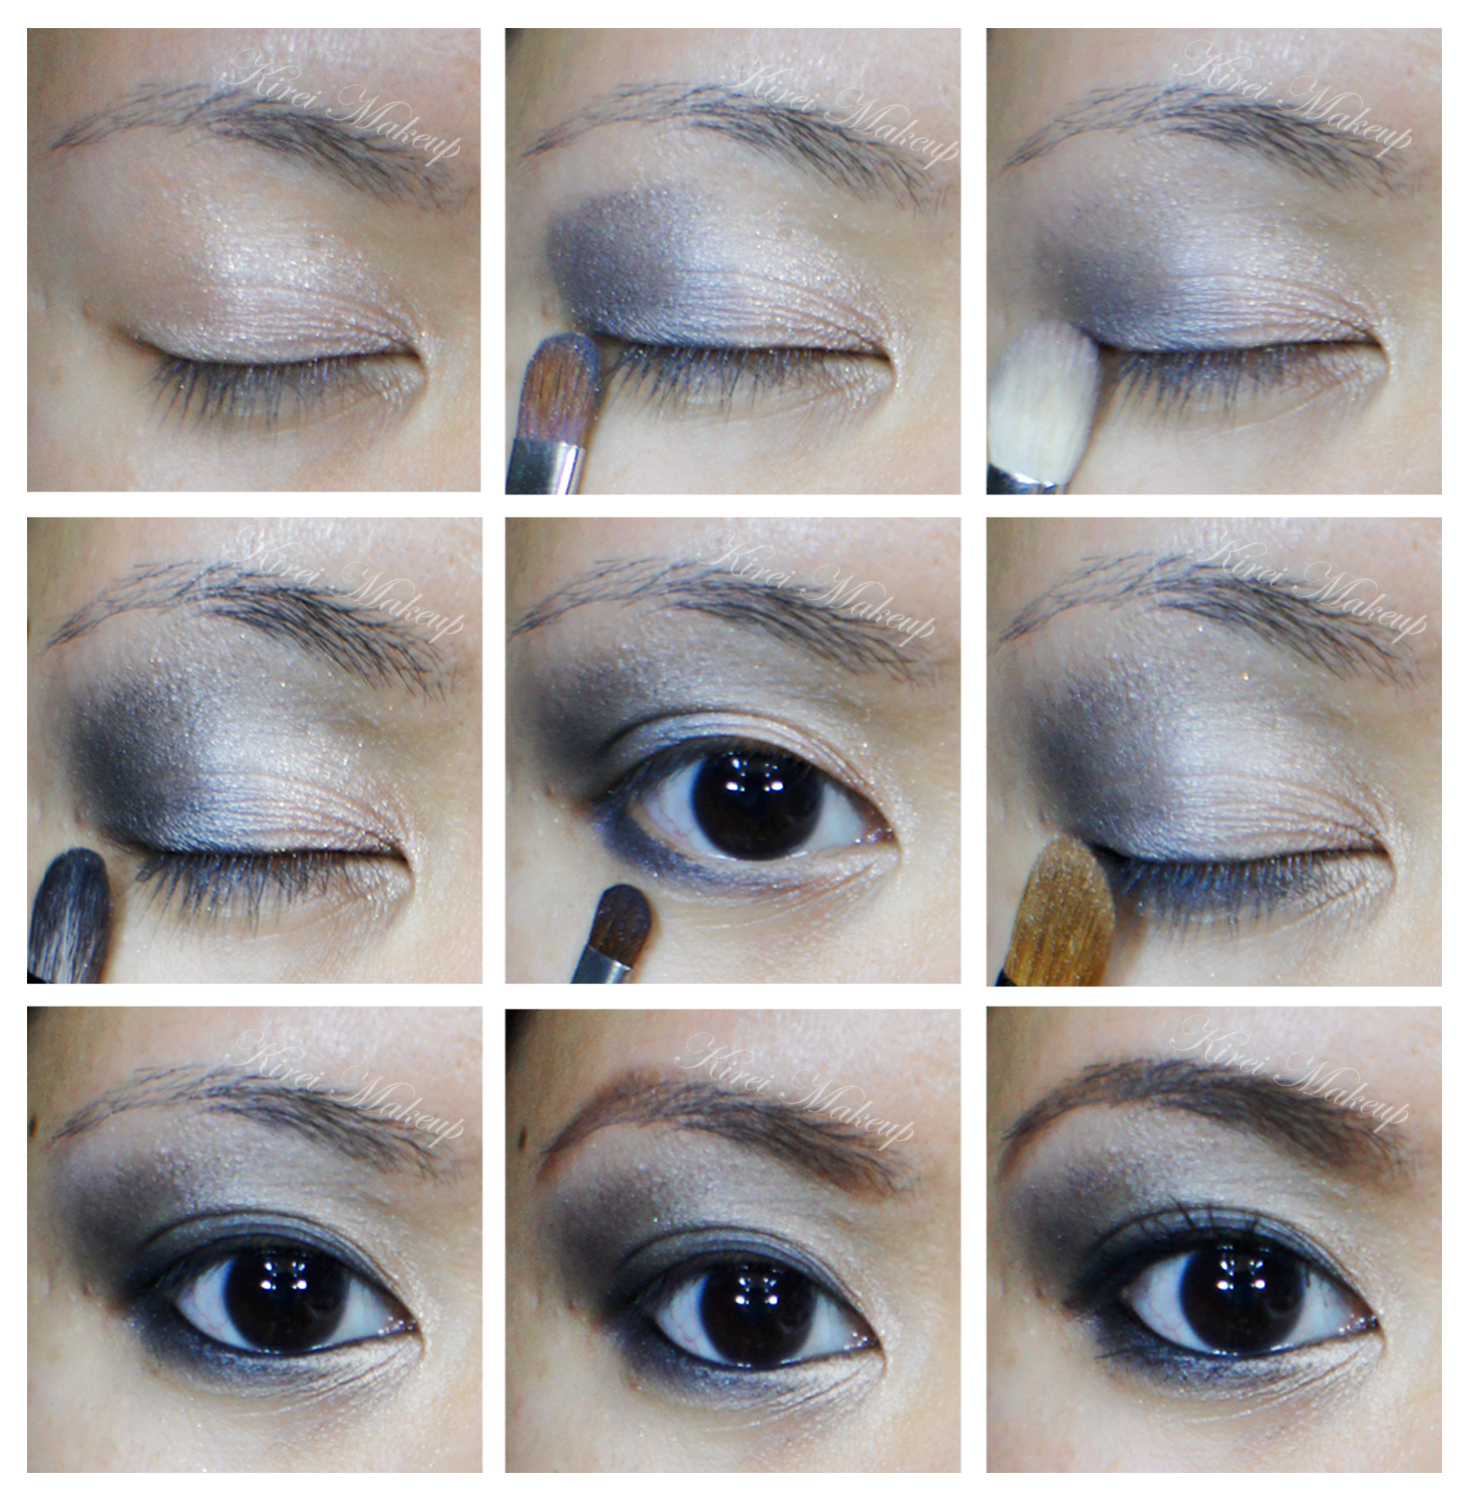
The other best part about this pigment is you can use it dry or wet. If you like it sheer, you use it with a dry brush. If you like a bit more intensity, use it dry. Either or, the result is gorgeous. Use it dry and you end up with a frosty finish, use it wet and you end up with a pearly finish.

You can also use this as nail color. Mix it with clear nail polish and ta-daaah you just created a nail polish. I might do a tutorial using loose pigments on your nails.


mac melon pigment

Longevity

On myself, whether I apply it wet or dry, it seems to last the whole day (8 hours) with little creasing. Applying it on top of a primer would probably help esp. if you have oily lids.

Price

It’s USD$ 21/each. Each container consists of 4.5g of pigment. I’m not sure how much it is in Indonesia.

Pros

  • Amazing pigment pay-off.
  • Intense and very concentrated color.
  • Beautiful shade for any skintone.
  • Can be used wet or dry.
  • A lot of product in the container (even though it’s less than in the past, but there’s still a lot of product in the smaller newer container). This product will last a good while.
  • Easily blendable.
  • Long lasting.
  • Multi-purpose.

Cons

  • A lot of fall-out if you use it dry and don’t tap the excess off your brush.
  • Hard to use if you are not used to it.
  • Pricy compared to other brands like NYX, Coastal Scents etc. (if you don’t have a Pro discount)

mac melon pigment review

For this product, I give it 4.5 winks out of 5! It’s an amazing product, with great pigment pay-off, which is what every artists always love! For me, and other professionals who work in the beauty industry, you can buy this product with your Pro Discount. Even though other brands might have similar color to M.A.C Melon, I still think M.A.C Melon has the extra vibrancy and shimmer, not to mention there’s something unique with that peachy undertone of this pigment.

I am not in any way sponsored/endorsed/being paid by the company to review this product. I bought this out of my own pocket and any review pertaining to this product is purely my own opinion. Please be reminded that each individual reacts differently to the product. Always do a test patch whenever possible before using the product on yourselves.

Lily Cole Bodyshop Shimmer Cube Look #2

I wanted to do another tutorial using the Lily Cole BodyShop Shimmer Cube that I bought in April. I’ve done a review in this post Body Shop Lily Cole Shimmer Cube, and a tutorial in this Spring Lilac post. I really love the eyeshadow combination, and wanted to create another look that’s wearable and not too over the top, yet at the same time there’s still a play of colors on the eyes.

I decided to use the eyeshadows dry for a sheer wash of color. If you like a more intense color, feel free to apply the eyeshadows wet. I like how this look ends up to be very light and just enough. I think it’s perfect for the Summer, esp. since the weather is getting really hot in Jakarta.

How-to:

1. I applied the Live Lilac eyeshadow from BodyShop Lily Cole Shimmer cube using a flat eyeshadow brush all over my lid.

2. Next, I applied Think Pink eyeshadow from Bodyshop Lily Cole Shimmer cube on the outer half of the lid using a flat eyeshadow brush.

3. On the outer corner only, I applied Go Violet using a flat eyeshadow brush.

4. Using a clean blending brush, I blended Go Violet on the crease.

5. I applied Think Pink on the lower lid, as well as Go Violet on the outer corner of the lower lid using a small shader brush.

6. I dabbed Live Lilac on the inner corner of the lower lid using a pencil brush.

7. Using L’oreal Voluminous Smoldering eyeliner, I lined my waterline, tightline and along the upper lash line creating a small flick at the outer corner.

8. I filled my brows using Shu Uemura Hard Formula 9 eyebrow pencil.

9. I curled my lashes and applied Maybelline Volume Express Turbo Boost mascara.

Lily Cole Bodyshop Shimmer Cube

10. For the face, I applied Urban Decay Naked foundation using foundation brush.

11. On the cheeks, I applied Benefit Hervana.

12. I completed the look by applying Clinique Chubbystick Lip pencil in Bountiful Blush.

Lily Cole Bodyshop Shimmer Cube

Neutral

I wanted to do a pretty makeup, something that will be good for brides, or prom goers, or just for anyone who wants an extra something something..bahahahaha..anyways! I love how it ended up and I think this look is perfect for brides, if they don’t want anything too smoky.

Anyways, I love how I’ve been using UD Naked palette more lately. I think I might do more tutorials using the Naked and Naked 2 palettes. Also, how do you like my brows? I managed to fix it today. Lately, I’ve played around with the MUFE Aqua Brow gel and I have to say, I’m loving it! More on that later on during the week.

How-to:

1. I applied UD Sin eyeshadow all over the lid using a flat eyeshadow brush.

2. On the crease, I applied UD Buck eyeshadow using a small blending brush.

3. Using the same brush, I applied MAC Brun on the outer V.

4. I clean the edge of the crease using a clean blending brush.

5. Using a small shader brush, I applied Sin on the inner corner of the lower lid and MAC Brun on the outer corner.

6. I created a winged liner along the upper lashline using MUFE Aqua Black gel liner and an angled eyeliner brush.

7. I lined my waterline using L’oreal Voluminous Smoldering eyeliner.

8. For my lashes, I applied MUFE Smoky Lash mascara on both top and lower lashes.

9. I filled my brows in using MUFE Aqua Brow.

natural makeup with urban decay naked palette

10. For the face, I applied UD Naked foundation using a foundation brush.

11. Under the eyes, I applied MAC Pro Conceal/Correct concealer in Medium.

12. I applied MAC Shadowy as a light contour and then MAC Cubic on my cheeks as blush.

13. For the lips, I filled it in using MAC Dervish lipliner.

asian bridal makeup

Gunmetal

How is everyone’s Monday going??? I apologize for M.I.A last week. If you follow me on twitter/instagram, you’d know that I burnt my fingers (because of steam)  on Tuesday. My ring and pinky fingers were burnt due to the steam from boiling water. Anyways, long story short, my ring finger didn’t get burnt as bad as my pinky. There were bubbles forming on my pinky finger! It hurt a lot, and well it’s red and purple now. Due to the burnt, I couldn’t really hold my makeup brushes properly since it hurt a lot. I have a very low tolerance of pain (exception for piercings..hahaha). Heck, I couldn’t even hold my chopsticks properly.

However, since the ring finger gotten better, I managed to do one tutorial. I wanted to play with the Gunmetal eyeshadow from Urban Decay Naked 1 Palette, so I created this smoky eyes look. Very simple and very easy. This will look great for party makeup, prom or wedding.

Also, ignore my brows, haven’t had time to get them trimmed or shaped because of the recent incident.

How-to:

1. I applied Chanel Illusion D’ombre in Emmervielle all over the lid using my finger.

2. Using a flat eyeshadow brush, I applied UD Gunmetal eyeshadow on the outer third of the lid.

3. I blended the edge of the shadow using a clean fluffy brush.

4. Using a bullet brush by Smashbox, I applied UD Creep eyeshadow from Naked palette on the outer V.

5. Using a small shader brush, I applied UD Gunmetal eyeshadow on the lower lid.

6. Using a flat eyeshadow brush, I applied L’oreal Infallible Hourglass Beige eyeshadow in on the inner half of the upper lid, and slightly on the inner corner of the lower lid.

7. I lined my upper lashline and waterline using L’oreal Voluminous Smoldering eyeliner.

8. I filled my brows using Shu Uemura brow pencil.

9. I curled my lashes using MUFE Smoky Lashes mascara.

asian smoky eyes

10. For the face, I used Giorgio Armani Silk foundation and a foundation brush.

11. Under the eyes, I applied MAC Pro Correct/Conceal yellow corrector.

12. I applied MAC Shadowy as contour and MAC Fleur Power on the cheeks.

13. For the lips, I applied Clinique Chubbystick in Heaping Hazelnut.

asian smoky eyes

Seafoam

I’m sure by now you guys are probably tired of me using my Sleek Makeup Snapshot palette…but I can’t help it! It’s too gorgeous! Today’s look is very simple, no crease or outer V whatsoever…I’ve actually worn mascara the whole day, and didn’t take it off for the tutorial, so don’t mind the mascara on the step-by-step picture..

Let’s get on the tutorial! (I prepped my eyes using MAC Soft Ochre paint pot)

How-to:

1. Using a flat eyeshadow brush, I applied Green Iguana from Sleek Makeup Snapshot palette on the eyelid, leaving the inner third of the lid empty.

2. (not in picture) I used a clean fluffy brush to blend the crease so there’s no harsh edge.

3. Using a small shader brush, I applied MAC Butterfly Party Crushed Metal Pigment on the inner third of the lid.

4. Using another clean small shader brush, I blended the edge where the 2 eyeshadows meet.

5. I lined my waterline using L’oreal Voluminous Smoldering eyeliner.

6. Using an angled eyeliner brush, I applied Green Iguana eyeshadow on the lower lid.

7. I lined the upper lash line using Clinique gel liner, creating a winged/cat-eyeliner.

8. Using a big clean fluffy brush, I applied Kiwi Flower just above the crease for an extra wash of color.

9. I applied Maybelline Volume Express Turbo Boost mascara on both upper and lower lashes.

10. I filled my brows in using Shu Uemura brow pencil.

sleek makeup snapshot

11. On the face, I applied MUFE HD Foundation using my fingers.

12. I contoured my cheeks using MAC Shadowy and NARS Ita Kabuki brush.

13. On the cheeks, I applied MAC Peaches blush.

14. On the lips, I applied Chanel Levres Scintillantes in Volupte.

green and purple makeup

Unboxing Beauty Treats Indonesia!

After a long wait for my first Beauty Treats package to arrive, I finally got my hands on it! Today’s box was quite late because apparently they were changing their courier service, so there was a delay. Also, just to let you guys know, if you did not input the special code given to you for payment confirmation, they will not notify you that there’s something wrong with your payment. You do have to contact them if you have issues with payment and subscription, don’t expect them to contact you.

Anyhooow, let’s get to the good stuffs! The package arrived safely. I love the little “sshh…it’s a secret!” slogan. I think it’s cute. Inside the package, there’s a little “thank-you” note, and I find it very lovely that they handwritten my name. I think it’s a nice personal touch.

Beautytreats indonesia

You will find a booklet explaining which brands and products are inside this month’s box. The booklet also contain the full description of each item and their original price should you be interested in buying the original size. I heard that they will be releasing a new section on their website where you can buy the full-size products online. On the last 2 pages, they included makeup tutorials, which you can also find on their Facebook page and website.

The beautytreats package comes in a pretty pink box, with black ribbon tied around it. I’m keeping the box, and probably will use it as an organizer or to keep my stuffs inside. It’s pretty sturdy! Inside the box you’ll find vouchers and booklets from the different brands that are partnered with beautytreats. Beautytreats indonesia

So, what’s inside this month’s box?

1. Make Up For Ever Rouge Artist Natural lipstick – test set.

2. Rudy Hadisuwarno Hair Intense Repair Serum – real size!

3. Hada Labo Gokujyun Alpha Ultimate Anti-aging, Shirojyun and Gokujyun Ultimate Whitening – 15ml/bottle.

4. Travel-size Skin Aqua moisturizers (super cute!) – 15ml/bottle.

5. Face on Face Nourishing Blush on Blooming Rose – real size! (as big as an eyeshadow..so adorable).

6. Acne Pore Strip – 1 sachet.

7. Masami Shouko White Puff with Black Fabric – real size.

8. Koji Eyeliner Pencil – sample size.

9. D’eyeko lashes – real size.

Other subscribers might receive the following products instead of the Masami Shouko White Puff:

  • Biokos Derma Bright Set, or
  • Caring Colors BB Cream Fair White, or
  • Caring Colours BB Cream Everlast, or
  • Caring Colours BB Cream Luminizing, or
  • Lioele 3D Lifting Mask.make up for ever indonesia

Update: as of July 2, 2013, I’m very disappointed with Beauty Treats Indonesia. The June box arrived in July 2, the products as well as the amount of products inside the box were not up to standard. 

Pearlescent

Another smoky tutorial! This time, I wanted to show you guys another way of doing a smoky eye. This look highlights the center of the eyelid, instead of the usual highlight on the inner corner. I like doing this smoky eyes more than the other ones since I find that the eyes catch the light when you blink or look down. It’s something different than the classic sooty, dark grey smoky eyes. Obviously, you can do this with any color. I’ve done this type of look using cranberry and blue eyeshadow in my Peek a Blue post.

How-to:

1. Using a synthetic art brush, I applied Smashbox Stone cream eyeshadow on the inner and outer corner of the eyes, leaving the center part of the lid bare.

2. Using a flat eyeshadow brush, I applied Urban Decay Dark Horse eyeshadow on top of the cream eyeshadow. Again, leave the middle part of the lid empty.

3. Using another clean synthetic art brush, I applied Chanel Illusion D’ombre in Emerveille in the middle of the lid.

4. Using a clean flat eyeshadow brush, I applied Urban Decay Sidecar eyeshadow on top of Chanel Emerveille cream shadow.

5. Using a clean small fluffy brush, I blended the edges where the dark and the light eyeshadow meet.

6. I applied UD Darkhorse on the outer half of the lower lid and UD Sidecar on the inner half.

7. I lined my waterline, tightline and upper lashline using L’oreal Voluminous Smoldering eyeliner.

8. I curled my lashes and applied Maybelline Express Volume Turbo boost mascara on my lashes.

9. I filled my brows in using Shu Uemura brow pencil.

asian smoky eyes

10. On my face, I applied MUFE HD foundation in 118 all over using IPKN Auto Wave makeup.

11. I contoured my cheeks using MAC Shadowy.

12. On the cheeks, I applied MAC Peaches blush.

13. On the lips I applied Chanel Confidentielle lipstick.

asian smoky eyes

Sunset Inspired

I’ve been wanting to do a sunset inspired makeup for a while, but couldn’t find the right colors to do it. Well, ever since I got my hands on that MUFE Aqua Cream no. 9, I couldn’t resist playing with that color. I think it’s probably one of my favorite colors so far. I just want to use it all the time!

If you see anything that’s underlined and bold in the sentences below, it means that I’ve link it to another tutorial/review that I’ve done in this blog. The links are not spam nor will it lead you to another site.

How-to:

1. I applied MUFE Aqua Cream Shadow no. 9 all over my lid using my finger. (for other tutorials using this color please refer to Coral and Blue, and Candiliscious)

2. Using a flat eyeshadow brush, I applied Smashbox Soft Shimmering Coral from the Admire Me palette on top of the aqua cream.

3. Using Smashbox bullet brush, I applied purple eyeshadow from Sariayu’s Karimunjawa palette.

4. I blended the edge of the shadow using a clean blending brush.

5. Using an angled eyebrow brush, I applied Lancome All Made Up eyeshadow on the inner corner of the lower lid, and the purple eyeshadow from step 3 on the outer half.

6. Using a Kate Super Sharp liquid eyeliner (bought from a Japanese drugstore during my trip), I created a winged liner along the upper lash line.

7. I lined the outer third of my lower lid using the same eyeliner and used an angled brush to smudge the liner slightly.

8. I filled my brows using a mixture of MAC Omega and MAC Brun using an angled eyeliner brush.

9. I curled my lashes and applied L’oreal Double Extender Curl mascara.

10. I applied my face powder right below my brows.

coral and purple makeup

11. Under the eyes, I applied the yellow corrector from MAC Pro Conceal/Correct palette in Medium.

12. On my face, I applied MUFE HD foundation using a Sigma Round Kabuki brush.

13. I powdered my face using Cinema Secret loose powder.

14. I applied MAC Shadowy to contour my face and MAC Peaches blush on my cheeks (for my contouring tutorial please refer to Subtle Contour/Highlight/Blush).

15. On my lips, I applied Revlon Mauve It Over lipstick.

sunset makeup

Rosy

Today’s look is more on the softer, romantic, feminine colors. This look is great for first date, or for whoever wants a more natural look. Will work great on brides as well!

I also wanted my eyes to look bright and open, so I skipped the black liner on the waterline. Instead, I opted for a beige eyeliner. If you prefer a more darker version to this, feel free to substitute the dark shadow and eyeliner to black.

For this look, the focus is on the overall appearance. Nothing stands out too much, yet the whole look feels right and if done correctly, people will notice a subtle difference in your face but cannot put their finger why you look so great 😉

FYI, if you’d like to know how I contour, highlight and apply my blush come check the blog out tomorrow 😉

How-to:

1. I applied Bobbi Brown Rose Gold cream shadow all over the lid using my ring finger.

2. Using a flat eyeshadow brush, I applied Urban Decay Toasted eyeshadow on top of the base.

3. Using the same flat eyeshadow brush, I applied Urban Decay Busted eyeshadow on the outer V of the eyes.

4. I used a clean blending brush to blend the edge of UD Busted eyeshadow.

5. Using a small shader brush, I applied UD Toasted on the inner half of the lower lid and UD Busted on the outer half of the lower lid.

6. I lined my waterline using MAC Chromagraphic eyeliner in NC30.

7. I created a slight winged liner along my upper lashline using UD Blackout eyeshadow and an angled eyeliner brush.

8. I used whatever was left on the eyeliner brush to line the outer half my lower lash line (very close to the lashes).

9. I filled my brows in using Shu Uemura brow pencil.

10. I curled my lashes and applied L’oreal Double Extender Curl mascara on both top and bottom lashes.

11. I applied my face powder right underneath the brows.

Urban Decay Hustle

12. For the face, I applied MUFE HD Foundation using a foundation brush.

13. Under the eyes, I applied YSL Touche Eclat.

14. For the contour, I applied MAC Shadowy.

15. On the cheeks, I applied Benefit Hervana blush.

16. On the lips, I applied YSL no. 17 lipstick lightly using a lip brush.

urban decay naked palette