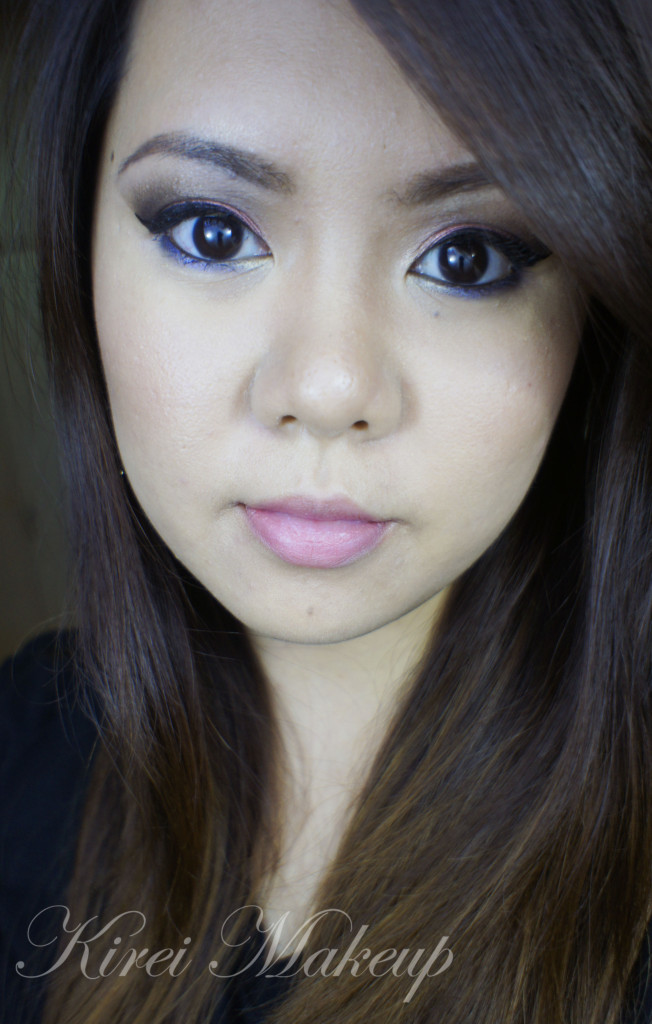
Sleek Makeup Candy Palette Giveaway!

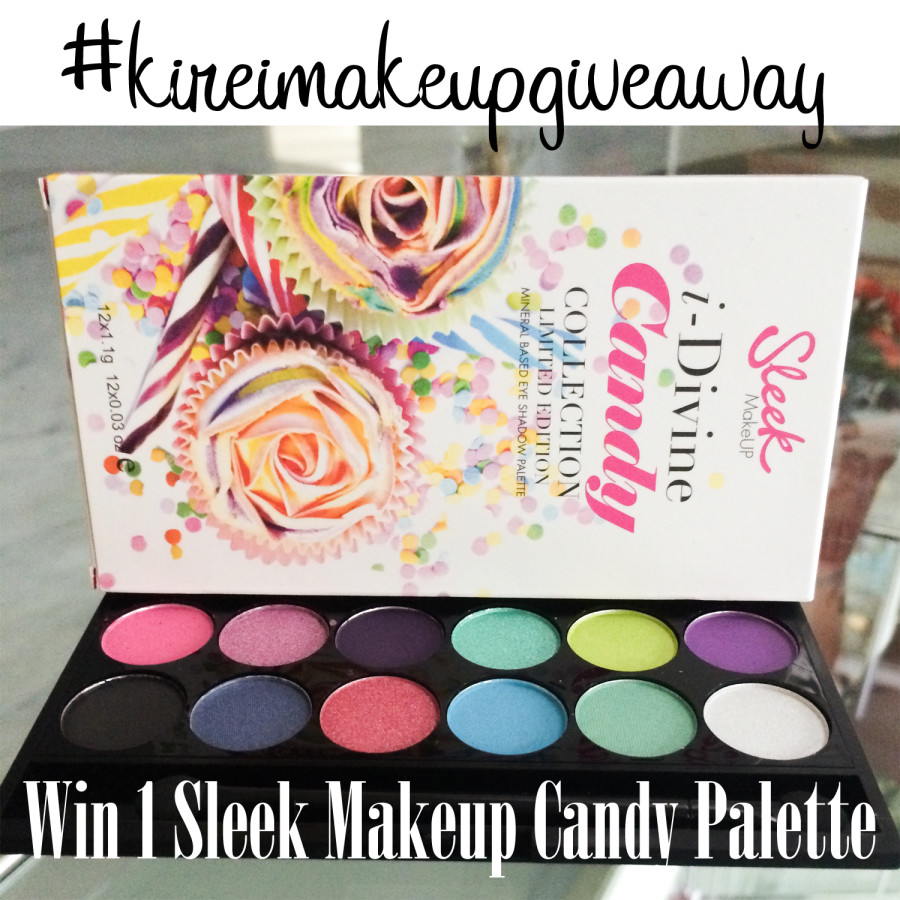
Hello makeup junkies in Indonesia! Today I want to share a GIVEAWAY for my INDONESIAN FOLLOWERS! I will be posting a tutorial using this LIMITED EDITION Sleek Makeup Candy palette on my next post!

Currently, I have 1 FREE SLEEK MAKEUP IDIVINE CANDY PALETTE up for grab! This contest is open for anybody who are currently living in Indonesia. This limited edition palette is so beautiful, full of colors, and very pigmented! Check out my next tutorial if you want to see how gorgeous this palette is!

Interested in joining my Sleek Makeup iDivine Candy Palette Giveaway? Keep reading!

Rules & Regulations:

1. Subscribe to my blog – enter your email address on the “Subscribe To Us” box on the left sidebar.

2. Comment below when you’ve done subscribing – only comments posted on THIS giveaway page is valid.

3. Follow me on Instagram (handle name: @KireiMakeup), REPOST my giveaway picture (pic below) with #kireimakeupgiveaway.

4. Open only to those living in Indonesia currently.

5. I will pick a winner at random next Thursday (June 12, 2014) by 11.59pm.ONE winner will be announced on Friday (June 13, 2014) via Instagram and on my blog!

6. Only 1 entry per person.

7. Another winner will be picked at random if the first person I picked does not reply me within 24hr.sleek makeup candy palette


Disclaimer:

This giveaway is not sponsored by Sleek Makeup nor Luxola. I personally purchased this palette.

Colorful Carnival Makeup

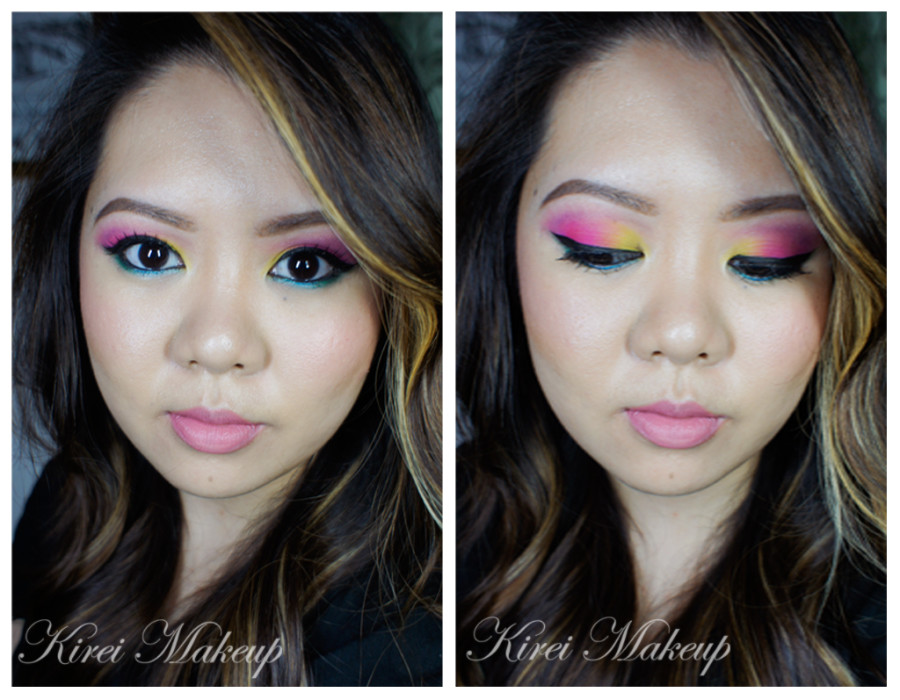
As Easter is approaching this weekend, and Carnival next weekend, I wanted to do a tutorial that incorporates super bright and really fun colors onto my makeup. This Colorful Carnival Makeup look is inspired by the ladies in Jamaica, who are unafraid to wear bright eyeshadows!

I used Sleek Makeup Ultra Matte Brights V1 for the eyeshadows since I really wanted to use matte eyeshadows for this look. If you do decide to use this palette for your makeup, I suggest that you use a white base (i.e. NYX Jumbo pencil in Milk) so the colors pop even more.

Again, don’t forget to check my Instagram for daily updates since I’ll be away from my laptop this weekend! Remember to TAG your work with #KIREIMAKEUP so I can see and get inspired by YOU! 😉

Scroll all the way down for products list.

sleek makeup matte bright tutorial

All eyeshadows used in this tutorial is from Sleek Makeup Ultra Matte Brights V1. If you are in Asia, and you want to buy this palette, please check Luxola website! Use the code LXBLOG for 15% off!

How-to:

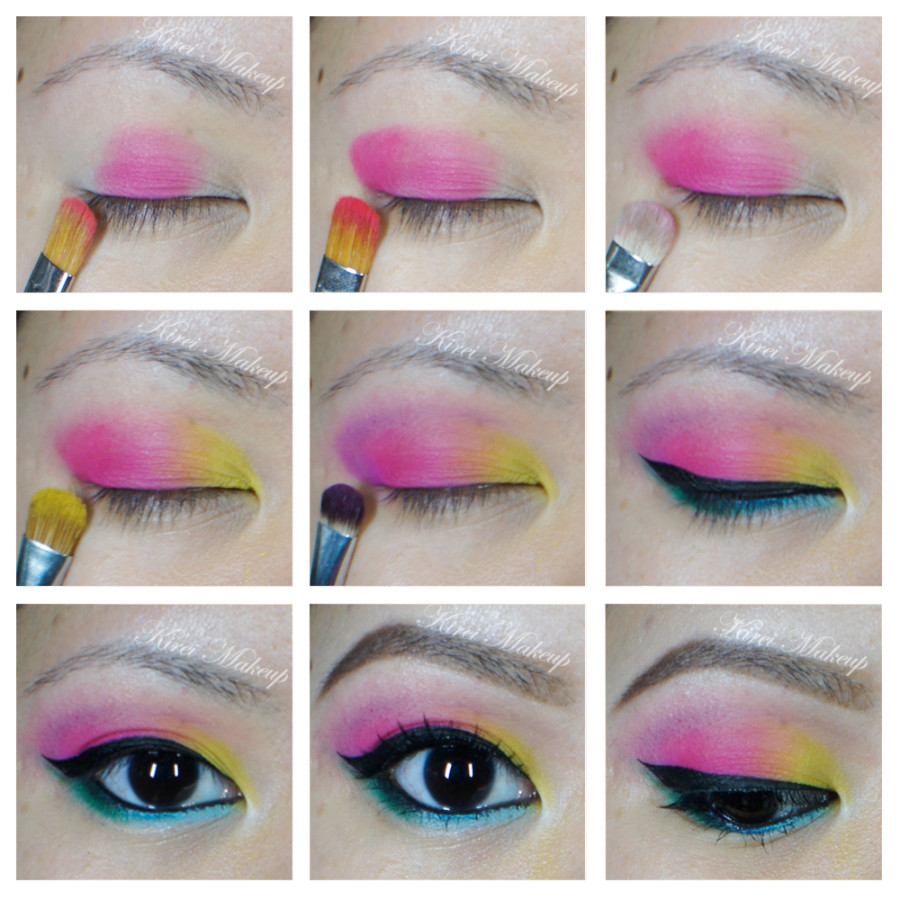
1. I prepped my eyelid using NYX Jumbo Pencil Shadow in Milk on both upper and lower lid.

2. I applied Pucker in the middle of my eyelid using a flat eyeshadow brush.

3. Using the same brush, I applied Pout on the outer part of my eyelid.

4. Using a clean shader brush, I blended out the edge of Pucker and Pout to remove any harsh edge.

5. I applied Bammi on the inner corner of the eyelid using a flat eyeshadow brush.

6. (Optional) I applied Sugarlite on my crease using a small shader brush. Optional step since the purple isn’t dark enough.

7. (Not in picture) I applied Floss on the crease using a blending brush as a transition color.

8. I lined my upper lash line with Kanebo Kate Super Sharp Eyeliner. On my waterline, I applied L’oreal Voluminous Smoldering eyeliner.

9. On the lower lid I used an angled eyebrow brush and  applied Chill on the inner corner, Bolt in the middle, and Dragonfly on the outer part.

10. I curled my lashes and applied Cover Girls Lash blast mascara on both upper and lower lashes.

11. I also applied Gwiyomi “Yuki” False Eyelashes (Indonesian store, check my Instagram if you want to buy).

12. I filled my brows using Anastasia Brow Wiz in Ash Blonde and Brunette.rainbow makeup

13. On my face, I applied Cover FX cream foundation in G40 using MAC Masterclass Brush Oval 6.

14. Very lightly, I applied Cover FX cream foundation in G20 under my eyes. I set my base using CoverFX translucent powder.

15. On my cheeks, I applied MAC Dainty blush.

16. I lined my lips using L’oreal Color Riche Lip Liner in Beyond Pink, and applied MAC Please Me Lipstick using a lip brush.


Products used

Eyes – NYX Jumbo Pencil Shadow in Milk; Sleek Makeup iDivine Ultra Matte V1 Brights; Kanebo Kate Super Sharp eyeliner; L’oreal Voluminous Smoldering eyeliner; Cover Girl Lash Blast mascara; Gwiyomi “Yuki” false eyelashes; Anastasia Brow Wiz in Ash Blonde and Brunette.

Face – CoverFX cream foundation in G40 (base) and G20 (under eyes); CoverFX translucent powder; MAC Dainty blush.

Lips – L’oreal Color Riche Lip Liner in Beyond Pink; MAC Please Me lipstick.

Soft Rose Smokey Eyes tutorial using UD Naked 3

Here I am with a new Soft Rose Smoky Eyes tutorial using UD Naked 3 (again)! I do apologize for missing for almost a week without any tutorials. I’ve been having some difficulties with the internet at home. However, if you do follow me on Twitter or Instagram, you’d have gotten a little bit of update here and there every day.

In another news, I was very excited to find out that Urban Decay has used one of my pictures that I did on their email newsletter! I’m not sure if you guys subscribe to their mailing list, but I was so surprised to see my face on it. It’s small, but I’m so happy! If you want to recreate that look, please take a look at my Rose Smoky III tutorial.

Don’t forget to check out my other UD Naked 3 tutorials (pictorials and video)!

Urban Decay

So, for today’s tutorial, I wanted to use my Urban Decay Naked 3 again to create a much softer rosy smoky eyes, something that most people can recreate and do it on themselves. This look would be great for those with medium to darker skin tone as well. If you like a very light eyelid, you can apply Burnout or Dust instead of Buzz.

Scrolls all the way down if you want to skip the how-to, and go straight to the product list.

urban decay naked 3 rose smoky

How-to:

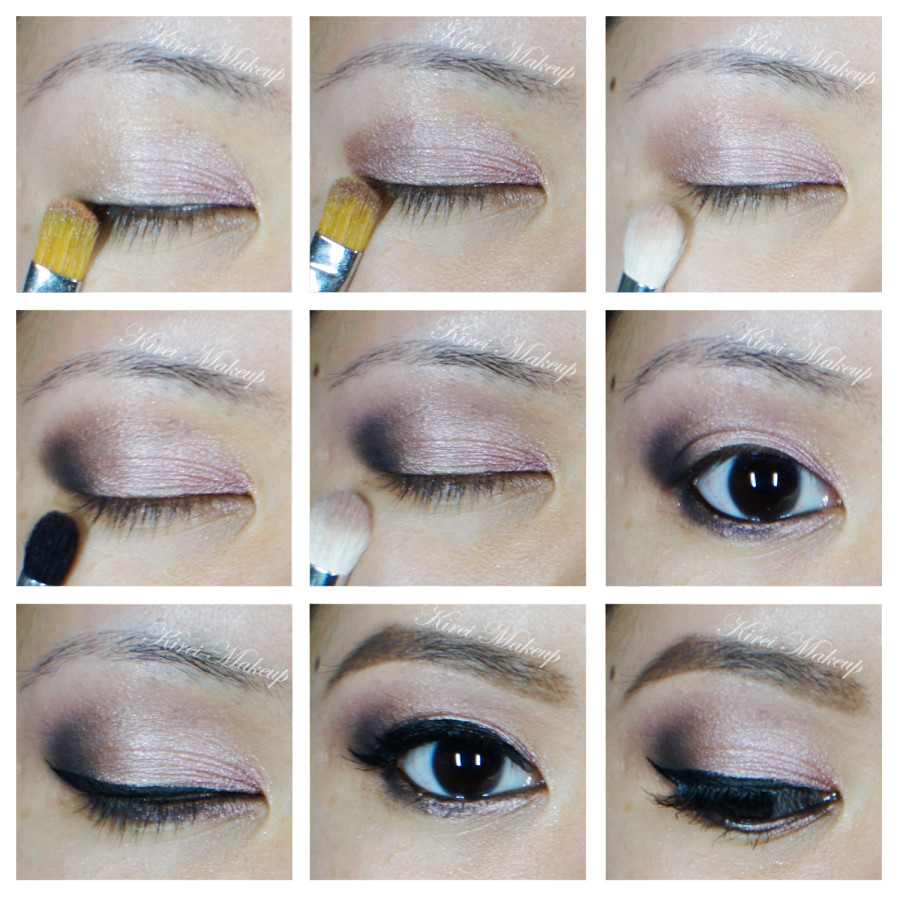
  1. I prepped my eyelids using Urban Decay Primer Potion in Sin.
  2. I applied Buzz on the inner half of my upper eyelid, and Liar on the outer half, using a flat eyeshadow brush.
  3. On the crease, I lightly applied Limit using a blending brush.
  4. Using a bullet crease brush, I applied Blackheart on the outer V.
  5. I blended out the outer V using the same blending brush I used on Step 3.
  6. On the lower lid, I applied Blackheart using an angled brow brush.
  7. I also applied Buzz on the inner corner of the lower lid.
  8. I lined my waterline using L’oreal Voluminous Smoldering eyeliner.
  9. I applied a winged eyeliner along the upper lash line using Kanebo Kate Super Sharp eyeliner.
  10. I curled my lashes, and applied Clinique High Impact mascara. Then, I added false lashes.
  11. I outlined my brows using Anastasia Brow Wiz in Ash Blonde, and filled it with Anastasia Brow Powder in Brunette.

urban decay naked 3 makeup tutorial

  1. I applied Cover FX cream foundation in G20 under my eyes, on the bridge of my nose, chin, and forehead using a clean foundation brush.
  2. I then applied Cover FX cream foundation in N110 on my temples, sides of my nose, on the hollows of my cheeks and on my jawline using a clean foundation brush.
  3. I blended the 2 foundation using a damped sponge.
  4. I set my face using Cover FX translucent powder.
  5. I applied Chanel Blush de Horizon on my cheeks.
  6. On my lips, I applied Tarte Lipsurgence in Lively.


Products used

Eyes – Urban Decay Naked 3 (eyelid: Buzz & Liar, crease: Limit, outer V: Blackheart); L’oreal Voluminous Smoldering eyeliner; Kanebo Kate Super Sharp eyeliner; Ardell false lashes no. 109; Anastasia Brow Wiz in Ash Blonde; Anastasia Duo Brow Powder in Brunette.

Face – Cover FX cream foundation in G20 & N110; Cover FX translucent powder; Chanel Blush de Horizon.

Lips – Tarte lipsurgence in Lively.

Kat Von D Esperanza Palette Review

Happy Friday (or Saturday depending on which time zone you are in), everyone! I wanted to actually do a tutorial today but the Sun is hiding behind the cloud, so I decided to fulfill my promise from my last post to put up my Kat Von D Esperanza Palette review. I hope when the Sun decides to come out again, I can do a fun tutorial for the upcoming week! Don’t forget to follow me on Instagram and Twitter to find out what I’m up to daily, and also like my Facebook page so you can get notification on facebook whenever I upload a new post (or subscribe if you prefer email notification!).

Anyways, let’s get down to the review!

Kat Von D Esperanza palette review

What is the Kat Von D Esperanza palette?

“A fresh palette of eight long-wear, full coverage shadows that deliver matte, pearl, and high-glitter finishes, plus one transformative color veil.

Inspired by the transformative spirit of spring, this luxurious eye shadow palette contains a variety of shades ranging from subtle mattes to bold shimmers and pearls. The transformer shade, Dayglo, can layer on to each color to add a unique dimension. A built-in mirror helps you create an abundance of on-the-go eye looks.

Palette is infused with rose extract to moisturize delicate eyelid area.”

(Sephora, 2014)

First impression – what a gorgeous coveeeer! I want it! I have to have iiiit! *while standing in front of the cashier, and without any shame asking her if she can get the palette from behind her*. Pretty much that sums up how I felt about the palette when I first saw it at Sephora…hahahaha…So, yeeep! There you go, I’m a sucker for any pretty packaging!

I actually have owned several Kat Von D products before – liquid eyeliner (Trooper), and Beethoven palette. I’ve loved those products, and have re-bought them several times, especially the Trooper liquid eyeliner. So, I expected quite a few things from this palette – great pigments, long-lasting, easily blendable etc. I’m pretty happy to see that Kat Von D finally released a palette with pastels and colors for Spring. However, this palette is just OK. I think you’ll be better off buying her True Romance palettes than this one, unless you like the pastels in this palette.

Keep reading to see why this palette didn’t make it to my Product of the Week!

Kat Von D Esperanza palette review

Packaging

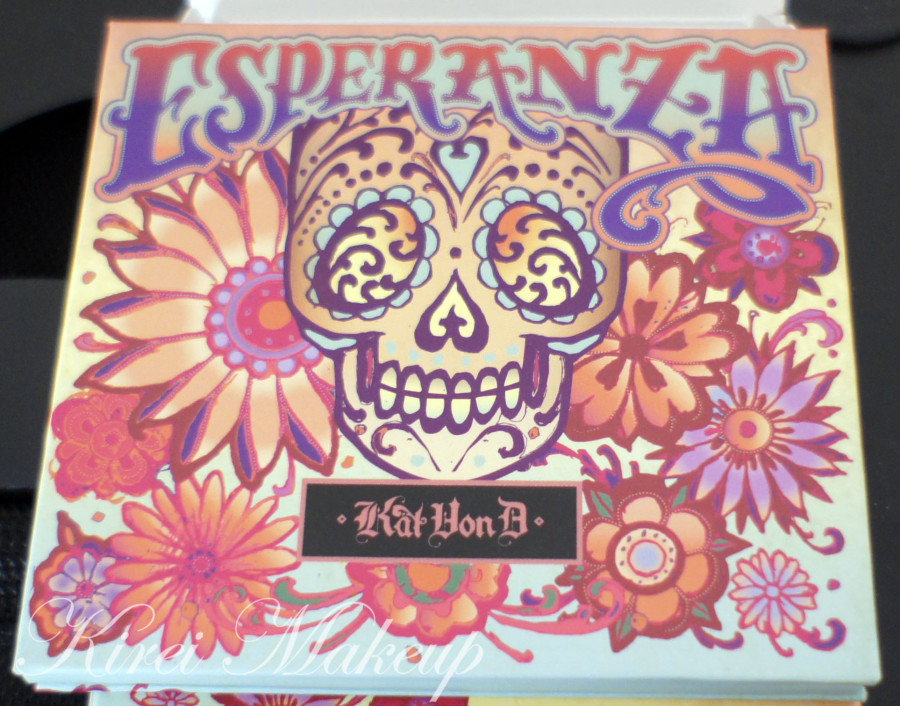
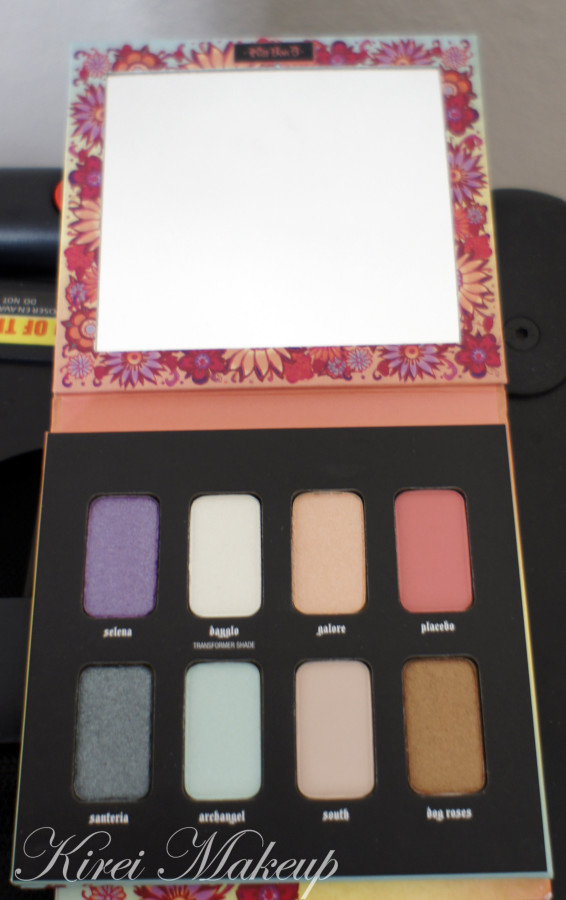
The Esperanza palette comes in a carton box. As you can see, there’s a beautiful art work in the cover, very reminiscent of the Sugar Skull. Inside, you get a mirror on one side, and 8 eyeshadows on the other side.

To be honest, I’m quite disappointed with the packaging, since I find it quite flimsy, considering the other True Romance palettes come in a hard plastic package with a clasp.

Longevity/Blendability/Pigmentation

As with most of the other Kat Von D palettes, the shadows in this palette last really well. I’ve worn it with UD Primer Potion for 6-hour with no creasing.

The eyeshadows are so soft and buttery; it blends so easily. I do have to say that if you have a skin tone like me (or darker), Archangel might look a little chalky (although I love this shade so much!). I find that Santeria and Dog Roses have the most pigment pay-off out of all the 8. I also love Dayglo, which can work really well as a transition color on the eyelid if you have 2 or more shades on the lid. It also gives a nice iridescent finish whether you wear it alone or on top of any shadow.

I do have to mention that there’s a significantly more fall-out from this palette compared to the other Kat Von D palettes.

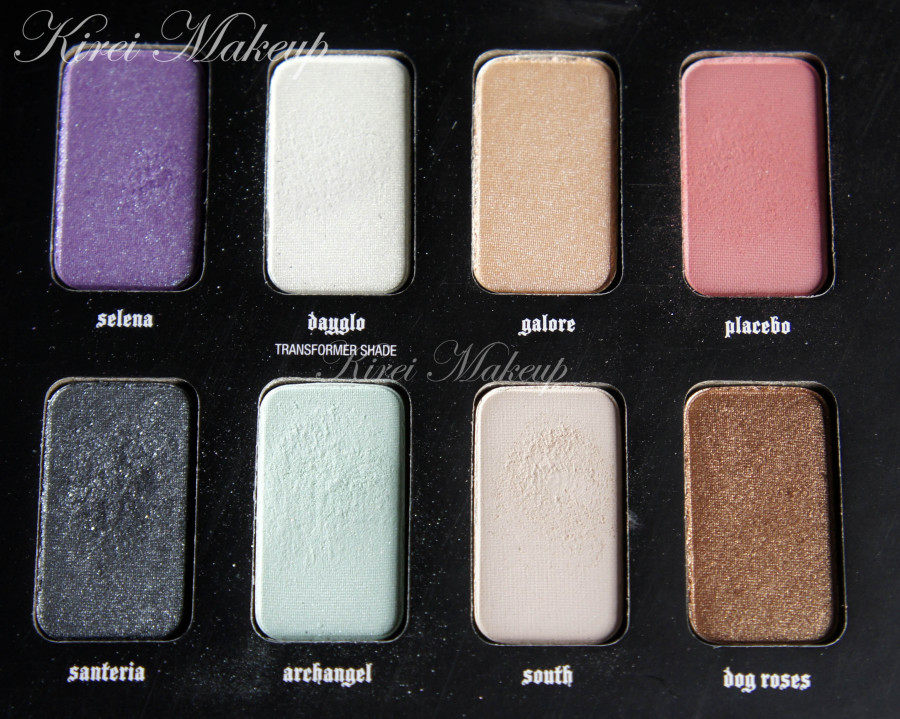
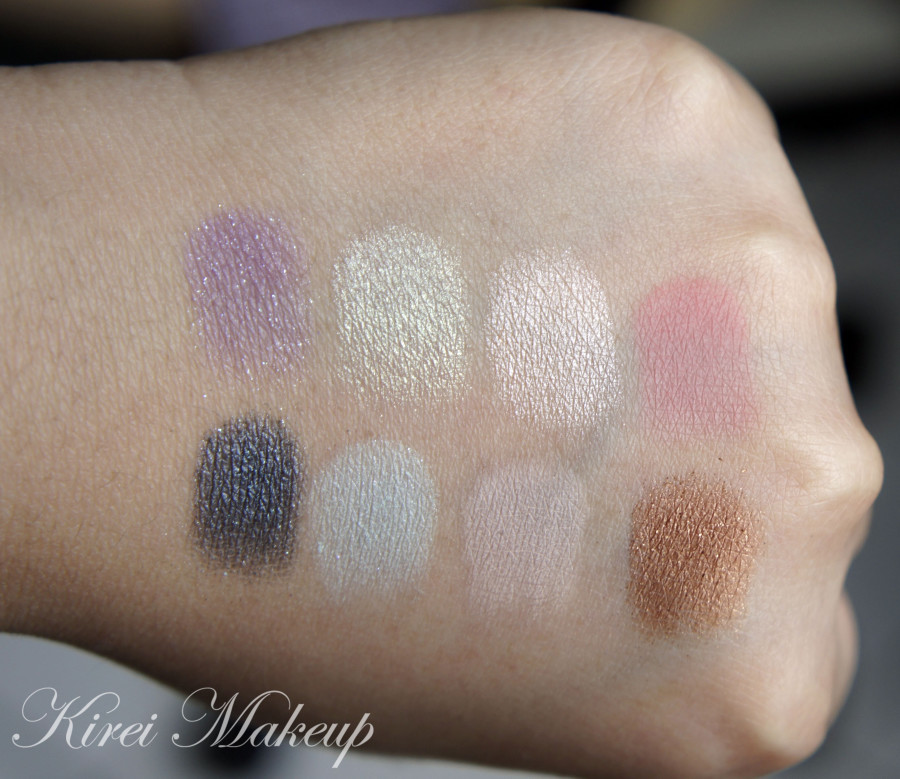
Kat Von D Esperanza palette swatches

Shades & Finish

Top (L-R)

  • Selena (glitter purple)
  • Dayglo (transformer shade, iridescent white)
  • Galore (pearl peach)
  • Placebo (matte peony pink)

Bottom (L-R)

  • Santeria (glitter greenish grey)
  • Archangel (sparkle seafoam green)
  • South (matte beige)
  • Dog Roses (sparkle bronze)

*shades description taken from Sephora*

Kat Von D Esperanza palette review

Price

CA$43 for 0.035 oz x 8 eyeshadows. It is a limited edition palette, so I’ve expected it to be a bit more expensive. The other Kat Von D palettes (the True Romance) are also $43/each, but you get 0.05 oz x 8 shades (with better packaging). I think this palette is slightly more expensive, but if you love pastels and light colors then this would be a great palette for you.

Pros

  • What is so great about this palette is that the colors work with each other very well in any combination!
  • Love all the soft, spring colors.
  • Easily blended and great pigment pay-off.
  • Beautiful cover.
  • Paraben free.

Cons

  • Flimsy packaging.
  • Some of the lighter shades might look chalky on medium to dark skin tone.
  • Quite a few fall-out.
  • Pricy considering you pay the same price as the other Kat Von D palettes, but you get less product and flimsier packaging.


Disclaimer: I am not affiliated nor sponsored to do this review. I bought this palette out of my own pocket, and I do not gain any monetary profit out of it.

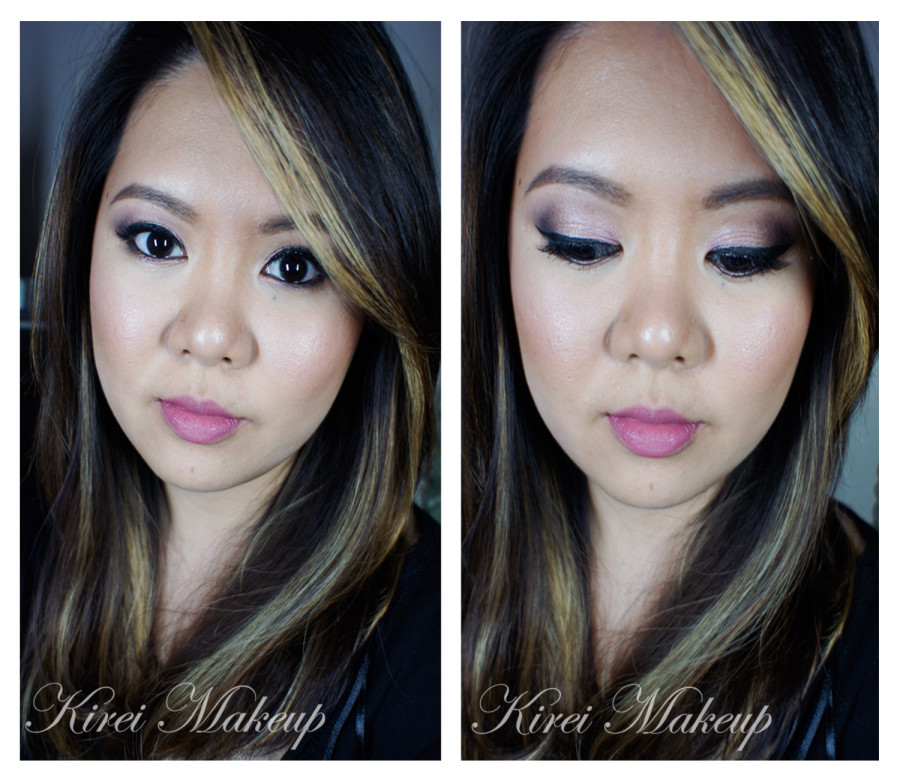
Kat Von D Esperanza Tutorial #1

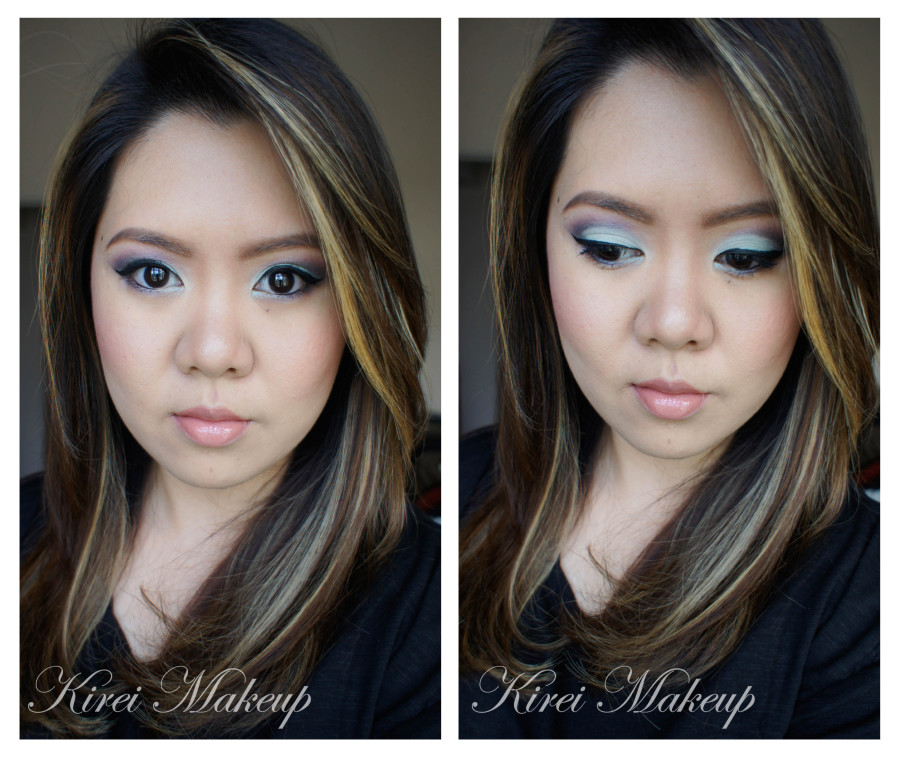
If you guys follow me on Instagram (you should, btw!), you would know that I’ve posted a little sneak peek on today’s tutorial there. Today, I wanted to do my first Kat Von D Esperanza tutorial, using the mint eyeshadow as the main focus. If you are wondering why the pictures on the step-by-step is a bit off in terms of the color, it’s because the Sun was playing hide and seek with me today. Luckily, the sky cleared up, and I managed to get good shots for the final looks!

I’ll try to post a review for this palette some time this week. I prepped my eyelids using UD Primer Potion, which I think didn’t work too well for this look. May be for future tutorial, I might use a white-colored base (i.e. NYX Jumbo Pencil in Milk) OR a mint-colored base for the lid. I feel that the mint eyeshadow that I used doesn’t have much color on it, and look slightly chalky.

All eyeshadows mention are from Kat Von D Esperanza palette. If you want to find out the product I used and skip the how-to, scroll all the way down.

How-to:

1. After prepping my lid using UD Primer Potion, I applied Archangel using a flat eyeshadow brush.

2. Using Sigma E25 Blending Brush, I applied Placebo slightly above the crease.

3. Using the tip of a flat eyeshadow brush (like the Sigma E54 Medium Shader brush), I applied Santeria on the crease and outer V.

4. Using the same Sigma E25 blending brush that I used on step 2, I blended out Santeria.

5. Using a fluffy blending brush (like the Sigma E38 Diffused Crease brush), I applied South under the brow. I also buffed South slightly on to my crease.

6. Using a small shader brush, I applied Archangel on the inner corner of the lower lid, and Selena on the outer corner.

7. (not in picture), I applied Danglo on top of Archangel using a flat eyeshadow brush.

8. I created a winged eyeliner using Kanebo Kate Super Sharp eyeliner, and lined my waterline using L’oreal Voluminous Smoldering eyeliner.

9. I curled my lashes and applied Cover Girl Lash Blast Mascara.

10. I filled my brows using Anastasia Brow Wiz in Ash Blonde, and then I set it using Faint eyeshadow from the Naked Basic palette.

Kat Von D Esperanza makeup tutorial

11. On my face, I applied UD Naked Skin foundation using a damped makeup sponge.

12. I set my face using NARS Setting Powder.

13. I lightly contoured my face and nose using MAC Blunt.

14. On my cheeks, I applied Chanel Blush de Horizon.

15. Lastly, on my lips, I applied L’oreal Color Riche lipliner in Beyond Pink, top it off with Revlon Socialite suede lipstick and a little tiny bit of clear lip balm from L’occitane.Kat Von D Esperanza eye makeup

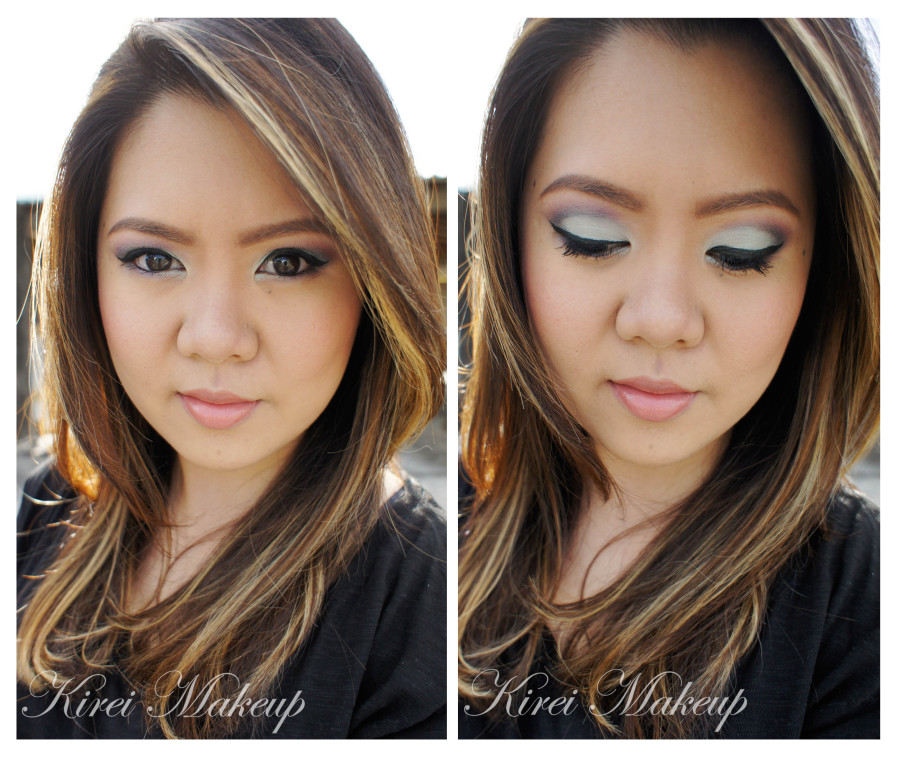
I took the pictures above in a room with big windows and natural day light. For the pictures below, I actually stepped out of the house and took the pictures outdoor with the Sun somewhat behind me. As you can see, in both pictures, my makeup is not heavy at all, esp. for the face. The focus is still on the eyes, while the skin is left pretty natural looking.

If you are curious about my hair, please check my post on Highlights for Brunette.

Kat Von D Esperanza tutorial

Products used:

Eyes – Kat Von D Esperanza palette; Kanebo Kate Super Sharp eyeliner; L’oreal Voluminous Smoldering eyeliner; Cover Girl Lash Blast Mascara; Anastasia Brow Wiz in Ash Blonde; Faint eyeshadow (Naked Basic palette).

FaceUD Naked Skin foundation; NARS Setting Powder; MAC Blunt; Chanel Blush de Horizon.

Lips – L’oreal Color Riche lipliner in Beyond Pink; Revlon Socialite suede lipstick; clear lip balm from L’occitane.

Recommended Sigma brushes – Sigma E25 Blending Brush; E54 Medium Shader brush; Sigma E38 Diffused Crease brush.

Disclaimer: clicking on the Sigma link will take you to my Sigma affiliate page. Any purchase you make on Sigma from my website will help in this blog’s maintenance. Rest assured, I only recommend products that I honestly love and use on myself. Thank you for your support!

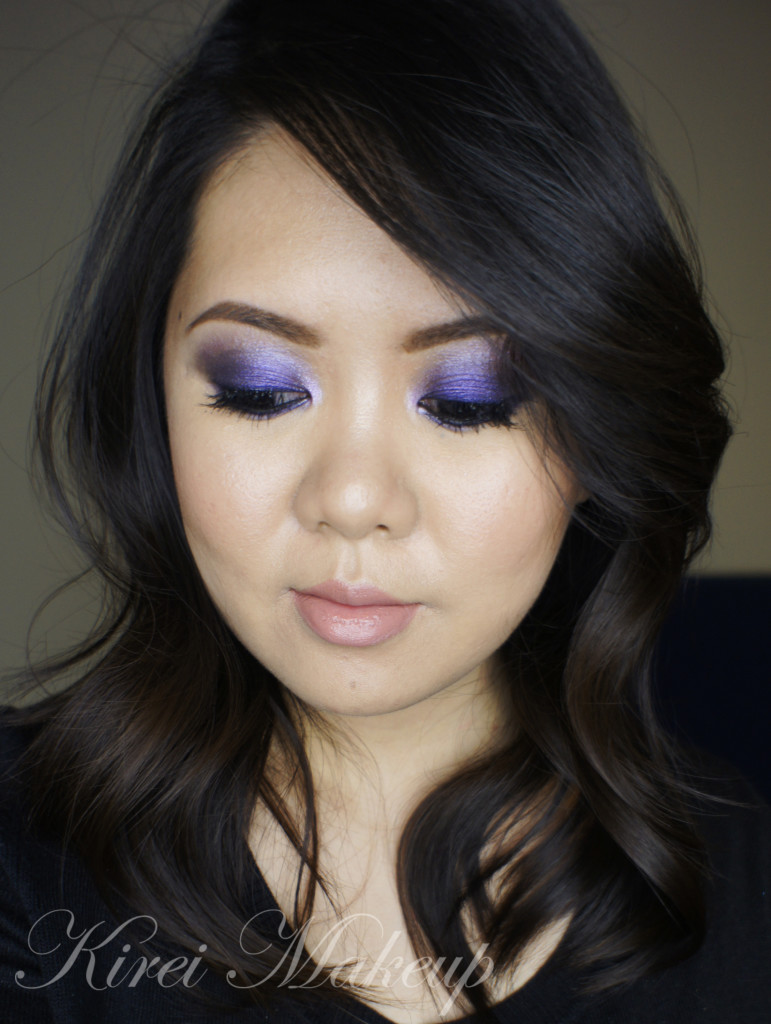
L’oreal Infallible Purple Obsession

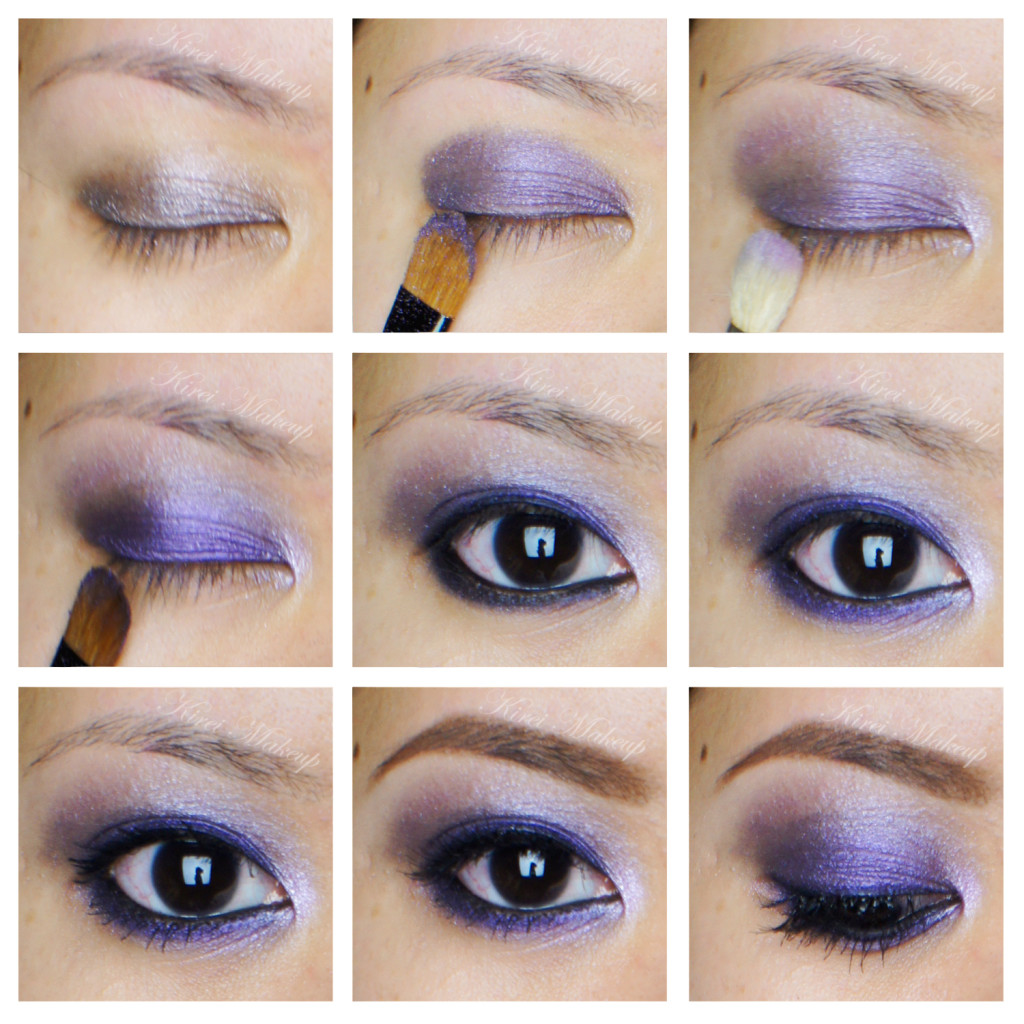
I was watching Lisa Eldridge Purple Glitter youtube video, and wanted to re-create that look on myself. It definitely looks amazing, and since I do own a pot of purple glitter I wanted to give it a shot. I do not have all the products that she used on the video, so I had to improvise with whatever I owned. I also modify it so it suits me.

Anyways, halfway through my tutorial, I realized I couldn’t open up my glitter. The purple glitter is at the bottom container of my glitter stack, and I guessed I didn’t close it properly last time. So, I omitted the glitter out of the equation.

So, to make the purple pops even more, I decided to apply L’oreal Infallible Purple Obsession eyeshadow with a wet brush. I love using the L’oreal Infallible eyeshadows wet. It gives such great intensity and has a nice sheen to it!

purple smoky eyes

How-to:

1. I applied Chanel Illusion d’Ombre in Illusoire on my eyelid using my finger.

2. Using a flat eyeshadow brush, I applied L’oreal Infallible eyeshadow in Purple Obsession.

3. Using a fluffy blending brush, I applied Lotus Flower from Sleek Makeup iDivine Snapshot above the crease and on the inner corner of the lid.

4. At this point, I realized I couldn’t open my purple glitter, so I decided to wet my flat eyeshadow brush and re-applied L’oreal Infallible Purple Obsession eyeshadow on the lid.

5. I lined my upper and lower lashline, as well as waterline using L’oreal Infallible Gel Lacquer Liner in Blackest Black (using the brush that comes with it).

6. Using a pencil brush, I applied L’oreal Infallible Purple Obsession on the lower lid.

7. I curled my lashes, and applied L’oreal Voluminous Carbon Black mascara on both top and lower lashes.

8. I applied several individual false eyelashes (camera didn’t pick those lashes) on the upper lashes.

9. I filled my brows using Anastasia Brow Powder in Brunette.

L'oreal Infallible Purple Obsession

10. On my face, I applied L’oreal Magic Lumi foundation using a foundation brush.

11. I applied YSL Cream Blush no. 2 on the cheeks.

12. I also applied MAC Pearl cream base using my finger on the bridge of my nose, on top of my cheekbones, cupid’s bow and chin.

13. On my lips, I applied L’oreal Color Riche lipliner in Beyond Pink, and added L’oreal Color Caresse Shine Stain in Eternally Nude. (I feel like this makes lips look bigger than usual..lol)

purple smoky eyes

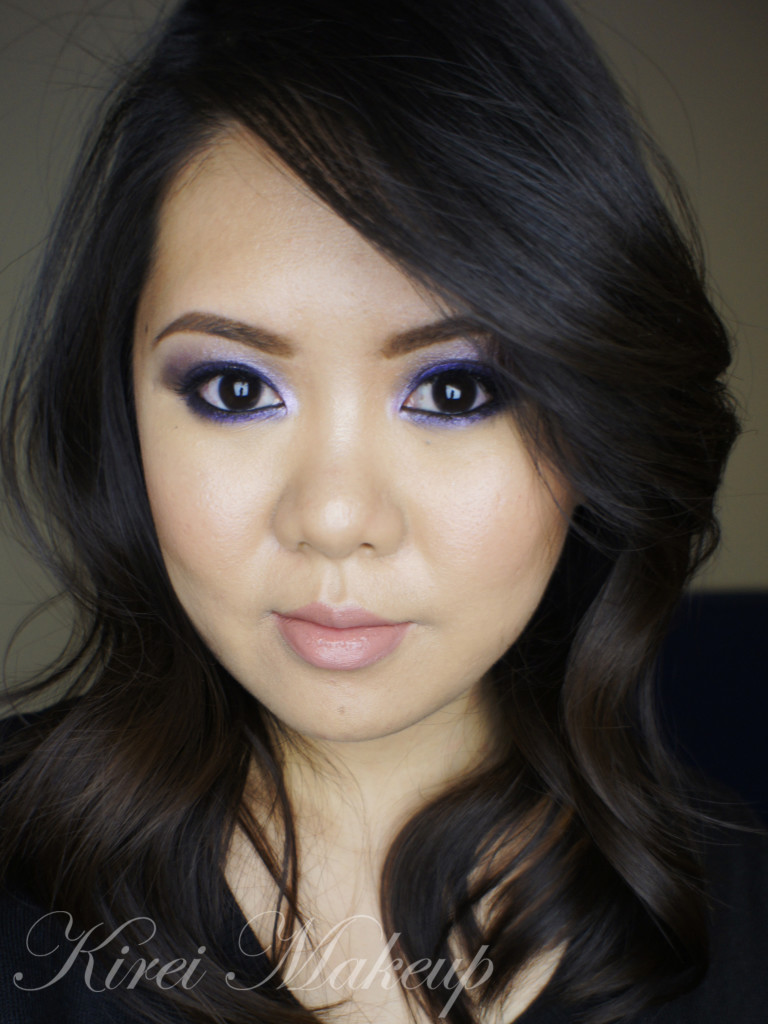
Black Smokey Eye Tutorial

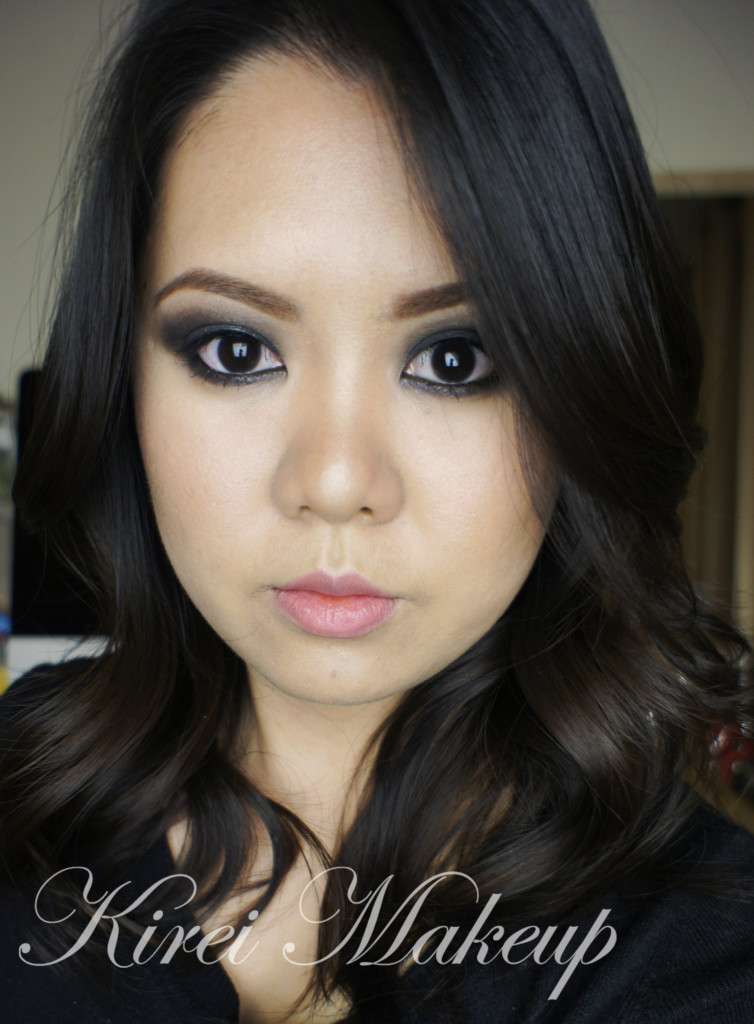
Today black smokey eye tutorial is a requested look by  Nurina, who asked for a Taylor Momsen look. I decided to do Taylor’s signature look – the black smokey eyes. Anyways, I’ve done something similar to this look in my Classic Smoky Eyes using UD Naked post.

Since this tutorial is a bit more intense, I brought the black eyeshadow up above the crease. Taylor Momsen signature smoky eyes look is very messy, very dark and sometimes she paired it with red lips. You can pair it with red lips, or dark red lips to make it more goth-like.  However, I prefer to go with a peachy lips instead, keeping the focus just on the eyes.

Keep in mind this is an inspired look, so I’ve modify it to suit my face as well as my style. Taylor Momsen’s smoky eye sits too low on the lower lid to my liking. Be warn if the black eyeshadow is very low on the lid, it might make you look older, or it can make you look like you have panda eyes! As cute as pandas are, I’m sure you don’t want to look like you have panda eyes, right?!

black smoky eyes

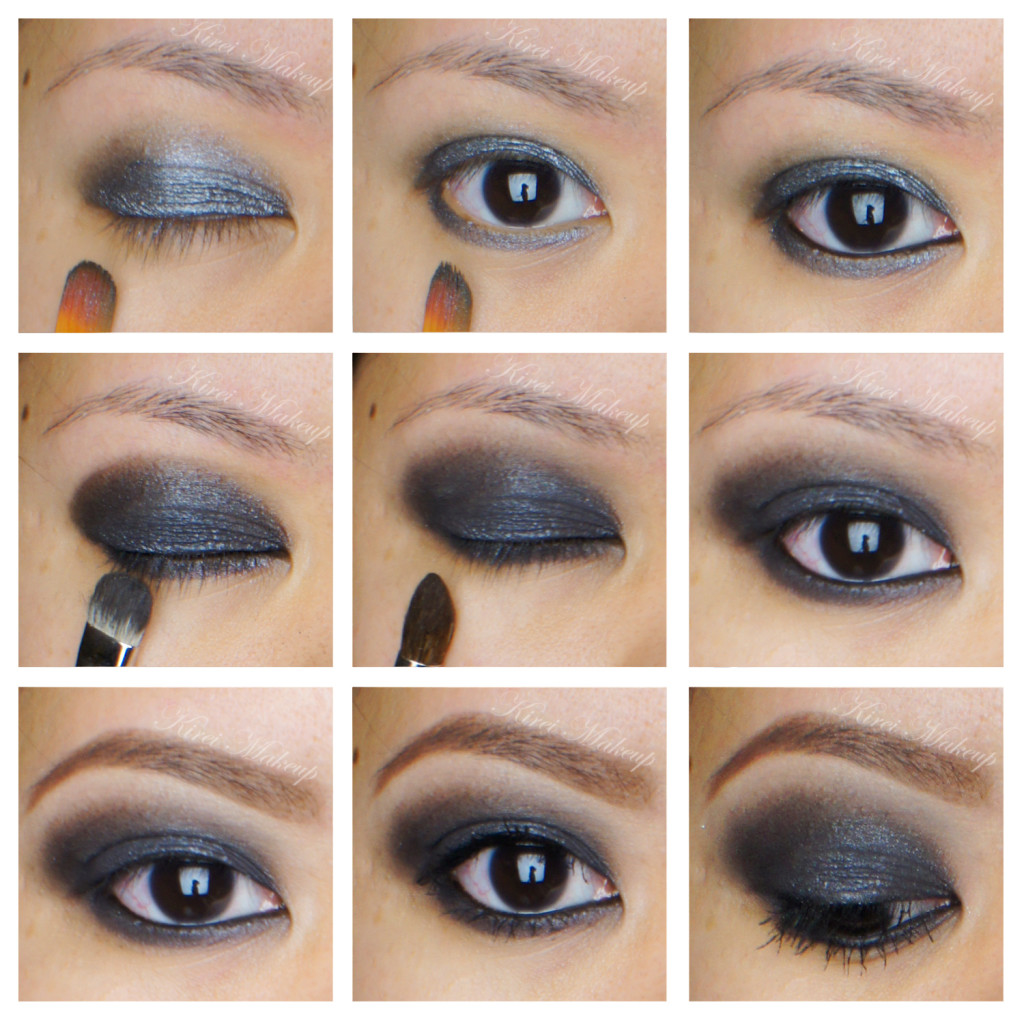
How-to:

1. I applied MUFE Aqua Cream #1 Anthracite using a synthetic paint brush on both upper and lower lid. I’ve decided to use this so I can get interesting texture on the eyes. If you want to use a matte eyeshadow only, please check my Classic Smoky Eyes post.

2. I lined my waterline and tightline using a black kohl pencil eyeliner by Annabelle.

3. Using a shader brush, I applied Crave eyeshadow from UD Naked Basics palette on top of my eyelid. I extended the eyeshadow to slightly above the crease.

4. Using a clean blending brush, I applied Foxy eyeshadow from UD Naked Basics right at the edge of the black eyeshadow.

5. I applied Crave eyeshadow from UD Naked Basics palette on the lower lid.

6. I filled my brows using Shu Uemura Hard Formula brow pencil, and then set it using Anastasia Brow Powder in Brunette.

7. I curled my lashes and applied L’oreal Carbon Black mascara on both lower and upper lashes.

taylor momsen makeup tutorial

8. I applied UD Naked Skin foundation using a Sigma Flat Top Kabuki Brush.

9. I contoured and highlight my face using Smashbox Contour kit.

10. I applied Chanel Blush de Horizon very lightly on my cheeks.

11. On my lips, I applied Revlon Colorstay Ultimate Suede lipstick in Socialite, and add a few dabs of YSL Glossy Stain in Pêche Cerra-Cola (27).

Metallic Storm

A new tutorial using my brand new Sleek Makeup iDivine Storm Palette. I actually been wanting to buy the palette for a while, and I couldn’t made up my mind because I had a bad experience with Indonesian custom not releasing my palettes. So, I was extremely happy when Luxola finally has an office in Jakarta. That makes online shopping in Luxola so much easier. My palette arrived in 2 days after I purchased it. So fast and quick! If you do click on my Luxola banner or links, you’ll get a 15% off. I am affiliated with Luxola and do earn commission in store credit form. However, I have to buy my palettes out of my own pocket.

Anyways, In the Storm palette, there’s a lot of metallic colors, and I’m sure you all know that Metallics are in again this Fall 2013. There is no individual shades name from the palette (which is super weird), but I hope you get the idea.

I prepped my eyes using MAC Paint Pot in Soft Ochre.

How-to:

1. I applied a cranberry eyeshadow (darkest pink from the palette) all over my lid using a flat eyeshadow brush.

2. Using a fluffy blending brush, I blended the edge out. (Optional step)

3. Using a small fluffy brush, I applied a black eyeshadow from the palette on the outer corner to the crease.

4. Using a clean blending brush, I blended the edge until there’s no harsh line on the crease. (sorry for the blurry picture)

5. Using a wet wipe, I cleaned the outer edge of my eyelid to create a diagonal clean line.

6. I also applied MUFE Aqua Liner in black on the outer half of the waterline. I also applied a gold eyeshadow from Sleek iDivine Storm on the inner corner of the lid, and a blue eyeshadow on the rest of the lower lid.

7. I created winged liner/cat-eye liner/feline flick along the upper lash line using Kanebo Kate Super Sharp eyeliner.

8. I applied MAC Brule under the brow bone.

9. I curled my lashes and applied L’oreal Double Curl Extension mascara on both upper and lower lashes.

10.  I filled my brows using Shu Uemura Hard Formula 9.

11. I also applied Ardell individual short flare eyelashes on my top lashes to make them look thicker.sleek idivine storm

12. On the face, I applied MUFE HD Foundation, and under the eyes I applied MUFE HD concealer.

13. I powdered my face using Cinema Secret loose powder.

14. I applied MAC Cubic on my cheeks as blush.

15. On the lips, I applied some lipstick that I’ve melted and forgot to label it…(sorry)

Anything that can go wrong on this tutorial went wrong. I mean, I couldn’t get the lights to work like normal for some reason, may be they are dying. Then, my skin was so dry that day, and I ran out of moisturizer. So, apologies if my foundation looks slightly cakey (or a lot). On top of that, my palette fell from the table because I accidentally tripped – when I was trying to break the fall by holding onto the table, my hand hit the palette. Ah, what a day 🙂 hahahaha…

 Sleek iDivine Storm

Sebastian Gunawan Mod Muse 2014

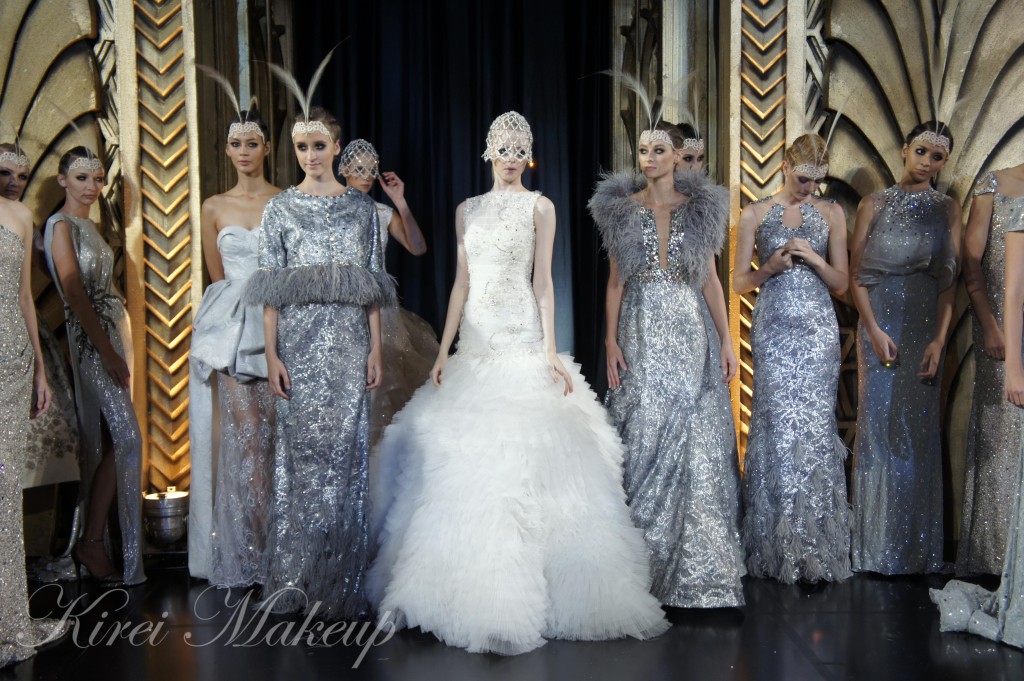
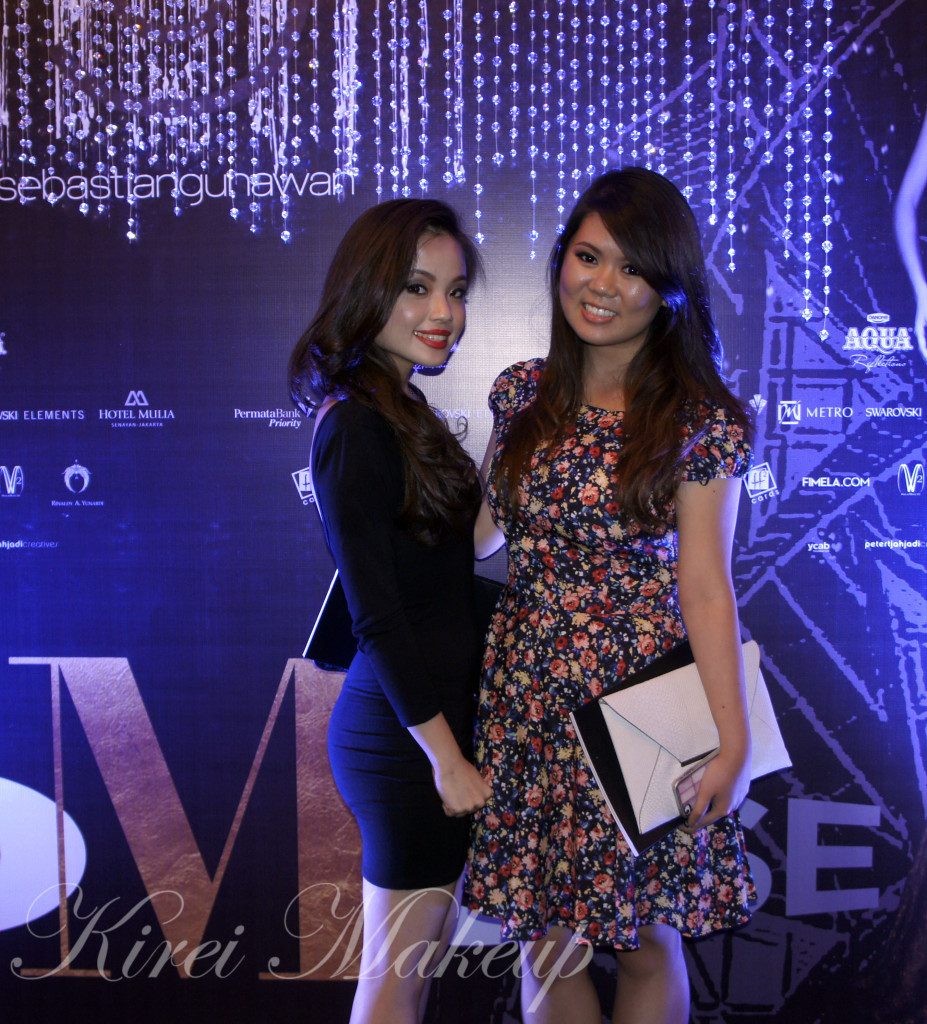
Last night, Wiwin and I had the pleasure of attending Sebastian Gunawan Mod Muse 2014 Fashion Show at Hotel Mulia. I just want to take the time to give Bryna Lie a shout out. All thanks to her that I was able to watch the show, and even able to bring Wiwin (and did her makeup mwahahahaha) along. We are all childhood friends, so it was a good little reunion (again :P). So, again a big huge hug, loads of kisses and thanks to this sexy hot mama!

sebastian gunawan mod muse 2014

Sebastian Gunawan is a famous Indonesian-based fashion designer. His design is very popular amongst Indonesians. He’s actually Bryna’s uncle! He’s not only known in Indonesia, but also very prolific in the world’s stage. Anyways, below is a quote from his website about his profile:

A life dedicated to inspire and be inspired by women seems to be a pre(-)destined matter for Sebastian Gunawan. Born in a tight knit family with 4 sisters, his interest in style started early thanks to his elegant mother’s natural flair in fashion. This led to a discovery that the young Sebastian Gunawan is gifted in fashion illustration. From mere hobby, this talent was then honed by a degree in fashion design at the Fashion Institute of Design & Merchandising in Los Angeles. The glamorous air of Hollywood seems to be a starting point for his design inspirations, something that was later honed at Milan’s famed Instituto Morangoni. It was here when he met his wife and creative partner, Cristina Panarese. He and Cristina then came back to Jakarta, Indonesia and launched his line, Sebastian Gunawan in 1993. In the same year represented Indonesia at the prestigious “Young Fashion Designers Contest”. His distinctive style was later recognized internationally when he received the First Award at the “International Apparel Federation World Young Designer Award 2004” in Barcelona, Spain. A year later he was invited to show his collection at “Moda in 3D” in Rome, Italy.

Sebastian continues to grow his presence by launching two ready to wear lines. The first one, “Red Label by Sebastian & Cristina” and “Votum”. He cites his family and the ongoing desire to make women look their most beautiful as the driving force behind his never ending inspirations.


sebastian gunawan mod muse 2014

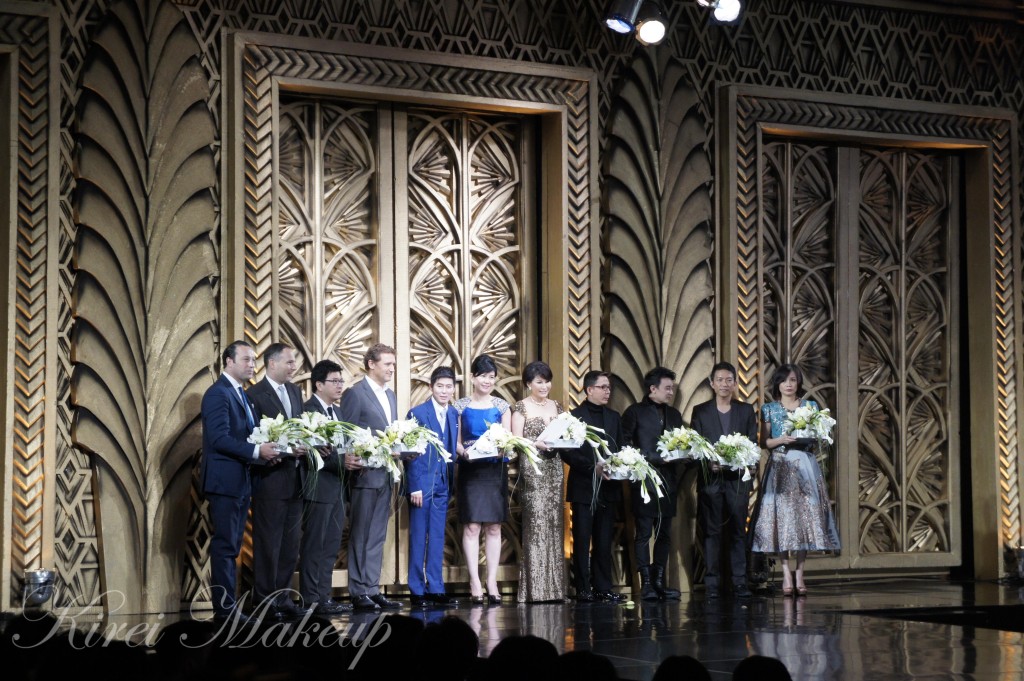
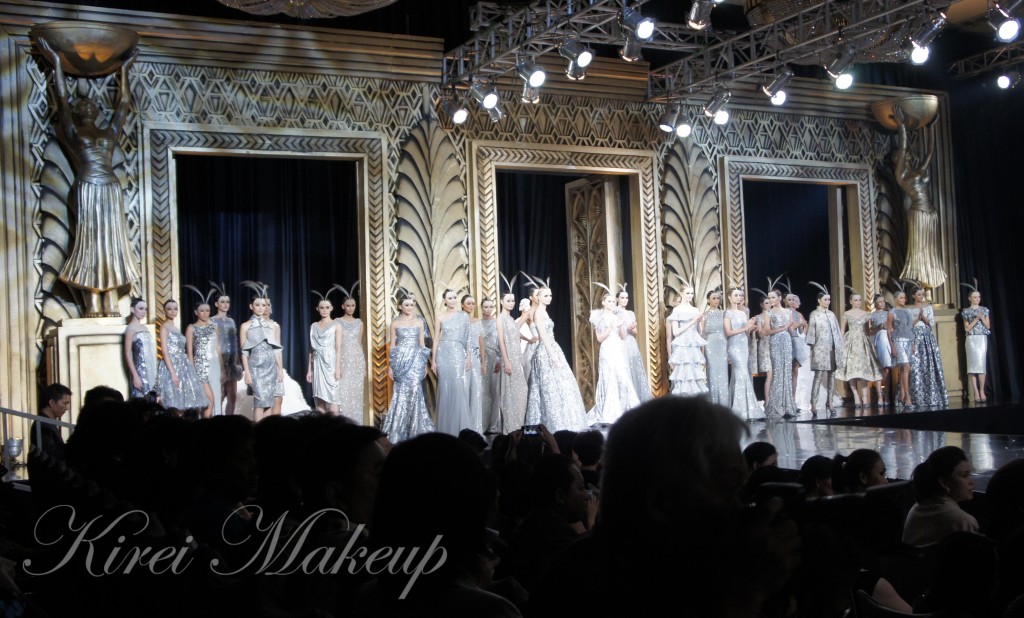
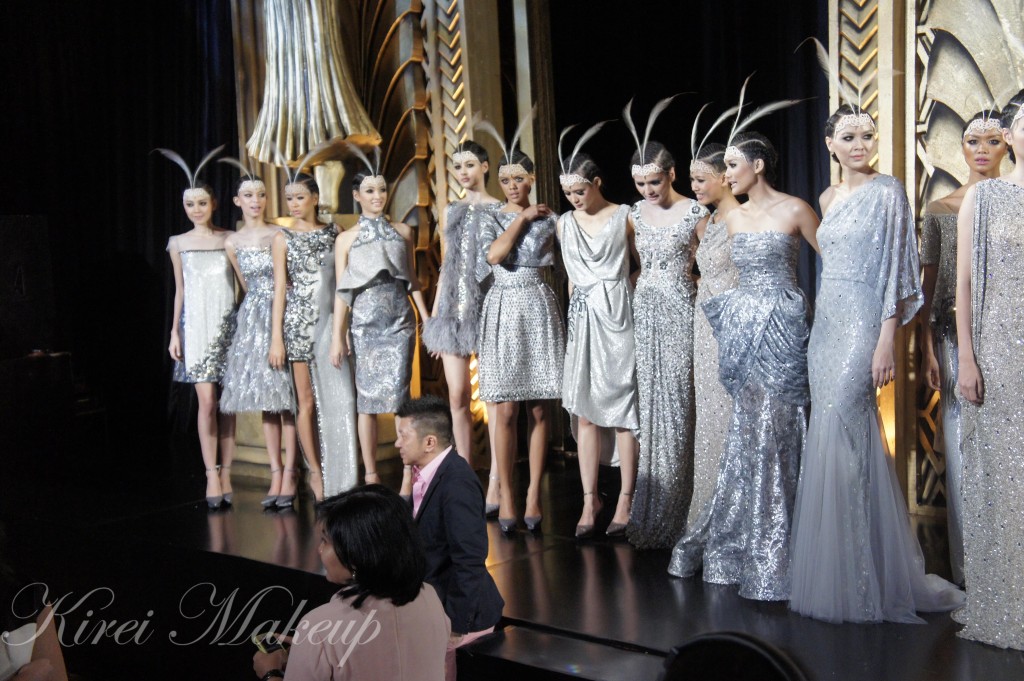
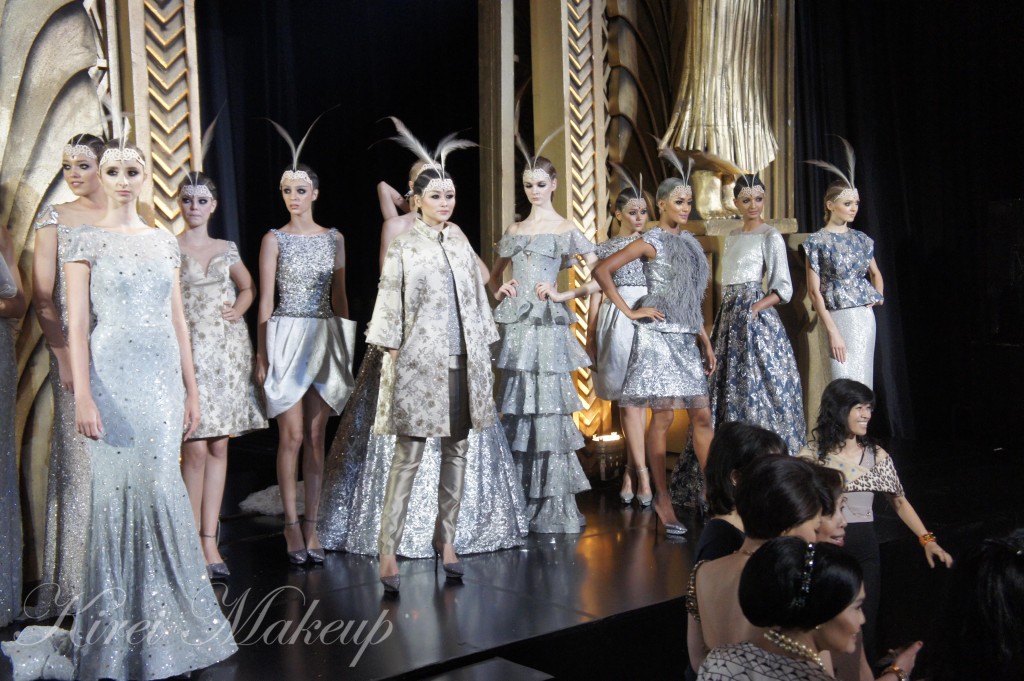
Anyhow, the show took place in Hotel Mulia (Jakarta) Ballroom, and can we all just take a look at how amazing the decoration is. I mean, that runway backdrop was so gorgeous! The event showcased cocktail dresses and evening gowns, as well as 3 bridal gowns. Everything was super pretty. Lots of pretty colors ranging from gold to blue and silver. I especially love the first few dresses, which has a lot of orange/blue combo (not in pictures) . I definitely love all the 50s inspired skirts and dresses.

sebastian gunawan mod muse 2014MOD MUSE 2014

Besides the amazing clothes, I have to mention how edgy the hair is. The models get a very tight braid along the scalp, almost like a corn braid, but in bigger section. The makeup is smoky eyes, I think with silver on the lid, I can’t say for sure. I know there were a lot of falsies involved, though!

sebastian gunawan mod muse 2014


sebastian gunawan mod muse 2014

Refer to the photo below: I’ve fallen heads over heels for that skirt with the pocket (second from the right, model has her hand inside the pocket). The model next to her (the one with her hand on her hip, third from the right), she has the best walk! I’m no expert, but she rocked that stage!

sebastian gunawan mod muse 2014

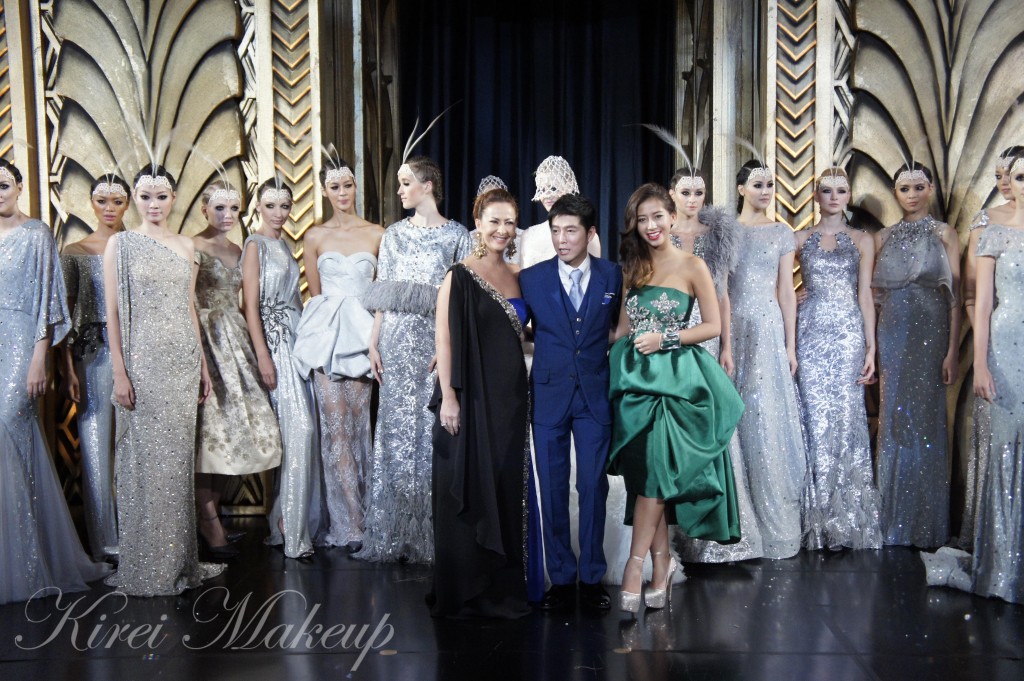
sebastian gunawan mod muse 2014Sebastian Gunawan with his wife and daughter. What a beautiful family!

sebastian gunawan mod muse 2014

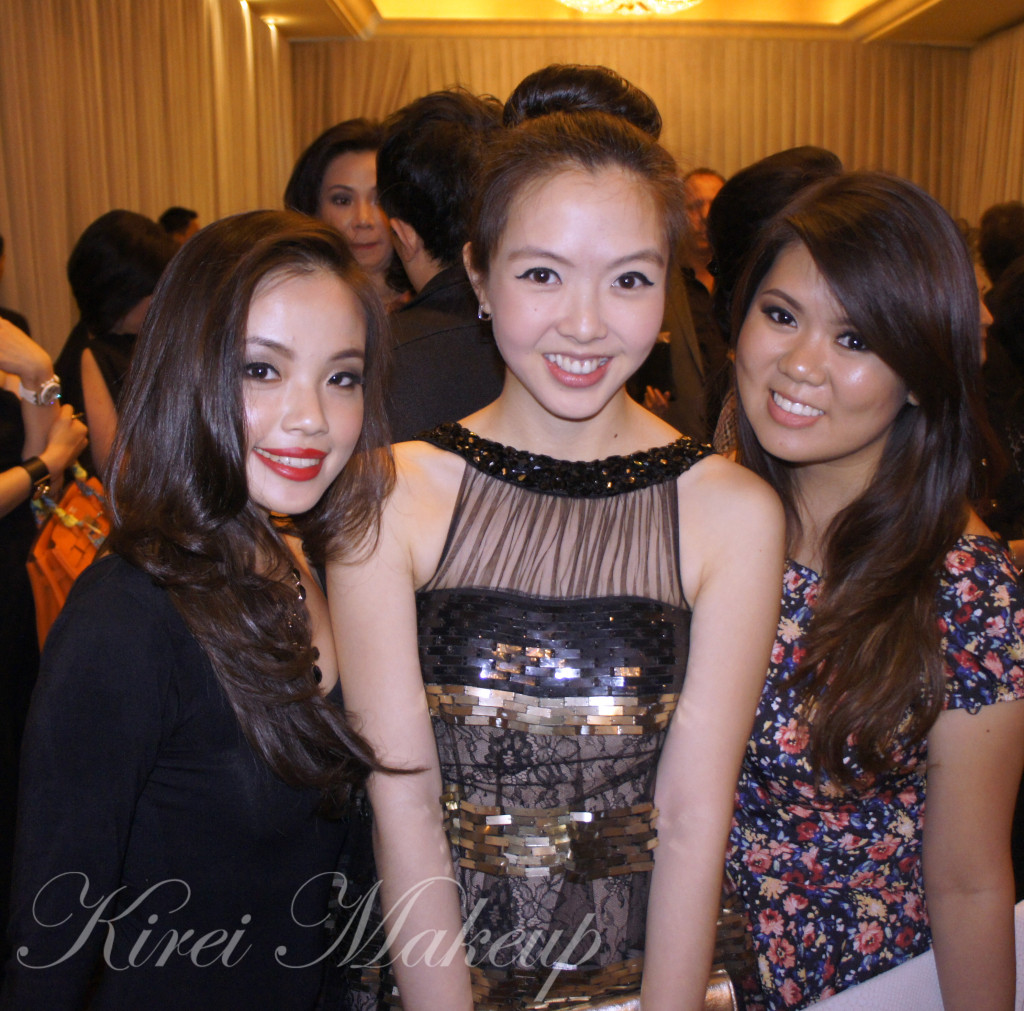
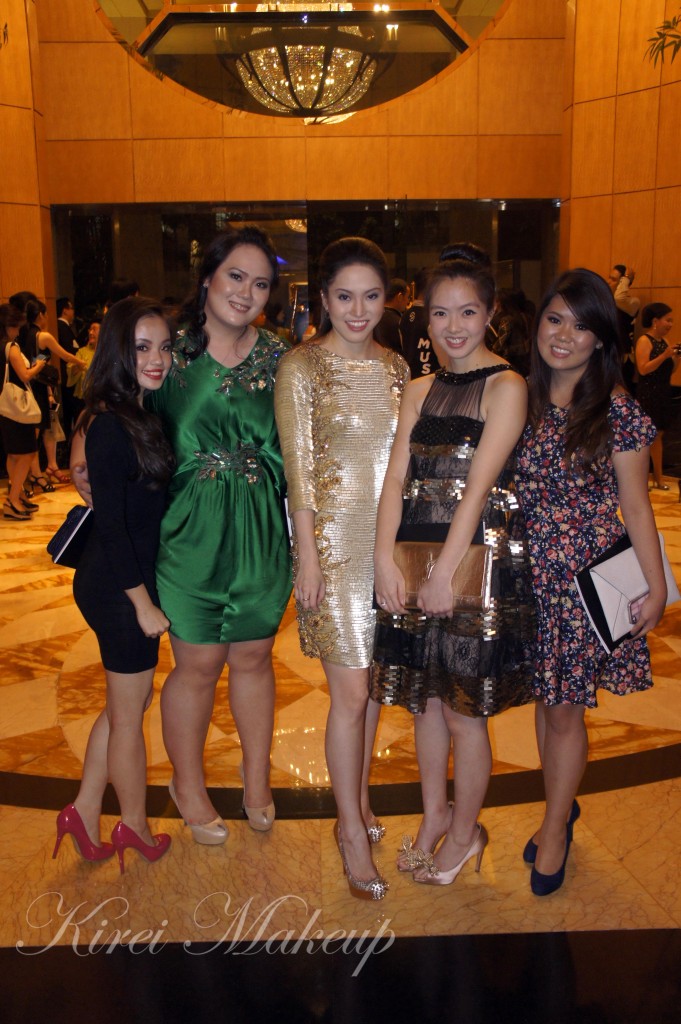
sebastian pr girl(L-R) Wiwin, Livia, Bella (aka Sebastian PR Girl), Bryna, and myself

Livia, Bella and Bryna are all wearing Sebastian Gunawan dresses.

Dr. Jart+ Indonesia V7 Product Launch

As you might know from Twitter (I was live tweeting), I was invited to join Dr. Jart+ Indonesia product launch, and the event occurred just last Wednesday. A BIG THANK YOU AND HUGS to Indah for the invitation! Anyhow, I wanted to share what happened last Wednesday in this post. For the official press release, I’ll post that up later on this week.

I have heard about Dr. Jart+ back when I was in Canada. Sephora stores in Canada carry this brand. To be honest, I never actually paid much attention to it since I thought it was just another brand selling BB creams. Just couple months back, I was actually curious about Dr. Jart+ skincare lines, and lucky me I received an invitation to join their product launch!

Dr. Jart+ is a Korean skincare brand, which is developed by Korean dermatologists. Their products are known globally, and now are available in Indonesia.
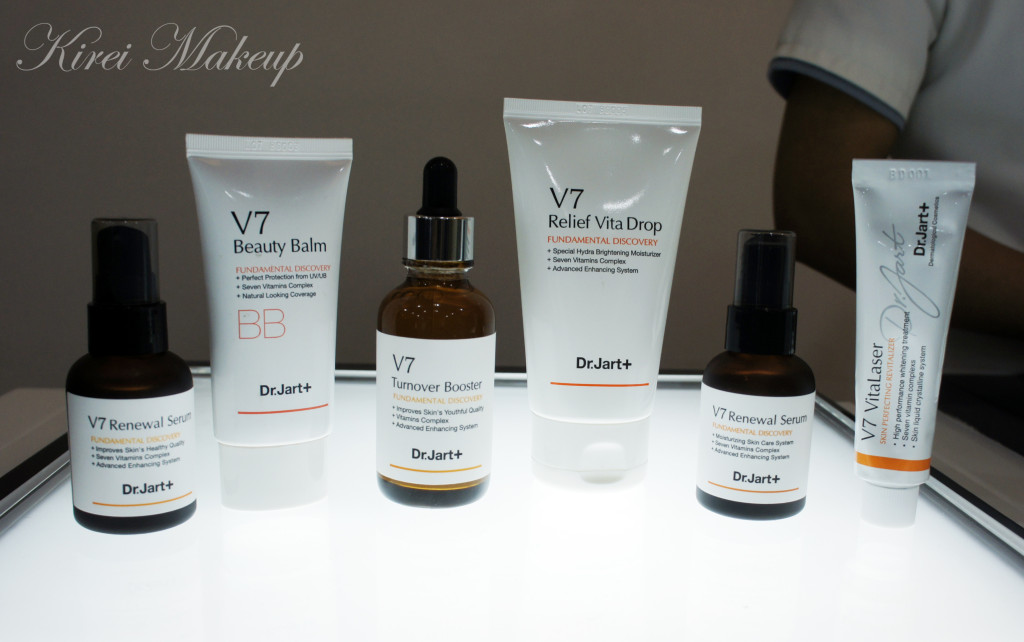
Dr. Jart V7 skincare line

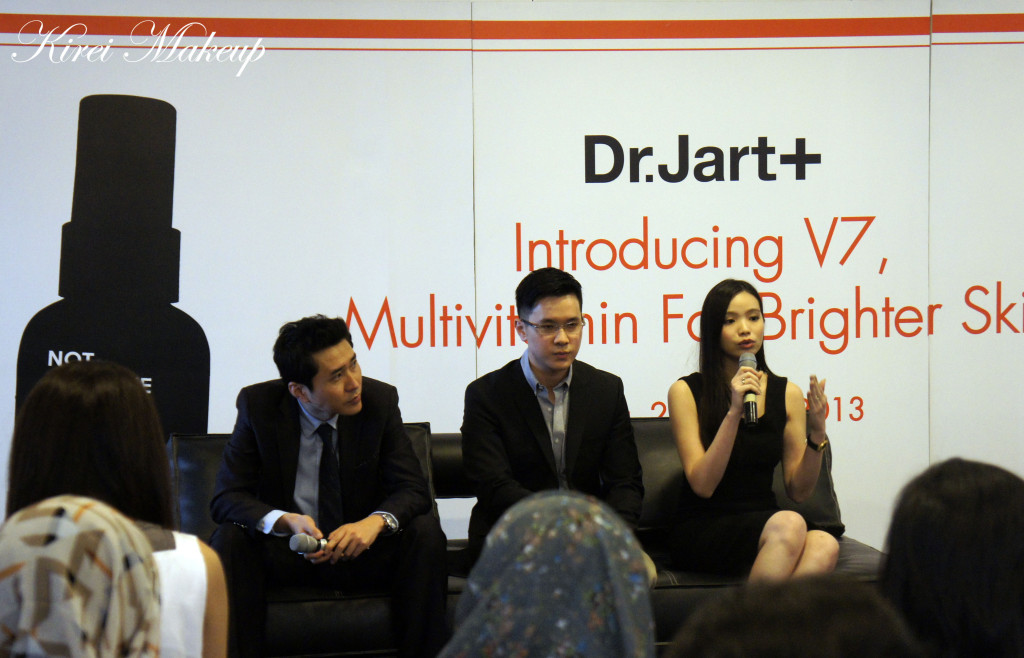
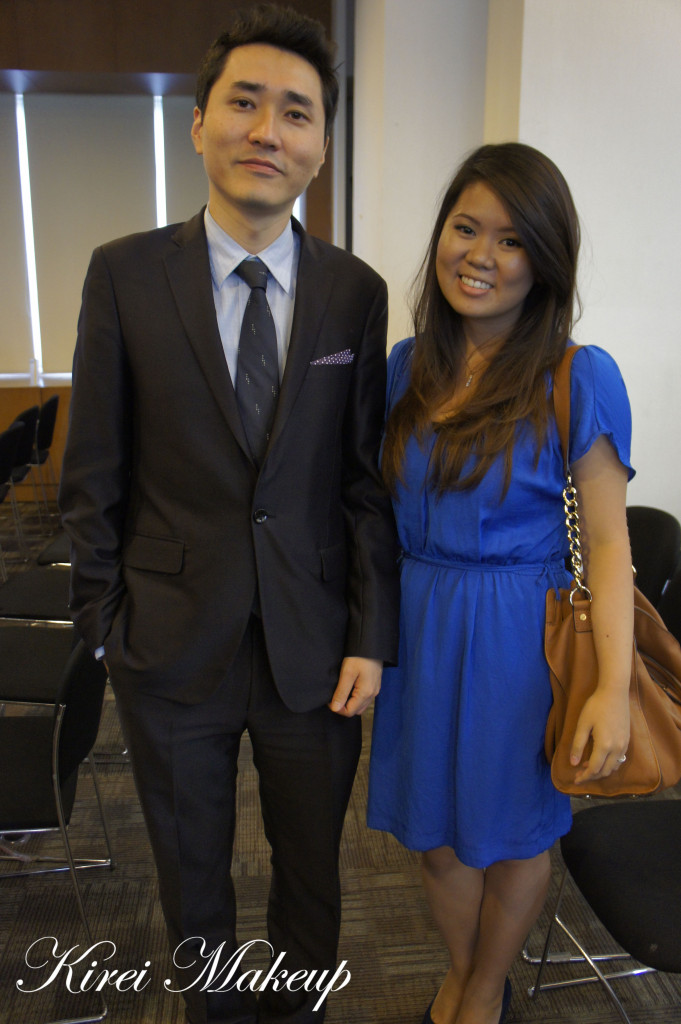
Last Wednesday , they wanted to launch the Dr. Jart+ V7 skincare line in Indonesia. Several key people in the pictures below are: Vera Liono (Brand Manager Dr. Jart+ Indonesia), John Kim (Overseas Sales Team Manager), and Dr. Kevin Maharis (guest speaker, an aesthetic physician).

So, what is V7 skincare line? The V7 skincare line consists of several products, which help individuals to achieve a brighter looking skin. It’s called V7 because the products in this line are infused with several vitamins which can help to brighten the skin. The products include cleanser, toner, serum, moisturizer, and BB cream. This line is directed for those who want to get rid of their dark spots, dull skin and hyper-pigmentation. The products do not consist of any alcohol, and artificial fragrance, coloring as well as preservatives. It’s for all skin-type, and for both men and women.
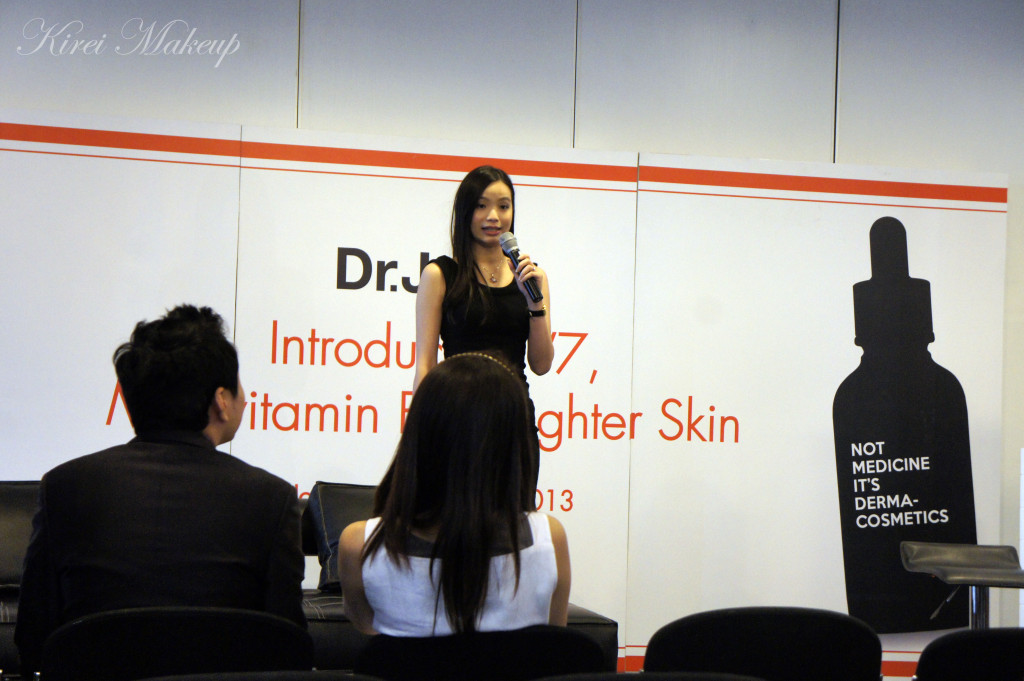
Dr jart indonesia

(Vera Liono giving us a brief introduction regarding the brand)
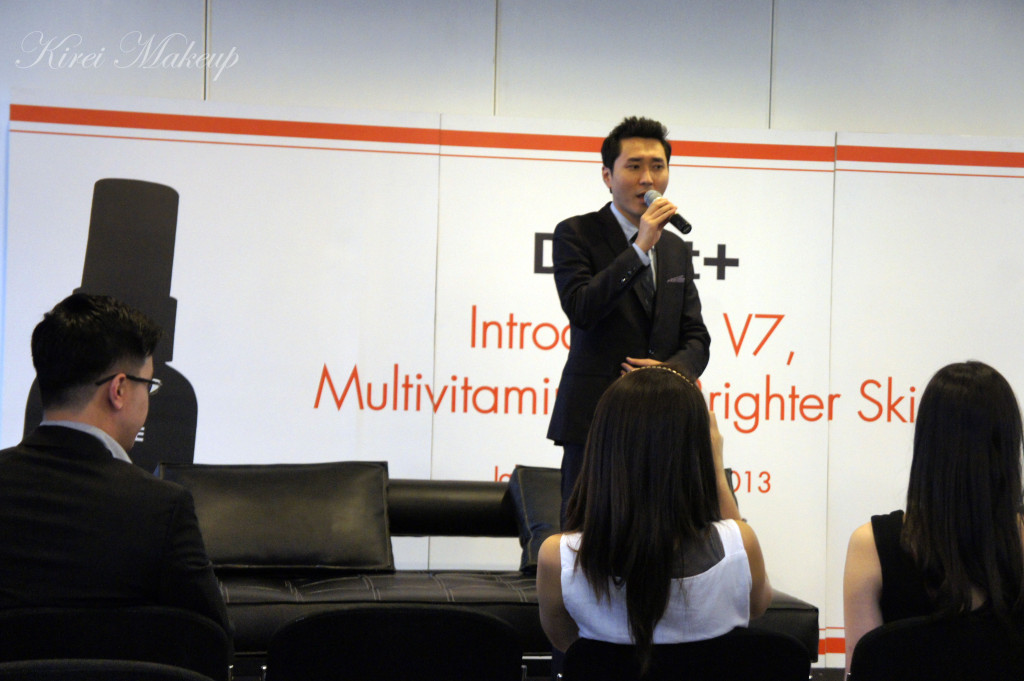
Dr. John Kim

(John Kim, explaining to us about the development of Dr. Jart+ globally)
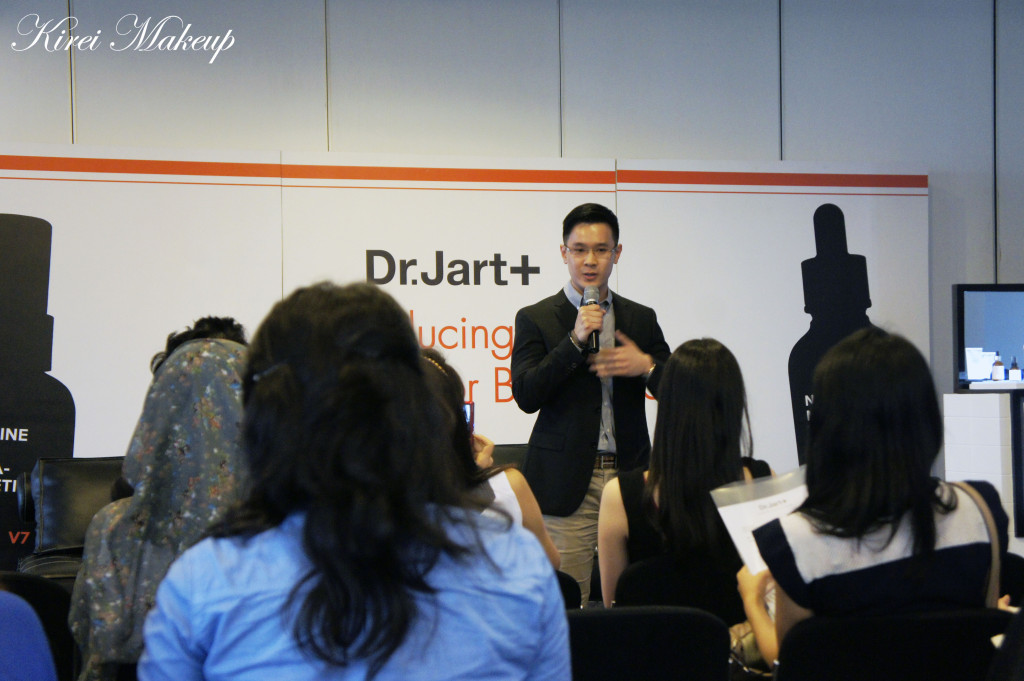
Dr. Kevin Maharis

(Dr. Kevin Maharis talking about the importance of proper products during skincare routine)

During the event, there was a demo to show us the right sequence to apply these products and what kind of effects the skin will get. I felt that the BB cream was way too light for her skin, when the makeup artist started her application. I zoomed in a little closer to see if my hunch was right, and true enough. Look at the picture below to see the difference between the left and the right side of her face.
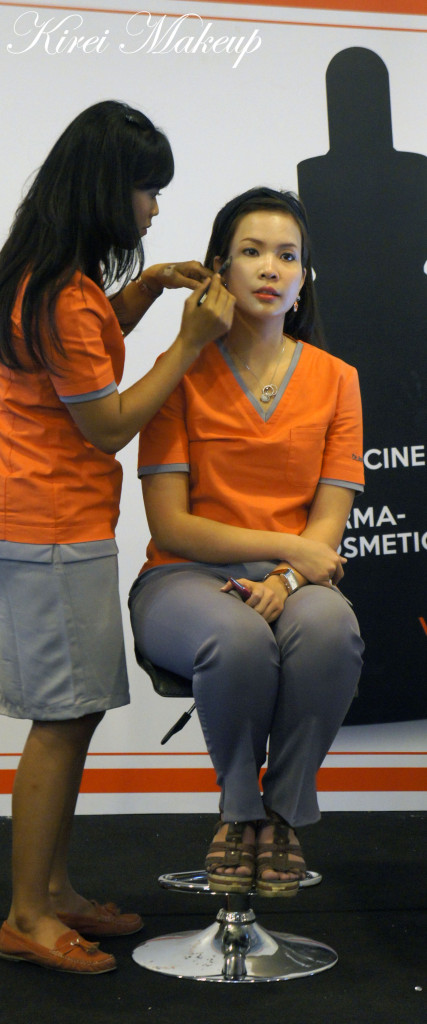
Dr. Jart bb cream

(Skincare and makeup demo)

In the Q&A session, obviously, I had to ask. I raised my concern regarding the range of shades from the BB cream. I am, afterall, a makeup artist and I was curious to see if they have a good answer. I do want and like to recommend products to my clients, friends and family. I, of course, want to ensure that I recommend great products.

Not surprisingly at all, the answer to my question was quite confusing at first. The answer was NO, there is not a wide selection of shade for the BB cream. In fact, there’s only ONE shade for the BB creams. So, anyone who’s darker than MAC NC/W15 (may be NC/W20 can still give it a try), you can forget about the BB creams from Dr. Jart+. I asked if they’ll overcome this issue, and they do not give me any definitive answer. Instead, they kept going on and on how their BB creams come in range for the different skin-type.
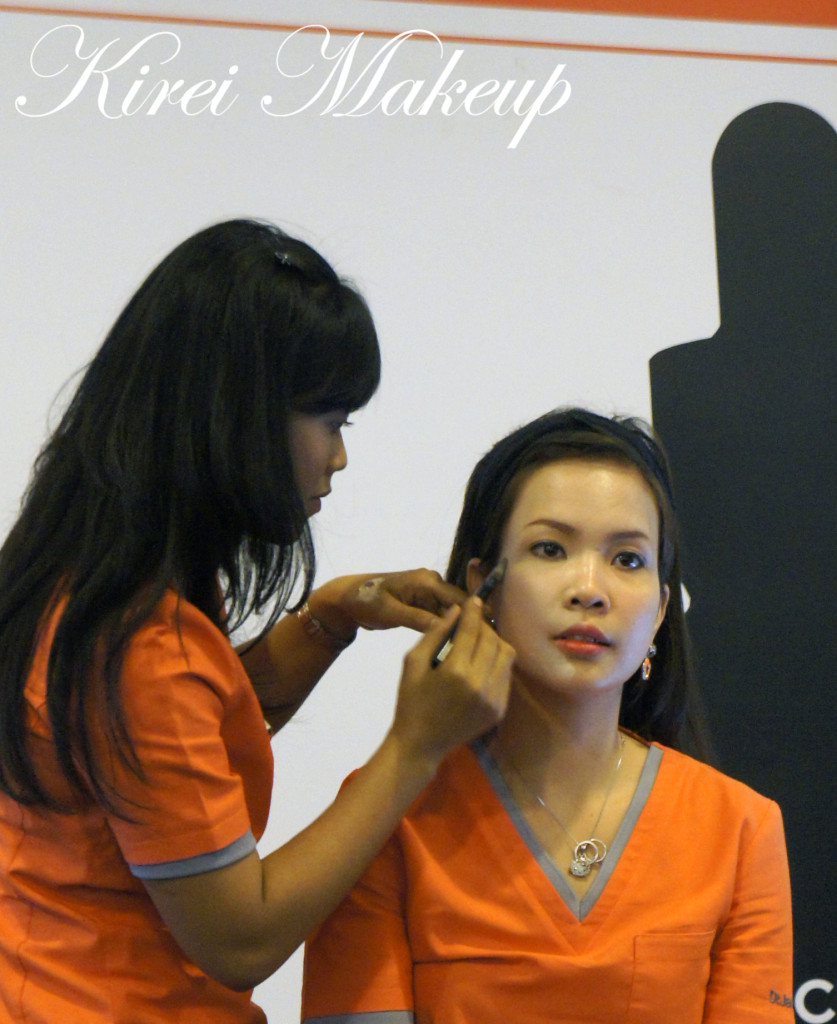
Dr. Jart bb cream

(BB cream application)

So, I’d recommend the Dr. Jart+ BB creams if you are light, and have a difficulty finding BB creams for your skin-type (oily, combination, dry, mature, and/or sensitive) you should give this a try. I do think that the BB creams for different skin type is definitely a great idea. Dr. Jart+ carries 9 different BB creams according to your skin-type (only 4 is currently sold in Indonesia).

The price range for Indonesia for each product would be around Rp. 400,000 – Rp. 600,000. Again, let me mention that I’ll give more details in the official press release some time this week.
Dr. Jart+ V7

(Q&A Session)

So, what’s the take-home message from this event? I think Dr. Jart+ carries an amazing skincare line. I have no doubt about it. Afterall, this is one of the biggest Korean skincare brand around the world. How I feel about the BB creams is entirely my own opinion, and for me I don’t find the BB creams to be that good since it only comes in 1 shade. Don’t get me wrong, I think most Korean BB creams only carry 1 shade because Korean women (and men) are very light and pale to begin with. It’s no surprise that they only carry that light shade.

So, please be warn that if you are interested in their BB creams, it might not match your skin-tone. However, you can find a great skincare line for everyone from Dr. Jart+.
Dr. Jart+(with John Kim)

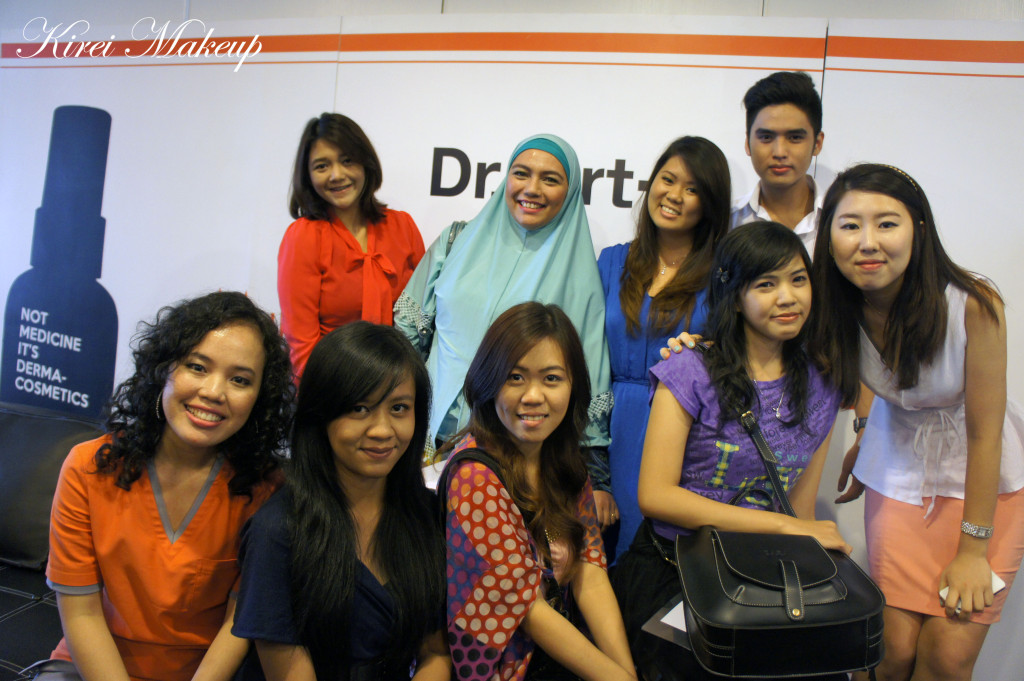
Below is a picture of a few Indonesian Beauty Bloggers who came to the event, along with Dr. Jart+ staff. Not all who came to the event was in the picture below since they had to go to other events. It was great to see the other bloggers, and we had tons of fun (and questions)! Shout out to all the bloggers who was asking all the right questions!
Indonesian Beauty Bloggers

A big thanks to Dr. Jart+ for inviting us to the event! Thank you for the great goodie bag as well!