Dr. Jart+ Indonesia V7 Product Launch

As you might know from Twitter (I was live tweeting), I was invited to join Dr. Jart+ Indonesia product launch, and the event occurred just last Wednesday. A BIG THANK YOU AND HUGS to Indah for the invitation! Anyhow, I wanted to share what happened last Wednesday in this post. For the official press release, I’ll post that up later on this week.

I have heard about Dr. Jart+ back when I was in Canada. Sephora stores in Canada carry this brand. To be honest, I never actually paid much attention to it since I thought it was just another brand selling BB creams. Just couple months back, I was actually curious about Dr. Jart+ skincare lines, and lucky me I received an invitation to join their product launch!

Dr. Jart+ is a Korean skincare brand, which is developed by Korean dermatologists. Their products are known globally, and now are available in Indonesia.

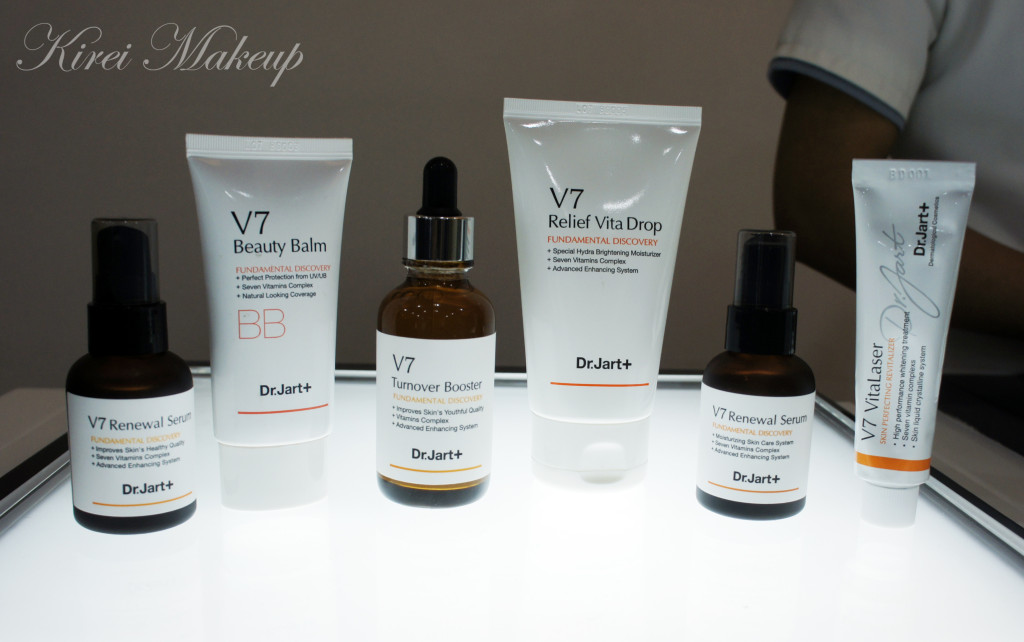
Dr. Jart V7 skincare line

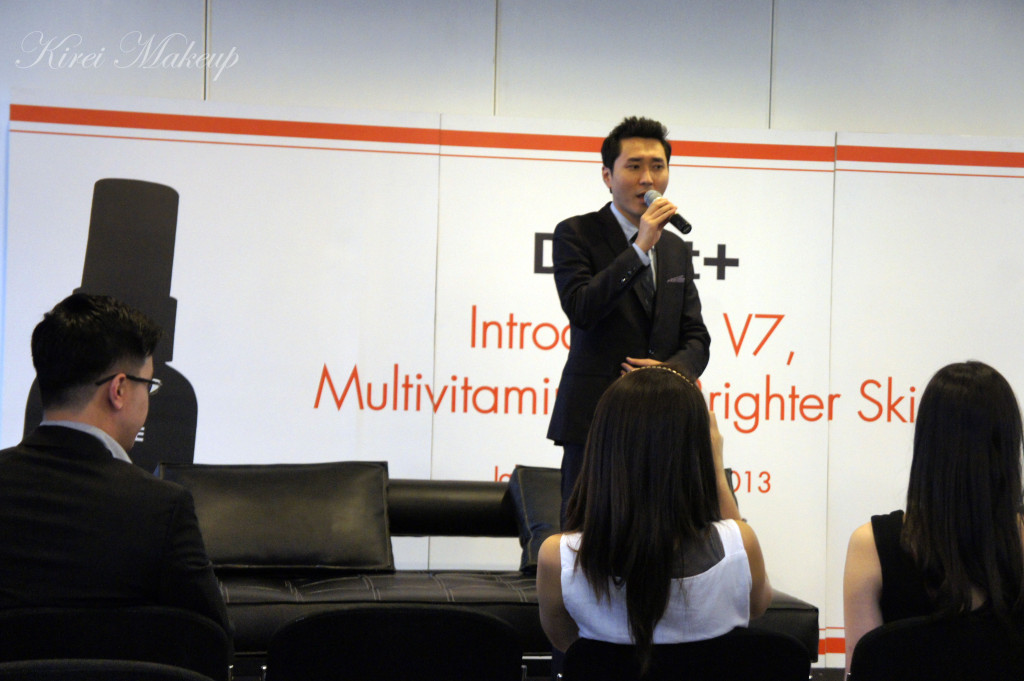
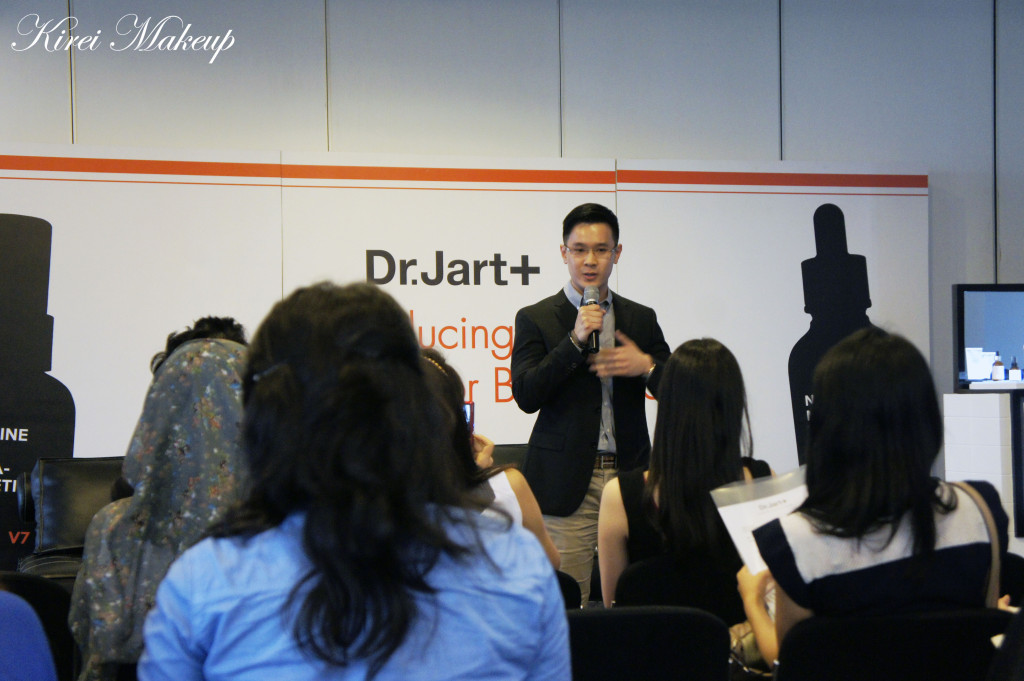
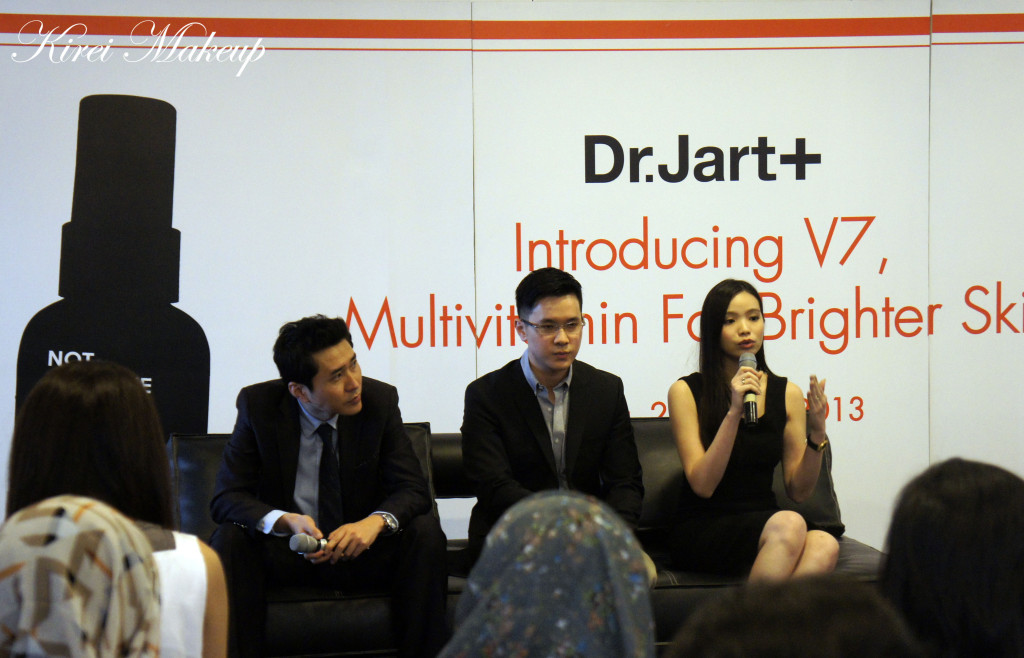
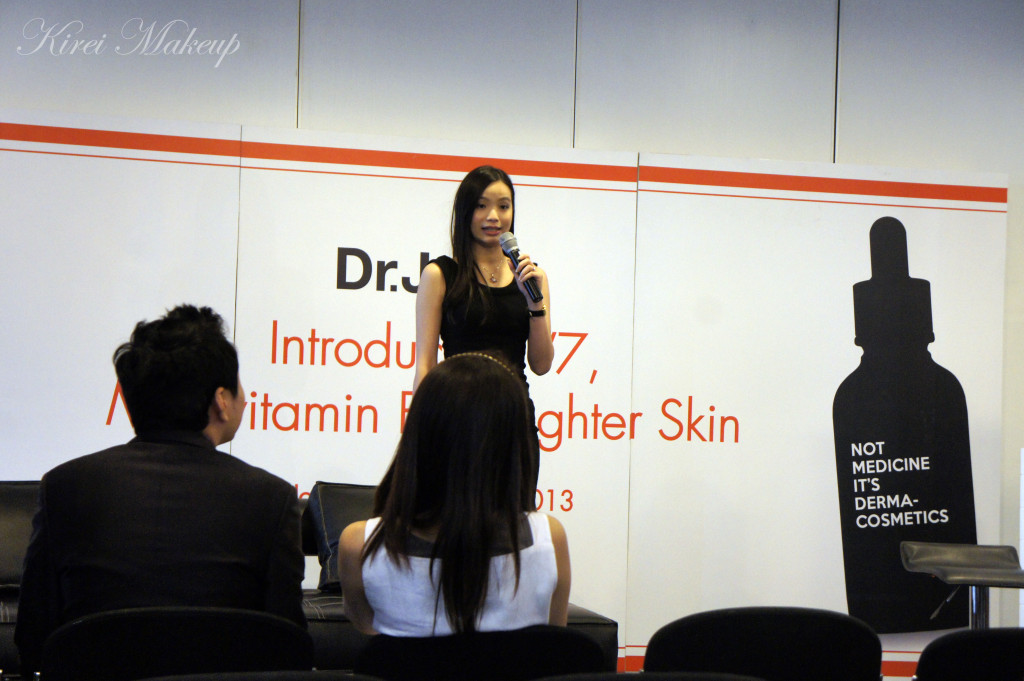
Last Wednesday , they wanted to launch the Dr. Jart+ V7 skincare line in Indonesia. Several key people in the pictures below are: Vera Liono (Brand Manager Dr. Jart+ Indonesia), John Kim (Overseas Sales Team Manager), and Dr. Kevin Maharis (guest speaker, an aesthetic physician).

So, what is V7 skincare line? The V7 skincare line consists of several products, which help individuals to achieve a brighter looking skin. It’s called V7 because the products in this line are infused with several vitamins which can help to brighten the skin. The products include cleanser, toner, serum, moisturizer, and BB cream. This line is directed for those who want to get rid of their dark spots, dull skin and hyper-pigmentation. The products do not consist of any alcohol, and artificial fragrance, coloring as well as preservatives. It’s for all skin-type, and for both men and women.

Dr jart indonesia

(Vera Liono giving us a brief introduction regarding the brand)

Dr. John Kim

(John Kim, explaining to us about the development of Dr. Jart+ globally)

Dr. Kevin Maharis

(Dr. Kevin Maharis talking about the importance of proper products during skincare routine)

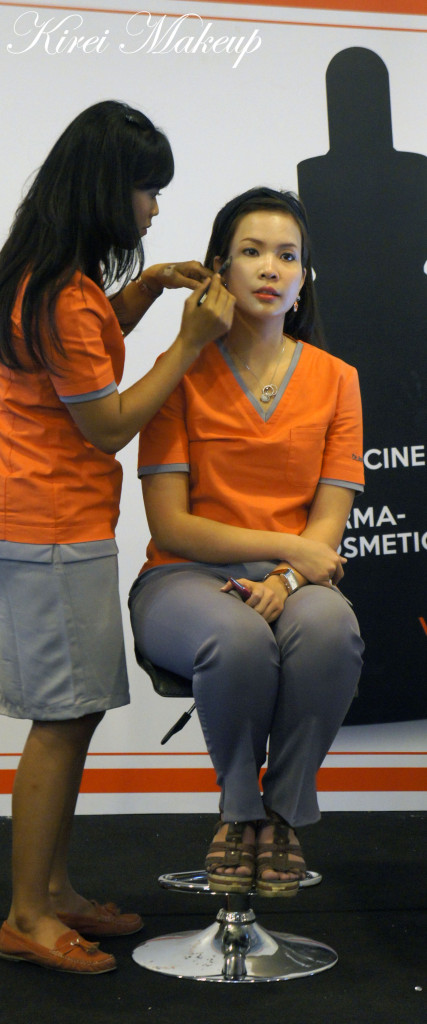
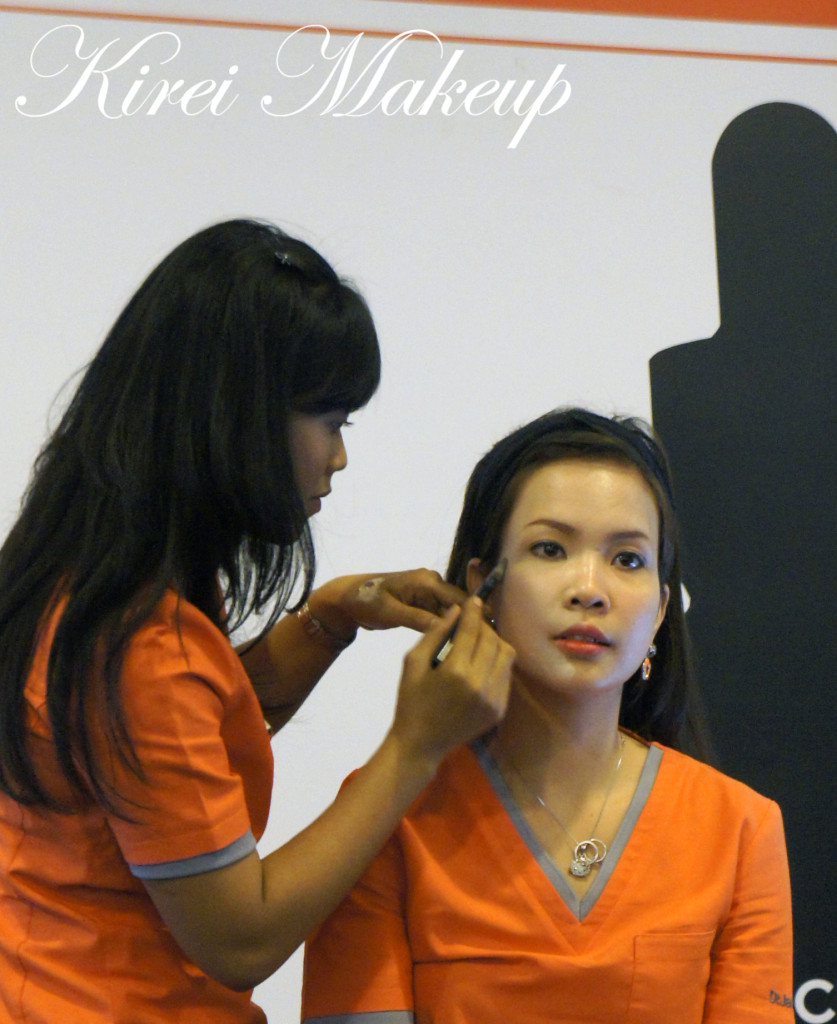
During the event, there was a demo to show us the right sequence to apply these products and what kind of effects the skin will get. I felt that the BB cream was way too light for her skin, when the makeup artist started her application. I zoomed in a little closer to see if my hunch was right, and true enough. Look at the picture below to see the difference between the left and the right side of her face.

Dr. Jart bb cream

(Skincare and makeup demo)

In the Q&A session, obviously, I had to ask. I raised my concern regarding the range of shades from the BB cream. I am, afterall, a makeup artist and I was curious to see if they have a good answer. I do want and like to recommend products to my clients, friends and family. I, of course, want to ensure that I recommend great products.

Not surprisingly at all, the answer to my question was quite confusing at first. The answer was NO, there is not a wide selection of shade for the BB cream. In fact, there’s only ONE shade for the BB creams. So, anyone who’s darker than MAC NC/W15 (may be NC/W20 can still give it a try), you can forget about the BB creams from Dr. Jart+. I asked if they’ll overcome this issue, and they do not give me any definitive answer. Instead, they kept going on and on how their BB creams come in range for the different skin-type.

Dr. Jart bb cream

(BB cream application)

So, I’d recommend the Dr. Jart+ BB creams if you are light, and have a difficulty finding BB creams for your skin-type (oily, combination, dry, mature, and/or sensitive) you should give this a try. I do think that the BB creams for different skin type is definitely a great idea. Dr. Jart+ carries 9 different BB creams according to your skin-type (only 4 is currently sold in Indonesia).

The price range for Indonesia for each product would be around Rp. 400,000 – Rp. 600,000. Again, let me mention that I’ll give more details in the official press release some time this week.

Dr. Jart+ V7

(Q&A Session)

So, what’s the take-home message from this event? I think Dr. Jart+ carries an amazing skincare line. I have no doubt about it. Afterall, this is one of the biggest Korean skincare brand around the world. How I feel about the BB creams is entirely my own opinion, and for me I don’t find the BB creams to be that good since it only comes in 1 shade. Don’t get me wrong, I think most Korean BB creams only carry 1 shade because Korean women (and men) are very light and pale to begin with. It’s no surprise that they only carry that light shade.

So, please be warn that if you are interested in their BB creams, it might not match your skin-tone. However, you can find a great skincare line for everyone from Dr. Jart+.

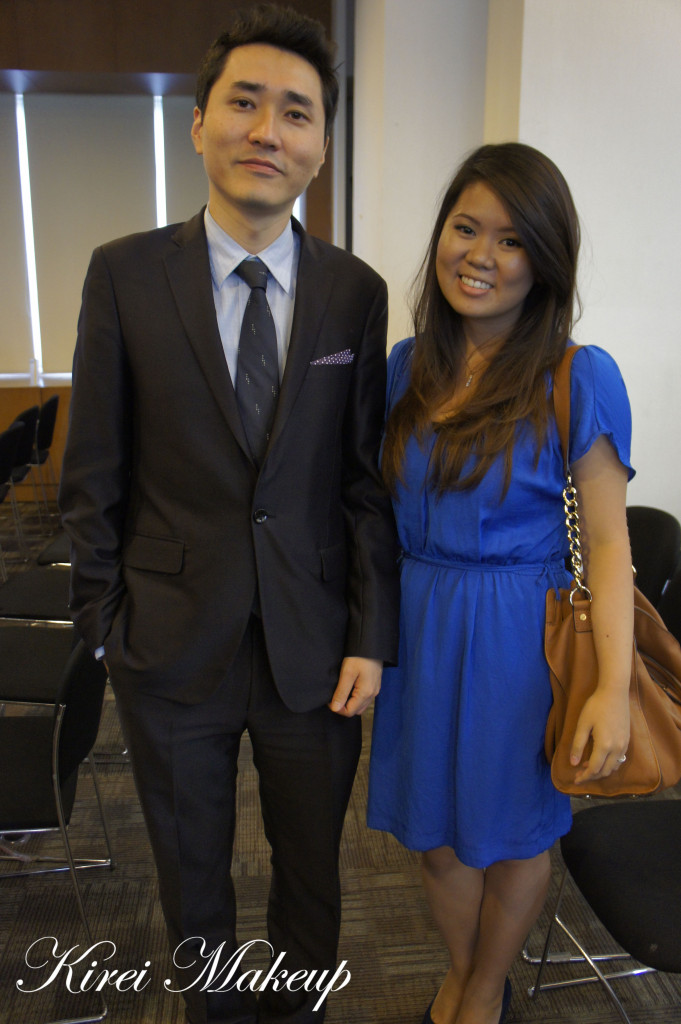
Dr. Jart+(with John Kim)

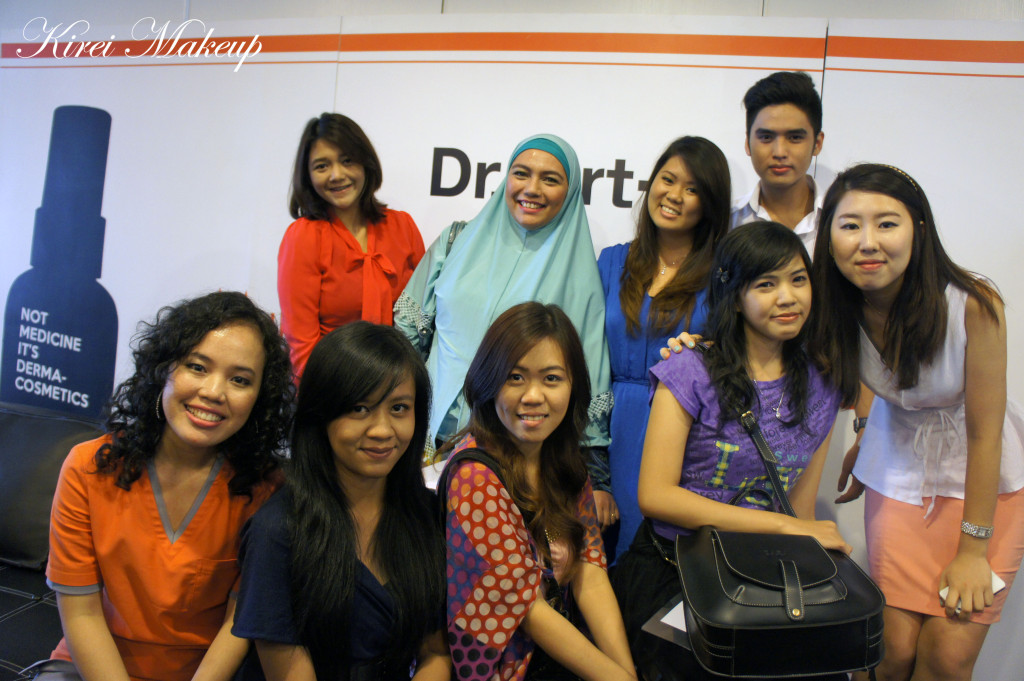
Below is a picture of a few Indonesian Beauty Bloggers who came to the event, along with Dr. Jart+ staff. Not all who came to the event was in the picture below since they had to go to other events. It was great to see the other bloggers, and we had tons of fun (and questions)! Shout out to all the bloggers who was asking all the right questions!

Indonesian Beauty Bloggers

A big thanks to Dr. Jart+ for inviting us to the event! Thank you for the great goodie bag as well!
Gunmetal

How is everyone’s Monday going??? I apologize for M.I.A last week. If you follow me on twitter/instagram, you’d know that I burnt my fingers (because of steam)  on Tuesday. My ring and pinky fingers were burnt due to the steam from boiling water. Anyways, long story short, my ring finger didn’t get burnt as bad as my pinky. There were bubbles forming on my pinky finger! It hurt a lot, and well it’s red and purple now. Due to the burnt, I couldn’t really hold my makeup brushes properly since it hurt a lot. I have a very low tolerance of pain (exception for piercings..hahaha). Heck, I couldn’t even hold my chopsticks properly.

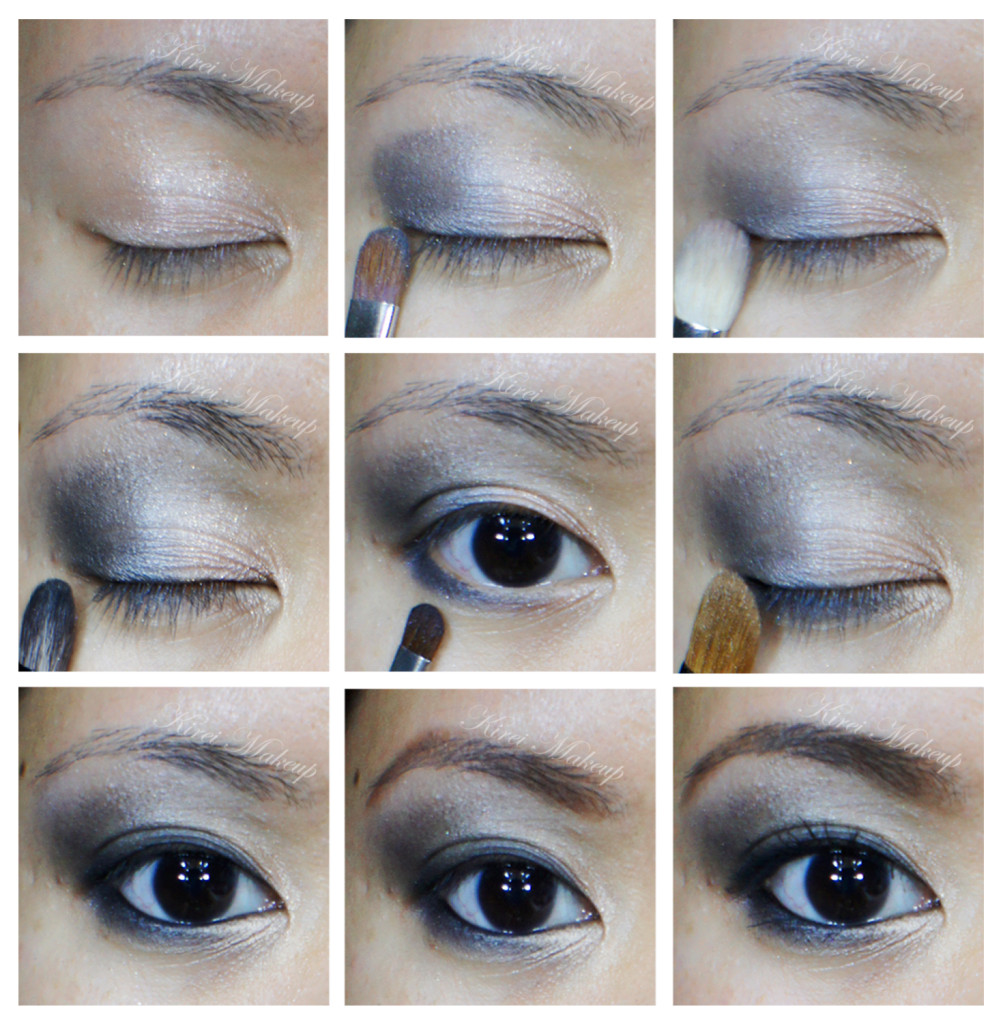
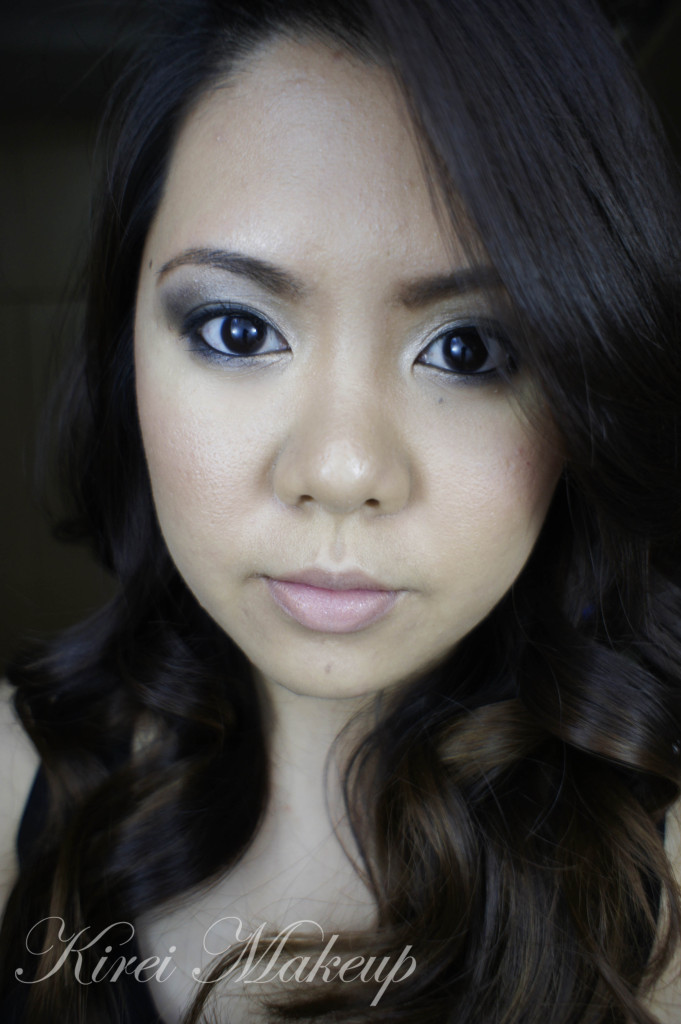
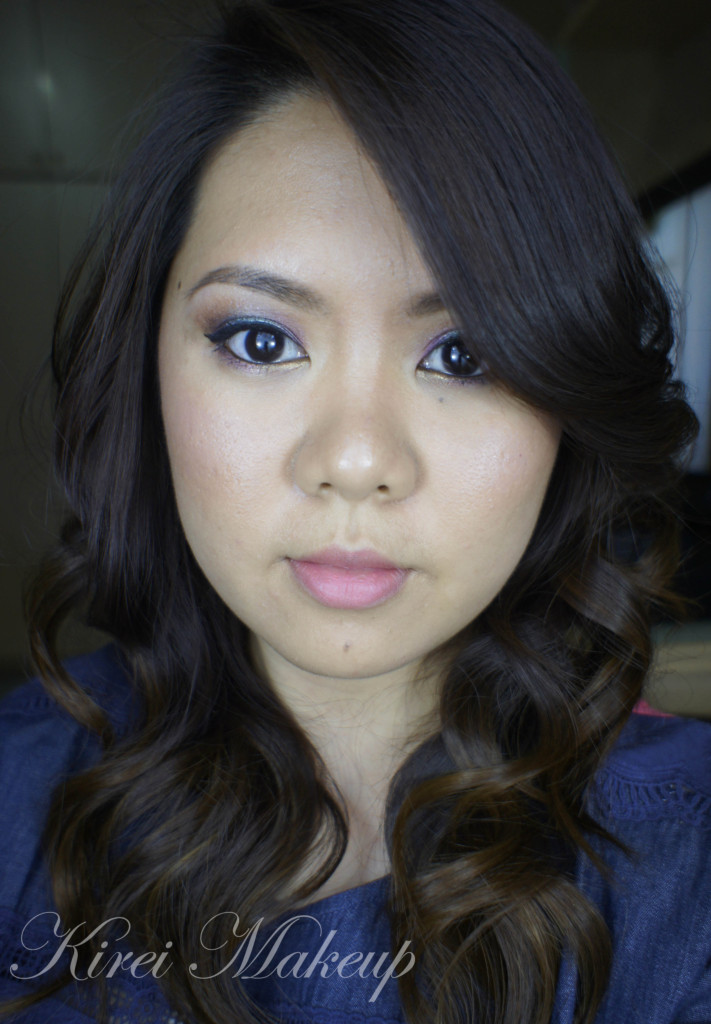
However, since the ring finger gotten better, I managed to do one tutorial. I wanted to play with the Gunmetal eyeshadow from Urban Decay Naked 1 Palette, so I created this smoky eyes look. Very simple and very easy. This will look great for party makeup, prom or wedding.

Also, ignore my brows, haven’t had time to get them trimmed or shaped because of the recent incident.

How-to:

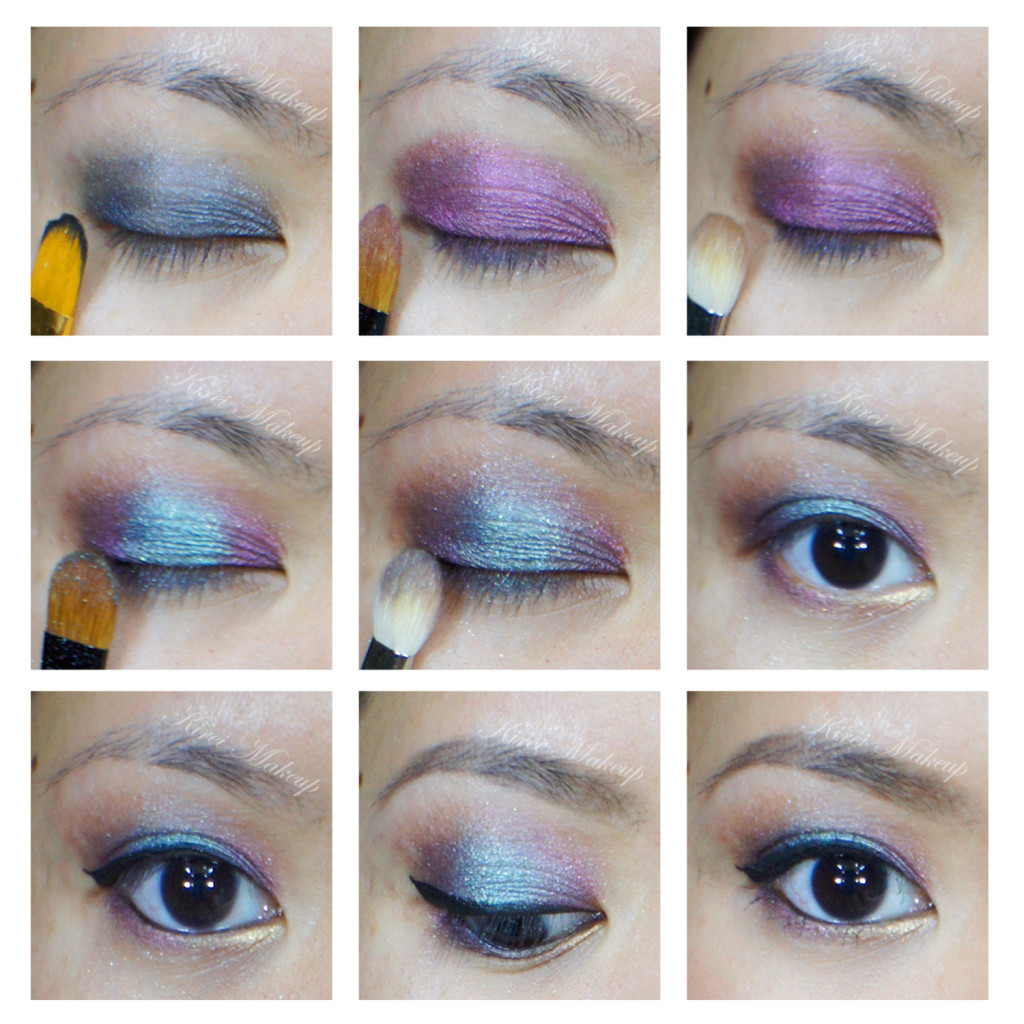
1. I applied Chanel Illusion D’ombre in Emmervielle all over the lid using my finger.

2. Using a flat eyeshadow brush, I applied UD Gunmetal eyeshadow on the outer third of the lid.

3. I blended the edge of the shadow using a clean fluffy brush.

4. Using a bullet brush by Smashbox, I applied UD Creep eyeshadow from Naked palette on the outer V.

5. Using a small shader brush, I applied UD Gunmetal eyeshadow on the lower lid.

6. Using a flat eyeshadow brush, I applied L’oreal Infallible Hourglass Beige eyeshadow in on the inner half of the upper lid, and slightly on the inner corner of the lower lid.

7. I lined my upper lashline and waterline using L’oreal Voluminous Smoldering eyeliner.

8. I filled my brows using Shu Uemura brow pencil.

9. I curled my lashes using MUFE Smoky Lashes mascara.

asian smoky eyes

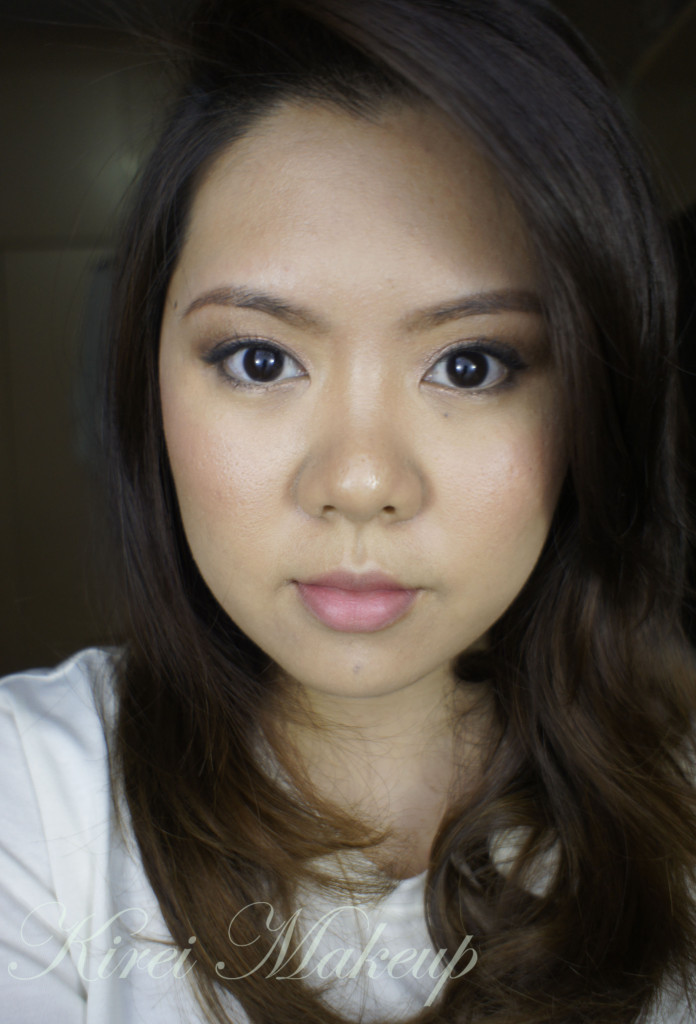
10. For the face, I used Giorgio Armani Silk foundation and a foundation brush.

11. Under the eyes, I applied MAC Pro Correct/Conceal yellow corrector.

12. I applied MAC Shadowy as contour and MAC Fleur Power on the cheeks.

13. For the lips, I applied Clinique Chubbystick in Heaping Hazelnut.

asian smoky eyes

OPI San-Tan-Tonio

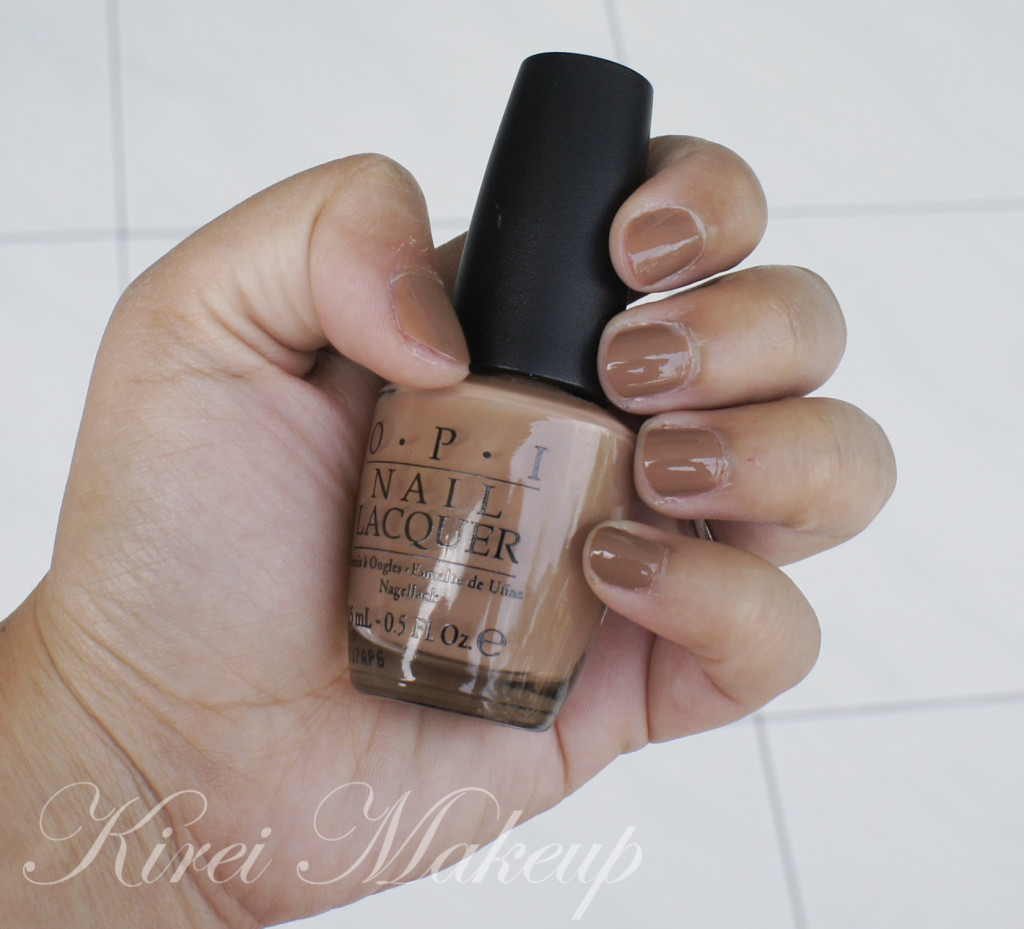
As much as I love colors and dark colors on my nails, once in a blue moon I love something nude. I found myself reaching for this nail polish most of the time when I want a nude color on my nails. This is OPI Santantonio from the Spring/Summer 2011 Texas collection. I believe I bought this in Trade Secret, Canada for $9.99.

It has a creamy sandy-beige color to it, just slightly darker than my skintone. I’m looking for something lighter so it matched my skin better, but for now, this nail polish will do. If you’re darker than me, you’ll probably find this polish to suit you better. If you are lighter than me (anyone above NC30), you might find this polish to be too dark for your skin.

I don’t mind this color at all on my skin to be honest. I love wearing this nude polish to work, esp. back when I was working as a counselor in a private high school since bright (and red) nail polish colors are frowned upon. This color makes your nails look polish and at the same time professional.

OPI Santantonio

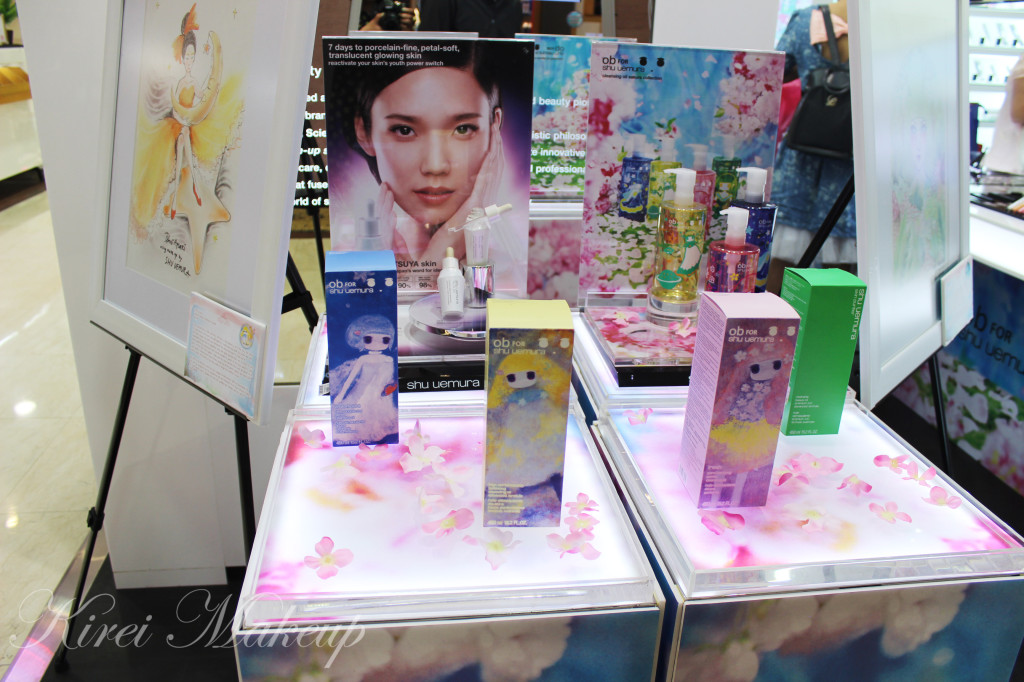
Ob for Shu Uemura Collection Part 1

Happy Sunday, you gorgeous people out there! Last Saturday (yesterday), I was invited by Shu Uemura Indonesia to join them in the launching of Ob for Shu Uemura collection at Sogo in Mal Kelapa Gading. The event was fun and definitely intimate. I love this type of event since I get a chance to talk to everyone! I, however, did not swatch the newly released products because I was too busy admiring the illustrators…I’m soooo sorry! I’ll try to swatch the products if I get the chance to go to the nearest Shu Uemura counter!

Let’s get on it! What is this Ob collection all about, you ask?

“On a constant quest for innovation and beauty, Shu Uemura invites you to a magical world for spring 2013. Inspired by Japanese artist ob and the young creators of her generation comes a limited-edition collection that celebrates the rise of a new era in art. in-between reality and a dream beckons you into ob’s creative universe, a world that appears normal at first sight but is filled with fantasy and delight; a world that showcases the emerging vision of a generation of creators who came of age in a radical new digital world. Discover this magical landscape and create a new you – someone you’ve never imagined yourself to be – with a line-up of gorgeous shu uemura products intricately wrapped in the beauty of spring and the sensitivity of a new generation.” (Shu Uemura USA, 2013)

29

16

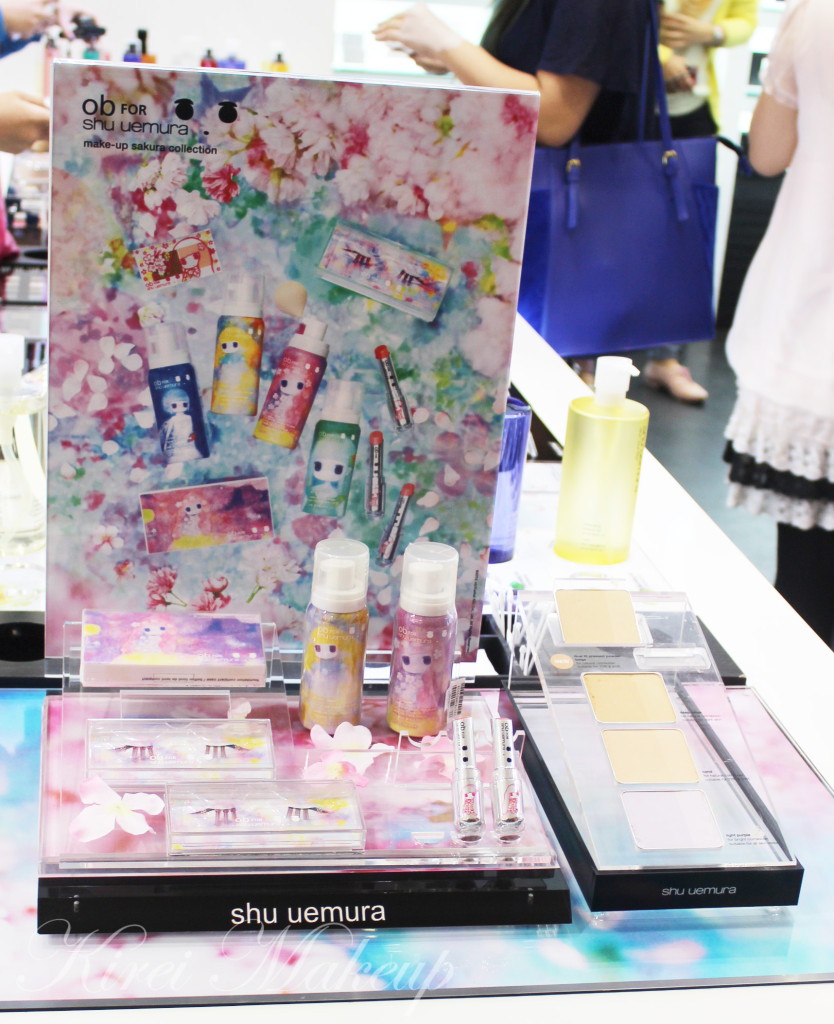
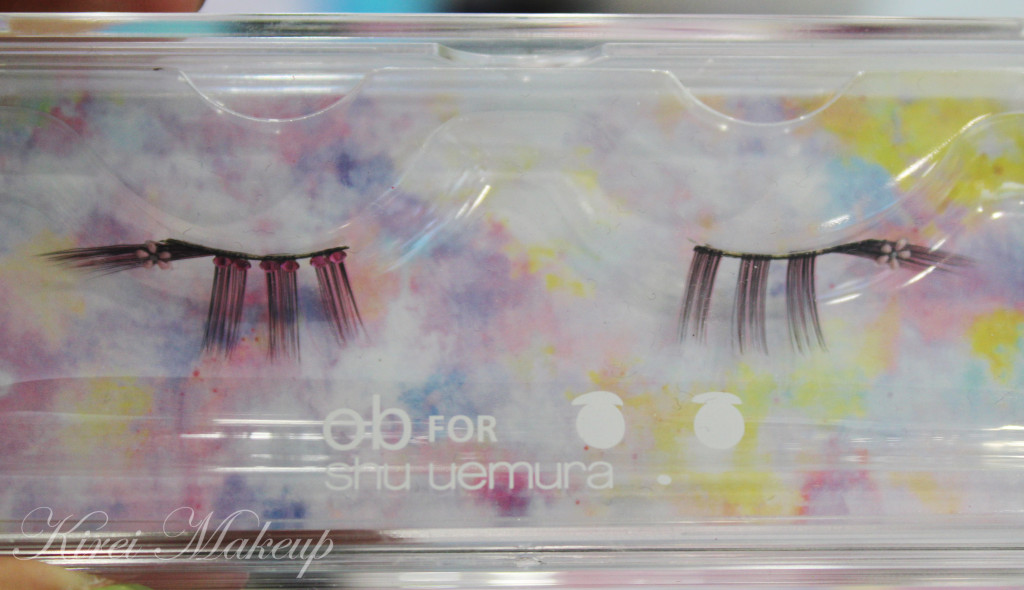
During the event, I did not see any eyeshadow collection. However, on display, there were UV Under Base Mousse, False Eyelashes, Rouge Unlimited Supreme Shine Ob Collection, and Compact Case (for eyeshadow) Ob Collection.

They also carried in the collection the 4 different cleansing oils with the 4 different princesses illustrated on each bottle.

  • Cherry Blossom Princess – Pore-less smooth skin as fresh petals of cherry blossom. This cleansing oil is catered for those with normal, oily and acne-prone skin type.
  • Moon Princess – Luminous soft skin as hazy moon in spring night. This cleansing oil is for all skin type.
  • Ocean Princess – Bright skin as completely transparent ocean. This cleansing is intended to brightened up your skin.
  • Forest Princess – Vitalized even-toned skin as fresh as the young leaves in early Spring. This cleansing oil is catered towards aging/mature skin.

All the cleansing oils above work as a makeup remover as well. I, personally owned the Fresh Pore Clarifying Gentle Cleansing Oil (the pink bottle), and have been using it since I was in makeup school.


28

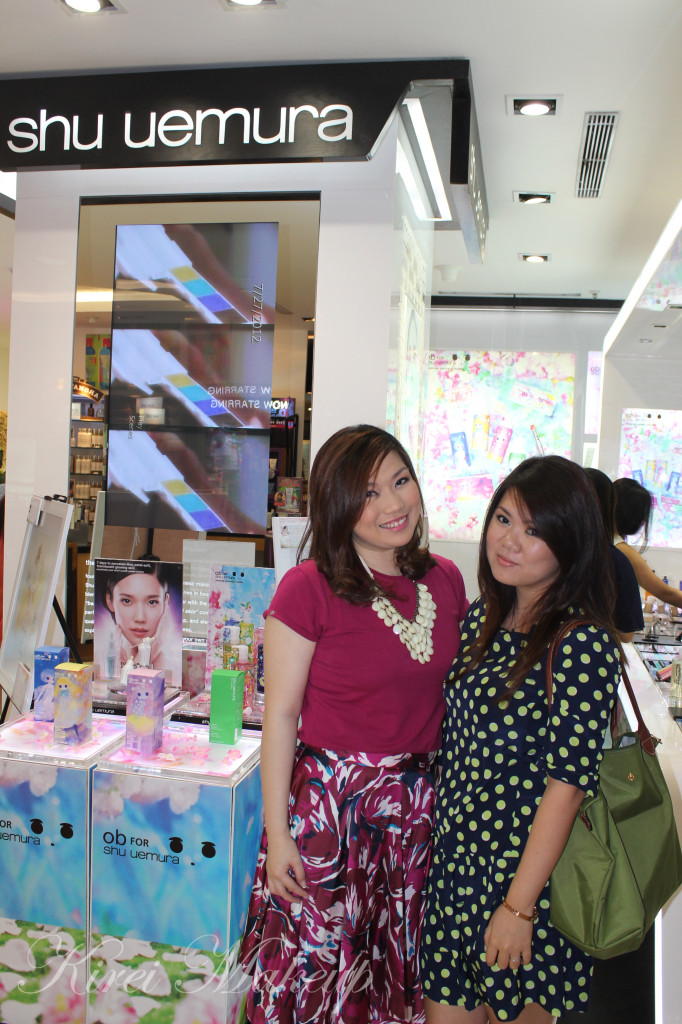
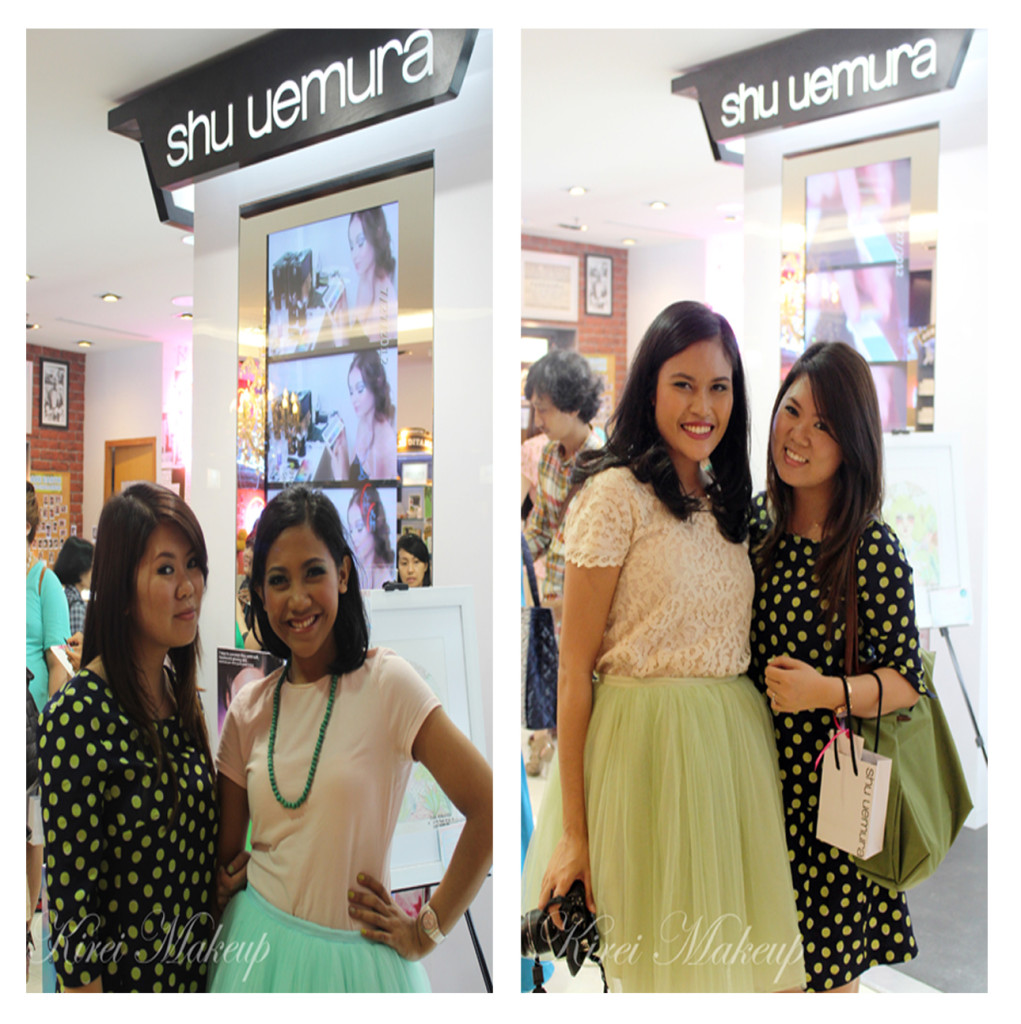
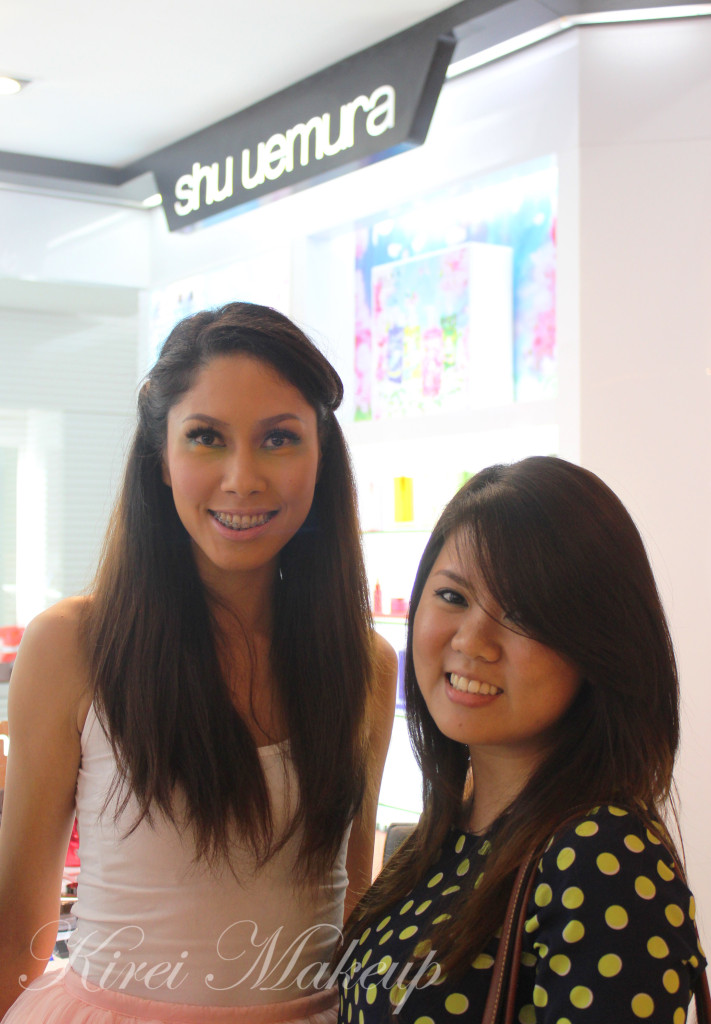
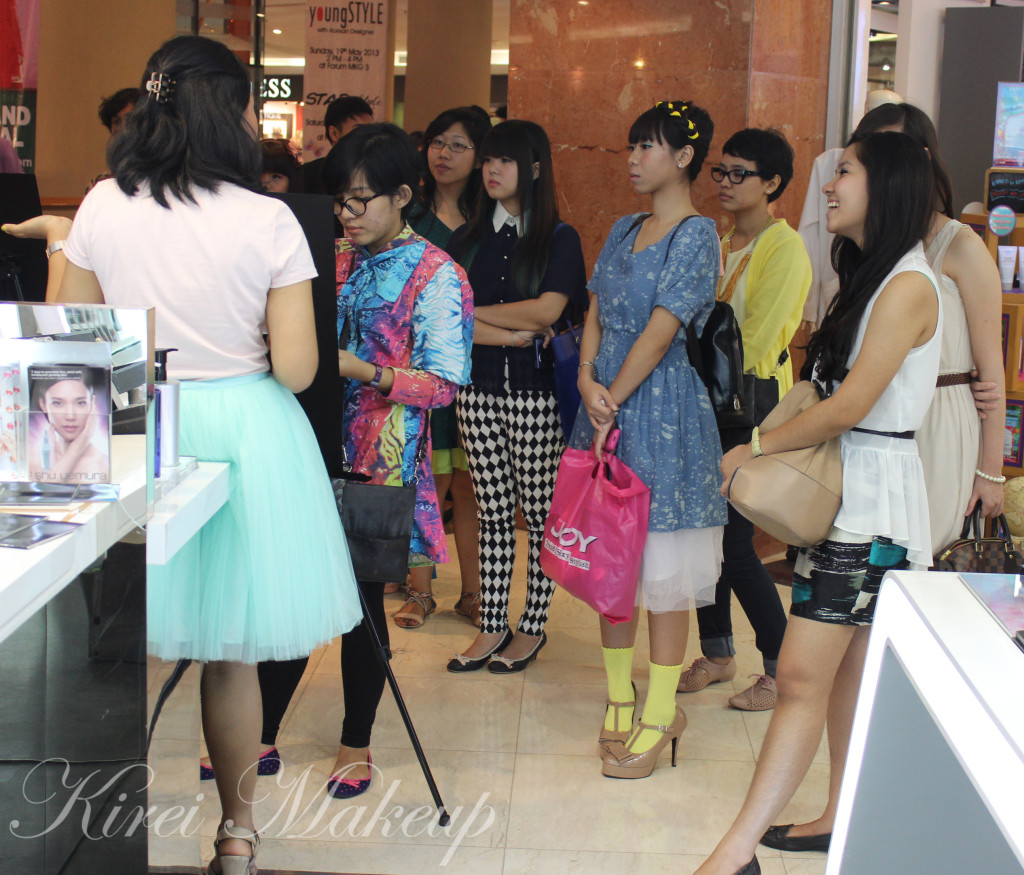
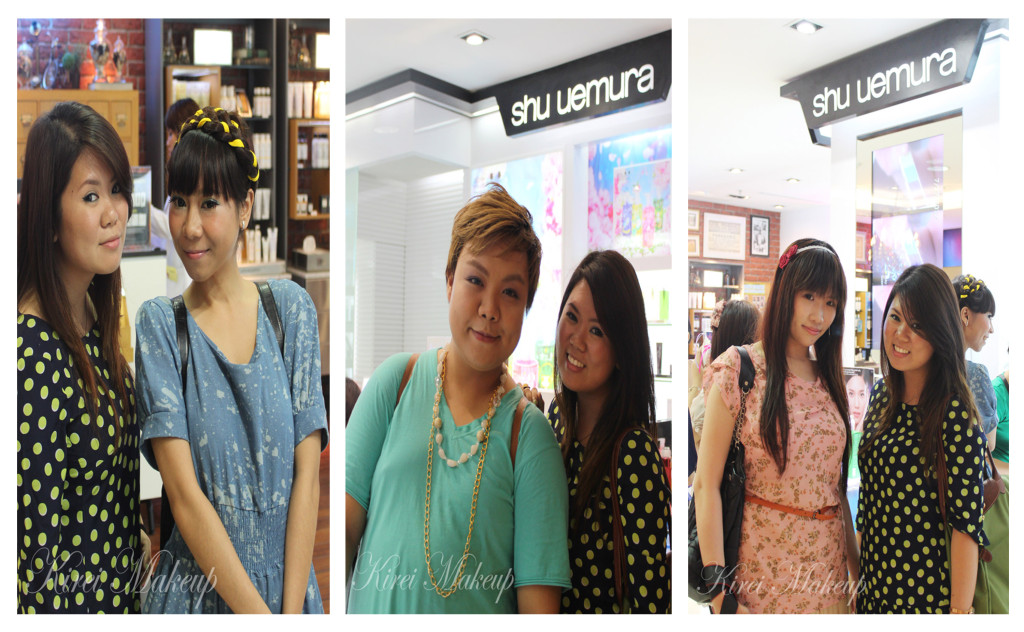
Of course, I’ve to take a picture with Regina, Shu Uemura (and Kiehl’s) Brand Manager for Indonesia. You might’ve seen her in my other Shu Uemura events. Doesn’t she look adorable in her outfit? I love her skirt! I think she’s going for the Cherry Blossom look, and nailed it! Tres chic! I also took pictures with Sesa and Dea who sent out the invitation, and were super duper extra kind and helpful with all my questions…they promised to go for a bubble tea with me, right girls? (hahaha hopefully they’ll read this :P)

I decided to dress up as Forest Princess. Since the inspiration for Forest Princess is green, I went with my navy blue with green polka dots dress is from GAP Canada. I also brought along my Longchamp green bag. I also applied Essie Navigate Her nail polish.

27

Shu Uemura Ob Collection

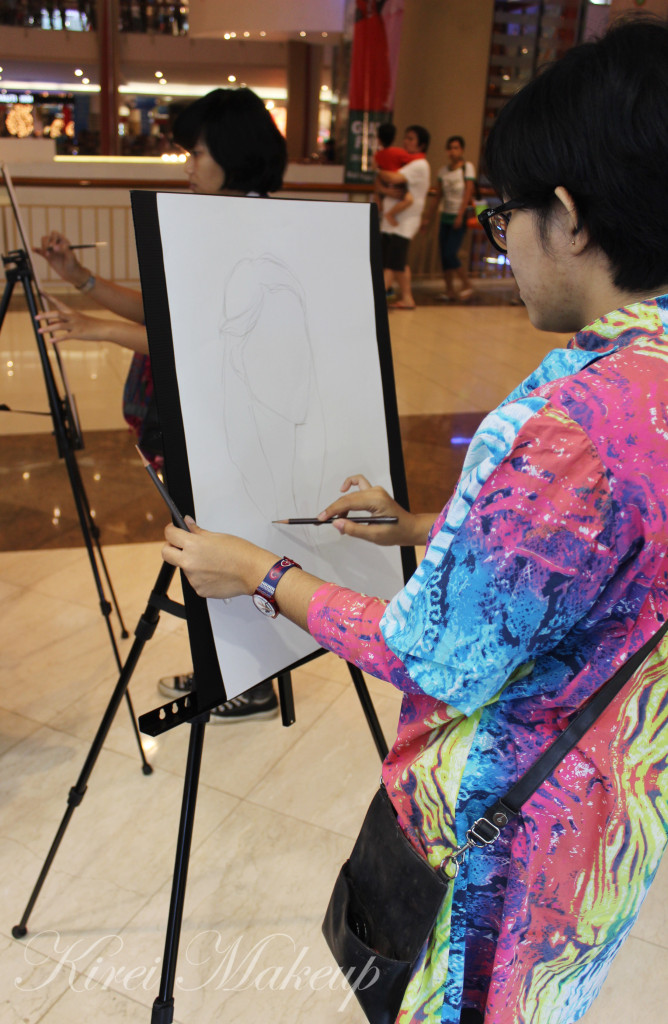
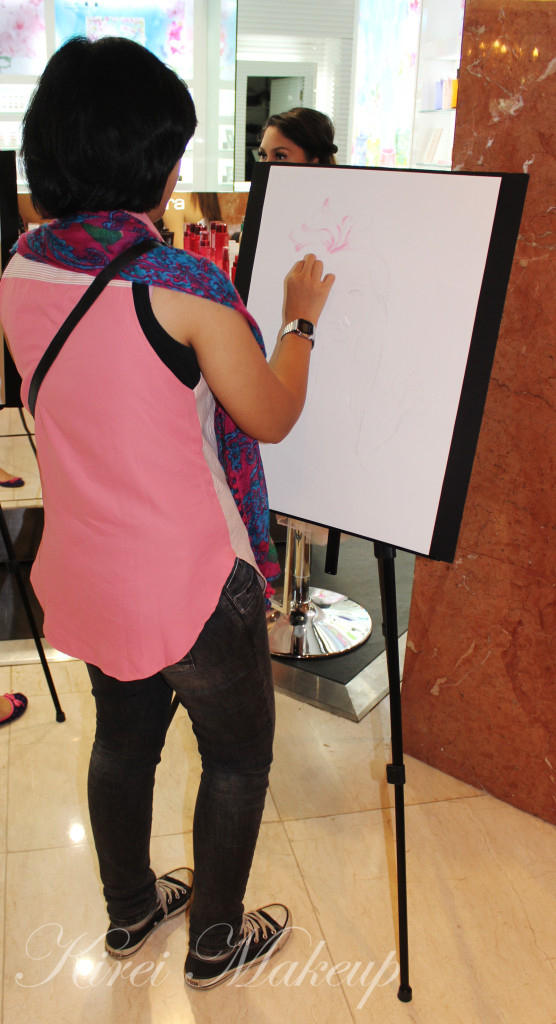
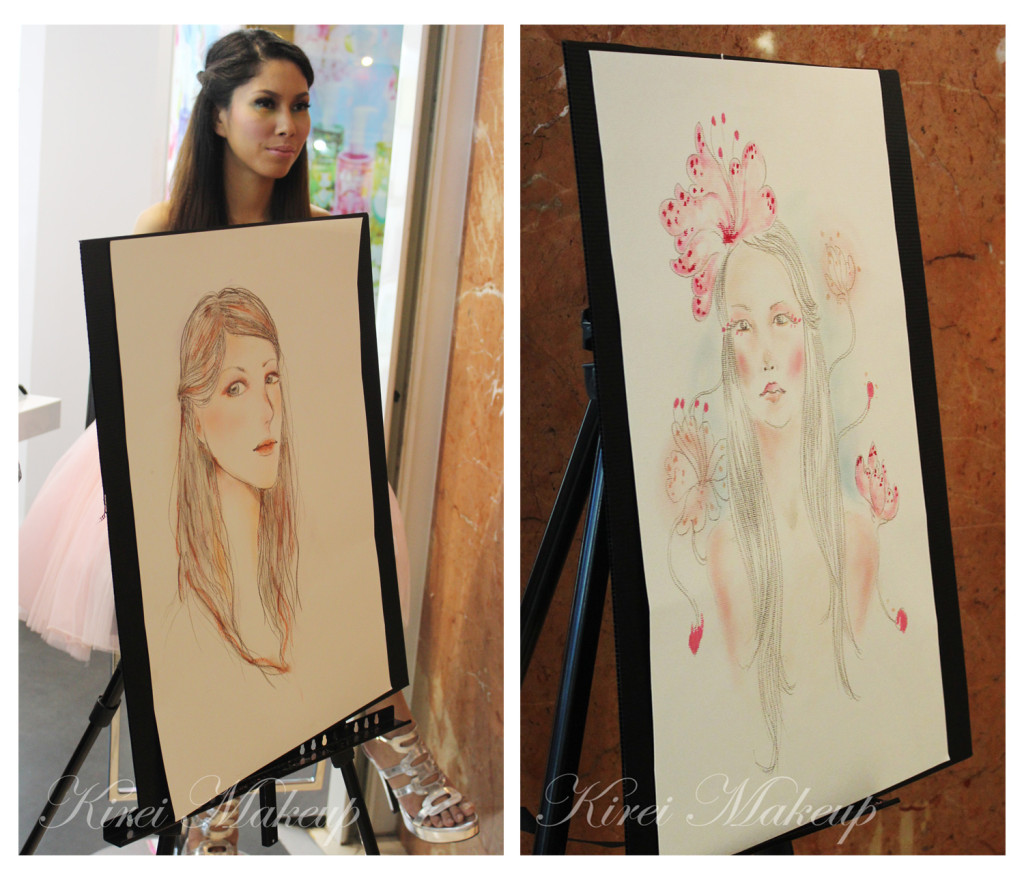
There were 4 illustrators for the event, however, only 2 drew during the live demo. Yes, people, they were sketching and drawing LIVE! You know what’s even more amazing? They were using MAKEUP provided by Shu Uemura to draw the model. Amazing, much?

Below you can see the illustrators were sketching using Shu Uemura Brow Pencil Hard Formula. This is the same brow pencil that I’ve been using to fill in my brows these couple tutorials. So, if you can’t find your pencil, you can use this brow pencil to draw or write..bahahahah :p

26

The illustrator in the photo below was using eyeshadow in which she has crushed into loose powder form to fill in the sketch with colors.

25

Look at that! I can’t even sketch anything if my life depends on it. But, I mean, come on! Live sketch in front of 30 something people in less than 30 mins. That’s super cool!

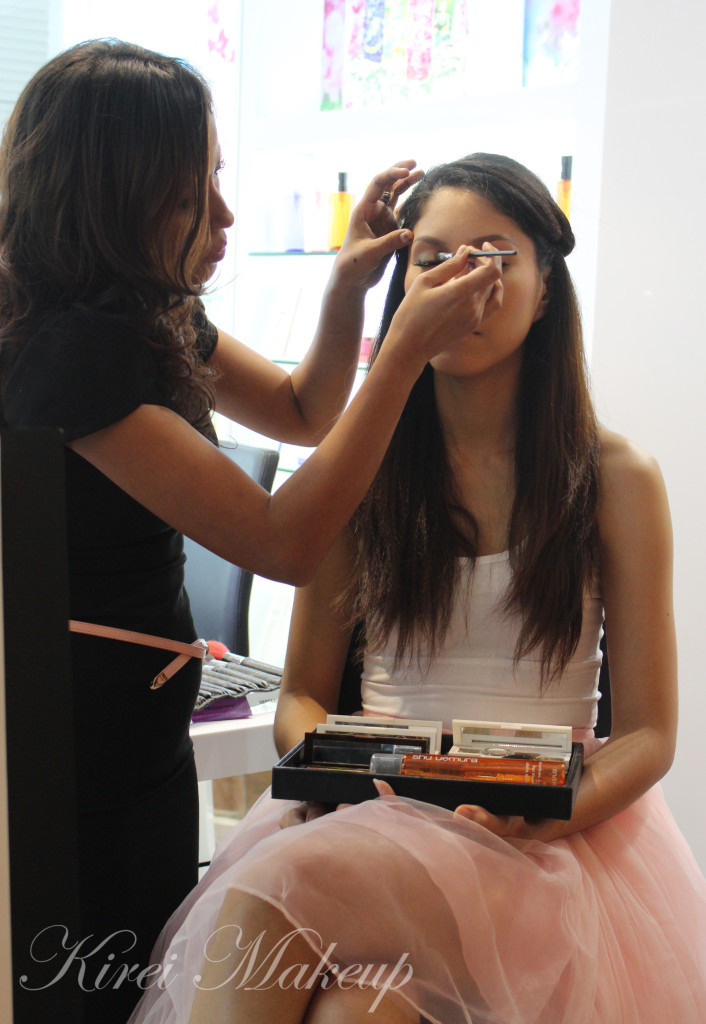
Shu Uemura Ob collectionOh, yes, at the same time of the live sketch, Shu Uemura makeup artist also did a live demo on the model. She applied Pink eyeshadow on the lid, brown on the crease. On the lower lid she applied a combination of green (inner third), yellow (middle) and blue (outer third).20

I took a picture with the model…she’s super tall and skinny…-___-lll…I feel like a fat midget beside her…

Anywaays! I also get the chance to take pictures with other bloggers (Endi, Ayu and Gaby)!

1

indonesian beauty bloggers

indonesian beauty bloggers

I’ll also post the 2nd part of this event tomorrow to talk more about the illustrators themselves and their works! I’ll include the goodie bag that we received on the event.

I’d like to thank Shu Uemura Indonesia, esp. Regina, Sesa and Dea for inviting me to join the lovely event!

Seafoam

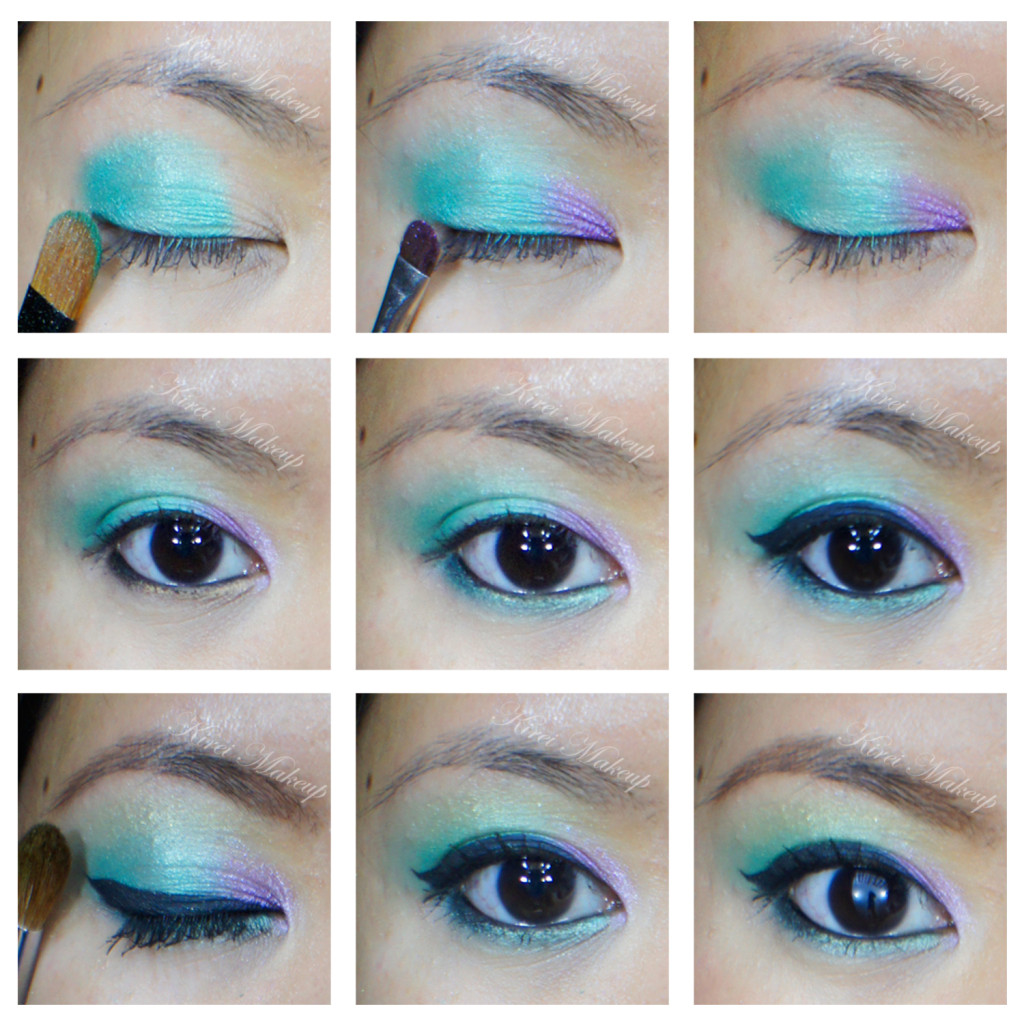
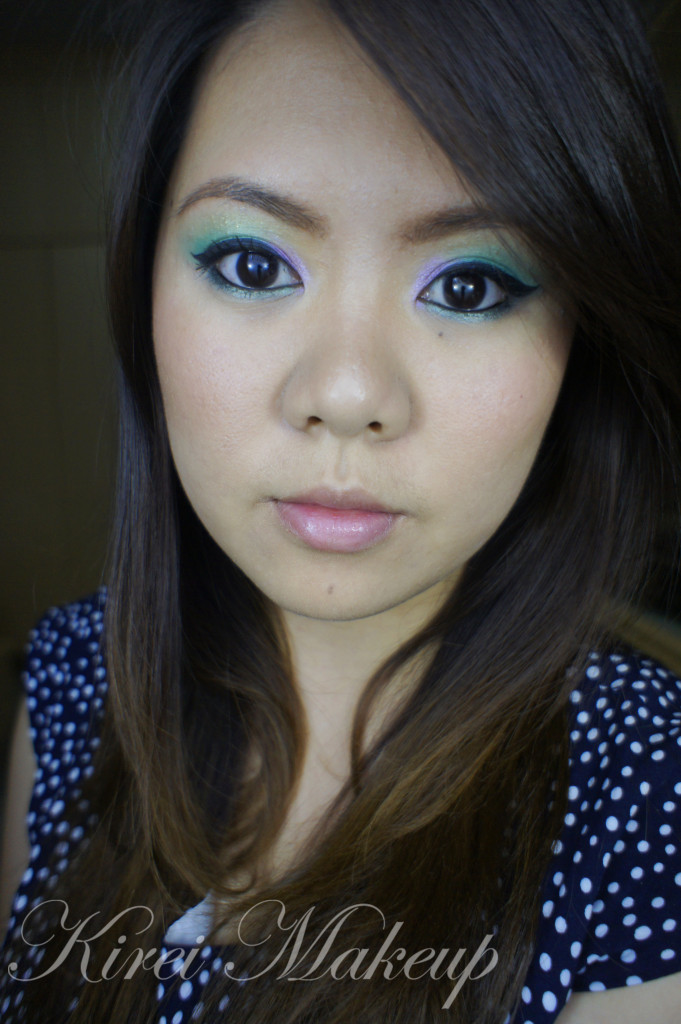
I’m sure by now you guys are probably tired of me using my Sleek Makeup Snapshot palette…but I can’t help it! It’s too gorgeous! Today’s look is very simple, no crease or outer V whatsoever…I’ve actually worn mascara the whole day, and didn’t take it off for the tutorial, so don’t mind the mascara on the step-by-step picture..

Let’s get on the tutorial! (I prepped my eyes using MAC Soft Ochre paint pot)

How-to:

1. Using a flat eyeshadow brush, I applied Green Iguana from Sleek Makeup Snapshot palette on the eyelid, leaving the inner third of the lid empty.

2. (not in picture) I used a clean fluffy brush to blend the crease so there’s no harsh edge.

3. Using a small shader brush, I applied MAC Butterfly Party Crushed Metal Pigment on the inner third of the lid.

4. Using another clean small shader brush, I blended the edge where the 2 eyeshadows meet.

5. I lined my waterline using L’oreal Voluminous Smoldering eyeliner.

6. Using an angled eyeliner brush, I applied Green Iguana eyeshadow on the lower lid.

7. I lined the upper lash line using Clinique gel liner, creating a winged/cat-eyeliner.

8. Using a big clean fluffy brush, I applied Kiwi Flower just above the crease for an extra wash of color.

9. I applied Maybelline Volume Express Turbo Boost mascara on both upper and lower lashes.

10. I filled my brows in using Shu Uemura brow pencil.

sleek makeup snapshot

11. On the face, I applied MUFE HD Foundation using my fingers.

12. I contoured my cheeks using MAC Shadowy and NARS Ita Kabuki brush.

13. On the cheeks, I applied MAC Peaches blush.

14. On the lips, I applied Chanel Levres Scintillantes in Volupte.

green and purple makeup

Silver Fox

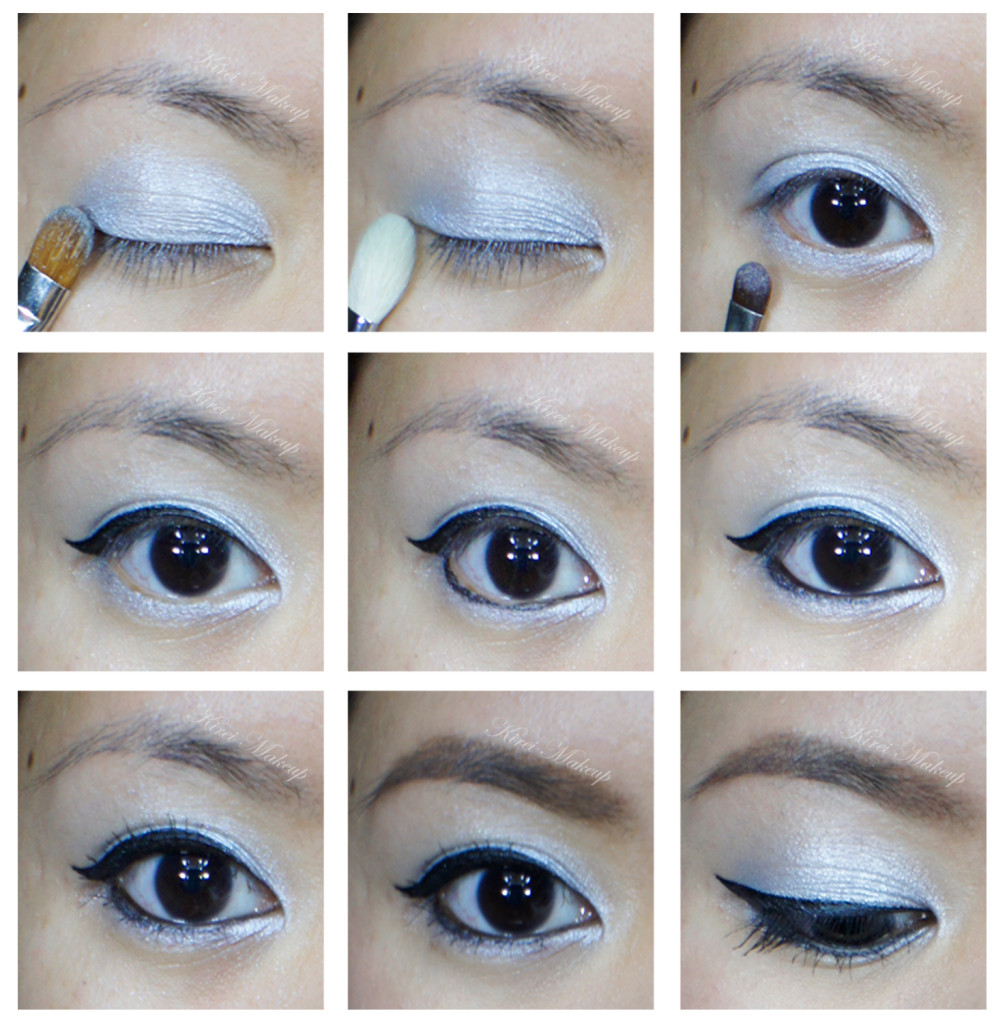
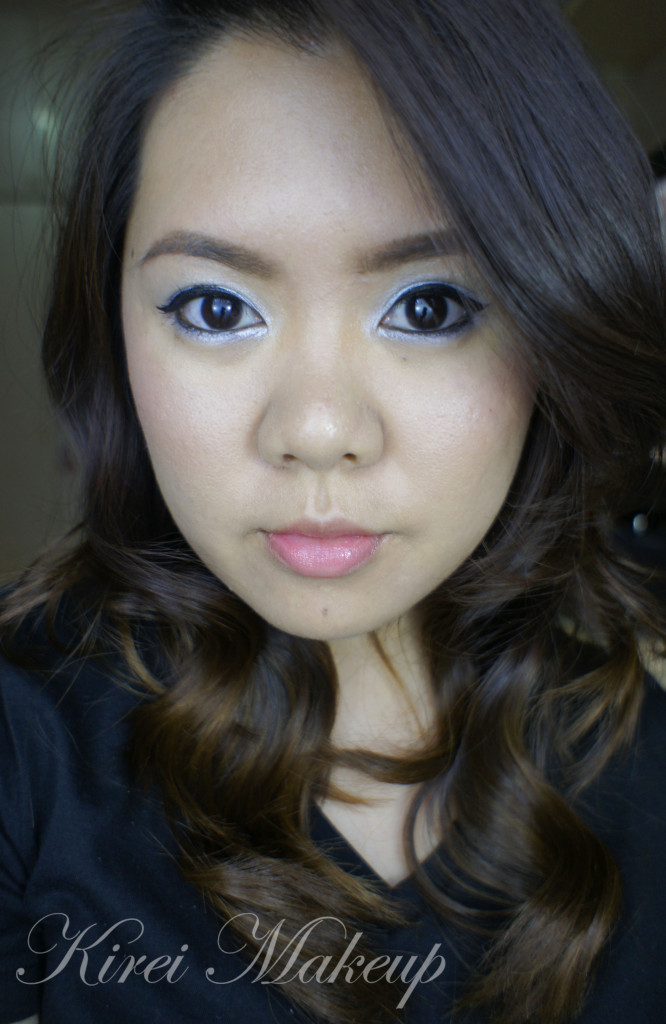
I was mesmerized by Chanel’s Spring 2013 RTW runway makeup, that I’ve decided to do an inspired look based on it. I usually prefer warm-toned colors, like gold and bronze over silver, so it was definitely interesting to do this look.

I used Tinsel eyeshadow from the Sleek Makeup iDivine Sparkle 2 palette in this tutorial. I believed the makeup artist for Chanel used a silver cream eyeshadow (illusion d’ombre) to create the look. Since I don’t own any silver cream eyeshadow, I decided to use a powder eyeshadow. Tinsel eyeshadow is very creamy and can be easily blended.

It’s a very simple and wearable look. Since the focus is on the eyes, everything else is downplayed. In the runway, models were seen with bare face, but I decided to add a blush just so that I don’t look too washed out.

How-to:

1. I applied Tinsel all over the lid using a flat eyeshadow brush.

2. Using a fluffy blending brush, I blended the color from the crease all the way up to the brow bone.

3. Using a small shader brush, I applied Tinsel on the lower lid.

4. I created a winged liner along the upper lashline using Kate Sharp eyeliner.

5. I also lightly lined the lower lashline using the same eyeliner.

6. I lined my waterline using L’oreal Voluminous Smoldering eyeliner.

7. I curled my lashes, and applied Maybelline Express Volume Turbo Boost mascara on both upper and lower lashes.

8. I filled my brows in using Dolly Winked Brow pencil no. 3. (if you notice the difference between the last 2 pictures below on the brow, that’s because I brush the brows after I filled them in using a clean spooly).

chanel inspired makeup

9. For the face, I applied Urban Decay Naked foundation using IPKN Auto Wave makeup.

10. Under the eyes, I applied MAC Pro Conceal/Correct palette in Medium.

11. I powdered my face lightly on the T-zone using loose powder.

12. On the cheeks, I applied MAC Dainty blush.

13. On the lips, I applied Chanel Levres Scintillantes in Volupte.

silver makeup

Sleek Makeup i-Divine Swatches

If you have been on my Twitter or Instagram, you should know that I’ve just received my Sleek Makeup palettes that I purchased from Luxola. I got my hands on it this weekend when I was in Bali, so I have yet to play with it. I wanted to swatch these palettes first before I do any tutorials with them. I’ve heard so much raves about these palettes on the blogsphere and youtube, that I was so excited when I get received them!

First of all, let me mention how great the Staff at Luxola are! I am affiliated with Luxola, but what I’m going to tell you guys is 100% based on my experience. You guys should know by now that I would never recommend anything that, in my personal and professional opinion, is below standard and expectations. Let me tell you what happened before we proceed to the swatches itself.

I bought (yes, bought! with my own money) several products from Luxola website. I’ve checked out and paid for all the items in my cart at end of March. I was told that my products would arrive between 5-8 business days. I was happy and excited to get the products before my trip to Japan. 8 days later, my shipment was nowhere to be found! I contacted Luxola, checked my tracking number and found out that my shipment was stuck at Indonesian customs! I tried calling Indonesian post to find out what’s going on, even went on their twitter asking questions but no answer.

I was devastated. I contacted Luxola regarding the issue and they tried to help me by contacting the courier service that they’ve used over in Singapore. Luxola Staff patiently replied to every single one of my emails promptly. I went to Japan, came back just to find out that customs isn’t releasing my shipment. No letters, no contact information, nothing to assist me to get the shipment out of customs! I almost gave up. That’s $100 worth of products that I’m not going to receive ever.

However, an email came through from Luxola. They messaged me saying that they will ship a new set of products (of whatever that I’ve bought) to my bff in Singapore. I was so thrilled when I read the message!

I was so happy! To be honest, I had the same issue with another online store at the same time, and they weren’t even as helpful or offered any assistance like Luxola. By this time, I was jumping up and down, and told my bff to keep the package for me till we meet again. Not even 2 days after, my package arrived at my bff’s and she was holding it for me! I mean, talking about fast and amazing services! So, thank you Luxola for the great service and assistance that you’ve offered.

Ok, let’s get on the swatches!

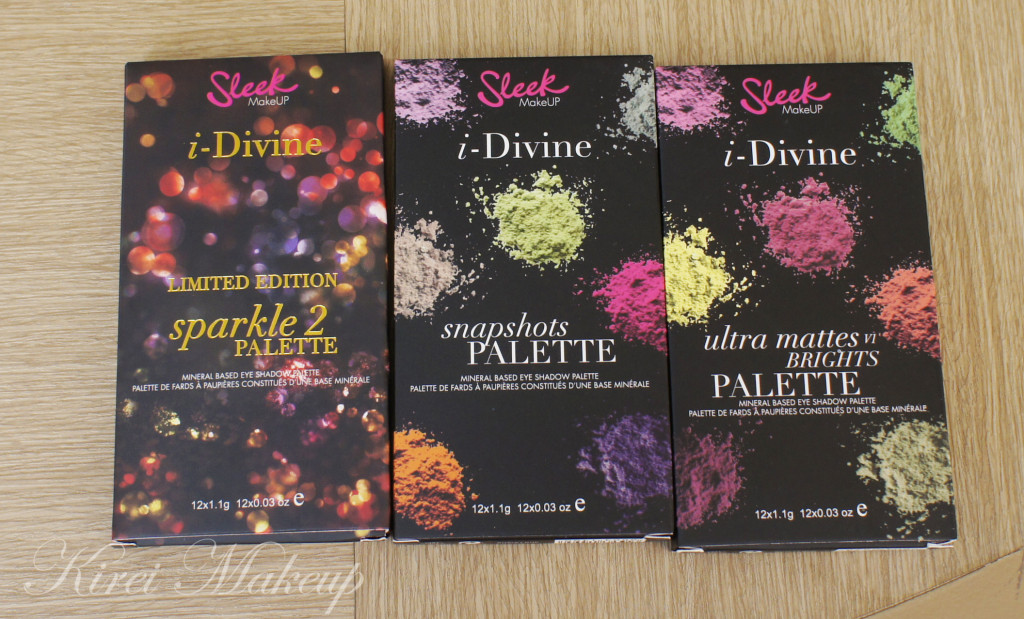
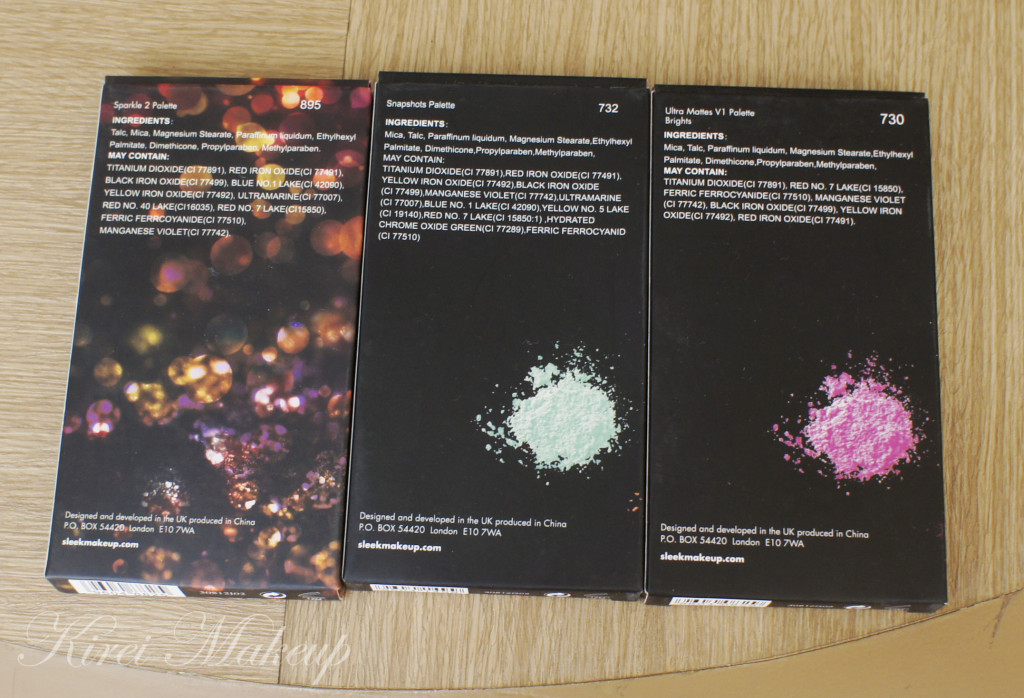
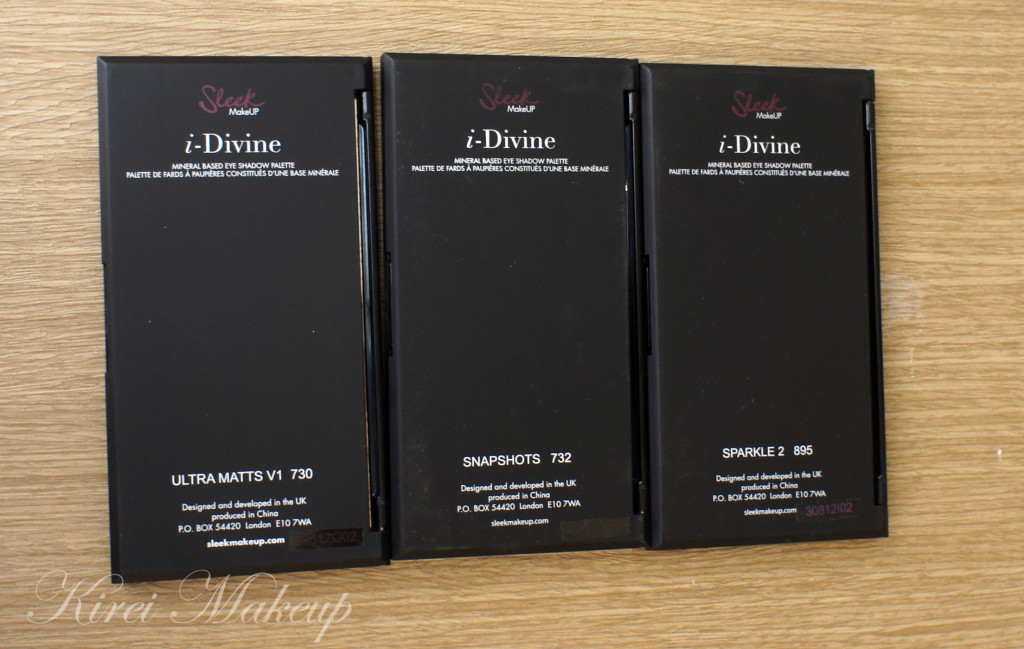
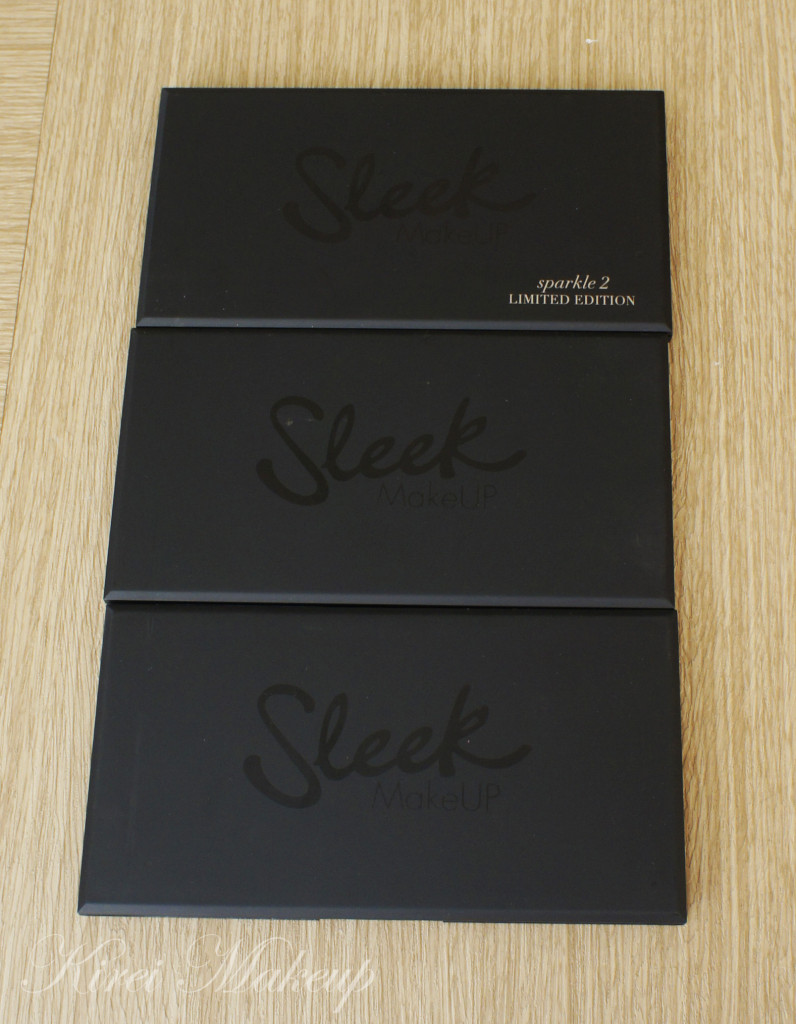
I bought 3 Sleek Makeup palettesSparkle 2, Snapshots and Ultra Mattes V1 Brights.

Sleek Makeup palettes

sleek sparkle palette

It comes in a black casing. Very light and small. The boxes above actually remind me of chocolate bars for some reason. Oh just to let you guys know, the reason why I bought these 3 palettes is because these 3 cannot be shipped to U.S.A or Canada (according to Sleek Makeup website). I wanted to buy them when I was in Canada, but since it cannot enter the country, I decided to buy them here.

Each palette costs IDR Rp. 157,000. From Sleek Makeup website it costs £7.99/palette.

sleek makeup

sleek makeup

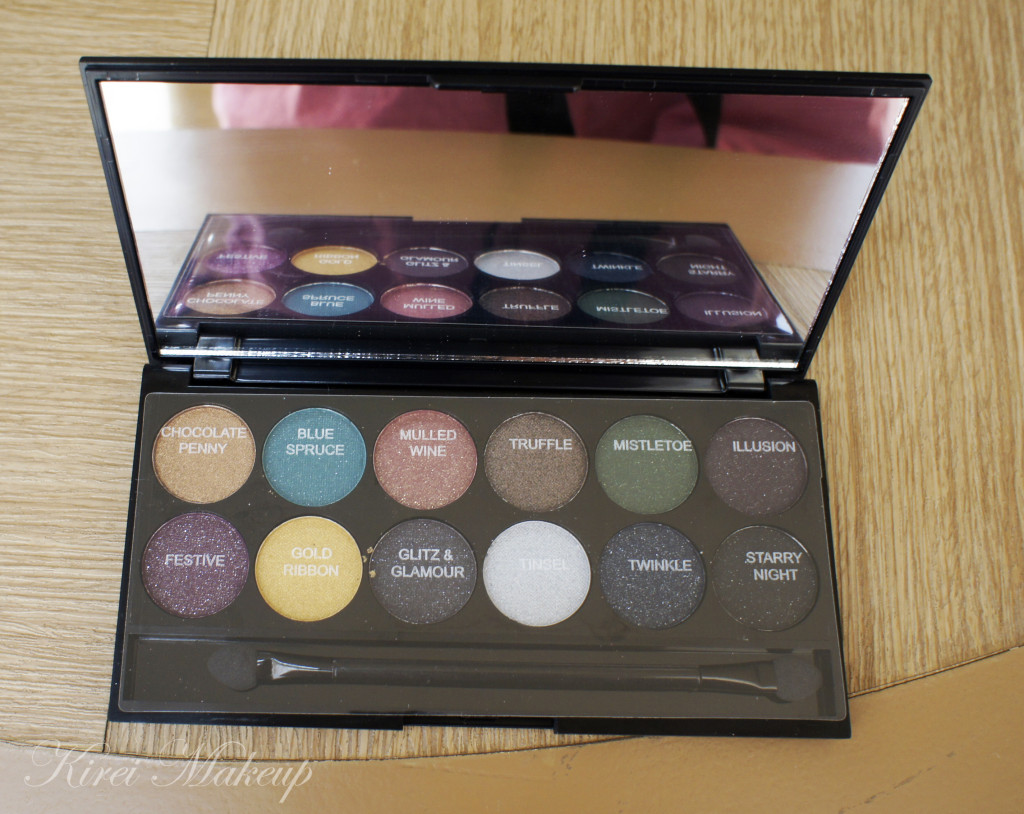
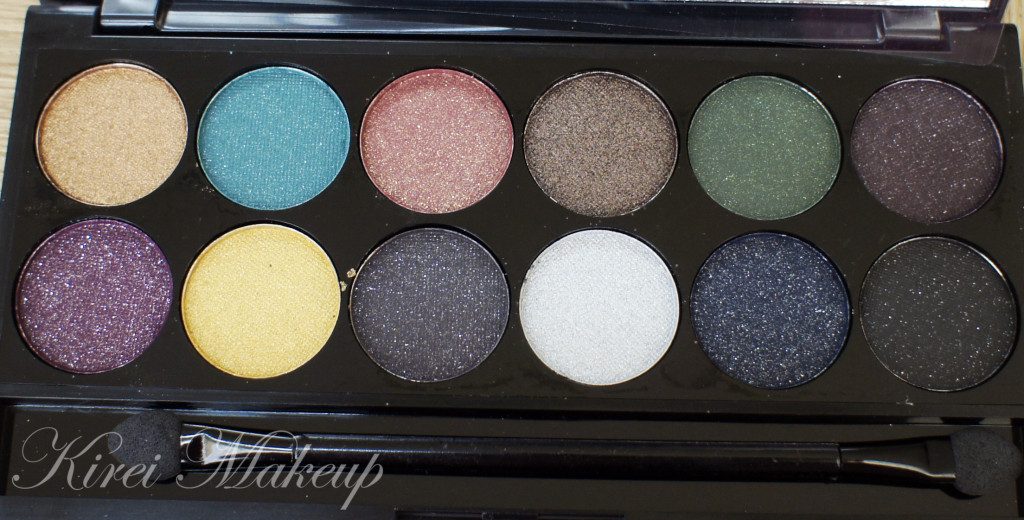
The Sparkle 2 palette is a limited edition palette. My first impression when I opened the palette was “that’s a lot of sparkle”..well it is called the Sparkle palette. I didn’t expect the sparkle to be so huge! I’m a little afraid that the sparkle might be rough and hurt my eyelid. I’m also a bit skeptical on how much sparkles going to stay on the lid. I’ve worked with glitters and sparkles before, I find that I’ve to use some sort of “adhesive”, let it be cream or liquid to make it stick to the skin. I guess I just have to try it, right? 😉

sleek sparkle 2 palette

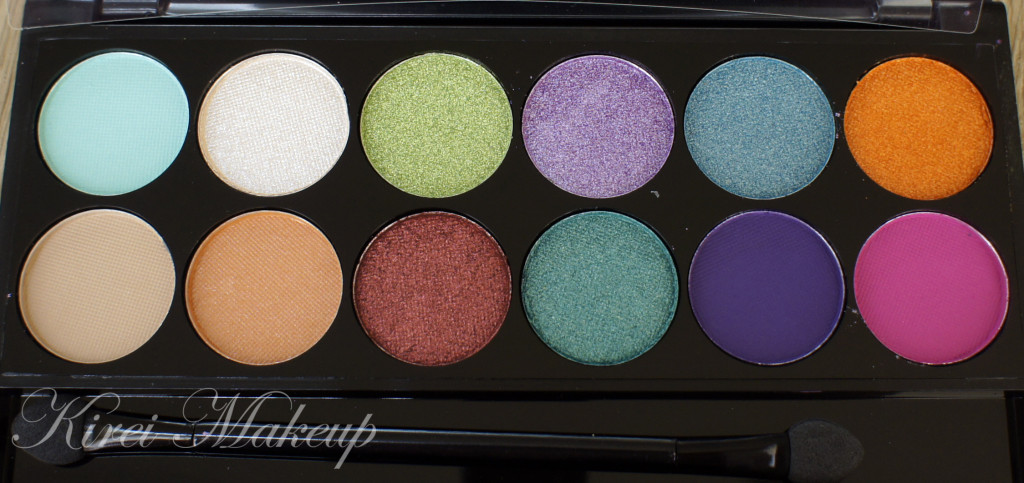
The Sparkle 2 Palette comes with 12 shades. 4 of which are shimmery, while the other 8 has glitter/sparkles in them. The 4 shimmery eyeshadows are Chocolate Penny, Gold Ribbon, Truffle and Tinsel. The 8 glittery ones are Festive, Blue Spruce, Mulled Wine, Glitz & Glamour, Mistletoe, Twinkle, Illusion and Starry Night.

sleek sparkle 2 palette

On the top part (L-R)

  • Chocolate Penny – golden bronze.
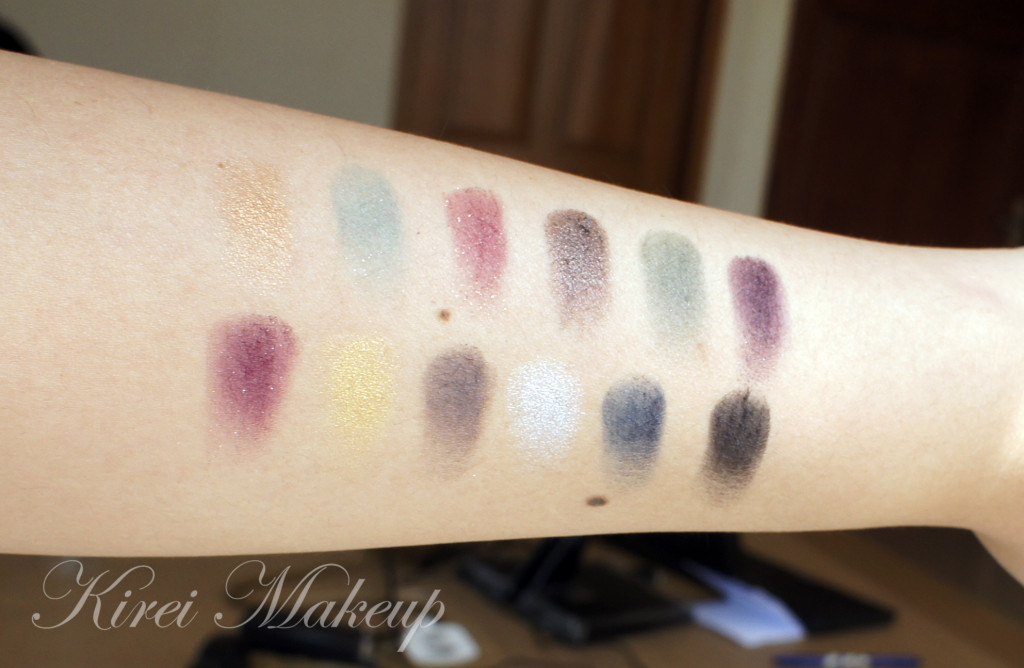
  • Blue Spruce – a turquoise with silver sparkles. Feels dry when touch, and surprisingly does not swatch very well considering how vivid the color is.
  • Mulled Wine – crimson with gold glitter.
  • Truffle – deep rich chocolate metallic color. Very buttery and has a lot of pigments.
  • Mistletoe – forest green with silver glitter.
  • Illusion – an eggplant purple eyeshadow with silver glitter.

On the bottom part (L-R)

  • Festive – plum eyeshadow with silver glitter (the only one you can see with sparkles on the swatch below)
  • Gold Ribbon – bright golden yellow with shimmer.
  • Glitz & Glamour – grey with silver sparkles.
  • Tinsel – silver shimmery eyeshadow.
  • Twinkle – navy blue with silver sparkles.
  • Starry Night – black with silver glitters.

sleek sparkle 2 palette swatch

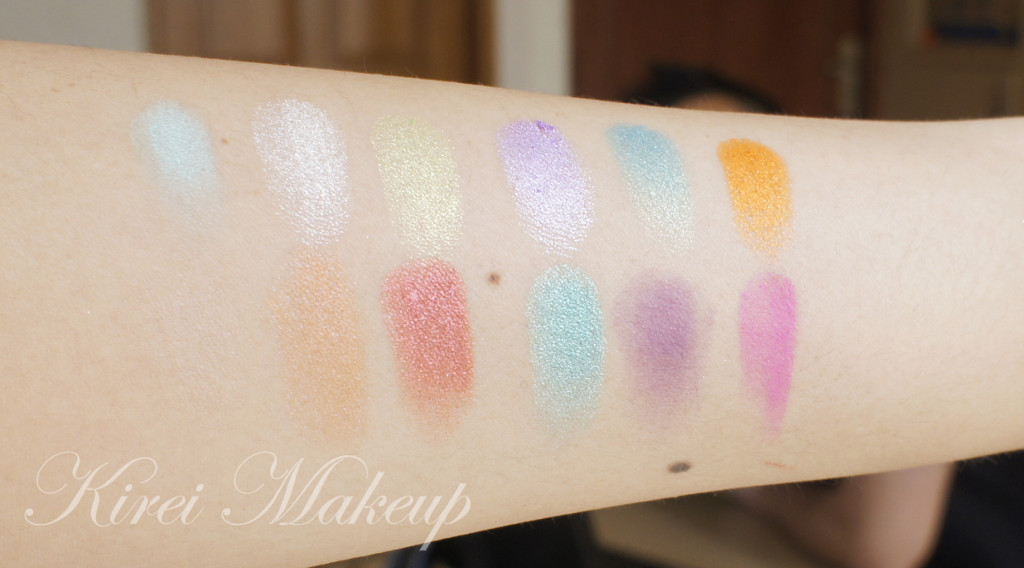
The Snapshot palette is one that I really wanted to get. It has a combination of matte and shimmer eyeshadows. It has a whole loads of bright eyeshadows, and some neutral ones. I absolutely love and adore this palette.

In this palette there’s 5 matte eyeshadows and 7 shimmer eyeshadows. The 5 matte ones are Summer Breeze, Sand Walker, Washed Ashore, Purple Haze and Magenta Madness. The 7 shimmery ones are Martini, Kiwi Flower, Sunset, Lotus Folower, Green Iguana, Humming Bird and Tequila Sunrise.

Sleek snapshot palette

During the swatching process, I found that Sand Walker does not show up on my arm because, it’s pretty much the same color as my skin. That shadow probably would work as a great base for my eyelid.

I also find that the shades on this palette turns out to be more on the medium shades range on my skintone. Nothing too dark for contour or crease color. Perhaps using a primer/base under the eyeshadows will make the shades brighter.

Sleek snapshot palette

From the Top (L-R):

  • Summer Breeze – matte cyan.
  • Martini – shimmery vanilla.
  • Kiwi Flower – shimmery chartreuse green.
  • Lotus Flower – shimmery lavender.
  • Humming Bird – shimmery deep turquoise blue.
  • Tequila Sunrise – shimmery orange.

On the bottom (L-R):

  • Sand Walker – matte beige nude shade.
  • Washed Ashore – matte light orange.
  • Sunset – shimmery copper.
  • Green Iguana – green teal shimmer.
  • Purple Haze – matte purple with cool undertone.
  • Magenta Madness – fuschia pink matte shade.


Sleek snapshot palette swatch

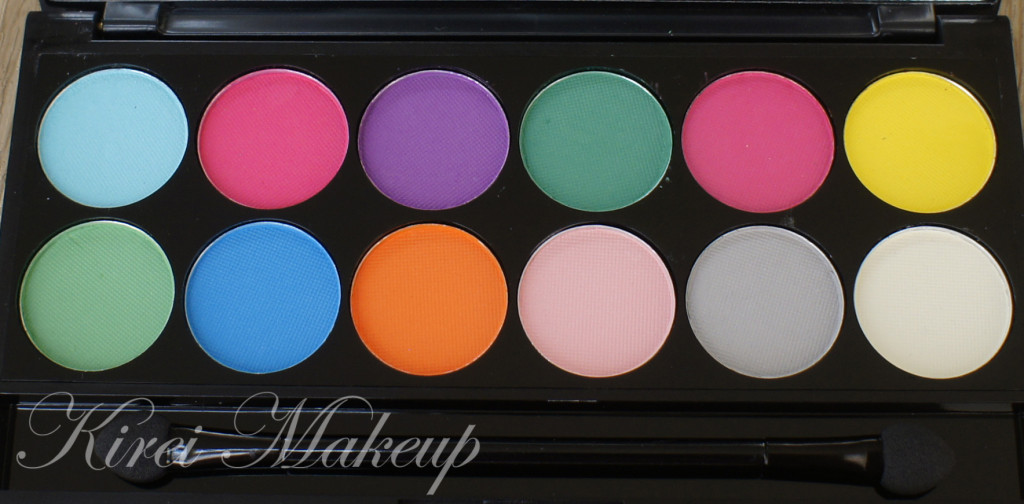
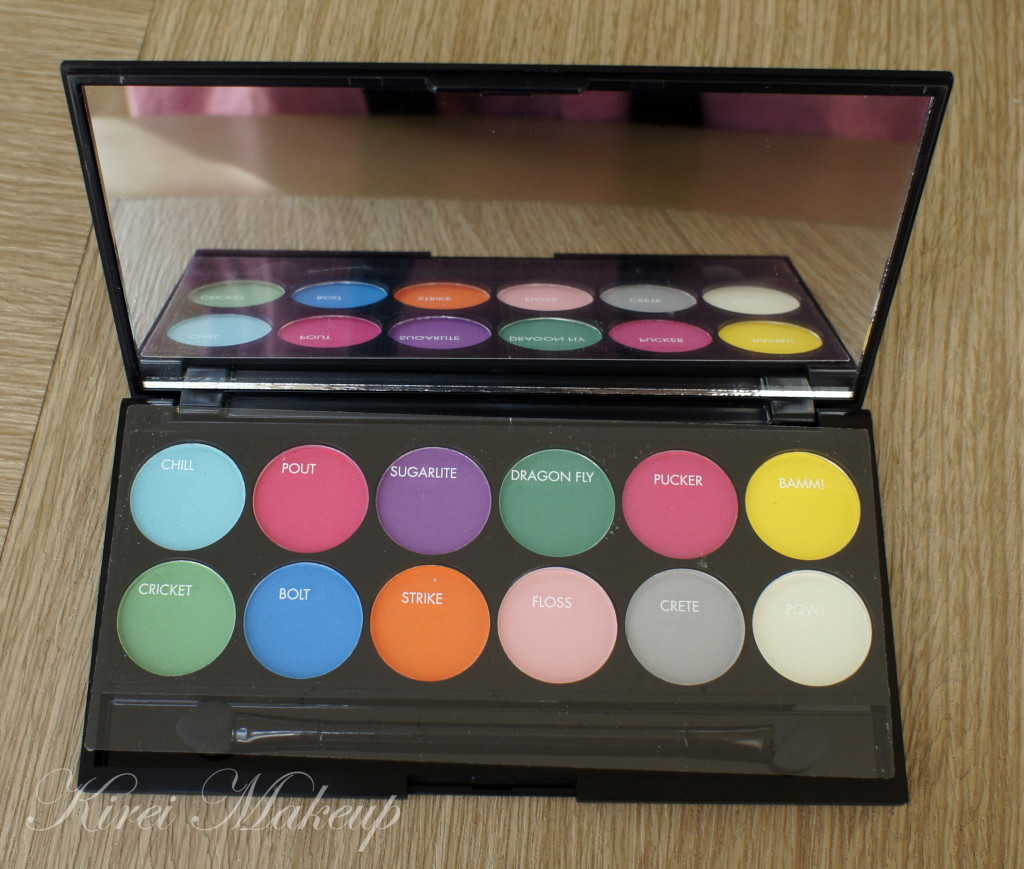
The last palette is the Ultra Mattes V1 Brights, which is a very popular palette. I’ve heard raves about this palette on how great the colors were even though they are mattes. When I first opened the palette, my eyes immediately went to Dragon Fly shade. It’s soooo beautiful! It’s bright, it’s gorgeous and it’s so creamy when touched. The shades just seem to glide on the skin smoothly.

sleek ultra mattes V1 brights


sleek ultra mattes V1 brights

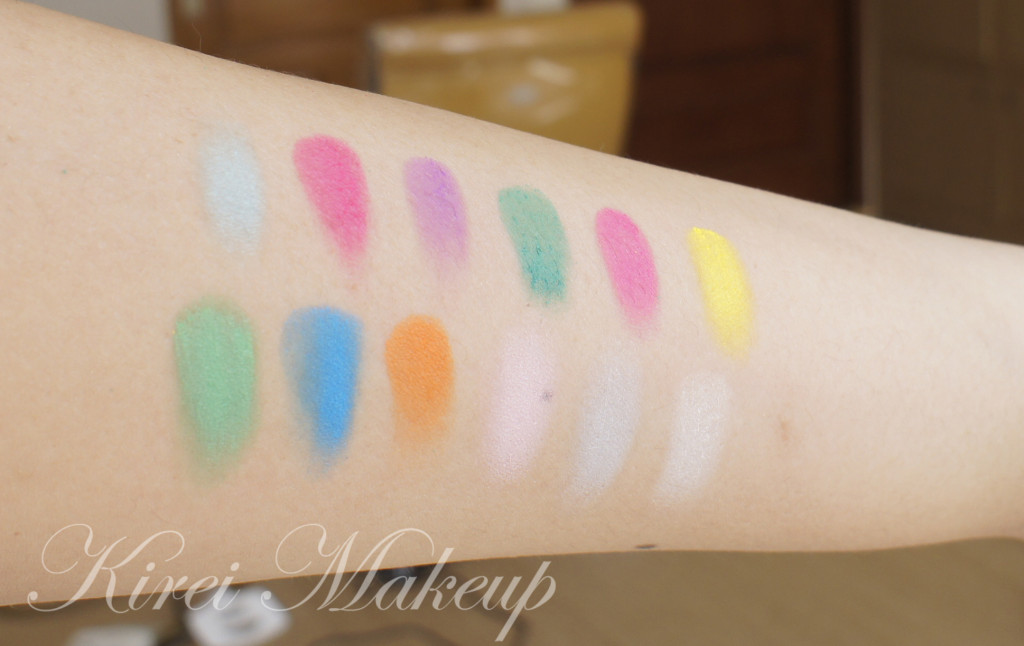
All the colors on this palette are matte. It does not feel chalky at all, instead it has a creamy, velvety texure to it. Most of the colors look pretty good without a primer when swatched. Even the lighter ones like pink, grey and white, though it might look light and chalky, you can still see the slight difference in hue on my arm.

On the top layer (L-R):

  • Chill  – aqua blue.
  • Pout – hot pink.
  • Sugarlite – purple with red undertone.
  • Dragonfly – jungle green (yes, it is a color, I did not make this up).
  • Pucker- another hot pink shade. I think this shade is very similar to Pout, but slightly lighter.
  • Bammi – true yellow.

On the bottom layer (L-R):

  • Cricket – grass green.
  • Bolt – electric blue.
  • Strike – orange (similar to that in Pantone’s).
  • Floss – ballerina pink
  • Crete – soft grey.
  • Pow – vanilla.sleek ultra mattes V1 brights swatch

All in all, I think all 3 palettes are pretty awesome. It’s a tad more expensive than the original price from Sleek, but I still think it’s a good price by Luxola. I’m one happy gal!

Peek a Blue

How’s everyone this weekend? I hope you guys had a blast, because I sure did! I went to Bali for a friend’s wedding. I also did her makeup/hair and couple of the other friends. It was a small, intimate wedding which was really awesome since usually weddings in Indonesia are grand and big. It was nice and refreshing. I also get to soak up the sun and enjoyed a lot of awesome seafood..bahahaha…

Anyhow, let’s get the tutorial started! I’ve been wanting to do something similar to this look (highlight in the middle of the eyes) with a more neutral shades, but oh heck why not use bright colors? 😀

You can obviously substitute all the colors below to whatever you want.

How-to:

1. I applied MUFE Aqua Cream Shadow no. 1 using a synthetic art brush on the eyelid and along the lower lashline.

2. Using a flat eyeshadow brush, I applied Burnt Red from the YSL Pure Chromatic quad no. 7. This eyeshadow turned out looking more like cranberry than burnt red when applied on top of black base.

3. I blended the edge using a fluffy blending brush.

4. Using another flat eyeshadow brush, I applied MAC Metallic Crush Pigment in Raindrop.

5. I used another blending brush to blend the lines where the 2 eyeshadows met.

6. Using an angled eyeliner brush, I applied UD Half-baked eyeshadow on the inner corner of the lower lid, and Burnt Red on the outer corner of the lid.

7. I lined my waterline and tightline using L’oreal Voluminous Smoldering eyeliner.

8. Along the upper lashline, I created a winged liner using Kate Sharp eyeliner.

9. I filled my brows using a mixture of MAC Omega and MAC Brun.

10. I curled my lashes using Shu Uemura lash curler and applied L’oreal Double Extender Curl mascara on both top and bottom lashes.

11. I also applied YSL Touche Eclat right underneath my brows.

blue makeup

12. I applied MUFE HD foundation on my face using a foundation brush from the center of my face and blending it outwards.

13. I applied YSL Touche Eclat on the bridge of my nose and underneath my eyes along to my cheekbones.

14. I contoured the sides of my nose and on the hollows of my cheeks using MAC Shadowy.

15. I applied Chanel Blush de Horizon on my cheeks.

16. I finished the look by applying YSL Rouge Pur Couture no. 7 lightly using a lip brush on my lips.

ysl pure chromatics no. 7

Rosy

Today’s look is more on the softer, romantic, feminine colors. This look is great for first date, or for whoever wants a more natural look. Will work great on brides as well!
I also wanted my eyes to look bright and open, so I skipped the black liner on the waterline. Instead, I opted for a beige eyeliner. If you prefer a more darker version to this, feel free to substitute the dark shadow and eyeliner to black.

For this look, the focus is on the overall appearance. Nothing stands out too much, yet the whole look feels right and if done correctly, people will notice a subtle difference in your face but cannot put their finger why you look so great 😉

FYI, if you’d like to know how I contour, highlight and apply my blush come check the blog out tomorrow 😉

How-to:

1. I applied Bobbi Brown Rose Gold cream shadow all over the lid using my ring finger.

2. Using a flat eyeshadow brush, I applied Urban Decay Toasted eyeshadow on top of the base.

3. Using the same flat eyeshadow brush, I applied Urban Decay Busted eyeshadow on the outer V of the eyes.

4. I used a clean blending brush to blend the edge of UD Busted eyeshadow.

5. Using a small shader brush, I applied UD Toasted on the inner half of the lower lid and UD Busted on the outer half of the lower lid.

6. I lined my waterline using MAC Chromagraphic eyeliner in NC30.

7. I created a slight winged liner along my upper lashline using UD Blackout eyeshadow and an angled eyeliner brush.

8. I used whatever was left on the eyeliner brush to line the outer half my lower lash line (very close to the lashes).

9. I filled my brows in using Shu Uemura brow pencil.

10. I curled my lashes and applied L’oreal Double Extender Curl mascara on both top and bottom lashes.

11. I applied my face powder right underneath the brows.

Urban Decay Hustle

12. For the face, I applied MUFE HD Foundation using a foundation brush.

13. Under the eyes, I applied YSL Touche Eclat.

14. For the contour, I applied MAC Shadowy.

15. On the cheeks, I applied Benefit Hervana blush.

16. On the lips, I applied YSL no. 17 lipstick lightly using a lip brush.

urban decay naked palette

Product of the Week: Maybelline Express Volume Turbo Boost Mascara

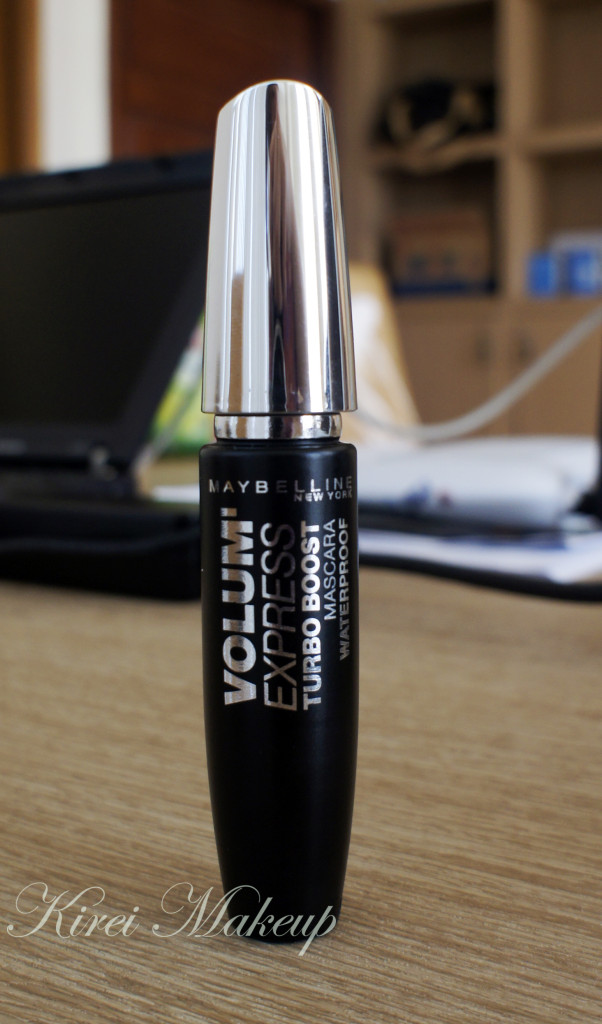
Finally I get the chance to upload my Product of The Week! In this week’s installment, I’d like to present my favorite mascara at the moment. My favorite mascara of all time was actualy L’oreal Carbon Black mascara, but since I can’t find it here in Indonesia, I’ve to go look for another mascara to replace my Carbon Black.
I was at Carrefour and decided to get the Maybelline Express Volume Turbo Boost macara. Actually, I’ve tried the Maybelline Volume Express Hypercurl mascara last year, but it didn’t do anything much to me. So, I was a bit skeptical about the Maybelline Express Volume Turbo Boost mascara, but after my first try, I fell in love with it.

I bought the mascara for IDR Rp. 63,300 at Carrefour in Jakarta.

 maybelline volume express turbo boost mascara

From Maybelline Indonesia website:

Tebal dalam sekejap, tanpa gumpalan

  • Untuk hasil bulu mata 5x lebih tebal dalam sekejap dan tanpa gumpalan.
  • Super tebal, super cepat, bulu mata menakjubkan.
  • Waterproof

From Maybelline Canada website:

• Long-lasting waterproof turbo-boost formula and patented Anti-Clump Brush quickly thicken lashes for up to 5x more volume
• Contact lens safe, ophthalmologist-tested
• Waterproof, also available in Washable

For Best Result

Sweep brush upwards from root to tip to build instant volume. Do not let dry between coats. Removes easily with Expert Eyes® Moisturizing Eye Makeup Remover.

maybelline volume express turbo boost mascara

I found that the instruction from Maybelline Canada website is very useful. I applied this mascara as per instruction (sweep upwards and not to let it dry between coats) to get the best out of this mascara. Even when I did let it dry between application, there’s something about the bristle of the mascara that doesn’t let the product to get clumpy.

I love the fact that this mascara holds my curl all day long! Not only curls, it definitely gave me extra length on my lashes. However, it was not as volumizing as it promises. I don’t really mind it. I like my lashes to be more feathery and soft to touch, so this mascara is perfect for me. I’ve been using the mascara for the last few tutorials last week if you’d like to see more pictures.

You can apply the mascara lightly just for curls and length for a day makeup, or you can layer several coats of the mascara for a more intense, dramatic lashes. You can definitely layer this mascara and get maximum length, curl and a bit more volume. I personally like it the way I wore it in the picture below for daily use.

I’ve worn this mascara for a good 6 hours without smudging in Indonesia. However, keep in mind that I was inside an air-conditioned environment most of the time. I’m not sure how long this mascara will last if I was outdoor.

maybelline volume express turbo boost mascara

Will I buy this mascara again? ABSOLUTELY!

I gave this mascara 4.5 winks out of 5. It’s missing 0.5 because it does not give 5x the volume (compared to my bare lashes).