Beauty Restore Hydrating MaskerAide

Hello readers! It’s been a while, eh? I have gotten over my jet lag, snow storm, and flu. It was quite a tough week to handle since I was feeling super weak! Anyways, have you guys been following my Instagram? If you haven’t please do follow me there to get in touch or to stay updated with my daily antics. If you have, you’re awesome! Anyways, if you are on my Instagram, you’d know that I’ve tried out a new face mask by MaskerAide recently. I’d like to thank Obsessed Canada (division of Nail Polish Canada) for sending me these awesome facial masks for me to try on.

I received 3 MaskerAide facial sheet masks to try on (you can see all 3 on my Instagram account), but I wanted to share with you guys my review on the Beauty Restore Hydrating Facial Sheet Mask by Masker Aide.  I’ll do the other masks review soon since each mask has a different function, so I want to review it separately.

Anyways, let me talk about the mask a bit more!

What is Beauty Restore Hydrating Facial Sheet Mask?

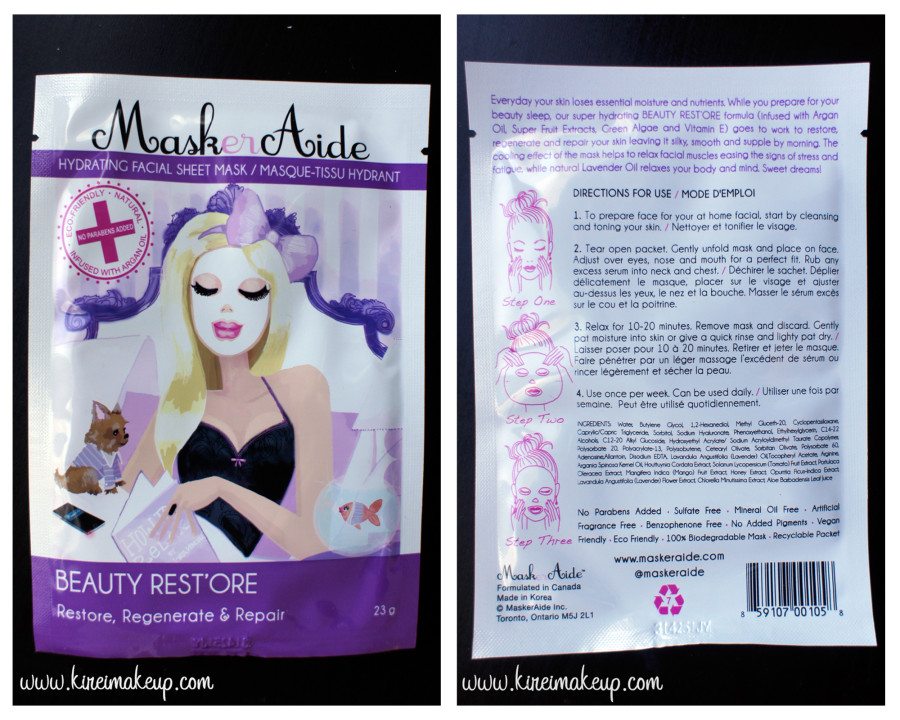
Everyday your skin loses essential moisture and nutrients. While you prepare for your beauty sleep, our super hydrating BEAUTY REST’ORE formula (infused with Argan Oil, Super Fruit Extracts, Green Algae and Vitamin E) goes to work to restore, regenerate and repair your skin leaving it silky, smooth and supple by morning. The cooling effect of the mask helps to relax facial muscles easing the signs of stress and fatigue, while natural Lavender Oil relaxes your body and mind. Sweet dreams!

DIRECTIONS FOR USE

1. To prepare face for your at home facial, start by cleansing and toning your skin.

2. Tear open packet. Gently unfold mask and place on face. Adjust over eyes, nose and mouth for a perfect fit. Rub any excess serum into neck and chest.

3. Relax for 10-20 minutes. Remove mask and discard. Gently pat moisture into skin or give a quick rinse and lightly pat dry.

4. Use once per week. Can be used daily.

Obsessed Canada, 2015

Beauty Restore Hydrating MaskerAide

Ok, so if you don’t know what a facial sheet mask is, it is basically a mask. Usually, a face mask is like one of those gel-like or mud-like product where you slap on your face, let it on for a few minutes or until it dries, and you rinse your face afterwards. That’s like the traditional masks, for example the Glam Glow Mud Mask, one I’ve reviewed before.

A facial sheet mask comes with a sheet of mask. This sheet of mask is soaked in the skincare product that it comes with, in this case, a hydrating serum – Vit. E, Argan oil etc. You leave in on your face for 10-20 minutes and then discard the mask afterwards. There isn’t a need to rinse if you don’t want to. You can use it daily or once a week. Facial sheet masks are pretty much a concentrated version of night cream.

Facial sheet masks are very popular in Asia, especially Korea and Japan. I usually use SK II face masks, it was especially helpful during long flights from CGK-YYZ (or vice versa). It gives my skin the extra moisture I need when the humidity is low.

MaskerAide review

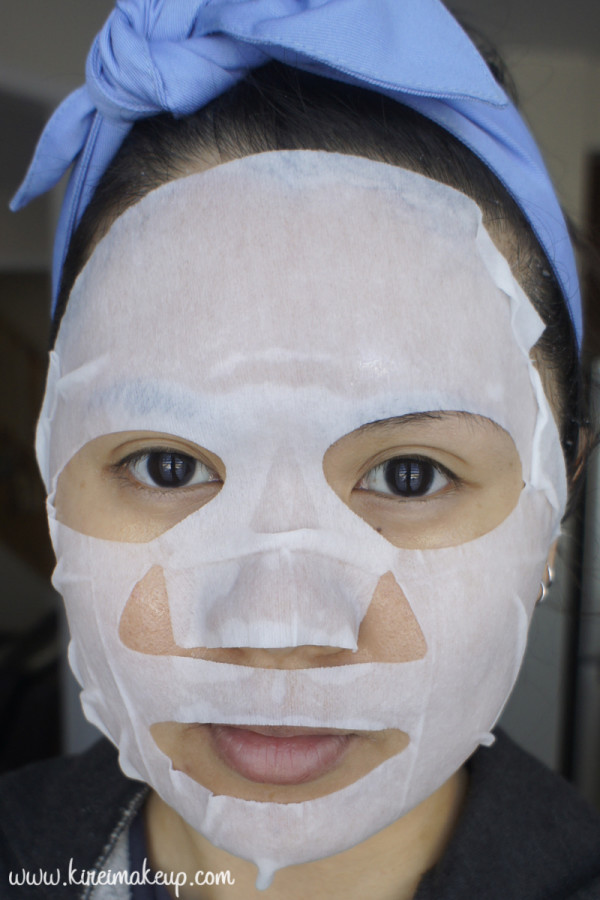
Facial sheet masks are usually used at night after your nightly skincare routine. I’m not sure if you use it before or after your night cream, since I don’t use any. I do use it after my skincare regime (wash, tone, moisturize). After the 20-minute is up, I just rub any excess serum on to my skin and go to bed. For this review, I did it during the day since I need the day light for pictures. I prefer doing the mask after moisturizer since I usually discard the sheet and go to bed, but I think you can do it before your moisturizer too if you want.

Pros

  • Extra moisture for the dry parched skin
  • Effect can be seen immediately (look at before and after pictures below)
  • Skin feels plump, moistened, and look dewy
  • Smells great!
  • Excess serum can be used on neck and decolletage
  • Affordable – CA $6/each (compared to SK II – CA $168/10 masks)

Cons

  • Not for those with oily skin, especially in humid countries (i.e. Indonesia)
  • Face mask was too big for my face – certain areas of my face didn’t get covered properly
  • Excessive serum can get drippy and messy
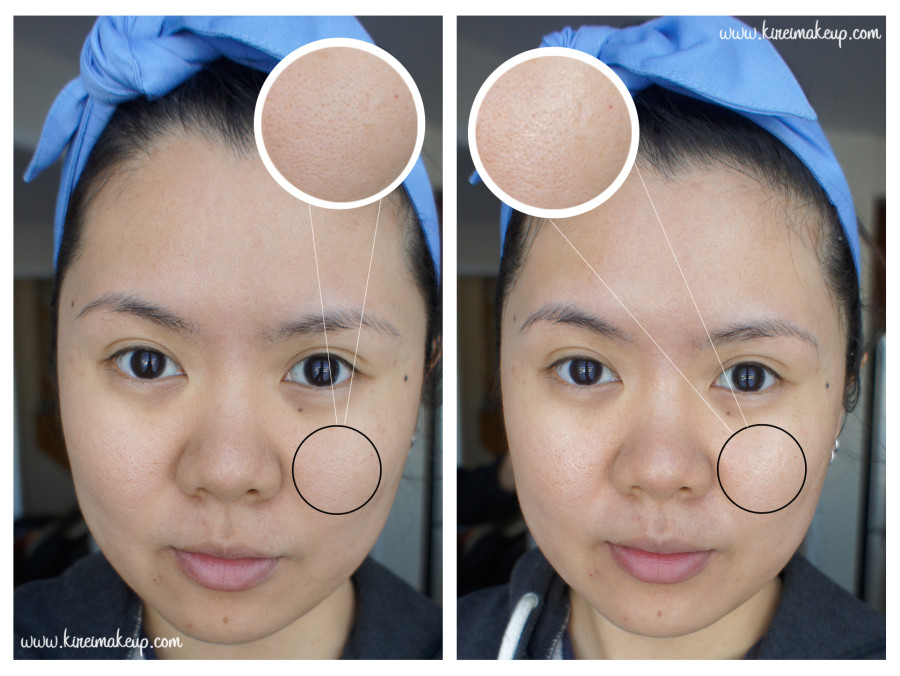
Facial mask reviewBefore (Left) and After (Right)

Disclaimer: The Beauty Restore Hydrating facial sheet mask by MaskerAide was sent to me by Obsessed Canada. However, my review is based purely out of my own opinion. I do not earn any money nor credits if you click on the Obsessed Canada and Nail Polish Canada links.
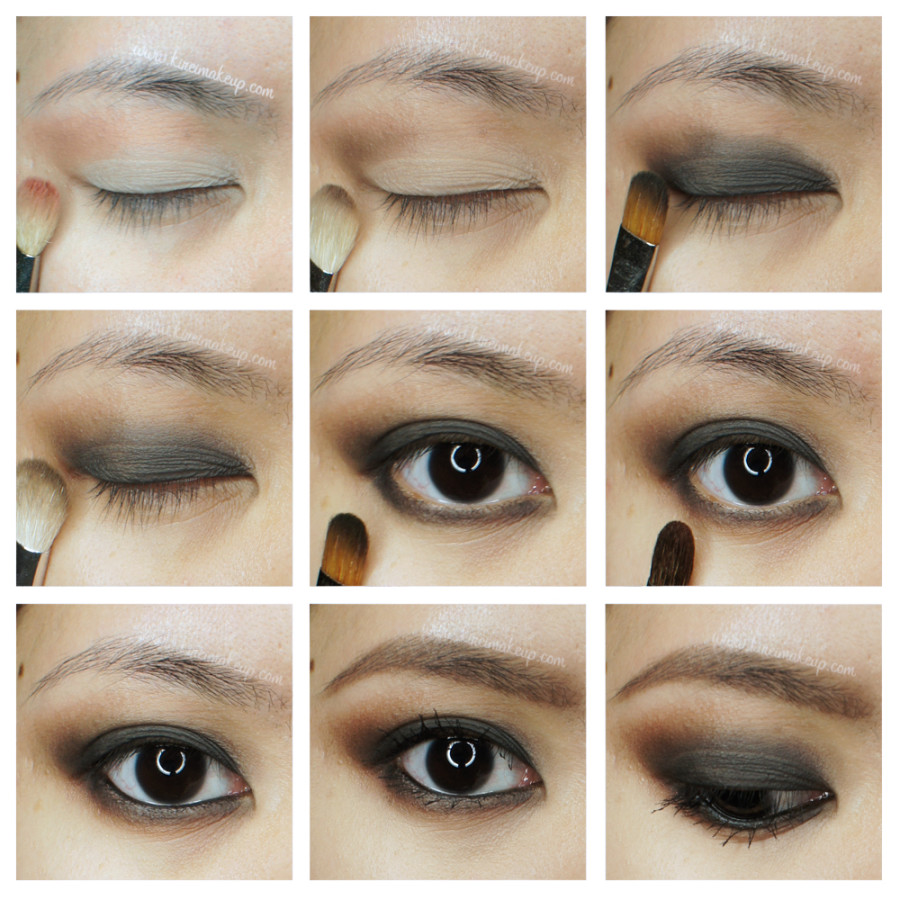
Kat Von D Monarch Palette Tutorial – Smokey

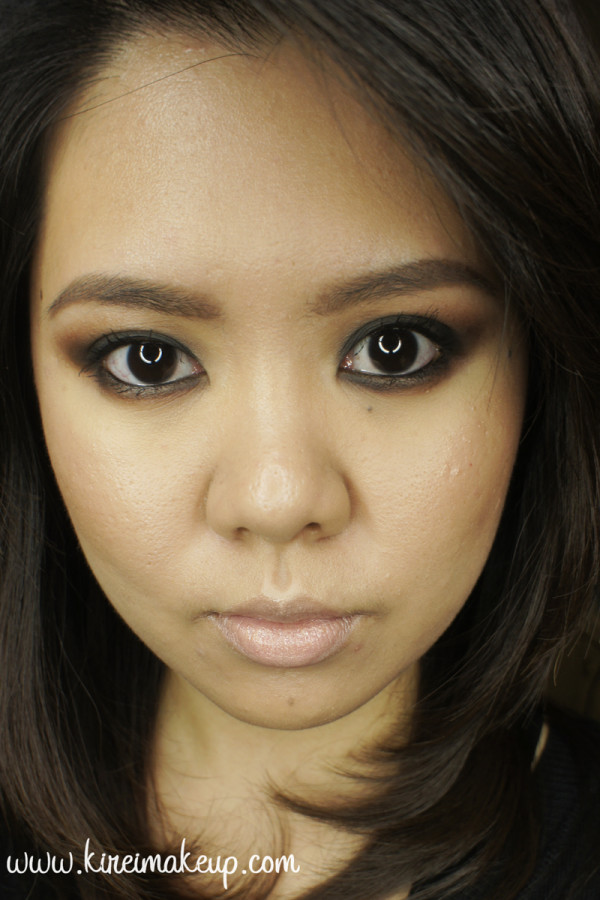
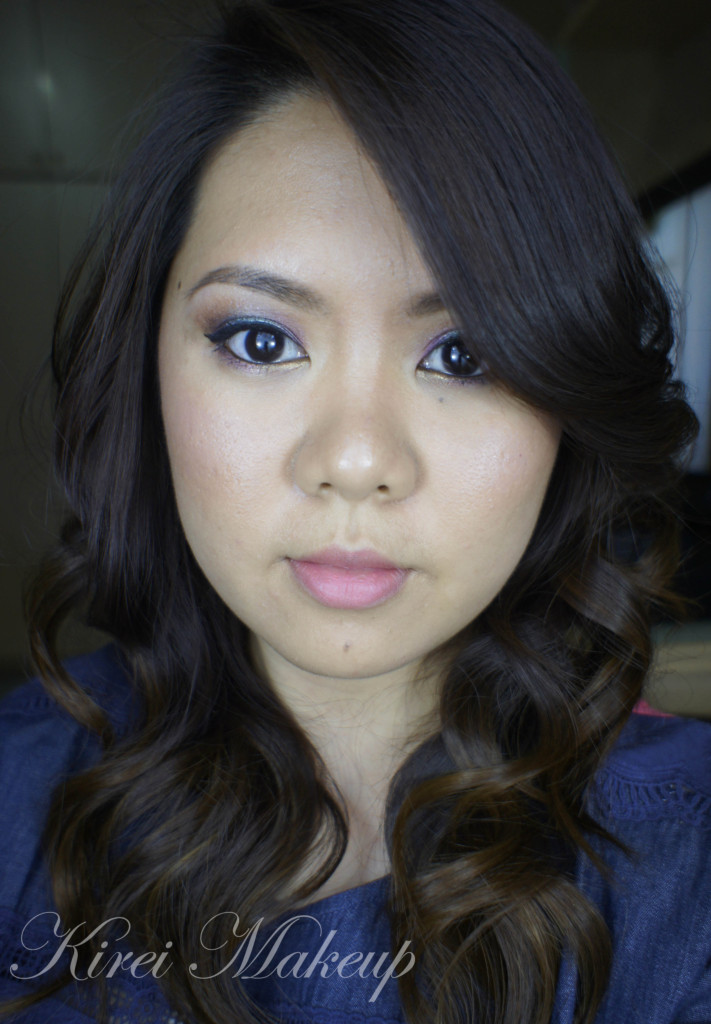
I am back! Sorry for missing for a week, guys! I’m actually in Canada right now, so I had to deal with jet lag and weather change, actually I got sick for a while due to the change in weather. Anyways, I did a tutorial before I left, but didn’t have the chance to post it. Here’s another Kat Von D Monarch Palette tutorial! If you don’t already know, this palette is like my favorite! I have done other tutorials using the same palette, but this is like the smokiest of them all! I think I might go grab some more Kat Von D products, any recommendation?

Also, I received a few products from L’oreal Paris Indonesia, which I’ll share with you guys on the next post. Out of all the products, I was only able to bring the lipsticks with me. One of the lipsticks was the JLo signature lip color, which I used on this tutorial. I don’t love how it ends up, I think it’s too pale, I prefer a bit more color on my lips. Nevertheless, I thought I wanted to share with you guys how it looks. I’m not a big fan of super pale nude lips, so this is definitely not my favorite lipstick.

Anyways, let’s get on the pictorials. All products listed below! Don’t forget to check out my other Kat Von D Monarch palette looks!

Kat Von D smoky eyes monarch palette

Eyes

Face

  • Foundation – Make Up For Ever HD Foundation
  • Corrector – Bobbi Brown Peach corrector
  • Concealer – MAC Pro Longwear concealer
  • Powder – NARS Setting powder

Cheeks

  • Bronzer – Chanel Universal bronzer
  • Cheeks – Benefit Hervana
  • Highlighter – The Balm Mary Lou Manizer

Lips

  • Lipstick – L’oreal Collection Star JLo Barely Greige


Jlo nude lipstick

Lavish

I’m just going to say please ignore that red dot on my eyebrow. It hurts and it’s a slightly irritated. Thanks! I accidentally scratched it cause it was itchy when I was doing my eyes, and in the pictures below it was irritated and a bit swollen.

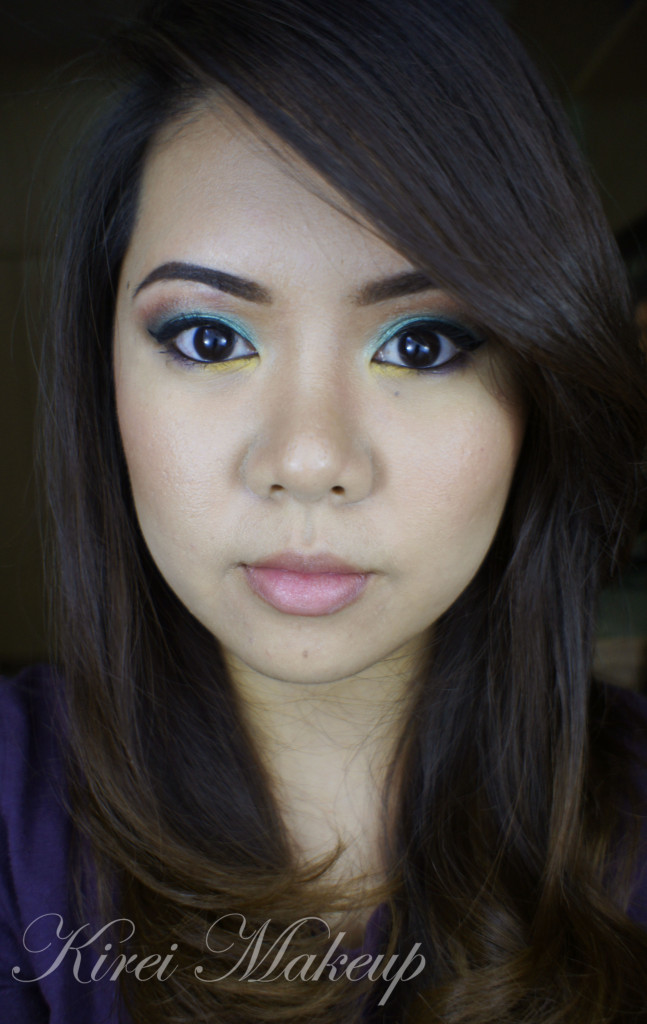
Anyhow, I just recently watched Percy Jackson and the Sea Monster (I also watched Elysium!). Anyways, I saw the Hippocampus from the movie and I love its color. Gorgeous! Anyways, I took some of the colors that I can see prominently on the Hippocampus as an inspiration. Not to mention, I just bought the new Clinique Chubby Eye Tint in Two Ton Teal, so a good excuse to do a teal look!

Let’s get the tutorial started!

How-to:

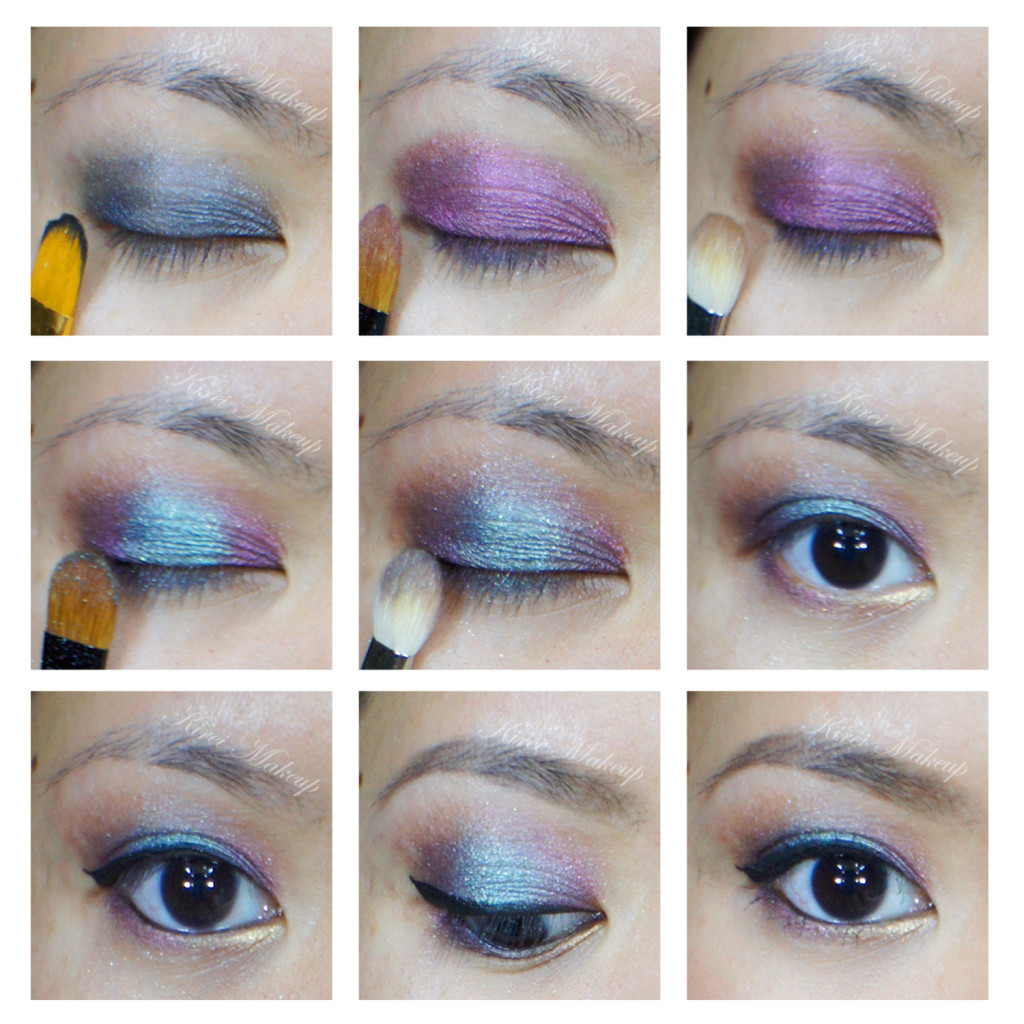
1. I applied Clinique Chubby Stick Eye Tint in Two Ton Teal all over the lid. I layered this product several times to get the intensity I want.

2. Using a flat eyeshadow brush, I applied MAC Shimmermoss on top of the Two Ton Teal.

3. I used a small shader brush and applied no-brand black eyeshadow on the outer V of the lid.

4. Using a clean fluffy blending brush, I clean up the crease.

5.  Using another clean blending brush, I applied MAC Coppering just slightly above the crease.

6. I used an angled brush to apply MUFE no. 71 on the inner corner of the eyes and MAC Indigo Ink on the outer corner of the lower lid.

7. I lined my waterline and tightline using L’oreal Voluminous Smoldering eyeliner.

8. I created a feline flick (or winged eyeliner) along the upper lashline using Kanebo Kate Super Sharp eyeliner.

9. I filled my brows in using MUFE Aqua Brow Gel.

10. I curled my lashes and applied L’oreal Double Extended Curl mascara on both top and lower lashes.

Purple and teal makeup

11. For the face, first I applied Clinique CC cream to prep the skin, and then applied MUFE HD Foundation all over using a foundation brush. I covered my blemishes and under eye circles using MUFE HD concealer

12. I also contoured my cheeks and nose using MAC Shadowy.

13. I applied a mix of MAC Cubic and MAC Fleur Power on the cheeks.

14. On the lips, I applied Clinique Bountiful Blush chubby lipstick.

Teal and purple makeup

A Hint of Emerald

Hello everyone! If you guys follow my Instagram, you’d know that I’ve just recently purchased another aqua cream last weekend. I just bought no. 22 to be added into my collection (which is shown as a little twist in the tutorial below). Just to let you know, MUFE Indonesia has just increased the price of their aqua creams to Rp. 300,000/each. Also, if you purchase anything from them this week for anything above Rp. 1,300,000 you’ll receive a free pouch along with a few goodies inside. I think this promo will only last until they finish their stock. So go to the nearest MUFE Indonesia stores and check them out if you’re interested.

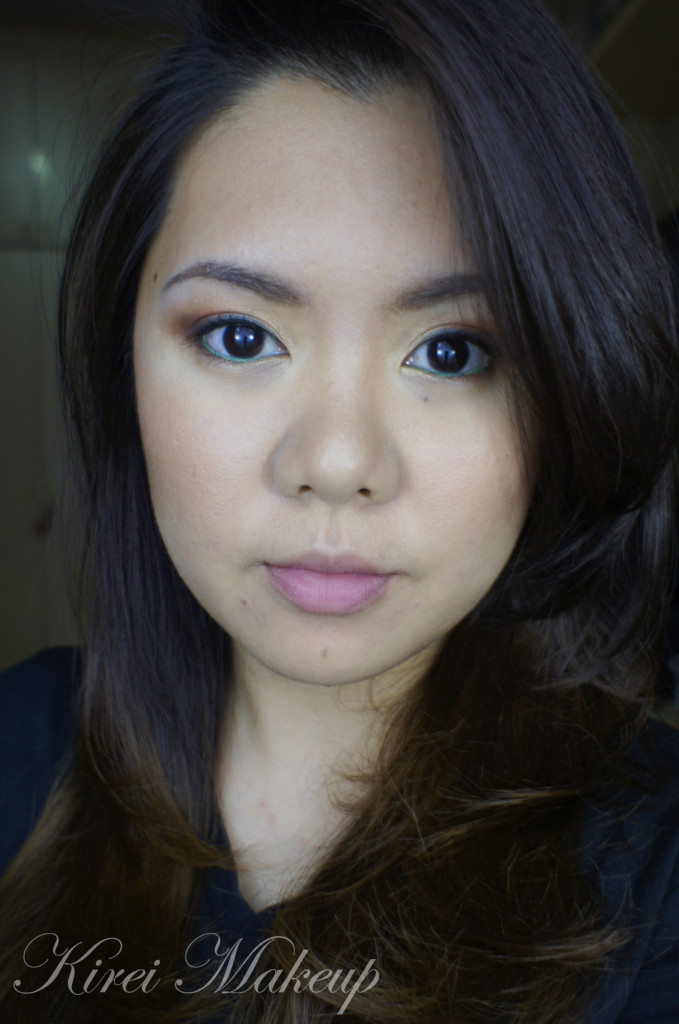
Anyways, just a brief story about this tutorial. I wanted to use my Sariayu Petikan Sitar eyeshadow since I bought it quite a while back at Carrefour. Similar to my Sariayu K. Karimunjawa trio eyeshadow, this one is very pigmented and easily blendable as well.

How-to:

1. I applied the brown eyeshadow from Sariayu Petikan Sitar on the outer corner of the lid using a flat eyeshadow brush.

2. Using another clean eyeshadow brush, I applied the orange shadow from Sariayu Petikan Sitar in the center.

3. I used a clean blending brush to blend the edge where the 2 shadows meet, and also the crease.

4. Using a flat eyeshadow brush, I applied the champagne shadow from Sariayu Petikan Sita on the inner corner of the lid.

5. Using an angled eyeliner brush, I applied the brown eyeshadow along the lower lashline.

6. I lined my waterline using MUFE Aqua Cream no. 22 and an angled eyeliner brush.

7. For the upper lashline, I applied L’oreal Voluminous Smoldering eyeliner.

8. I curled my lashes and applied MUFE Smoky Lash mascara on both top and bottom lashes.

9. I filled my brows in using MUFE Brow Gel and angled eyebrow brush.

10. Under the eyebrow, I applied L’oreal Super Blendable concealer crayon in W1/2 and blended it out using my finger.

Sariayu eyeshadow

11. I applied Estee Lauder Double Wear Light foundation on my face using my fingers.

12. On the cheeks, I applied MAC Peaches blush.

13. I contoured the side of my nose using MAC Shadowy contour powder.

14. On the lips, I applied Becca Beach Tint in Dragonfruit.

sariayu petikan sitar

Peek a Blue

How’s everyone this weekend? I hope you guys had a blast, because I sure did! I went to Bali for a friend’s wedding. I also did her makeup/hair and couple of the other friends. It was a small, intimate wedding which was really awesome since usually weddings in Indonesia are grand and big. It was nice and refreshing. I also get to soak up the sun and enjoyed a lot of awesome seafood..bahahaha…

Anyhow, let’s get the tutorial started! I’ve been wanting to do something similar to this look (highlight in the middle of the eyes) with a more neutral shades, but oh heck why not use bright colors? 😀

You can obviously substitute all the colors below to whatever you want.

How-to:

1. I applied MUFE Aqua Cream Shadow no. 1 using a synthetic art brush on the eyelid and along the lower lashline.

2. Using a flat eyeshadow brush, I applied Burnt Red from the YSL Pure Chromatic quad no. 7. This eyeshadow turned out looking more like cranberry than burnt red when applied on top of black base.

3. I blended the edge using a fluffy blending brush.

4. Using another flat eyeshadow brush, I applied MAC Metallic Crush Pigment in Raindrop.

5. I used another blending brush to blend the lines where the 2 eyeshadows met.

6. Using an angled eyeliner brush, I applied UD Half-baked eyeshadow on the inner corner of the lower lid, and Burnt Red on the outer corner of the lid.

7. I lined my waterline and tightline using L’oreal Voluminous Smoldering eyeliner.

8. Along the upper lashline, I created a winged liner using Kate Sharp eyeliner.

9. I filled my brows using a mixture of MAC Omega and MAC Brun.

10. I curled my lashes using Shu Uemura lash curler and applied L’oreal Double Extender Curl mascara on both top and bottom lashes.

11. I also applied YSL Touche Eclat right underneath my brows.

blue makeup

12. I applied MUFE HD foundation on my face using a foundation brush from the center of my face and blending it outwards.

13. I applied YSL Touche Eclat on the bridge of my nose and underneath my eyes along to my cheekbones.

14. I contoured the sides of my nose and on the hollows of my cheeks using MAC Shadowy.

15. I applied Chanel Blush de Horizon on my cheeks.

16. I finished the look by applying YSL Rouge Pur Couture no. 7 lightly using a lip brush on my lips.

ysl pure chromatics no. 7