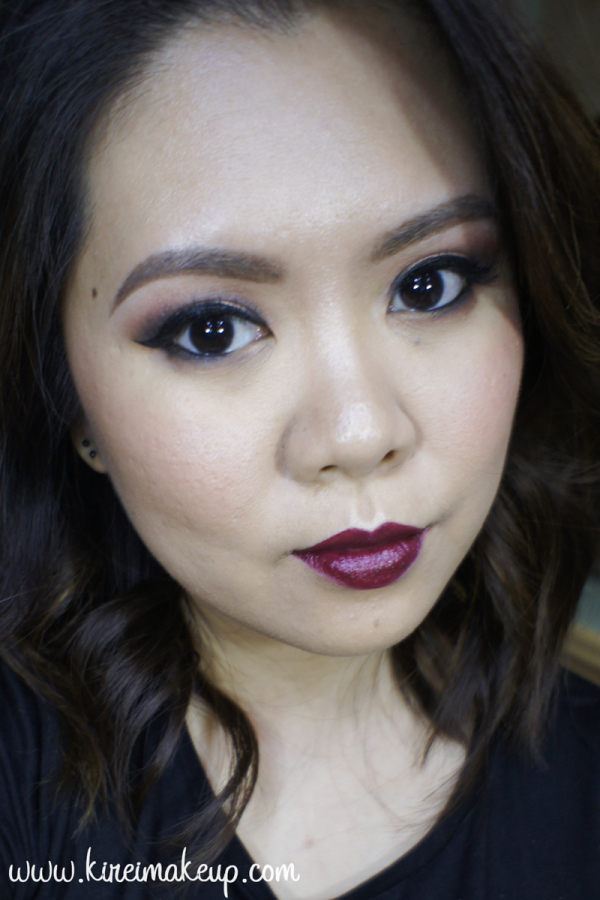
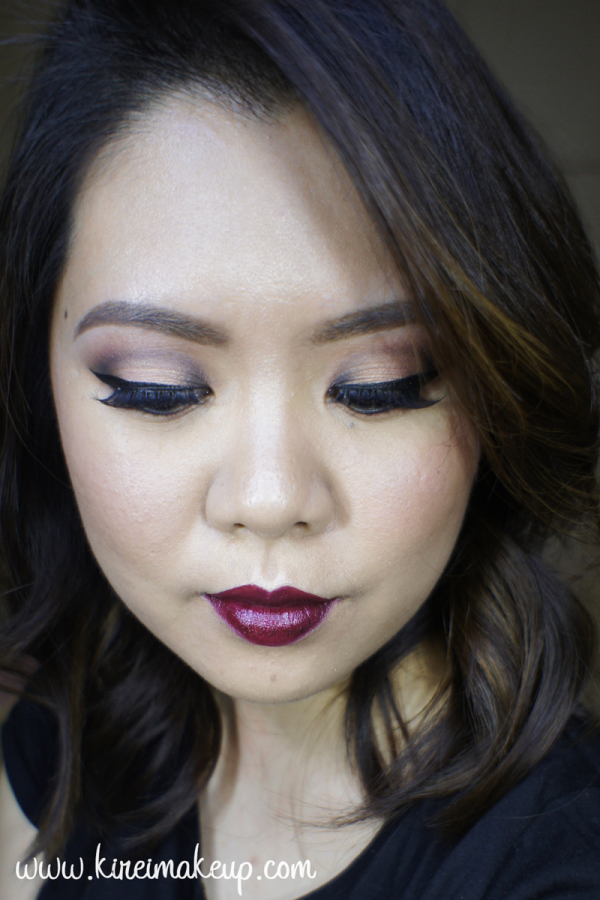
Fall Makeup Tutorial

Fall is almost over I heard! How I miss those beautiful leaves turning yellow, orange, and red! Anyways, since I’ve been reminiscing about Fall, I decided to do a Fall Makeup Tutorial, inspired by the beautiful maple leaves that turn red during the season. I’ve done a review on the lipstick that I’ll be wearing for this tutorial too! You guys should check Revlon Black Cherry out if you are looking for a dark lipstick for this Fall/Winter season.

I usually don’t do bold lips and eyes at the same time like on this post, but I like to break the rules some times, so hey why not?! Anyways, enough with the chit-chat, let’s get on the tutorial!

For product list, scroll all the way to the bottom!

*Check out my tutorial on how to have a long lasting lipstick*

My eyelids are prepped using Urban Decay Primer Potion.

How-to:

1. I applied MAC Pro Longwear Paint Pot in Perky all over the eyelid.

2. Using a flat eyeshadow brush, I applied The Balm Meet Matt(e) Nude Matt Rosen on the inner and outer third of my eyelid.

3. I applied Kat Von D Esperanza Placebo just slightly above my crease as the transition color.

4. On the crease, I used a small brush and applied The Balm Meet Matt(e) Hung.

5. I applied MAC Artistic License eyeshadow on the eyelid using a flat eyeshadow brush.

6. I lined my upper lash line using Shu Uemura Calligraphy Ink eyeliner, and created a winged liner. I also added MAC Carbon on the outer and inner third of my eyelid, and on my crease. I decided to add MAC Carbon to add extra intensity and depth.

7. I applied MAC Carbon lightly along my lower lash line.

8. I lined my waterline using L’oreal Voluminous Smoldering eyeliner.

9. My brows are filled using Anastasia Brow Wiz in Taupe and Brunette. My falsies are Gwiyomi false eyelashes no. 3

peach smoky eyes

10. I applied Diorskin Star foundation all over my face using Real Technique buffing brush.

11. I applied MAC Conceal/Correct palette in Medium under my eyes.

12. I set my face using Cover FX translucent powder.

13. I lightly contoured my face using Smashbox contour kit powder.

14. I applied The Balm Mary Lou manizier highlighter on my cheekbones, nose and cupid’s bow.

15. I applied The Balm Instain blush in Houndstooth on my cheeks.

16. On my lips, I applied Revlon Black Cherry lipstick using a lipbrush.

Revlon Black Cherry makeup tutorial

Product list

Eyes – Urban Decay Primer Potion; MAC Perky Pro Longwear Paint Pot; The Balm Meet Matt(e) Nude (Matt Rosen: lid, Matt Hung: Crease); Kat Von D Esperanza Palette (Placebo: upper crease); MAC Artistic License eyeshadow (lid); MAC Carbon eyeshadow  (lid & crease) ; Shu Uemura Calligraphy Ink pen liner; Anastasia Beverly Hills Brow Wiz (Taupe and Brunette); Gwiyomi False Lashes no. 3

Face – Diorskin Star foundation; MAC Conceal/Correct palette in Medium; CoverFX translucent powder.

Cheeks – Smashbox contour kit; The Balm Mary-Lou manizier highlighter; The Balm Instain Houndstooth blush.

Lips – Revlon Black Cherry lipstick.


Fall Makeup dark lips

YSL Pure Chromatics no. 7

Finally, I get the chance to play with the Yves Saint Laurent Pure Chromatics quad that I bought during the YSL event a few weeks a go. As I’ve mentioned, I fell in love with the gold and reddish copper eyeshadows of the quad. On this tutorial, I’ll be using the eyeshadows dry. I also found out the names of each color: golden rose, golden pearl, golden orange and burnt red. The quad reminds me of sunset color.

Let me, first of all, mention that I love how the end result turned out. I was expecting a meeeeeh pigmentation since I’m applying the eyeshadow dry, but to be honest, I’ve to take my words back. The colors are amazing when you build them and they blend really nicely, applied very smoothly and very little fall-outs.

I’ve always find it difficult to wear this kind of reddish-copper (or as they call it – burnt red) eyeshadow since they always bring a lot of pinkish tone on my eyes, which make me look sick. However, this burnt red eyeshadow has hint of plum in it, and when I added the black, it shimmers beautifully (which, btw, the camera couldn’t pick up)

Anyhow! Let’s get the tutorial started!

(click on pictures to enlarge it)

YSL Pure Chromatics no. 7

1. I applied YSL Golden Rose eyeshadow from the quad on the inner corner of the eyes using a flat eyeshadow brush from Urban Decay.

2. Then, using another flat eyeshadow from Urban Decay, I applied the Golden Orange eyeshadow in the middle of the lid in a patting motion.

3. Taking a MAC 239 brush, I applied the Burnt Red eyeshadow on the outer V, blending it towards the crease.

3. Using a clean MAC 217 brush, I blended the edge of the shadow.

4. To add extra depth, I added a black eyeshadow just on the crease. I applied this with a very small shader brush (no brand).

5. I, then, picked up a little bit of the Burnt Red eyeshadow on my blending brush and applied the shadow on top of the Smashbox Blackout shadow. At this point, I added more of the Golden Orange and Golden Rose eyeshadows again.

6. Using a black kohl pencil liner like L’oreal Voluminous eyeliner, I lined my tightline and waterline.

7. I applied Burnt Red eyeshadow on the lower lid, leaving the inner 1/4 for the Golden Orange eyeshadow. I applied it using MAC 263 brush.

8. I curled my lashes and applied several coats of mascara on top and lower lashes.

9. I also filled in my brows by using Anastasia Brow Powder and MAC 266 brush.

10. I highlighted the brow bone by applying Golden Pearl eyeshadow from the quad using a clean blending brush from QUO.

YSL Summer 2012 eyeshadows

11. For the face, I applied MAC Face and Body foundation in C3 using a foundation brush from Cover FX. I also applied L’oreal Touche Magique concealer under my eyes to get rid of some of my dark circles.

12. Once the foundation dried, I applied YSL Cream Blush in no. 2 on my cheeks using a Sephora foundation brush.

13. I also applied L’oreal Magic Lumi using a clean foundation brush on my cheekbones, on the bridge of the nose and on my cupid’s bow.

14. I applied MAC Blot powder on my T-zone.

15. I also applied Benefit Hoola bronzer on the hollows of my cheeks and on my temples using an angled brush (similar to MAC 168 brush, but mine is no brand).

16. I completed the look by finishing it off with GOSH Nougat Lipstick and L’occitane clear lip balm.