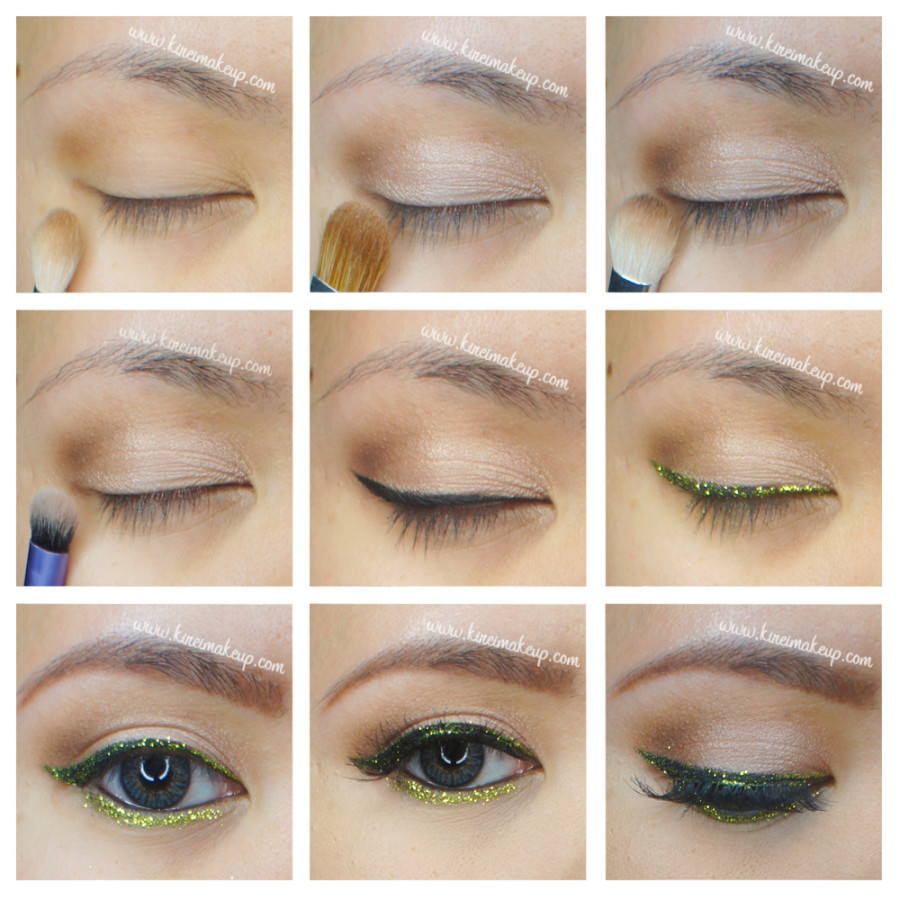
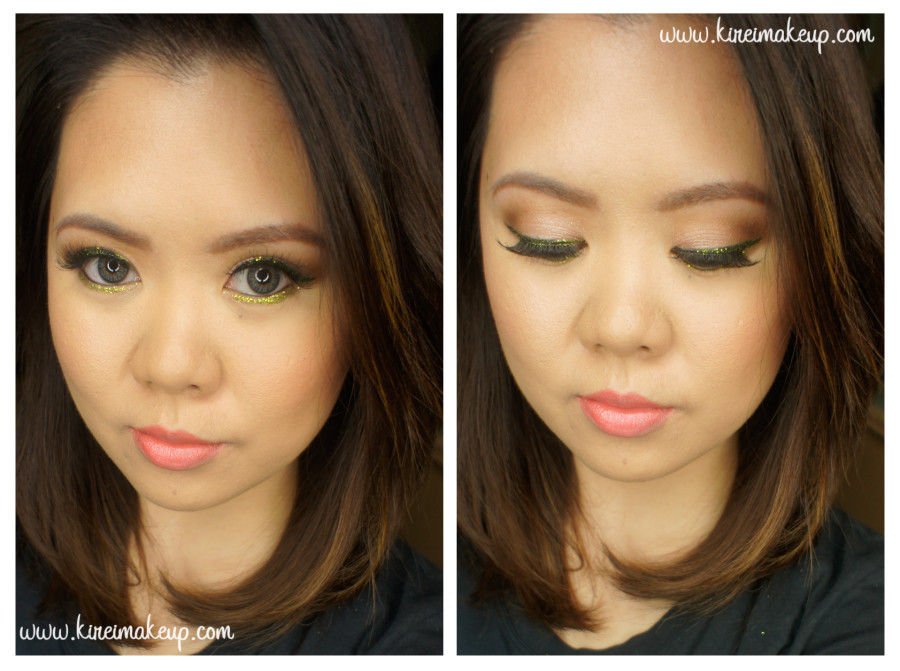
Almost NEW YEAR! I wish everyone a great year ahead! 2014 was fun, it was a bit rocky for me, but nevertheless a good year. 2014 has passed, and here to a great 2015! Hopefully in 2015 everything will go even better! I cannot wait to start 2015, and I have a feeling it’ll be an awesome year! Anyways, since the New Year is almost here, this is my last post of 2014 – a glitter liner tutorial. Last year, for NYE, I did a silver smoky makeup, this time I opted for more glitter!
I wanted to do a slightly more silver glitter, but couldn’t find any, so I decided to do this neon green glitter. Keep in mind that some glitters are not meant for the eye area! The one that I used for this tutorial actually is NOT for the eye area. I decided to use it because I know it won’t irritate my eyes. If you are not sure whether to use glitter or not, please consult the makeup artist/sales person who’s selling you the glitter. Also please be careful if you’re wearing contacts and using glitter on your eyes!
As I said in my previous post, I will not be posting the step-by-step instruction, instead you’ll get the usual photos and product list only. This is a scheduled post, so for any questions, go to my Instagram if you need a quick response.
For the glitter, I applied it onto my eyes using a wet angled eyeliner brush. However, if you can find a mixing medium (e.g. MAC), that’d probably be better since I found that when the water evaporated from the glitter, it became apparent that the glitter started to fall all over my lashes and then to my face.
Another tip when using glitter and it falls on your face, use a tape to pick it up – just press it lightly to your face and it’ll pick up all the fallen glitters. If you have no tape around, use a CLEAN SPOOLY (aka mascara wand) to get rid of the glitter – just brush it in places where the glitter has fallen, use the tip of the wand if it is a stubborn one.
 Please check out my how-to winged eyeliner tutorial if you need help. I also have another glitter eyeliner tutorial that’s slightly easier and simpler.
If you prefer a full on glitter makeup, please check out my Christmas inspired makeup, and last year’s gold glitter makeup tutorial.
Products used
Eyes – Urban Decay Primer Potion; Make-Up Store Smog eyeshadow (crease), Make-Up Store Desert eyeshadow (transition color); Too Faced Chocolate Bar Palette (outer v – Triple Fudge); MUFE Aqua Black; L’oreal Voluminous Smoldering eyeliner; Make-Up Store Northern Lights glitter; Gwiyomi False Eyelashes; Chanel brow pencil
Face – MAC Pro Long-Wear foundation and concealer; MUFE Pro Finish powder.
Cheeks – Chanel Universal Bronzer; Smashbox Halo Blush in In Bloom.
Lips – MUFE Aqua lip pencil #18C


