MAC Viva Glam 1 Look #1

My friend, Elfa, and I went to Tex Saverio Trunk Show last week (photos on instagram). I did Elfa’s makeup, she wanted smoky eyes with red lips, and I actually loved how she looked. So, today I decided to recreate the makeup she wore, but twist it to suit me. I also wanted to use my the Original Viva Glam lipstick (MAC Viva Glam 1), so that look was perfect!

For the eyes, I decided to use my Sleek Makeup iDivine Storm palette since I wanted to do a warmer, coppery smoky eyes. I really seem to like a warmer, redder shades lately. Anyways, if you’re in Southeast Asia and want to purchase Sleek Makeup, you can do so with Luxola. Since this palette doesn’t have the names of each eyeshadow, I decided to number them for this post.

Sleek Makeup iDivine Storm tutorial

image courtesy of Sleek Makeup

Eyes are prepped using Urban Decay Primer Potion.

How-to:

1. I applied no. 1 on the center of my eyelid using a flat eyeshadow brush.

2. Using the same flat eyeshadow brush, I applied no. 2 all over the eyelid.

3. Using a fluffy blending brush, I blended out the edge all the way to above the crease using shade no. 3

4. I applied  no. 4 just on the outer V using a small crease brush.

5. Using a clean blending brush, I applied shade no. 5 under the brows.

6. I applied shade no. 2 along the lower lash line, and no. 6 just on the outer half using a small shader brush.

7. I lined my upper lash line using Kanebo Kate Super Sharp eyeliner, and on the waterline I used L’oreal Voluminous Smoldering eyeliner.

8. I applied a golden eyeshadow (above shade no. 3 – I forgot to add it) just on the inner corner of the eyes.

9. I filled my brows using Anastasia Brow Wiz in Medium Ash and Brunette. Also added Gwiyomi false eyelashes no. 18.

Copper smoky eyes

10. I applied Dior Star foundation on my face using CoverFX cream foundation brush.

11. I highlight and contour my face using Motives Fire sculpting palette. (Will do a highlight/contour tutorial using this palette soon).

12. I set my face using Cover FX translucent setting powder.

13. I added extra highlight using MAC Soft and Gentle highlighter powder. Then, I applied Smashbox Halo Blush in In Bloom.

14. On my lips, I applied MAC Viva Glam 1 straight from the tube.

Ru Paul MAC lipstick

Kat Von D Monarch Palette Tutorial #2

I kept forgetting how amazing this palette is, so I decided to remind myself and created this Monarch palette tutorial. Like I said on my first tutorial using this palette, the eyeshadows are unbelievably smooth and so easily blended. Love it! I promise I’ll do swatches and review for this palette. If you have the chance to grab it, you should really consider it.

Anyways, I’m quite busy this week, as well as the whole September due to work. I think I’ll try to post twice a week, hopefully more. If you do follow me on Instagram, I’ll do micro-blogging from there. Also, don’t forget to comment here or on my twitter/instagram on what you’d like to see more. I know I still have to do a few requests, and I’ll try to get on it ASAP. What a busy month!

Ok, let’s get the tutorial started! I just want to mention that for some reason my camera picks up Wrath really orange this time round. Not sure why, I did reverted back to my glamcor lights, so that might be the cause. Trust me, it doesn’t look that orange in real life. It’s a very pretty warm reddish-brown, almost like a brick color.

warm brown smoky eyes

I prepped my eyelids using Urban Decay Primer Potion.

How-to:

1. Using a fluffy blending brush, I applied Wrath on the outer V and just above the crease.

2. Using a clean blending brush, I blended out the crease.

3. I applied Shadow Box on the outer V, inner V, and crease of my eyelid using a bullet crease brush.

4. Using a flat eyeshadow brush, I applied MAC Tan loose pigment on the center of my eyelid.

5. I applied Urban Decay Jilted eyeshadow (from the electric palette) along my lower lash line using an angled eyeliner brush, then I applied Urban on top of it using a pencil brush.

6. I lined my waterline using L’oreal Voluminous Smoldering eyeliner.

7. I also created a winged liner using Kanebo Kate Super Sharp eyeliner.

8. I filled my brows using Anastasia Brow Wiz in Medium Ash.

9. I applied MUFE Aqua Smoky lash mascara on top and bottom lashes. Also applied Lavie Lash falsies in Snowdrop.

kat von d monarch palette makeup look

10. On my face, I applied Diorskin Star foundation using a foundation brush.

11. I also applied MUFE HD concealer under my eyes.

12. I wanted an extra glow on my skin, so I applied Smashbox Halo Highlighting wand. I applied this highlighter on the high points of my face – cheekbones, bridge of the nose, cupid’s bow, chin, forehead.

13. I lightly dust Cover FX translucent powder to set everything.

14. I applied contour very lightly on my face using Smashbox Contour Kit (they’re selling it again for a limited quantity on their website!).

15. On my lips, I applied MAC Spice lip liner all over, and then applied Clinique Heaping Hazelnut chubby lip stick.

mac tan makeup tutorial

Diorskin Star Foundation Review

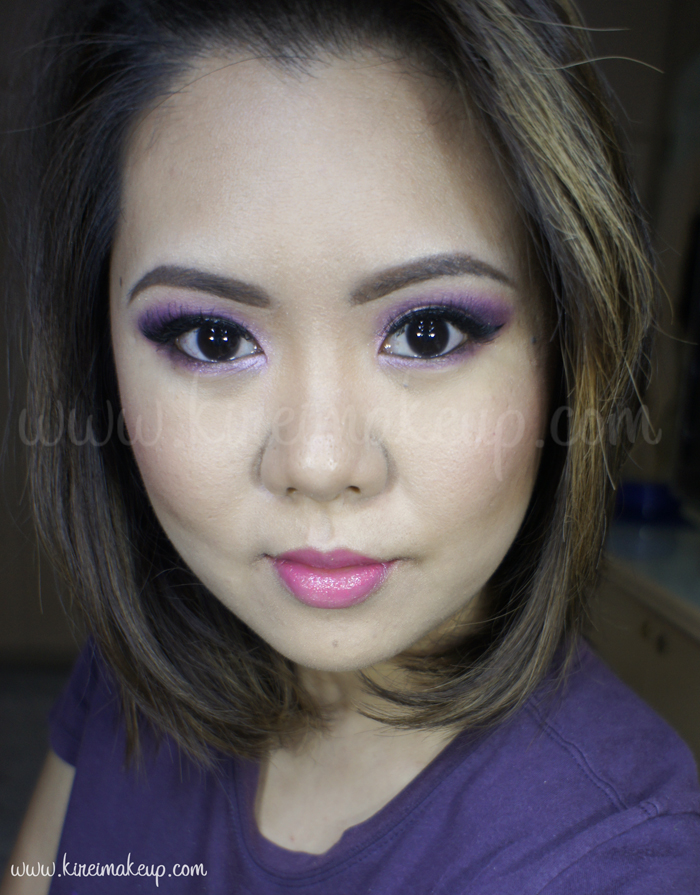
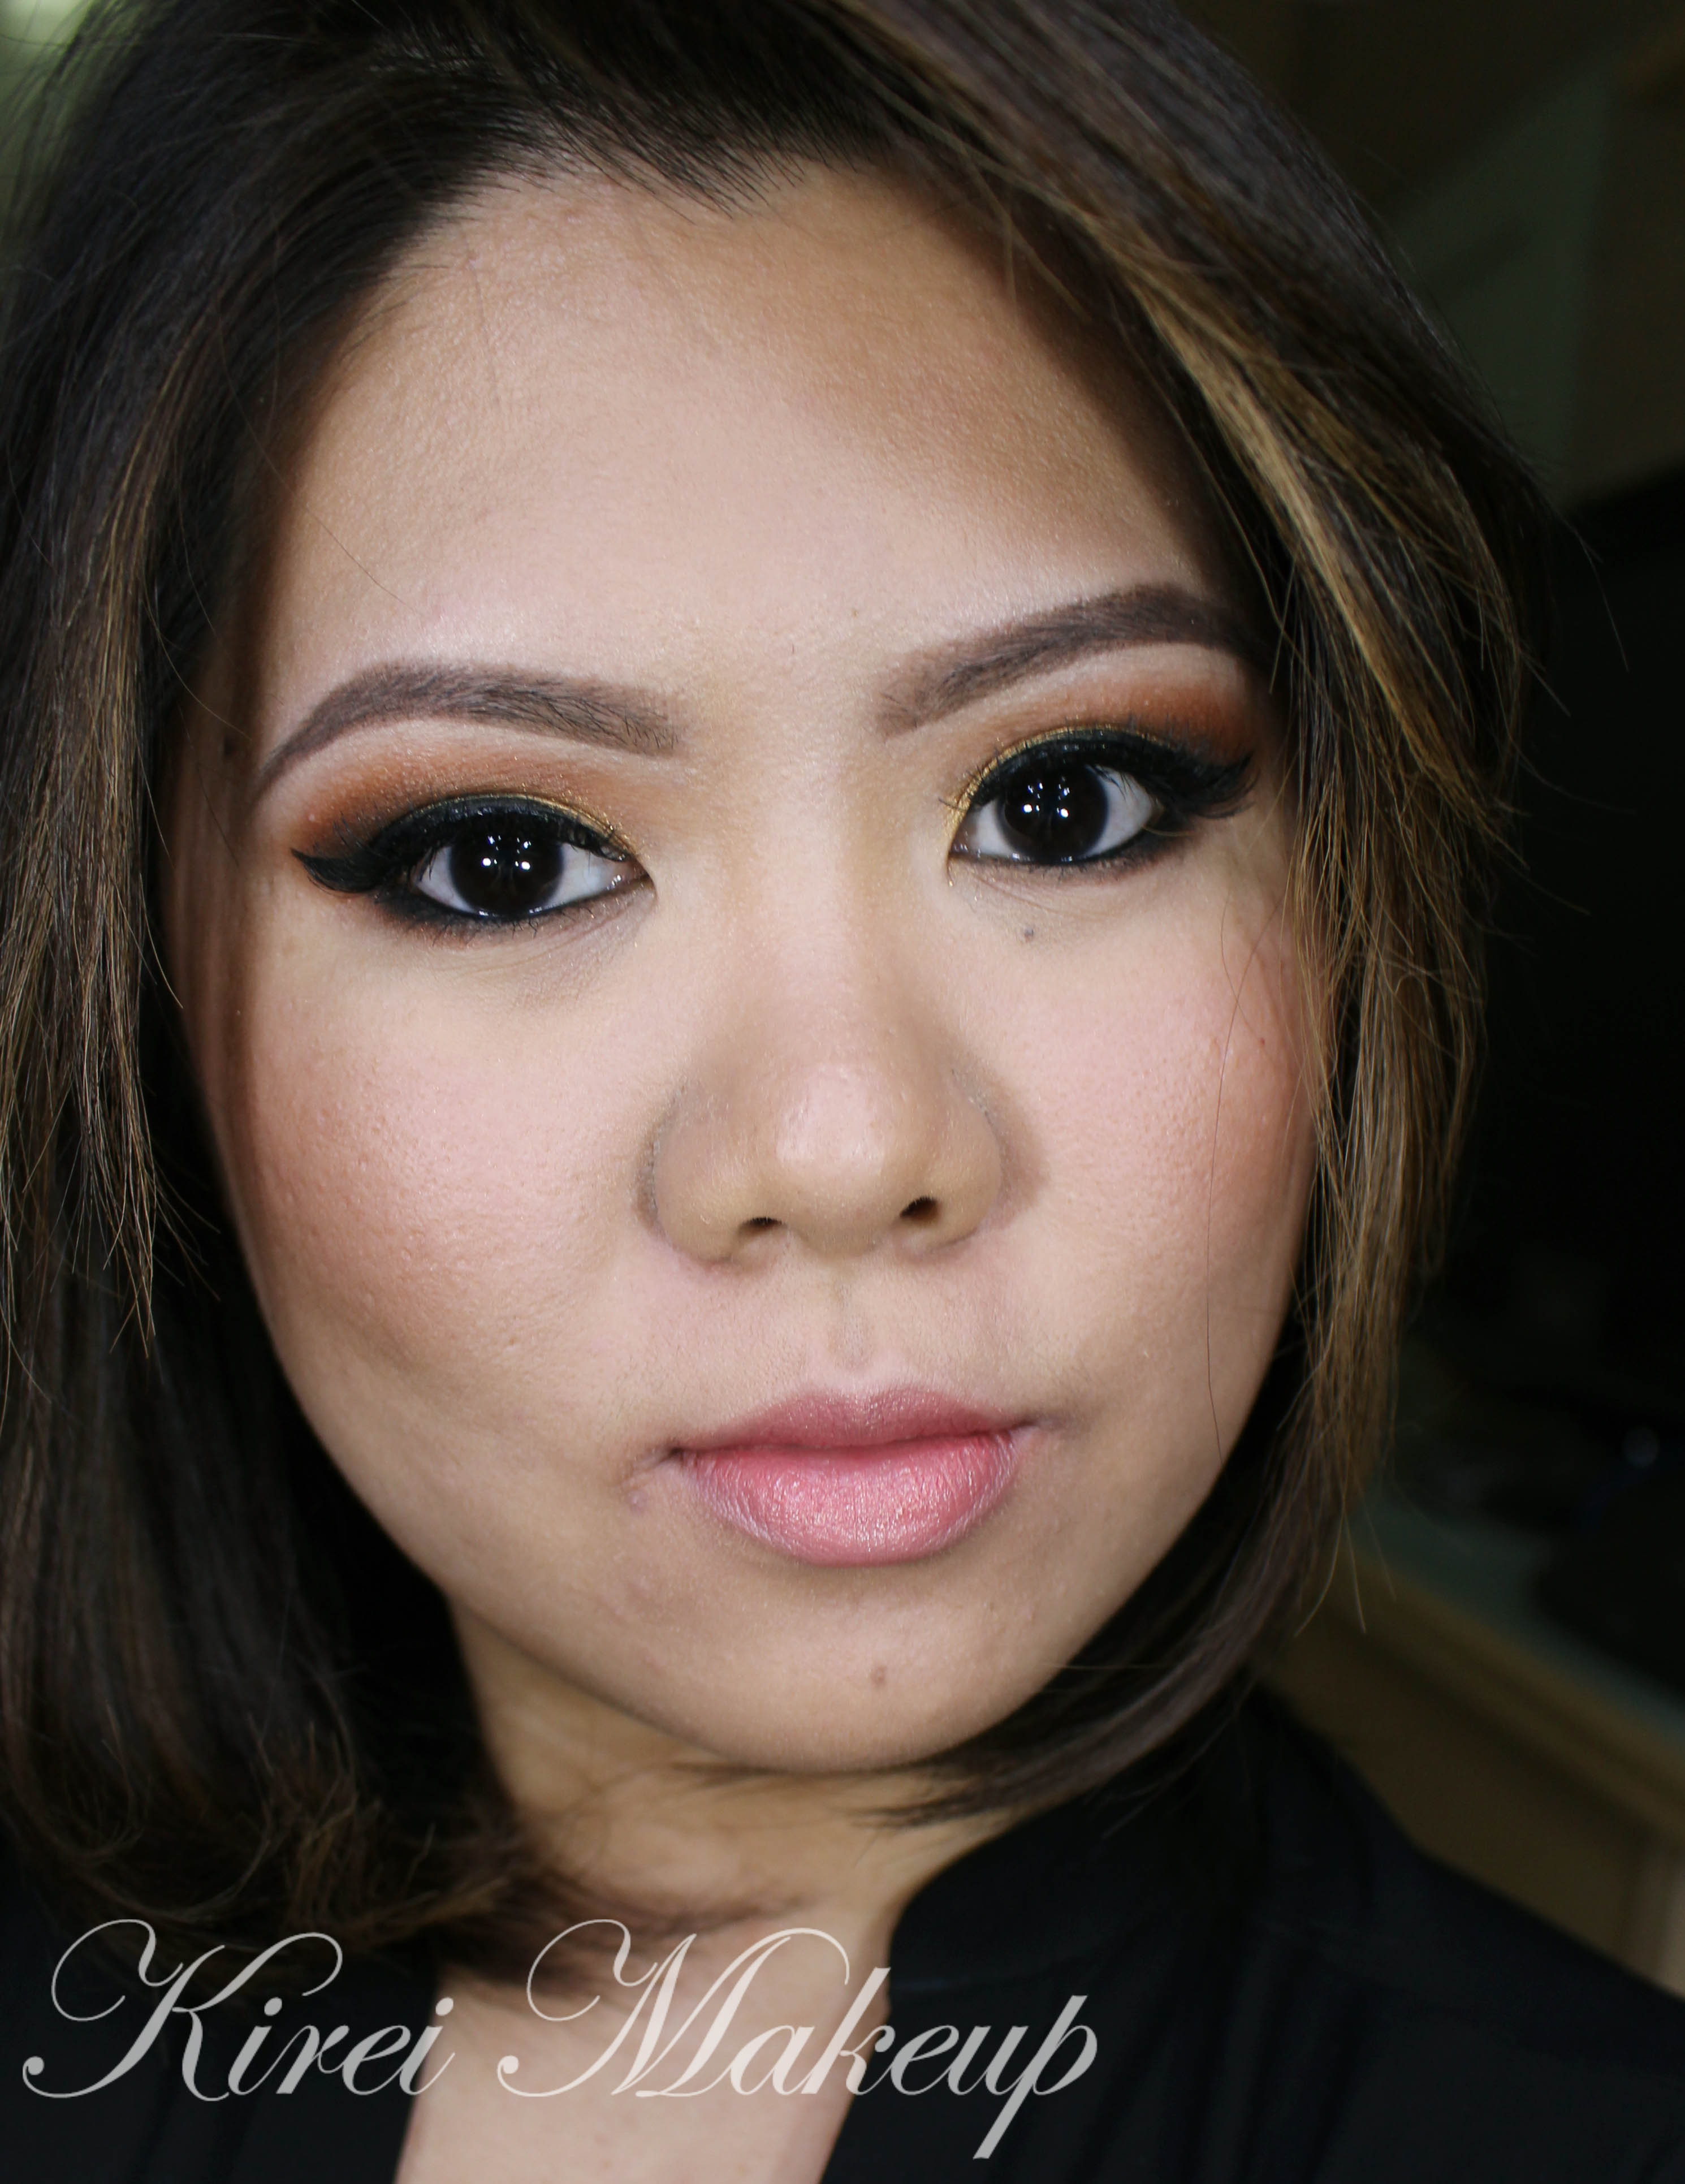
I am back, ya’ll! Ok, so for any updates please go check my Instagram! Anyways, as you all know, I bought a new foundation, and as promised here’s my Diorskin Star foundation review! I’ve been trying to find this foundation all over the web, but it seems that this foundation is totally brand new. Sephora has it but it’s out of stock, and written as “new”. Anyways, when I bought it, the lady who was helping me actually told me they just received this foundation that morning, and I was the first person to purchase it. So, yay me!

Anyhow, I actually have a very high expectation for this foundation due to the hefty price tag, and the fact that it is Dior! I have never tried any of Dior foundation previously, only their eyeshadows and highlighter. So, I was totally curious about this foundation. Without further ado, let’s get on the review!

Diorskin star foundation review

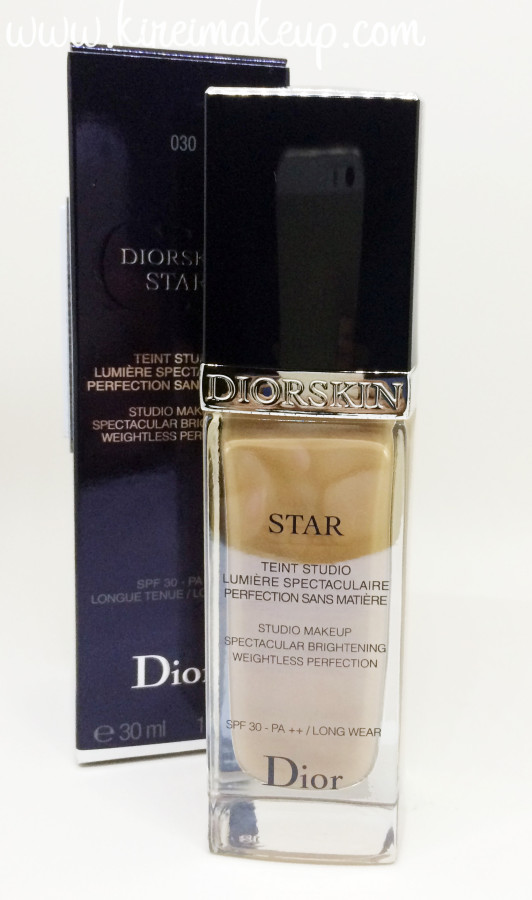
The description below is taken from the leaflet provided inside the foundation box.

What is Diorskin Star Foundation?

“Diorskin Star Studio Makeup Spectacular Brightening Weightless Perfection SPF 30 (is) inspired by the professional illuminating techniques and expertise of its makeup artists. Dior invents Diorskin Star, its 1st brightening foundation: a weightless fluid capable of instantly and over time recreating the spectacular and perfecting light of Dior’s studios.

Innovative formula: a complexion bathed in light. Boasting Light Pulsion technology, Diorskin Star formulas give a whole new dimension to light with 2-fold brightening action.

1. A complexion that is instantly more luminous and visibly evener – a new generation of hollow silica beads captures and diffuses light in a correcting halo with no shine. At the same time, colour-filter pigments adapt to each skin tone and neutralize color imbalances to recreate the perfect light.

2. Day after day, a clarified, purer, more dazzling complexion – anti-“light trap” skincare ingredients target action at the source of the skin’s brightness and radiance, with each application they help reduce the appearance of dark areas, pigment spots and redness.

Innovative Texture: a weightless fluid: with extreme finesse and incredible glide, this fluid boasts an evanescent texture with a barely-there feel that leaves nothing on the skin but a correcting veil of pure light. A texture with a new sensation and flawless coverage, it provides comfort and hold all day long.”

source: Dior leaflet from its foundation box
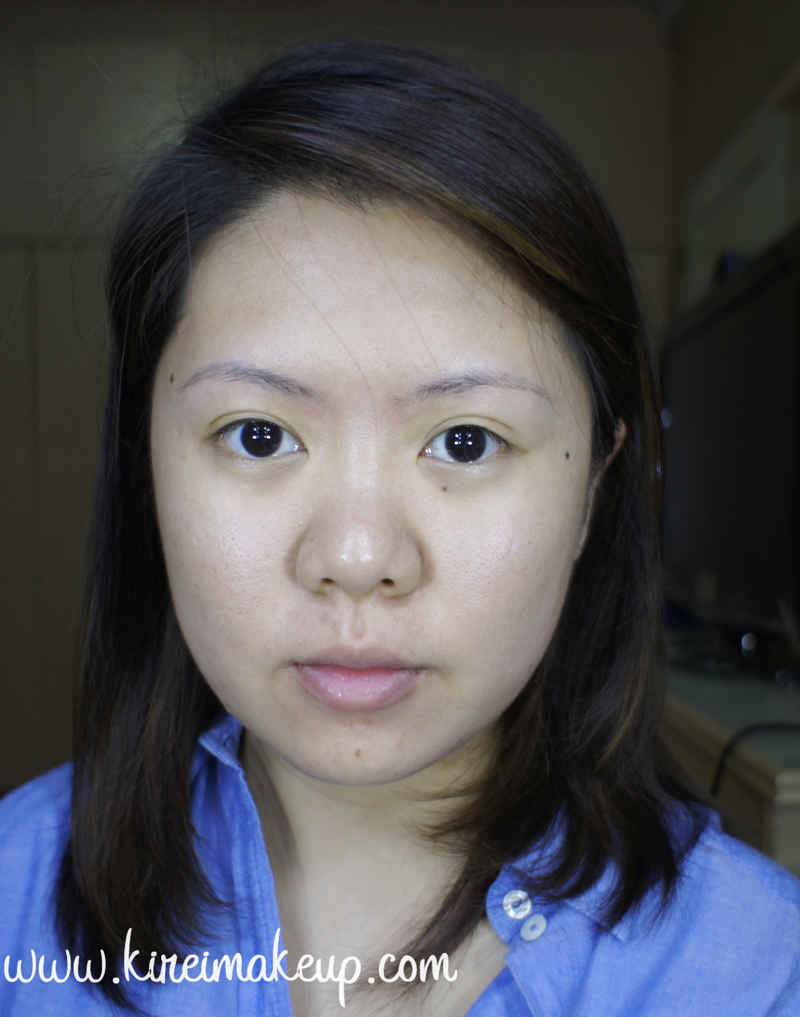
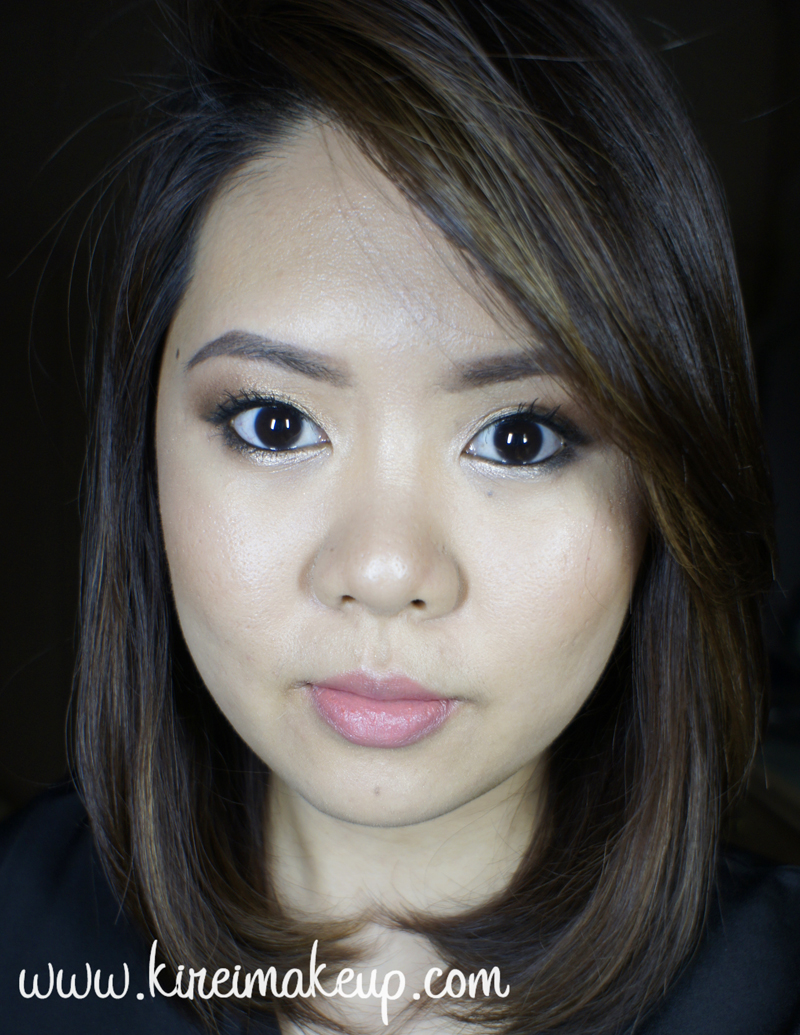
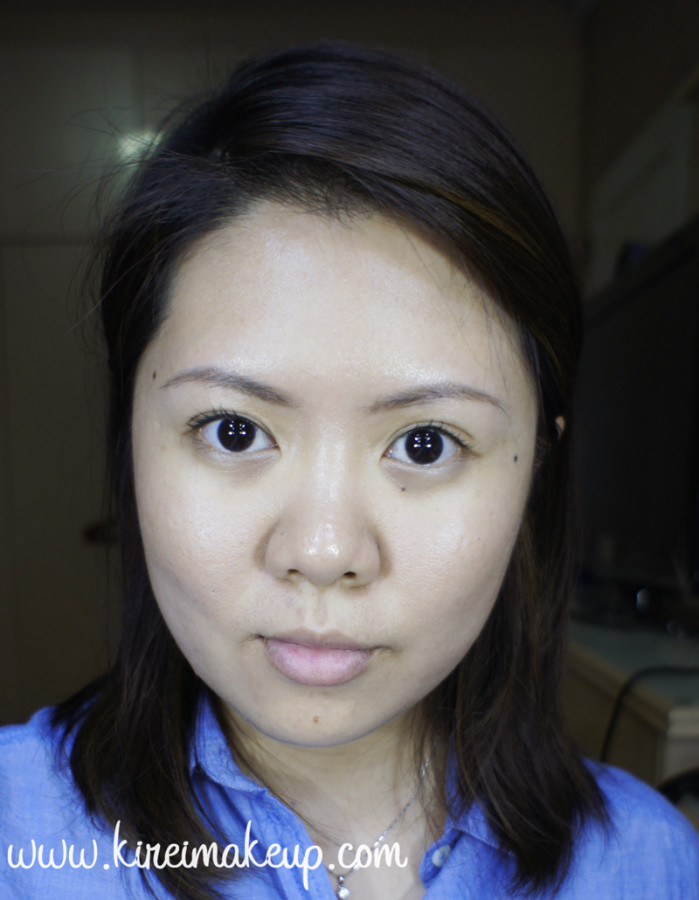
Diorskin Star NC30Bare Face

Just a quick reminder on my shades in other brands: MAC NC25/30, MUFE HD foundation 120, Cover FX cream foundation G40, Estee Lauder Double Wear Light foundation 3.0, Urban Decay Naked Skin foundation 4.0, MAC Face and Body C3, and L’oreal Magic Lumi foundation W2/4.

First impression

I actually love it! I’m quite picky when it comes to foundation, especially since I’m an in-between shade kind of person. I knew I’ll probably be a shade 30 (there was no shade 31 for this line), and I actually told the lady who helped me to try the 30 on my face. She said it was a perfect match. I think it was close enough, but not perfect. I find shade 30 to be of a neutral undertone, so it doesn’t match me perfectly since I have a yellow undertone. It looks slightly pink, but it’s bearable.

*UPDATE: a few readers have been telling me that they were able to find shade 31, if you can find shade 31 go for it! If I can find shade 31, I’ll probably ditch 30 and go for 31. Like I said, 30 is not a perfect match, but it’s workable for me*

UPDATE (JULY 11, 2015) – I FOUND SHADE 31 AND BOUGHT IT! It matches my skin a lot better now since it has a yellow undertone! Perfection! Absolutely beautiful, especially since I’m a bit more tanned now in the Summer.

Anyways, getting back on the foundation, I love how it’s very light when I put it on my face. It doesn’t feel sticky, nor tacky. It just feel absolutely like my skin, like it’s barely there. Since I expected this foundation to be light-weight, I didn’t expect much coverage. I think this foundation has a light to medium coverage. I didn’t mind it at all. It covers just enough, but still let my skin shows through.

I was expecting some kind of light-reflecting particles on this foundation, since they claimed it was “brightening”. To my surprise, there wasn’t any particles that I can see, no shimmers, no glitters, just normal foundation. It reminds me a lot of my old favorite foundation, the Lancome Teint Miracle.

I think this foundation might be suitable for all skin-type. I have a combination skin, and this foundation works well on both my dry patches, as well as the oily areas. It doesn’t look overly dewy/glowy, and it doesn’t cling to any of the dry patches.

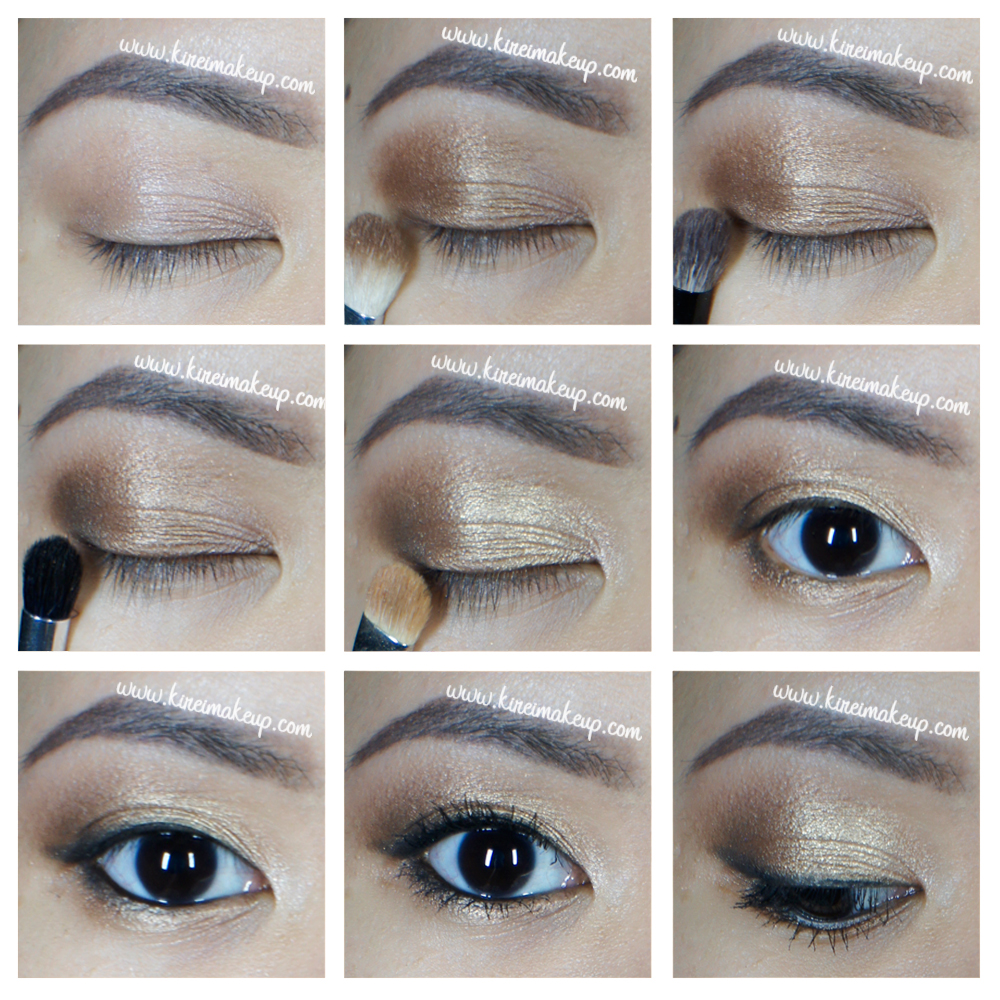
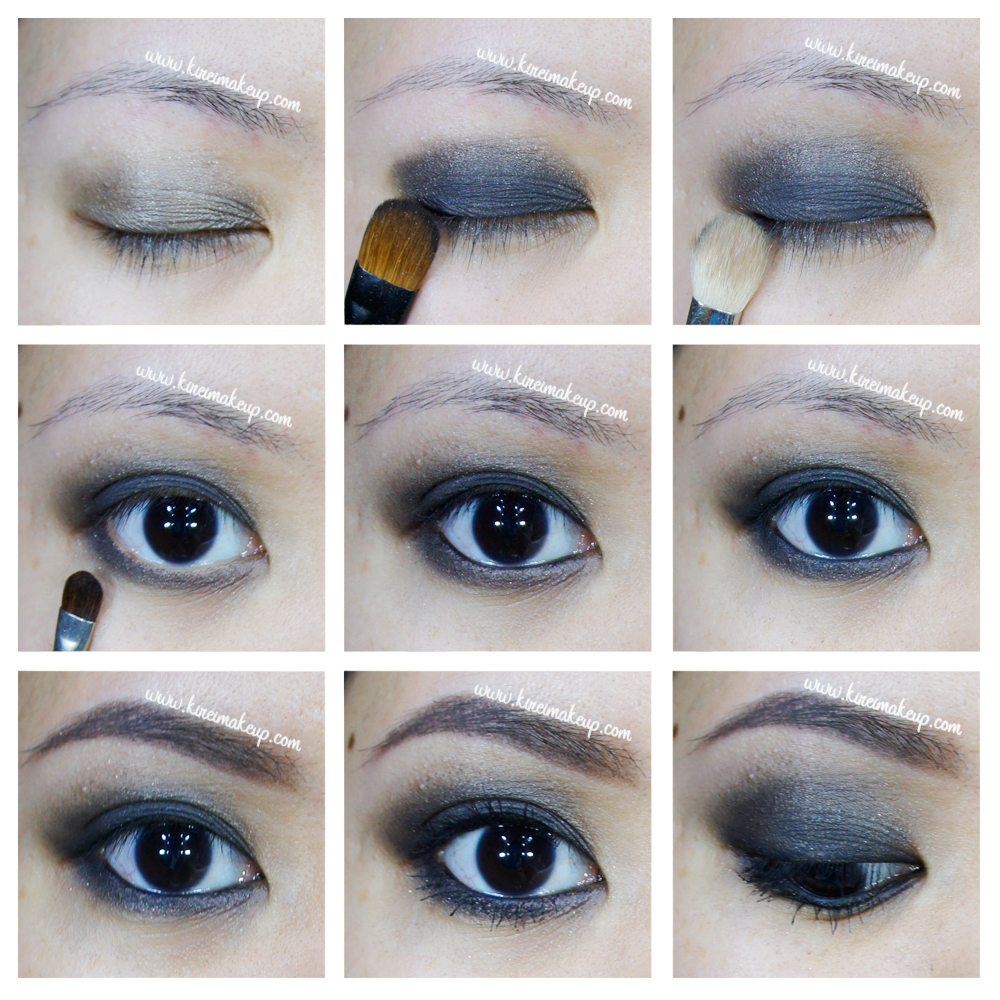
I’d like to mention that I applied this foundation using my favorite Cover FX cream foundation brush. For the entire face, I only used 2 pumps of foundation. Even then, I still have quite a bit of excess foundation left.

Dior star foundation before and after
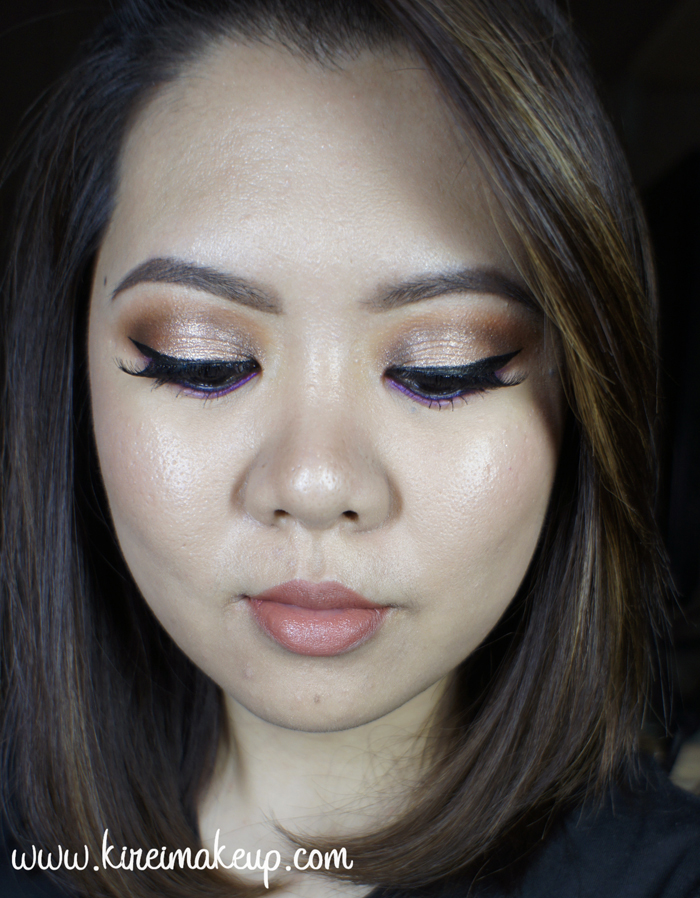
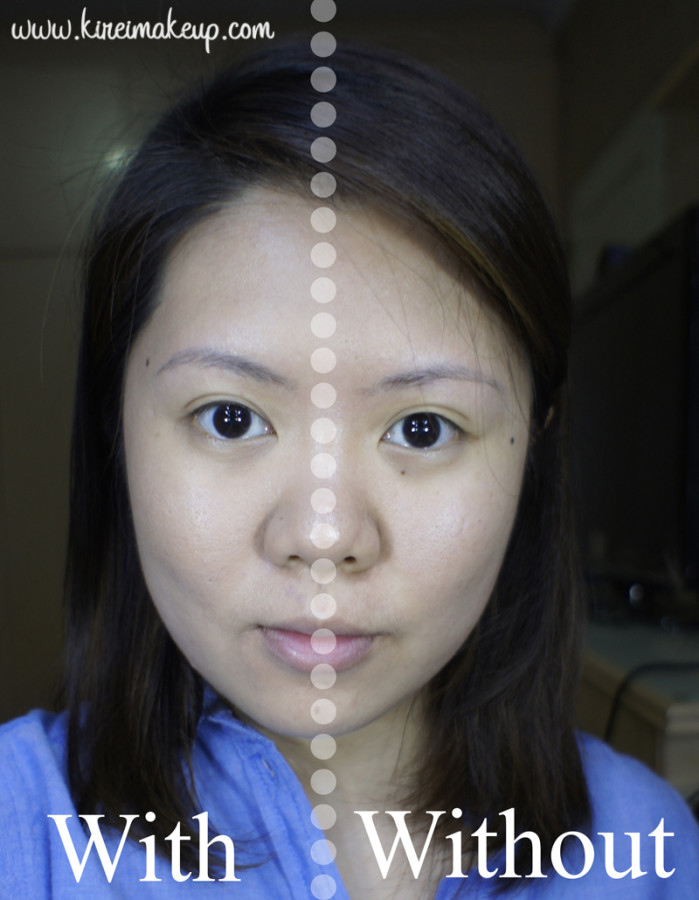
Left: with foundation; Right: bare face
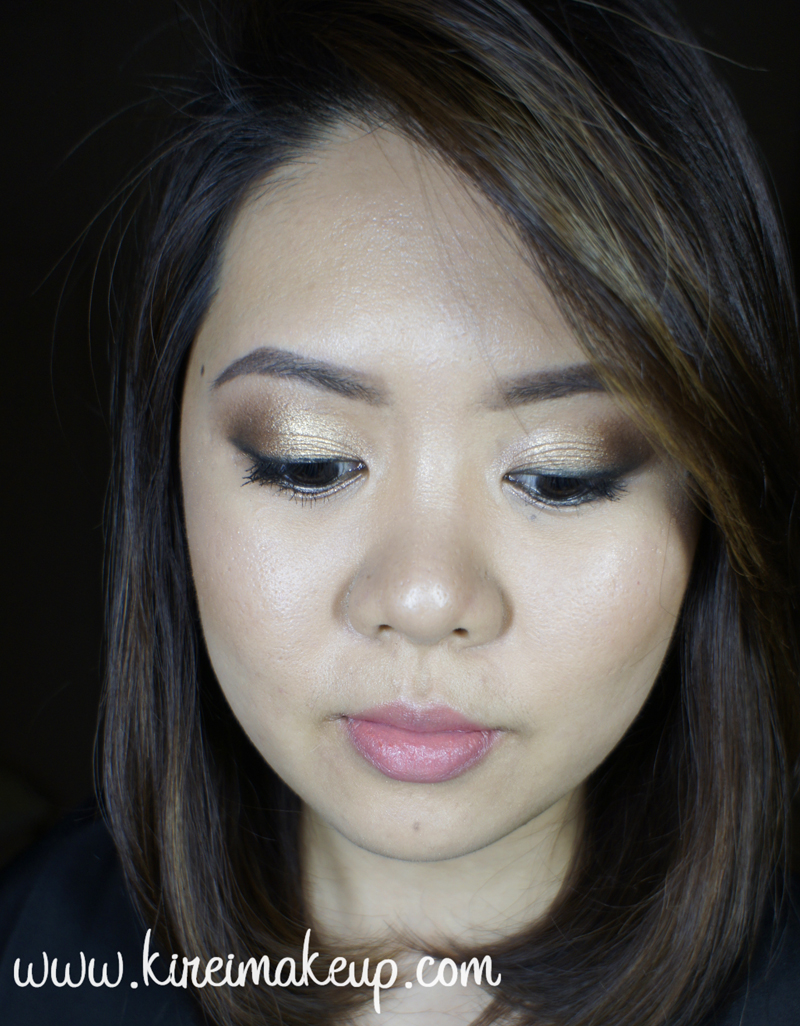
Coverage

As mentioned above, I think this foundation has a light to medium coverage. If you are looking for a heavier coverage, then you might want to look at another foundation. This foundation covers just enough, but as you can see from the above pictures, it doesn’t cover everything. The redness was covered well enough, but my acne scars (e.g. above my lips) is still noticeable.

Finish

Dior claims that this foundation has a natural “barely-there” finish. I’m not sure if this is a “new texture” as they claimed, but again, it does feel very natural and weightless. It doesn’t have a glowy or dewy finish, it just looks like my skin but the better version of it. Do you guys get what I mean? It just looks like my skin, but better!

I actually do have to give credit to this foundation. When I wore it today, I received a lot of compliments regarding my skin. Actually my cousin asked me if I’ve been to a dermatologist for a new skin-care regime since my skin looks really smooth and flawless. The fact that people thought my skin looks great meant the foundation does its job!

No one came up to say “oh you wore makeup today”, all of them actually didn’t even notice I wore foundation at all. In fact, I don’t usually wear makeup, so when I do, everyone at office notice it. Today, however, I had this foundation on, brows filled, a bit of blush, and some mascara, and everyone complimented only on my skin. Isn’t that awesome?

Shades

7 shades available in Sephora North America. I’m not sure how many shades Sephora Singapore carries. When I bought it, they literally was putting it out of the boxes on to the shelves. So, I didn’t get to see if they have all the 7 shades or not.

The 7 shades are: 010 (Ivory), 020 (Light Beige), 021 (Linen), 030 (Medium Beige), 033 (Apricot Beige), 040 (Honey Beige), 050 (Dark Beige), 070 (Dark Brown).

I got shade 030, which has a neutral undertone. As mentioned above, I didn’t mind it even though I have yellow undertone, since the difference in undertone is barely noticeable. I’ve put a picture of me with a natural light while wearing this foundation on Instagram so you guys can see that the foundation still match me pretty well.

Diorskin star before after
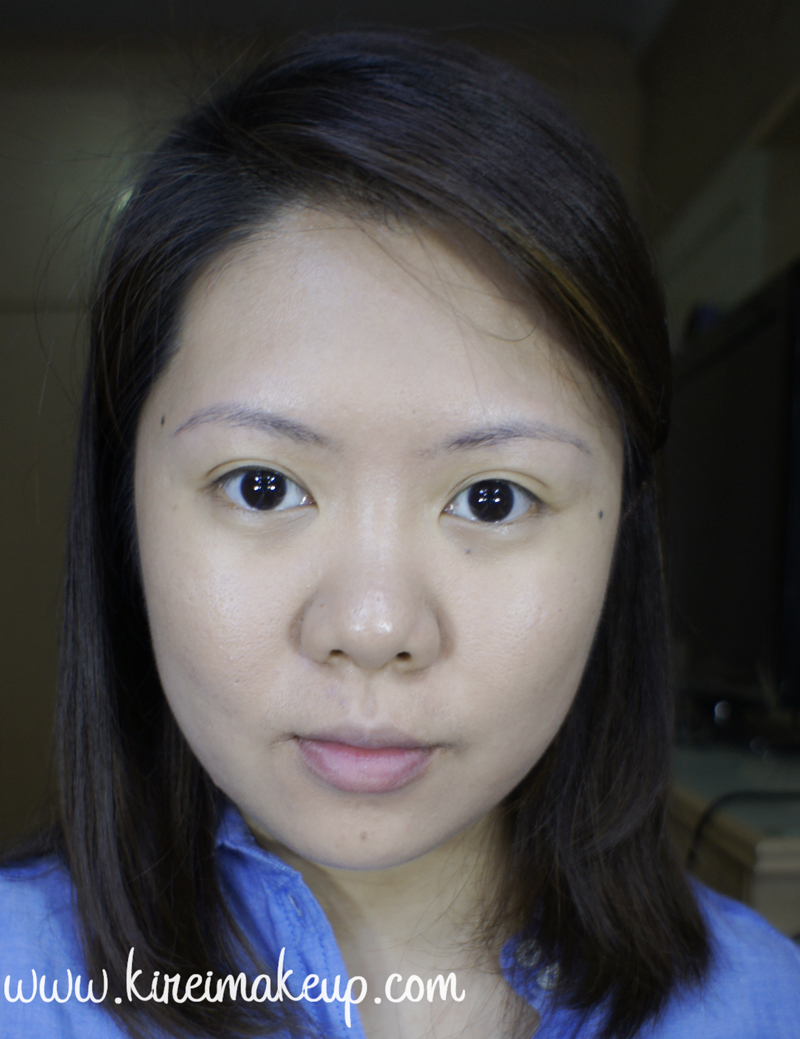
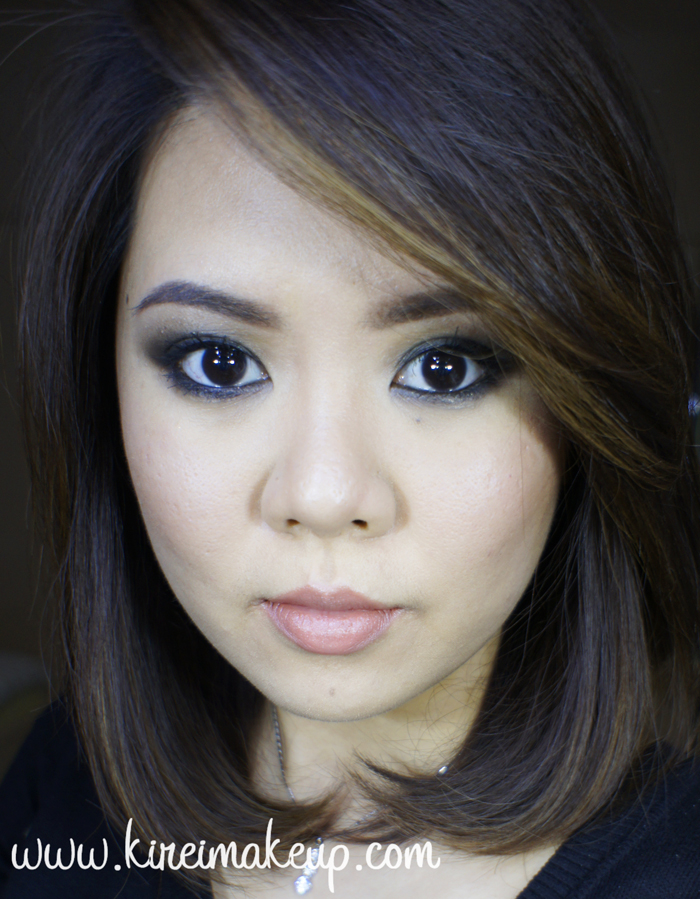
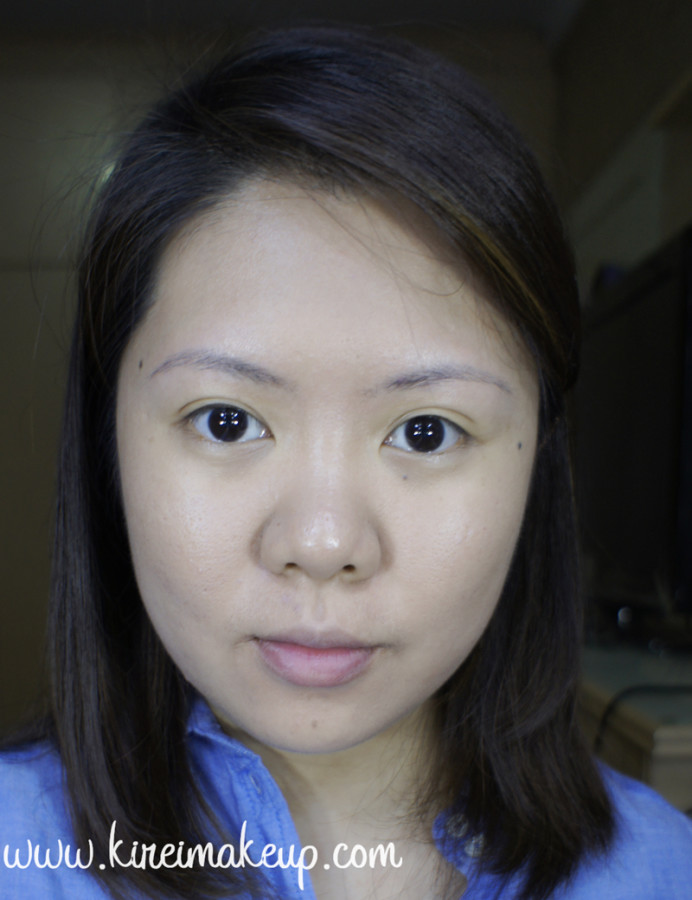
Foundation on whole face – taken at 10am

Longevity

I started wearing this foundation at 10am. I didn’t set it with powder since I want to see how long this foundation will actually last without being set. I took the last picture (see below) at 9pm. As you can see within the 11-hour time frame, the foundation seems to have last the whole time.

I noticed I looked visibly oily on my T-zone, but that’s to be expected since I have a combination skin plus I didn’t set my face. Also, the acne scars above my lips were visible after 11-hour, but that’s because I had my meals and wiped my mouth with napkins. So, the foundation was transferred to the napkins when I wiped my mouth.

Other than that, I think the foundation looked pretty intact after 11-hour. It did not settle on my pores, it did not oxidizes, and it still maintains that natural finish even after 11-hour.

Packaging

Oh, you sweet beautiful packaging. I feel like half of the price goes to the packaging. Dior truly knows how to make beautiful product with beautiful packaging. Love the glass bottle, love everything about that glass bottle. It just looks so luxurious and gorgeous. This foundation comes with a pump, so there’s no need to pour the foundation out. Just pump it twice to cover your entire face and neck.

Price

I bought this in Sephora Singapore for SG$78. In Sephora website (.com and its canadian part) they’re selling it at $48. Let me say how I’m super upset that I’m not in Canada right now.  What a big price difference between Asia and North America Sephoras. Not sure how much this would be in Indonesia, probably will be expensive too!

Diorskin star foundation NC30Taken at 9pm

Pros

  • My skin looks amazing.
  • Definitely not cakey, very natural, and light-weight.
  • Doesn’t feel heavy at all.
  • Fragrance doesn’t bother me, has a faint scent.
  • Lasted the whole day.
  • Doesn’t have any shimmers.
  • Doesn’t settle on my pores, thus not making it look big.
  • Beautiful, luxurious packaging

Cons

  • Expensive in Asia! (looking at you Singapore!!!)
  • Limited amount of shades – only 7. I find mine to be slightly on the neutral side, while I’m actually yellow. So, this shade did not match me perfectly.
  • Not for those looking for a full coverage.

The reason why I am not putting it on my Product of the Week is because I have only tried this foundation once. I think it’ll probably go on my favorite foundation list soon enough, though!

Disclaimer: I am not affiliated nor endorsed by Dior or Sephora. I bought this product using my own money. All opinion, review, and pictures are my own unless otherwise noted. My review is based on my own experience, and my own skin. I am not a dermatologist, nor an expert on skin care. Please note that results might vary on different skin types. Do a skin patch test should you worry for any skin reaction. I bear no responsibility should any issues arise on your own skin.

Daytime Bronze Smokey Eyes

Today’s post, Daytime Bronze smokey eyes, was actually a pending post from last week. I actually did this look after I did my brows video. Since I was uber busy last week (Shu Uemura competition, work and stuff), I didn’t have the chance to post this tutorial up. I also want to mention that I will not be posting any tutorial until end of this week, so I apologize for missing again. However, do follow me on Instagram to find out what I’m up to! Instagram has been a place for me to micro-blog almost daily.

Anyways, for this look was a request over on Instagram by Sammie. She wanted me to do an easy golden smoky eyes that she can wear during daytime. The key to this look is to keep the black to a minimum if you are going to wear it out for a day makeup. The usual smoky eyes are quite strong and dark, meawhile for this look I kept it quite light and not as intense. I smudged a lot of the black out, and skipped my usual black winged liner. Instead, I opted for a smudged eyeliner using powder. I kept the black on the waterline & tightline, but if you’re afraid that this will close your eyes up you can skip it. I just love black eyeliner on waterline & tightline for smoky eyes.

bronze makeup tutorial

I used Urban Decay Naked 1 palette for the eyeshadows. You can also find these shades in single pot from Urban Decay.

Brows are filled using Anastasia Brow Wiz in Medium Ash and Brunette.

How-to:

1. I applied Urban Decay Primer Potion in Sin all over my lid using my ring finger.

2. Using a fluffy blending brush, I applied Urban Decay Smog on the outer half of the lid, all the way to the crease.

3. I used Smashbox bullet crease brush to blend out the edges.

4. Using Sephora crease brush, I applied Urban Decay Darkhorse just to deepen the outer corner.

5. Using a shader brush, I applied Urban Decay Half-Baked on the eyelid.

6. I applied Smog on the outer half of the lower lash line, and Half-Baked on the inner half using an angled eyebrow brush.

7. I applied Urban Decay Creep along the upper lash line and outer third of lower lash line using an angled eyeliner brush.

8. I lined my waterline and tightline using L’oreal Voluminous Smoldering eyeliner.

9. I curled my lashes and applied Make Up For Ever Aqua Smoky Lash mascara on both upper and lower lashes.

daytime makeup

10. For my face, I applied Smashbox Halo Liquid foundation and Cover FX cream foundation brush.

11. I lightly contoured my face using Benefit Hoola bronzer, and added highlight using MAC soft and gentle highlighter.

12. I applied Benefit Coralista blush on my cheeks.

13. On my lips, I applied Shu Uemura Lip Tint Gelato in 01.

golden bronze smoky eyes

[Updated] Brow Tutorial Video

I actually wanted to post this Brow Tutorial video tomorrow, since I do have another post lining up to be published. However, I got excited since this is my first video ever using my own face. It took me a lot of years to actually pluck the courage to do a video. Anyways, the quality might not be as good as other great youtube gurus, but please take it easy with me. I’ll try to improve slowly, and I look forward to read comments from you. I did not talk or do a voice-over since I’m not comfortable doing that just yet. However, again, in the future when I get more comfortable in front of a camera, I’ll start talking or doing voice-over.

So, I asked on Instagram, what kind of tutorials would you guys like to see me do. The majority of the comments said to do a brow tutorial. I have done a brow pictorial before on my How-to Fill in Brows post, but I guess seeing picture and seeing me doing it is quite different. Just keep in mind that this is how I DO my brows.

I cannot emphasize enough how each person has different shape and this might not work for you. However, what you can take from this tutorial is how I draw each hair individually. This is the most important part of filling in your brows. Light feathery stroke is the key! Try not to press too hard on your eyebrows to avoid making it look too thick.

For this tutorial, I assumed you already know or have gotten your brows shaped (waxed/tweezed/threaded). If you have not gotten your eyebrows shaped before, take a look at my Brows 101 post. If you are not allowed to shape your eyebrows, the best thing I can suggest is to trim your eyebrows using a clean spooly and a cuticle scissors. This way, you can see the brows’ shape, and fill it in lightly using brow powder, emphasize on LIGHTLY.

For a day makeup, I usually do something similar to my Shu Uemura Brow Pencil post.

Enjoy the video, and comments are welcome!


NARS Mekong Smoky Eyes (NARSissist palette)

Who doesn’t love a good smoky eyes? I sure do! I’m sure my friend, Finency, loves it too! She showed me this picture on Instagram, and it showed a smoky eyes using NARS Mekong eyeshadow. I love how simple, easy, and definitely I’ll wear this for a night out.

I skipped the whole false lashes so this look is more grungy, and more me. I don’t usually wear falsies, so this really stay true to how I’d wear my smoky eyes. I also filled my brows without shaping it using any concealer. Again, just want to stay true to how I usually do my makeup. As I said, it’s very simple and quick. No fuss, sexy, and sultry. I like my makeup to be as simple as possible. This is just how I prefer to do my makeup, but if you like more of a glam look you can take a look at my other tutorials under smoky eyes.

For this tutorial, I used NARS eyeshadows from the NARSississt palette. I’ve done tutorials, and review of this palette. Please feel free to check them out.

NARS Mekong tutorial

How-to:

1. I prepped my eyelids by applying a cream-base eyeshadow. I used Smashbox limitless 15-hour cream shadow in Stone.

2. Using a flat eyeshadow brush, I applied NARS Mekong eyeshadow all over my eyelid. The camera didn’t pick it up, but there’s lots of gorgeous golden flecks on my lids.

3. Using a fluffy blending brush, I applied NARS Madrague I on the crease to diffuse the color out.

4. I applied NARS Mekong on the lower lash line using a small shader brush.

5. I lined my waterline, tightline, and upper lash line using L’oreal Voluminous Smoldering eyeliner.

6. Using an angled eyebrow brush, I applied NARS Pandora II along the upper lash line. I kind of winged mine a little, but you don’t have to.

7. I filled my brows using Anastasia Brow Wiz in Medium Ash.

8. I curled my lashes and applied MUFE Aqua Smoky Lash mascara on both upper and bottom lashes.

NARS Mekong smoky eyes

9. On my face, I applied Smashbox Liquid Halo Foundation using CoverFX cream foundation brush.

10. I highlighted (under my eyes, bridge of my nose, cupid’s bow, chin, & forehead) my face using YSL Touche Eclat.

11. I set my face using Cover FX translucent powder.

12. I lightly contoured my face using Smashbox contour palette.

13. On my cheeks, I applied Chanel Blush de Horizon.

14. I filled my lips using MAC Spice lip liner, and Clinique Heaping Hazelnut Chubby Stick lip balm.


Products used

Eyes – Smashbox limitless 15-hour cream shadow in Stone; NARSissist eyeshadow palette (Lid: Mekong, crease: Madrague I, liner: Pandora II); Anastasia Brow Wiz in Medium Ash; MUFE Aqua Smoky Lash mascara

Face – Smashbox Liquid Halo foundation; YSL Touche Eclat; Cover FX Translucent Powder; Smashbox contour powder; Chanel Blush de Horizon

Lips – MAC Spice lip pencil; Clinique Heaping Hazelnut chubby stick

White Eyeliner Makeup Tutorial

Ok, so this White Eyeliner makeup tutorial is actually my World Cup 2014 England Inspired Makeup, as requested by Nurina over on facebook. However, since World Cup is over, I didn’t want to title it as England inspired makeup. Not to mention, I feel like this look can be worn during Indonesia’s Independence Day which is coming up next month, or any country with a red/white flag.

Anyways, I think ever since I tried out the white eyeliner look in my Netherlands inspired makeup, I’ve been quite a fan of white winged eyeliner. It’s a fresh outtake on my usual black winged eyeliner, not to mention it does brighten up the eyes quite a bit. For my World Cup 2014 makeup series, please check my Brazil, Netherlands, Argentina, and Germany inspired makeup posts.

For this white eyeliner makeup tutorial, I wanted to show you how you can use tape to create your winged liner. I’ve done this before in my other tutorial, but just going to show it again. That tape will create a very clean edge for your eyeliner. All you have to do is run a diagonal line from the outer tip towards the inner corner of your eye. For a detailed tutorial on how to create winged eyeliner, please check my how-to post.

The only word of caution I’m going to mention again, is to be very careful when applying mascara. If you’re not careful you might end up with black spots from the mascara all over your eyeliner. The easiest way to fix this is to let the mascara dry first, run a clean cotton bud over the mascara spots, and then run the white eyeliner on top of it again.

white eyeliner makeup

How-to:

1. I applied MAC Pearl cream base all over the eyelid for some shine.

2. Then, I realized it started on crease on my eyelid, so I set it with Revlon Sand eyeshadow.

3. I placed a tape on my skin to create an angle for my eyeliner.

4. Using Revlon Photoready Kajal eyeliner in Carbon Cleopatra, I created a diagonal line from the outer corner of my eye towards the inner corner. I just dragged the pencil eyeliner on my lid, and filled in any gaps.

5. I set the eyeliner using Sleek Makeup iDivine Ultra Matte v1 Brights in Pow using an angled eyebrow brush.

6. I removed the tape, curled my lashes and applied MUFE Aqua Smoky Lash.

7. I applied Gwiyomi false eyelashes no. 3 for added drama.

8. I filled my brows using Anastasia Brow Wiz in Medium Ash.

white eyeliner makeup tutorial

9. I applied Giorgio Armani Maestro foundation using my fingertips all over my face. (Such an amazing foundation, btw!)

10. I applied Bobby Brown under eye brightener in Peach, and blended it out using my finger.

11. I set my face using NARS setting powder.

12. On my cheeks, I applied Smashbox Halo Powder blush in In Bloom.

13. For added shine, I applied MAC Soft and Gentle on top of my cheekbones, and the bridge of my nose.

14. I very lightly contoured my face using Smashbox contouring palette.

15. I lined and filled my lips using MAC Redd lip liner, then added L’oreal Super Lustrous lipstick in Ravish Me Red.

red lips makeup tutorial


Very Purple with Sleek Makeup Candy Palette

As mentioned in my previous post, I wanted to share this tutorial with you guys! Today’s look uses Sleek Makeup Candy Palette (Limited Edition) that I bought from Luxola! Don’t worry, the palette that I’m giving away is totally brand new, and unused!

Oh, you didn’t know about the giveaway that’s going on? Check out my Sleek Makeup Candy Palette Giveaway post for details! This giveaway will last until Thursday (June 12, 2014) at 11.59pm.So, hurry up and check out that post for more info!

I also want to mention that since my images were getting used without my permission nor credits, I’m putting a huge watermark in the middle of all my pictures from here onwards. I do apologize if the watermark is bothering the picture, but I have to protect my work. I do want to thank all of you who have been kind enough to let me know whenever someone used my pictures (aka plagiarism). I appreciate all your kindness! A big thank you, hugs, and kisses for you who have been supporting me!

Anyways, let’s get the tutorial started!

sleek makeup idivine candy paletteEyelids are prepped using Urban Decay Primer Potion in Eden. All shades for the eyes are from Sleek Makeup iDivine Candy Palette.

How-to:

1. Using Smashbox bullet crease brush, I applied Flump slightly above my crease.

2. Using a small blending brush, I applied Parma Violet on the outer V and the crease. You can apply this using a small shader brush for a more precise application.

3. Using the same bullet crease brush as step 1, I blended out Parma Violet to remove any harsh edge on the crease. I also slightly winged the outer part.

4. Using a flat eyeshadow brush, I applied Aniseed all over my eyelid.

5. Using a small shader brush, I applied Bon Bon on the inner corner of my eyes, and then I applied Parma Violet along the lower lash line.

6. I used my face powder (MUFE 118 Pro Finish) and a blending brush under my brows, blending it into the purple shades slightly to remove any harsh edge.

7. I lined my upper lash line using Kanebo Kate Super Sharp Eyeliner. On the waterline, I applied black eyeliner pencil.

8. I curled my lashes, applied mascara, and then applied Ardell Demi Wispies lashes. (As you can see, Ardell demi wispies falsies are my current favorite lol).

9. For the brows, I applied Anastasia Brow Wiz in Medium Ash. I lightly set it with Anastasia Brow Powder duo in Brunette.

sleek makeup candy tutorial

10. For my face, I applied Motives Fire highlight/contour palette. I applied the lightest highlight color on the high planes of my face – cheekbones, bridge of the nose, cupid’s bow, forehead, chin, below hollows of the cheeks, and under my eyes. I applied the darkest contour color on the hollows of my cheeks, sides of my nose, and temples. I blended them out using a damped beauty blender sponge and MUFE HD Foundation in 118.

11. For my cheeks, I applied Smashbox Halo blush in In Bloom.

12. For the lips, my new favorite, I applied L’oreal Color Riche Extraordinaire Liquid Lipstick in Rose Symphony

Summer Lips with NARS Schiap

I posted a picture of this look on Instagram, and asked if anyone would like to see it since I don’t actually love how it turned out. However, lots of my followers on Instagram commented to post this tutorial, to my surprise. I think my mistake with this look is with the eyes. May be for future look using NARS Schiap lipstick, I wouldn’t be using the NAKED 3 on my eyes.

Since my Instagram followers love the result, I want to post this up for them! I’d suggest skipping the eyeshadow entirely and just use the winged liner on the eyes to complement the lips. If you want to figure out how to apply winged eyeliner, please check my how-to winged liner post!

I’m just going to skip the step-by-step on the eyes, and instead will list all the products used below.

urban decay naked 3 tutorial

Products used

Eyes – Urban Decay Naked 3 palette (Lid: Buzz, Above crease: Factory, Crease/lower lid: Nooner); L’oreal Super Liner Ultra Sharp Tip; Anastasia Brow Wiz in Medium Ash; Ardell false eyelashes in 110.

Face – Cover FX cream foundation in G40 as base; Cover FX N110 as contour.

Blush – NARS Matahari.

Lips – NARS Schiap.nars schiap

Kat Von D Monarch Palette Makeup Tutorial

A new tutorial! As you all know from my Instagram, I just recently posted a sneak preview of today’s tutorial there. I used my brand new Kat Von D Monarch Palette, and I love it! I think this palette is going to be one of my favorites this year. Amazing colors, great pigmentation, so smooth and easily blendable. Love it!

I prepped my eyelids using Urba Decay Primer Potion in Eden. On my face, I used Smashbox Foundation primer.

As always, scroll all the way down to skip the how-to and get on the product list.

Kat Von D Monarch makeup look

How-to:

1. I applied Wrath on my crease using Sephora bullet crease brush.

2. Using a clean blending brush, I softened the edge of my crease.

3. I applied Shadow Box on the outer V using a small shader brush.

4. I, then, used the Sephora bullet crease brush on step 1 to blend my outer V shade.

5. I also applied Summerfly on my eyelid using a flat eyeshadow brush.

6. Along the lower lash line, I applied Shadow Box using a small shader brush.

7. Using the same brush, I applied Wrath on top of Shadow Box on the lower lid.

8. I created a winged liner using Kanebo Kate Super Sharp eyeliner, and along my waterline I applied L’oreal Voluminous Smoldering eyeliner.

9. I curled my lashes and applied L’oreal double extended mascara on both upper and lower lashes. I also applied Ardell Demi Wispies false eyelashes.

10. I filled my brows using Anastasia Brow Wiz in Medium Ash.

Kat Von D Monarch makeup look

11. On my face, I applied Cover FX cream foundation in G40 all over, while I added a little N110 as contour.

12. I applied Smashbox Halo Long Wear Blush in In Bloom.

13. I also added a MAC Bronzer on top of the blush a little bit.

14. On my lips, I applied Clinique Mega Melon chubby lip tint.


Products used

Eyes – Kat Von D Monarch palette (crease: Wrath, outer box: Shadow Box, eyelid: Summer Fly, lower lid: Shadow Box and Wrath); Kanebo Kate Super Sharp liner; L’oreal Voluminous Smoldering eyeliner; L’oreal Double Extender mascara; Ardell Demi Wispies; Anastasia Brow Wiz in Medium Ash.

Face – Coverfx cream foundation in G40 and N11.

Cheeks – Smashbox Halo Long Wear Blush in In Bloom; MAC Bronzer.

Lips – Clinique Mega Melon chubby lip tint.