Halloween #1- Monster Teeth

Alright! I finally decided to start my Halloween tutorials early this year! I’m super pumped since my parents are setting up a haunted house at work for everyone to enjoy! Anyways, you can be sure I’m going to be there with full makeup on! For my first tutorial, I decided to do a Monster Teeth or monster smile, since I always find difficulty creating these teeth. I’m not that happy with the result, but oh well, I think it worked pretty well.

One tip that I should keep in mind for myself, is to use water-based white paint for the teeth instead of cream face paint. I think the cream is hard to work with since it moves around so easily, but that’s just my preference. Also, funny story (not so funny when it happened), I was so close to finishing the whole look, and I decided to “fix” the two teeth on the bottom lip, then my hand slip and smudged everything. I had to remove the 2 teeth and just created 1 since it was getting late, and I had to go to bed.

*For Killer Clown tutorial please check out my latest post*

*Please check out my other Halloween post*

Ok, let’s get this whole thing started!

How-t0:

1. I started out by drawing an outline of the smile using a black eyeliner pencil.

halloween makeup tutorial

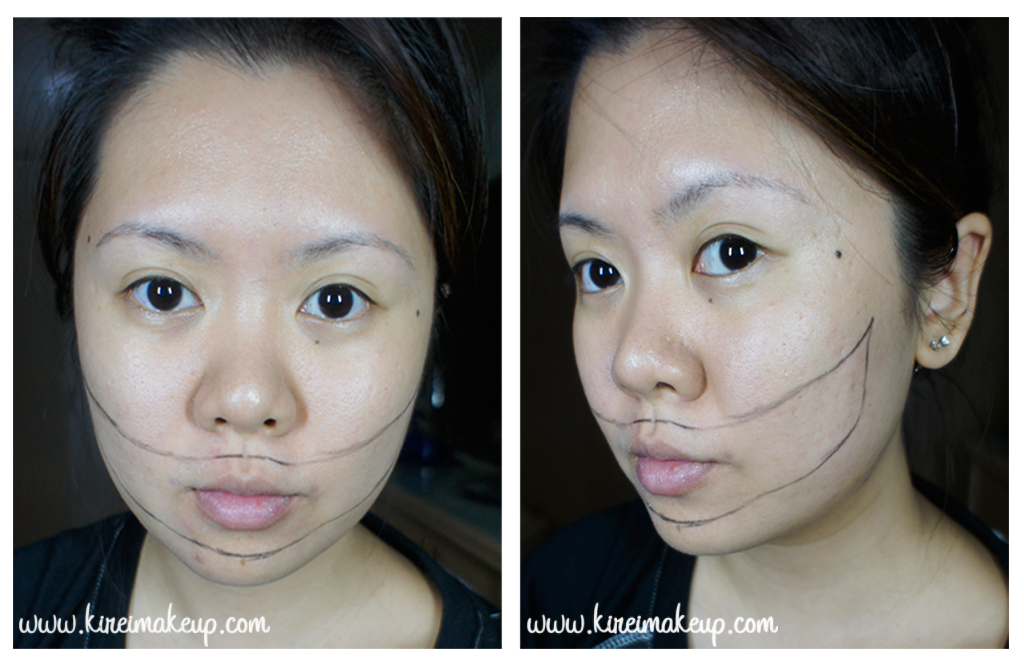
2. Using the same eyeliner pencil, I started drawing the outline of the teeth. It doesn’t have to be pretty, it can be as sharp or as big as you want. I drew the teeth at the back of the mouth a little bit curved in to create an eerier smile.

3. Using a small synthetic artist brush, I applied black cream face paint outside the teeth area.

halloween makeup tutorial

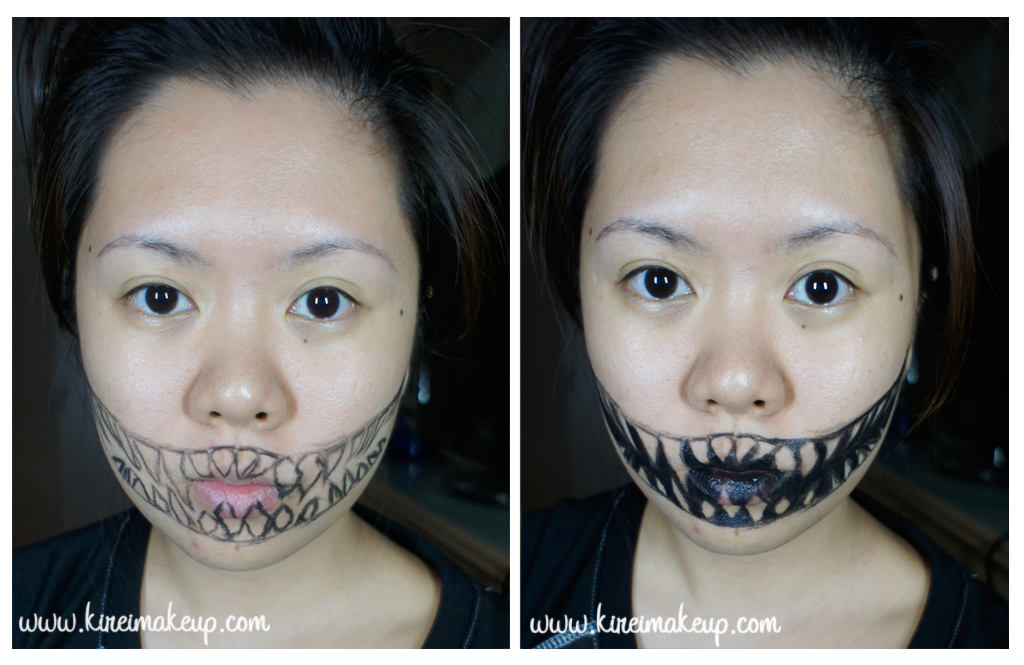
4. Using a clean synthetic artist brush, I applied white cream face paint inside the teeth.halloween makeup tutorial

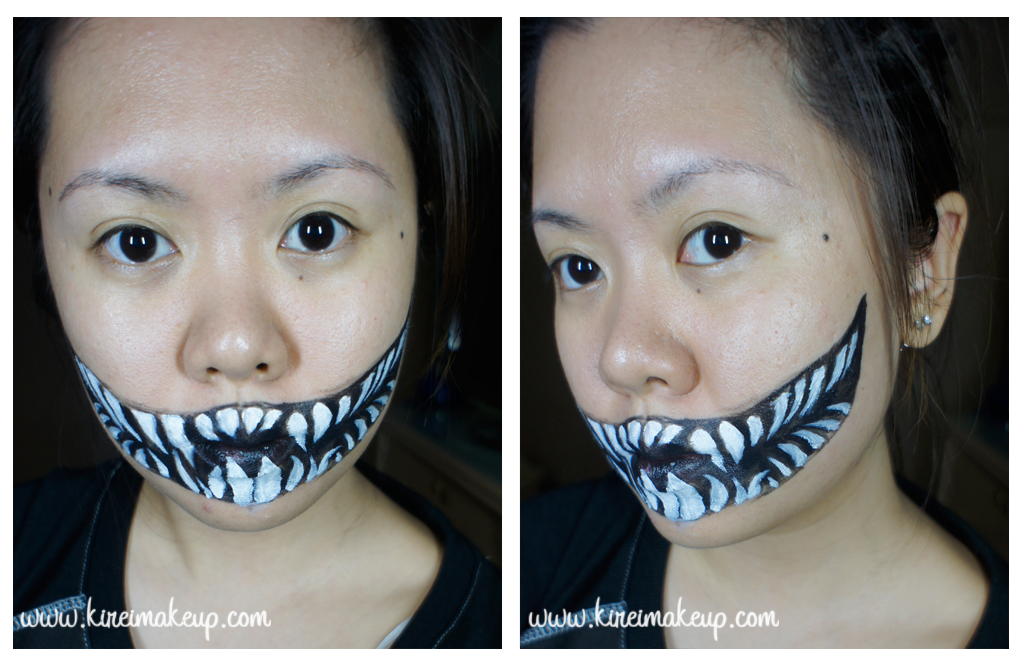
5. To create some depth, I created some smile lines at the end of the monster mouth, above and below the monster lips.

6. Using an angled eyeliner brush, I blended the lines down for the lines on below the lips, and upwards for the lines above the lips. This will create an illusion of depth.

halloween makeup tutorial

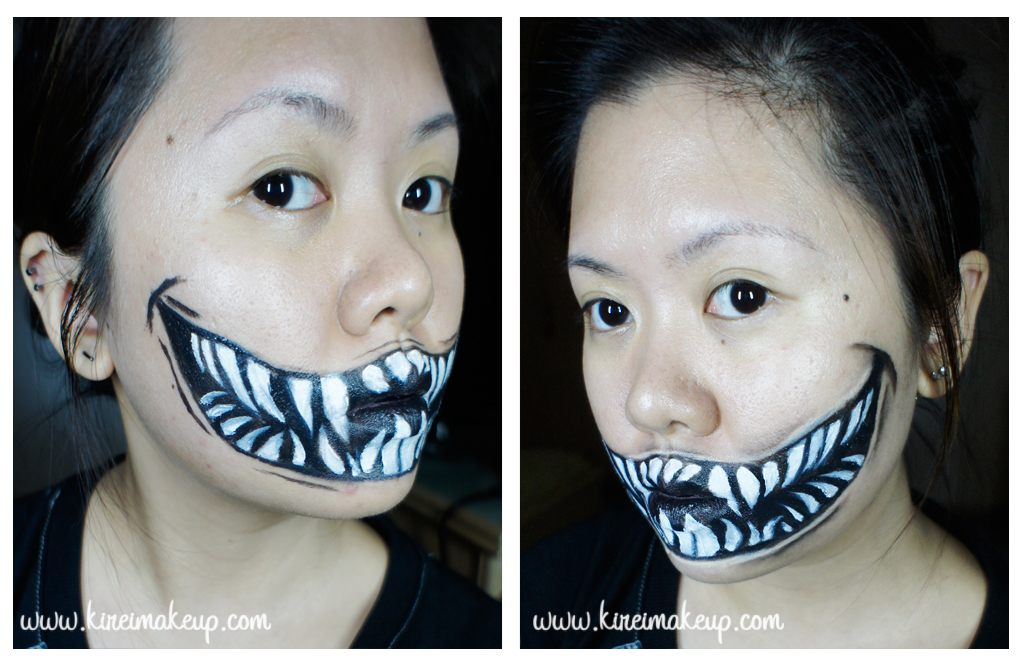
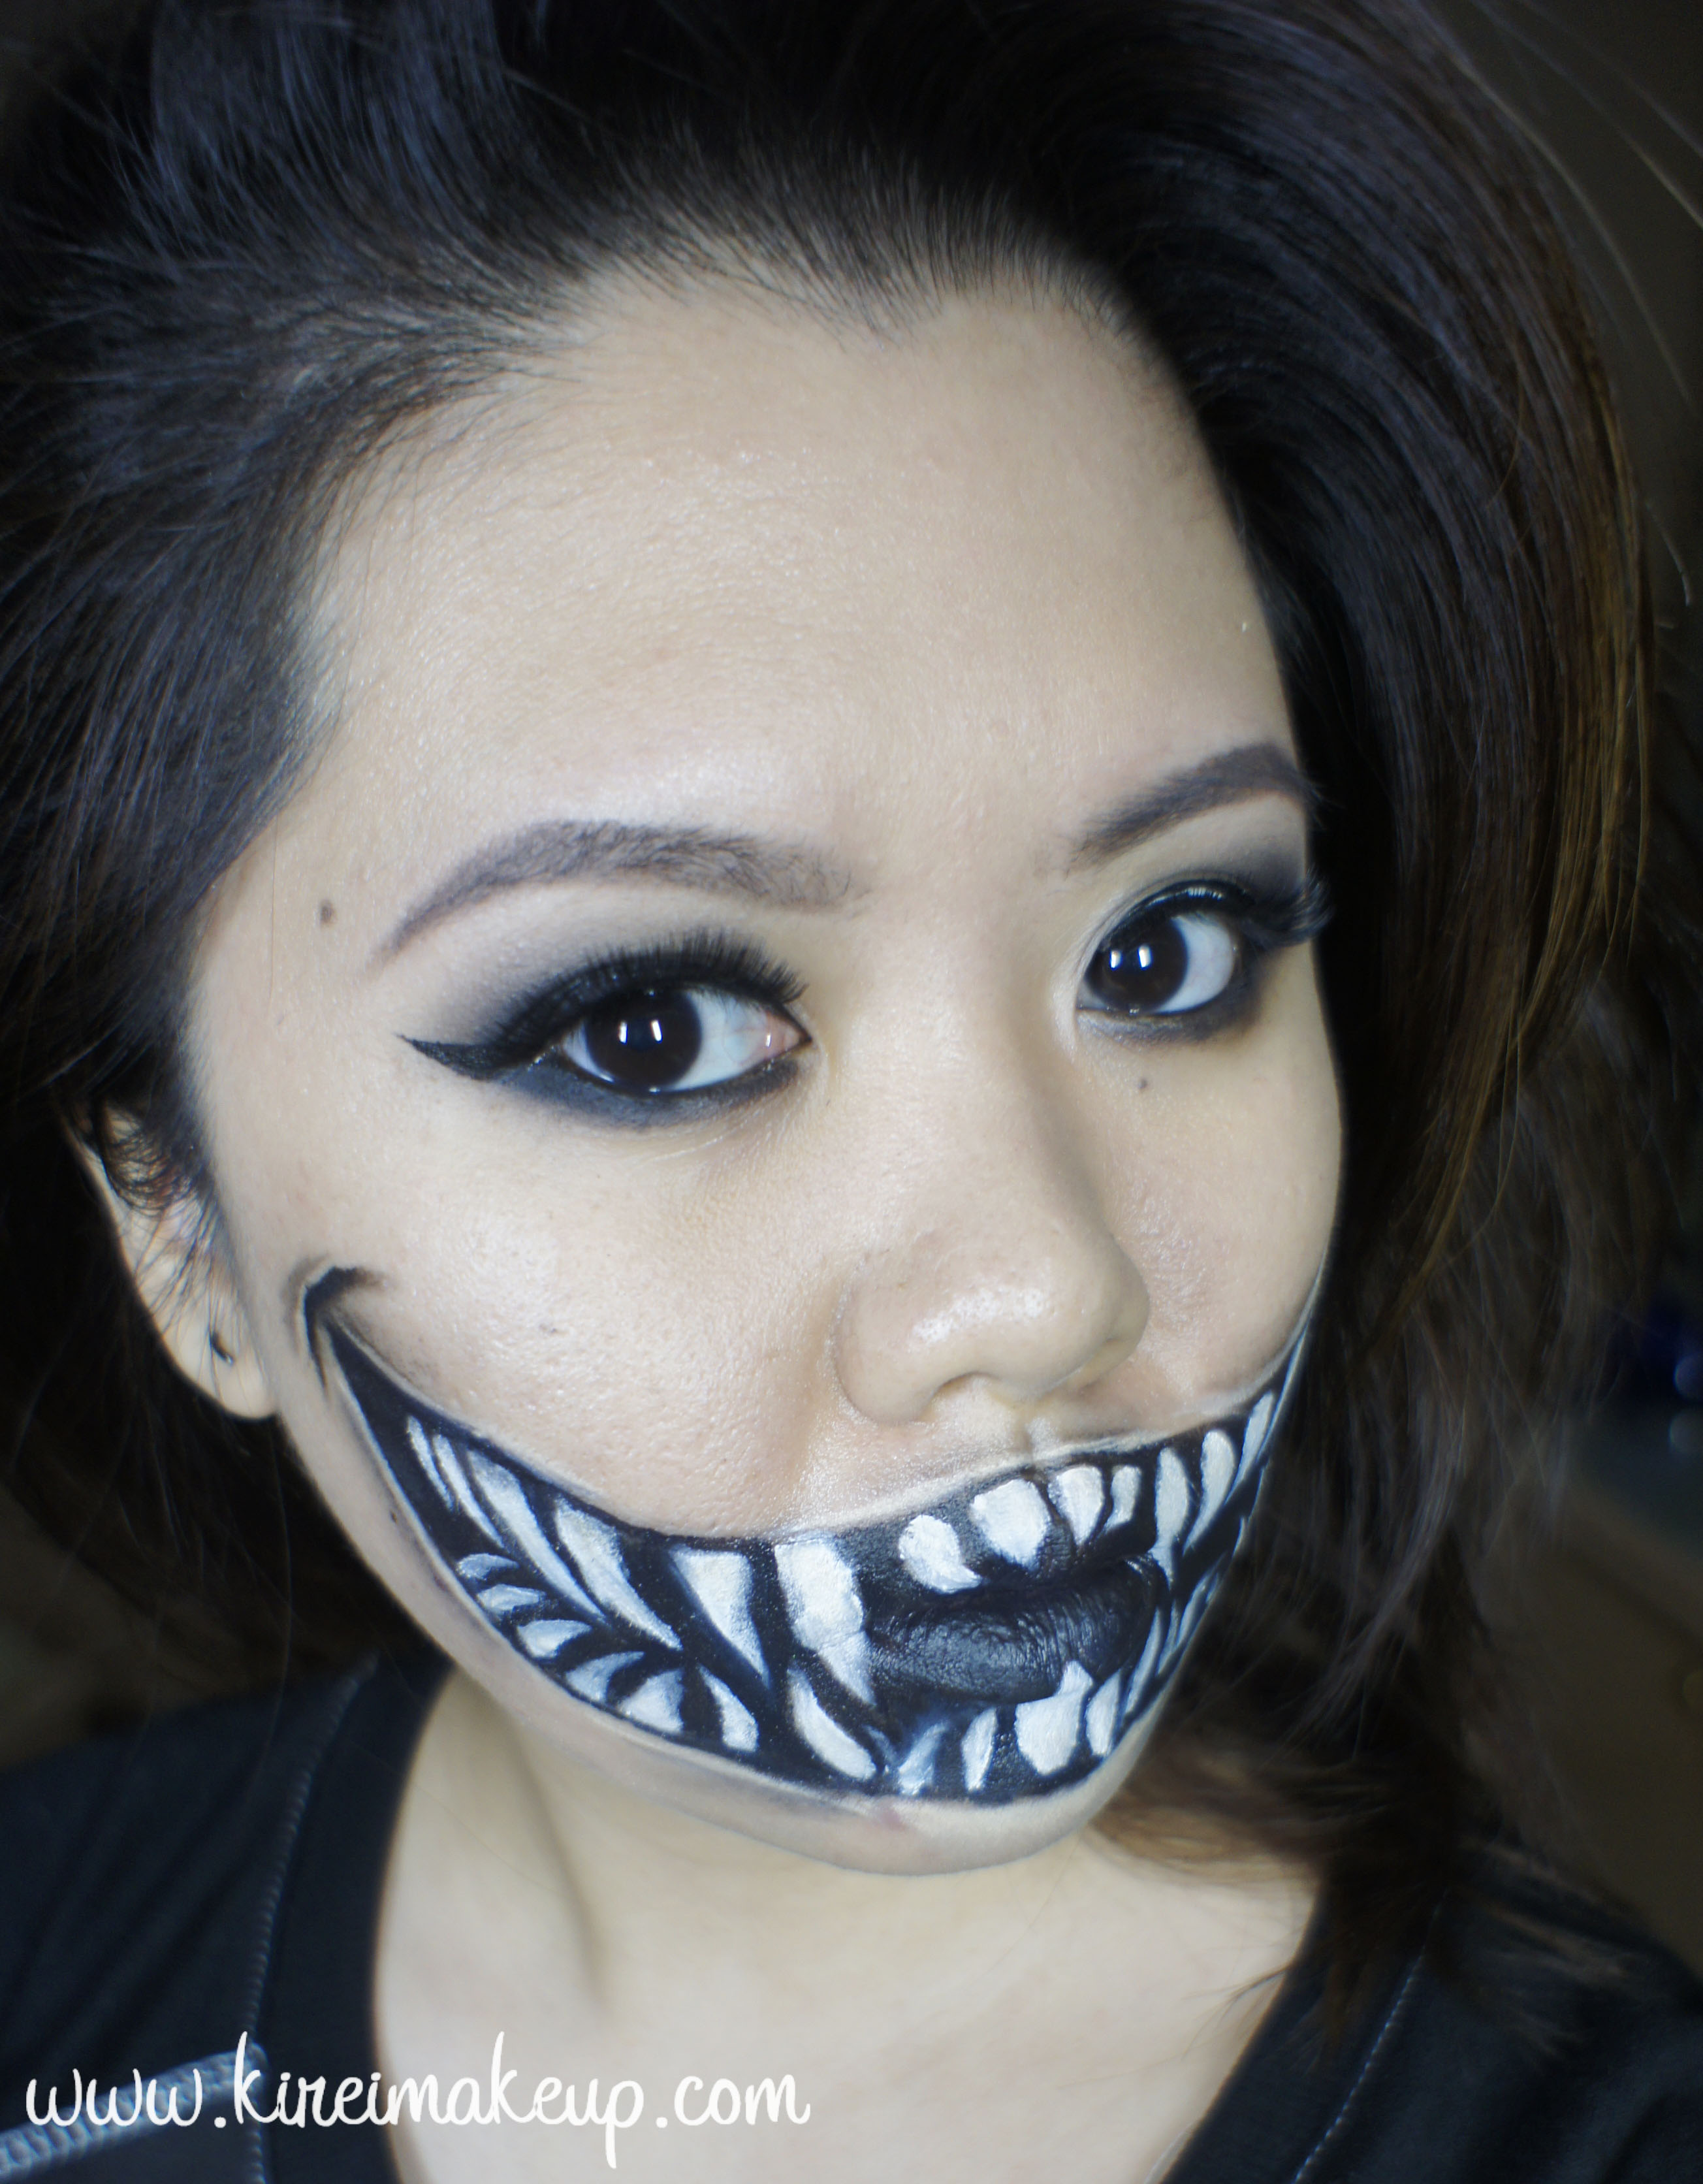
7. For the rest of the face, I applied foundation and smoky eyes just for fun.

8. I also set the cream face paint using eyeshadow of similar colors – black for the black areas, and white mixed with beige for the teeth.

halloween makeup tutorial

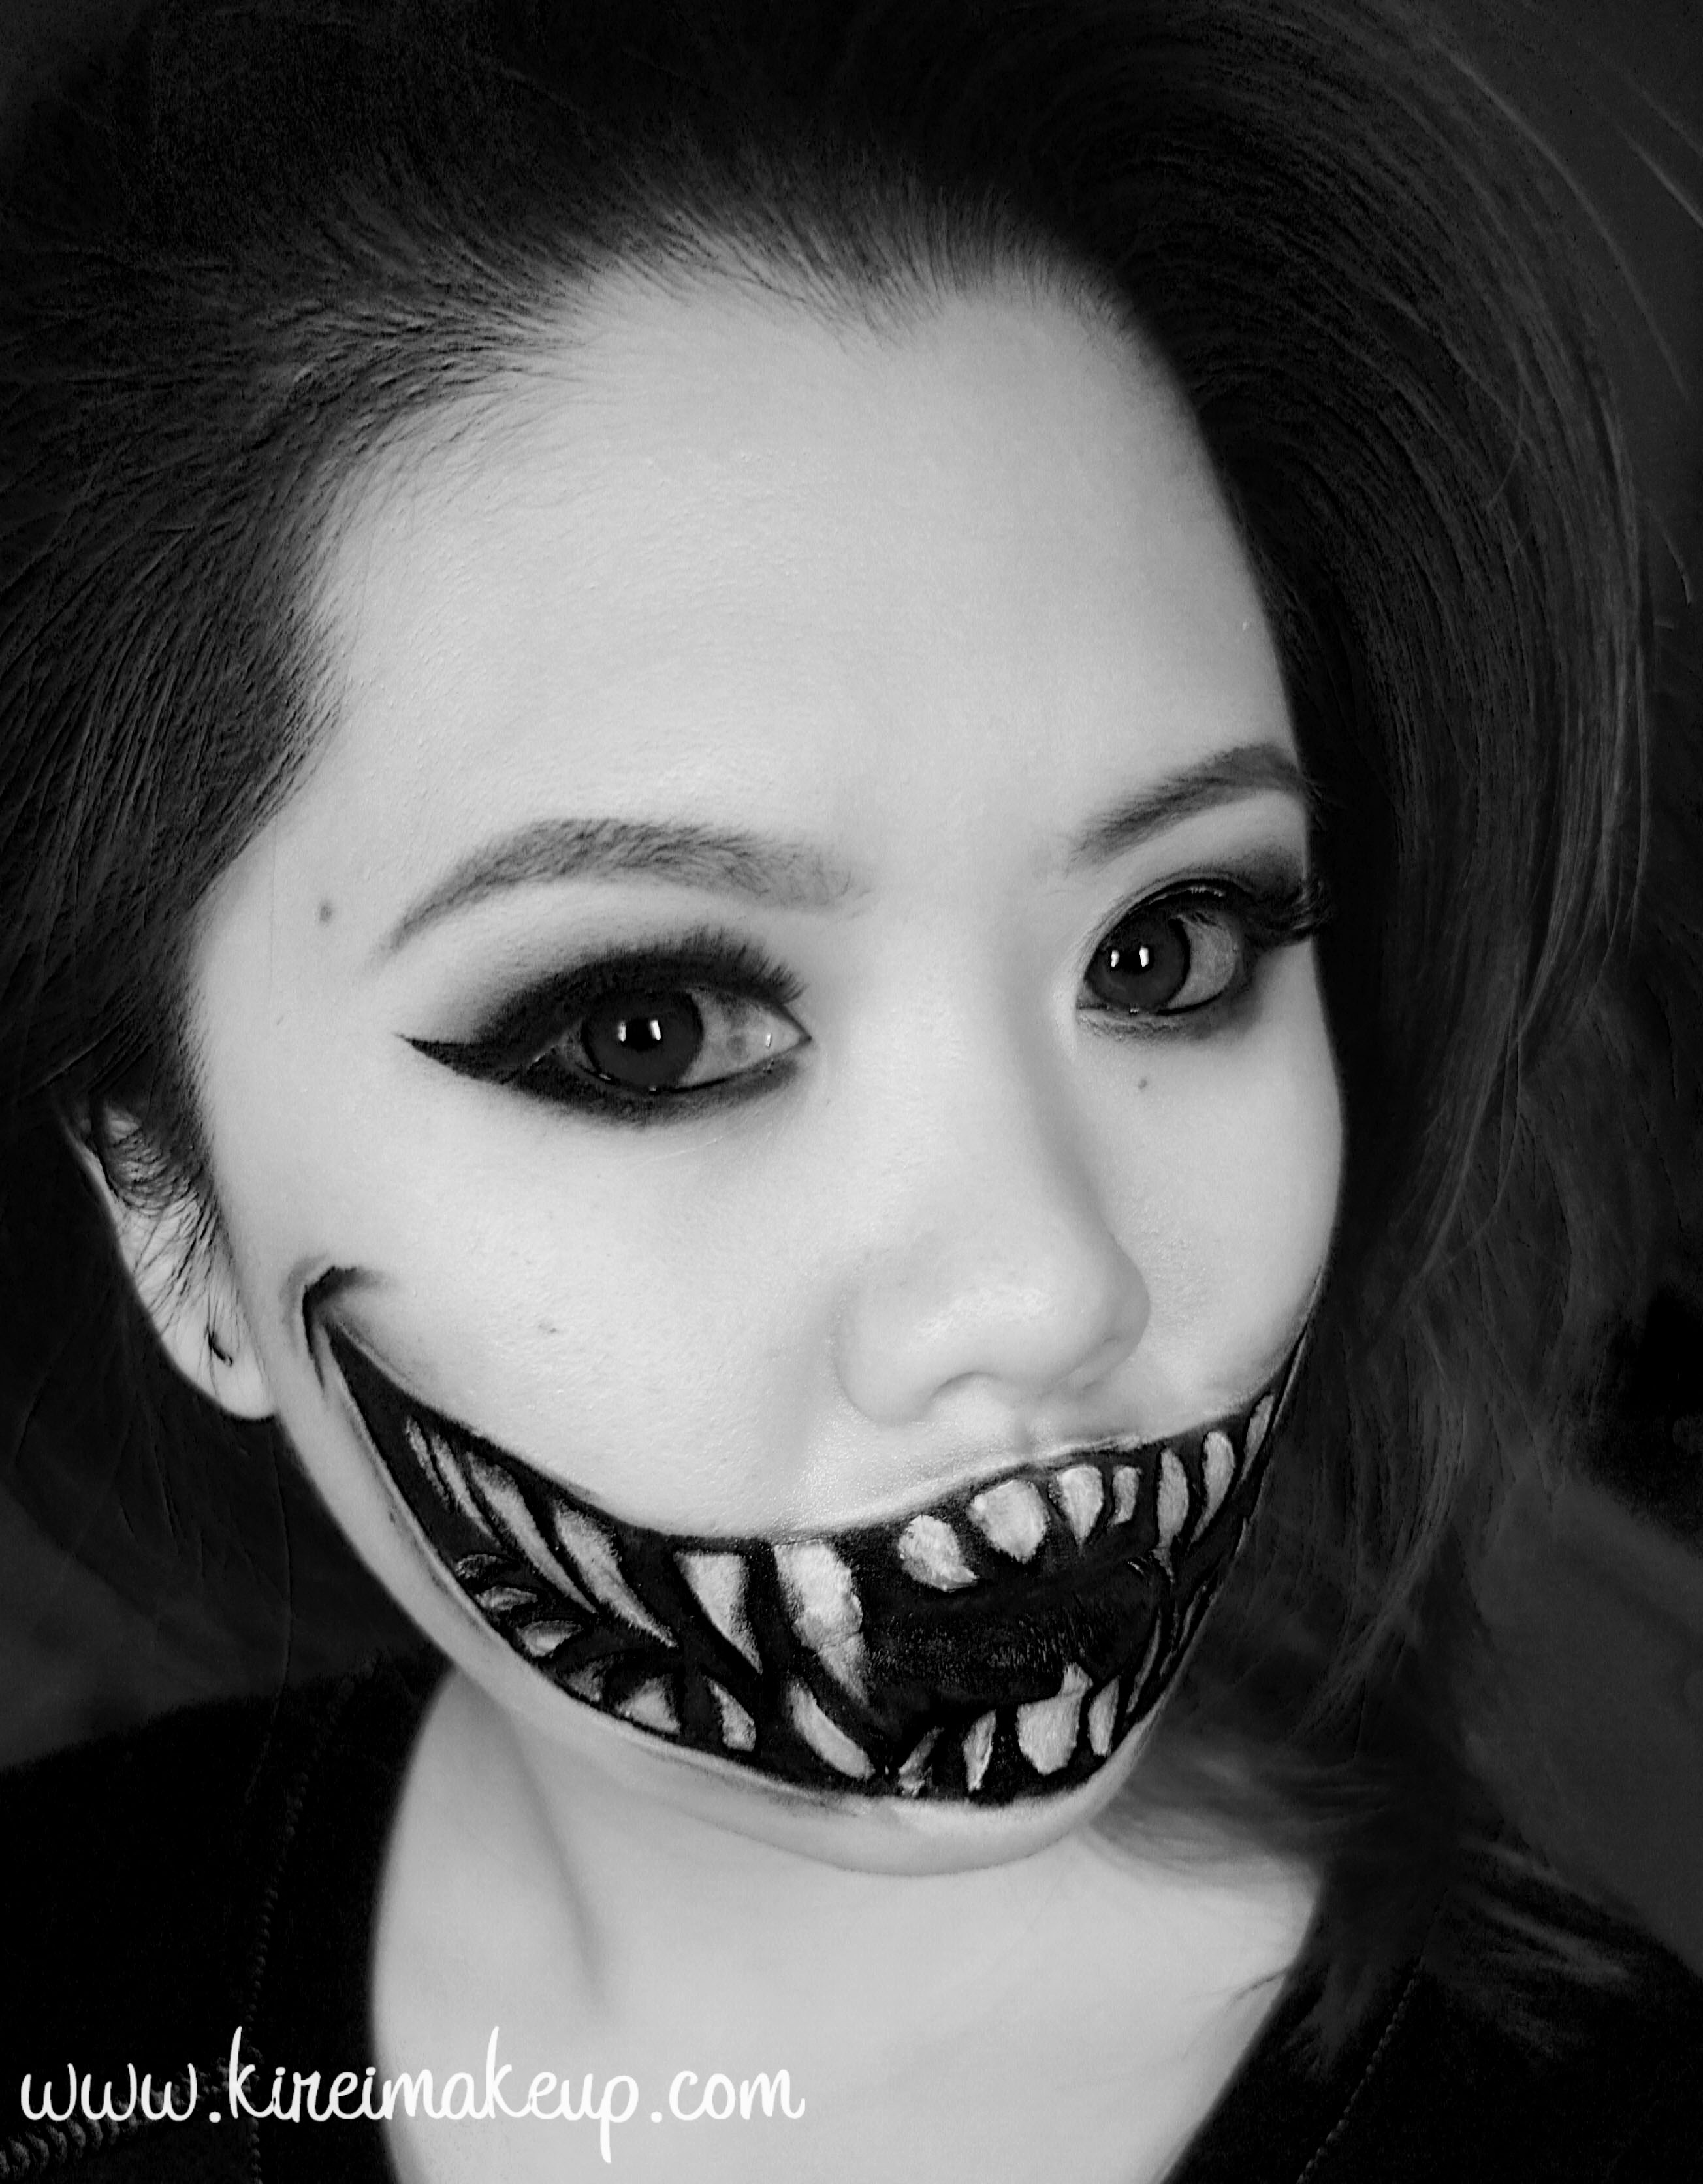
It looks really good in black and white!

halloween makeup tutorial

Ta-daaaah! So, let me know if you have any request for Halloween, ‘kay?!


xoxo

Stitched Up (face paint only)

Last minute Halloween idea using very simple products:

  1. Dark red lip liner (or face paint) – I used the dark red from Kryolan Bruised Wheel palette, and an angled eyebrow brush.
  2. Light red lip liner – I used MAC Brick lip liner.
  3. A small flat eyeshadow brush.
  4. White pencil eyeliner.
  5. Liquid eyeliner – I used L’oreal Infallible Super Slim Liquid Eyeliner.

No latex, no glue, no special equipment needed. Everything is face paint, and it’s easy to achieve. You can get all these products from Wal-Mar, Shopper’s Drug mart etc. Very easy to make!

Should you decide to wear this look out, you might want to apply your makeup first and then create the face paint.

stitched face paint

How-to:

1. Create dashes along your face using a dark red lip liner, or using face paint with an angled brush.

2. Using a lighter red lip liner, smudge it beside the lines that you’ve created.

3. Using the flat eyeshadow brush, blend out the lighter red lip liner to create pink tenderness on the face.

4. Lightly line the outside perimeter of the “dashes” to highlight it. This will make your wound look swollen.stitched up makeup

6. Using the black liquid eyeliner to create the “stitches”. Create dots at the end of the stitches.

7. (Optional) You can use the white pencil eyeliner to highlight the ends of the stitches.

halloween stitched up stitched face paint

Na’vi (Avatar) Inspired Look

So! The whole Avatar hype and while it’s still hot, I decided to do some face paint on tiff during lunch break today. I used different shades of blues, you can use any kind of blues really. Mine is probably not that close to the colours that they used in the movie, but well, you got to use what you have..=D

Anyway, I won’t be posting the products that I used just because I left them at school and I don’t remember what they’re called (I remember some, so read the description for each photo). But, if you intend to do this look, just use different shades of blues – light blue, dark blue, navy, cornflower blue etc

Pls read the description for each photos if you’re planning to do this for halloween or just for fun! =)..