Recently I bought a few Chanel’s products from the newly opened Chanel Nordstrom counter in Yorkdale, and so today I want to use those products to create this soft smoky eyes look paired with red lips for the cold weather. I’m absolutely loving the Chanel Candeur Et Experience palette, and I’m definitely obsessed with Chanel Rouge Allure Ink! Read more below.
Tag: asian red lips
Bright Raspberry Lips Makeup
Spring is just around the corner, and I couldn’t wait! This bright raspberry lips would be just the perfect look to welcome spring, don’t you think? Pair this bright lips with simple eye makeup, for a wearable look.
Chinese New Year Makeup
Since the Lunar New Year is just around the corner, I’ve decided to create this Chinese New Year makeup inspired by the year of the Red Monkey! This look is filled with gold and red which represent wealth and luck! I know that there’s a lot of different cultures who celebrate the Lunar New Year, so I’ll be referring it as Lunar New Year instead of Chinese New Year. I wrote Chinese New Year on the title for SEO purposes. I hope that’s ok with everyone!
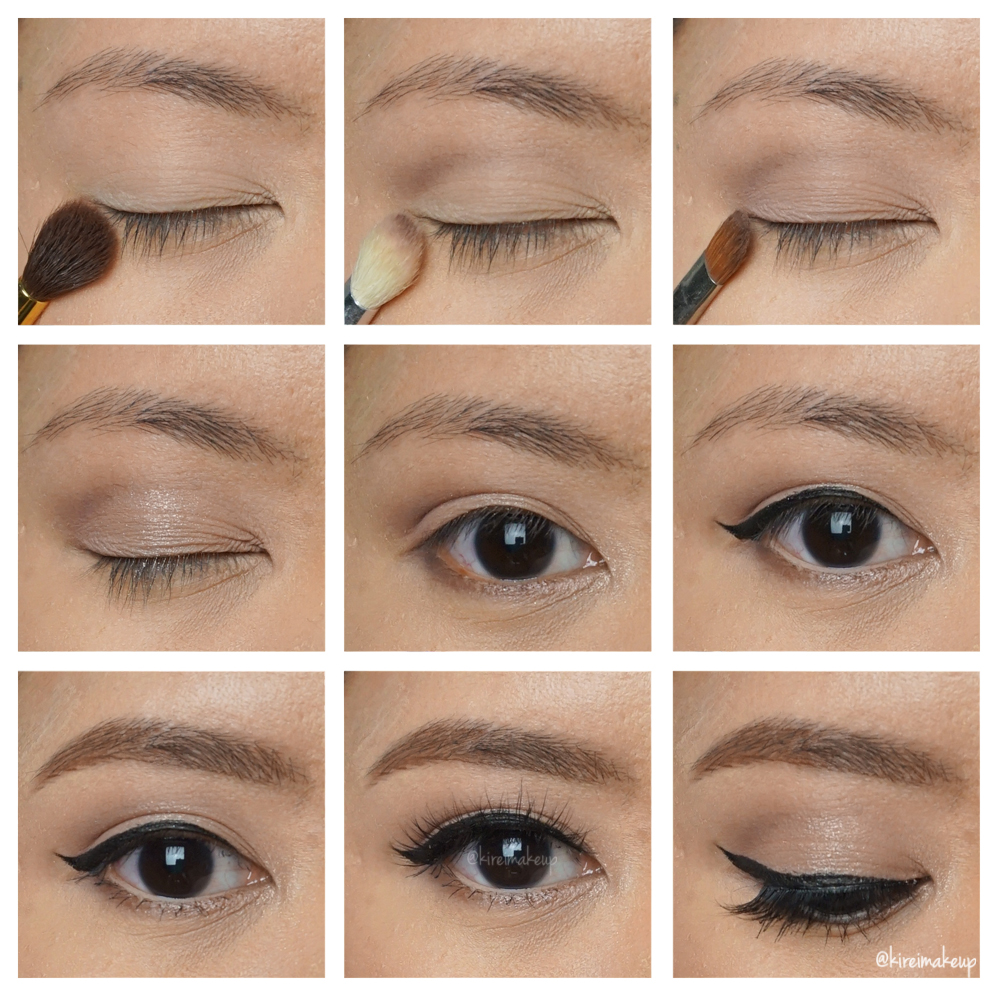
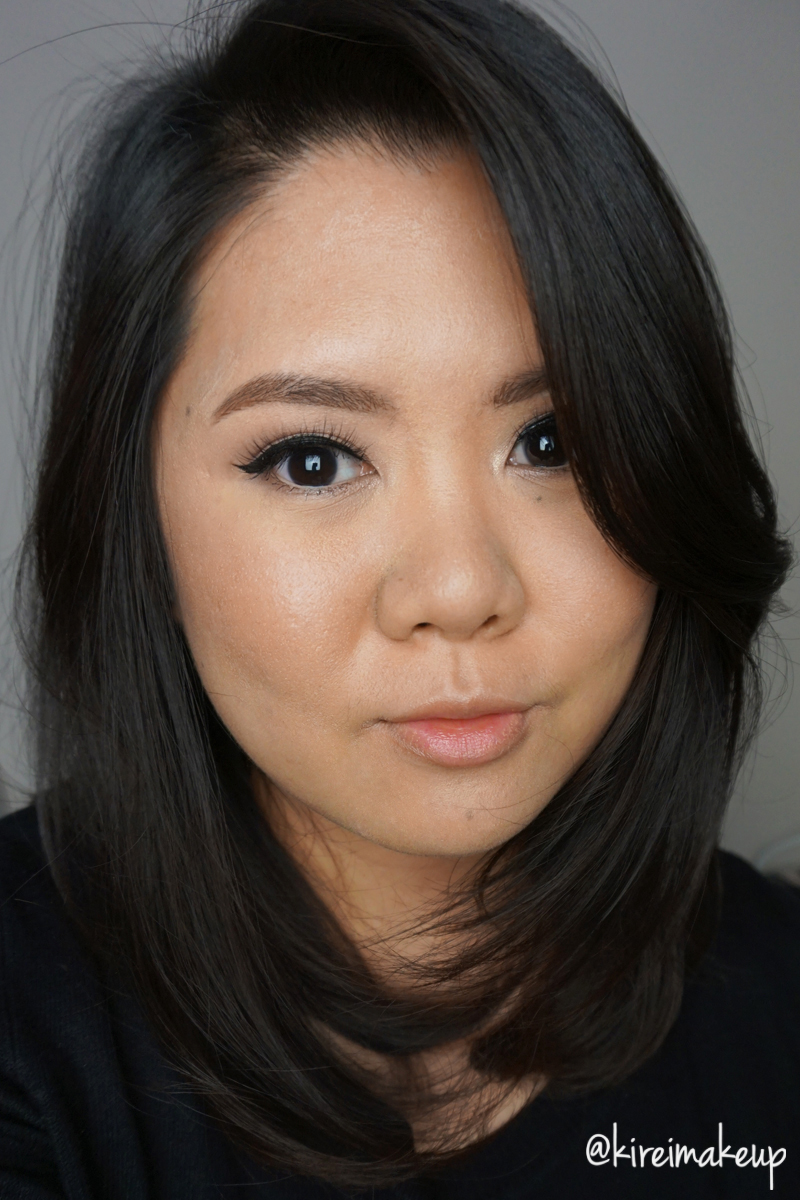
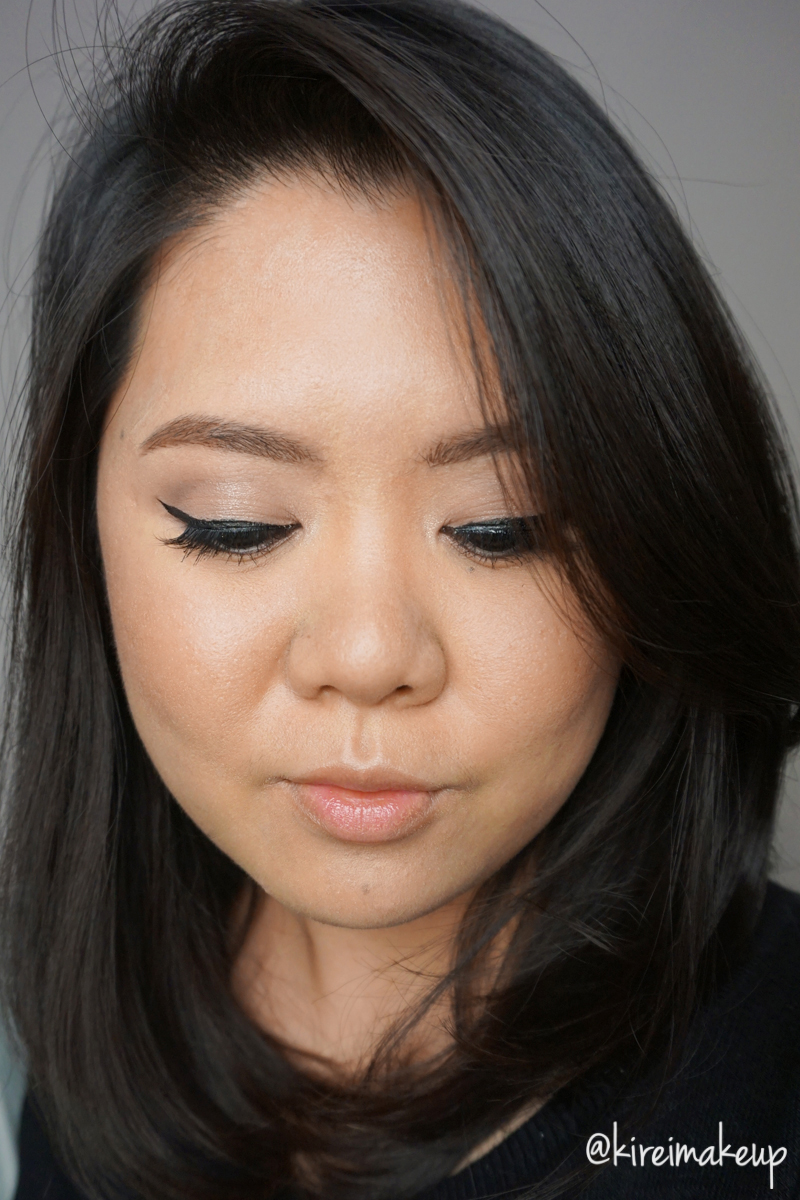
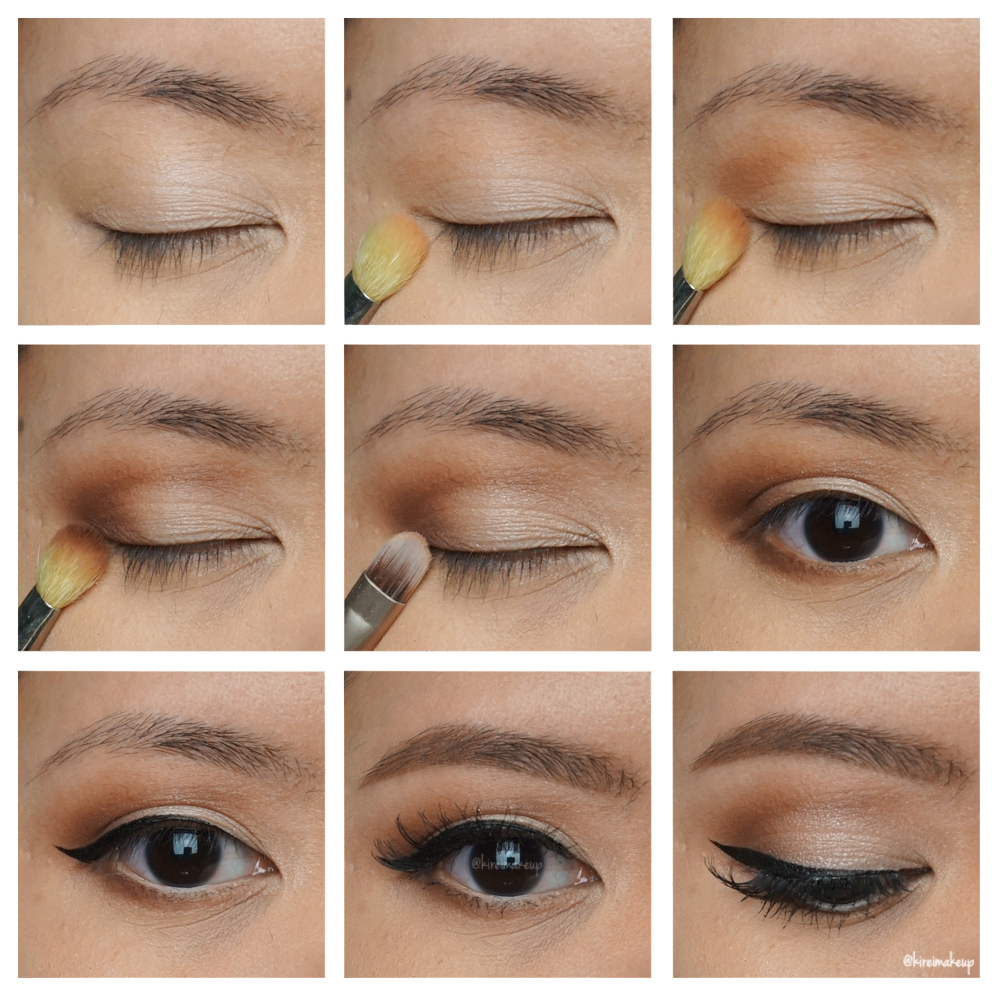
How-to: Smoky Winged Liner
I received a request by Dila who wanted me to do a video to show her how to create a smoky winged liner. She saw me back in 2014 when I was in Jakarta, and when we met I was wearing the day version of this smoky winged liner. Check out my Smokey Winged Liner post if you prefer a pictorial, or one which you can wear for a day look. This smoky winged liner tutorial is a darker, smokier version.
Day to Night Party Makeup Tutorial
We are almost in mid-December, already?! Anyways, most of you must have a lot of parties and events to attend to, so today’s post is a Day to Night Party Makeup Tutorial! This is one way of changing your day makeup to night makeup quickly, and all you need is a lipstick. You can also add a black eyeliner if you prefer, just like what I did for this post, but if you don’t it’s not a big deal.
For this look, I applied falsies just because my real lashes are not that full. You can skip the falsies altogether, I just do it because it looks better in pictures since my real lashes are not full in volume and not curly.
This Day to Night party makeup tutorial is all about creating a strobed-looking skin, nothing too contoured. The eyes are very muted and simple. For the Day look, the eyes are very open and brightened. For the Night look, the focus in on the lips, not too dark but not too bright either.
For the eyes and cheeks, I used my new Tarte Light of the Party palette, and can I just say that I’m loving it?! One of the best neutral palette, in my opinion. The colors are very muted and soft, a lot of matte colors too! Absolutely gorgeous. I’ll do the review for this palette soon!
Also, how you liking my luminous/strobed skin? I just bought Becca Backlight Filter primer, and tested it today. Such a gorgeous primer for strobing. I feel like my skin just glow all over! I applied this primer under my eyes, on top of my cheekbones, on the bridge of my nose, & cupid’s bow. I also applied this primer under my NARS foundation so it doesn’t look too dewy.
Products used
Eyes
- Primer – Urban Decay Primer Potion “Original”
- Base – Tarte Light of the Party “Eggnog”
- Crease – Tarte Light of the Party “Mulled Wine”
- Eyelid – Tarte Light of the Party “Rum Pum Plum”
- Center of lid – Tarte Light of the Party “Fizz the Season” (I applied this using my ring finger)
- Inner lower lash line – Tarte Light of the Party “Ring-a-Ling”
- Outer lower lash line – Tarte Light of the Party “Cocoa What Fun”
- Winged liner – Kanebo “Kate Super Sharp eyeliner”
- Waterline – [Day] MAC Chromagraphic eyeliner “NW25/NC30”; [Night] MAC “Smolder” kohl liner
- Mascara – Tarte “Light, Camera and Lashes” mascara
- Brows – Kat Von D Tattoo Brow “Medium Brown”
- Falsies – Esqido Mink Lashes “Oh So Sweet”
Face
- Primer – Becca “Backlight Priming Filter”
- Foundation – NARS Luminous Weightless Foundation “Punjab”
- Concealer – NARS Radiant Creamy concealer “Custard”
- Powder – Laura Mercier “Invisible Loose Powder”
Cheeks – I used Eve Pearl fan brush only for the cheeks, starting with the Bronzer then Blush & lastly the Highlighter.
- Bronzer – Tarte Light of the Party “Social Butterfly”
- Blush – Tarte Light of the Party “Amazed”
- Highlighter – Tarte Light of the Party “Pink Champagne”
Lips
- Day look
- Lipstick – Sephora Collection Oil Infusion Color & Care “Pink Granita”
- Night look
- Lip pencil – MAC “Nightmoth” lip pencil
- Lipstick – MAC “Media” lipstick

Urban Decay Gwen Stefani Tutorial #1
I did promise to post an Urban Decay Gwen Stefani tutorial in my previous post, and here it is! I did this pretty quickly since I was testing several products all at once. It’s very simple and easy to do. I pretty much only used 2 brushes for the eyes – blending and flat eyeshadow brushes, and this is just my regular go-to eye makeup look.
I’ll be posting more Urban Decay Gwen Stefani tutorials, so if you have any requests, feel free to leave a comment below! As you know, Gwen Stefani is no stranger to bold makeup look, so for this tutorial, I’ve decided to pair the eyes with red lips. Gwen Stefani does wear a lot of red lipstick paired with bold winged liner. I did a winged liner, but not as bold as her since I don’t have the “real estate” (aka enough space) on my eyelids to do so.
Check out my VLOG using this palette!
Have you guys check out my UD x Gwen Stefani swatches and first impression yet?! You should!
Products used
Eyes
- Primer – Urban Decay Primer Potion “Anti Aging”
- Base – Urban Decay Gwen Stefani “Skimp”
- Transition –Urban Decay Gwen Stefani Stefani “Anaheim”
- Crease – Urban Decay Gwen Stefani “Zone”
- Outer V/Lower Lash line – Urban Decay Gwen Stefani “Punk”
- Eyelid – Urban Decay Gwen Stefani “Blonde”
- Waterline – MAC Chromagraphic eyeliner NC30
- Winged liner – Kanebo Kate Super Sharp eyeliner
- Mascara – NARS “Audicious” mascara
- Falsies – Ardell “Demi Wispies”
- Brows – Anastasia Brow Pomade “Medium Brown”
Face
- Base – Bobbi Brown “Vitamin Enriched Face Base”
- Foundation – Shu Uemura Skin:Fit foundation
- Concealer – NARS Radiant Creamy Concealer “Custard”
- Setting powder – Laura Mercier “Invisible Loose Powder”
- Nose contour – Make Up Store “Smog” Micro Eyeshadow
Cheeks
- Blush – Eve Pearl “Bronzing Trio”
Lips
- Lip pencil – MAC “Brick” lip pencil
- Lipstick – MAC “Russian Red” lipstick
Shu Uemura Sheer Shine Lipsticks
Last month, I was chosen to be one of the 20 beauty bloggers to try out Shu Uemura Sheer Shine lipsticks! I was thrilled to receive 3 of the Shu Uemura Rouge Unlimited Sheer Shine lipsticks at my door step. I’m sure you all have seen these 3 gorgeous lipsticks on my Instagram. I absolutely love these lipsticks!
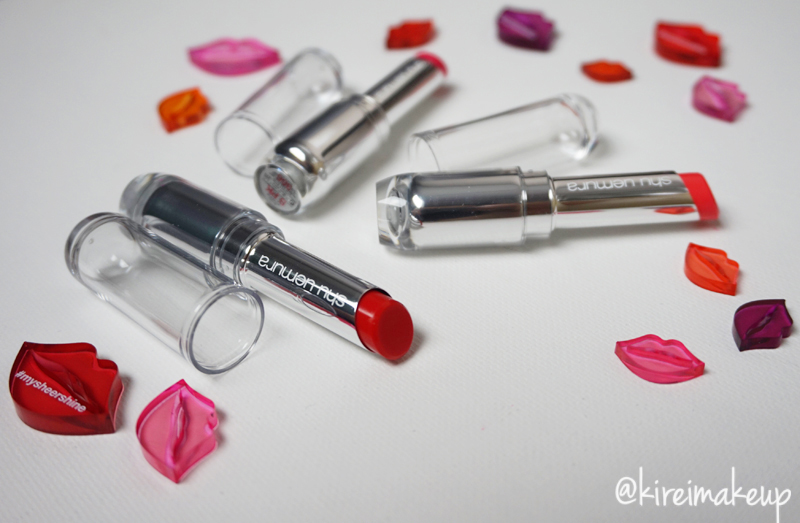
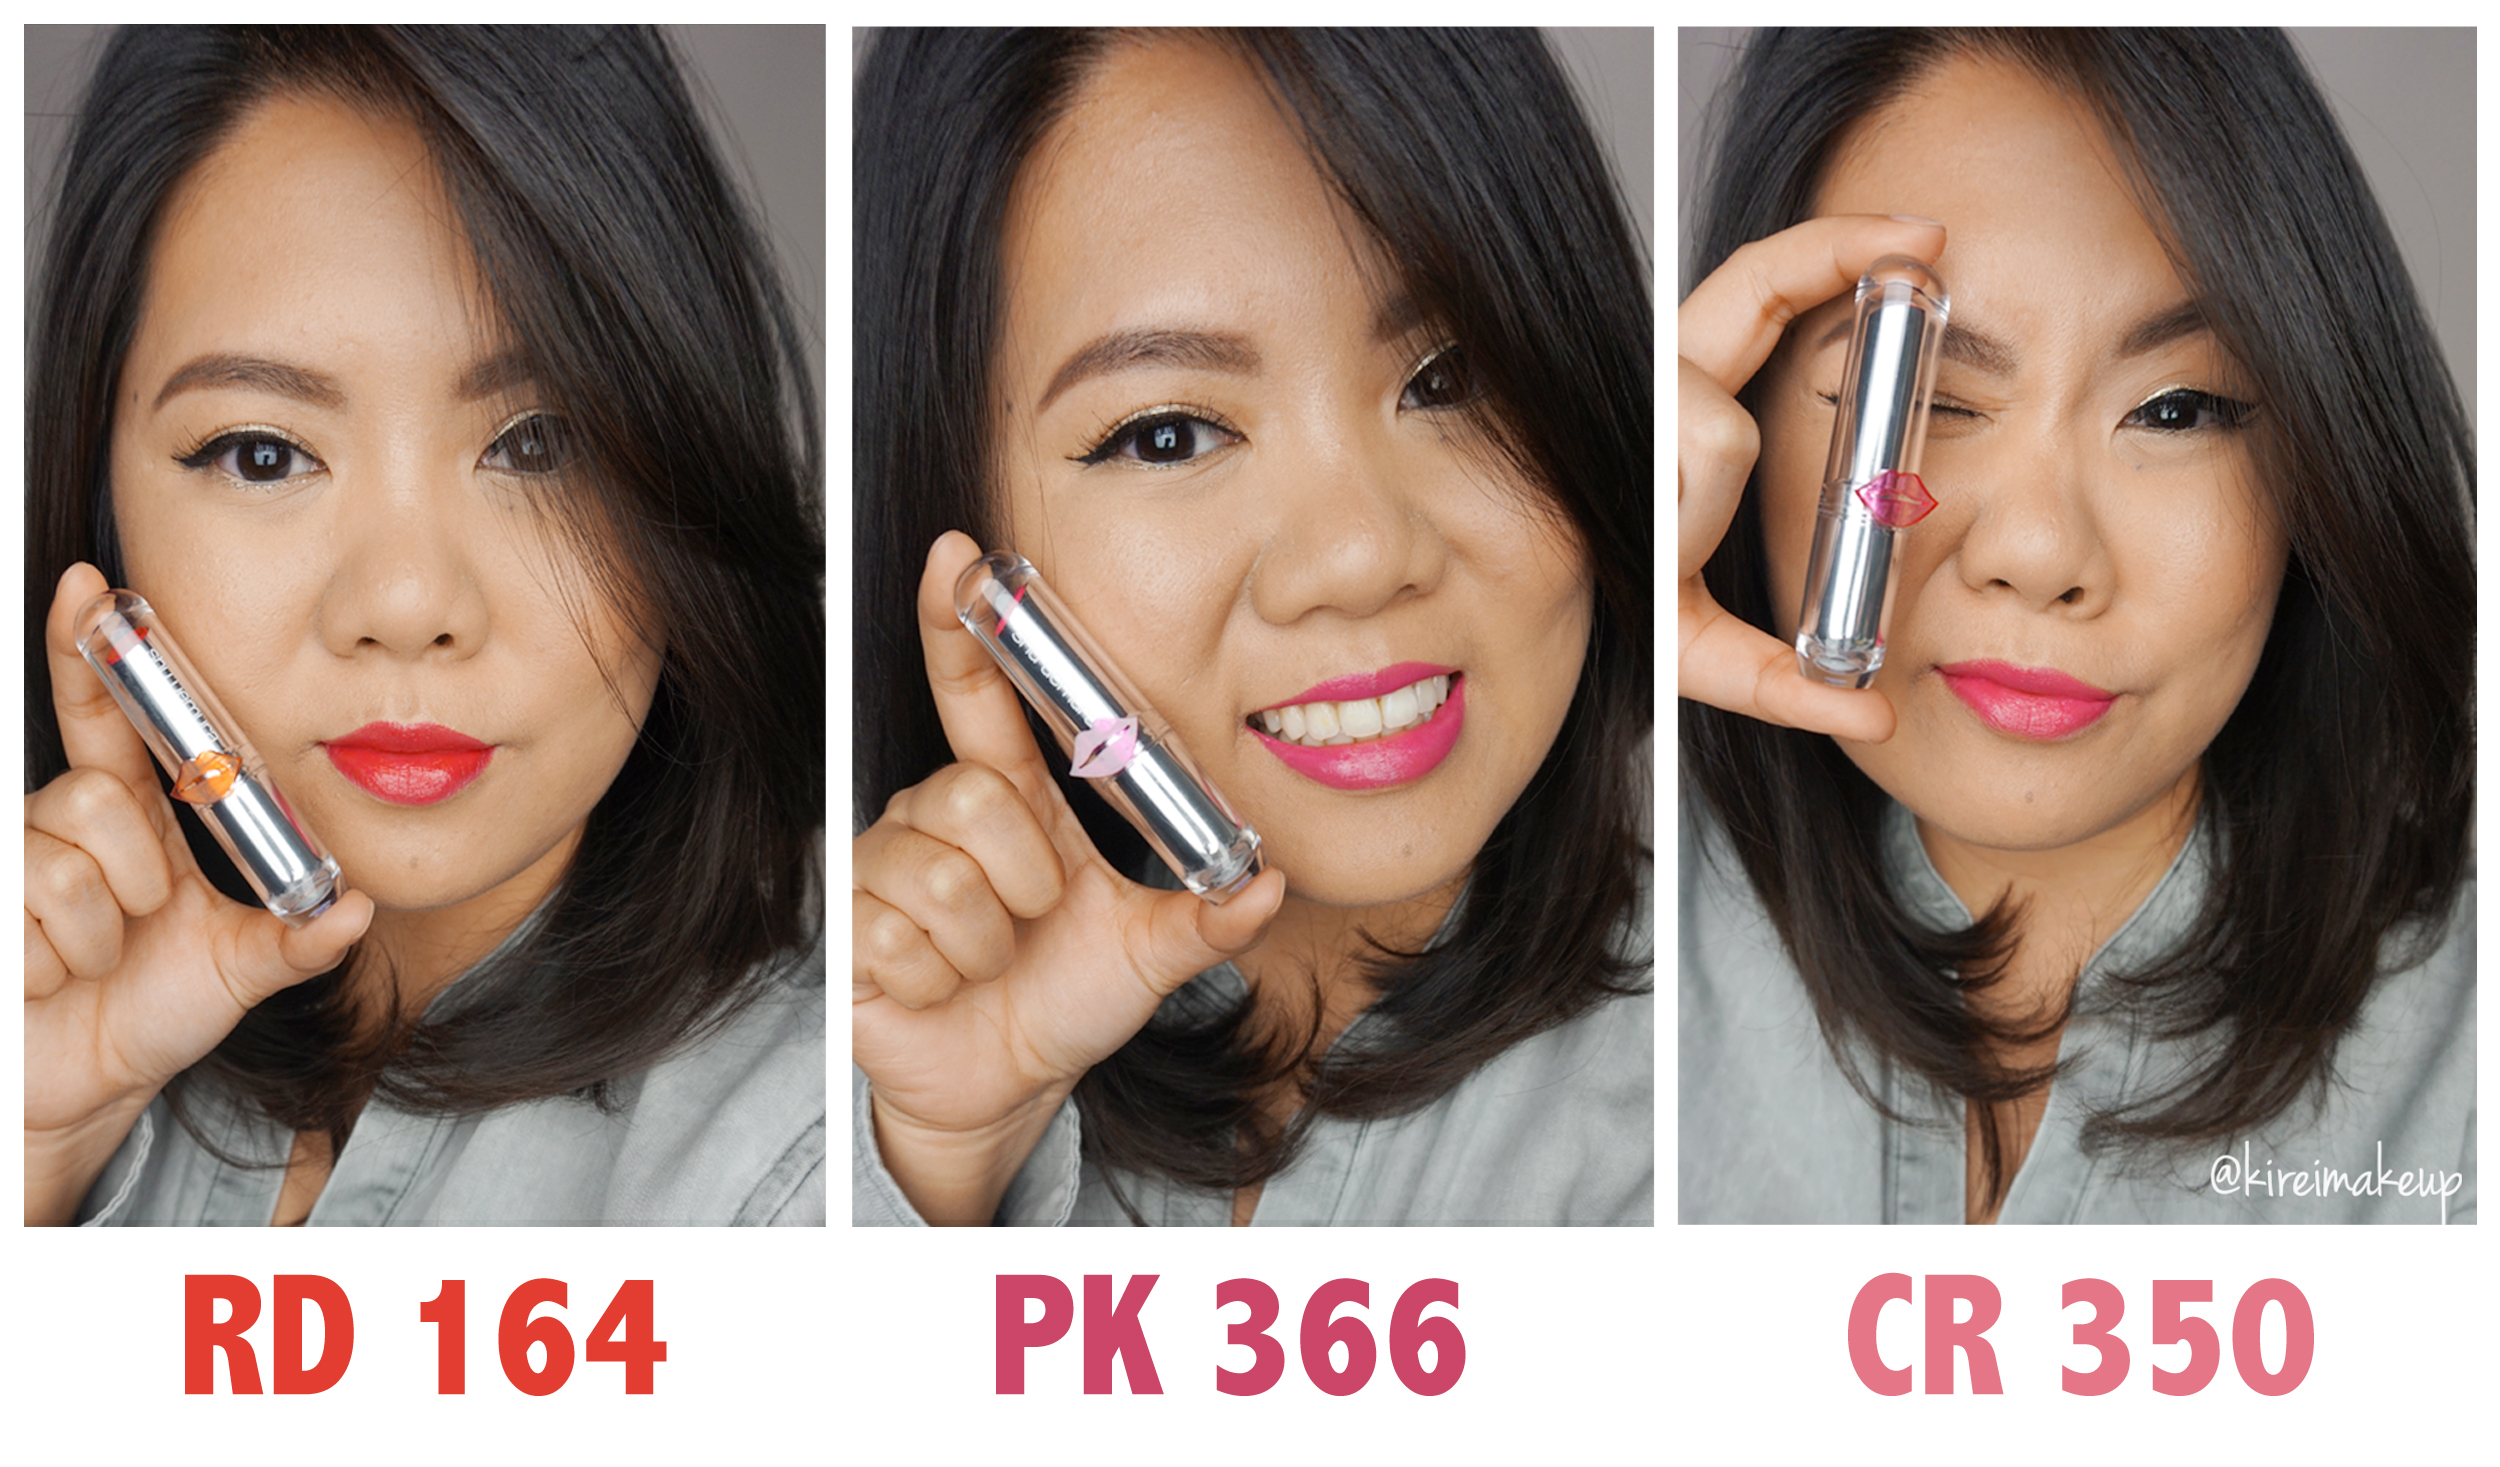
So, the 3 shades that I received are RD 164 (red), PK 366 (pink), CR 350 (peach). I can’t really pick a favorite because I love them all equally! They are very vibrant, and you can layer it. If you are not used to wearing bright colored lipsticks, you should definitely give this a try. This way, you can apply it sheer at first then build it to a more opaque finish once you get used to the color, especially if you want to try the red lipstick.
The best part, for me, is the fact that these Sheer Shine lipsticks are very moisturizing, and it has a “glass-like” finish, similar to a gloss but without the stickiness. Actually the shine on these lipsticks are amazing! It’s definitely better than a gloss! If you apply the Sheer Shine lipsticks with a lip brush (I recommend the Shu Uemura lip brush), you can actually create a stain on your lips.
These lipsticks are very pigmented, don’t let the name “Sheer” fools you! So vibrant, high shine and very colorful! On top of that, this product is just like butter. Very smooth and you can apply this very easily to the lips.
 Disclaimer:
- Links on this post are not affiliated links
- These products were sent to me, however all opinions expressed are honest and were based on my experience with the products.
- Please do your research & test patch before buying any products, I am not responsible should any irritation occurs
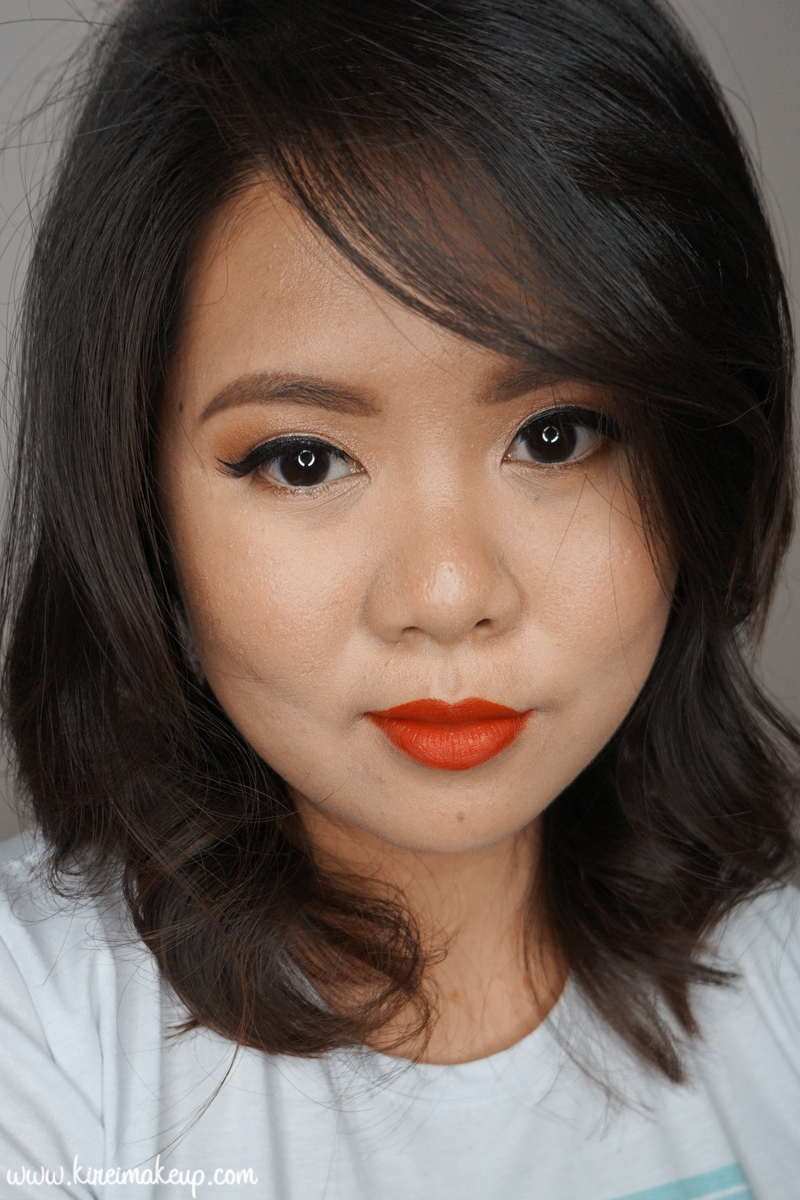
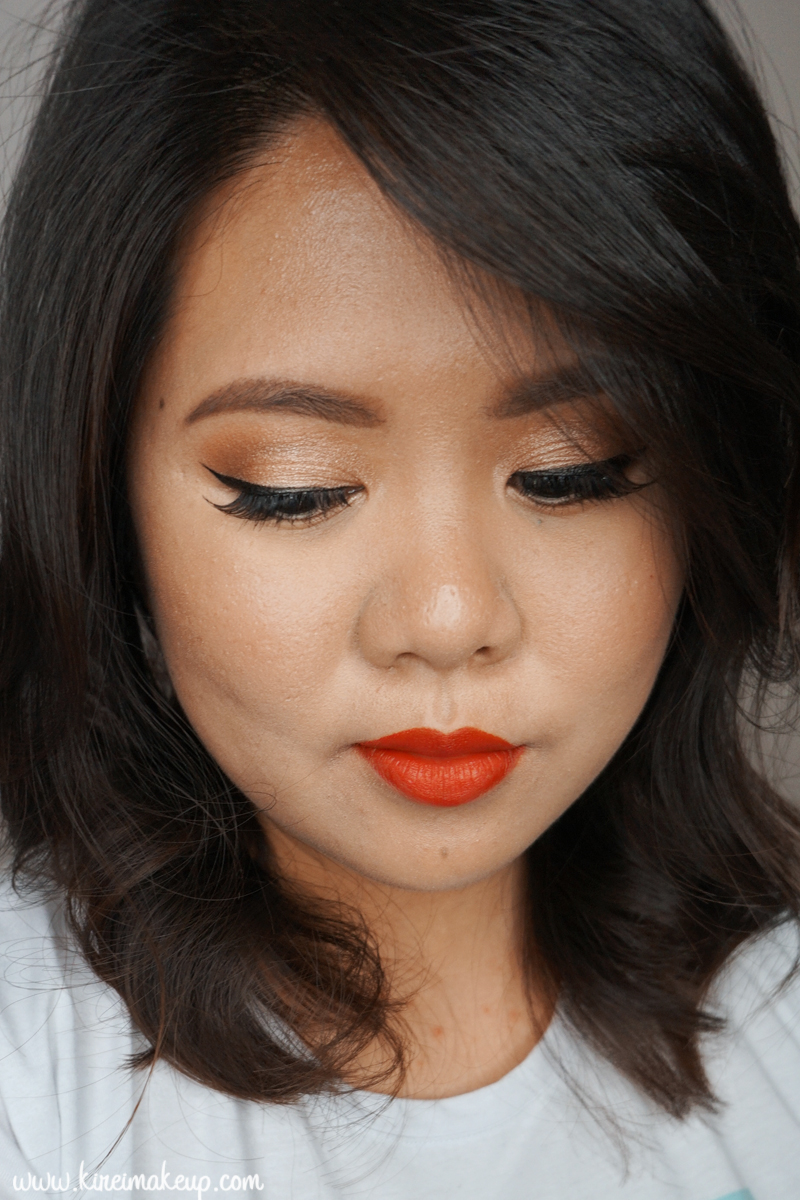
50s Inspired Makeup
This 50s inspired makeup is a modern take of the old Hollywood glam. It’s still pretty glamorous due to the falsies and eyeshadows, which make it suitable for wedding guests, and even brides! You can draw a thicker winged eyeliner if you have bigger eyes, but I kept mine pretty thin.
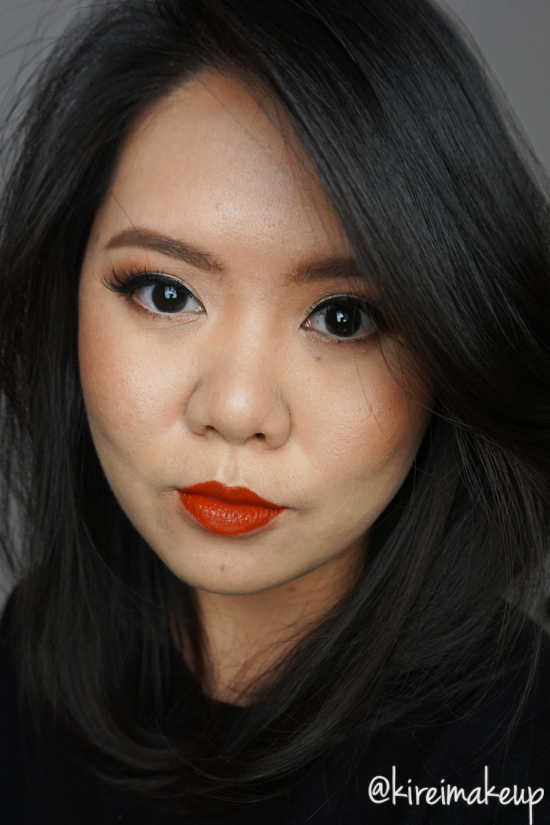
I wanted the focus to still be on the lips, since I think this Shu Uemura Diva Red lipstick is the perfect red lipstick for summer. It has an orange undertone, and it will look great especially on East Asian skintones.
I’ve done a more neutral eyes if you prefer non-winged liner look. Please take a look at my Kat Von D Shade + Light eye contour tutorial for a more neutral non-liner eyes.

Products used
Eyes
- Primer – Urban Decay Primer Potion “Original”
- Eyelid – Make Up For Ever Aqua Cream no. 13 “Warm Beige”
- Transition – Makeup Geek Cosmetics “Peach Smoothie”
- Crease/lower lid – L’oreal “La Palette Nude no. 6”
- Winged liner – Kat Von D Tattoo Ink Eyeliner “Trooper”
- Waterline – MAC Chromagraphic eyeliner “NC25”
- Mascara – Maybelline Great Lash mascara
- Falsies – Ardell false lashes #120 “Demi”
- Eyebrows – Anastasia Beverly Hills Brow Wiz “Taupe” + “Medium Brown”
Face
- Foundation – MAC Pro Longwear Waterproof foundation “NC25”
- Corrector – Bobbi Brown Corrector “Peach”
- Concealer – MAC Pro Longwear Concealer “NC25”
- Powder – MAC Mineralized Skinfinish “Medium Plus”
Cheeks
- Contour – Smashbox contour kit
- Blush – Smashbox Halo Powder Blush “In Bloom”
- Highlight – The Balm “Mary-Lou Manizer”
Lips
- Lipstick – Shu Uemura “Diva Red” lipstick
Yaz Red Lipstick & Midnight Blue Liner
As mentioned in my Yaz Bukey for Shu Uemura post, I purchased Yaz Red lipstick during the event. I wanted to give it a try, so I decided to pair the red lipstick with this navy blue eyeliner. During the making of this tutorial, my eyes were so watery for no reason on the outer corner, and I couldn’t stop it even after wasting so much q-tips. I think my eyes were dry. Anyways, for that reason, you’ll see a bit of a mess on the bottom outer-corner part of my eye in the step-by-step picture.
For the eyeliner, I used the eyeshadow called Midnight from my Smashbox Double Exposure palette. I used the eyeshadow wet to create an intense and cleaner line. Talking about eyeliner, I posted a quick video on my Instagram on how I create my winged liner using liquid liner, so check it out! If you prefer a pictorial, I have 2 posts – Winged Liner tutorial (using Kat Von D Trooper liner) and How-to (gel/cream) winged liner (using brush and cream liner).
I’ve done other tutorials using Smashbox Double Exposure palette – Valentine’s Day makeup and Look #2.

Products used
Eyes
- Primer – Urban Decay Primer Potion “original”
- Eyelid/Brow Bone – Smashbox Double Exposure Palette “Veiled” (applied dry)
- Crease – Smashbox Double Exposure Palette “Espresso” (applied dry)
- Winged Liner – Smashbox Double Exposure Palette “Midnight” (applied wet)
- Lower lash line (inner corner) – Smashbox Double Exposure Palette “Blanc” (applied wet)
- Waterline – MUFE Aqua Liner “0L Matte Black”
- Eyebrows – Stila All Day Waterproof Brow Colour
- Mascara – Cover Girl Lash Blast “Very Black”
- Falsies – Gwiyomi Boutique #3
Face/Cheeks
- Primer – Kat Von D face primer
- Foundation – NARS All Day Luminous Weightless Foundation “Punjab”
- Concealer – MAC Pro Longwear concealer “NC25”
- Highlight – Becca Shimmering Skin Perfector “Moonstone”
- Setting powder – CoverFX translucent powder “Light”
- Contour – MAC “Sculpt” powder
- Blush – Smashbox Halo Blush powder “In Passion”
Lips
- Lipstick – Yaz Bukey for Shu Uemura “Yaz Red”

4 Bridal Makeup Looks
I collaborated with Lover.ly to create a bridal makeup look. I was shown 3 photos of the bridal gowns, and I chose my favorite as below for my post. While I was thinking of to create a look for this gown, I decided to create not one, but FOUR bridal makeup looks to suit the gown! I created 4 looks since I knew that most brides would have their own interpretation of their makeup, some chose to be more on the natural side, while others might not be afraid to go bold!
I also took into consideration of the whole outfit and hair. As you can see, the gown that I chose has a very demure neckline, along with a very elegant lace details. With this in mind, in my opinion, I think brides who chose this type of gown would be very classy, lady-like and conservative.

Since the hair is pulled back, so not to clash with the neckline, I didn’t want to create a heavy dark smoky eyes. I think with this gown and hairstyle, a simple warm eyes would suffice. I feel that a heavy, dark smoky eyes would be too heavy and might clash with the high neckline. Of course, you can go on the dark smoky eyes look, but I prefer going light on the eyes and play on the lips.
So, for this tutorial, I created 1 eye makeup which can be paired with 4 different lips look. Usually for bridal makeup, I tend to choose the warmer neutrals (think browns and gold) since I think it looks very flattering on everyone. Very rarely I do a black smoky eyes, unless the client asked for it, and/or during change of makeup from morning to evening. Even then, I’ll still add some warmth on the smoky eyes.
To compliment the lace and the gown’s off-white color, I decided to use a beautiful gold on the eyelids from the Too Faced Chocolate Bar eye palette called Creme Brulee. This gold isn’t too yellow, nor it is too shimmery. It has a somewhat satin finish, which makes it perfect for this look so it doesn’t clash with the texture of the gown.
Since this gown doesn’t have shiny finish, I decided to keep the face semi-matte to avoid looking too dewy. I feel that this gown has a grown-up feeling to it, so I try to avoid the dewy/glowing finish since it can make the bride looking too youthful. Semi-matte is the right choice for this look.
In all of the 4 looks I created, I only added extra blush on the bottom looks (both left and right), and added a black waterline on the look with the dark lips. Otherwise, everything is exactly the same (brows, foundation, highlight, contour etc).
No, I do NOT contour my face heavily with cream foundation. You can if you want, but I prefer not to. I like very subtle highlight/contour so my clients look still like themselves in the photos instead of looking like someone else. HOWEVER, IF or WHEN the client asks for heavy contouring (i.e. Kim K contouring), I’ll still provide the cream contouring for her.
If you’d like to see me do a glam Bridal makeup (i.e. smoky eyes, contour, and the whole nine yards), do let me know by leaving comments here or on my Instagram page!
Eyelids are prepped using Urban Decay Primer Potion. Face is primed using MUFE HD Elixir.
How-to:
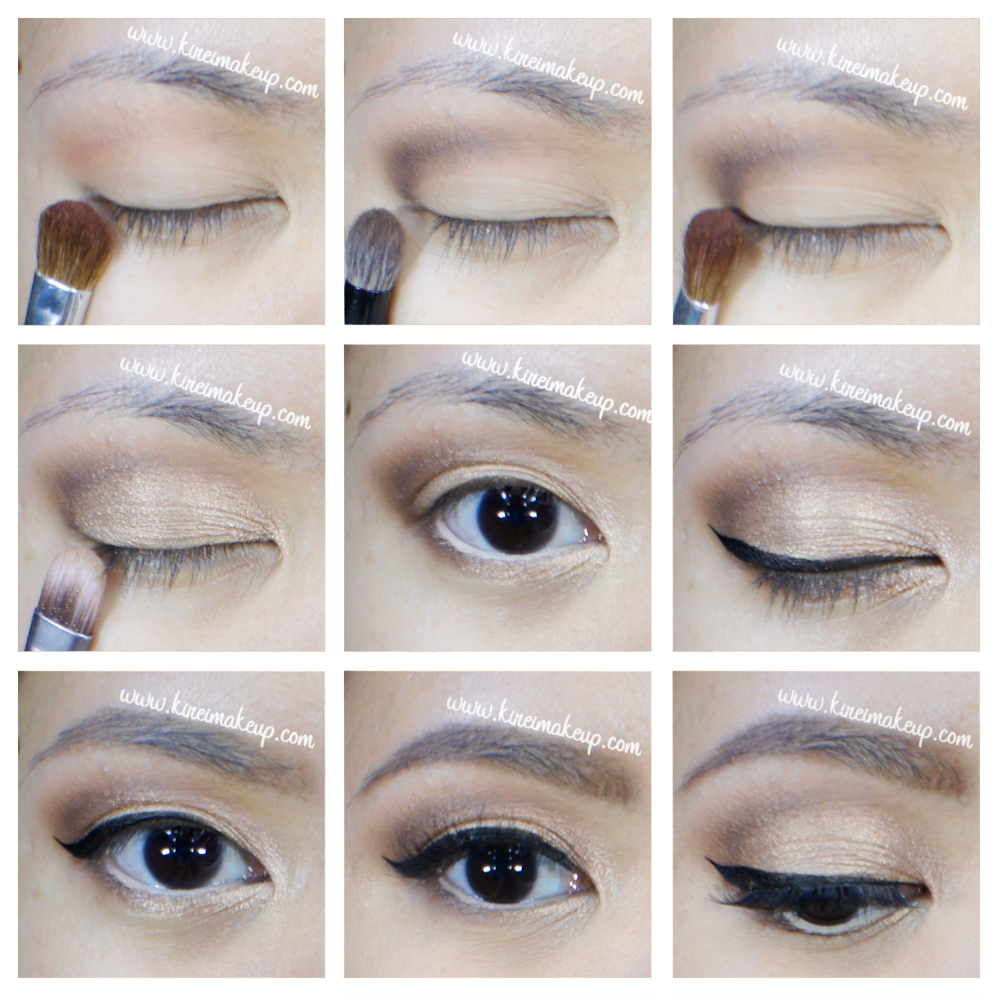
1. I applied Salted Caramel from Too Faced Chocolate Bar eye palette on my crease using a clean blending brush.
2. On the outer V, I applied a mixture of Triple Fudge and Semi Sweet (both from Too Faced Chocolate Bar palette) using a Smashbox Bullet Crease brush.
3. Then, using the same brush as step 1, I blended out the edge of my crease.
4. Using a flat eyeshadow brush, I applied Creme Brulee (from Too Faced Chocolate Bar palette) on my eyelid.
5. I lined my waterline using MAC Chromagraphic pencil eyeliner in NC15 (or L‘oreal Voluminous Smoldering eyeliner for the dark lips version).
6. I also applied Triple Fudge/Semi Sweet mix on the outer half of the lower lash line. Then, I applied Creme Brulee on the inner half of the lower lid. I used the edge of a flat eyeshadow brush to do this.
7. I created a winged liner using Shu Uemura Calligraphy:ink liquid liner pen along the upper lash line.
8. I filled my brows using Anastasia Brow Wiz in Taupe FIRST, then I darkened the tail and any sparse area using Anastasia Brow Wiz in Brunette.
9. I curled my lashes and applied Gwiyomi no. 3 false lashes.
10. On my face, I applied MUFE HD foundation all over using a foundation brush.
11. I set my face using CoverFX translucent setting powder.
12. I lightly contour my face using Smashbox contour kit powder, and highlight my face using The Balm Mary-Lou highlighter. If you have oily skin, I’d suggest skipping highlighting using Mary-Lou. Instead, you can use a matte powder which is a shade or two lighter than your skin, or the highlight powder from Smashbox contour kit.
13. I applied Chanel Blush de Horizon on my cheeks.

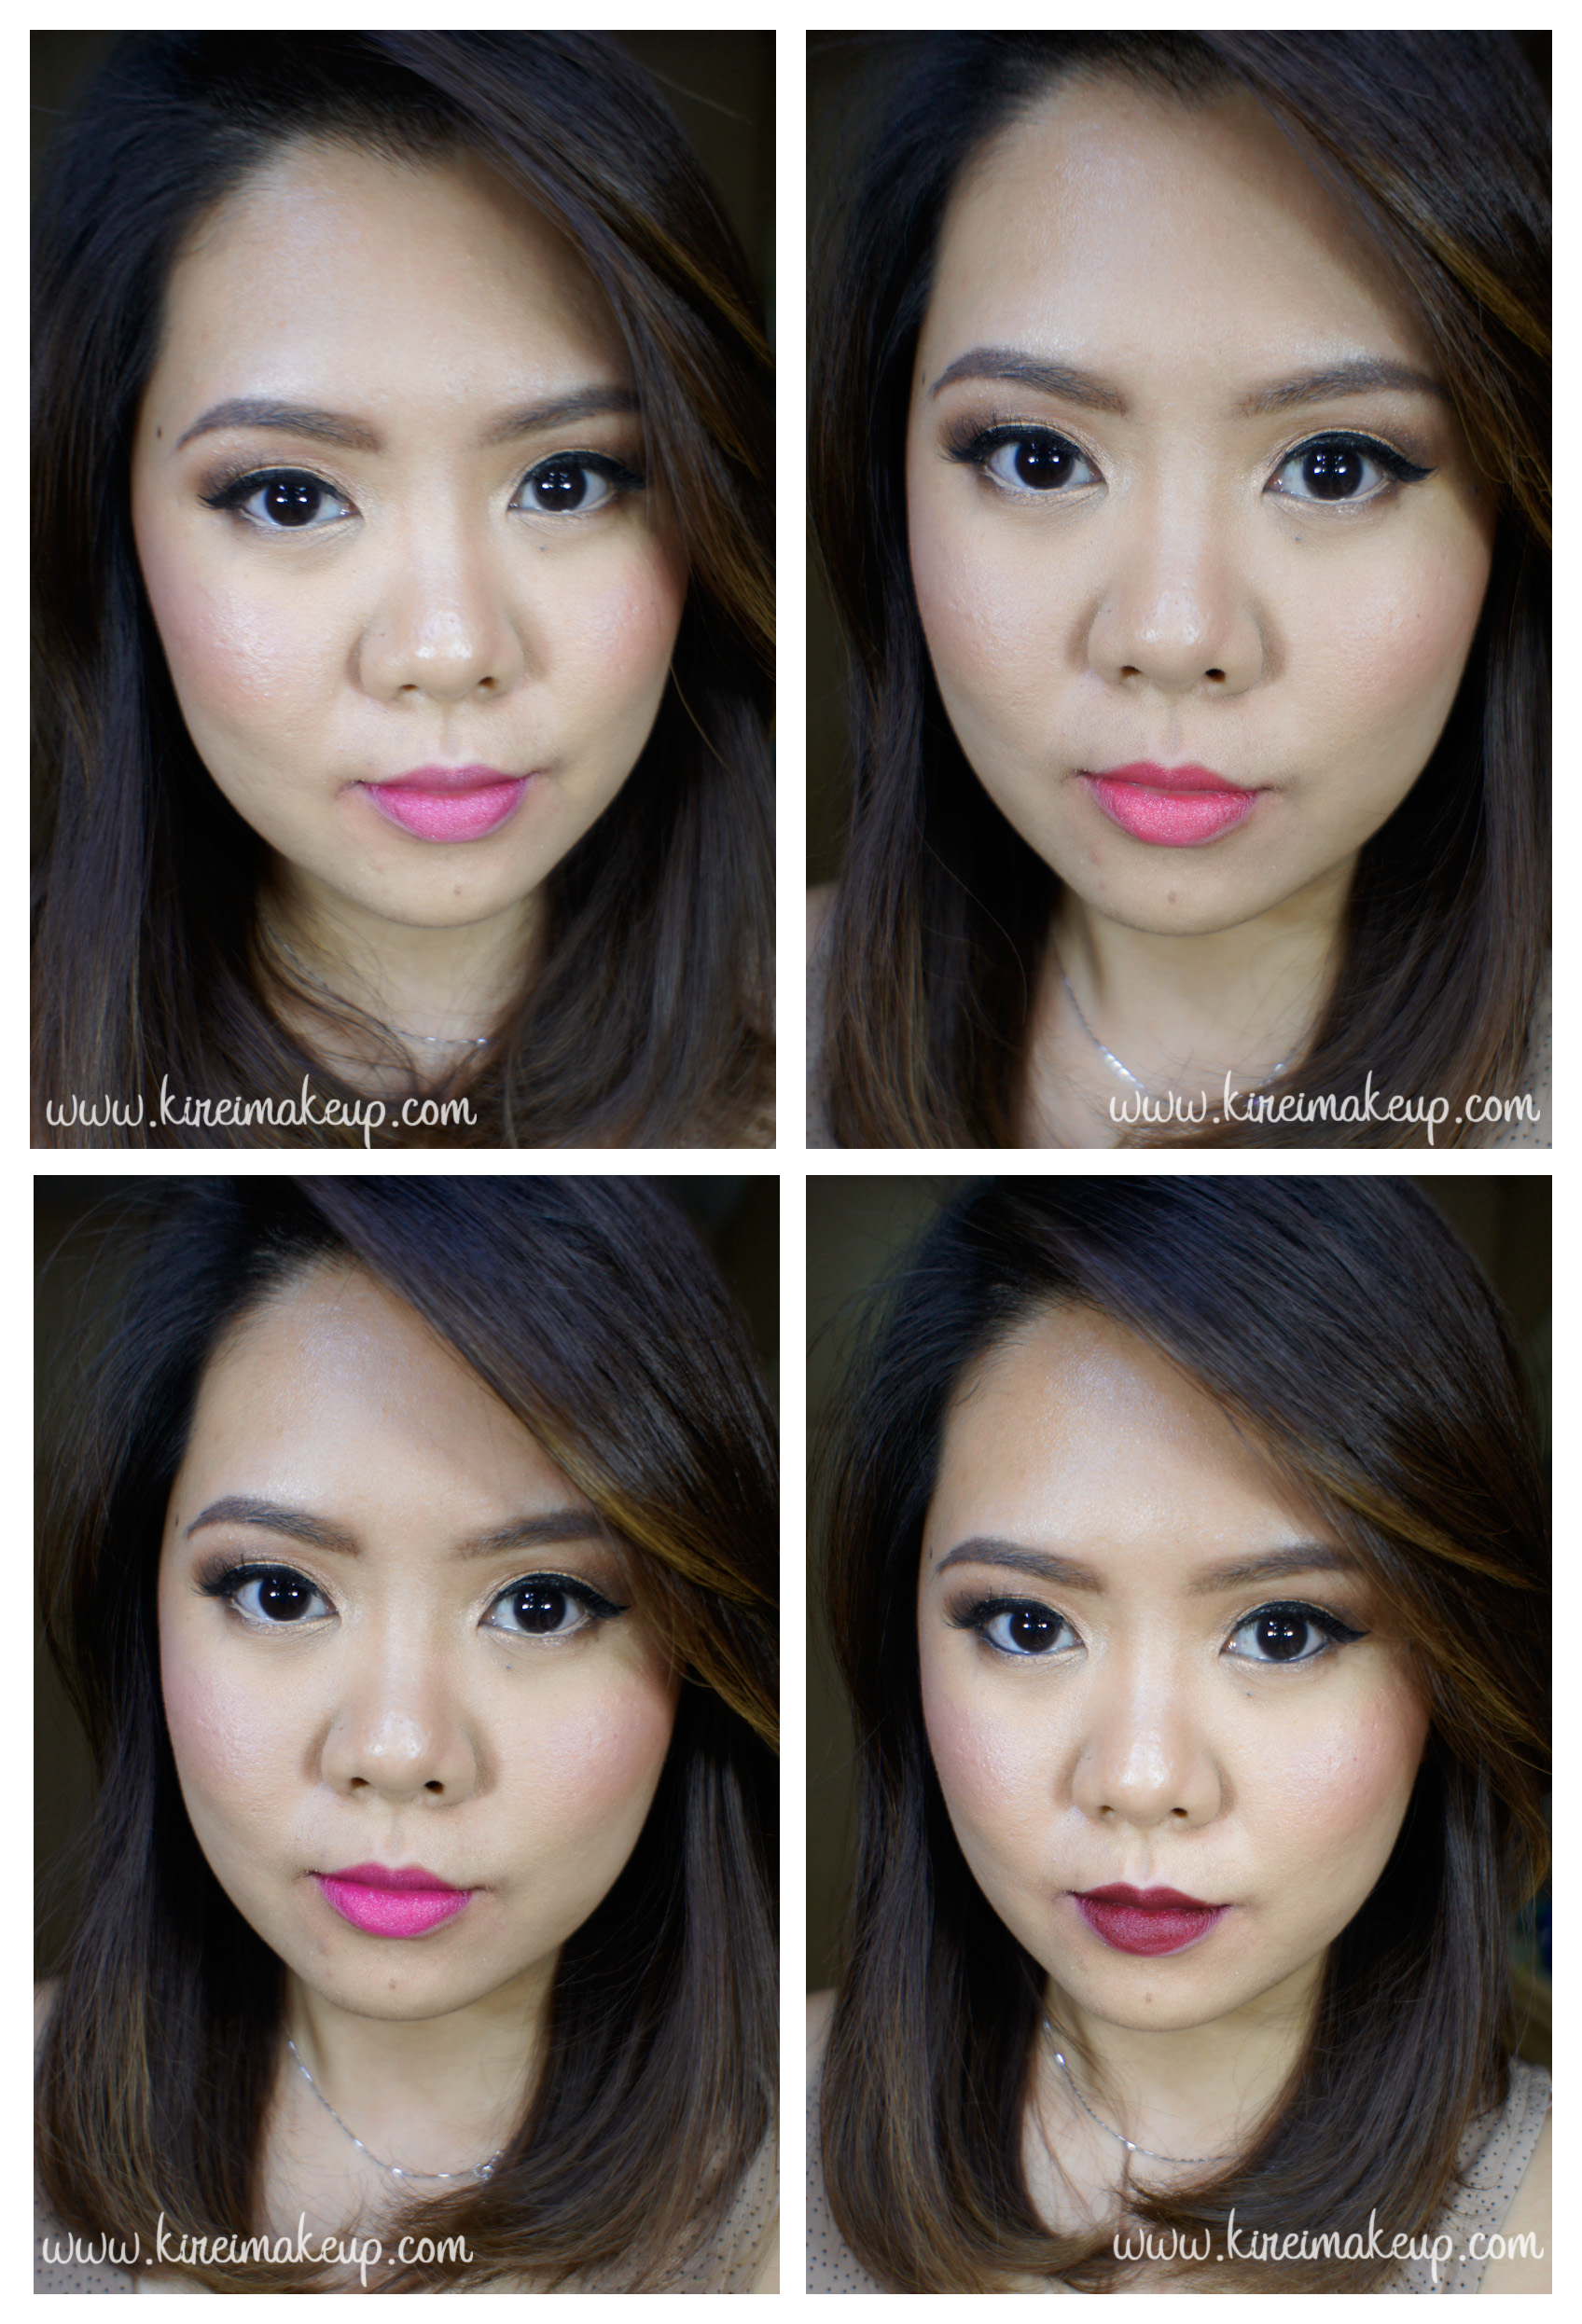
14a. For this blushing bride look, I applied Lancome Color Design in Vintage Rose Sheen.
This look is perfect for those brides who prefer to have a natural look. The rose lipstick has just enough color to brighten up the face. This bridal makeup look is great for Summer Wedding!

14b. For this youthful bridal look, I added YSL Rouge Pur Couture no. 52. I applied it using a lip brush.
This lipstick is pretty much sold out in Indonesia! When applied lightly on the lips, this YSL no. 52 really lives up to its popularity! It deposits enough pigment without looking too bright on the lips. This gorgeous coral lips is also great for Summer Wedding makeup, but I think it’d be perfect for Spring Wedding where all the flowers are just blooming, and the weather isn’t quite warm yet. This bridal makeup look would instantly gives the bride the most beautiful smile on her big day!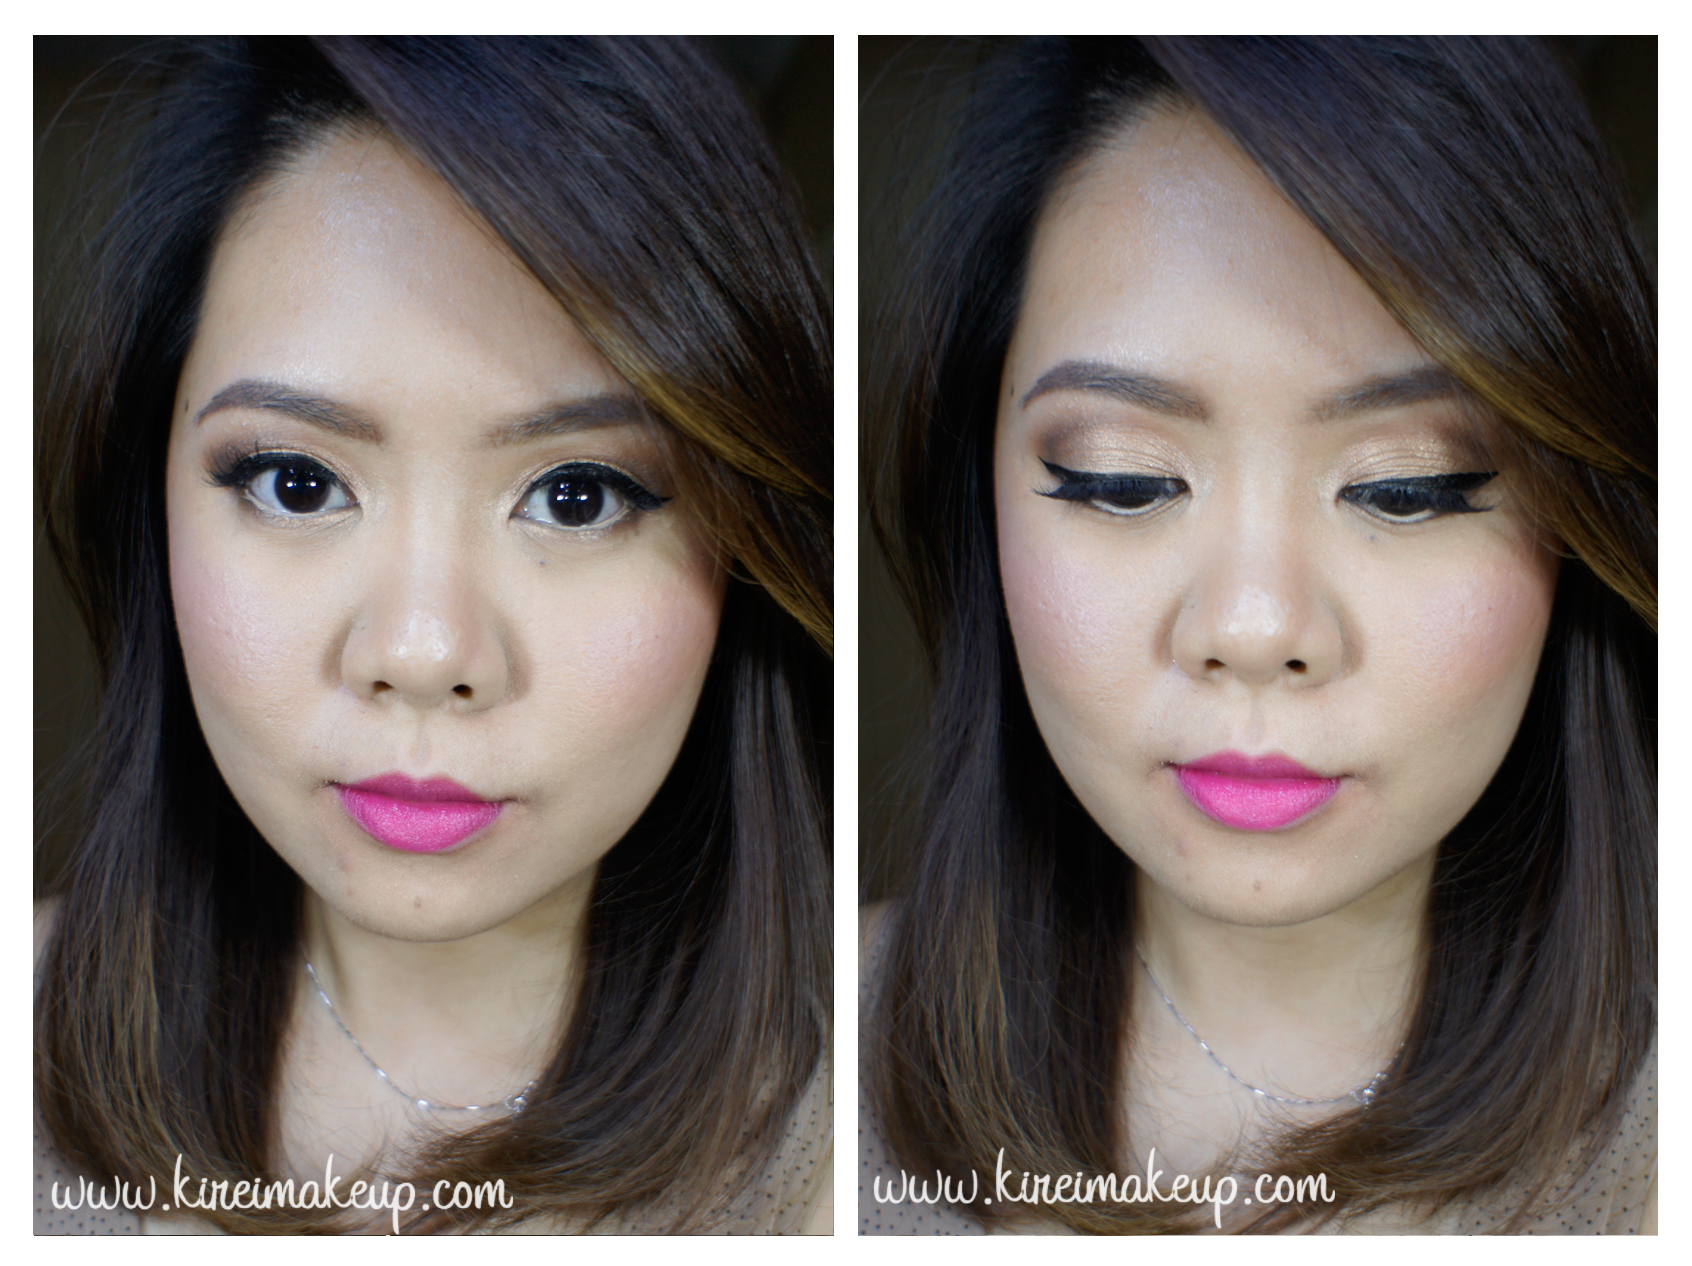
14c. I applied MAC Girl About Town on the lips using a lip brush. I had to add a bit more blush to avoid my face looking washed out for this look since the lips are quite bold.
This is another look which would look great for Spring/Summer Wedding. For brides who are a bit more adventurous, but not into red lips, this is definitely a look to try. What I love about MAC Girl About Town lipstick is that the color is not too fuchsia. It still has enough warm undertone to make it wearable for a wedding, and at the same time bright enough to give a punch of color.

14d. For this lovely deep red, I first lined my lips using L’oreal Color Riche Anti-Feathering lip liner in True Burgundy. Then, I applied MAC Diva lipstick on top of it. (The blush was the same as 14c)
Last but not least, we have the makeup look for a Fall/Winter wedding. Of course you can choose the other lip colors for Fall/Winter wedding, but I really love this deep red lips look. Personally, this is my favorite look out of the 4. I chose to darken my waterline to compliment the deep red lips.
So, that’s all folks! I think everything is pretty self-explanatory from the photos. I’d like to say that yes, you CAN wear all these makeup looks even if you aren’t a bride! Obviously some steps for bridal makeup are different than daily makeup, but that’s for next time! Yes, you can wear this look to a wedding party, or if you’re bridesmaids etc. Again, like I said, the way I applied and steps taken for bridal makeup is slightly different than daily or party makeup. You can tweak it to your preference!
Products used
Eyes – Urban Decay Primer potion; Too Faced Chocolate Bar eye palette (crease: Salted Caramel, outer V & lower lid: Triple Fudge/Semi Sweet, eyelid & lower lashline: Creme Brulee); Shu Uemura Calligraphy:ink liquid liner; MAC Chromagraphic pencil liner NC15 or L’oreal Voluminous Smoldering eyeliner; Anastasia Brow Wiz in Taupe and Brunette; Gwiyomi no. 3 falsies.
Face – MUFE HD elixir; MUFE HD foundation; Cover FX Translucent Powder.
Cheeks – Smashbox Contour kit; The Balm Mary-Lou; Chanel Blush de Horizon
Lips – Lancome Color Design Vintage Rose Sheen (a); YSL Pur Rouge Couture no. 52 (b); MAC Girl About Town (c); L’oreal Color Riche lipliner in True Burgundy and MAC Diva (d)