Daytime Bronze Smokey Eyes

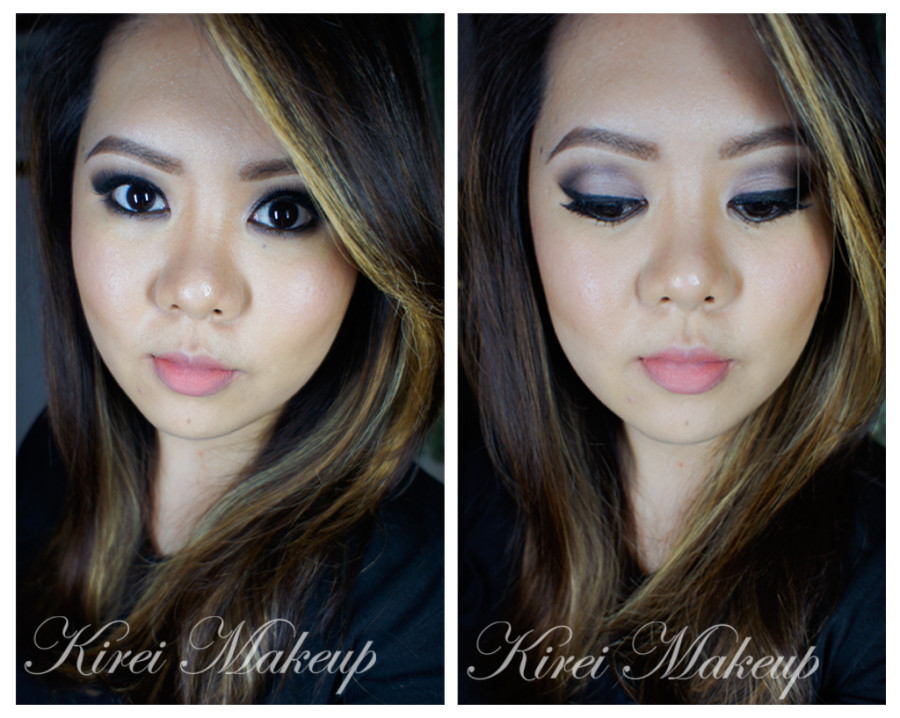
Today’s post, Daytime Bronze smokey eyes, was actually a pending post from last week. I actually did this look after I did my brows video. Since I was uber busy last week (Shu Uemura competition, work and stuff), I didn’t have the chance to post this tutorial up. I also want to mention that I will not be posting any tutorial until end of this week, so I apologize for missing again. However, do follow me on Instagram to find out what I’m up to! Instagram has been a place for me to micro-blog almost daily.

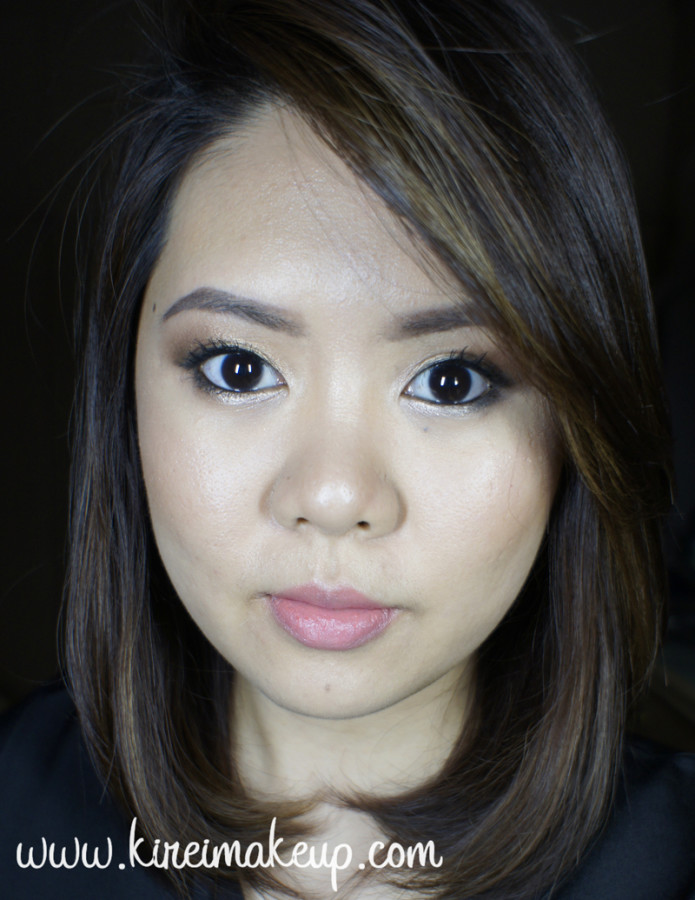
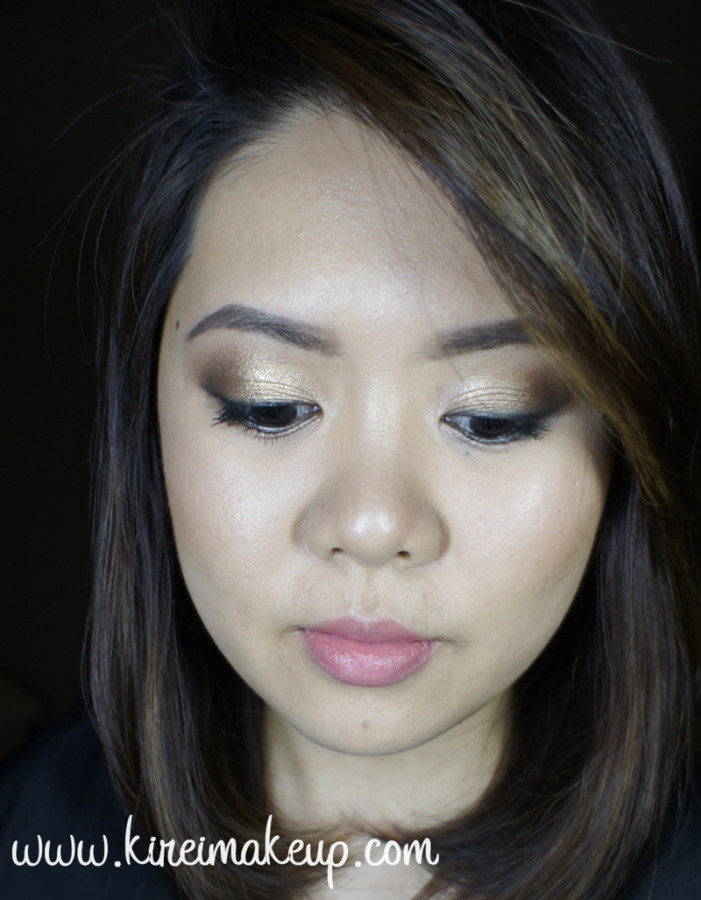
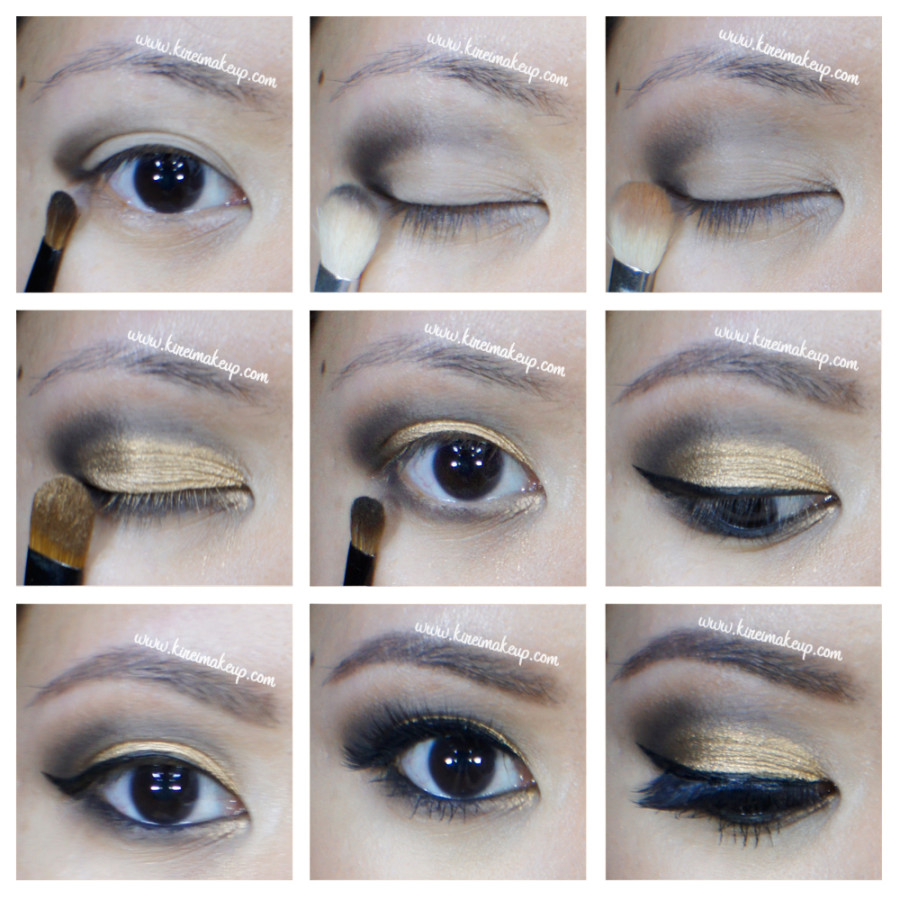
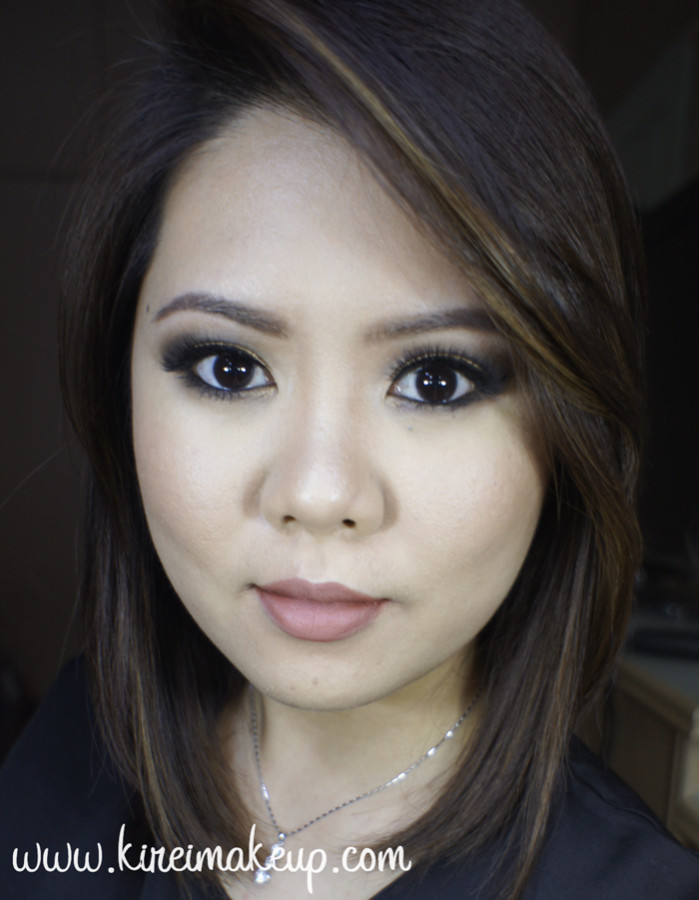
Anyways, for this look was a request over on Instagram by Sammie. She wanted me to do an easy golden smoky eyes that she can wear during daytime. The key to this look is to keep the black to a minimum if you are going to wear it out for a day makeup. The usual smoky eyes are quite strong and dark, meawhile for this look I kept it quite light and not as intense. I smudged a lot of the black out, and skipped my usual black winged liner. Instead, I opted for a smudged eyeliner using powder. I kept the black on the waterline & tightline, but if you’re afraid that this will close your eyes up you can skip it. I just love black eyeliner on waterline & tightline for smoky eyes.

bronze makeup tutorial

I used Urban Decay Naked 1 palette for the eyeshadows. You can also find these shades in single pot from Urban Decay.

Brows are filled using Anastasia Brow Wiz in Medium Ash and Brunette.

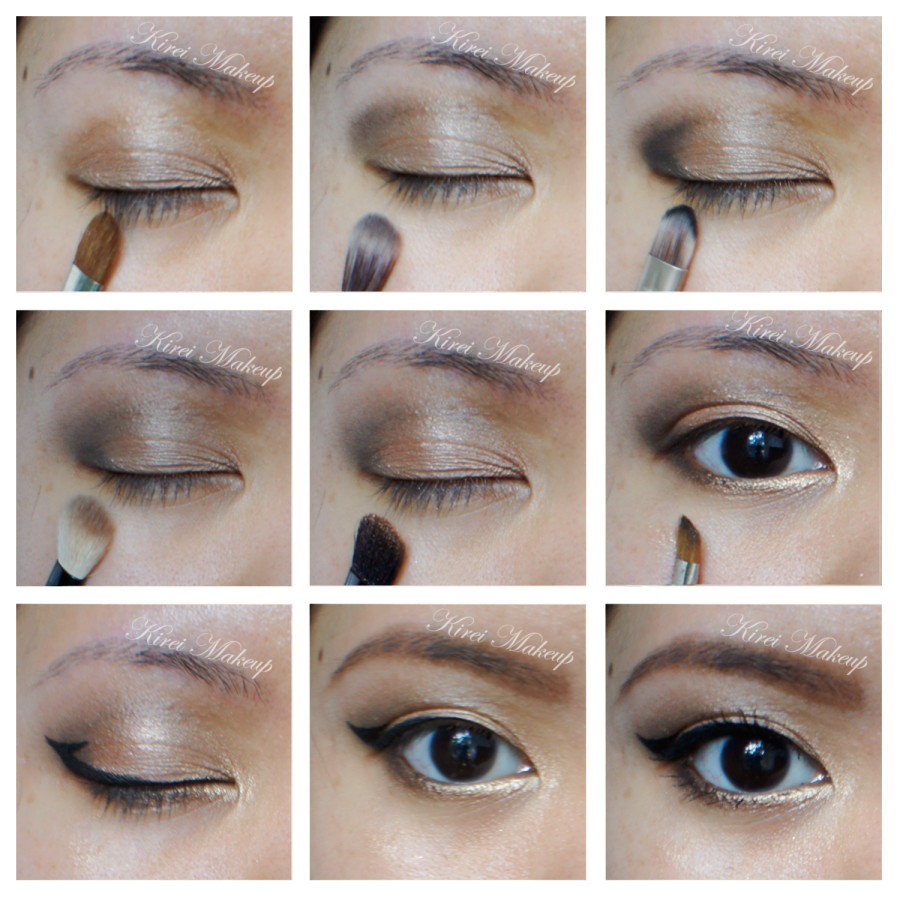
How-to:

1. I applied Urban Decay Primer Potion in Sin all over my lid using my ring finger.

2. Using a fluffy blending brush, I applied Urban Decay Smog on the outer half of the lid, all the way to the crease.

3. I used Smashbox bullet crease brush to blend out the edges.

4. Using Sephora crease brush, I applied Urban Decay Darkhorse just to deepen the outer corner.

5. Using a shader brush, I applied Urban Decay Half-Baked on the eyelid.

6. I applied Smog on the outer half of the lower lash line, and Half-Baked on the inner half using an angled eyebrow brush.

7. I applied Urban Decay Creep along the upper lash line and outer third of lower lash line using an angled eyeliner brush.

8. I lined my waterline and tightline using L’oreal Voluminous Smoldering eyeliner.

9. I curled my lashes and applied Make Up For Ever Aqua Smoky Lash mascara on both upper and lower lashes.

daytime makeup

10. For my face, I applied Smashbox Halo Liquid foundation and Cover FX cream foundation brush.

11. I lightly contoured my face using Benefit Hoola bronzer, and added highlight using MAC soft and gentle highlighter.

12. I applied Benefit Coralista blush on my cheeks.

13. On my lips, I applied Shu Uemura Lip Tint Gelato in 01.

golden bronze smoky eyes

Introduction to Clozette Indonesia

As most of you should know by now, I’m quite active on Instagram. If you realized, I’ve been hashtagging a lot of my beauty, skincare, fashion posts using #clozetteid and/or #clozette. If you are curious as to why I’ve been doing this, keep reading!

So, a year ago I started seeing Clozette Indonesia advertisement on Facebook, being a curious person, I decided to click on it and found out that Clozette Indonesia is a large beauty- and fashion-related social network in Indonesia. I decided to sign-up for it, connected my Instagram account to it and started hashtagging my works with #clozetteid.

Fast forward to a few months later, a few of my friends, followers and I started to realize that my tutorials have been popping up on Clozette Indonesia facebook ads. You would know if you follow me on Instagram, because I actually took a few screen shots of those ads and posted it there. Curiosity had gotten me, and I decided to email the staff over at Clozette Indonesia to ask why were my pictures were used. To my surprise, they asked me to become a Clozette Ambassador!

So, I’m certainly looking forward to meet the other ambassadors, and hopefully I can continue to inspire more people through Clozette Indonesia! I was quite surprised to see I’ve increased the number of followers over on Instagram, as well as Clozette’s website just from hashtagging my work with #clozetteid. I know the numbers are still low, but hey, baby steps!

Clozette Daily

Anyways! I’ve been talking a lot about Clozette Indonesia, and I’m sure you’re curious by now. So let’s get started on the website itself, and what does it do. Like I’ve mentioned previously, Clozette Indonesia is a fashion- and beauty-related social network. It is an online community, where you can share and discover beauty secrets, fashion must-have items and many more! Not to mention, you can find out what’s the latest videos and pictorials to keep your fashion and makeup wardrobe up-to-date.

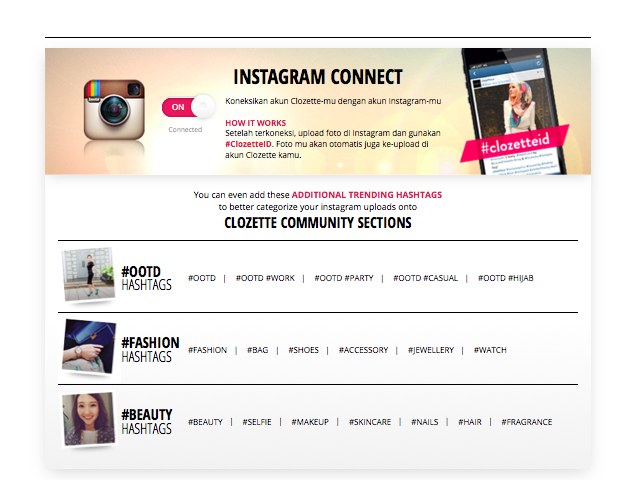
What I love the most about this website is the hashtagging feature; you can add #clozetteid #clozette on your Instagram description (only works on description, not comments), and it’ll automatically get uploaded to your Virtual Closet in Clozette’s website.

Clozette Indonesia

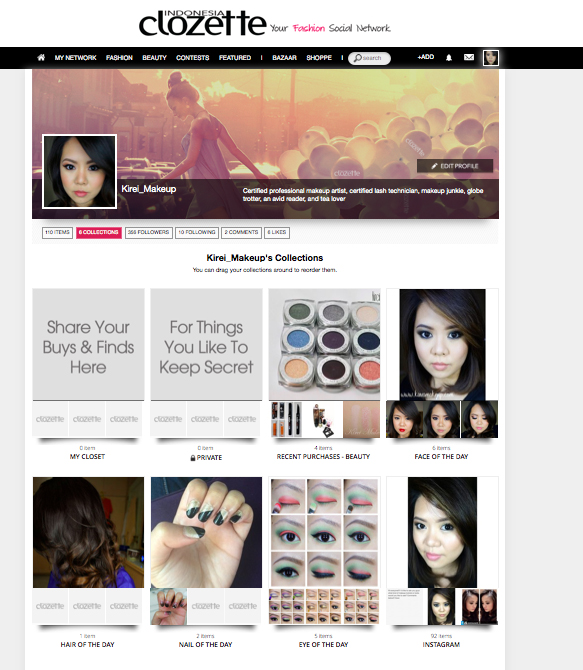
What is Virtual Closet, you ask? See, on Clozette Indonesia’s website, you can categorize your pictures into many “folders” to make everything organized. These “folders” are your Virtual Closet, much like your wardrobe at home. You know how you separate your wardrobes into “dresses”, “pants”, “sweaters”, “shirts” etc? Virtual Closet works like that, except you can make it into anything you want! If you take a look over on Kirei Makeup Virtual Closet (that’s mine), I have several closets such as “Face of the Day”, “Eye of the Day”, “Instagram”, “Recent Purchases – beauty” etc.

So, I’ll try to upload more pictures into my Collection (all of my virtual closets are called Collection), and not just on Instagram. But, as you can see, this is a neat idea, isn’t it? Everything is organized in its own closet! You can add whatever you want – wish list, fashion, look of the day, shoes, etc.

Clozette Indonesia Kirei Makeup

The other feature of Clozette Indonesia that, I think, is pretty cool, is their Store Management So, tell me, do you have a tons of clothes or makeup that you don’t even use anymore, and it’s collecting dust? Or, have you been wanting to start your own fashion/beauty business but don’t know where to start? Well, take a look at their Bazaar! This feature allows you to create your own store, and start selling your own fashion- and/or beauty-related products FOR FREE! All you need to start selling is just 10 items, and you can start making your money!

Clozette Indonesia

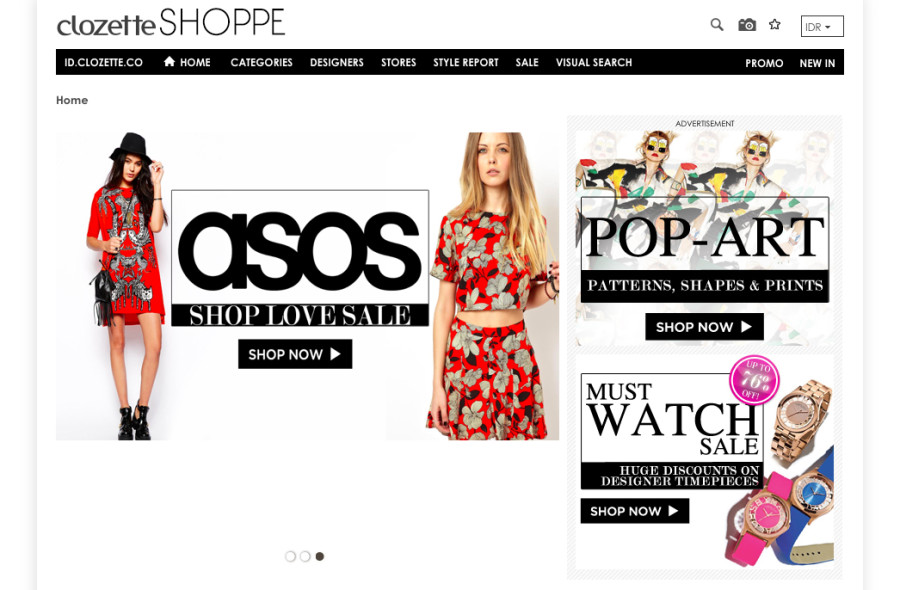
The other feature, related to shopping again because let’s face it we do love to shop, is Shoppe. What is shoppe? Shoppe is like an online store, but unlike Bazaar, the brands in Shoppe are affiliated with Clozette. Local and international online stores, like Zalora, Dian Pelangi, ASOS, Neimann Marcus etc can be found in Shoppe. So, if you’re like me, definitely check Shoppe out! You can shop many different international and local brands in just 1 website! How convenient!

See, Clozette Indonesia isn’t just about inspiring, and getting inspired. It also enables you to become an entrepreneur, for free! I think this website has so much more potential, and I’m so happy to be able to become a part of Clozette Indonesia.

clozette daily

Have I piqued your interest? Well then, what are you waiting for? Come, sign up over at Clozette Indonesia, and start following me! Comment, like, and I’ll be waiting for you! I hope my pictures can inspire you, and you inspire me!

Psst, if you are not from Indonesia, you can still join us! Just take a look at Clozette website right now!

Disclaimer: I am a part of Clozette Indonesia Ambassador program, however, I am not being paid to do this post. All links are NOT affiliated links. I do not earn any commission from Clozette Indonesia.


Smoky Eyes using MAC Rose Gold Pigment

At one point some time last year, I was crazy about anything Rose Gold. In fact, I am still obsessed with anything Rose Gold. Anyhow, I was browsing  around and saw this MAC Rose Gold pigment on their website. I bought it, and played with it. To be honest, when it first came, I was quite disappointed how it does not look anything rose-colored. I should’ve paid more attention to the description. On the MAC website it was described as “smooth, tarnished gold with a touch of rose”. Not sure where the “touch of rose” comes from, I think this pigment is a lot more “tarnished gold”.

Anyways, I actually love this pigment. It has amazing pigment pay-off, and it’s super smooth! I have used this pigment before on my New Year makeup post. I think the hardest part of using this pigment is actually finding a combination of color that will match it. I’m not that crazy on the result for this tutorial, I feel like the pigment should’ve been paired with a warmer shade. May be I’ll re-do this look in the future.

bronze smoky eyes

How-to:

1. I prepped my eyelids using Urban Decay Primer Potion.

2. Using a small fluffy blending brush, I applied Ultra Mattes V2 from Sleek Makeup iDivine Showstopper on my outer V. If you have a monolid, or droppy/hooded eyelids, apply this eyeshadow with your eyes open.

3. I blended out the crease using a clean fluffy blending brush. I added a little bit of the same black eyeshadow to create more depth.

4. I wanted to add a bit more warmth, so I ran a little bit of bronzer, from the Smashbox contour palette, just above the crease.

5. I applied MAC Rose Gold pigment on my eyelid using a flat eyeshadow brush.

6. Using the same brush as no. 2, I applied Ultra Mattes v2 on my lower lid. I applied a little bit of the pigment just on the inner corner of the lower lid.

7. I created a winged liner using Kanebo Super Sharp eyeliner. I also applied a little bit on my waterline.

8. I filled my brows using Anastasia Brow Wiz in Medium Ash. Then, I feathered in Brunette a bit more.

9. I curled my lashes, and applied Gwiyomi Boutique false eyelashes in Annabelle.

mac rose gold pigment

10. On my face, I applied MAC Pro Longwear foundation using MAC Masterclass Oval 6 brush.

11. I applied the concealer from MAC Pro conceal/correct palette under my eyes.

12. I set my face using Cover FX translucent powder.

13. I lightly contoured and highlight my face using Smashbox contour palette.

14. I applied MAC Cubic blush on my cheeks.

15. For my lips, I lined and filled it in using MAC Spice lip liner.

smoky eyes for asian

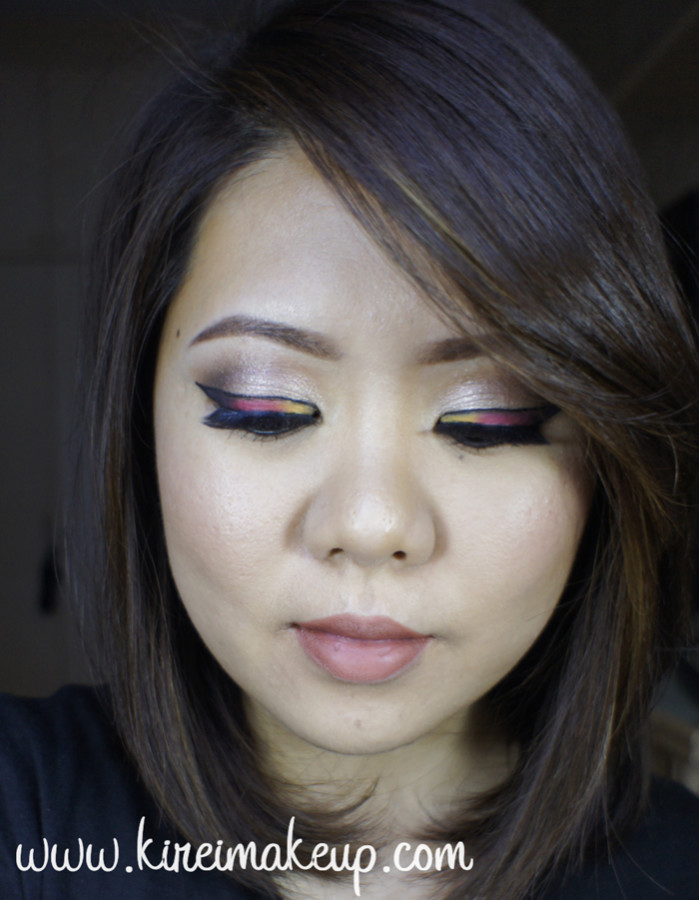
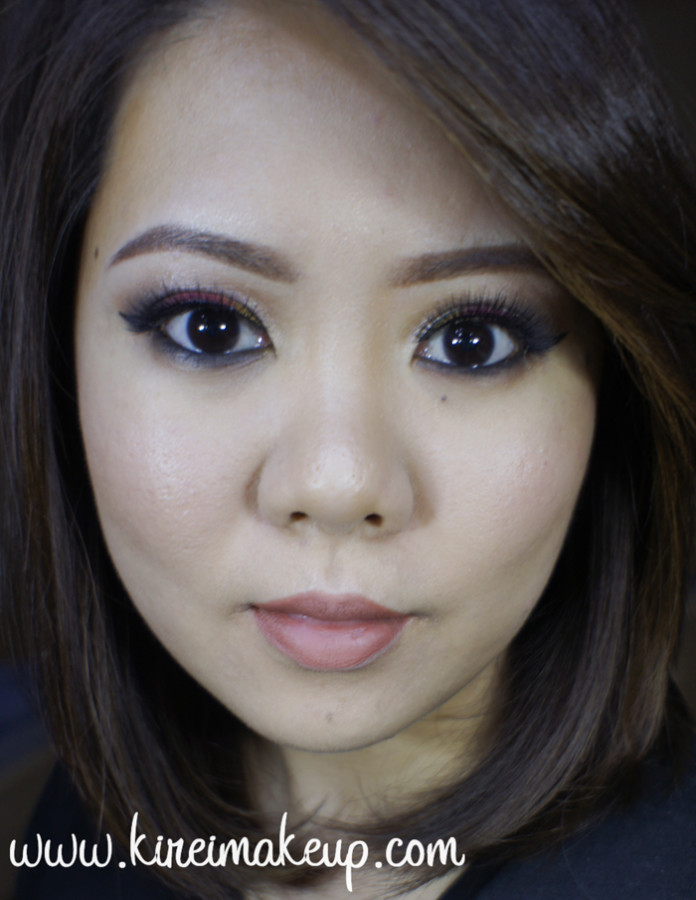
World Cup 2014 Germany Inspired Makeup

Tonight (Indonesian time) is the final match for FIFA World Cup 2014. A match between Germany and Argentina! So, for today’s tutorial I’m going to do a Germany inspired makeup. For Argentina’s makeup, I’ve done it in my World Cup 2014 Argentina Inspired Makeup post. I’ll do another tutorial that was requested for my last world cup inspired look next week.

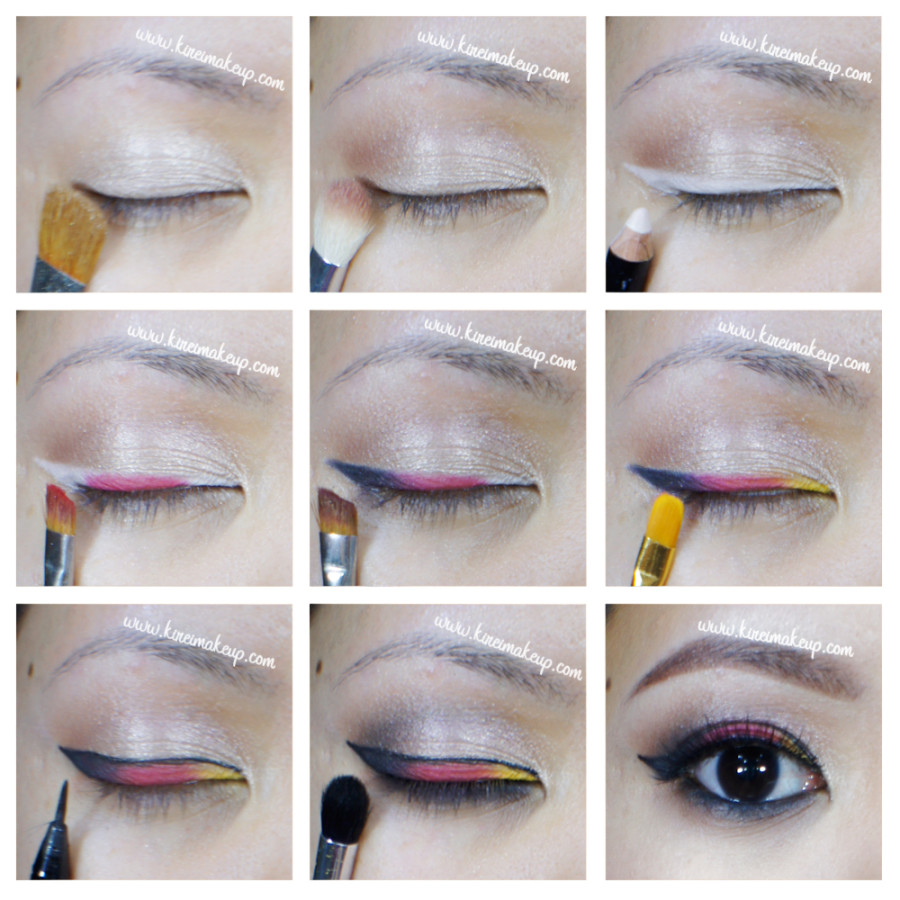
Anyways, for this tutorial, it’s actually super simple and easy. The hardest part for this tutorial is actually the black outline eyeliner. If you find it too hard, feel free to skip the outline. Also, for this tutorial, I didn’t use any cream face paint since I wanted to show you that you can do eyeliner with a different product/medium.

I do apologize if my brows look imperfect today. I have a pimple right underneath the arc, so I can’t really create a smooth line. Like I said, I don’t airbrush my pictures, so what you see is what you get!

german inspired makeup

How-to:

1. I applied L’oreal Infallible eyeshadow in Hourglass Beige all over my eyelid using a flat eyeshadow brush.

2. Using a fluffy blending brush, I applied MAC Blunt powder blush on my crease.

3. I created a winged eyeliner using the white end of Revlon Photoready Kajal eyeliner in Carbon Cleopatra.

4. Using an angled eyebrow brush, I applied Ben Nye Flame Red blush in the middle of the eyelid, on top of the white eyeliner.

5. I cleaned my brush on a paper towel, and then using the same brush, I applied Deadhead from Kat Von D monarch palette on the outer third of the white eyeliner.

6. Using a small flat brush (you can use angled eyeliner brush too), I applied MUFE no. 71 eyeshadow on the inner third of the eyeliner.

7. Using Kanebo Kate Super Sharp eyeliner, I lined the outer area of the eyeliner.

8. Using a Sephora bullet crease brush, I very lightly applied Deadhead just on the crease to create some depth.

9. Along the lower lash line, I applied Deadhead using a flat eyeliner brush. I used a very tiny bit of Shadow box from the same palette and a clean crease bullet brush and run it lightly to blend out Deadhead.

10. I lined my waterline using L’oreal Voluminous Smoldering eyeliner.

11. I curled my lashes, applied MUFE Aqua Smoky Lash mascara, and topped it off with Gwiyomi Annabelle lashes.

12. I filled my brows using Shu Uemura Hard Formula Brow Pencil.

world cup 2014 inspired makeup

13. On my face, I applied Marc Jacobs gel foundation using a foundation brush.

14. I also lightly applied some highlight and contour using Motives Fire sculpt palette.

15. I applied YLS cream blush no. 2 on my cheeks.

16. My face was set with Cover FX Translucent powder.

17. I filled my lips using MAC Spice lip pencil.

colorful eyeliner

World Cup 2014 Netherlands Inspired Makeup

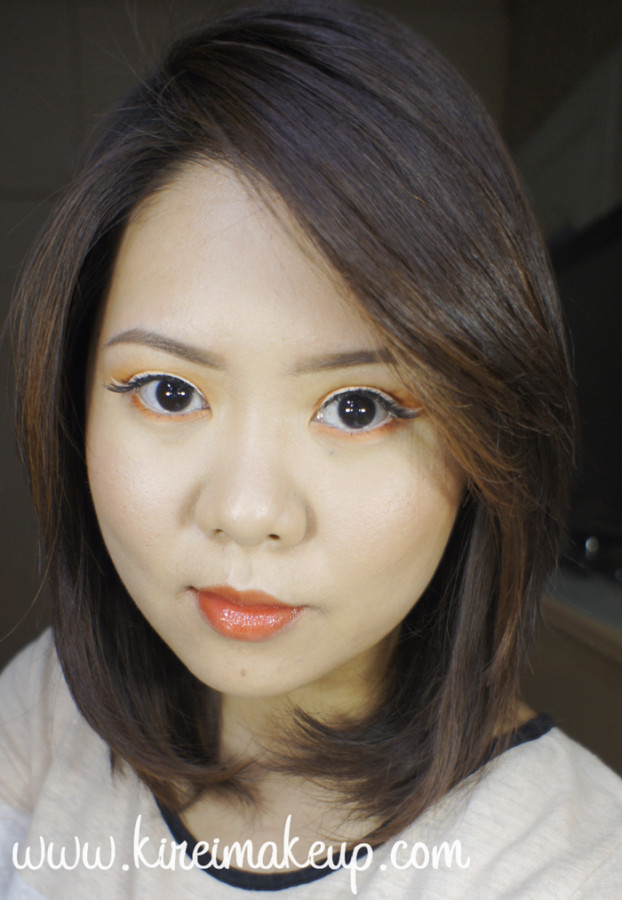
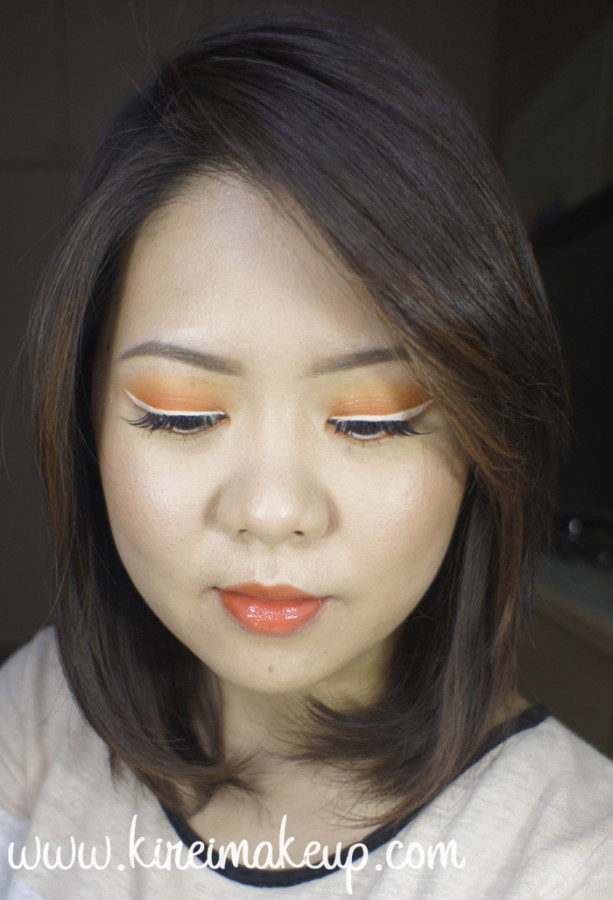
Go, Oranje! Today’s look is a Netherlands Inspired Makeup, a second installment to my World Cup 2014 series! I know this look is super orange, so feel free to change the lip color if you’d like. I just wanted to make everything orange for fun. If you want to know which team I chose to do on my first World Cup 2014 series, check out my tutorial here!

Let me just tell you, the white eyeliner is a bit tricky once you start putting mascara on. Be very careful! If not you might end up with black spots all over the white eyeliner, and it ain’t easy to remove. I’d suggest going for a white liquid eyeliner, or a water-based white face paint. I used a cream face paint because that’s what I have, but maaan it was so troublesome when the eyeliner wasn’t set. Whenever I blinked or open my eyes, the white cream went into the lines on my eyelids.

Anyhow, I hope you guys enjoy this look. It’s actually super simple and fast to do! If you do wear it to support Netherlands, please take a picture and tag me on it (or add #kireimakeup on instagram or twitter or facebook!).

For a list and pictures of products used in this tutorial, please scroll all the way down!

orange and white makeup

How-to:

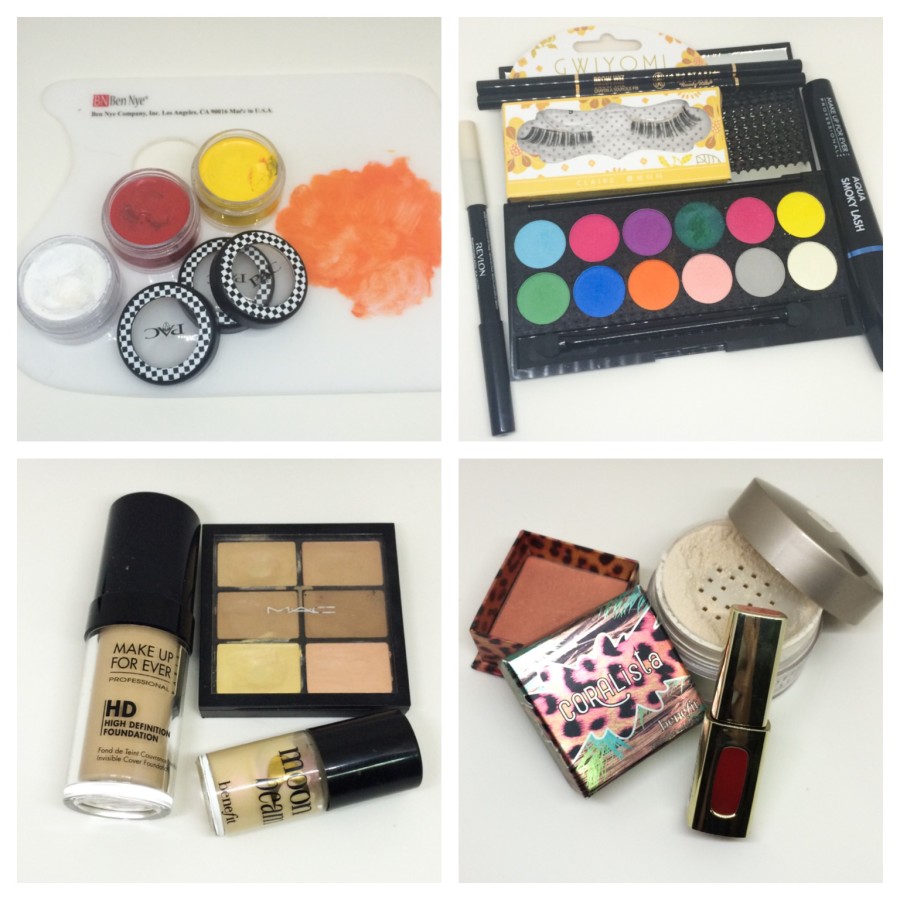
1. I mixed yellow and red cream-based face paint to create orange on my palette. Then, I applied the orange cream-based on my eyelid using a synthetic brush. I used my finger to blend this cream face paint.

2. Using a shader brush, I applied Strike from Sleek Makeup iDivine Ultra Mattes v1 Brights on the eyelid. I focused on packing the color along the lash line and center of the lid while blending it upwards.

3. Using a white face paint, I created a winged eyeliner along the upper lash line. (Check out my how-to create winged eyeliner tutorial if you want to learn how to do the perfect feline flick).

4. I set my eyeliner using Pow from Sleek Makeup iDivine Ultra Matte v1 Brights palette.

5. I lined my waterline using a white eyeliner from Revlon Photoready Kajal eyeliner in Carbon Cleopatra.

6. I also applied Strike on the lower lid using the tip of a flat eyeshadow brush.

7. I filled in my eyebrows using Anastasia Brow Wiz in Ash Blonde first, and then I lightly applied Brunette to create depth.

8. I curled my lashes using MUFE Aqua Smoky Lash.

9. I applied Gwiyomi “Claire” false eyelashes for an added winged effect.

netherland oranje makeup

10. I mixed MUFE HD foundation and Benefit Moon Beam to create a dewy foundation. I applied this mixture on my face using a foundation brush.

11. I applied concealer from MAC Pro correct/conceal palette in Medium under my eyes.

12. I set my foundation using Cover FX translucent powder.

13. I applied Benefit Coralista on my cheeks.

14. On my lips, I applied L’oreal Color Riche Extraordinaire Liquid Lipstick in Orange Tempo.

netherlands inspire makeup tutorialProducts List

Eyes – PAC Face Paint (eyelid: red/yellow mix, eyeliner: white); Sleek Makeup iDivine Ultra Matte V1 Brights (eyelid: Strike, eyeliner: Pow); Revlon Photoready Kajal eyeliner Carbon Cleopatra; MUFE Aqua Smoky Lash; Anastasia Brow Wiz Ash Blonde/Brunette; Gwiyomi Boutique Claire false eyelashes.

Face – MUFE HD foundation; Benefit Moon Beam; MAC Pro Correct/Conceal in Medium; CoverFX Translucent Powder; Benefit Coralista blush.

Lips – L’oreal Color Riche Extraordinaire Liquid Lipstick in Orange Tempo.

l'oreal color riche extraordinaire liquid lipstick orange tempo

Psychedelic w/ Sleek Makeup Candy Palette

Another tutorial using the Sleek Makeup Candy Palette (for the first tutorial check it out here), and if you don’t already know, I have a GIVEAWAY going on! Check out my Sleek Makeup Candy Palette Giveaway page to find out how you can win this beautiful gorgeous palette!

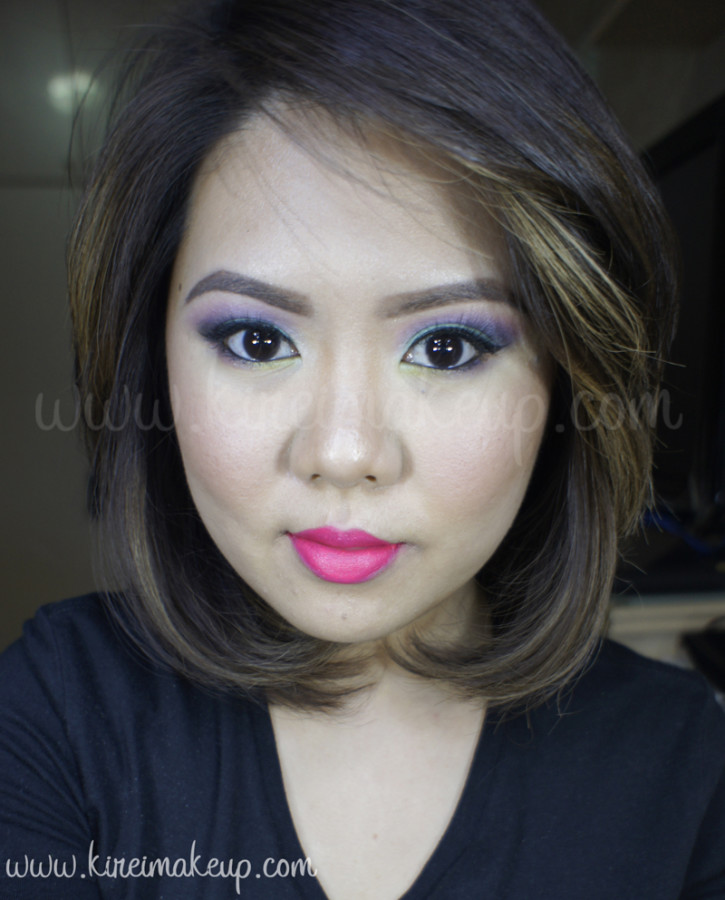
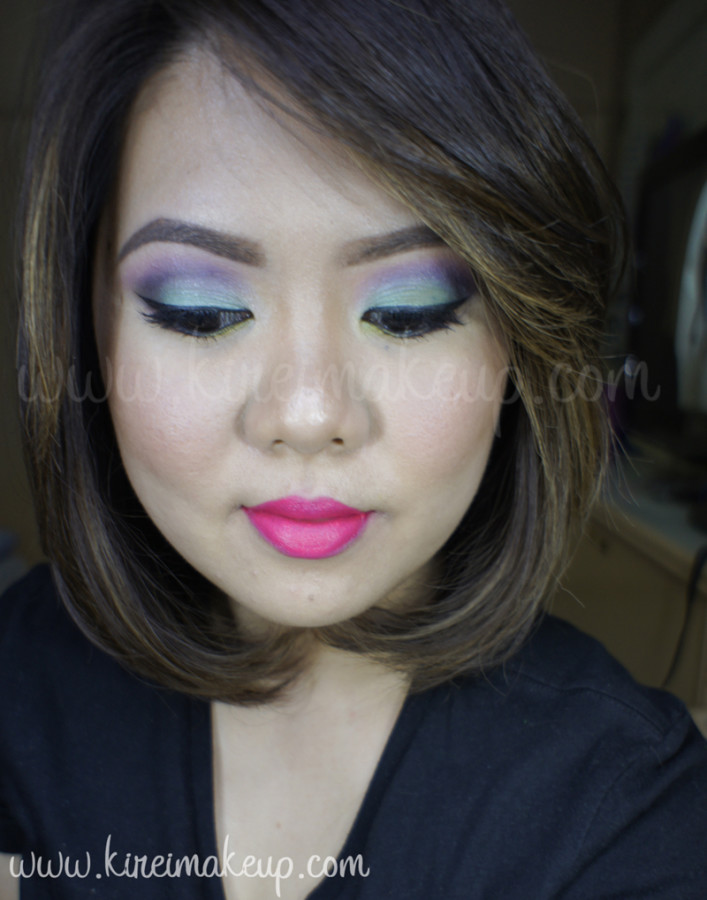
For today’s tutorial, I named in Psychedelic because of the amount of colors and how bold this look is. I, also, wanted to make full use of the palette’s beautiful color selections and this is the result that I came up with. I’ve done a lot of bold, bright colors tutorials, but I’ve never combined them together before. Well, today shall be the day where I combined both looks – colorful eyes and bright lips.

sleek makeup candy palette tutorial

Eyelids were prepped using Urban Decay Primer Potion in Eden. All eyeshadows are from Sleek Makeup iDivine Candy palette.

How-to:

1. I applied Blue Fizzle on my crease using a blending brush.

2. Using a tapered blending brush, I applied Strawberry Sherbet just slightly above Blue Fizzle, and blending it with Blue Fizzle, creating a beautiful hue of purple.

3. Using a flat eyeshadow brush, I applied Apple Sour all over my eyelid.

4. I applied Liquorice  on the outer V.

5. I created a winged eyeliner using L’oreal Super Liner Ultra Sharp Tip along the upper lash line. I lined my waterline using L’oreal Voluminous Smoldering eyeliner.

6. On the lower lash line, I applied Pear Drop on the inner half, and Parma Violet on the outer half. I also applied Cream Soda very lightly on the inner tear duct.

7. I curled my lashes and applied 4 coats of MUFE Smoky Extravagant mascara on the upper lashes, and a coat on the bottom lashes.

8. I applied Ardell 110 falsies.

9. Filled my brows using Anastasia Brow Wiz in Medium Ash and Brunette.

revlon matte balm unapologetic

10. For my face, I applied Cover FX cream foundation as base, highlight and contour (g40, g20, & n110)

11. On my cheeks, I applied NARS Mata Hari blush.

12. On my lips, I applied Revlon Colorburst Matte Balm in Unapologetic.

revlon matte balm unapologetic

Products used

Eyes – Sleek Makeup Candy Palette (lid: Apple Sour, crease: Blue Fizzle, above crease: Strawberry Sherbet, lower lid: Pear Drop/Parma Violet, outer V: liquorice, tear duct: Cream Soda); L’oreal Super Liner Ultra Sharp Tip; L’oreal Voluminous Smoldering Eyeliner; MUFE Smoky Extravagant mascara; Ardell false eyelashes 110; Anastasia Brow Wiz (Medium Ash/Brunette).

Face – Cover FX Cream foundation (base: G40, highlight: G20, Contour: N110)

Cheeks – NARS Mata Hari

Lips – Revlon Colorburst Matte Balm Unapologetic


Urban Decay Electric Makeup Look #2

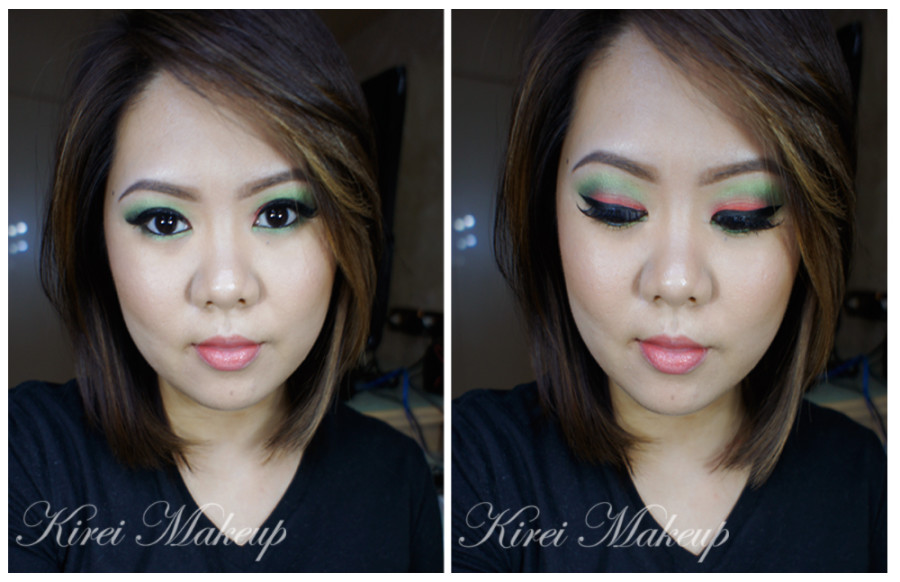
Another look using Urban Decay Electric palette! I will do a review and swatch the shades this week, promise! I was just playing with the colors for today’s look, and decided to post this tutorial up. I was expecting the orange shade, Slow Burn, to be a little bit lighter. However, it turned up to be quite dark, and has a lot more red in it. I think this color combo – green and orange, is a little bit different than I expected, but looks good nevertheless. I just love how easy it is to blend the shadows.

As always, scroll all the way to the bottom to skip the how-to, and get on the product list.ud electric makeup looks


How-to:

1. I prepped my eyelids using Urban Decay Primer Potion in Eden.

2. I applied Urban Decay Slow Burn all over my entire eyelid using a flat eyeshadow brush.

3. Using a shade brush, I applied Urban Decay Freak on my crease.

4. Using a small shader brush, I applied Lancome Strut on the outer V, blending the color in between the edge of Slowburn and Freak.

5. I applied Urban Decay Freak on the lower lid, and Lancome Strut on the outer half of the lower lid. I used an angled eyebrow brush for this.

6. I created a winged liner using Kanebo Kate Super Sharp eyeliner. On the waterline, I applied L’oreal Voluminous Smoldering eyeliner.

7. I filled my brows using Anastasia Brow Wiz in Medium Ash.

8. I curled my lashes, and applied L’oreal Carbon Black Mascara.

9. I also applied Ardell Demi Wispies falsies.

ud electric makeup looks

10. On my face, I applied CoverFX cream foundation in G40 (base), G20 (highlight), and N110 (contour).

11. On the cheeks, I applied Benefit Hervana blush.

12. I applied Clinique Mega Melon chubby lip tint.


Products used

Eyes – Urban Decay Electric palette (eyelid: Slowburn, crease and lower lid: Freak); Lancome Strut color design eyeshadow (outer V); Kanebo Kate Super Sharp eyeliner; L’oreal Voluminous Smoldering eyeliner; L’oreal Carbon Black mascara; Ardell Demi Wispies; Anastasia Beverly Hills Brow Wiz in Medium Ash.

Face – CoverFX cream foundation (G40: base, G20: highlight, N110: contour)

Cheeks – Benefit Hervana Blush.

Lips – Clinique Mega Melon chubby lip pencil.

Lavender Grey using NARSissist Palette

For this week’s tutorial, I decided to use my NARSissist Palette again! I fell in love with this palette all over again. I feel like it’s such a great palette with a more mature color option. For today’s tutorial, I picked out my favorite shades which were in the range of grey, lavender, and violet. I know the picture doesn’t show much of the lavender/violet on the lid, but I assure you it’s such a pretty grey with very subtle hint of lavender/violet in it. If you’re one not to wear color, and prefer a much neutral option, this would be a great addition to your makeup wardrobe.

Oh, just to let you guys know, I have been trying to update my Instagram daily. I’m going to try to do a weekly “Monday Makeup Inspiration”, and regram/repost-ing every look that YOU guys do if you FOLLOW me (@kireimakeup) and add #kireimakeup to your Instagram pictures! I’d love to see your makeup and/or your re-creation of any of my looks!

narsissist smoky eyes

How-to:

1. I’ve prepped my eyelid using Urban Decay Primer Potion in original. Using a blending brush (from UD Naked 3 palette), I applied NARS Brousse II on my crease.

2. Using a small shader brush, I applied NARS Pandora II on the outer V of my eyelid.

3. I blended my crease by applying NARS Madrague I using a clean blending brush. I used this shade as a transition color.

4. I applied NARS Ashes to Ashes on my entire eyelid using a flat eyeshadow brush. I also added a little bit of NARS Lhasa on top of it.

5. I created a winged liner along my upper lash line using L’oreal Infallible Gel Lacquer 24hr in Blackest Black and an angled eyeliner brush. Using whatever was left on the brush, I ran it along the lower lash line, and waterline.

6. I also used a small shader brush and applied NARS Ashes to Ashes along my lower lid.

7. I filled my brows using Anastasia Brow Wiz in Ash Blonde and Brunette. I cleaned up the edges of my brows using Cover FX G20 cream foundation. If you want to know how I fill my brows, please check my brow tutorial.

8. I curled my lashes and applied Cover Girl Lash Blast mascara. I also applied falsies (Korean’s falsies, not sure what it’s called since the brand is not in English).

NARSissist Lavender Grey smoky eyes

9. On my face, I applied Cover FX Cream Foundation in G40 using MAC Masterclass Brush Oval 6.

10. I lightly applied highlight and contour using CoverFX cream foundations in G20 & N110. Check out my BACON post to find out how I used CoverFX to do my highlight and contour.

11. On my cheeks, I applied Revlon cream blush in Pinched.

12. On my lips, I applied Revlon Mauve it Over matte lipstick.

Summer Makeup using MAC Sweet and Punchy

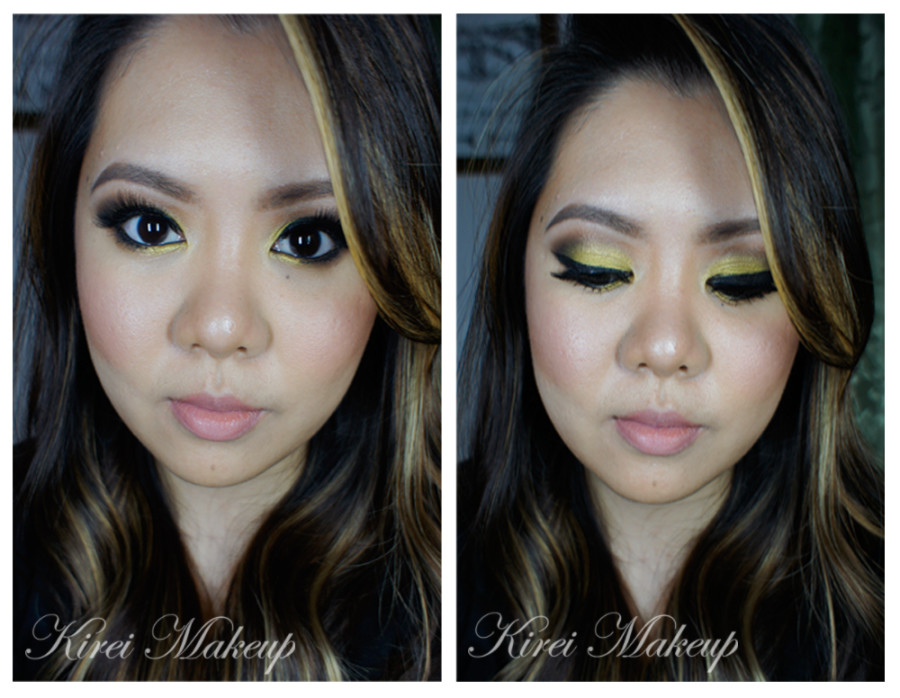
Last night, I put up a sneak preview on today’s tutorial on my Instagram account! I was super pumped to do this tutorial since I can show you guys how you can use the previous tutorial technique and incorporate other color into the look. Don’t you just love that bright green-yellow eyeshadow?! It’s actually MAC Sweet and Punchy eyeshadow, which was from the old MAC collection. If you can’t find this eyeshadow, you can substitute it for MAC Rated R which is exactly the same color.

Anyways, I also want to mention that I’ll start doing “repost” or “regram” on my Instagram account if you follow me and tag your beautiful makeup works with #kireimakeup. I’d love to see your works, especially if you re-create one of my looks! So, please do follow and tag me on Instagram!

As always, scroll all the way down if you want to skip the how-to, and get on the list of products used for this look.

bright green makeup tutorial

How-to:

1. My eyelids were prepped using Urban Decay Primer Potion in Sin. Next, I applied Smashbox Full Exposure eyeshadow in M1 using a blending brush on my crease.

2. Using a Sephora bullet crease brush, I applied Smashbox Full Exposure eyeshadow in M7 on the outer V.

3. Using a clean blending brush, I blended out my crease so there’s no harsh line.

4. I applied MAC Sweet and Punchy using a flat eyeshadow brush on my eyelid area.

5. Using a small shader brush, I applied MAC Sweet and Punchy on the inner part of my lower lid, and then I applied Smashbox Full Exposure M7 eyeshadow on the outer corner.

6. I created a thick winged eyeliner using a small angled eyeliner brush and L’oreal Infallible Gel Lacquer Liner 24H in Blackest Black.

7. Using whatever was left on the brush on step 6, I applied the gel liner on my waterline as well as the outer half of my lower lid.

8. I curled my lashes, applied Cover Girl Lash Blast mascara, and then I added Gwiyomi “Putri” false eyelashes.

9. I filled my brows using Anastasia Brow Wiz in Ash Blonde and Brunette (I filled my brows slightly differently this time, might do a tutorial on how I filled it in next time).mac sweet and punchy tutorial

10. On my face, I applied CoverFX cream foundation in G40 using a Sigma Tapered Kabuki brush.

11. I added a little bit of CoverFX N110 cream foundation along my jawline, underneath my cheeks and sides of my nose using a damped sponge.

12. I set my face using CoverFX translucent powder.

13. On my cheeks, I applied Benefit Hervana. I also added Benefit Coralista just on the apples of my cheeks.

14. On my lips, I applied L’oreal Color Riche lip liner in Beyond Pink.

Products used

Eyes – Urban Decay Primer Potion in Sin; MAC Sweet and Punchy eyeshadow; Smashbox Full Exposure palette (M1 on the crease; M7 on outer V); Cover Girl Lash Blast mascara; L’oreal Infallible Gel Lacquer 24Hr in Blackest Black; Gwiyomi “Putri” false eyelashes; Anastasia Brow Wiz in Ash Blonde and Brunette.

Face – CoverFX cream foundation (G40 as base, N110 as contour); CoverFX translucent powder; Benefit Hervana blush; Benefit Coralista blush.

Lips – L’oreal Color Riche lip liner in Beyond Pink.

Disclaimer: Please note that links to Sigma Beauty will land you to my affiliate page. However, I strive to recommend only the best products for you, and ones that I love myself, so you know you are in good hands. Your support in purchasing through these links will go towards the maintenance of this website, and to keep the blog updated and running. Thank you for your support!

Orange Lips with MAC Lady Danger

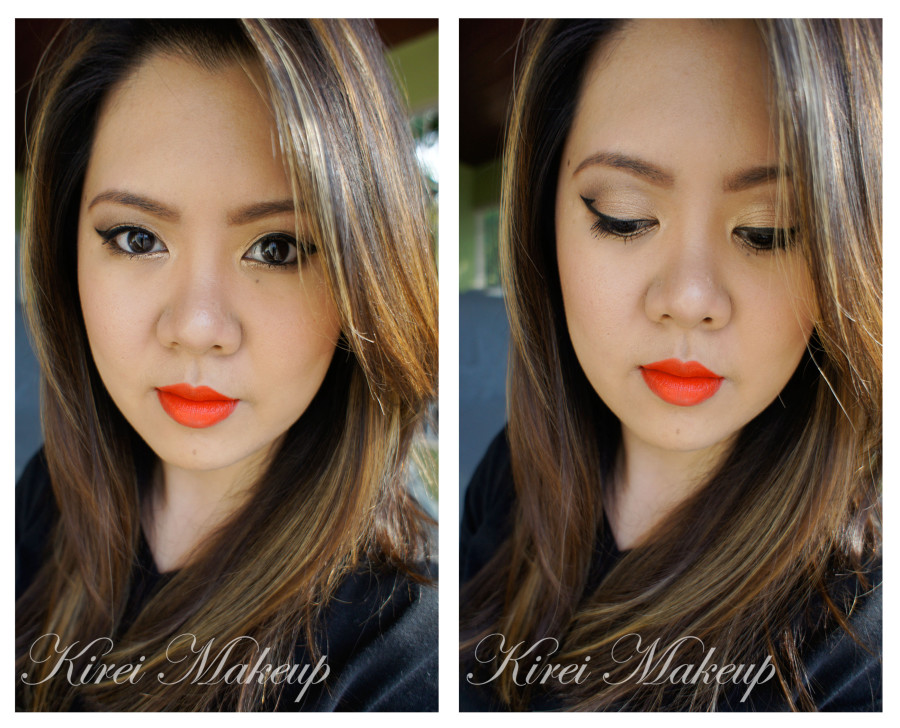
Today I want to share this orange lips makeup with you as we welcome the arrival of Spring, or if you’re in the tropics, then to welcome the heat wave…lol… I do have to say that this MAC Lady Danger lipstick might go into my favorite lipstick collection. The color is so pretty, and it will look great on any skin tone. Definitely something that you should look into if you want a bold lip look. It’s a great alternative to the usual red lips, or pink lips.

Let me just, also, tell you that today’s tutorial is full of sweat and screams of frustration due to power outage, and the Sun’s sudden disappearance from the sky. I can’t tell you how much I want my lights with me, but oh well, that’s what happened when I travel so much. So, please forgive me for the quality of the step-by-step picture.

Anyways, I was watching Kat Von D video on the Sephora’s youtube channel, and I wanted to recreate the way she create her eyeliner. I love how it looks! It’s so different, yet at the same time, so very wearable. I think I might re-do the eyeliner next time.

Scroll all the way to the bottom for full  product list.

Urban Decay naked 2 daytime makeup

How-to:

1. I applied MAC Groundwork paint pot all over my lid using my ring finger.

2. Using a flat eyeshadow brush, I applied Suspect from UD Naked 2 palette all over my eyelid.

3. Using a blending brush, I applied Busted from UD Naked 2 on the crease.

4. Using a flat eyeshadow brush, I applied Blackout from UD Naked 2 on the outer V.

5. I blended out Blackout using a clean blending brush.

6. I applied Chopper from UD Naked 2 on the eyelid using a flat eyeshadow brush.

7. I applied Half-Baked on the inner part of the lower lid, and Snakebite on the outer part using an angled eyebrow brush.

8. On the upper lid, I created a triangle-shaped eyeliner using Kanebo Kate Super Sharp Eyeliner.

9. I filled my brows using UD Faint eyeshadow and an angled eyeliner brush.

10. I curled my lashes and applied Cover Girl Lash Blast mascara on the upper and lower lashes.MAC Lady Danger

11. I applied UD Naked Skin foundation using a damped sponge.

12. I contoured my face very lightly using MAC Blunt.

13. I applied MAC Dainty blush on my cheeks.

14. I applied MAC Entertain Me lip liner on my lips first, and then applied MAC Lady Danger lipstick on top of it. If you want to find out how I fill my lips, please check my How-to Apply Lipstick post.

If you want to see the other lip makeup looks that I’ve created please check my Lips Tutorials.

For other UD Naked 2 tutorials, please use the search bar on the right side bar.

Products used

Eyes – MAC Groundwork paint pot; UD Naked 2 (eyelid: Suspect and Chopper, crease: Busted, outer V: Blackout, lower lid: Half-Baked and Snakebite); Kanebo Kate Super Sharp Eyeliner; Faint eyeshadow from UD Naked Basic; Cover Girl Lash Blast mascara.

Face – UD Naked Skin foundation; MAC Blunt; MAC Dainty.

Lips – MAC Entertain Me lip liner; MAC Lady Danger.