Shop Kitsu in Hamilton (Life Update)

Hi all! I’m so sorry I haven’t update the blog for a while. I’m not sure if you guys know, but I recently open a store called Kitsu in Hamilton, Ontario. The store’s concept is a lifestyle boutique, and we carry apparels for Men & Women, makeup, skincare, accessories and home decor products.

The store is also available online (yay) and we ship worldwide! You can use this code KIREI15 to get 15% off your purchase at Kitsu’s online store. Read more to see what’s in store for you (makeup related)

Read More

Grim Reaper Halloween Makeup

Another Halloween makeup look for today’s post! I have been wanting to do a skull makeup, so I created this Grim Reaper Halloween makeup look. I wanted to created a more evil, creepy skull look, so I googled up “Grim Reaper” and used the image I found as a reference.

*For my other Halloween makeup tutorials, please check out “Halloween” category*

The_Grim_Reaper

I sooo need to practice on my blending, as well as the teeth. It’s really hard to do the teeth, so note to self – practice drawing skull and teeth! I also should have leave the teeth outline after I colored it bone colored. So, if you want an easier to do the teeth, color it first before outlining the teeth! Also, for the “bone” part, I mixed beige cream product with white. I wanted an off white color, not a stark white.

skull makeup step by step


Anyways, let’s get on the tutorial!

  1. I drew outlines of bones using an angled eyebrow brush and a matte black eyeshadow.
  2. Mixing a beige cream with white, I applied this “bone” color on the areas where the bones are.
  3. You can set the cream product with an eyeshadow or translucent powder.
  4. For the darker areas, I filled it using a black face paint. I left the eye sockets last since I have to put my contacts in, and I didn’t want to get it messy.
  5. Using a white cream product (you can use white face paint), I filled in the teeth dragging the color upwards towards the face for the upper teeth, and down towards the chin for the lower teeth.
  6. I put my contacts in, and filled my eye sockets with black face paint.
  7. For shading around the bone areas, I used brown eyeshadow first then grey to deepen the shadows. All I can say about this part is to have the areas shaded as detailed as you can. I added some eyebrow creases as well to make the whole look a bit more evil looking.

skull makeup

Products used

  • MUFE Flash Palette #902
  • MAQPRO primary palette “white”
  • Kat Von D Shade + Light eye palette
  • Wolfe face paint “black”

grim reaper makeup


Winged Eyeliner Tutorial

Hello everyone! I’m back with a new tutorial! Since the weather is nice and warm, I wanted to create an everyday Spring Makeup look, and give the new MAC Miley Cyrus Viva Glam lipstick a try. As you know, I’m one to pair very simple eye makeup with bold lips. I usually leave my eyes bare, but once in a while I’ll wear a winged liner. Since, I do get asked to create a winged eyeliner tutorial, I’m going to show you how I do it using a liquid eyeliner.

I’ve done a winged eyeliner tutorial post using gel/cream liner in my other how-to post. Between a liquid and gel/cream liner, at this moment, I prefer a liquid liner. For me, it’s faster, easier and more convenient to use a liquid eyeliner since it comes in a pen-like applicator. There’s no need to have a separate brush, unlike gel/cream liner. However, a liquid eyeliner dries out faster than a cream/gel liner. So, if you do make a mistake, it’s hard to correct it. For beginners, I suggest going with a cream/gel liner. Once you’re comfortable, then advanced to a liquid liner.

The one I’m using for this tutorial is Kat Von D Trooper Tattoo liner. It’s pretty much waterproof, smudge-proof and long lasting. My favorite of all time! Been using it since it was released couple years a go. Absolutely a must-have in your kit!

how to create feline flick

So, I think the pictures are pretty self explanatory. All you have to do is just create the “outline” first, and then fill in the rest. If you aren’t satisfied with the pictures and instructions below, leave comments below or on my Instagram page or Twitter page, and I’ll try my best to answer it. I’ll try to do like more videos in the future once I’m all settled down.

Instructions:

1. Mark where you want your wings to be.

2. Create a diagonal line from the tip of the wing to the center of your lash line.

3. Create a line from the inner corner of your eyelid to the center of the lid.

4. Fill in the “outline”. At this point you can extend your wings, or thicken the line more. I’m satisfied with mine, I like it where the wings are bigger and it gradually tapers towards the inner corner of my eyes.

5. Then, fill in your brows, and add lashes if needed.

mac miley cyrus

Products used

Eyes

  • Primer – Urban Decay Primer Potion “original”
  • Eyelid – Chanel Illusion d’Ombrea “Emerveille”
  • Crease – The Balm Meet Matt(e) Nudes “Matt Rosen”
  • Eyeliner – Kat Von D Tattoo Liner “Trooper”
  • Eyebrows – Anastasia Beverly Hills Dipbrow Pomade “Medium Brown”
  • Falsies – Gwiyomi False lashes #3

Face/Cheeks

  • Foundation – NARS All Day Luminous Weightless foundation “Punjab”
  • Concealer – MAC Pro Longwear concealer “NC25”
  • Highlight – Kat Von D Shade + Light contour palette “Lyric”
  • Contour – Kat Von D Shade + Light contour palette “Sombre”
  • Blush – Smashbox Halo blush powder “In Passion”

Lips

  • Lipstick – MAC Miley Cyrus Viva Glam

mac miley cyrus viva glam


Asian Smokey Eyes

I’ve been going to this Korean restaurant in Hamilton, and in the restaurant they kept playing some sort of K-pop singers/bands performing on TV. Anyways, I was inspired by the singers from the various girl band to do this Asian smokey eyes look. I love how their skin looks absolutely flawless, with barely any contouring, and just a bit of blush.

Their smokey eyes are slightly winged, and the darker colors are mostly concentrated on the outer corner, since most of these girls don’t have a defined crease, like mine! Their eyeshadows are mostly on the lid, and on the outer half of the eyes, to elongate the eyes even more, creating a bigger eyes illusion.

For this look, I chose to pair it with a peachy lip, most of the girls in K-pop opt for a more pink or ombre pink lips. However, I prefer the peach lips especially with the warm bronze colors on the eyes. Warm tones on the eyes matched the warm tone on the lips to pull the look together.

I also wore a new foundation I recently bought (actually, exchanged for the Diorskin Nude Air). The new NARS weightless luminous foundation is pretty lovely, and I think I’ll do a review about it soon, hopefully next week! I think I might have found a new favorite foundation, guys!

Anyways, I apologize if the colors on my step-by-step pictures are a bit off (slightly cooler than real life) since I was trying out a new zoom lens. The full face pictures show the real colors, especially on the eyes. Pictures for the full face were taken using my usual lens, and with day light.

bronze smoky eyes

Products used

Eyes

  • Primer – Urban Decay Primer Potion
  • Base – MAC Brule
  • Crease – MAC Soft Brown
  • Inner corner (upper and lower lid) – MAC Honey Lust
  • Lid – MAC Mulch
  • Outer corner/Lower Lid – MAC Bronze
  • Outer lower lid – The Balm Balmsai in Righteous
  • Eyeliner – Shu Uemura Calligraphy Ink
  • Waterline – MAC Feline kohl pencil liner
  • EyebrowsAnastasia Beverly Hills Brow Pomade in Medium Brown
  • Mascara – Urban Decay Perversion mascara
  • Falsies – Gwiyomi false lashes #3


asian makeup

Face

  • Foundation – NARS weightless luminous foundation
  • Concealer/Highlighter – YSL Touche Eclat
  • Powder – MAC Magically Cool Liquid Powder

Cheeks

Lips

  • Liner – Urban Decay Naked lip pencil
  • Gloss – YSL Glossy Stain in Pêche Cerra-Cola

asian smoky eyes


Dermablend Cover Creme Review [sponsored]

First of all, I’d like to say “Thank You” to Nail Polish Canada for sending me the Dermablend Cover Creme to be reviewed. Also, free shipping for any purchase of Dermablend Professional products from Nail Polish Canada!

 What is Dermablend Cover Creme?

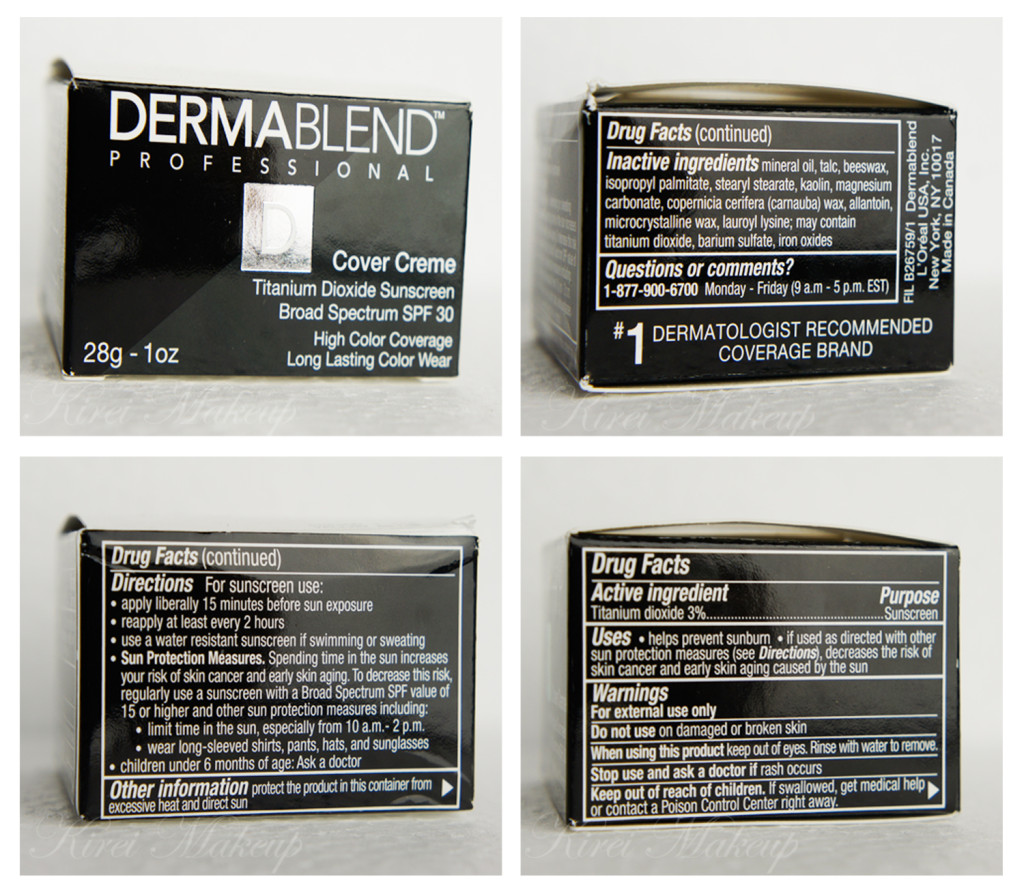
A lightweight creme formula with high coverage and natural skin tone shades. Cover Creme delivers a flawless complexion and 12 hours of consistent color wear.

Cover Creme provides coverage for moderate to major skin flaws including

  • Vitiligo
  • Birthmarks
  • Rosacea
  • Pigmentation Disorders
  • Post-Operative Bruising
  • Scars
  • Burns

Texture: Glides on evenly. Skin looks fresh, feels soft and velvety smooth.

Skin Benefit:All day hydration. Suitable for sensitive skin.

Sun Protection: SPF 30 Sunscreen.

Application

First apply cover creme

  1. Remove a small amount of Cover Creme with either a spatula or fingertips.
  2. Apply directly over imperfection. Tap gently to ensure maximum coverage.
  3. Blend outwardly. If extra coverage is desired, tap on more product over the area. For sunscreen benefits, apply before sun exposure.

Second apply setting powder (sold separetly)

  1. Pat on Setting Powder generously over covered areas.
  2. Brush off excess using a makeup brush.
Size: 28g / 1 oz
(Nail Polish Canada, 2013)

Dermablend Cover Creme review NC30

I was asked to choose a shade from the Nail Polish Canada website, but I wasn’t sure which shade I’m in. I decided to go with Yellow Beige, even though I was unsure. I’m usually a MAC NC30 in MAC Pro Longwear. I was also given the option to choose the different Dermablend products, but I chose this foundation since I think it’ll be beneficial for those who’d like to try a full coverage foundation.

I love how the Dermablend Cover Creme comes in a jar and a little spatula. Even if you are not a makeup artist, you might find the spatula to be quite useful. Use the spatula to pick the foundation up from the jar instead of dipping your finger or brush directly into it, to avoid bacterial contamination.

You’ll find that the foundation is very tightly packed into the jar. This little jar will probably last you a good while. A little goes a long way with this foundation.

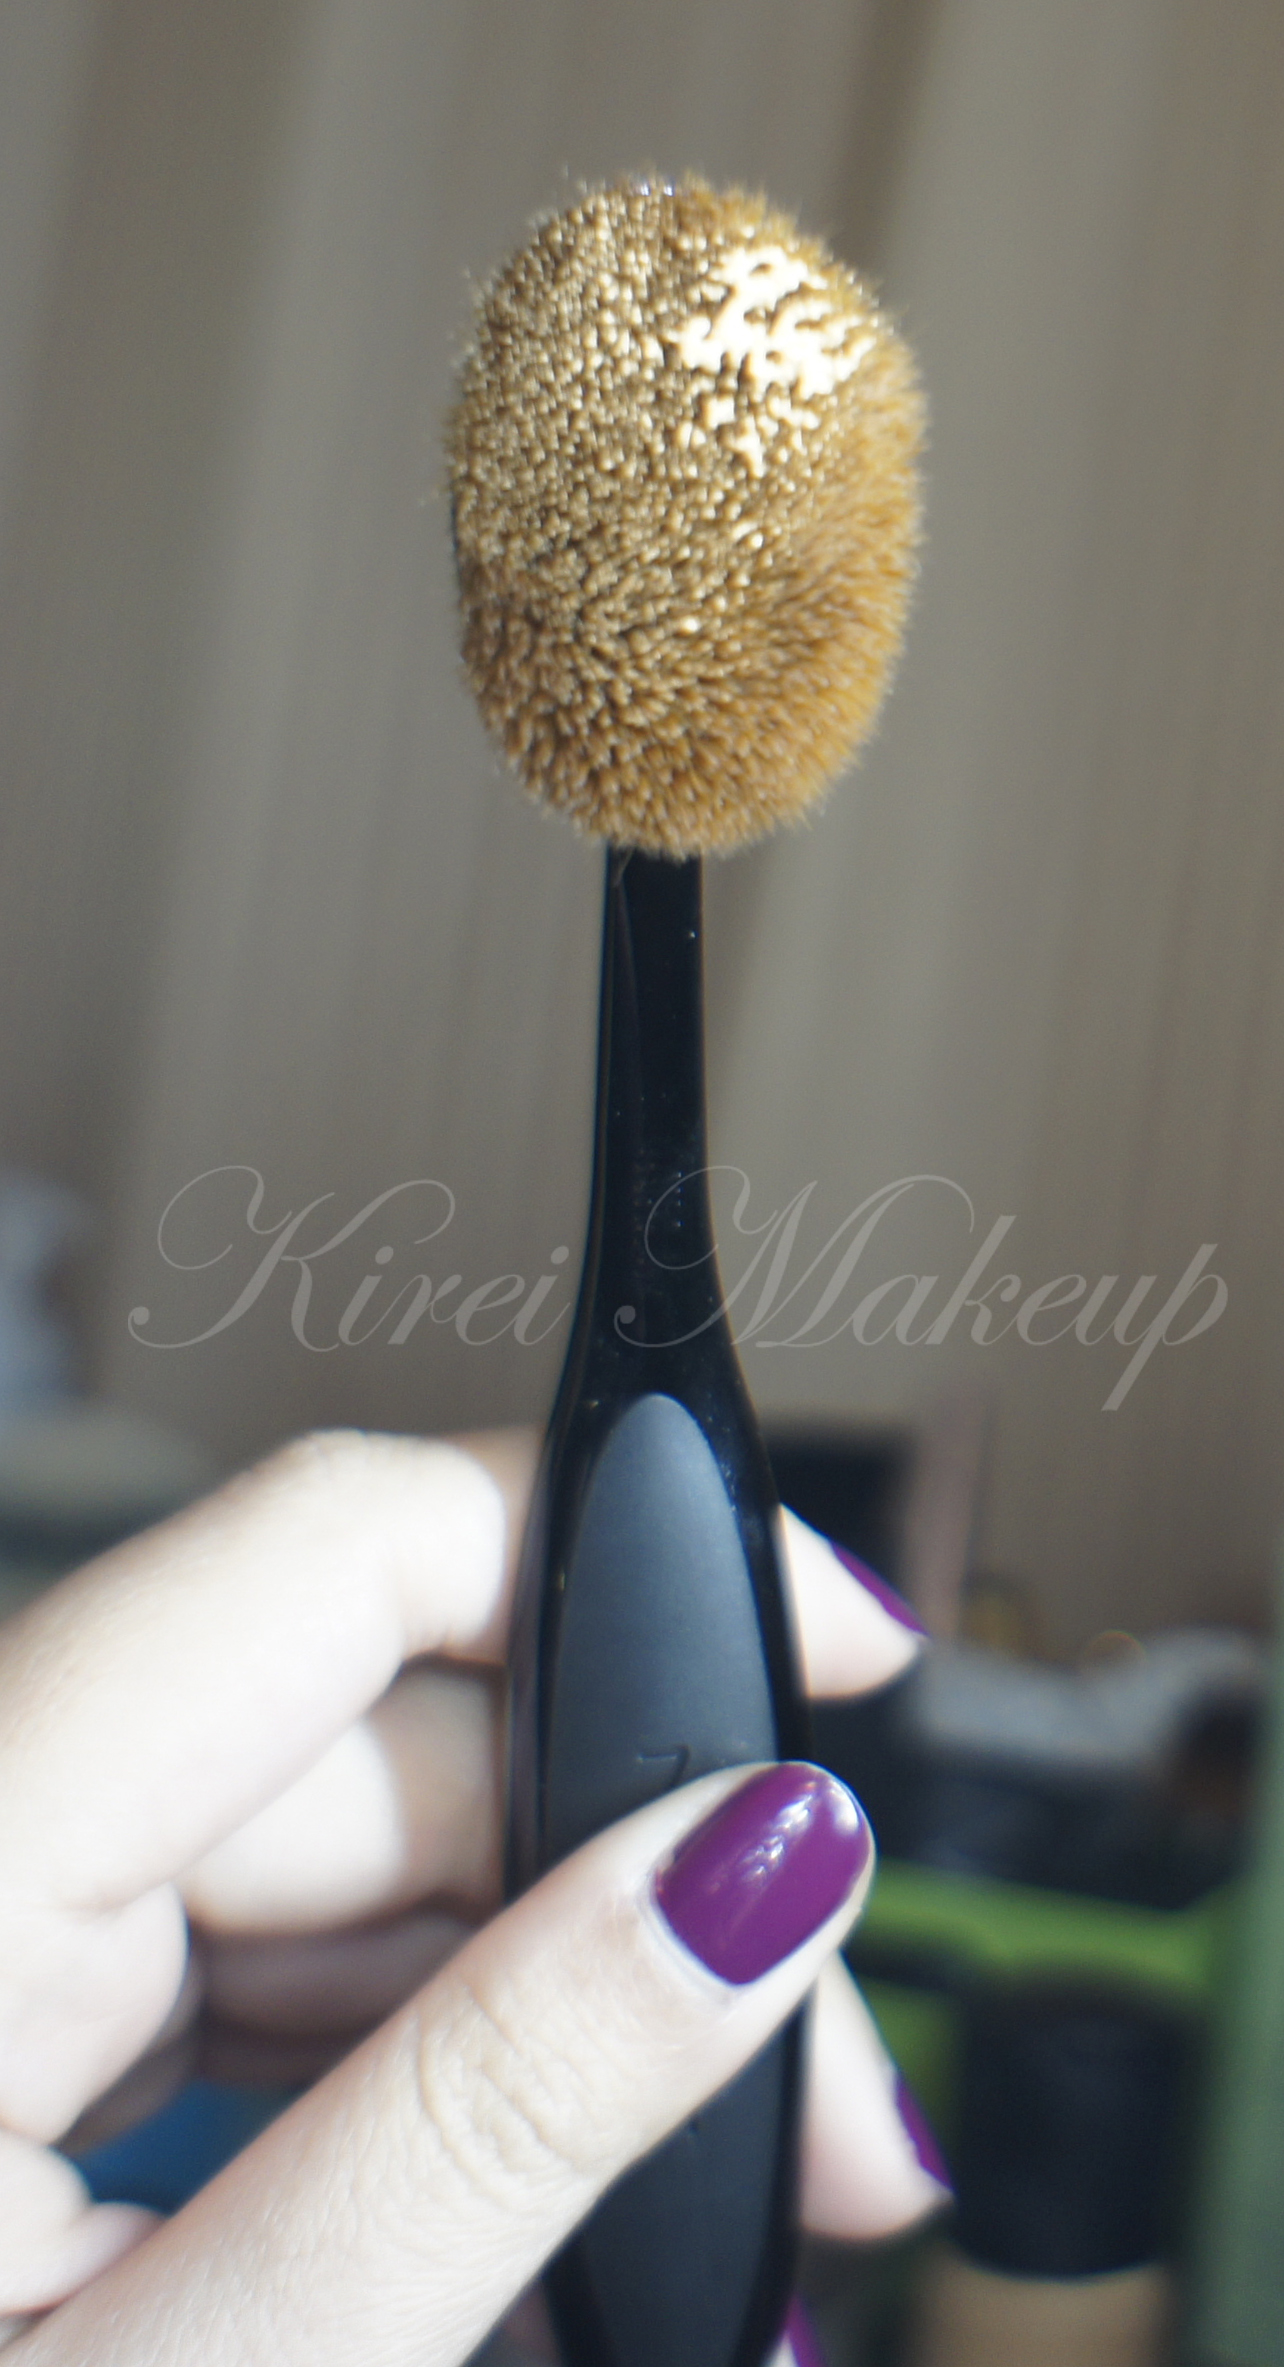
The foundation also blends very easily and smoothly to the skin. It almost feels like it melts into your skin. I applied the foundation by putting a little bit of it at the back of my hand, and work the product using the spatula. Then, I used the foundation brush to apply it to my face. The foundation is very pliable when you warm it up first.
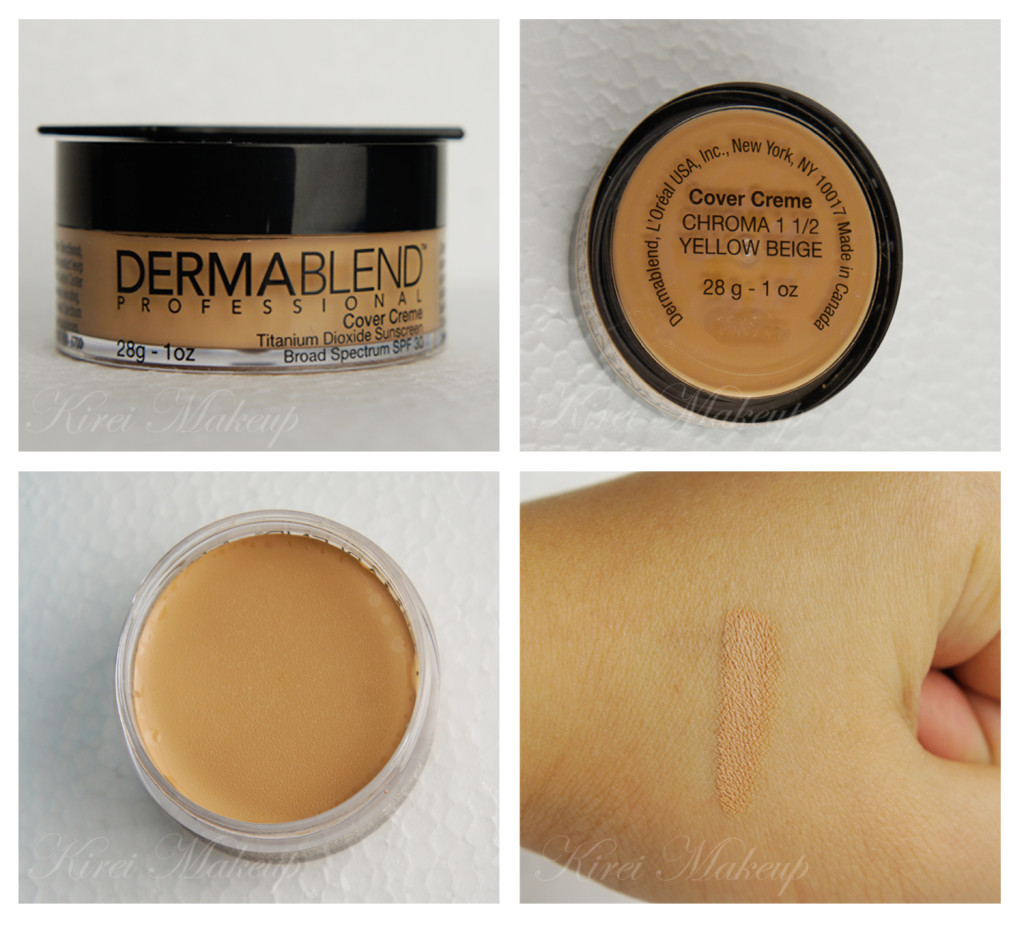
Dermablend Cover Creme NC30

Coverage

The Dermablend Cover Creme is a full-coverage foundation. However, like any other full-coverage foundation, this product can be applied thinly to create a sheer coverage. You can achieve a sheer to medium coverage by applying it using a damped sponge, or mixing the foundation with a primer or moisturizer.

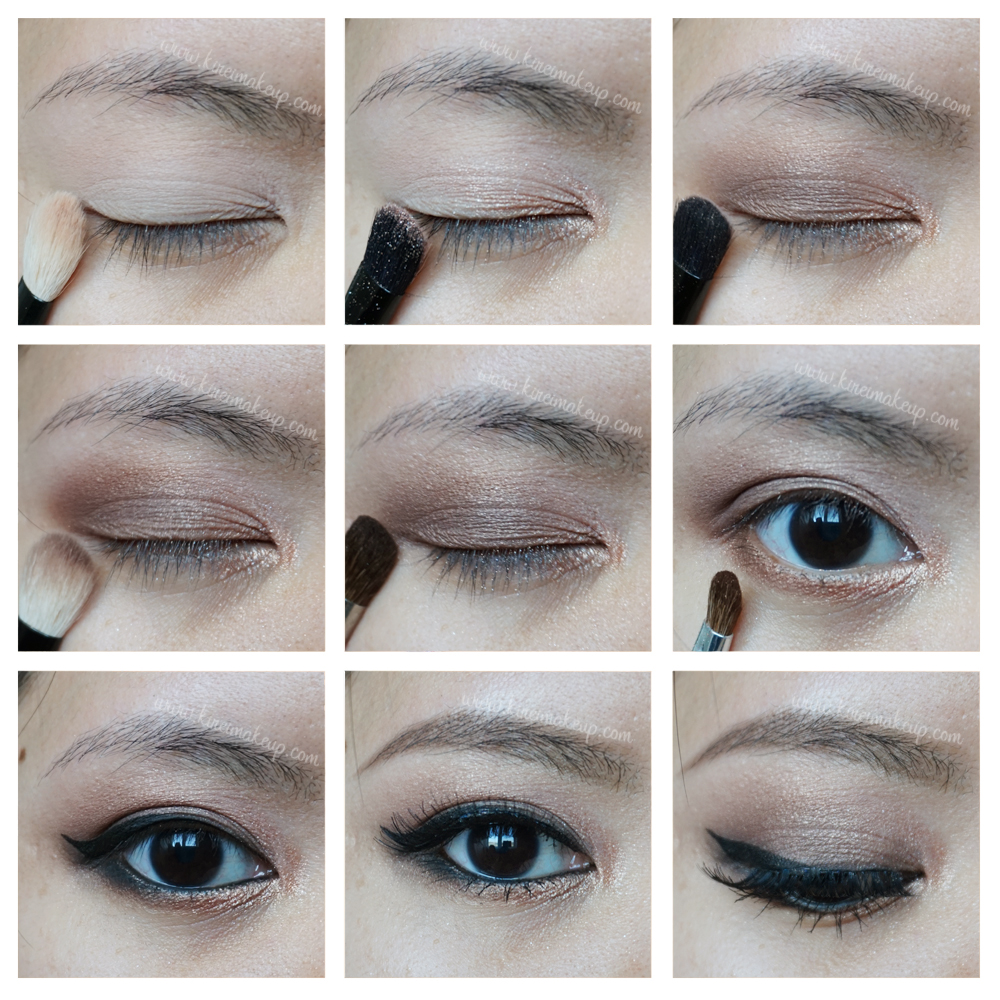
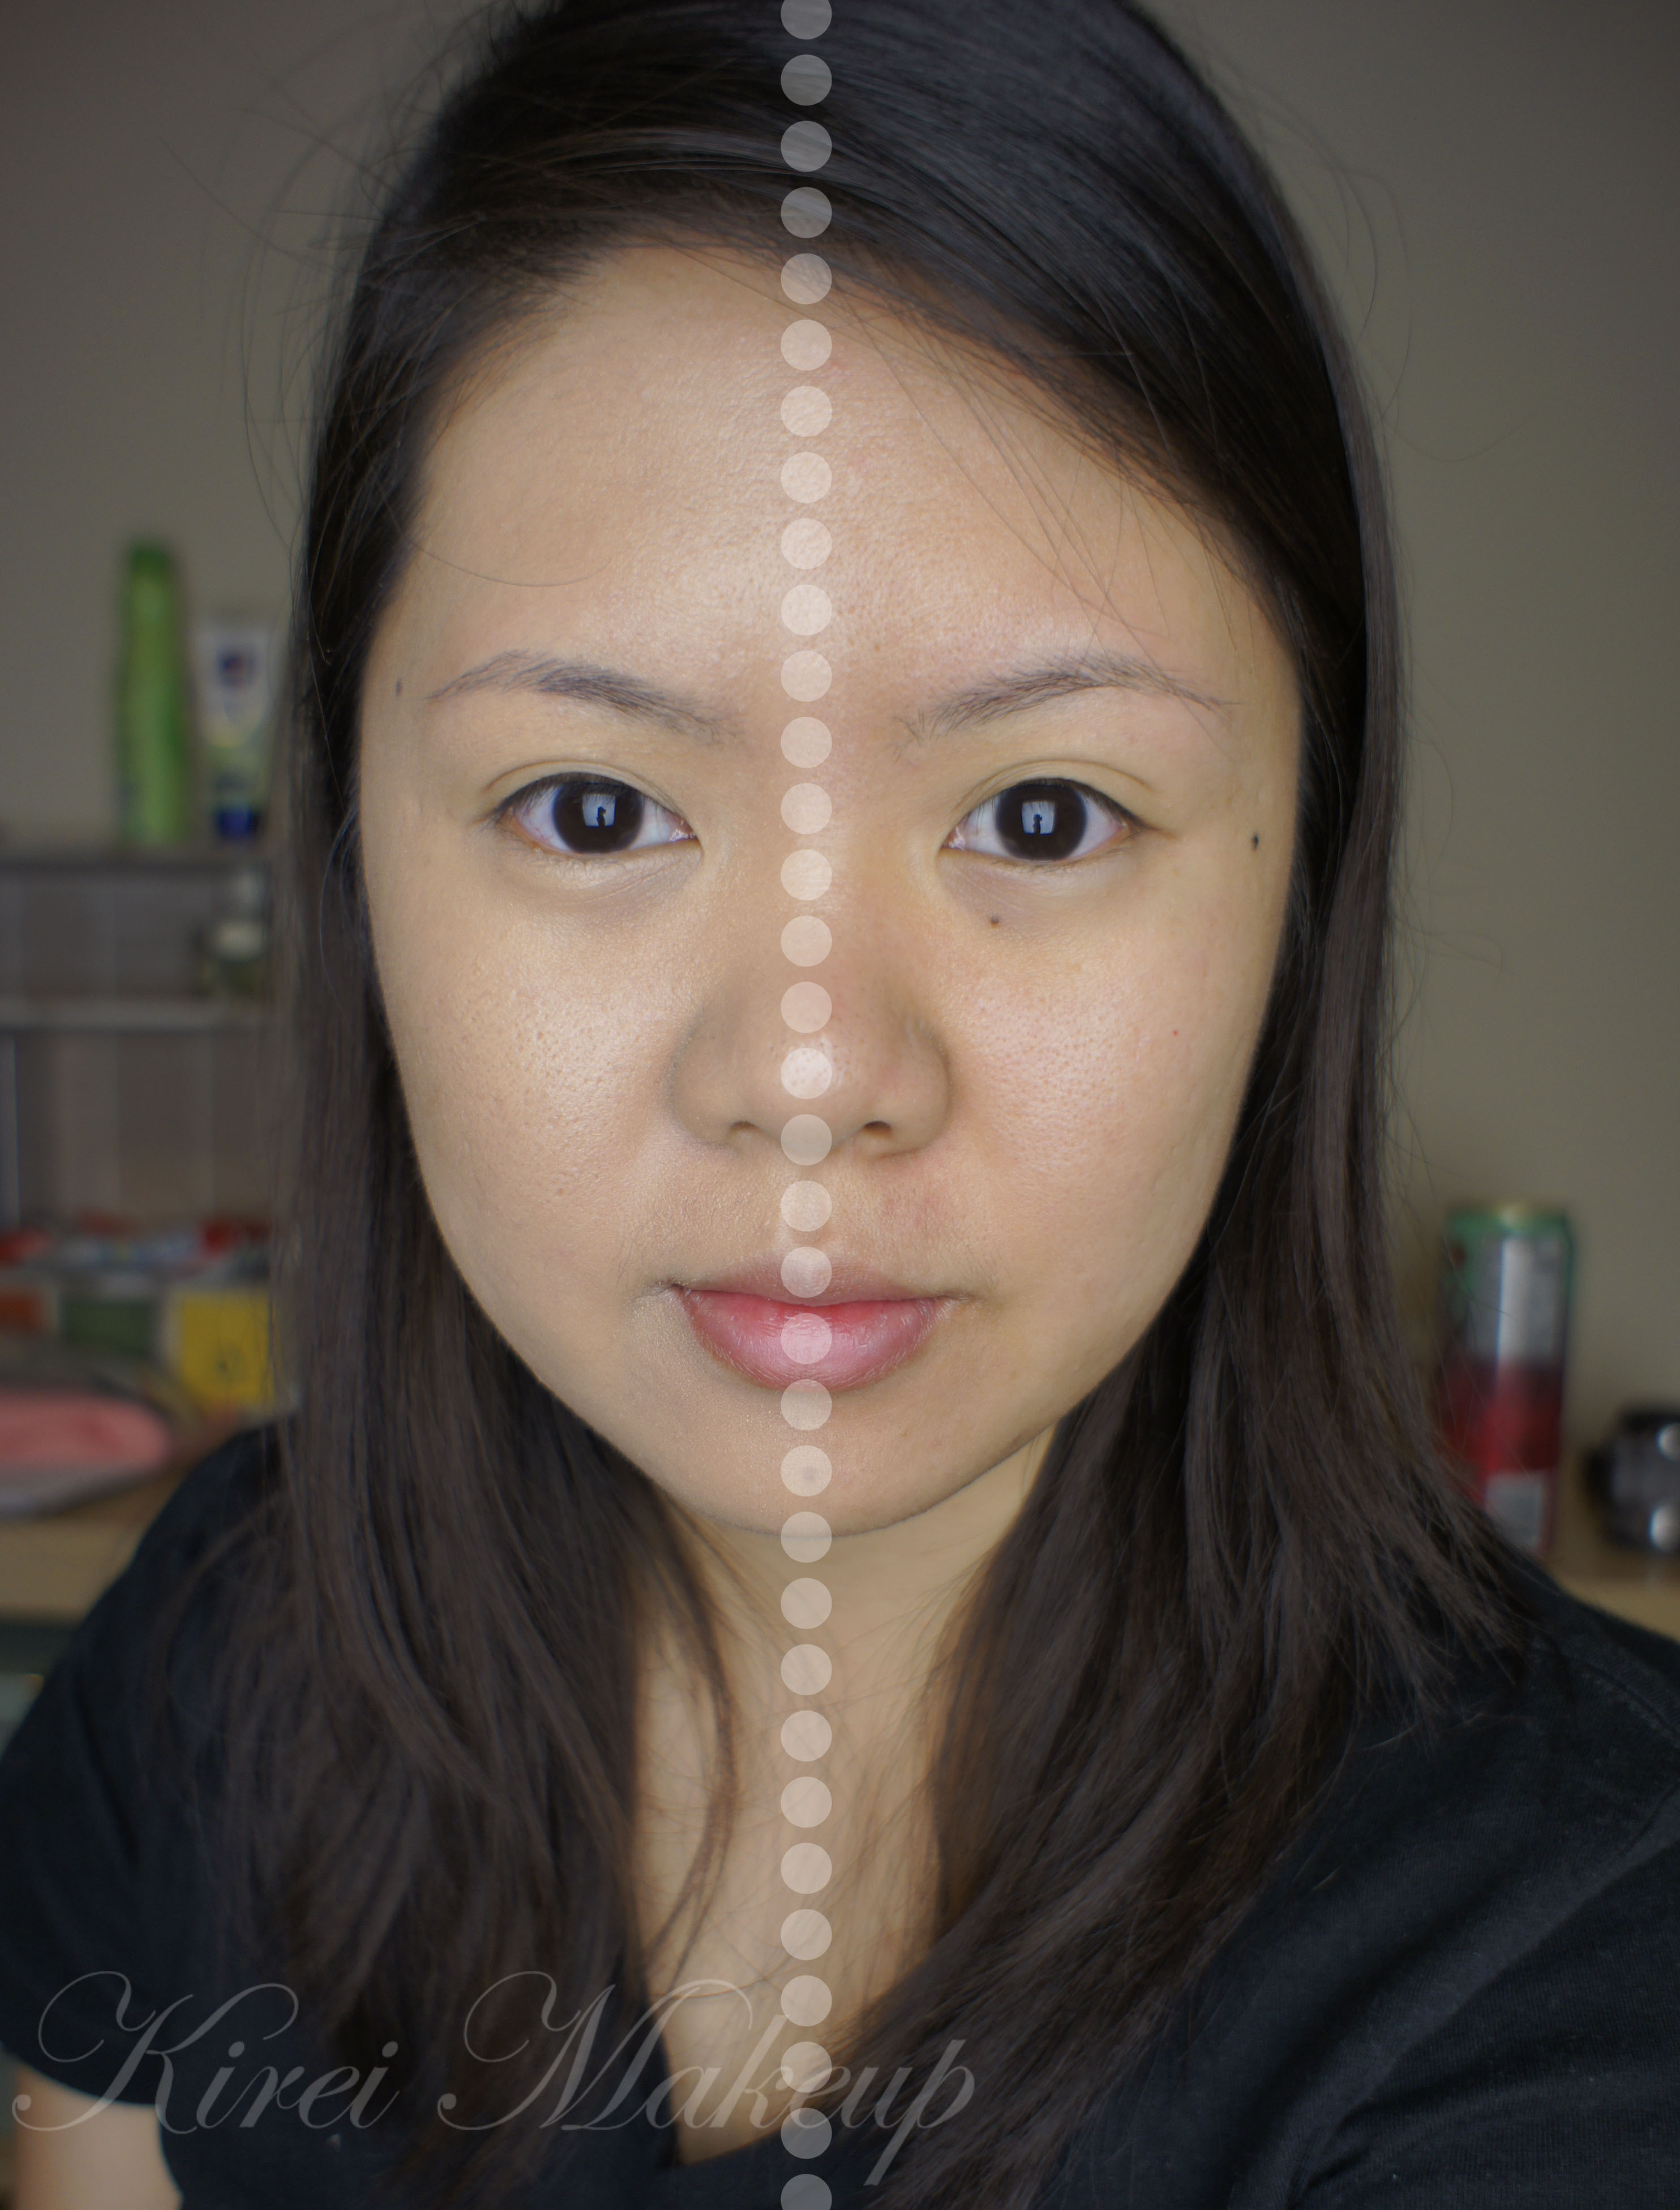
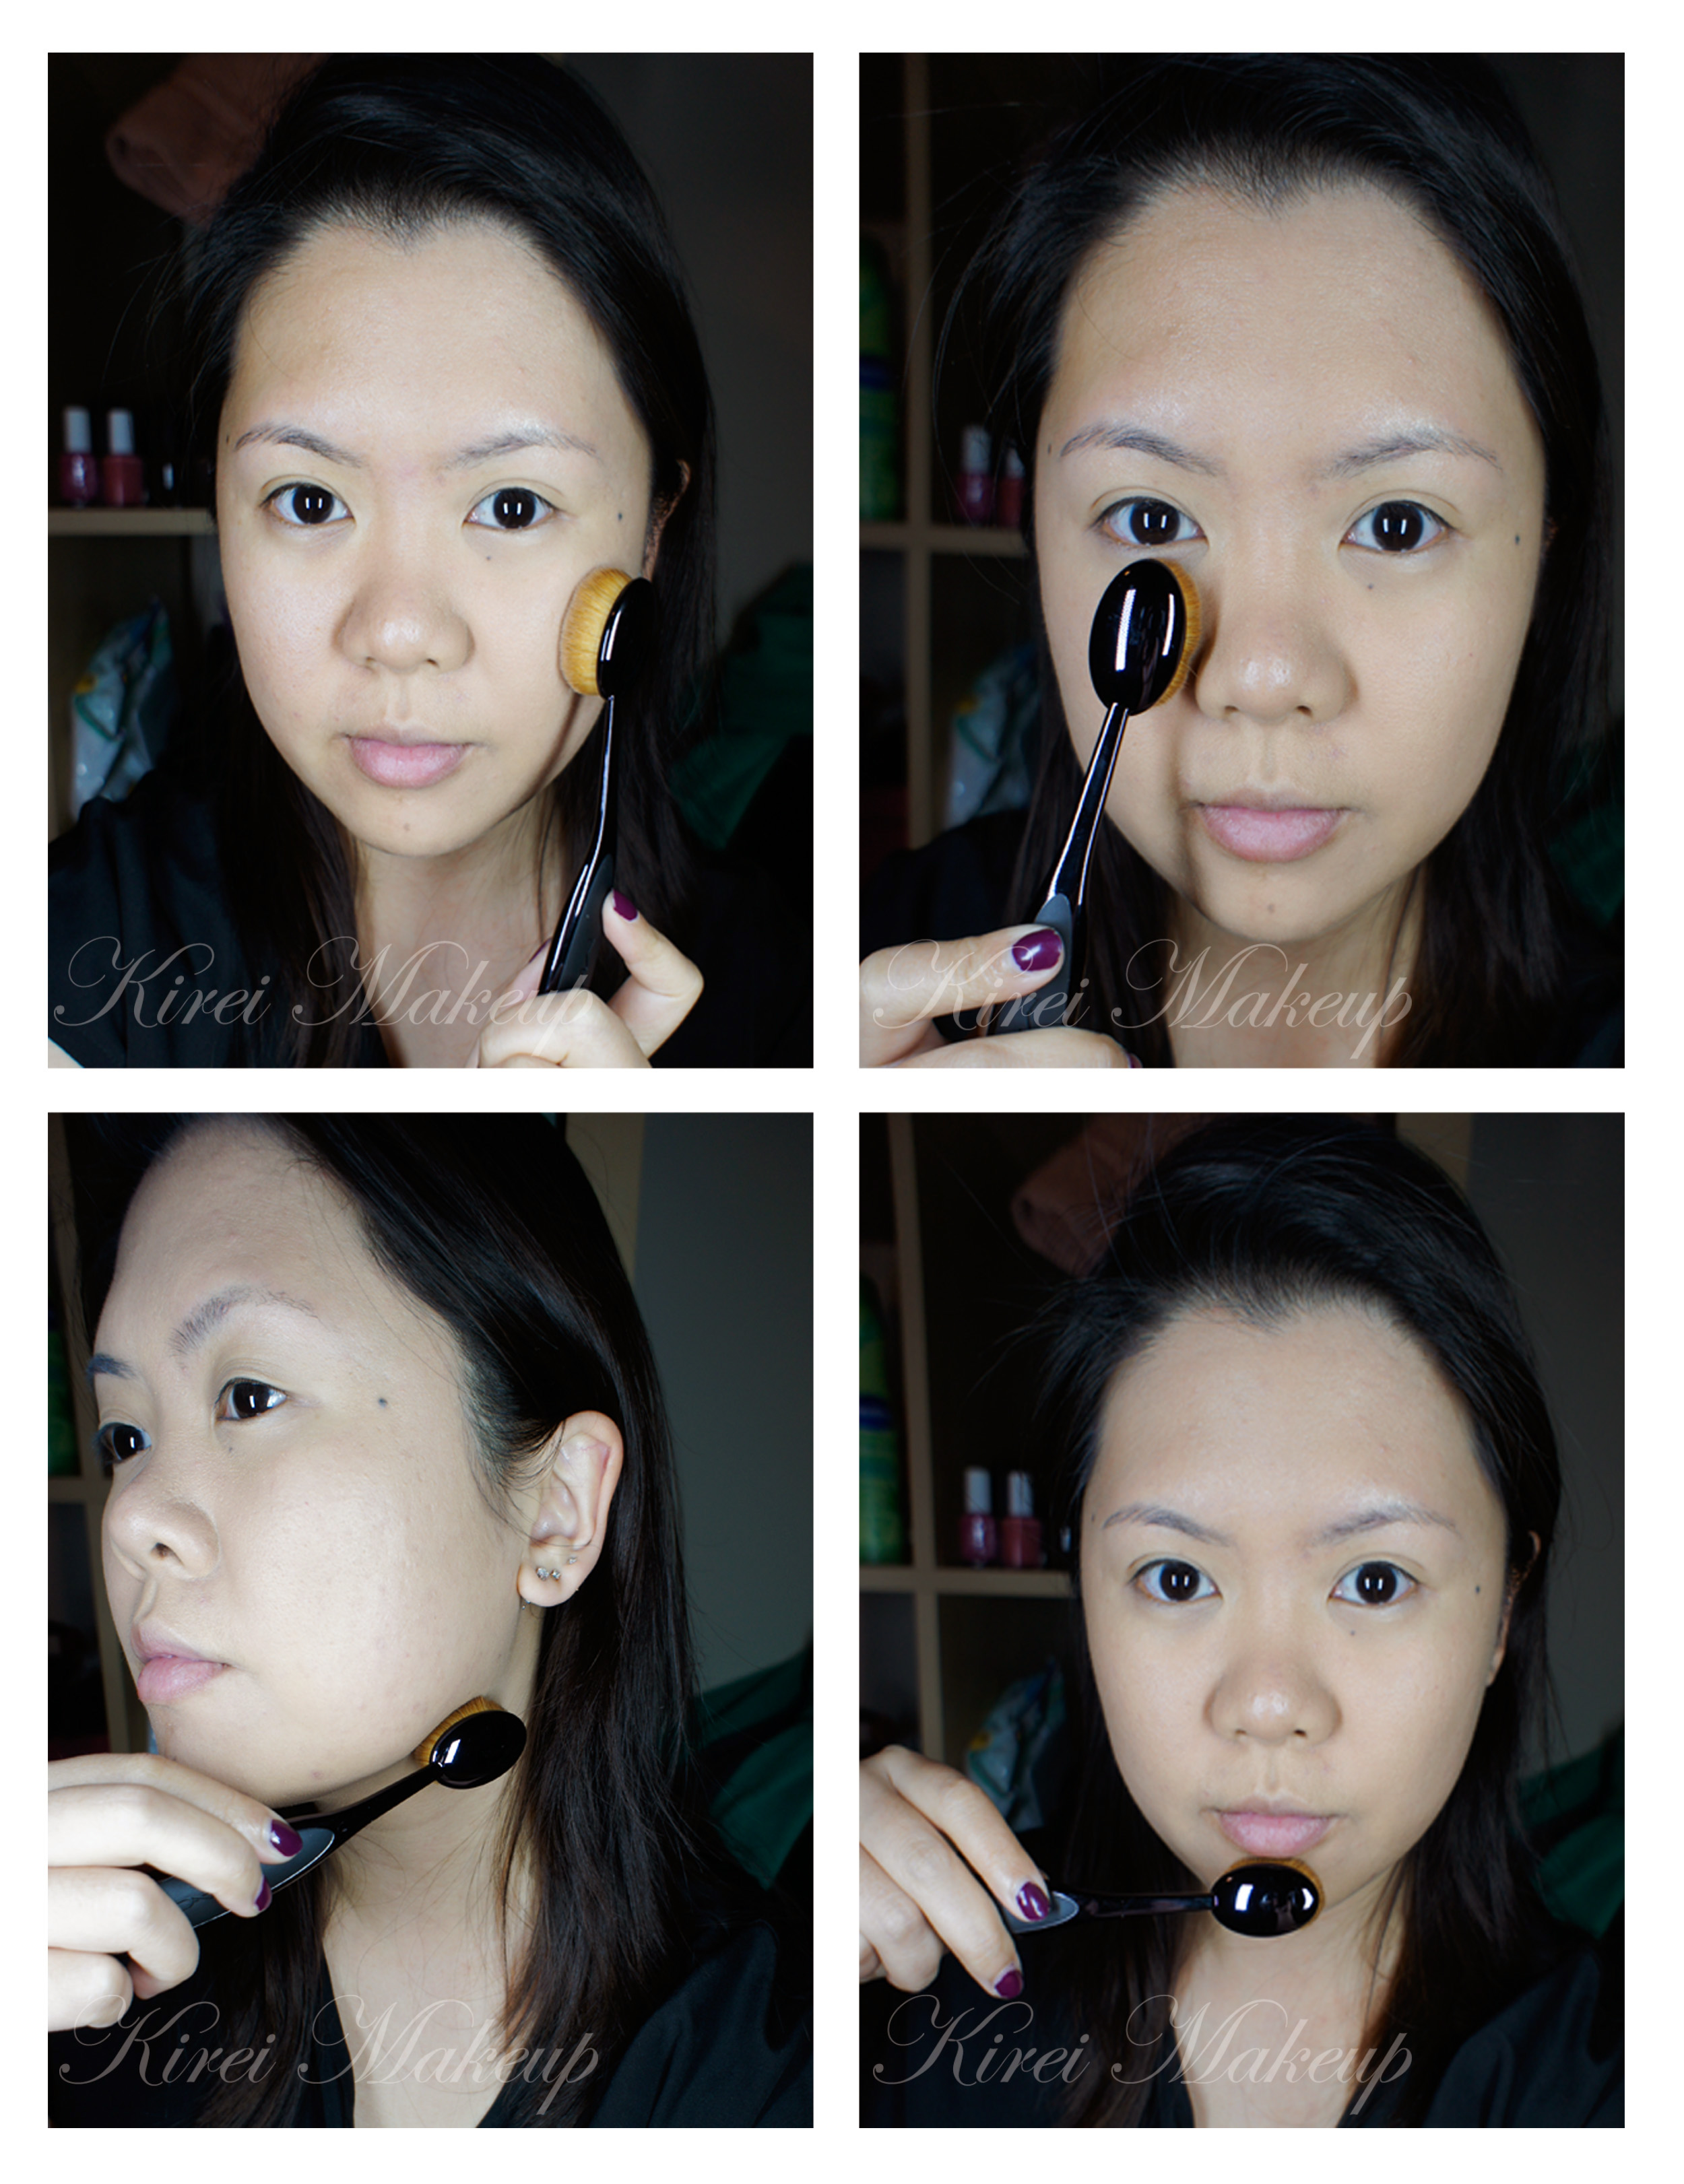
In the pictures below, I applied a layer of foundation using a foundation brush. There are several ways to create a heavier coverage:

  • Layer your foundation.
  • Stippled or dabbed the foundation to your skin using a dry sponge, or your finger.
  • Buff it to your skin using a buffer brush, something like Sigma Round Kabuki or a Sigma Flat Kabuki brush.

Finish

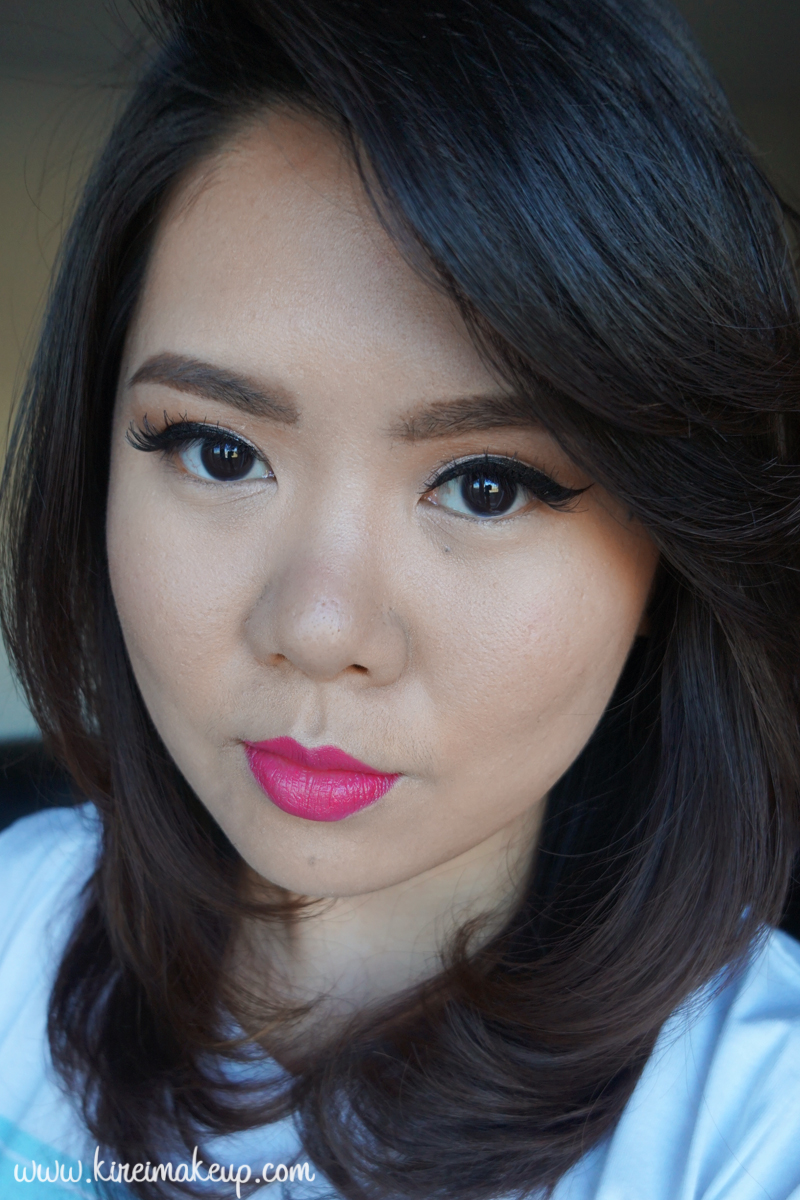
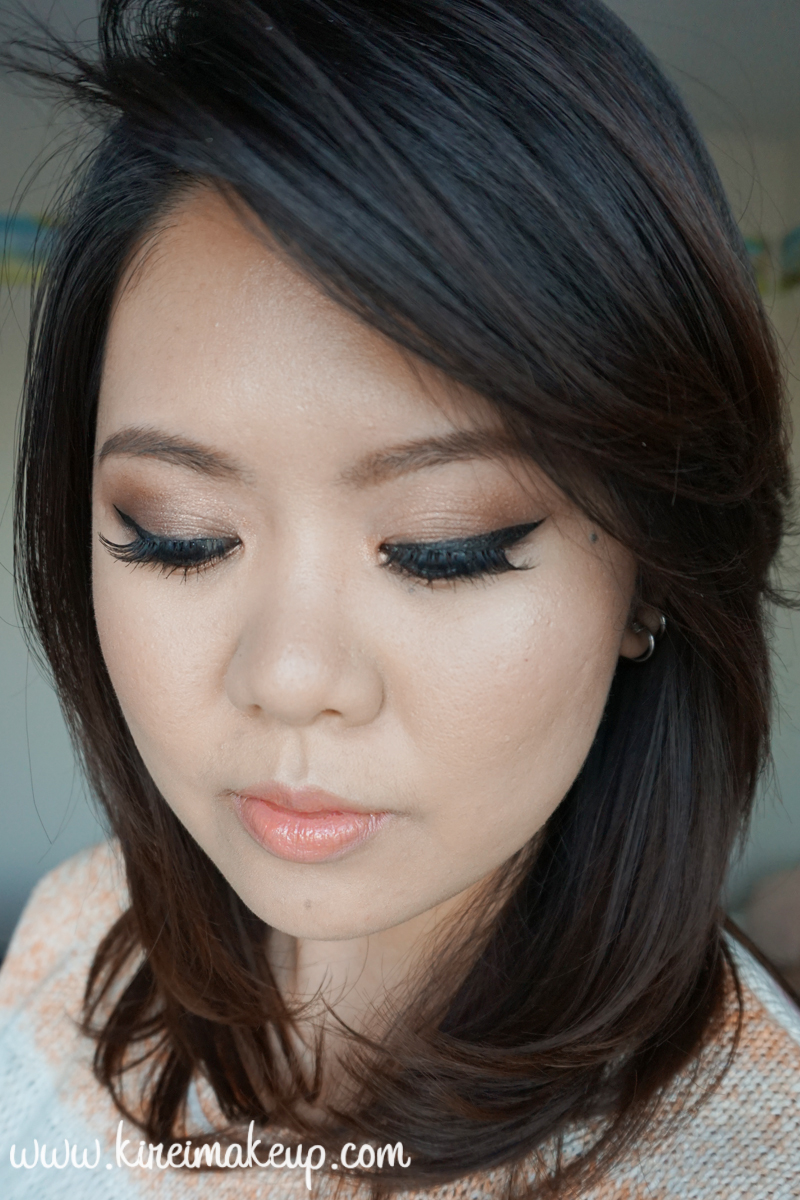
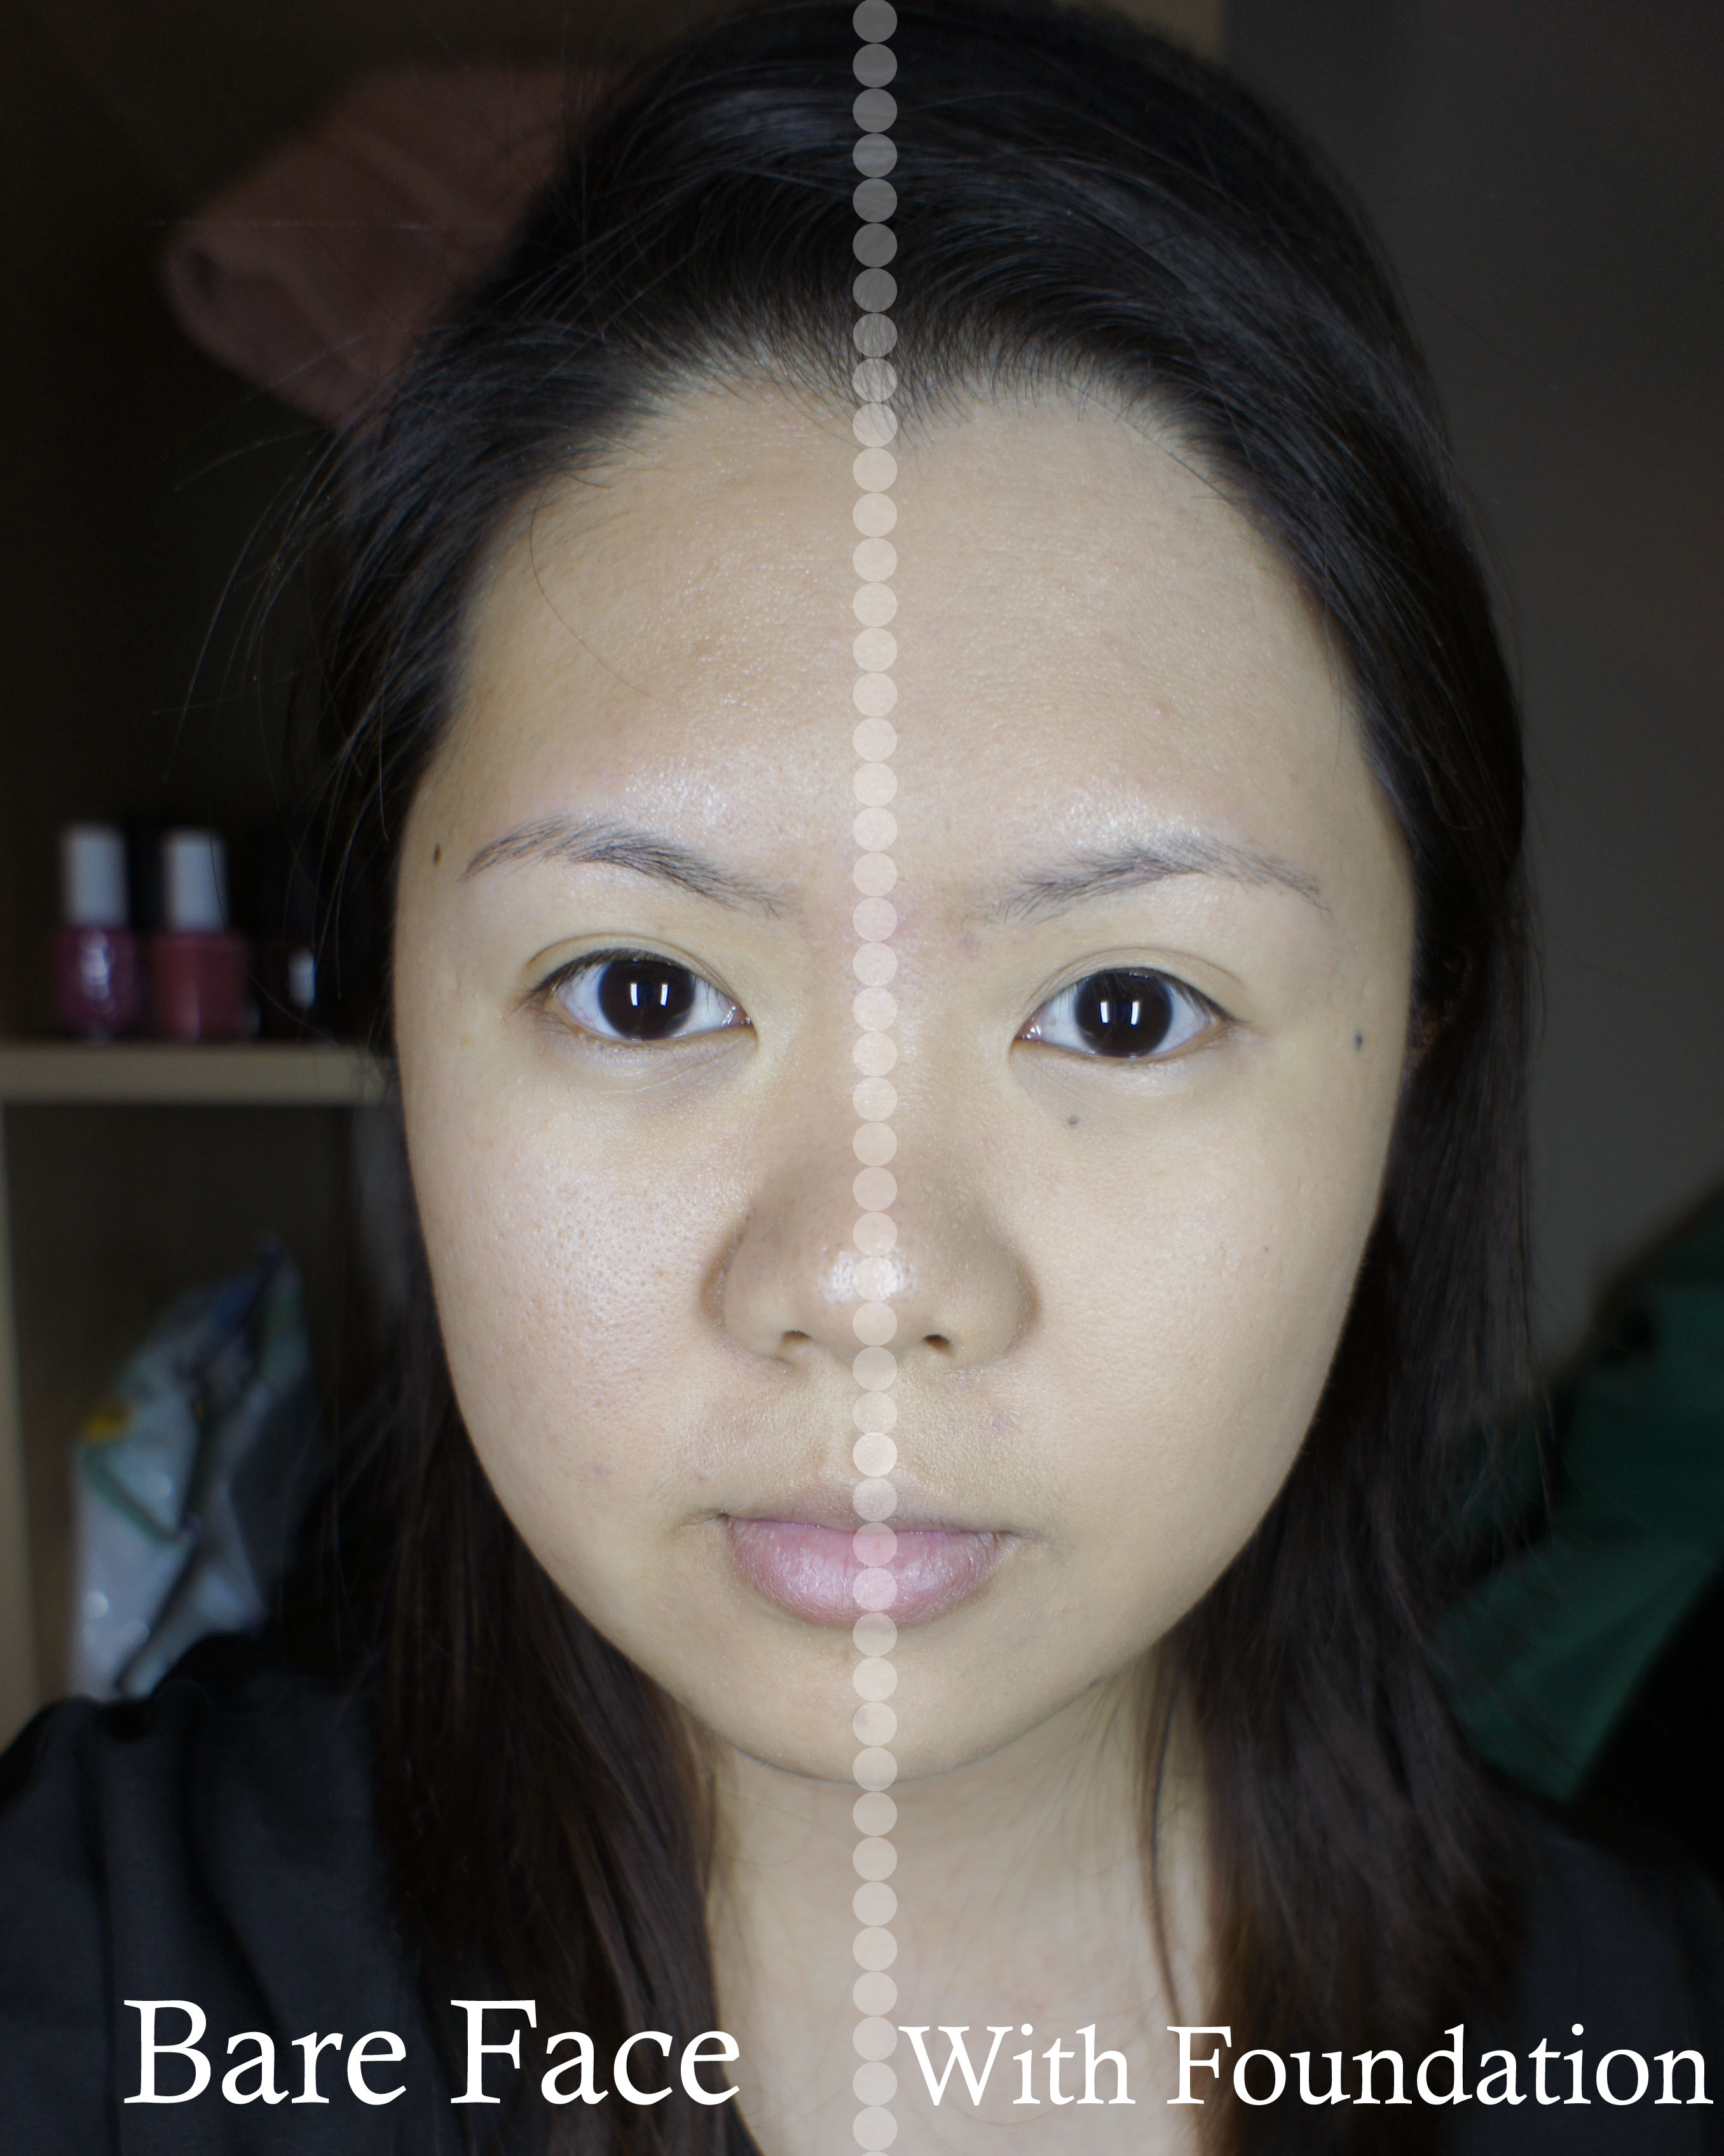
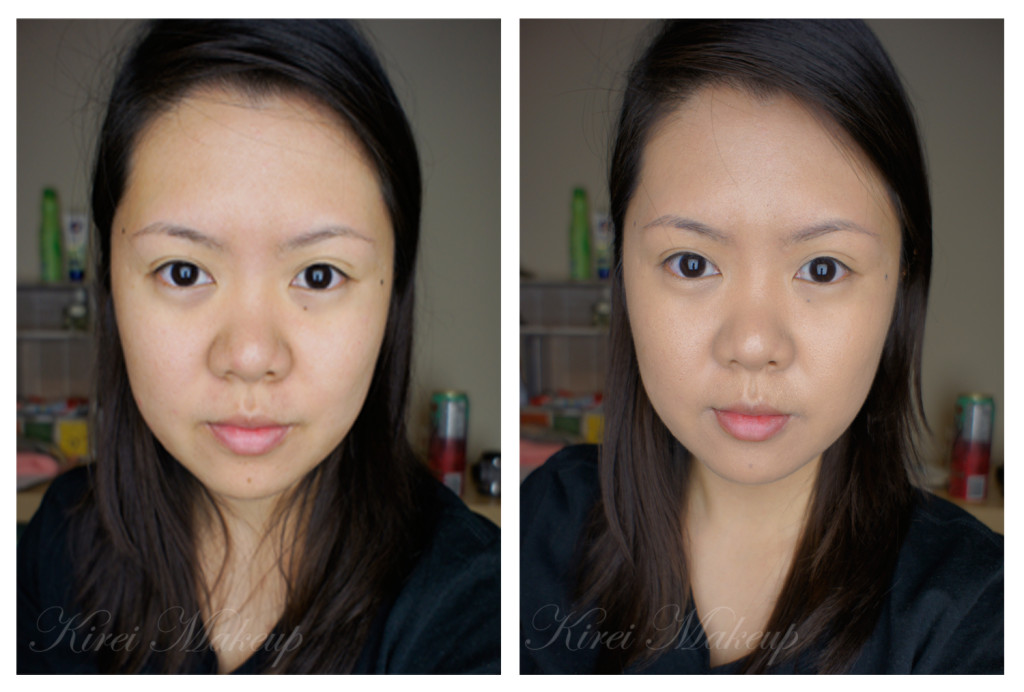
I was expecting the finish to be matte, but I was quite surprised at the result. I mean, look at my “after” picture, it doesn’t look super matte, does it? I feel like it actually has quite a natural finish. I think my “before” picture is more matte than the “after”.

I find the finish to be quite velvety. I like how it looks. It’s not too matte, not extremely dewy either. Just the right amount.

Longevity

The brand claims that it lasted for up to 12-hour. I’m not sure how true it is if you don’t set it. I wore it for couple hours (4hrs), and I noticed the foundation has started to settle on the lines under my eyes. I did not powder it, so may be if I do, it’ll last longer. Keep in mind that I have a combination skin type.

The foundation is quite slippery, so if you have an oily skin, you might want to set it with powder to ensure that the foundation will stay.

Shade

21 shades ranging from light to dark, along with different undertones (yellow, pink, olive, and red).

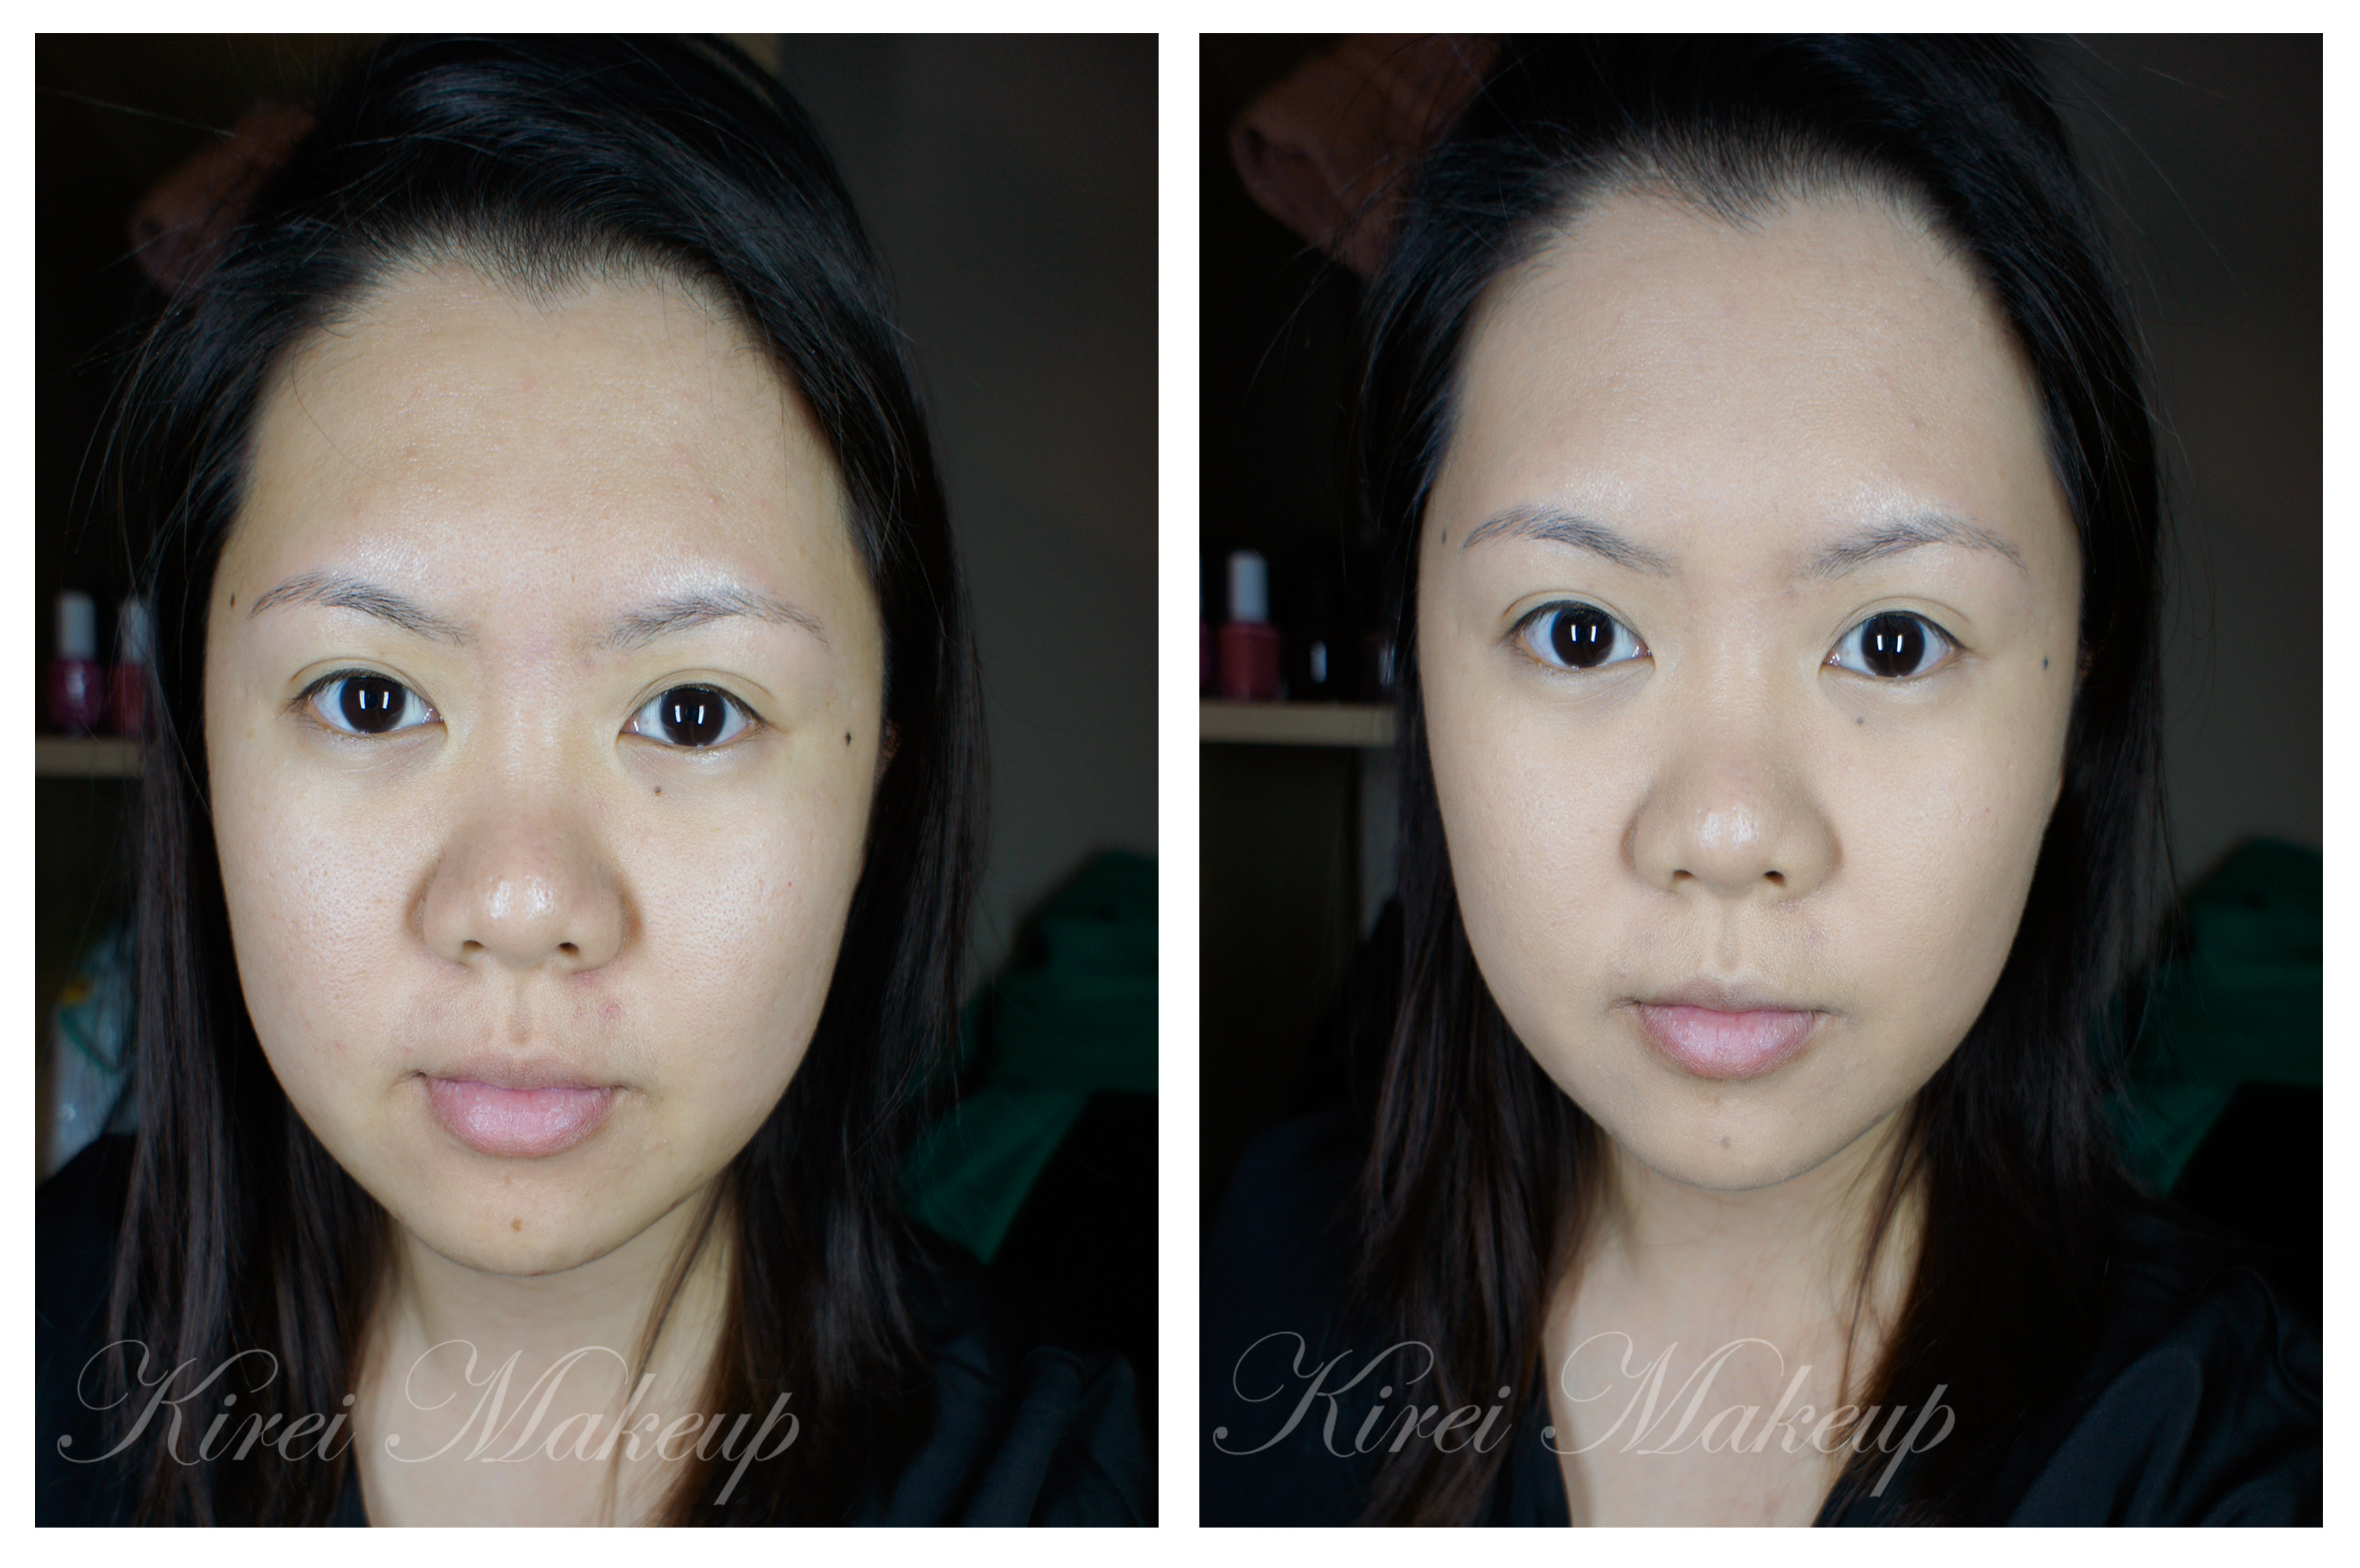
I picked Yellow Beige, thinking it might have more yellow undertone, but I feel that it has quite a pink undertone. In the picture you might think that it matches my skin tone, but I can assure you it did not. It’s very pink, but I know I can probably neutralize the pink slightly using a very yellow powder when setting it.

Price

Currently it’s sold for CAD $36 (usually $38) from Nail Polish Canada. I don’t know how much it is in other store. I think the price it’s not too bad, considering how much you get out of it. There are lots of other foundation that’s even more expensive and not as good as this one.

Dermablend Cover Creme Asian

Pros

  • Full coverage, but can be thinned out if needed.
  • It covers everything! I didn’t even need to use concealer for this review.
  • A large range of shades is available for all different skin tones.
  • Suitable for all skin type, including those with sensitive skin.
  • Natural to velvety finish, if you prefer a non-matte skin.
  • Blends easily.
  • Consists of SPF 30.
  • Great packaging and love the spatula.

Cons

  • For me, the cons would be the wrong undertone. Too pink, may be better luck for me next time…I think if you want to buy this online, make sure you already tested the foundation before hand to match your skin. If not, you’ll be like me doing a guessing game.
  • Settles on fine lines, but can easily be fixed by setting it with powder.

Dermablend Cover Creme review

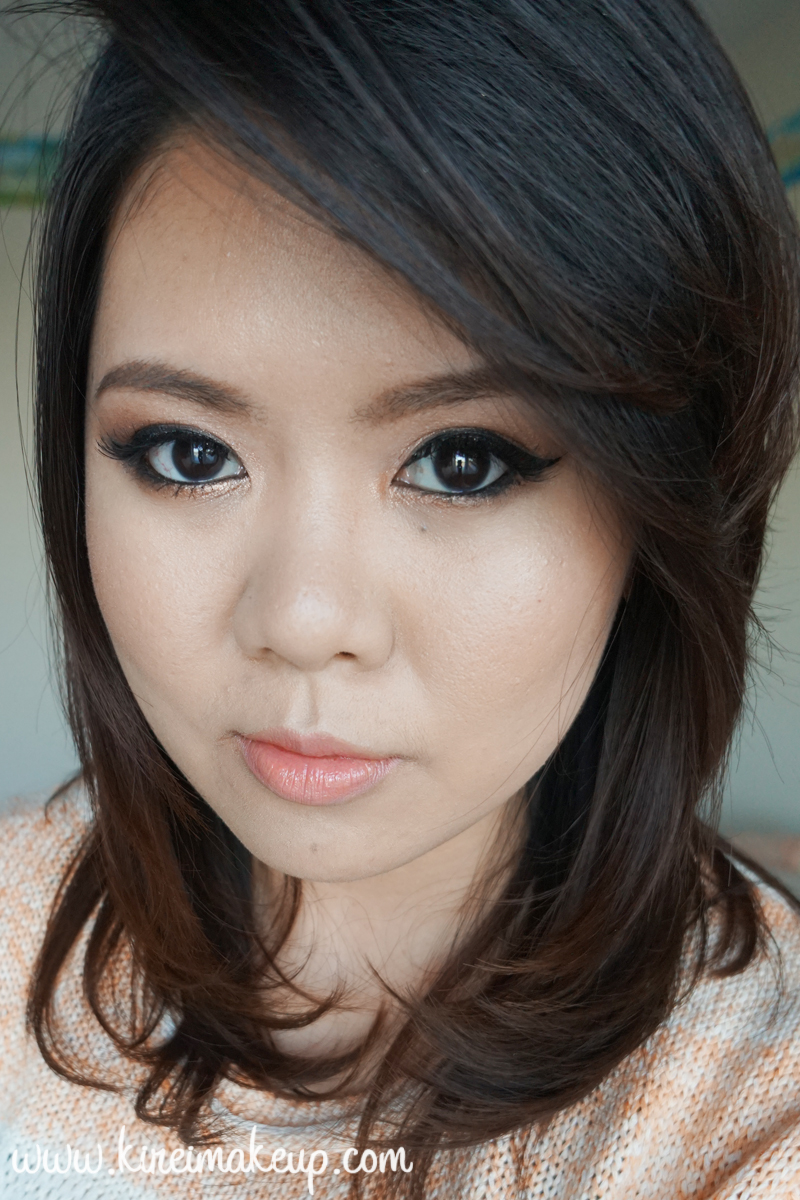
(Left: with Dermablend Cover Creme; Right: Bare face)

Smokey Eyes using Smashbox Full Exposure Palette

Another look using Smashbox Full Exposure Palette! I’ve created a natural warm-toned look using this palette in Smashbox Full Exposure Look #1, and I’ve also created a more glam look in Holiday Makeup using MAC Diva.

This time, I wanted to create a smokey eyes makeup with the palette, and so, I created this look! This look is a mixed of both the matte and shimmer eyeshadows from the Full Exposure palette.

Since it is smokey eyes look, you might want to do your eye makeup first before the rest of your face in case of fall-out.

How-to:

1. My eyelids were prep using Urban Decay Primer Potion.

2. Using a fluffy brush, I applied Smashbox Full Exposure eyeshadow in S6 slightly above the crease of my eyes.

3. Using a Smashbox bullet brush, I applied Smashbox Full Exposure eyeshadow in S7 on the outer V and on the crease.

4. Using the black side of the split-fiber brush from the palette, I applied Smashbox Full Exposure eyeshadow in M6.

5. Using a brush used in step 2, I blended the crease of my eyelid.

6. Using a small shader brush (MAC 228), I applied Smashbox Full Exposure eyeshadow in M5 on the inner corner of the eyes, and S7 on the rest of the lower lash line.

7. I lined my upper lash line, tightline and waterline using L’oreal Voluminous Smoldering eyeliner.

8. I applied Gwiyomi eyelashes in 8042 on the upper lashes. (Gwiyomi eyelashes are sold in Jakarta through my friend)

9. I filled my brows using Anastasia Brow Wiz in Medium Ash and Brunette.

silver smoky eyes

10. On the face, I applied Urban Decay Naked foundation using MAC Oval 6 brush.

11. I contoured my face using MAC Mineralized Skin Finish in Dark Deep.

12. On the cheeks, I applied Benefit Hervana blush.

13. I applied Chanel Lipgloss levres scintillantes glossimer (165).

Smashbox Full Exposure palette

Holiday Makeup using MAC Diva

I’m on a mission to use my new Smashbox Full Exposure palette as much as I can, and in as many tutorials as possible. I will mention that I’ll be doing Smashbox Full Exposure palette review and swatches in my next post!

I’ve recently bought MAC Diva lipstick, which is a retro matte dark red lipstick. So, I wanted to start creating a holiday makeup tutorial that has a little bit of a classic look, with a modern twist. I decided to do this tutorial, which consisted of dark red lips and shimmery cat eyeliner.

Keep in mind that the glitters from Smashbox Full Exposure palette S7 eyeshadow might create a lot of fall-out. You might want to do your eye makeup first before doing the rest of the face.

If you want to see a tutorial using the Smashbox Full Exposure palette, please check my Smashbox Full Exposure Look #1 post. If you want to find out how to apply red lipstick, please check my How-To Apply [red] Lipstick post.

cat eyeliner

How-to:

1. I applied Urban Decay Primer Potion all over my eyelid using my ring finger.

2. Using Smashbox Full Exposure palette M5 eyeshadow, I applied it all over my lid using a flat eyeshadow brush.

3. I created a cat-eyeliner along the upper lash line using MAC 266 brush and Smashbox Full Exposure palette S7 eyeshadow.

4. Using the same brush and eyeshadow from Step 3, I applied the eyeshadow on my lower lash line.

5. I used L’oreal Voluminous Smoldering eyeliner on my waterline and tightline.

6. I filled my brows using MUFE Aqua Brow gel and a clean MAC 266 brush.

7. I curled my lashes and applied Physician’s Formula Organic mascara on both upper and lower lashes.

8. Then, I applied Eyeme false eyelashes on the upper lashes.

Holiday Makeup Tutorial

9. I applied MAC Pro Longwear foundation in NC30 all over my face.

10. I applied Benefit Erase Paste under my eyes.

11. I set the base using Cover FX Translucent powder.

12. Using Diorskin Shimmer Star Amber Diamond as highlighter.

13. I used MAC Shadowy as contour, and NARS Mata Hari on the cheeks.

14. On the lips, I applied MAC Brick lip liner and then applied MAC Diva on top of it.


Product of the Week: MAC Masterclass Brush Oval 6

Hi all! Before we proceed to the review, don’t forget to join my GIVEAWAY (worth up to $250 of gift cards)! Read more all about it in my Trend Trunk post!

So, I have been waiting for this MAC Masterclass brushes ever since I found out about it last month. When it was released last week, I couldn’t handle the excitement and ordered the Oval 3 and Oval 6 brushes! Today, however, I’ll be sharing with you how I feel about the Oval 6 brush.

When I received this brush, I put a picture of it on Instagram and people were saying that it looked like a toothbrush. It does look like a toothbrush, eh? This brush is definitely quite different than any makeup brushes that are around. The handle is different, the bristle is different and there is no ferrule.

MAC Oval 6 brush

I think the pictures above and below are pretty explanatory on how the brush looks like. The bristles are so lovely! It’s super dense, soft and fluffy. It is not too stiff, nor too flimsy.

From MAC Website:

Ideal for blush, foundation or powder, the rounded, medium-sized brush applies, blends and contours all over the face or cheeks for even, flawless coverage. Synthetic fibres. Handle features special grip design and tilted brush tip for ultimate precision. Sleek black finish.

MAC masterclass brush

MAC Pro Longwear before and after nc30

I applied MUFE HD Elixir primer all over my face using the brush. Then, I squirted a pump of MAC Pro Longwear foundation on the back of my hand, and then picked some of the foundation using the Oval 6 brush. 

I think the trick with this brush is to apply it in downward stroke. Doing small circular movement (otherwise called buffing) also helps, unless you have dry patches on your face. The buffing motion might cause the dry skin patches to flake, so make sure you moisturize your skin really well.

If you are a beginner, you’ll probably find that this foundation brush is easier to use than other brushes in the market. If you have issue with streak marks from foundation application, you might find that this brush would help to get rid of that streaking issue. I also find the Oval 6 brush is perfect for blending the foundation into the skin.

MAC Oval 6 brush review

How-to:

  1. Apply foundation using Oval 6 brush on the face. Apply from the center of the face outwards. You want to use downward strokes. I also used a small circular movement to buff the foundation into the skin.
  2. Using the tip of the brush, I applied the foundation under my eyes in a left-right motion.
  3. I also used a downward stroke from my jawline down to my neck.
  4. For the chin, I tilted the brush horizontally so it’s parallel to the floor. Again, I used downward stroke for foundation application.
  5. I used stippling motion for blemishes.

how to use MAC Oval 6 brushI simply love the result that I achieved using this brush! I feel like my pores were completely covered, and almost disappeared. Such flawless result!

Not to mention, this brush takes out the guesswork. It’s so simple to use! You can use any type of motion – downward strokes, buffing, stippling to use it.

It costs CAD$50.50 for Oval 6 brush. Pretty pricy, compared to a normal foundation brush, like the MAC 190 that costs CAD$41.

MAC Pro Longwear nc30

(Left: Bare Face; Right: with MAC Pro Longwear applied using MAC Oval 6 brush)

Pros:

  • Easy to use
  • Flawless result
  • No streaking
  • Great packaging
  • Soft bristles
  • Synthetic fibers
  • Multi-use: can be used for primer, foundation application, blush and/or contour.

Cons:

  • Pricy!
  • No Pro Discount

4.5 starts out of 5! Lost 0.5 star because of price.

Revlon Chalkboard Nail Art

Hello everyone! So sorry for the empty blog last week. I’m not sure if you guys know, but I’m in Canada right now! I can’t wait to go to IMATS again this year *spoiler alert* hahahaha…Anyways, since I’m in Canada, I decided to grab this nail polish from Wal-Mart, and it only cost me CA$7.46 (before tax) at the time.

This is a limited edition product, so grab it while you can! I’m not sure how many shades are available, since these nail polishes were in quite a mess when I was there. I grabbed Spring Break, because who can resist the cute Mint color on the other end?!

Revlon Spring BreakAs you can see, the nail polish comes with 2 ends – black and mint. Both colors have a matte finish to mimick a chalkboard. The black polish has the usual normal nail brush. It’s wide with a rounded tip, which made it very easy to apply the polish to my nails. The consistency of the nail polish is just perfect. It’s very similar to OPI polishes, and it’s very opaque. I did 2 coats  on the picture below.

For the mint end, the brush is somehow not sticking together like a normal nail art polish brush is. The bristles were separated in half, so I think I bought a bad batch. Not sure if may be someone had tried to use it in the store, since the bottle wasn’t sealed or anything. Anyways, that was annoying, but oh well. I should’ve checked before I grabbed it.

Revlon Chalkboard Nail Art

So, I’m not a big nail art fan since I’m not that good with my hands in creating design or drawing, so please, don’t judge my “artwork” below..hahahaha :P…Anyways, I wrote “xoxo” on my thumb, then a failed “hashtag” sign on my index, an “exclamation mark” on the middle finger, a “question mark” on the ring finger and a somewhat skewed “heart” on my pinky.

I like the black end, and I also like the mint end. I think I’ll like it more as a nail polish, instead of a nail art. Perhaps, if I’m better at designing my nail art, I’d probably will love this product. I can’t even do my right hand since I can’t maneuver the brush properly using my left hand.

Revlon Spring Break nail polish