Skull Makeup Halloween 2016

This tutorial shall conclude my last Halloween 2016 Makeup. We are closing it with my all time must-do, Skull Makeup! Watch my tutorial or read more below!

Check out my step-by-step Grim Reaper pictorial from last year if you haven’t!

Don’t forget to check out the other Halloween Makeup I’ve done over the years!

https://youtu.be/b_7piBW7Leo

Read More

Grim Reaper Halloween Makeup

Another Halloween makeup look for today’s post! I have been wanting to do a skull makeup, so I created this Grim Reaper Halloween makeup look. I wanted to created a more evil, creepy skull look, so I googled up “Grim Reaper” and used the image I found as a reference.

*For my other Halloween makeup tutorials, please check out “Halloween” category*

The_Grim_Reaper

I sooo need to practice on my blending, as well as the teeth. It’s really hard to do the teeth, so note to self – practice drawing skull and teeth! I also should have leave the teeth outline after I colored it bone colored. So, if you want an easier to do the teeth, color it first before outlining the teeth! Also, for the “bone” part, I mixed beige cream product with white. I wanted an off white color, not a stark white.

skull makeup step by step


Anyways, let’s get on the tutorial!

  1. I drew outlines of bones using an angled eyebrow brush and a matte black eyeshadow.
  2. Mixing a beige cream with white, I applied this “bone” color on the areas where the bones are.
  3. You can set the cream product with an eyeshadow or translucent powder.
  4. For the darker areas, I filled it using a black face paint. I left the eye sockets last since I have to put my contacts in, and I didn’t want to get it messy.
  5. Using a white cream product (you can use white face paint), I filled in the teeth dragging the color upwards towards the face for the upper teeth, and down towards the chin for the lower teeth.
  6. I put my contacts in, and filled my eye sockets with black face paint.
  7. For shading around the bone areas, I used brown eyeshadow first then grey to deepen the shadows. All I can say about this part is to have the areas shaded as detailed as you can. I added some eyebrow creases as well to make the whole look a bit more evil looking.

skull makeup

Products used

  • MUFE Flash Palette #902
  • MAQPRO primary palette “white”
  • Kat Von D Shade + Light eye palette
  • Wolfe face paint “black”

grim reaper makeup


Half and Half

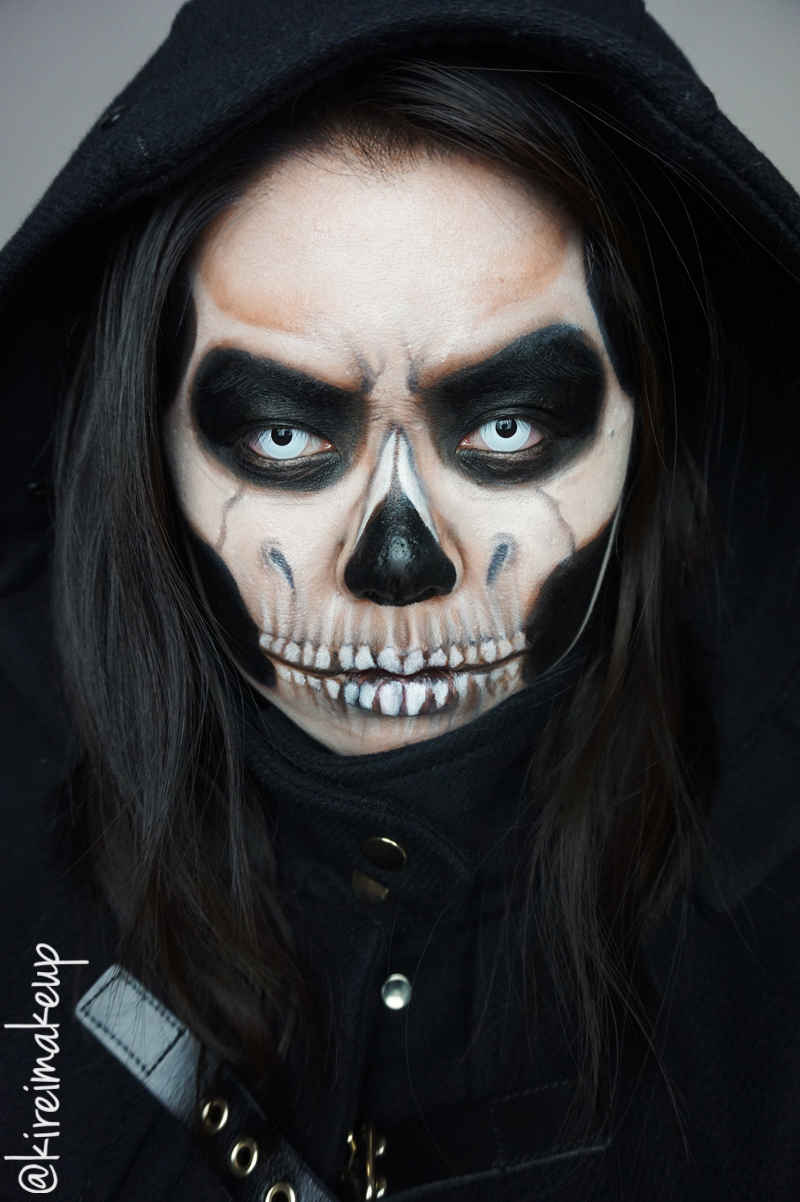
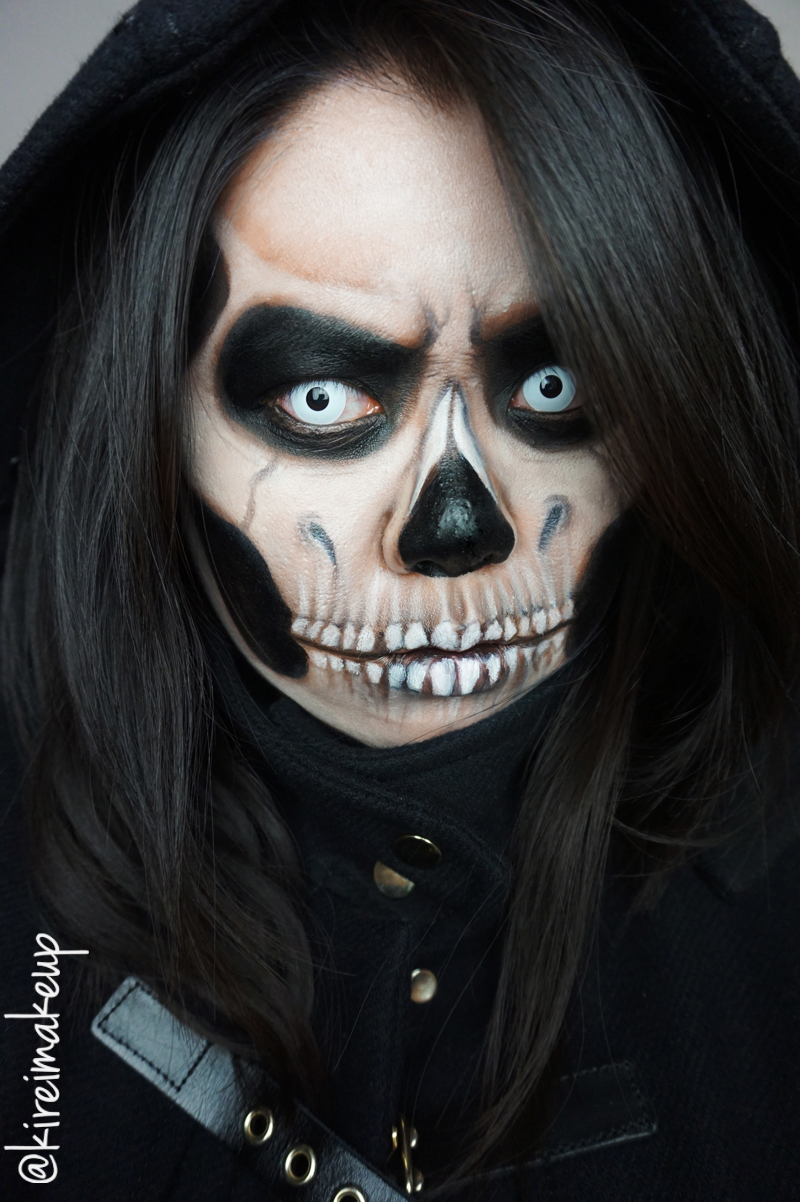
As always, this year’s Halloween isn’t complete if I don’t do a Skull makeup. This year I’m doing half pretty makeup and half skull makeup on my face. I used a skull photo from Google as reference, but I think I’ve might have made a mistake on the lower jaw. Oh well, next year will be better! :)

Also, I’d like to give a shout out to my cousin, Juicerna who sold me the lovely white contact lens for me to use in the tutorial. If you’re in Indonesia and would like to purchase one of these lenses, please go to her facebook page. I bought mine for Rp. 160.000 (plus delivery) and received in within 2 days. Oh, if you’re not used with wearing contact lenses, you might want to wear it before the makeup application as it might mess your makeup if you put it after.

Anyways, let’s get the tutorial started!

1. Google a skull picture and closely study the structure of the skull.

2. Using a black pencil liner, I used one from Physician’s Formula, I started outlining the structure of my face. This line will serve as a border between dark areas and bone areas.

skeleton makeup3. Once you’re satisfied with your outline, fill in the bone area using a flat eyeshadow brush. I used a white cream product from PAC since I find it easier to blend, but you can use water-activated face-paint like Snazaroo or Kryolan or MAC.

skull makeup

4. When you’ve finished filling in the white, use a clean flat eyeshadow brush and applied the black makeup on the hollow areas.

5. Add some shading using a small angled brush and MAC Omega/Brun mixture on the areas where the white and black meet.

half skull makeup6. For the teeth area, I filled in the teeth with a small shader brush. Using a clean angled brush and a black eyeshadow, I re-lined the teeth outline.

skull makeup


half skull makeup8. To avoid creasing, I generously applied translucent powder all over my face. For the black area, if you want you can apply black eyeshadow on top of it to make it even darker, but be careful during application since the black eyeshadow might fall on the white part and cause a mess.

half skull makeup

Halloween #1 – Skull

I should have done a step by step tutorial for this, but at first I was just trying it out for fun. I saw a picture of Rick Genest and fell in love with his tattoo. Rick Genest’s whole face and body are completely covered in tattoo! Go check him out here: http://speedballzee.files.wordpress.com/2011/06/rick-genest.png or google him out!

So, for this makeup you only need a few things:

1. Picture of a skull or Rick Genest (or Lady Gaga)

2. Black eyeliner pencil (any brand)

3. 3 brushes – an angled brush (MAC 208) for the thinner shadow, a shader brush (MAC 228) for really dark shadows and smudging brush (I used Sephora’s)

4. MAC Blanc type for highlight

5. Any medium brown eyeshadow if you like

How-to: look at the pictures and just follow it. I outlined everything first then started shading. I used the angled brush for the thinner shades for the teeth and to create dimension. I used the smudged brush to highlight the areas that I want to pop after I finished shading everything. I used the brown eyeshadow last to add depth.

I think I’ll re-do this tutorial on someone else and do a step-by-step explanation and pictures (hopefully this long weekend). Since I was just doing it for fun, I didn’t really take note on how I created this look..lol..

SONY DSC