Winged Eyeliner Tutorial

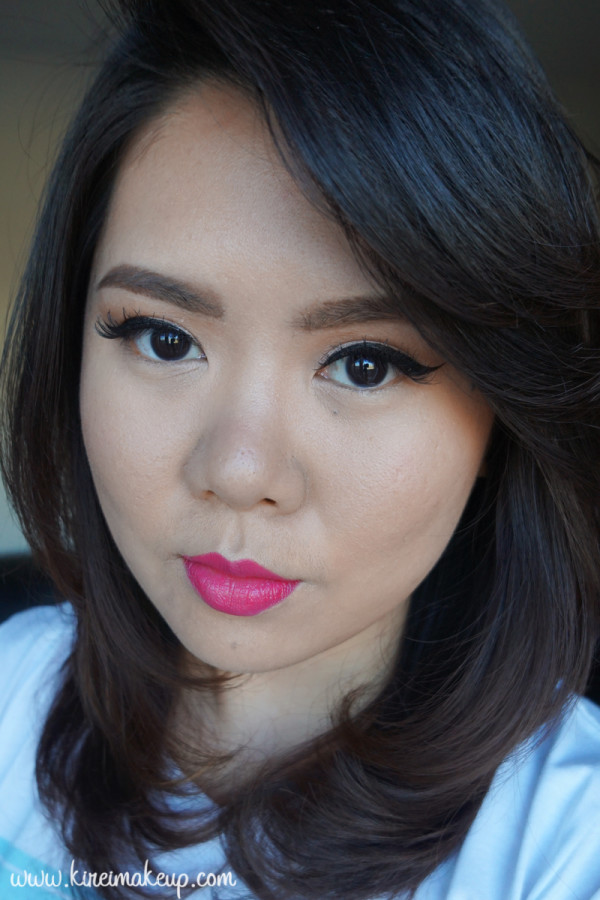
Hello everyone! I’m back with a new tutorial! Since the weather is nice and warm, I wanted to create an everyday Spring Makeup look, and give the new MAC Miley Cyrus Viva Glam lipstick a try. As you know, I’m one to pair very simple eye makeup with bold lips. I usually leave my eyes bare, but once in a while I’ll wear a winged liner. Since, I do get asked to create a winged eyeliner tutorial, I’m going to show you how I do it using a liquid eyeliner.

I’ve done a winged eyeliner tutorial post using gel/cream liner in my other how-to post. Between a liquid and gel/cream liner, at this moment, I prefer a liquid liner. For me, it’s faster, easier and more convenient to use a liquid eyeliner since it comes in a pen-like applicator. There’s no need to have a separate brush, unlike gel/cream liner. However, a liquid eyeliner dries out faster than a cream/gel liner. So, if you do make a mistake, it’s hard to correct it. For beginners, I suggest going with a cream/gel liner. Once you’re comfortable, then advanced to a liquid liner.

The one I’m using for this tutorial is Kat Von D Trooper Tattoo liner. It’s pretty much waterproof, smudge-proof and long lasting. My favorite of all time! Been using it since it was released couple years a go. Absolutely a must-have in your kit!

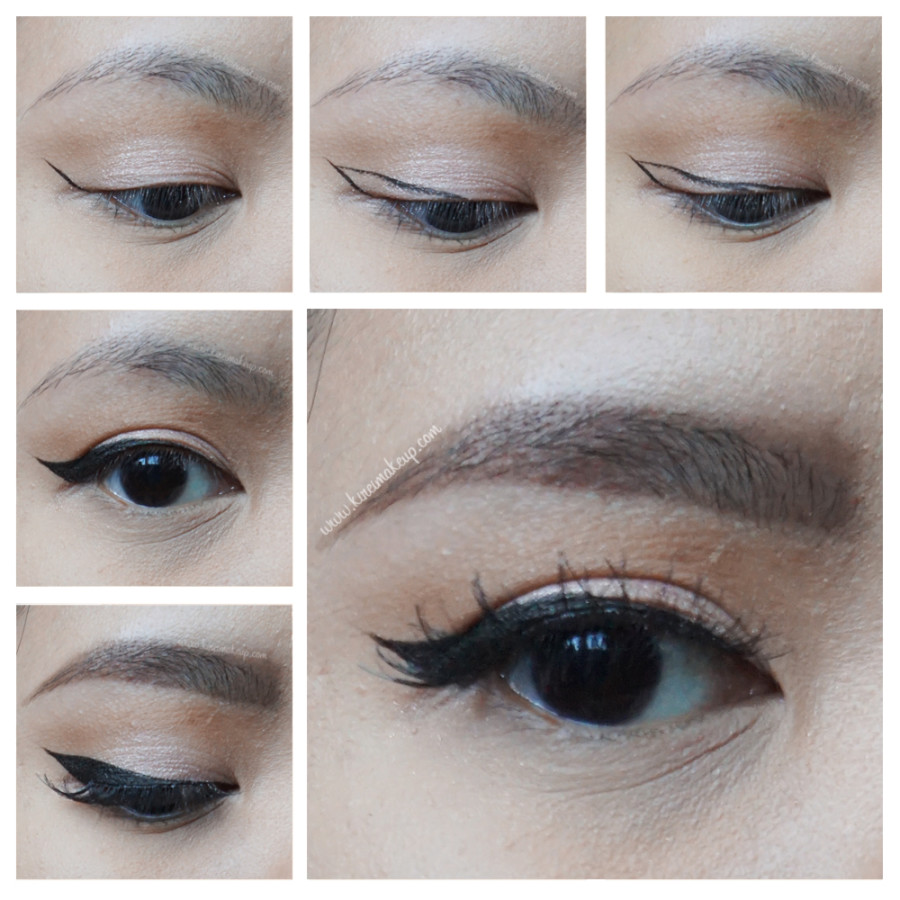
how to create feline flick

So, I think the pictures are pretty self explanatory. All you have to do is just create the “outline” first, and then fill in the rest. If you aren’t satisfied with the pictures and instructions below, leave comments below or on my Instagram page or Twitter page, and I’ll try my best to answer it. I’ll try to do like more videos in the future once I’m all settled down.

Instructions:

1. Mark where you want your wings to be.

2. Create a diagonal line from the tip of the wing to the center of your lash line.

3. Create a line from the inner corner of your eyelid to the center of the lid.

4. Fill in the “outline”. At this point you can extend your wings, or thicken the line more. I’m satisfied with mine, I like it where the wings are bigger and it gradually tapers towards the inner corner of my eyes.

5. Then, fill in your brows, and add lashes if needed.

mac miley cyrus

Products used

Eyes

  • Primer – Urban Decay Primer Potion “original”
  • Eyelid – Chanel Illusion d’Ombrea “Emerveille”
  • Crease – The Balm Meet Matt(e) Nudes “Matt Rosen”
  • Eyeliner – Kat Von D Tattoo Liner “Trooper”
  • Eyebrows – Anastasia Beverly Hills Dipbrow Pomade “Medium Brown”
  • Falsies – Gwiyomi False lashes #3

Face/Cheeks

  • Foundation – NARS All Day Luminous Weightless foundation “Punjab”
  • Concealer – MAC Pro Longwear concealer “NC25”
  • Highlight – Kat Von D Shade + Light contour palette “Lyric”
  • Contour – Kat Von D Shade + Light contour palette “Sombre”
  • Blush – Smashbox Halo blush powder “In Passion”

Lips

  • Lipstick – MAC Miley Cyrus Viva Glam
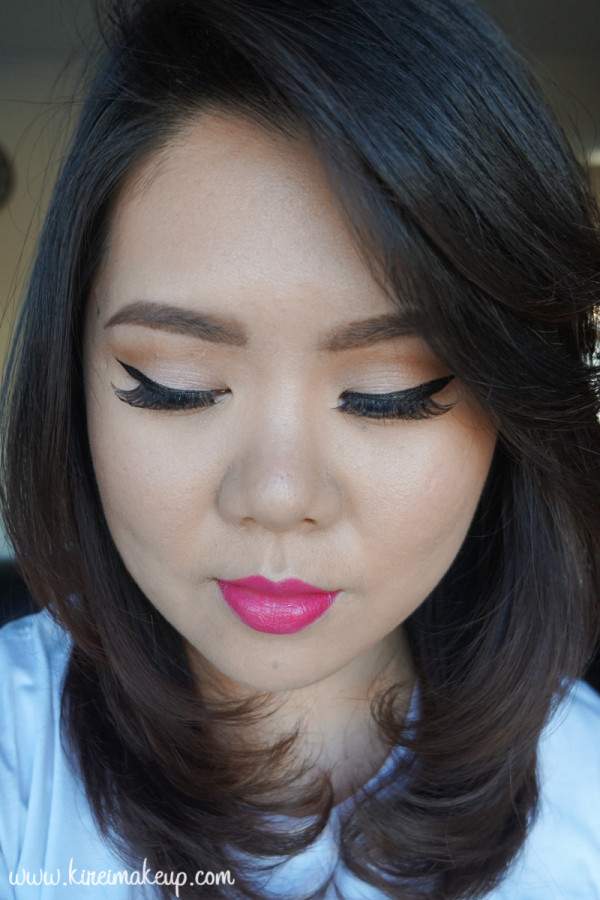
mac miley cyrus viva glam


L’oreal Neon Skirt

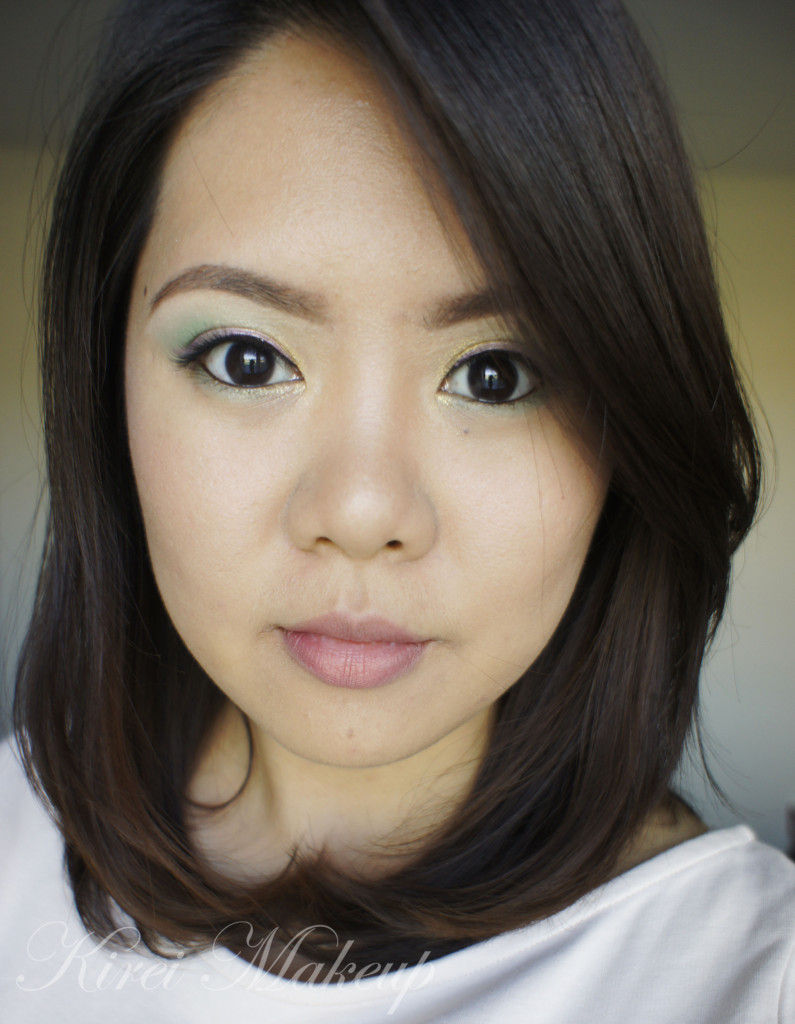
Finally! A tutorial to be posted. I do have to say, I’m not really loving how this look ends up. I used L’oreal Neon Skirt Color Riche quad eyeshadow that I recently purchased (posted on Instagram and Twitter). I love the colors that come with this quad, but…*sigh here comes the but*…I feel that one of the shadows is quite difficult to blend. May be it’s my fault for not priming my eyelid since  I can’t find my primers because I’m not totally unpacked yet.

Anyhooow, I just wanted to do a quick tutorial so I don’t go missing for another week or so, leaving the blog empty. Hmm, what do you guys think? I followed the instruction from the back of the quad for this look. I feel that the green color wasn’t blended properly. I wanted a sheer wash of color, so I tried blending it out, but it doesn’t look that great, eh…Also, I don’t know how I feel about the purple eyeliner. It’s not intense enough for me to be an eyeliner. Also, there’s a lot of fall out from the purple, so watch out for it.

Nevertheless, I think this can be a great look if you want to try to wear colors to go out. It’s very sheer and kinda look like watercolors, no? Oh, I love the vanilla highlighter in the middle of the lid! It makes the eyes look so pretty when you blink.

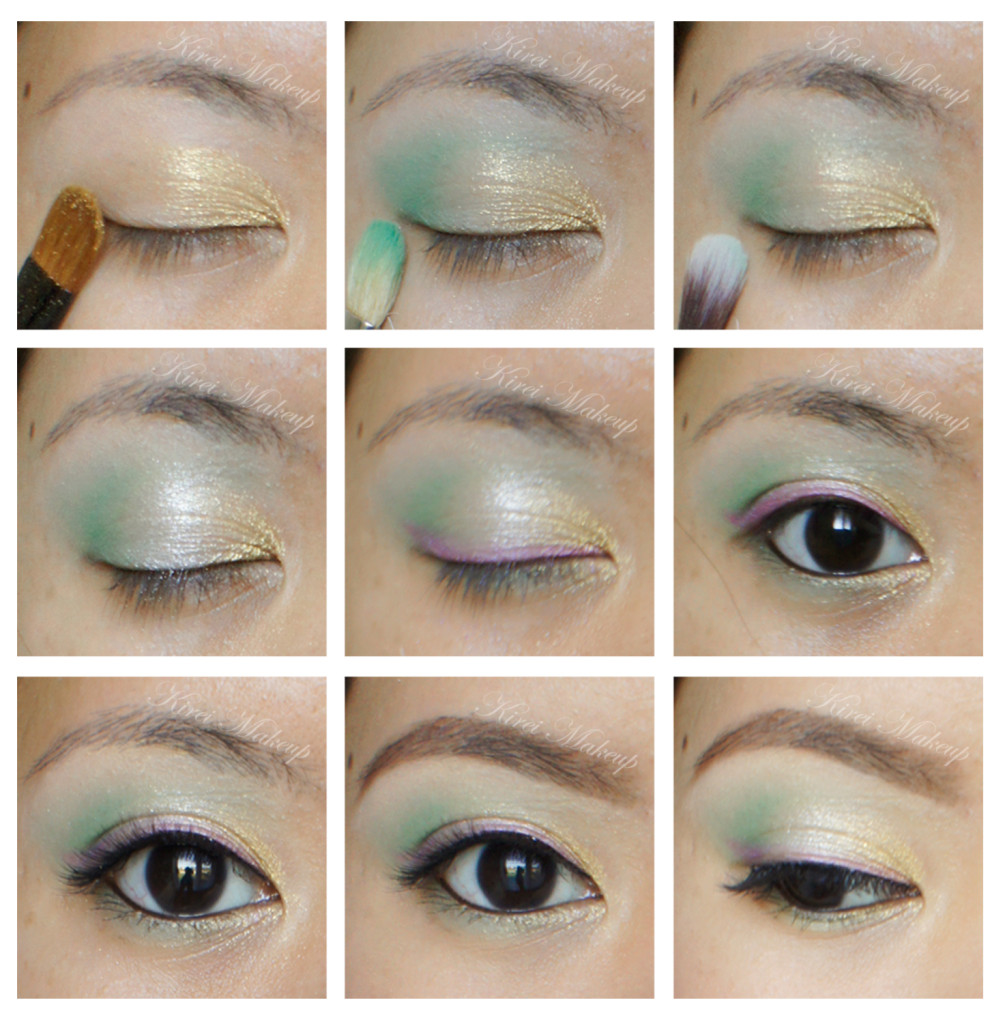
How-to:

1. I applied the gold eyeshadow from L’oreal Neon Skirt quad on the inner half of the lid using a flat eyeshadow brush.

2. Using a clean blending brush, I applied the green shadow from the same quad on the outer half of the lid.

3. (you can skip this step) I blended out the green eyeshadow towards the brow bone, leaving a little bit of color concentration in mostly the outer V of the eyelid.

4. Using my ring finger, I lightly tapped the vanilla eyeshadow from the quad to the middle of the lid.

5. Using an angled brush, I applied the purple eyeshadow of the L’oreal Neon Skirt quad along the upper lashline.

6. I applied the green along the lower lash line using a pencil brush. I dabbed a tiny bit of gold in the inner corner of the lower lid using a small shader brush.

7. I also lined the waterline and tightline using L’oreal Voluminous Smoldering eyeliner.

8. I curled my lashes and applied L’oreal Carbon Black mascara on both upper and lower lashes. I also applied EyeMe false eyelashes (free sample from a friend) on the upper lashes.

9. I filled my brows in using Anastasia Brow Wiz in Brunette.

L'oreal Neon Skirt

10. For the face, I applied MUFE HD Foundation in 118 using a foundation brush.

11. I set the foundation using MUFE Pro Finish powder.

12. I contoured my face and nose slightly using MAC Shadowy.

13. On the cheeks, I applied MAC Dainty blush.

14. I filled my lips in using MAC Dervish lip liner.

L'oreal Neon Skirt

ps: Pictures are taken using natural light.

pps: Like my new hair? hahaha 😛


Product Review: Arte Stile [sponsored]

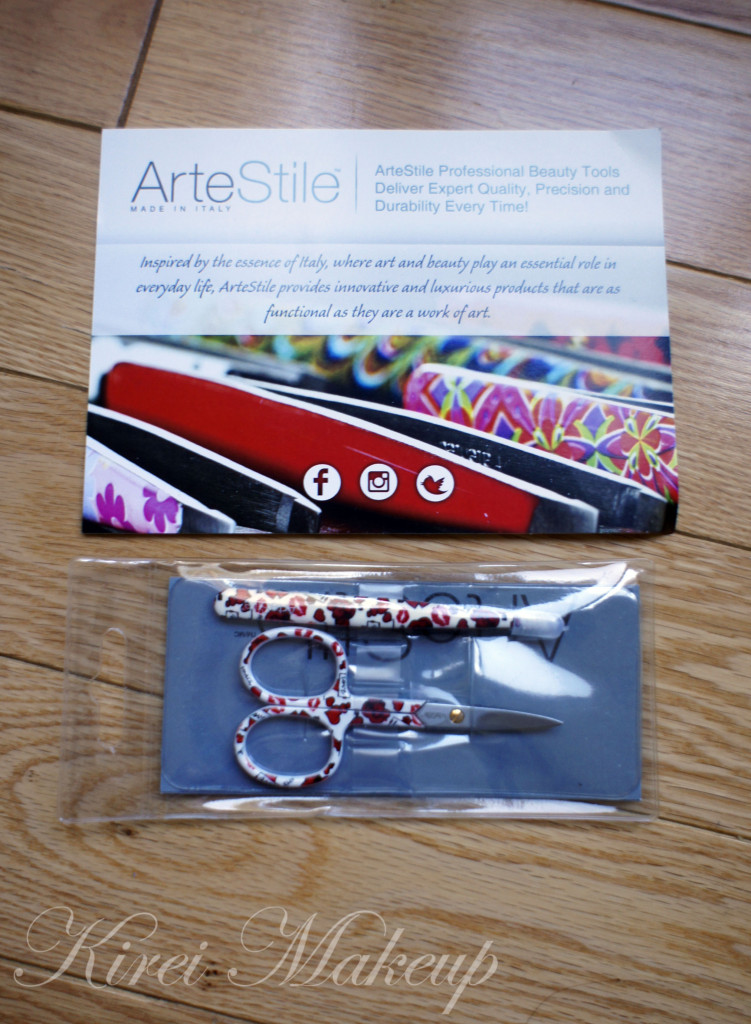
Hello, everyone!!! Has the week been treating you well? Again, I apologize for the lack of tutorials, but I’m sure if you follow my Twitter and/or Instagram account, you’ll find snippets of what’s going on in my life right now. Anyhow, if you’ve followed my Instagram account, you’d probably already know that I received a sample from ArteStile!

What is ArteStile?

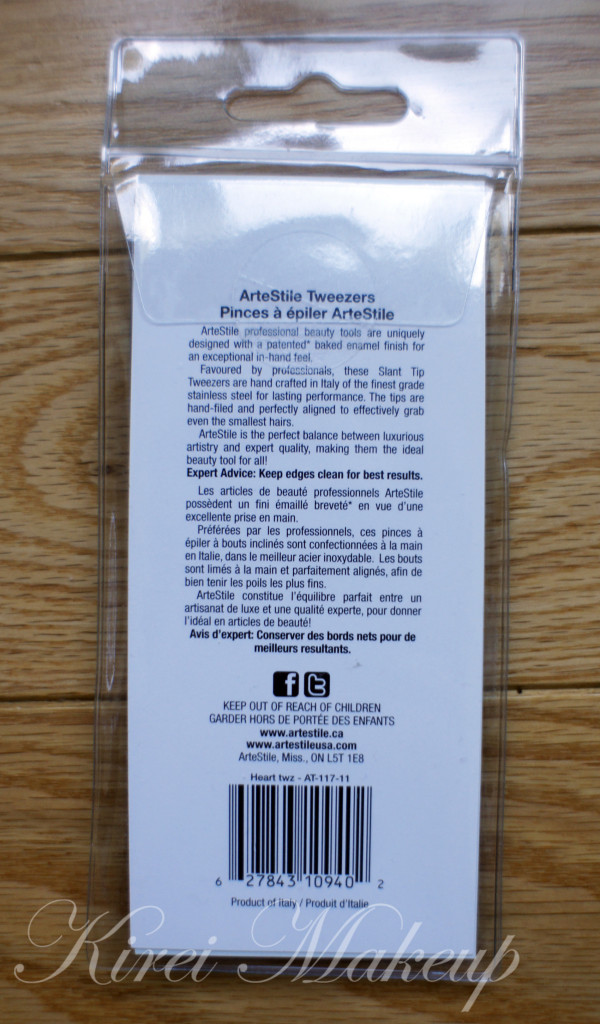
“Originally created for beauty experts, each ArteStile piece is handcrafted in Italy with the finest grade surgical steel for lasting performance.The tips and blades are hand-filed and perfectly aligned to effectively grab even the smallest hairs.

The ArteStile Collection is a unique line of tools with a patented baked enamel finish for a luxurious in hand feel and a perfect grip for at home use. The collection is available in different colours and patterns and is designed to be stylish and chic without compromising the professional quality ArteStile prides itself on. The ArteStile Collection is the perfect balance between luxurious artistry and expert quality making each piece an ideal beauty tool.”

ArteStile, 2013

tweezers

The best part about this brand is:

“[…] our products are crafted in Italy by small family businesses that are subjected to third party audits to secure all compliances are met. Our lead free implements may cost a little more but when you purchase one you can be assured we have remained true to this policy. There are NO harmful labour processes involved in creating our products. ArteStile is proud to stand behind this promise and it is something you can count on!”

ArteStile, 2013

I’d like to say a big thank you to Nick for sending me the tweezers and nail scissors! They are so adorable. You know how I like to put “xoxo” in a lot of my tweets and/or insta comments?! These 2 products are the “Hugs and Kisses” edition! Ah, perfection! I love the cute details on it.

arte stile

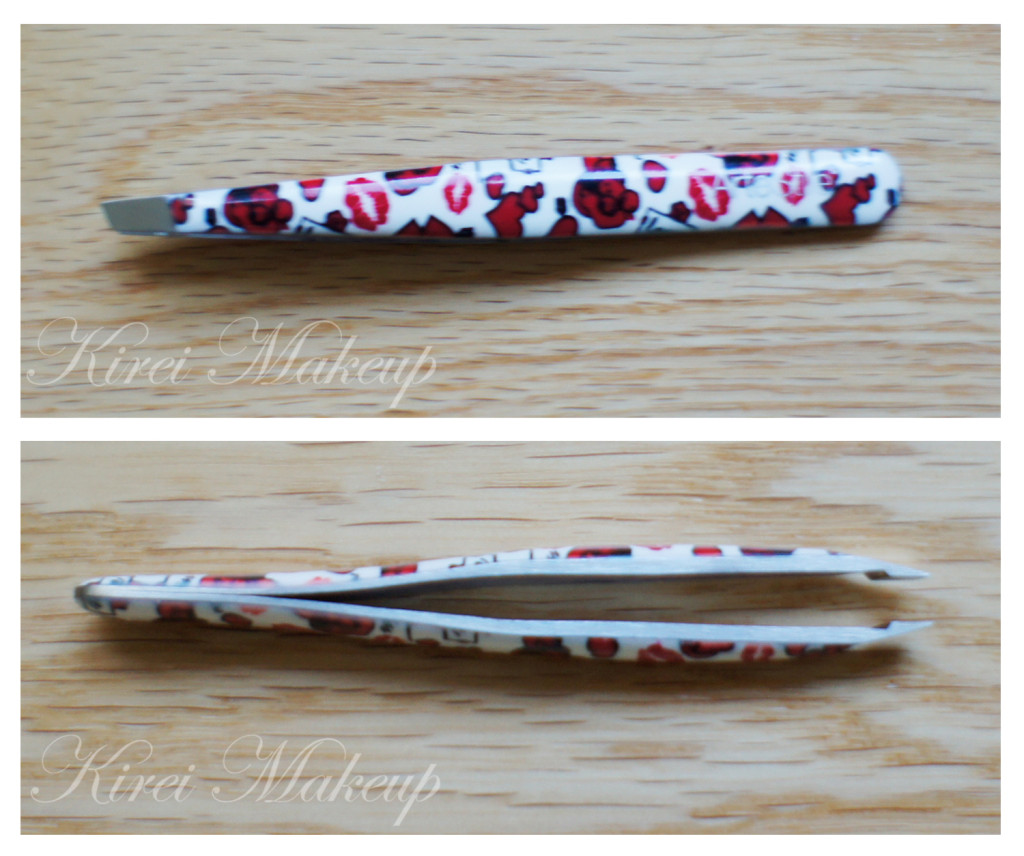
To be honest, I’m a big fan of Tweezerman’s tweezers. I owned several, and I thought nothing could replace those. They are the best tweezers in the whole wide world. Yet, after trying the ArteStile tweezer, I think I might have to change my opinion. Don’t get me wrong, my Pointed Slant-Tip Tweezerman will always be the one. However, the slant-tip tweezer by Arte Stile is actually better than my Slant Tweezers by Tweezerman! I find that the one by ArteStile graps my fine eyebrow hair better, and it doesn’t slip. The tip feels thinner and grips my individual eyebrow hair better.

I love it! This will go on my kit, for sure. This specific ArteStile Hugs and Kisses tweezer costs CA$24.97.

arte stile tweezers

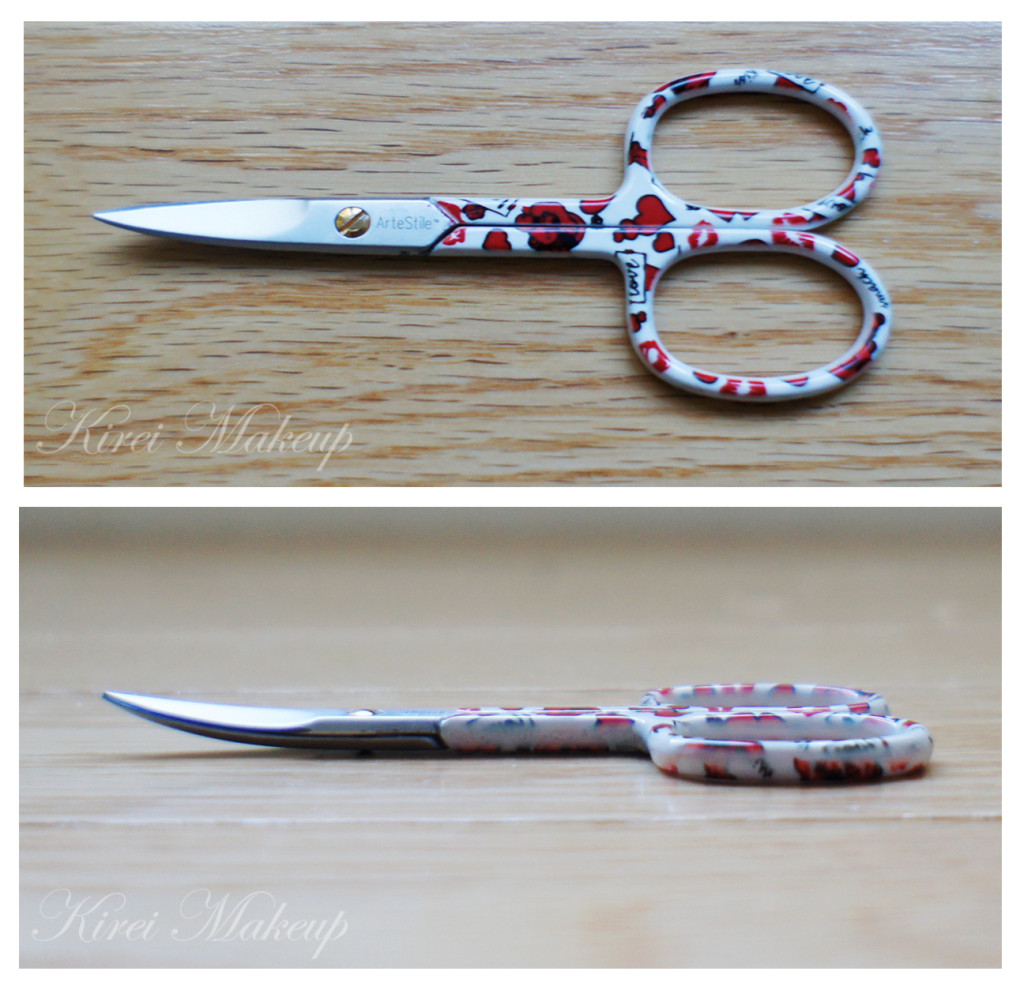
The ArteStile Nail Scissors is slightly curved. The use of the nail scissors is obviously to cut or trim your nails. I usually used it to cut my cuticles or any hangnail.

Another use of the nail scissors, esp. the one like the ArteStile Nail Scissors is to actually cut the eyelid tape. As most East Asians know, if you have monolids, you probably have used eyelid tape to create a lid. My fellow Indonesian Bloggers and Makeup Artists most definitely have tried to cut and create their own eyelid tape. This scissors is perfect in creating those eyelid tape because of the curvature of the blade.

The other possible use of this nail scissors is to trim your eyebrows (in conjunction with eyebrow brush/spooly). Please be very careful when using this to trim your eyebrows as the tips are very sharp.

This ArteStile Hugs and Kisses Nail Scissors cost CA$24.97 as well.arte stile nail scissors

You can get all these products from their website ArteStile.ca ! They have an amazing collections, like the super adorable glitter tweezers, nail scissors, c0lorful eyelash curlers and more. So, what are you waiting for? Go check them out!