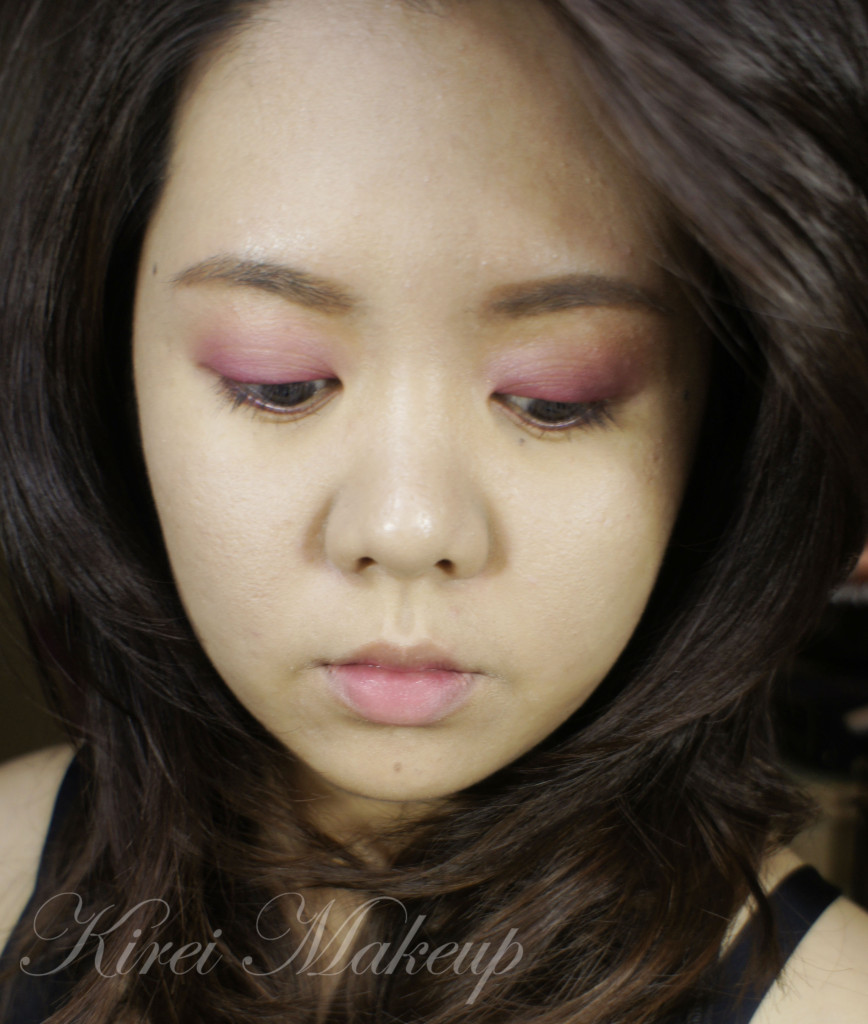
Lee Hi Rose MV Inspired

I received a request! Whuaaaat! hahaha..It’s been a while since I gotten requests for makeup tutorials, and it makes me very happy that one of my followers actually requested one! Pdo send me requests on comments below or over on Twitter 😀

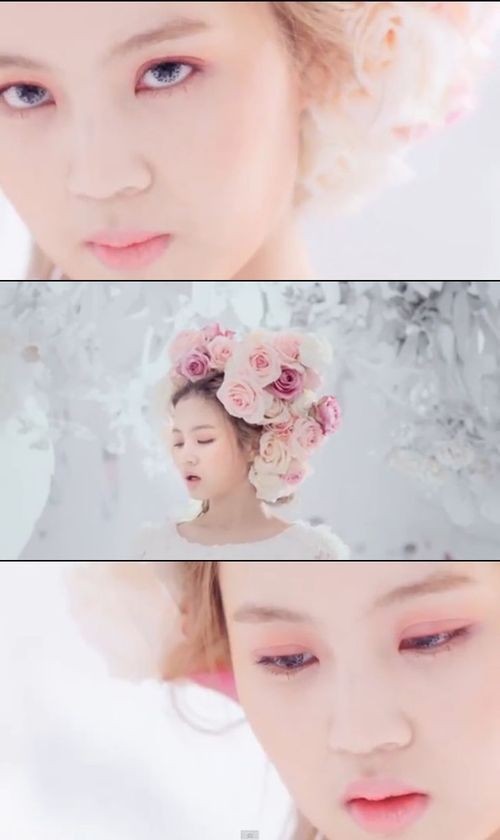
Anyhow, so Cahya requested me on Twitter to do Lee Hi’s makeup in her MV Rose. I was like whaaat??? Who’s this Lee Hi girl. I searched her on youtube and found the MV. Lee Hi is a Korean singer, and she has an amazing voice! Being Korean, she obviously has like the most perfect skin just like most of my Korean friends. She has 3 different looks on the video – red eyes and pink lips, red eyes and red lips, yellow/pink eyes with pink lips. I chose the red eyes/pink lips combo for this inspired look just because it showed up most of the time on the MV.

Can we please admire how gorgeous that rose crown on her head is!

lee hi rose mv

Image is Courtesy of Kpopstarz

Keep in mind that she is probably 2 shades lighter than me. Her makeup is quite minimal. Let’s break it down:

  • Her brows are straight across, just like most Korean actresses/singers. Mine has more shaped than hers, so I had to fill mine in more to make it less angular.
  • Seeing her video, I don’t think she wore any blushes or contour, which made the red eye more chic and modern.
  • It also seemed like she barely has any mascara on, perhaps she wears a brown mascara or even a clear one.

A word of caution! Please make sure that whatever red blush or product you are going to use are allowed to be used for the eyes. Some red lip products or cheeks are not allowed for the eyes due to sensitivity issue. I used Ben Nye blush because I’ve tried and tested it on myself and others, and found no allergic reaction or sensitivity towards it.

How-to:

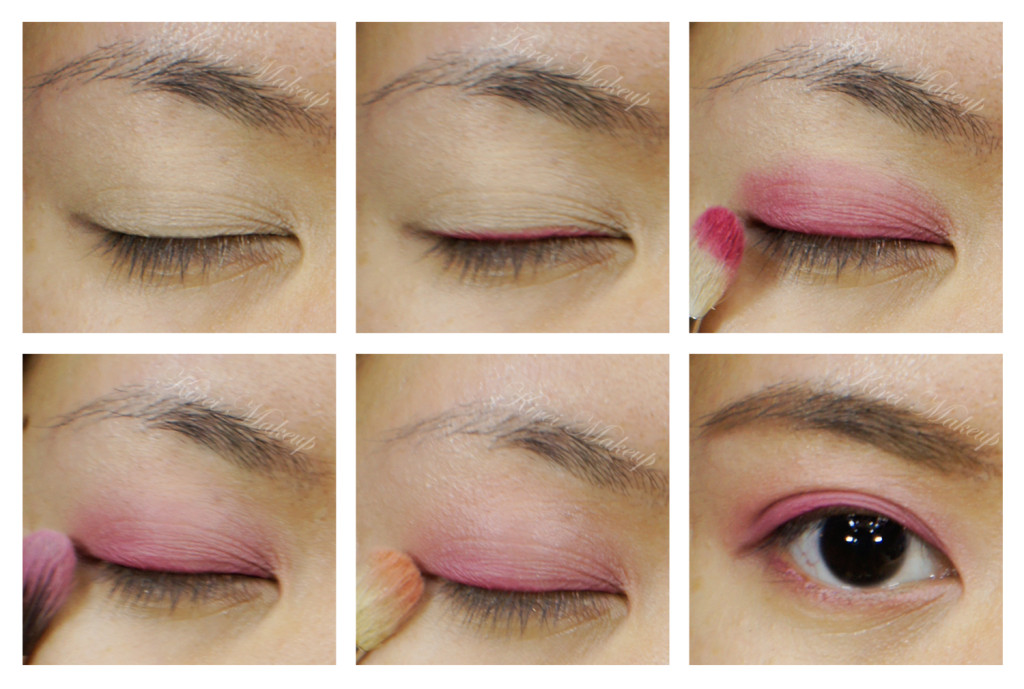
1. I applied MAC Soft Ochre paint pot all over my lid using my finger.

2. Using an angled eyeliner brush, I applied Ben Nye Soleil Red blush along my upper lashline.

3. Using a fluffy blending brush, I picked up a teeensy weensy bit of the blush and applied it lightly on my lid, avoiding the crease.

4. Using a clean blending brush, I blended whatever is on my lid so it fades.

5. Using a clean blending brush, I applied Ben Nye  Mango eyeshadow lightly on the crease.

6. Using a clean angled eyeliner brush, I mixed Ben Nye Mango eyeshadow with Ben Nye Soleil Red blush and applied it very lightly on the lower lashline.

7. I applied Urban Decay Woodstock eyeliner along the waterline.

8. You can choose to apply a very light coat of mascara or skip it.

9. I filled it my brows using Dollywinked eyebrow pencil in brown and set it with Anastasia Brow Powder in Brunette.

Ben Nye Soleil Red

10. For the face, I applied MUFE HD foundation in 117 all over my face using Sigma Round Kabuki brush, going over my lips with it as well.

11. I applied Revlon Ravishing Red lipstick on the center of my lips using my ring finger, just dabbing on it.

12. Lastly, I applied Chanel Levres Scintillantes Glossimer no. 165 (Volupte) lightly on my lips and then blot it with a piece of kleenex.
Lee Hi Rose MV Makeup


Product of the Week: Sariayu K. Karimunjawa

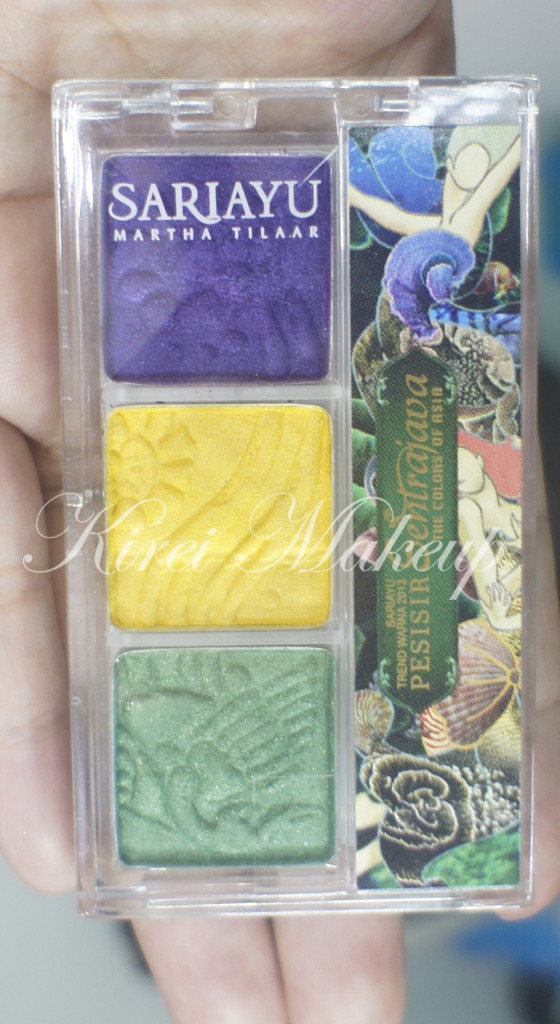
This week in Product of the Week installment, I’m presenting another Sariayu eyeshadows! I’m loving this Indonesian makeup brand so much. It’s affordable, pigmented and widely available. Martha Tilaar’s other brand, which is P.A.C is actually designed for makeup artist, but I find that Sariayu (also by Martha Tilaar) has the same quality as P.A.C eyeshadows. I also love the fact that Sariayu products are not tested animals!

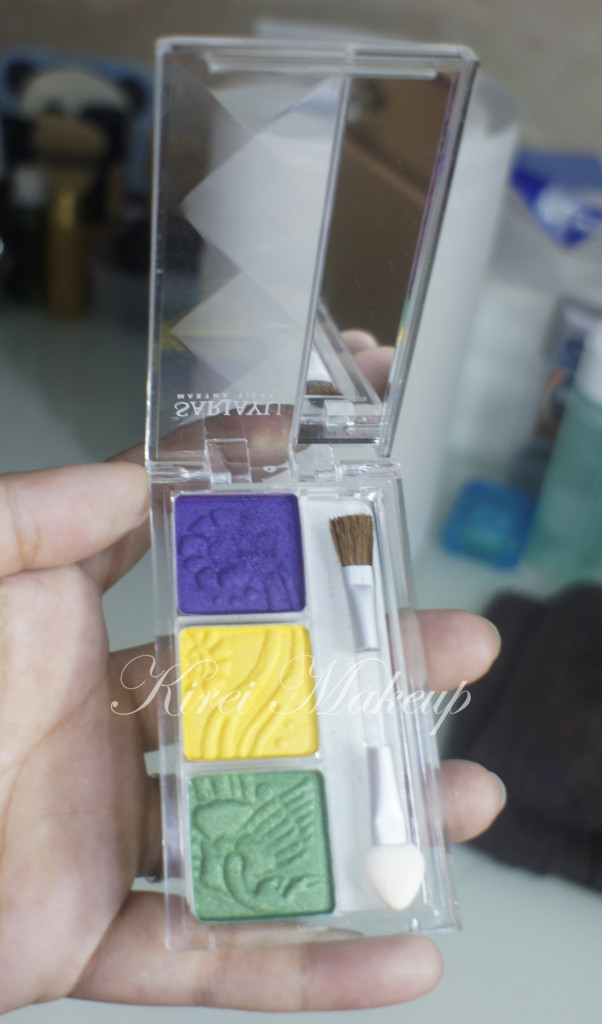
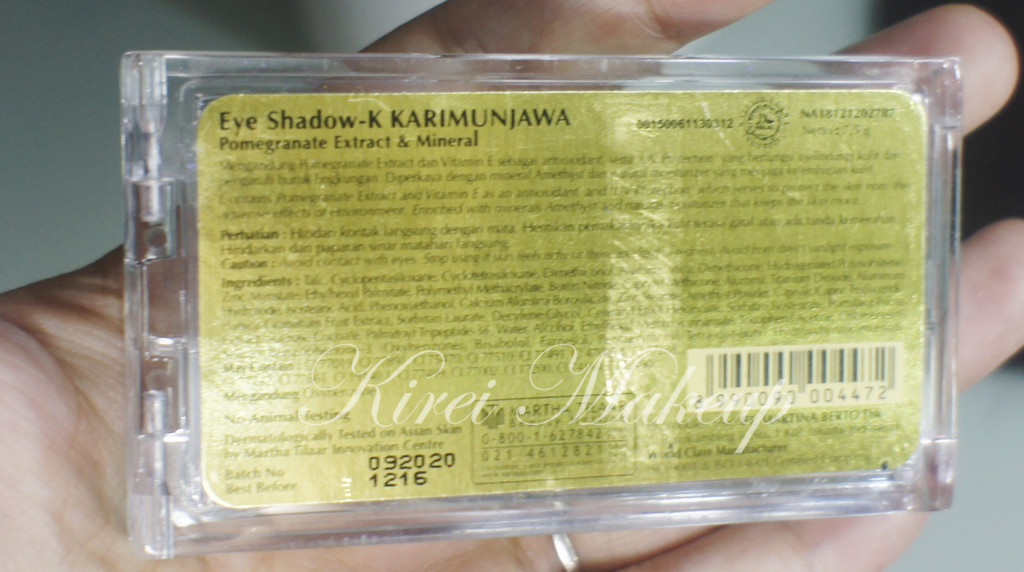
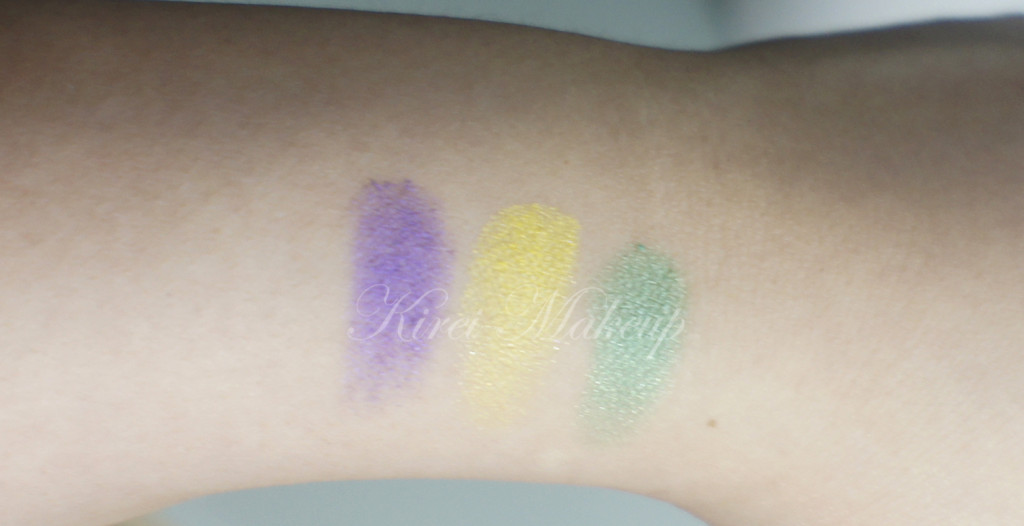
Anyways, let’s talk about this trio palette! This palette is called K. Karimunjawa, and it’s one of the latest products from Sariayu latest collection – Sariayu Trend Warna 2013 Pesisir Sentrajava. I bought mine in a Martha Tilaar store in the malls for IDR Rp. 45,000 (about USD $4.50). If I’m not wrong, when I went to Carrefour on the weekend, they were selling this at IDR Rp. 38,500.

The inspiration of the Karimunjawa palette comes from the Northern coast of Central Java, whereby there’s 27 little islands of Karimunjawa with the brightest ocean. Karimunjawa is a great home of the beautiful coral reefs. A place for almost 400 oceanic species, including 242 ornamental fishes that live there. As a National Park, Karimunjawa has developed and becomes a Marine Park attraction for both local and international tourists (Martha Tilaar Group, 2013).

Sariayu eyeshadows

The colors are amazingly pigmented, and easily blendable. All the colors have shimmers in them, but I do find that the yellow isn’t as shimmery as the green or the purple. The purple might look dark in pictures, but it’s not that dark when you apply it to the skin. The consistency is very buttery. I find it very easy to blend the colors without having to lose the intensity.


sariayu k karimunjawa

I’ve done a tutorial using this palette in my Northern Lights post. I’ve received a lot of compliments on that look. A lot of people seems to like the yellow eyeshadow since it pops out a lot in pictures.

In general, the color combination works and I think this is an awesome palette, especially for the price that I bought it at.

Sariayu

Sariayu K Karimunjawa

Of course, there’s more than just this shadow from Sariayu trend warna 2013. With the Karimunjawa line, they also carried 2 lip products and a Glow Powder which I did not buy. On their website, they also show the 3 different ways to wear the Karimunjawa trio shadow palette, so do check them out!

Will I buy this product again? Most definitely! I love all 3 colors and for that price, of course I’ll buy it again. I give this palette 5 winks out of 5! I have yet to find something that I don’t like from it. I love love love love it!


L’oreal True Match Superblendable Concealer Crayon

If you guys were following me on Instagram and Twitter, you’d know that I finally got my hands on the new L’oreal True Match Super Blendable Concealer Crayons! I’ve been looking for these crayons in Shopper’s and couldn’t find any, and by chance I went to Rexall and got them with 15% off! Super awesome 😀

Anyhow, I went to grab 3 colors, because they were on sale and also because I wanted to see if I could use them to do highlighting and contouring. I bought the Fair/Light (W1-2-3), Light/Medium (w4-5) and Medium Deep (N6-7-8).

On me, the Light/Medium (W3-4) is my matched. I used this to conceal blemishes and under eye circles. The Fair/Light (W1-2-3) is quite light, but not super light like the foundation counterpart. If you are very fair (ivory/porcelain), you might find the W1-2-3 a bit too yellow for you. May be the N1-2-3 might fare better for those with very fair skin tone.

The darkest shade (Medium Deep N6-7-8) is definitely darker than the W6-7-8. Those who use MAC NC/NW 50-58 might find the Medium Deep shade to be a shade or two lighter than their skin tone. Might be good as a highlighter for those with NC/NW 50-58 skin tone. This Medium Deep shade is definitely a great alternative for those who has similar skin-tone like mine or lighter to be used as a contour product.

L'oreal True Match Concealer Crayon

Please keep in mind I was doing this post in a rush, so didn’t do a great job in terms of blending or placement. I’ll show you a highlight/contour tutorial next time. The purpose of this post is to show you that these concealers can be used as concealer, highlighter and contour product.

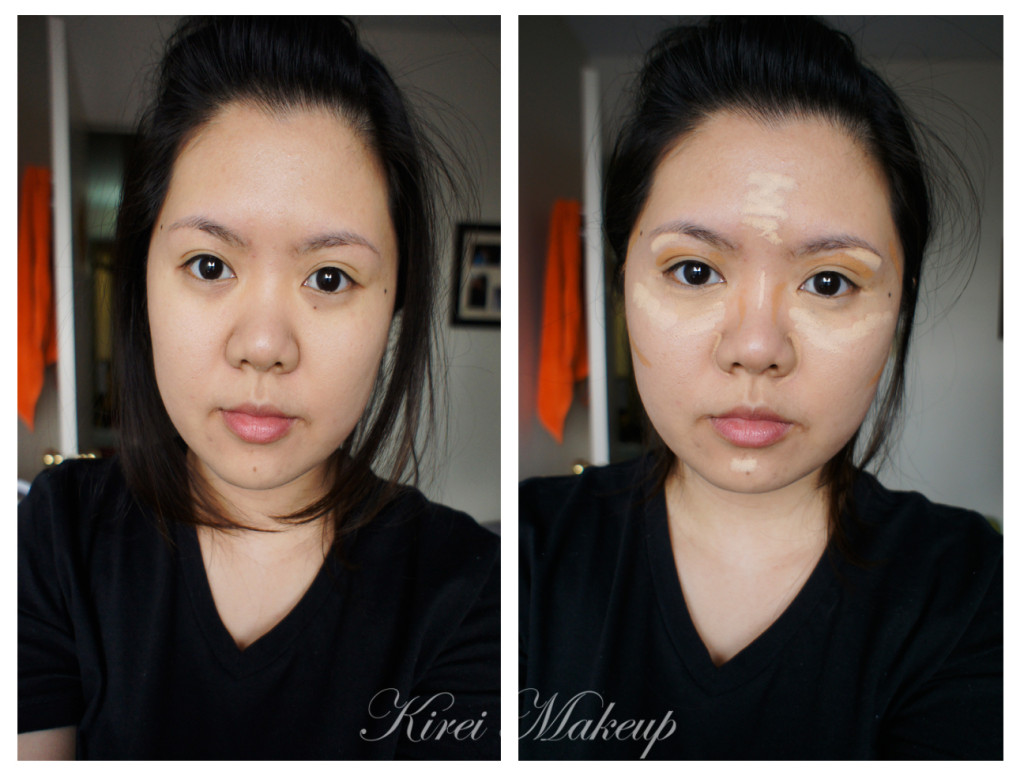
Below on the left side, I only had Urban Decay Naked Foundation (click on link for review of the foundation). As you can see, my dark circles are quite prominent (thanks to lack of sleep and stress). Other than that, I’ve redness around my nose. I applied the foundation using IPKN Artist Auto Wave Makeup.

On the right side, I applied L’oreal Super Blendable Concealer Crayon in Light/Medium (W4-5) under my eyes and around my nose, as well as on my blemishes. For a quick highlight, I applied Fair/Light (W1-2-3) on the high planes of the face: on the bridge of my nose, under the brows, on the forehead, along the cheekbones and chin. I blended everything using Sigma Precision Round brush (first the concealer, then the highlight and lastly the contour).

For contour, I applied Medium Deep (N6-7-8) under my cheeks, on the crease, side of the nose and temples.

L'oreal concealer crayon

Left: With Urban Decay Naked Foundation; Right: Concealer, Highlighter and Contour

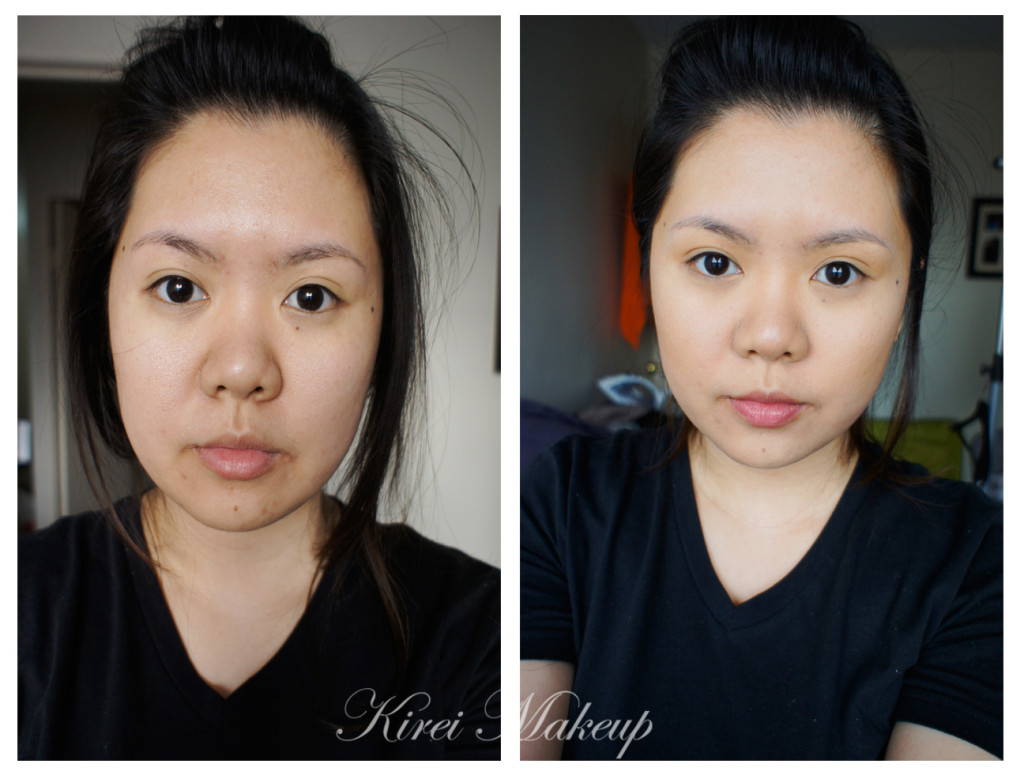
Below is a picture of my bare face (don’t judge!) on the left and a full face with foundation, highlighter, concealer and contour only on the right. Pictures are taken in daylight. The highlight and contour are meant to be a light application. I’d probably do this if I’ve extra time in the morning since it’s fast and easy. Take less than 3 minutes.

L'oreal True Match Superblendable Concealer Crayon

Left: bare face; Right: final look

My experience using this:

Pros:

  • Just like the name said, Super Blendable, the concealers are easily blendable with fingers, brushes and my favorite way with a damped sponge.
  • I found that the crayons are easier to work with when it’s warm, so if you’re in a cold climate, you might want to rub the crayons in between your palms first before application.
  • Love the crayon type of concealer. So easy to be used, so easy for traveling. So much love <3
  • Coverage is medium, pretty good for blemishes.
  • Under eye circles somewhat covered, but the product isn’t as creamy as the True Match liquid concealer. Might sink on fine lines under eyes after 4-6hours.
  • Works as amazing highlighter and contour, I mean, hello look at my cheekbones.

Cons:

  • Dry skin might want to stay away from this product, might cling to dry patches.
  • Only 6 shades available.
  • Need extra work to blend in cold climate.

Will I buy this product again? Absolutely! I do wish they will sell this in Indonesia or Singapore. It’s super convenient and easy to use!

4.5 stars out of 5


Pretty in Pink and Purple

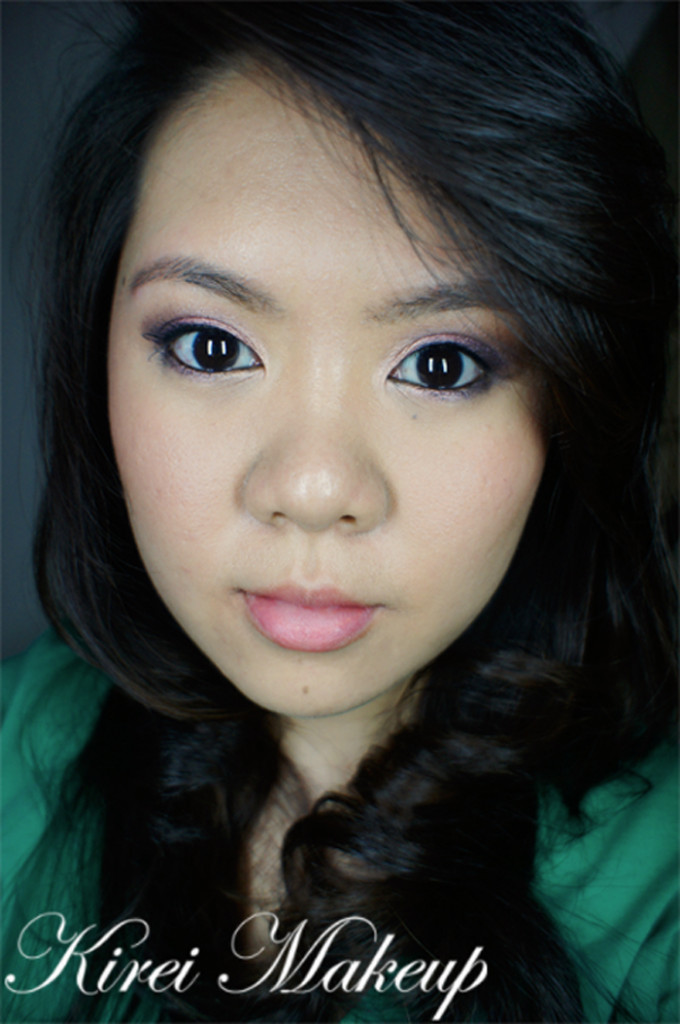
Hola! Today’s tutorial is perfect for Valentine’s Day. The pink and purple combination spells romance and it’s wearable enough to be worn on a date. The look turned out better than expected. The purple blends very nicely into the pink and I took may be about 30mins to complete the whole makeup.

How-to:

1. I applied Urban Decay Primer Potion all over my lid.

2. For the pink eyeshadow, I used the Burgundy from Smashbox Flash palette on my lid with a flat eyeshadow brush.

3. On the outer V, I gently pat L’oreal Infallible eyeshadow in Purple Obsession using a flat eyeshadow brush.

4. Using a clean blending brush, I blended the crease ensuring there’s no harsh line.

5. Using a small angled brush, I applied Purple Obsession on the outer half of the lower lid and Peachy from Smashbox Flash palette on the inner half of the lower lid.

6. I also applied Peachy lightly on the inner corner of the upper eyelid.

7. Using L’oreal Voluminous Smoldering eyeliner on the waterline and tightline.

8. I curled my lashes using Shu Uemura eyelash curler and applied L’oreal Voluminous Carbon Black mascara on both top and bottom lashes.

9. I filled my brows lightly using Anastasia Brow Wiz in Brunette.

L'oreal Infallible eyeshadow

10. For the face, I applied L’oreal Magic Lumi foundation all over my face using Shiseido foundation brush.

11. For under the eyes, I applied Smashbox Camera Ready Full Coverage stick concealer.

12. I applied MAC Fleur Power on the cheeks and applied Revlon Just Bitten in Charmed on my lips to complete the look.

pink and purple makeup