Today I want to share my No-makeup Makeup tutorial, since I feel like lately everyone is doing such heavy full on makeup. This no-makeup makeup look focuses more on creating beautiful skin and keeping everything else in the down low. The purpose of this tutorial is to show you guys that you can achieve a beautiful look without going overboard with extreme contouring/overlining and everything else. Read more below to find out more about this tutorial.
Tag: korean makeup
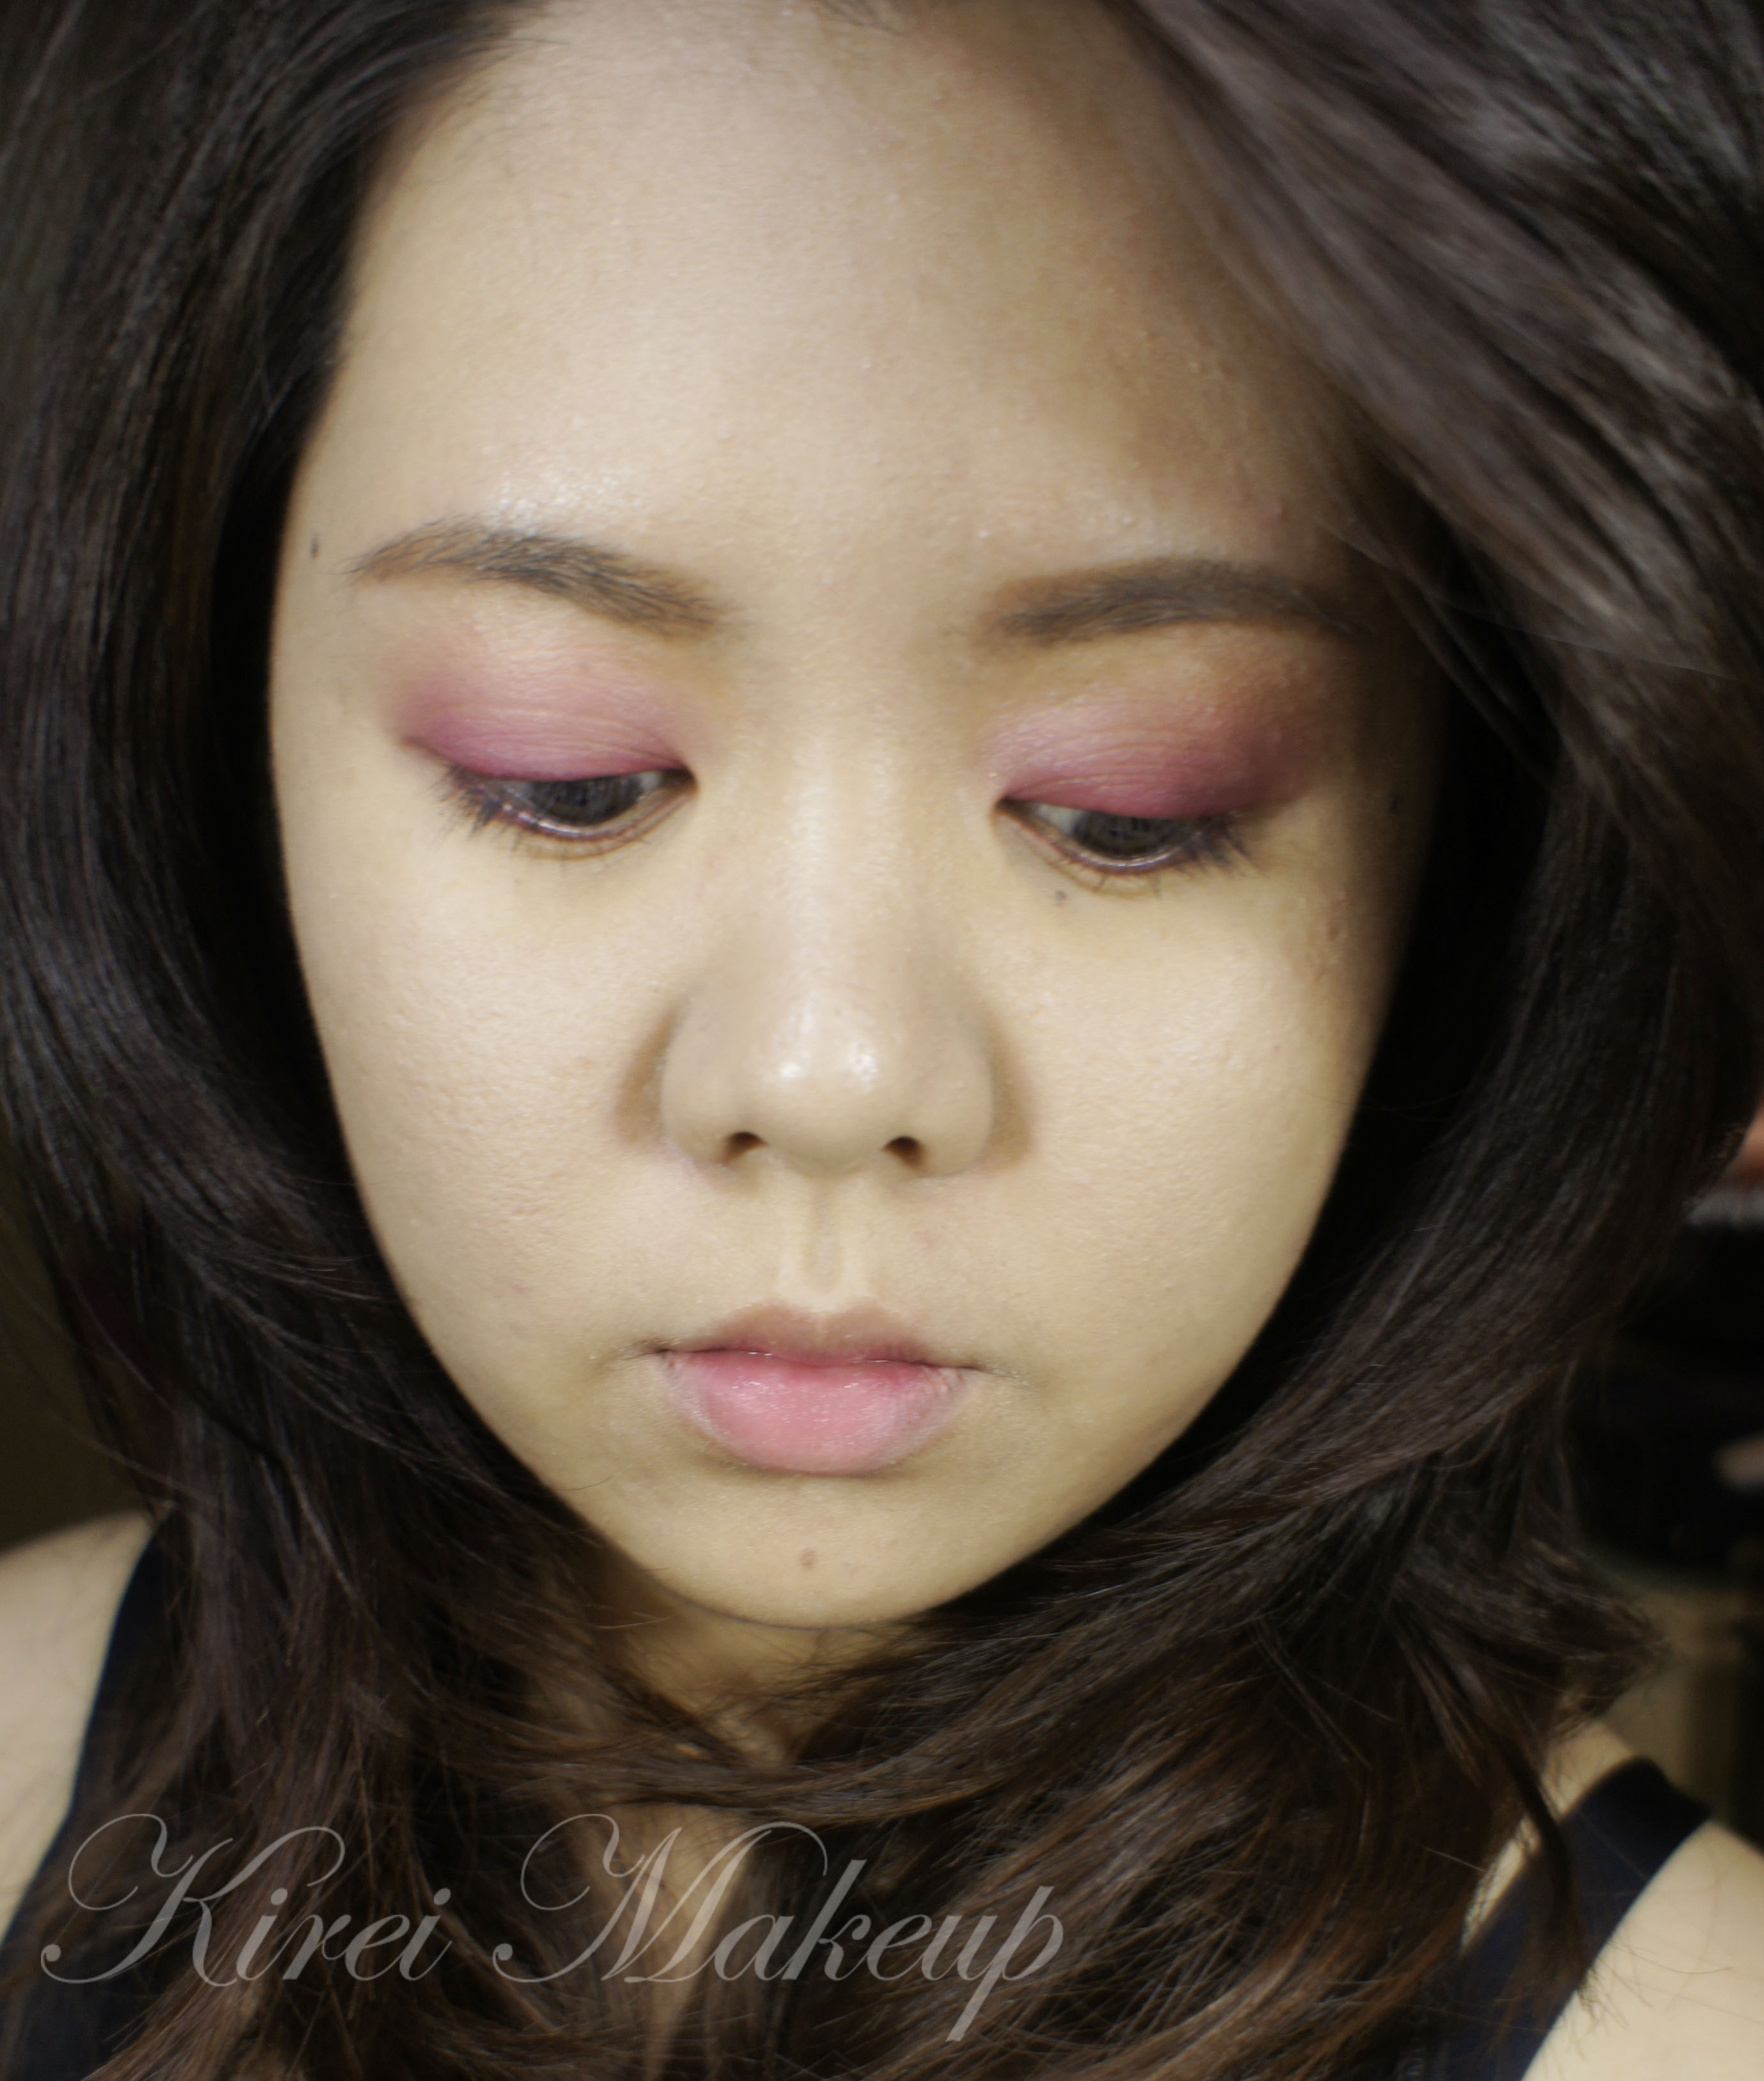
Korean Inspired Makeup for Everyday
Lately I’ve been into Korean makeup, which focuses more in creating a watery moist complexion. This look is all about looking youthful without going overboard. Nothing cakey, no over-contouring or dramatic brows at all. If you want to find out how I achieve this look, please watch my videos or read more below.
THEFACESHOP Canada (Product Reviews)
As you know, I recently received a few great products from THEFACESHOP Canada. If you have not checked out my post using these products, please check out my Lavender Glitter Party Makeup tutorial! It’s easy, fun, and definitely eye catching!
Have you tried any THEFACESHOP products? If you have, what’s your favorite product from this brand? If you haven’t, which product would you like to try? Leave your answer below on the comment section.
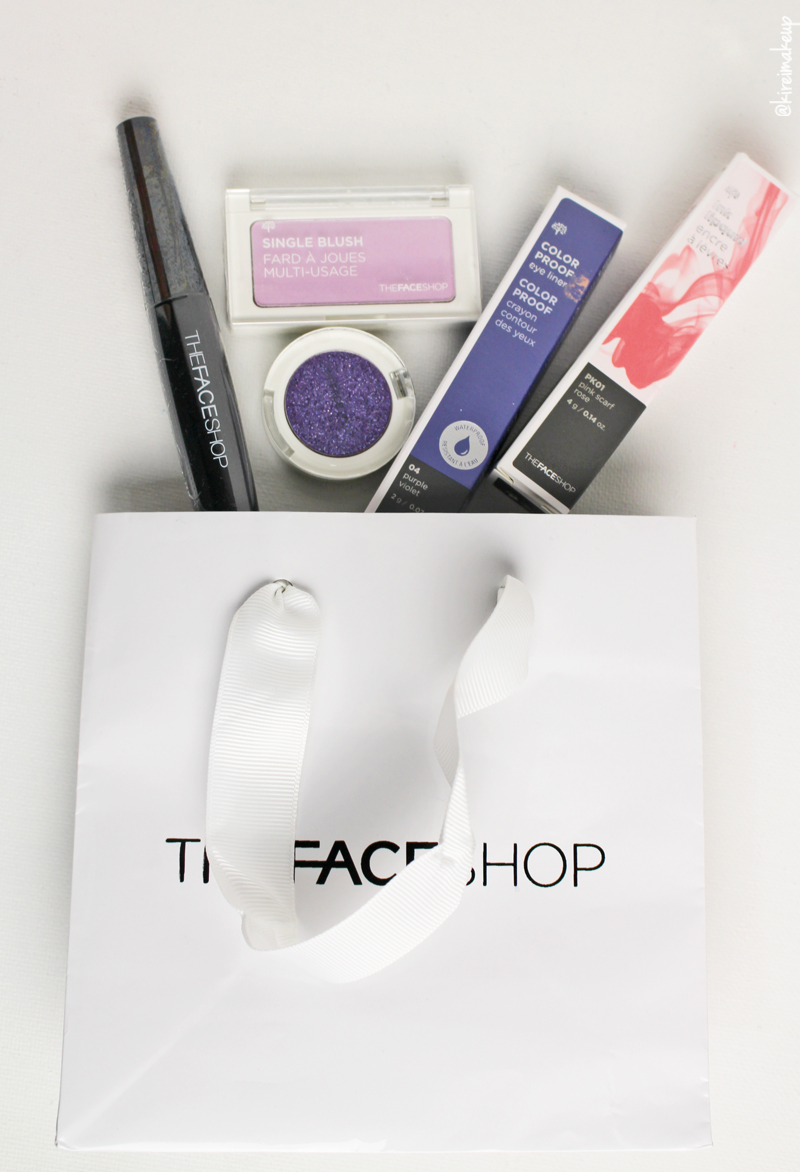
So, as part of the Canadian Beauty Bloggers network, I was selected to give THEFACESHOP Canada products a try. Big shout out to Canadian Beauty Bloggers, as well as THEFACESHOP Canada! I received these 5 products in the mail (L-R) – Freshian Big Mascara, Candy Violet blush, Lavender Glitter eyeshadow, Purple Violet Color Proof eyeliner, and Pink Scarf Rose Ink Lipquid. Keep on reading below to find out the swatches, as well as my review on these products!
 THEFACESHOP Canada
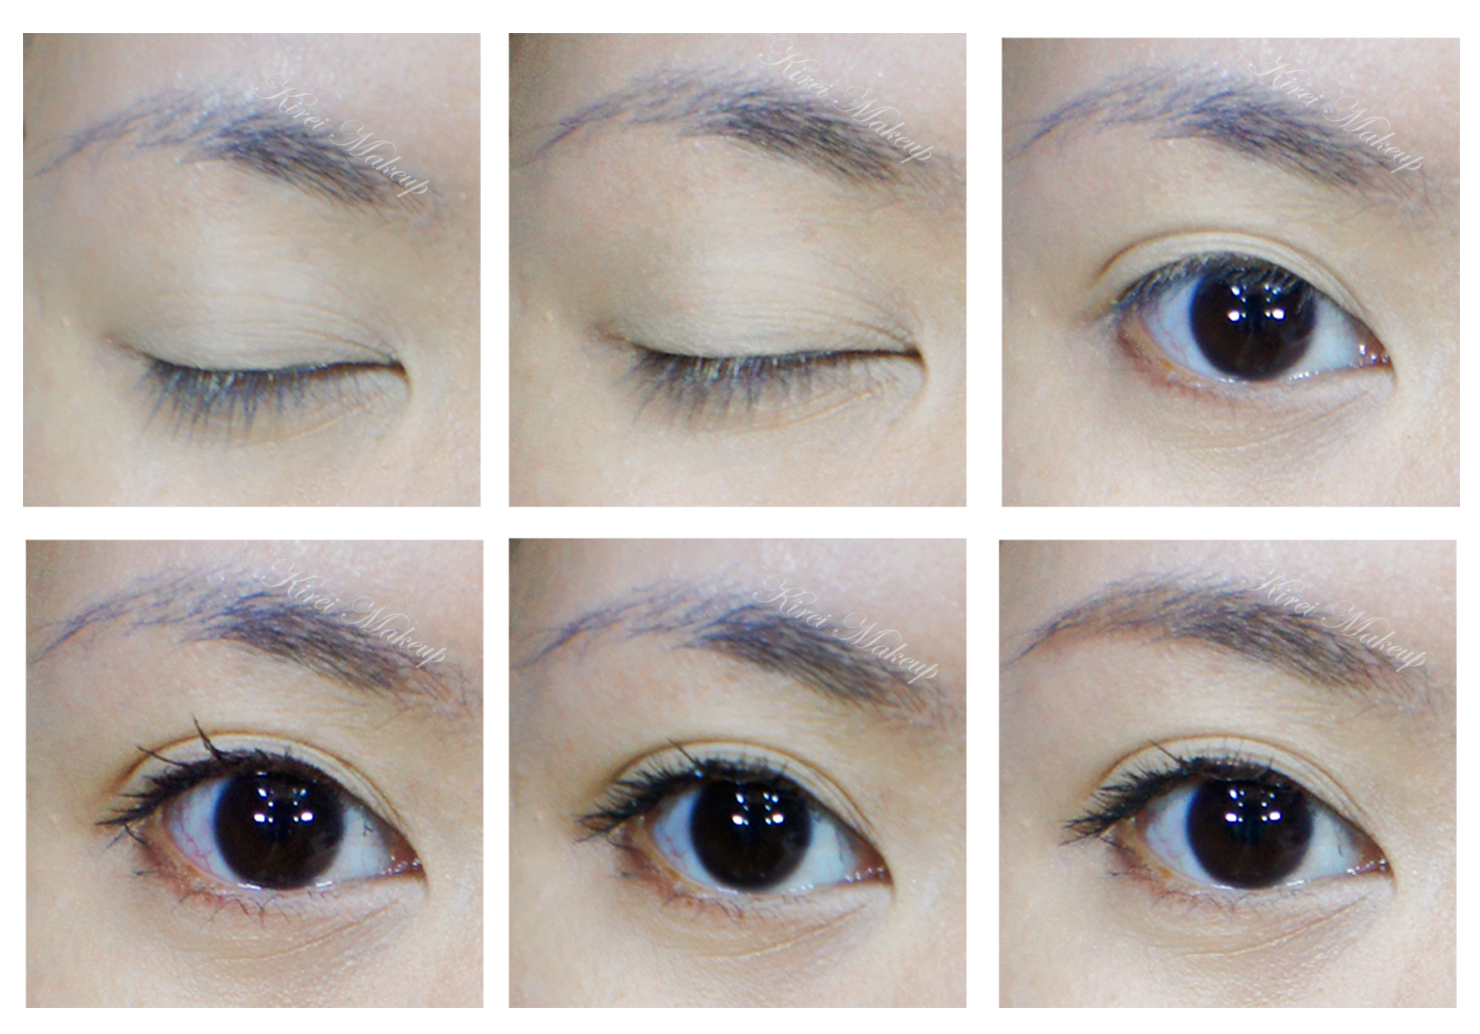
Let’s start with THEFACESHOP Canada Freshian Big Mascara (01 Curling). The Freshian Big mascara is described as “Mascara that provides natural eyelash looks. Curling & volume effects are well seen!”. There’s actually a Volume version of this mascara, the one that I received is the Curling effect. I actually quite like the wand on this mascara, it’s thin and I can get the bristles right in between my lashes. The formula is not too runny, and it does not dry out too quick either.
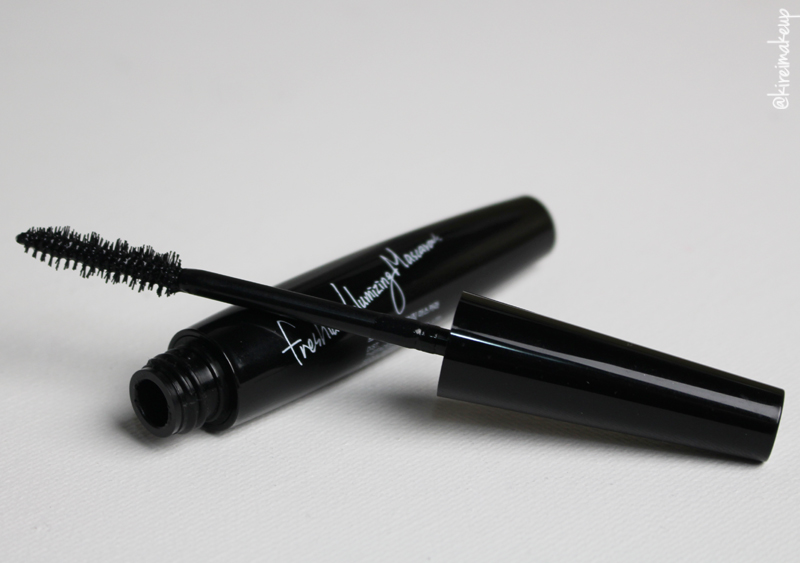
THEFACESHOP Canada Freshian Big Mascara (01 Curling)
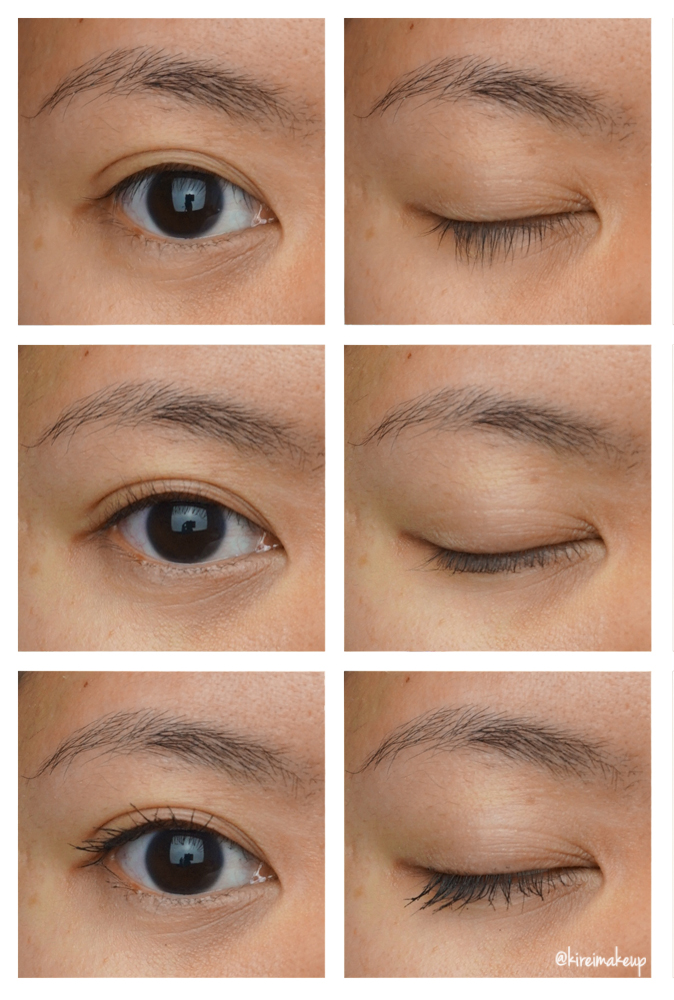
In the “before” picture below (top row), you can see that my lashes are stick-straight and long. I have to curl my lashes before I apply the mascara (middle row). As you can see in the “after” picture (bottom row), my lashes lost some of its curls but gain extra length. The mascara itself does not cause my lashes to clump, it separates the lashes pretty well. The reason why this mascara does not keep the curls of my lashes is because it does not dry quick enough. If you’re looking for a curling mascara, you should look for one that is waterproof since waterproof mascara dries out faster when you apply it, which then would help to lock the curls in place. This mascara is NOT waterproof, and so it does not hold the curls very well. It is still better than other non-waterproof mascara though in terms of holding the curls.
THEFACESHOP Canada also sent me a Candy Violet blush! Prior to this, I did not own a violet blush. This was my first time using a purple-toned blush. I know it looks quite pink in the picture, but it is actually a light purple if compared to other pink/rosy blushes. It is a very pale cool tone blush, so I wasn’t quite sure how this would show up on my skin.
The blush, since it’s purple, is really great to brighten your skin. As you know, purple/violet works as a brightening corrector. So, this blush does a good job to brighten up your skin. It has a little bit of shimmer, and it works well as a highlighter. The downside to this blush is the fact that it’s too light for my skin. I can’t really use this as a blush on its own, so I use it as a highlighter or a brightener on top of my other blush. I also can use this blush to change the “warmness” of my other blushes. For example, if I think my other blush is too warm-toned, I can apply this blush first then the warmer blush on top to make it more cool-toned or neutral.
 THEFACESHOP Candy Violet single blush
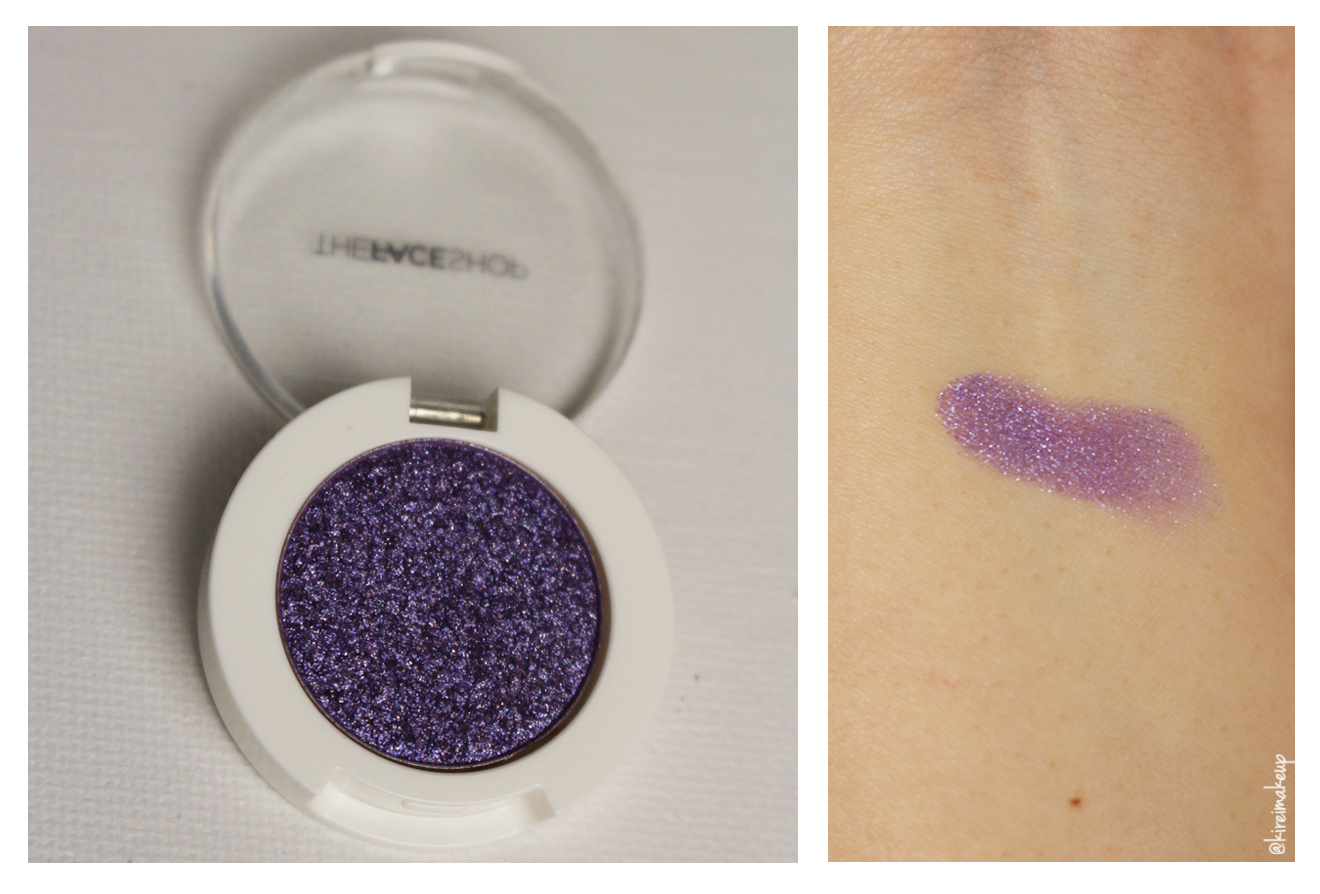
One of my favorite products from this package is this stunning sparkly purple eyeshadow! THEFACESHOP Lavender Glitter eyeshadow is described as “Highly pigmented Single Shadow Glitter gives a uniform and ultra shiny finish. Its silky, easy-to-adjust texture applies easily and adheres without smudging, for long-lasting hold.”
Oh, this gorgeous eyeshadow is amazing! Just enough glitters and there was no fallout at all! Glitter eyeshadows are notorious for their fallout, where the glitters will be everywhere EXCEPT in your eyelids where you want it to be! Not this eyeshadow! The glitters in the eyeshadow stay on the eyelids. You can also apply this eyeshadow with a wet brush, and it’ll make the shade even more purple and sparklier. Don’t believe me? Check out my Lavender Glitter Party makeup tutorial to see the eyeshadow in action.
 THEFACESHOP Lavender Glitter eyeshadow
My other favorite product from THEFACESHOP Canada PR Package is this Purple Violet Color Proof eyeliner. I wish the eyeliner is slightly more purple, but as you can see from my swatch, it’s actually pretty dark in color. On my tutorial, you can see that it looks almost black. However, I don’t really mind it. It almost looks like a soft black eyeliner, which will be a great alternative for those who prefer a non-black eyeliner. Sometimes a black eyeliner can look too harsh on those with fair-light skin tones. The hint of violet in this eyeliner will bring out the colors on your eyes. Purple is universally flattering on everyone and every eye colors!
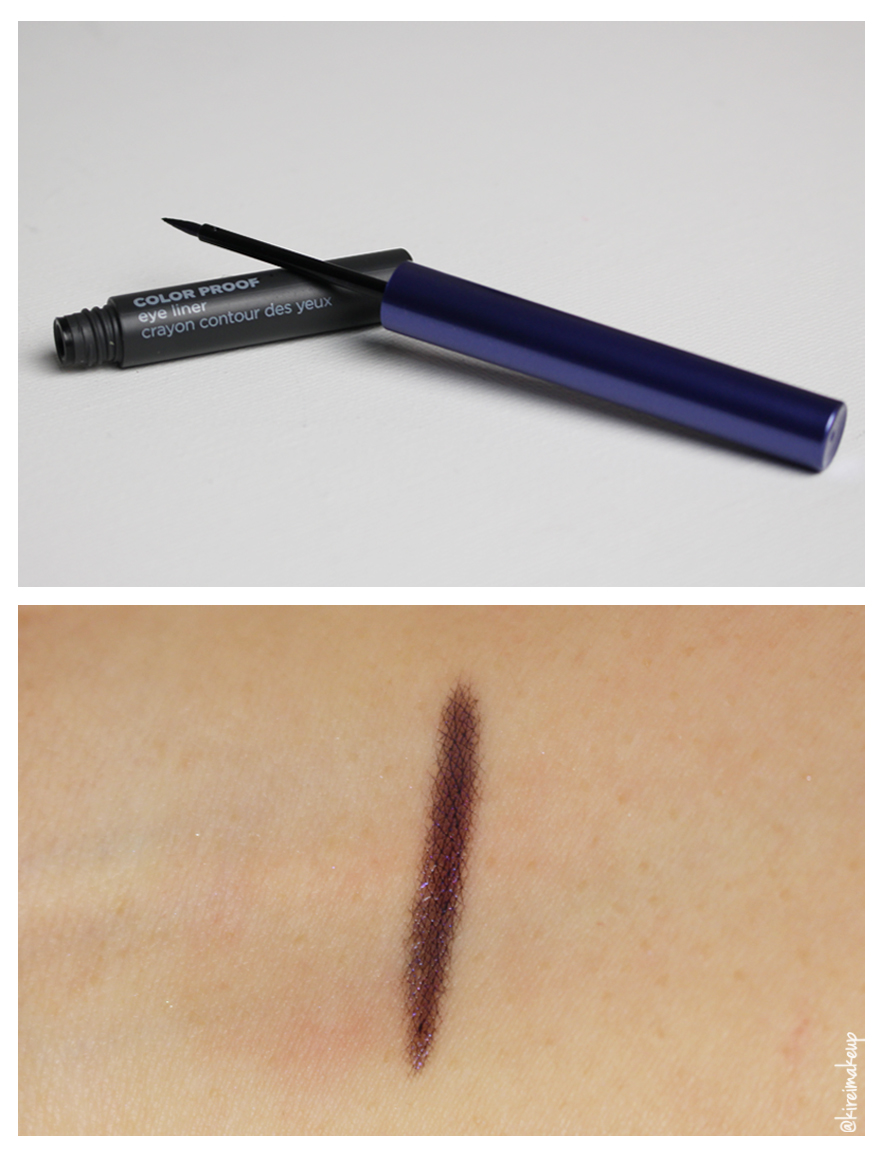 THEFACESHOP Color Proof Purple Violet eyeliner
The last product in my package is THEFACESHOP Pink Scarf Rose Ink lipquid. It’s a liquid lipstick, hence the name lipquid. It is described as ” [An] all-in-one lipstick, gloss, and tint comes in 12 shades and provides hydration and hold for up to 12 hours! The specially shaped applicator helps both define lip contours and fill in the lips. Using the chisel tip, you can define and color your lips with great precision.”
This lipquid is similar to a lip stain. It stains your lips with a pretty color, and you can layer it to make the color more intense. Since it is a stain, it lasts pretty long even after eating and drinking. When I did the swatch for this lipquid, my hand was stained for the whole day.
I love this lipquid, it’s not sticky or drying like other brands, and it’s also moisturizing. This shade Pink Rose Scarf is a beautiful shade of rosy pink, which is very flattering on everyone. One tip on using this lipquid is to apply it in layers. When you apply it in layers, apply it sparingly to control the intensity of the stain. On my previous tutorial, I applied a sheer layer on my lips, then I added more layers just in the center of my lips to create a gradient effect.
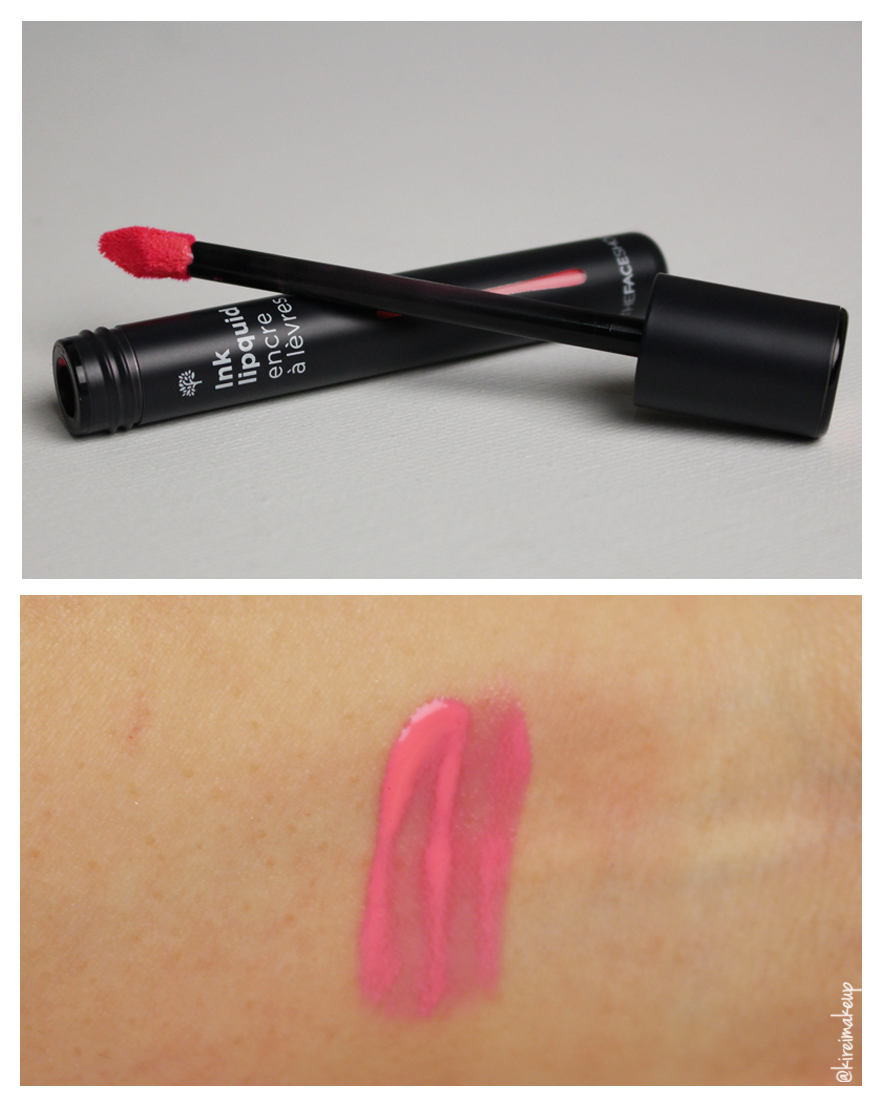 THEFACESHOP Ink Lipquid Pink Scarf Rose
Healthy Face Movement with Etude House Indonesia
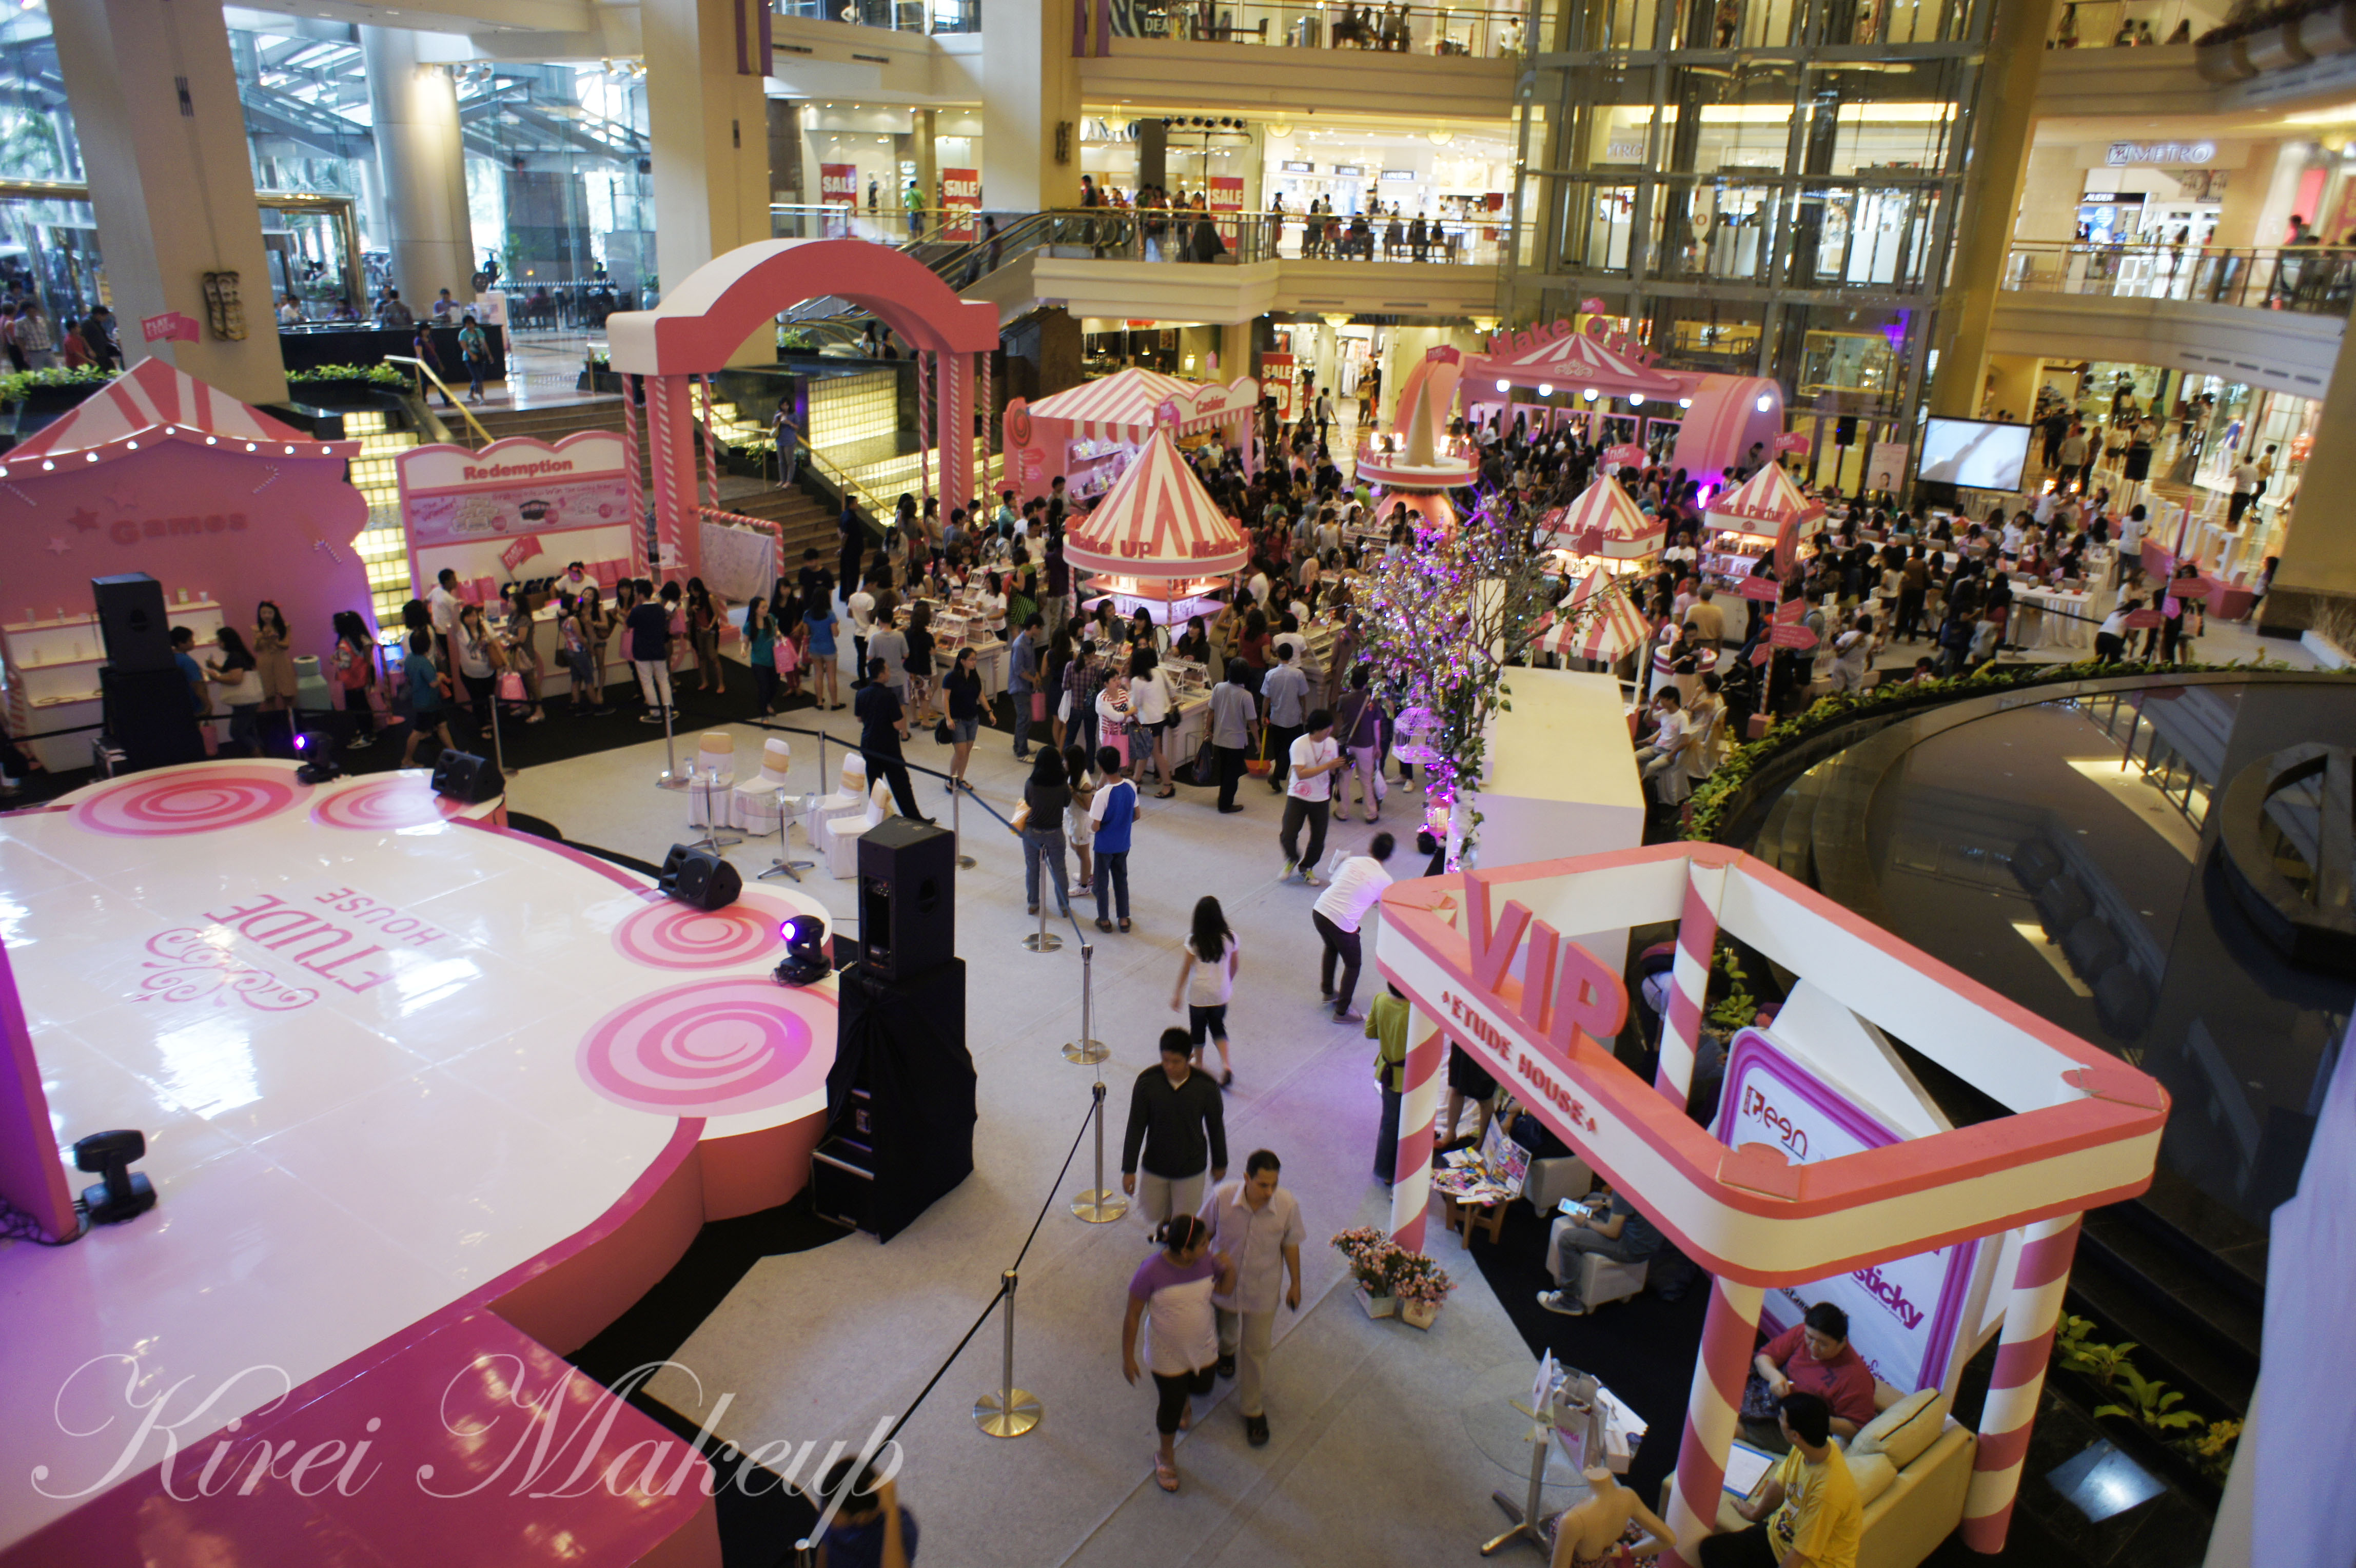
If you guys followed my twitter account, you would know that I was kindly invited to join the Etude House Healthy Face Movement event last Saturday at Mall Taman Anggrek, Jakarta. I was happy to see the other beauty bloggers, especially since I met familiar faces as well as new bloggers. I was quite surprised to see that some of these bloggers actually know my face and my name.
For those who were there, and have been reading my blog, a big hug and thank you. I’m not one that’s good with faces and names, so a big apology!!! I know I kept asking some people their names, ’cause I can’t remember. Sorry sorry sorry..I’m just really really bad with memorizing names and faces in big events, esp. because there’s way too much things going on (i.e. loud music and people chattering). If you see me next time, just come up and say hi to me. I’d probably ask for your name again, but I promise I’ll try to remember! Or say hi to me on Twitter 😀
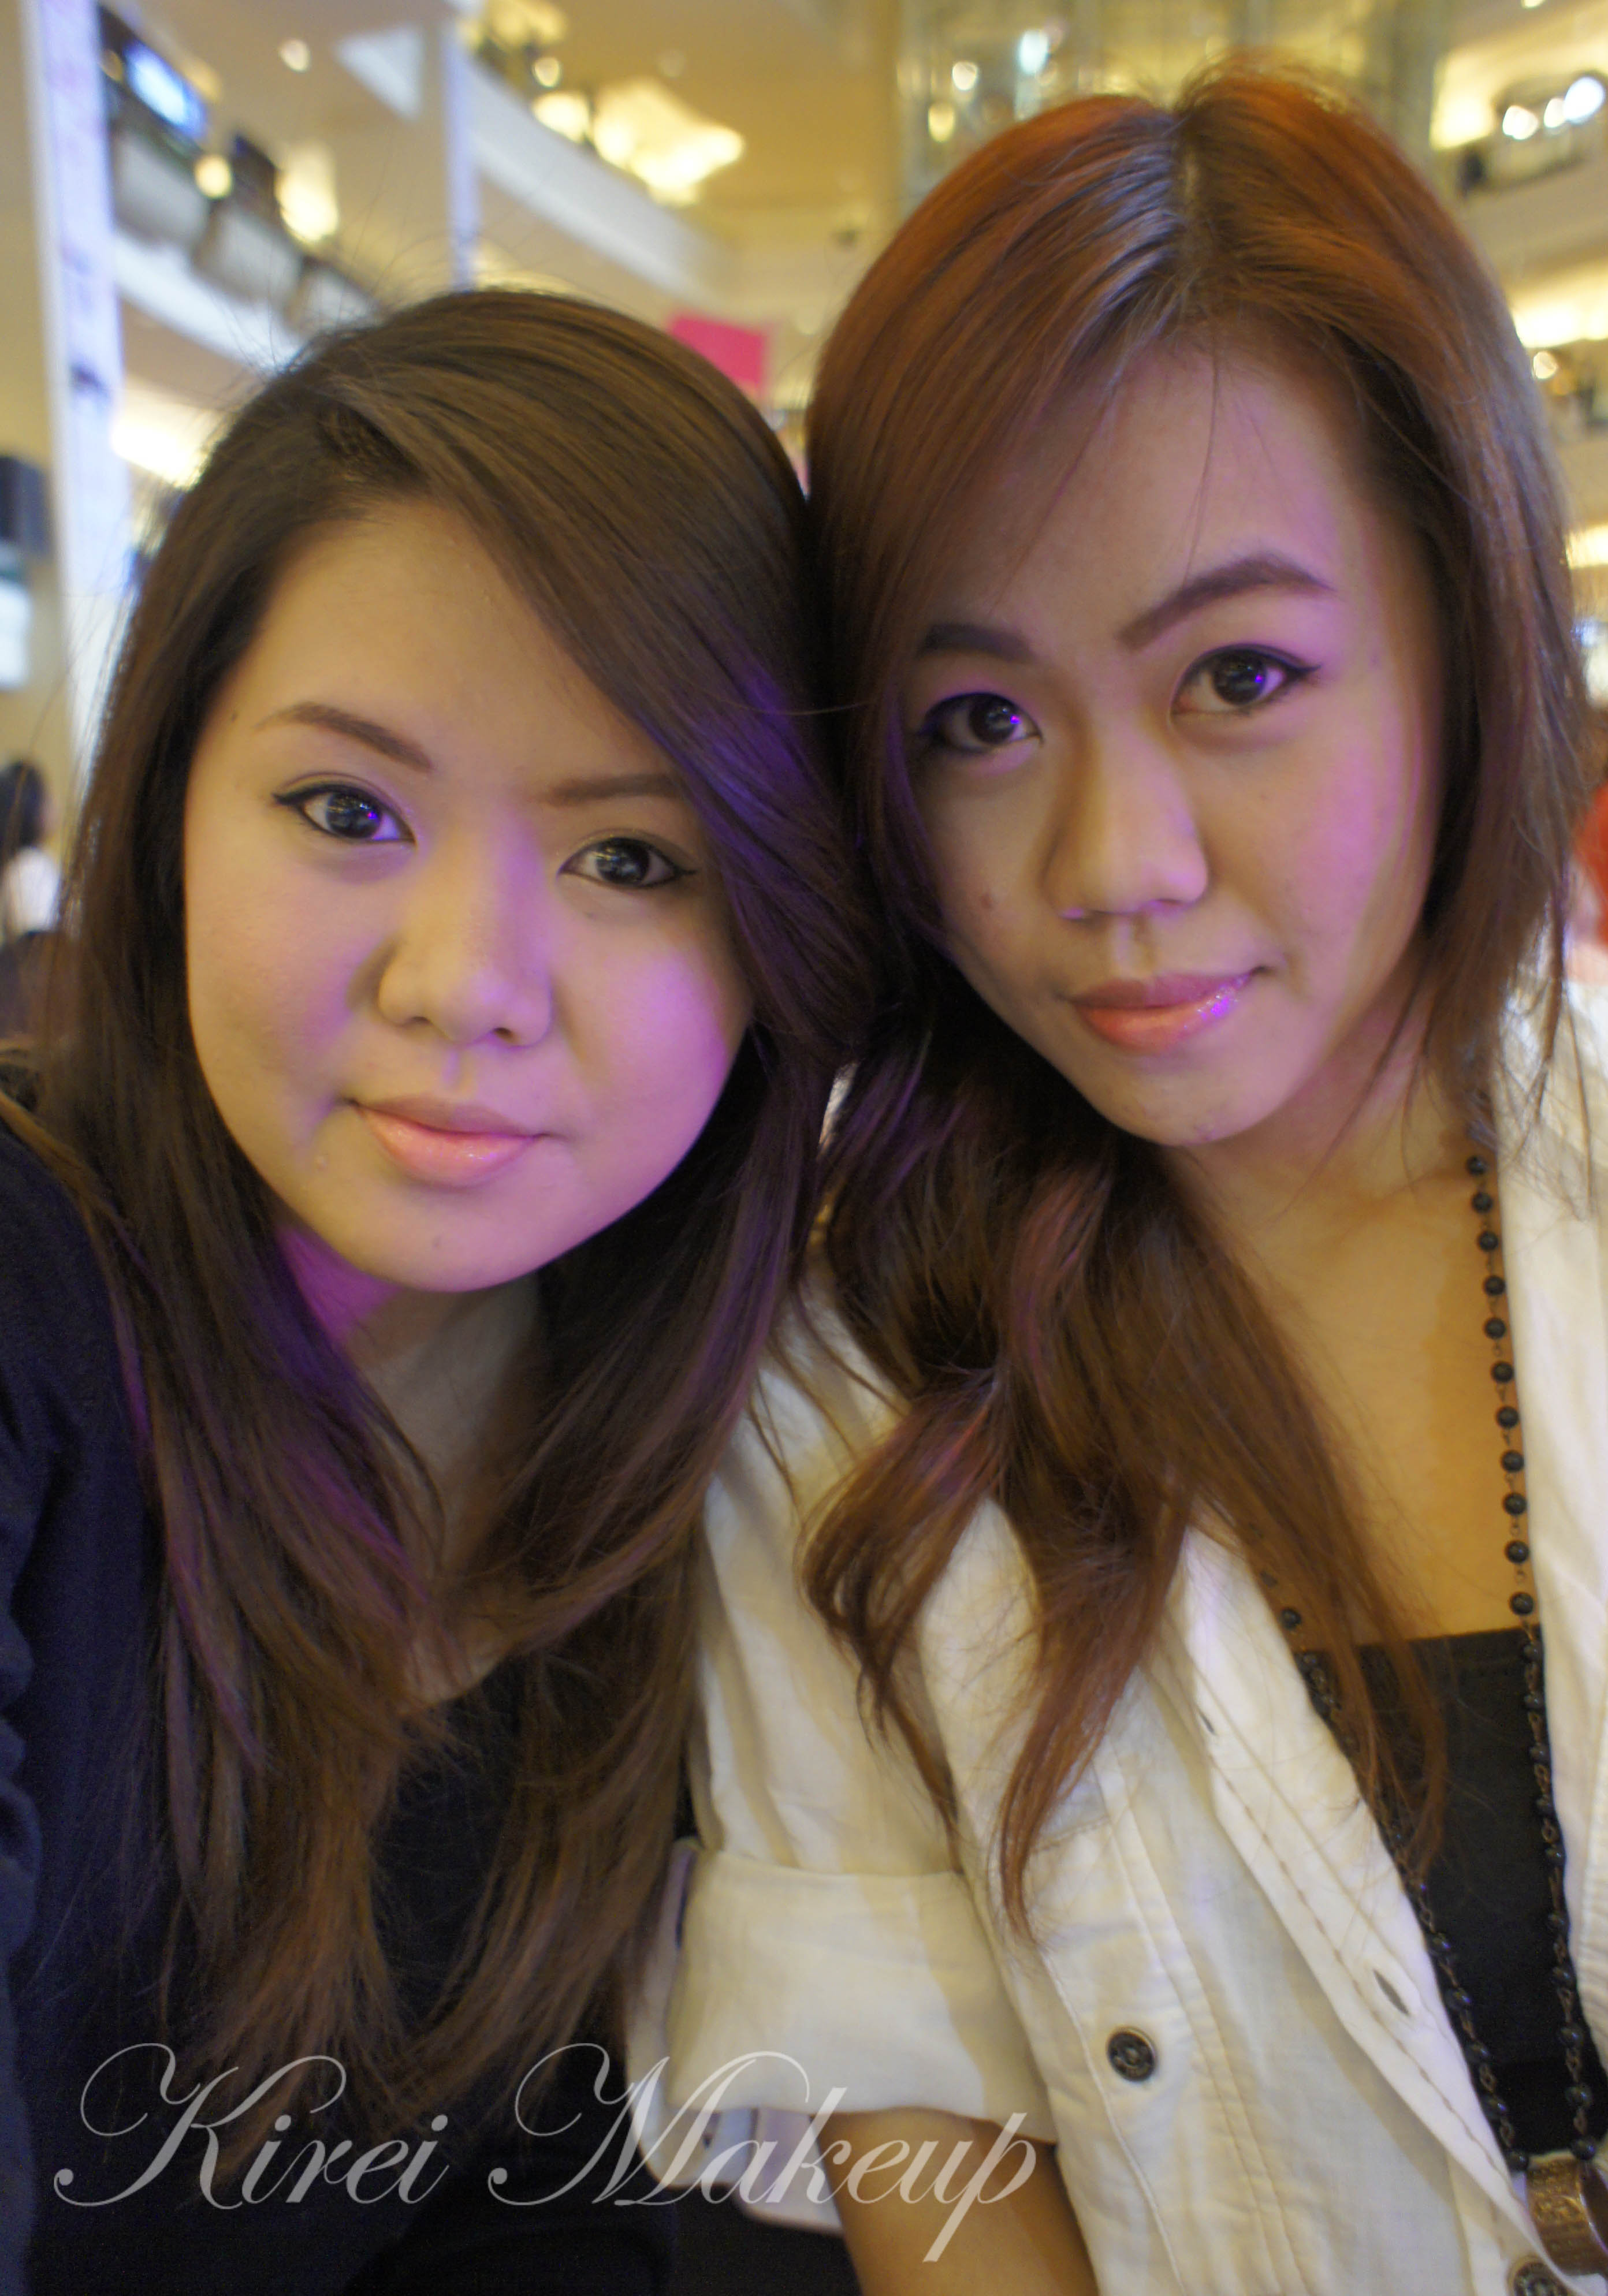
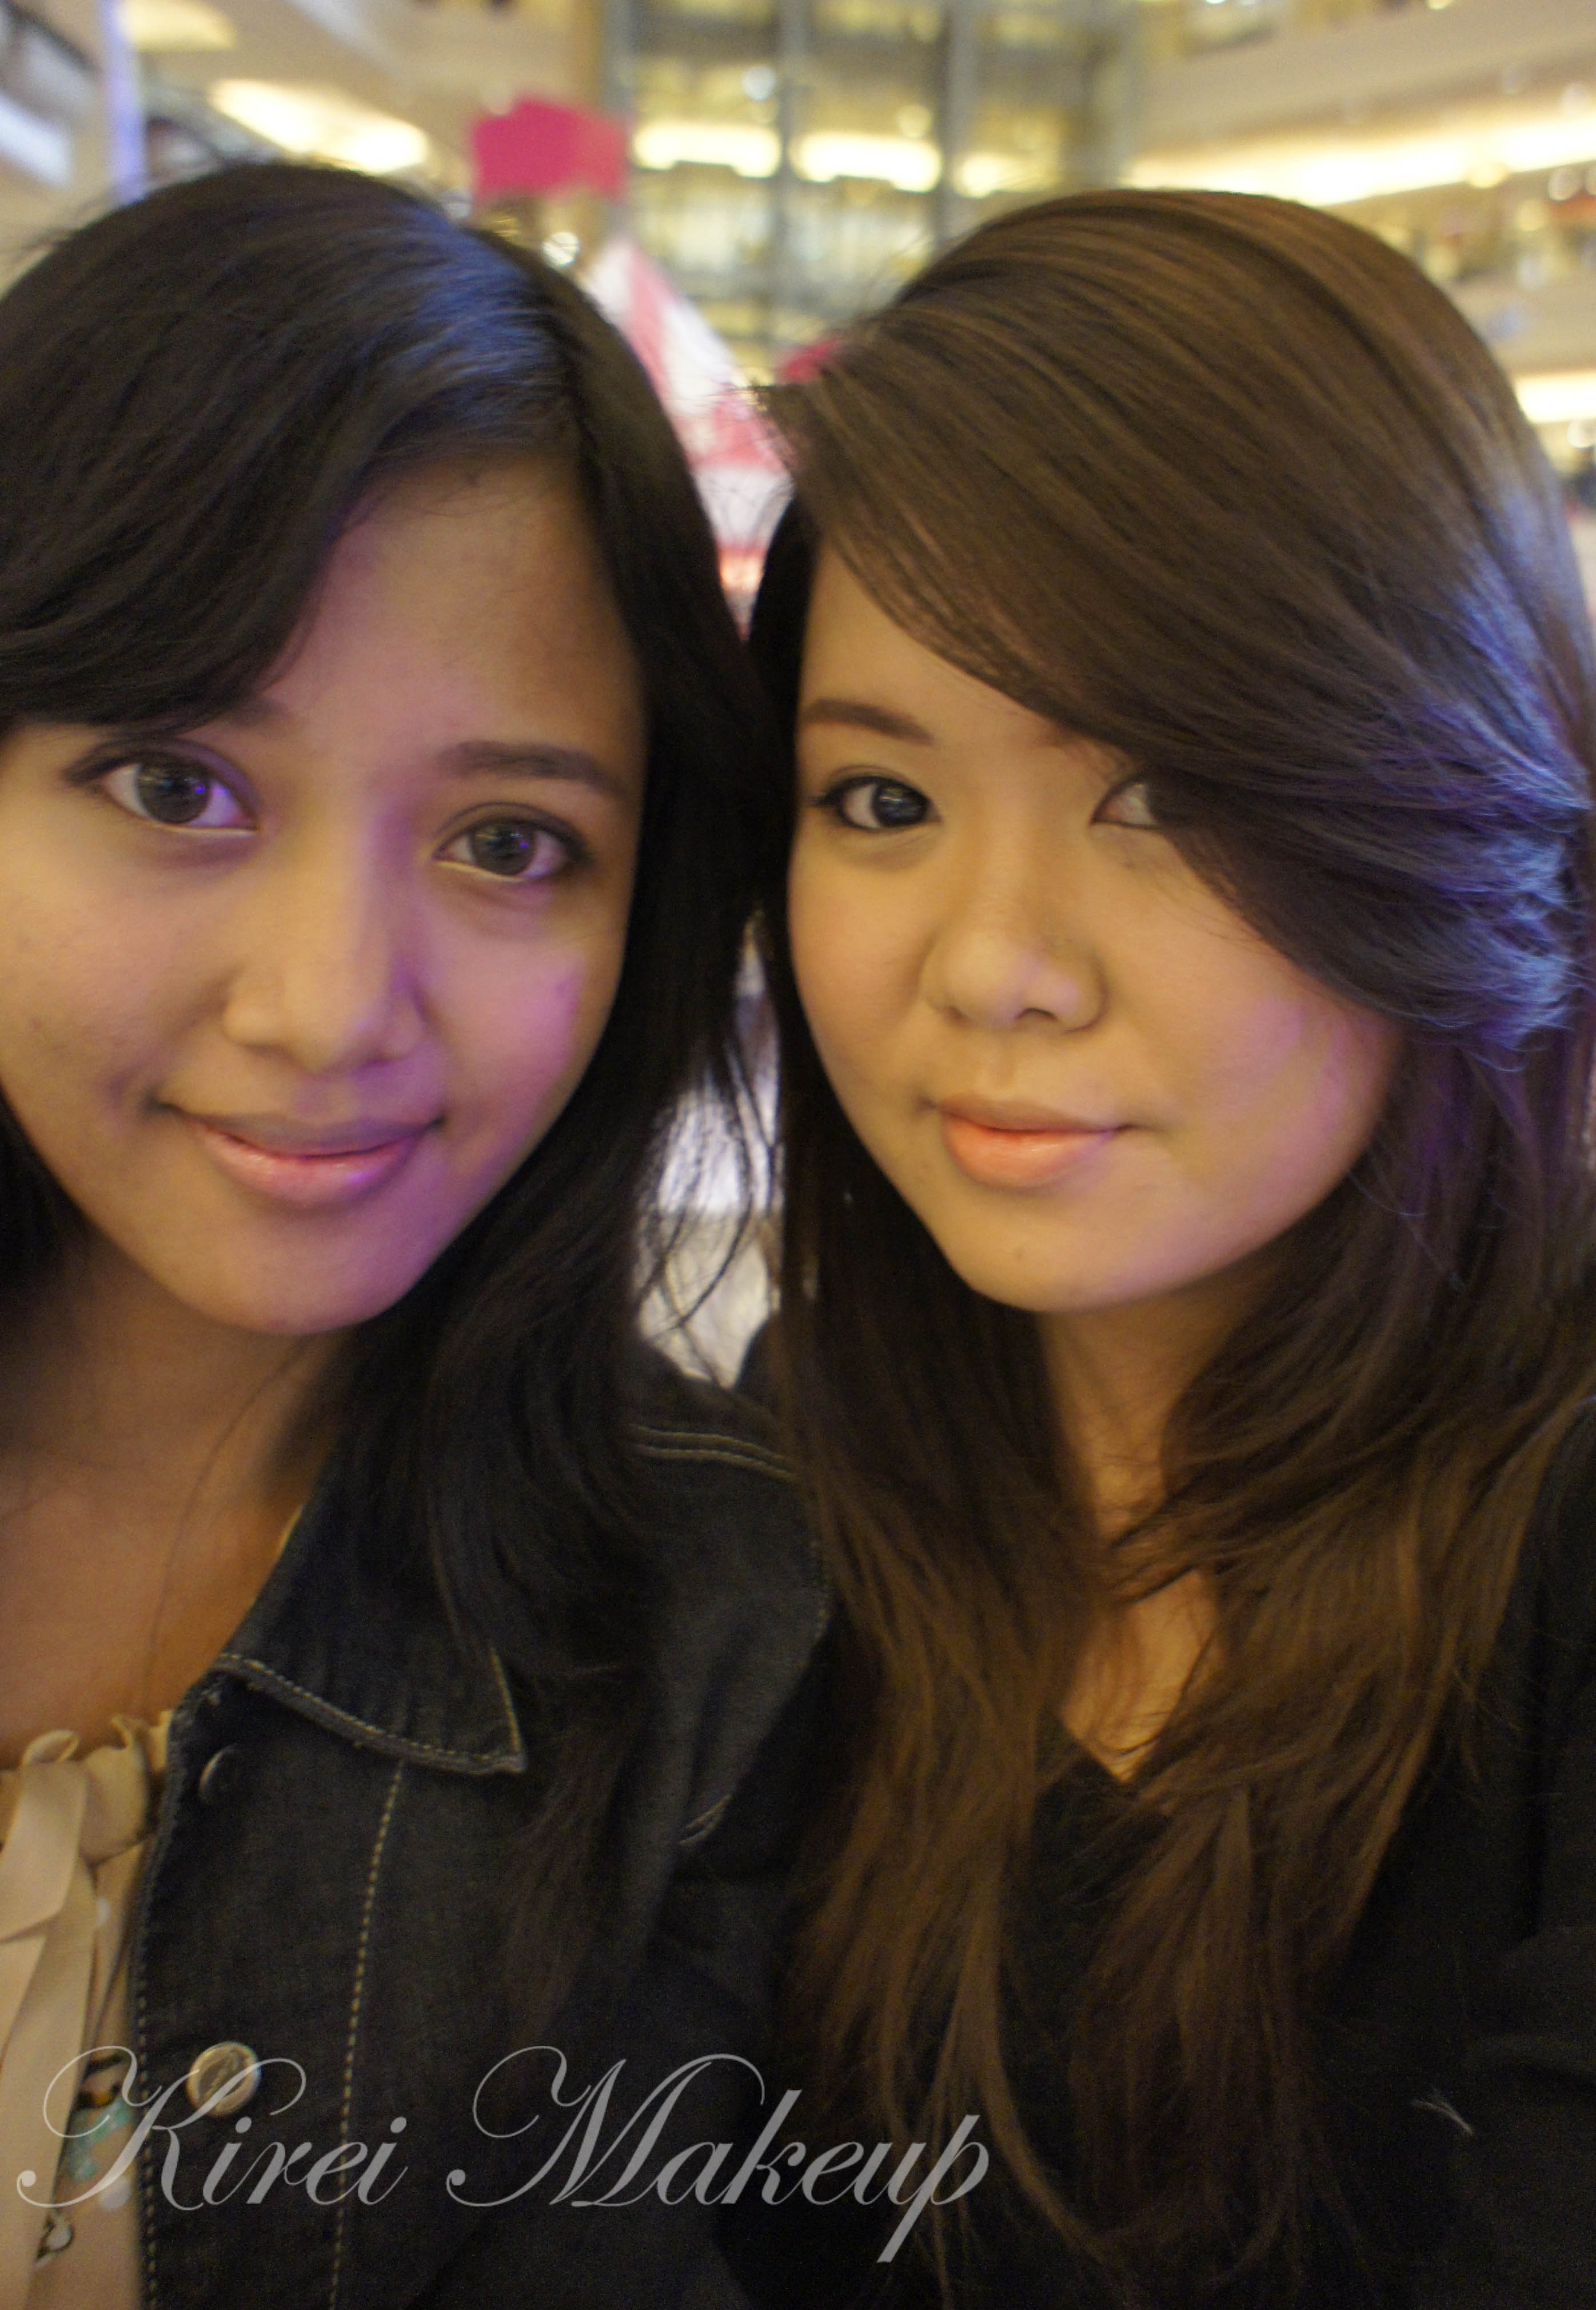
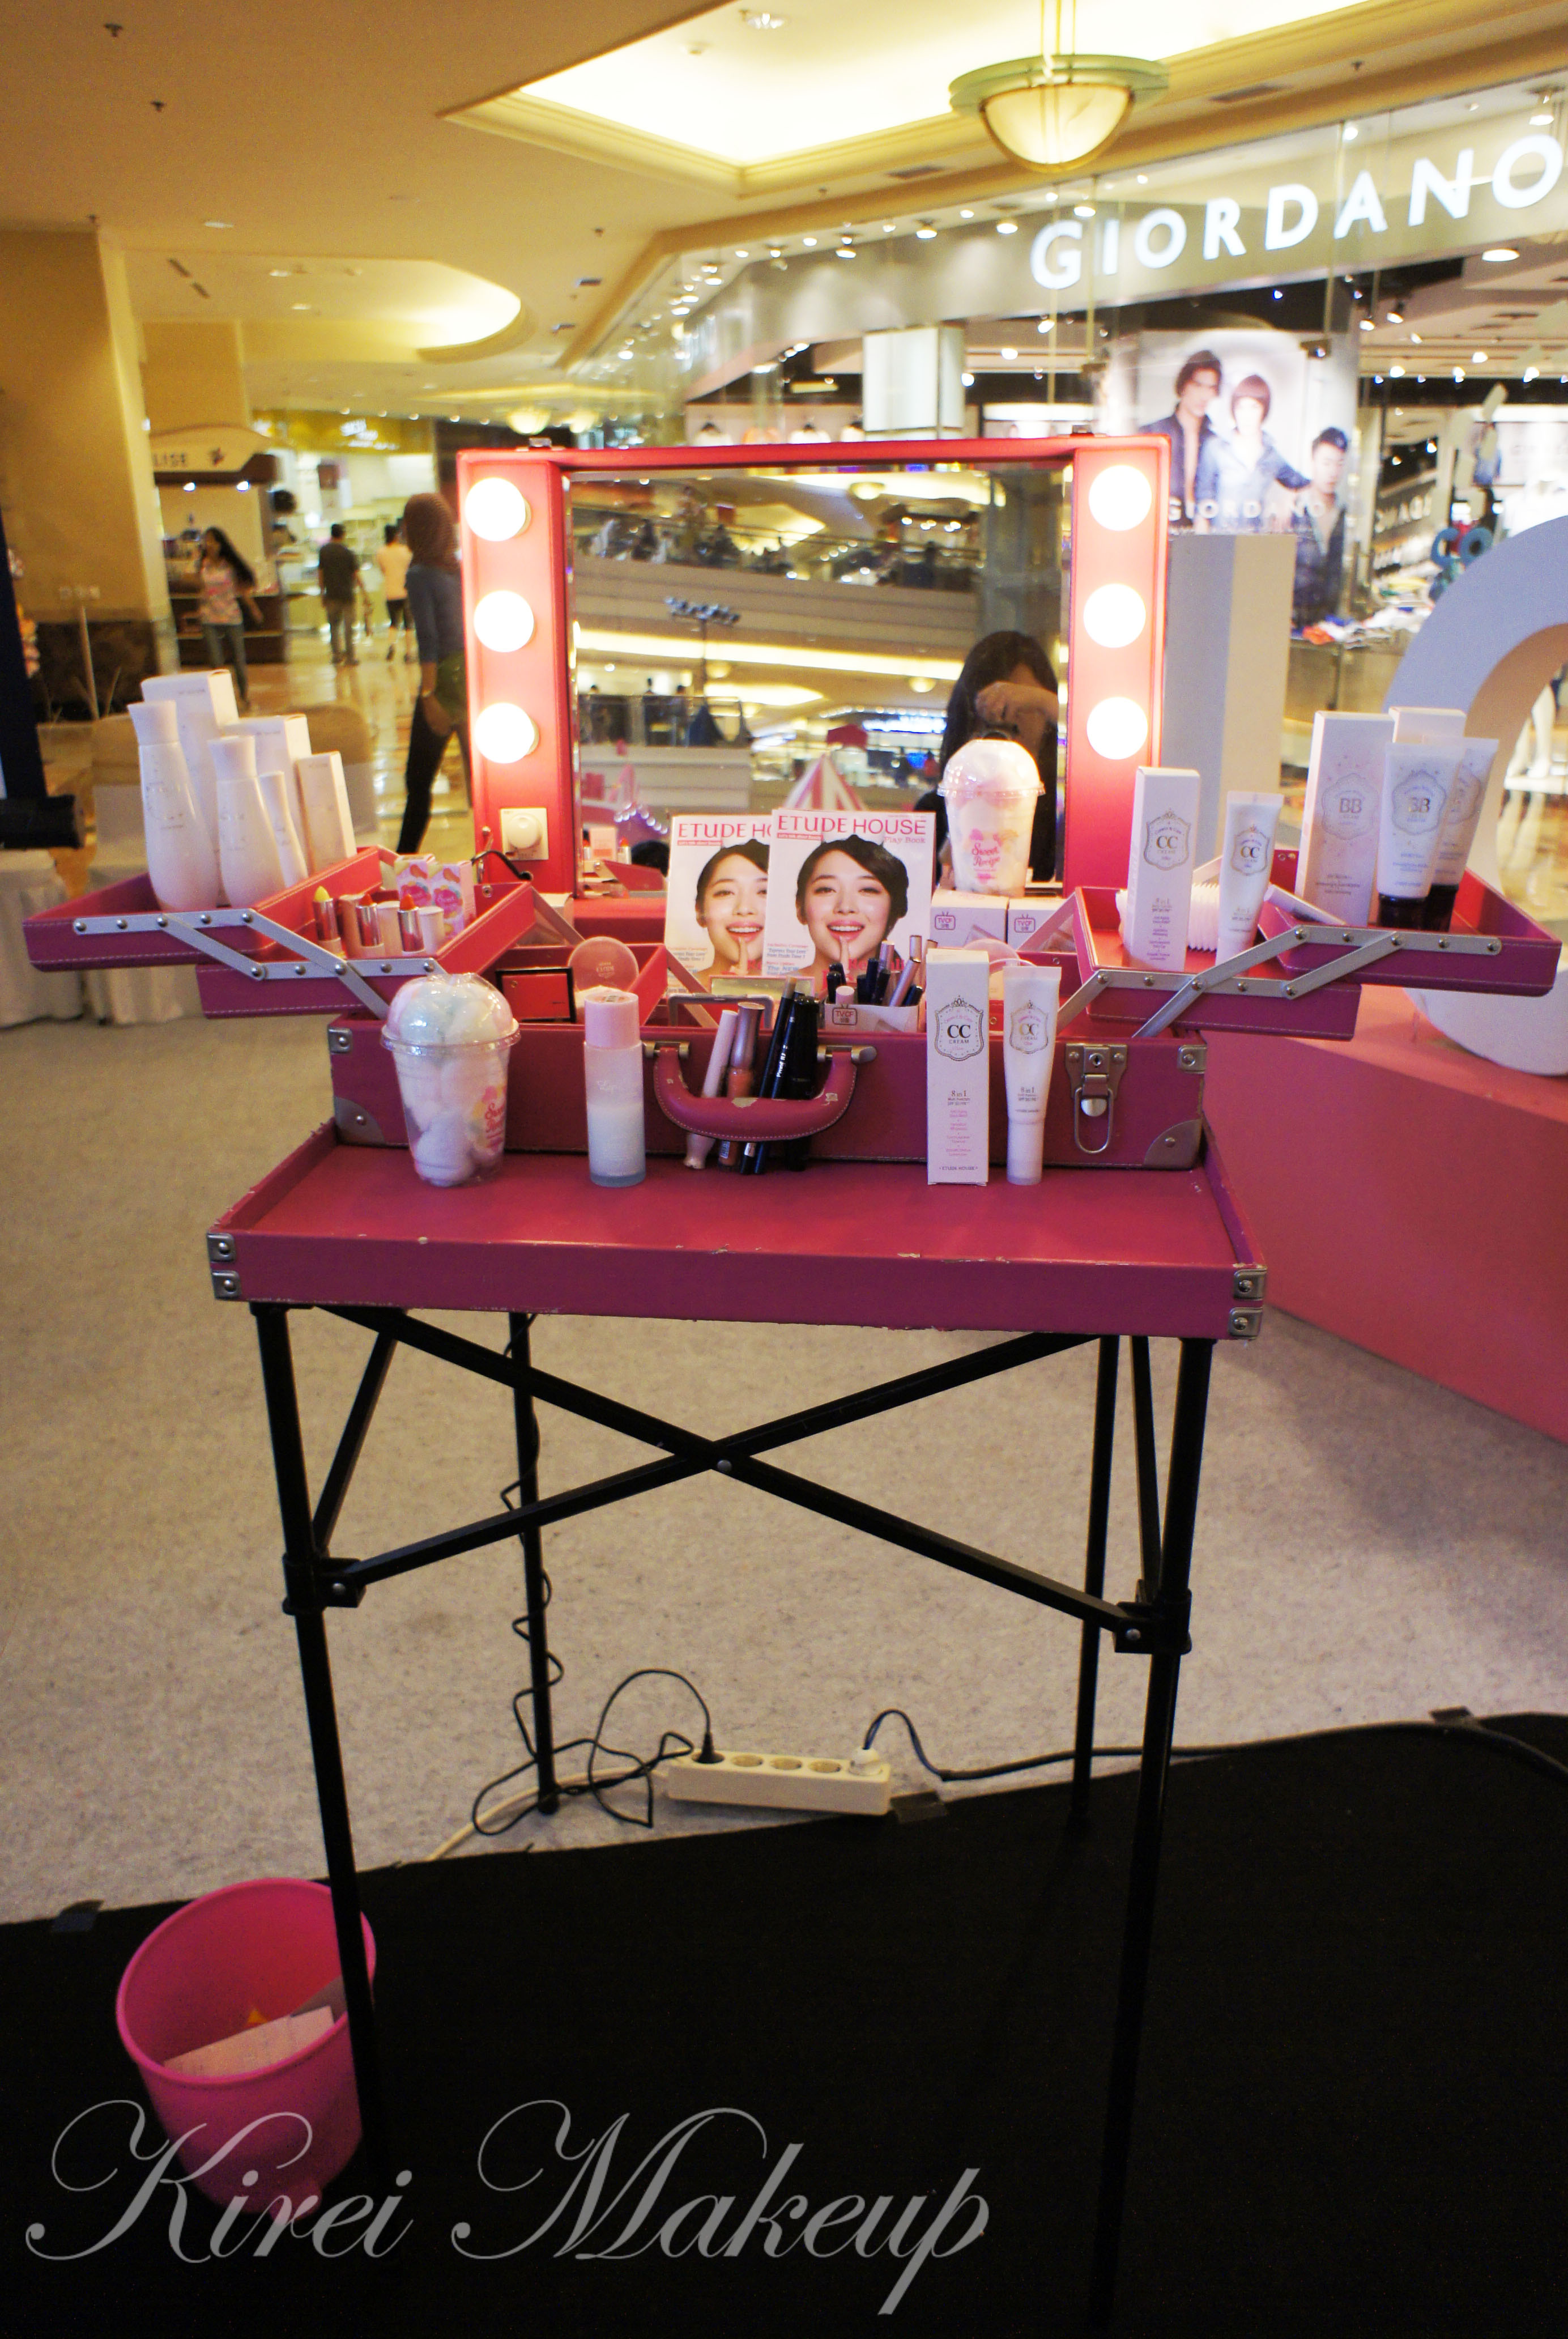
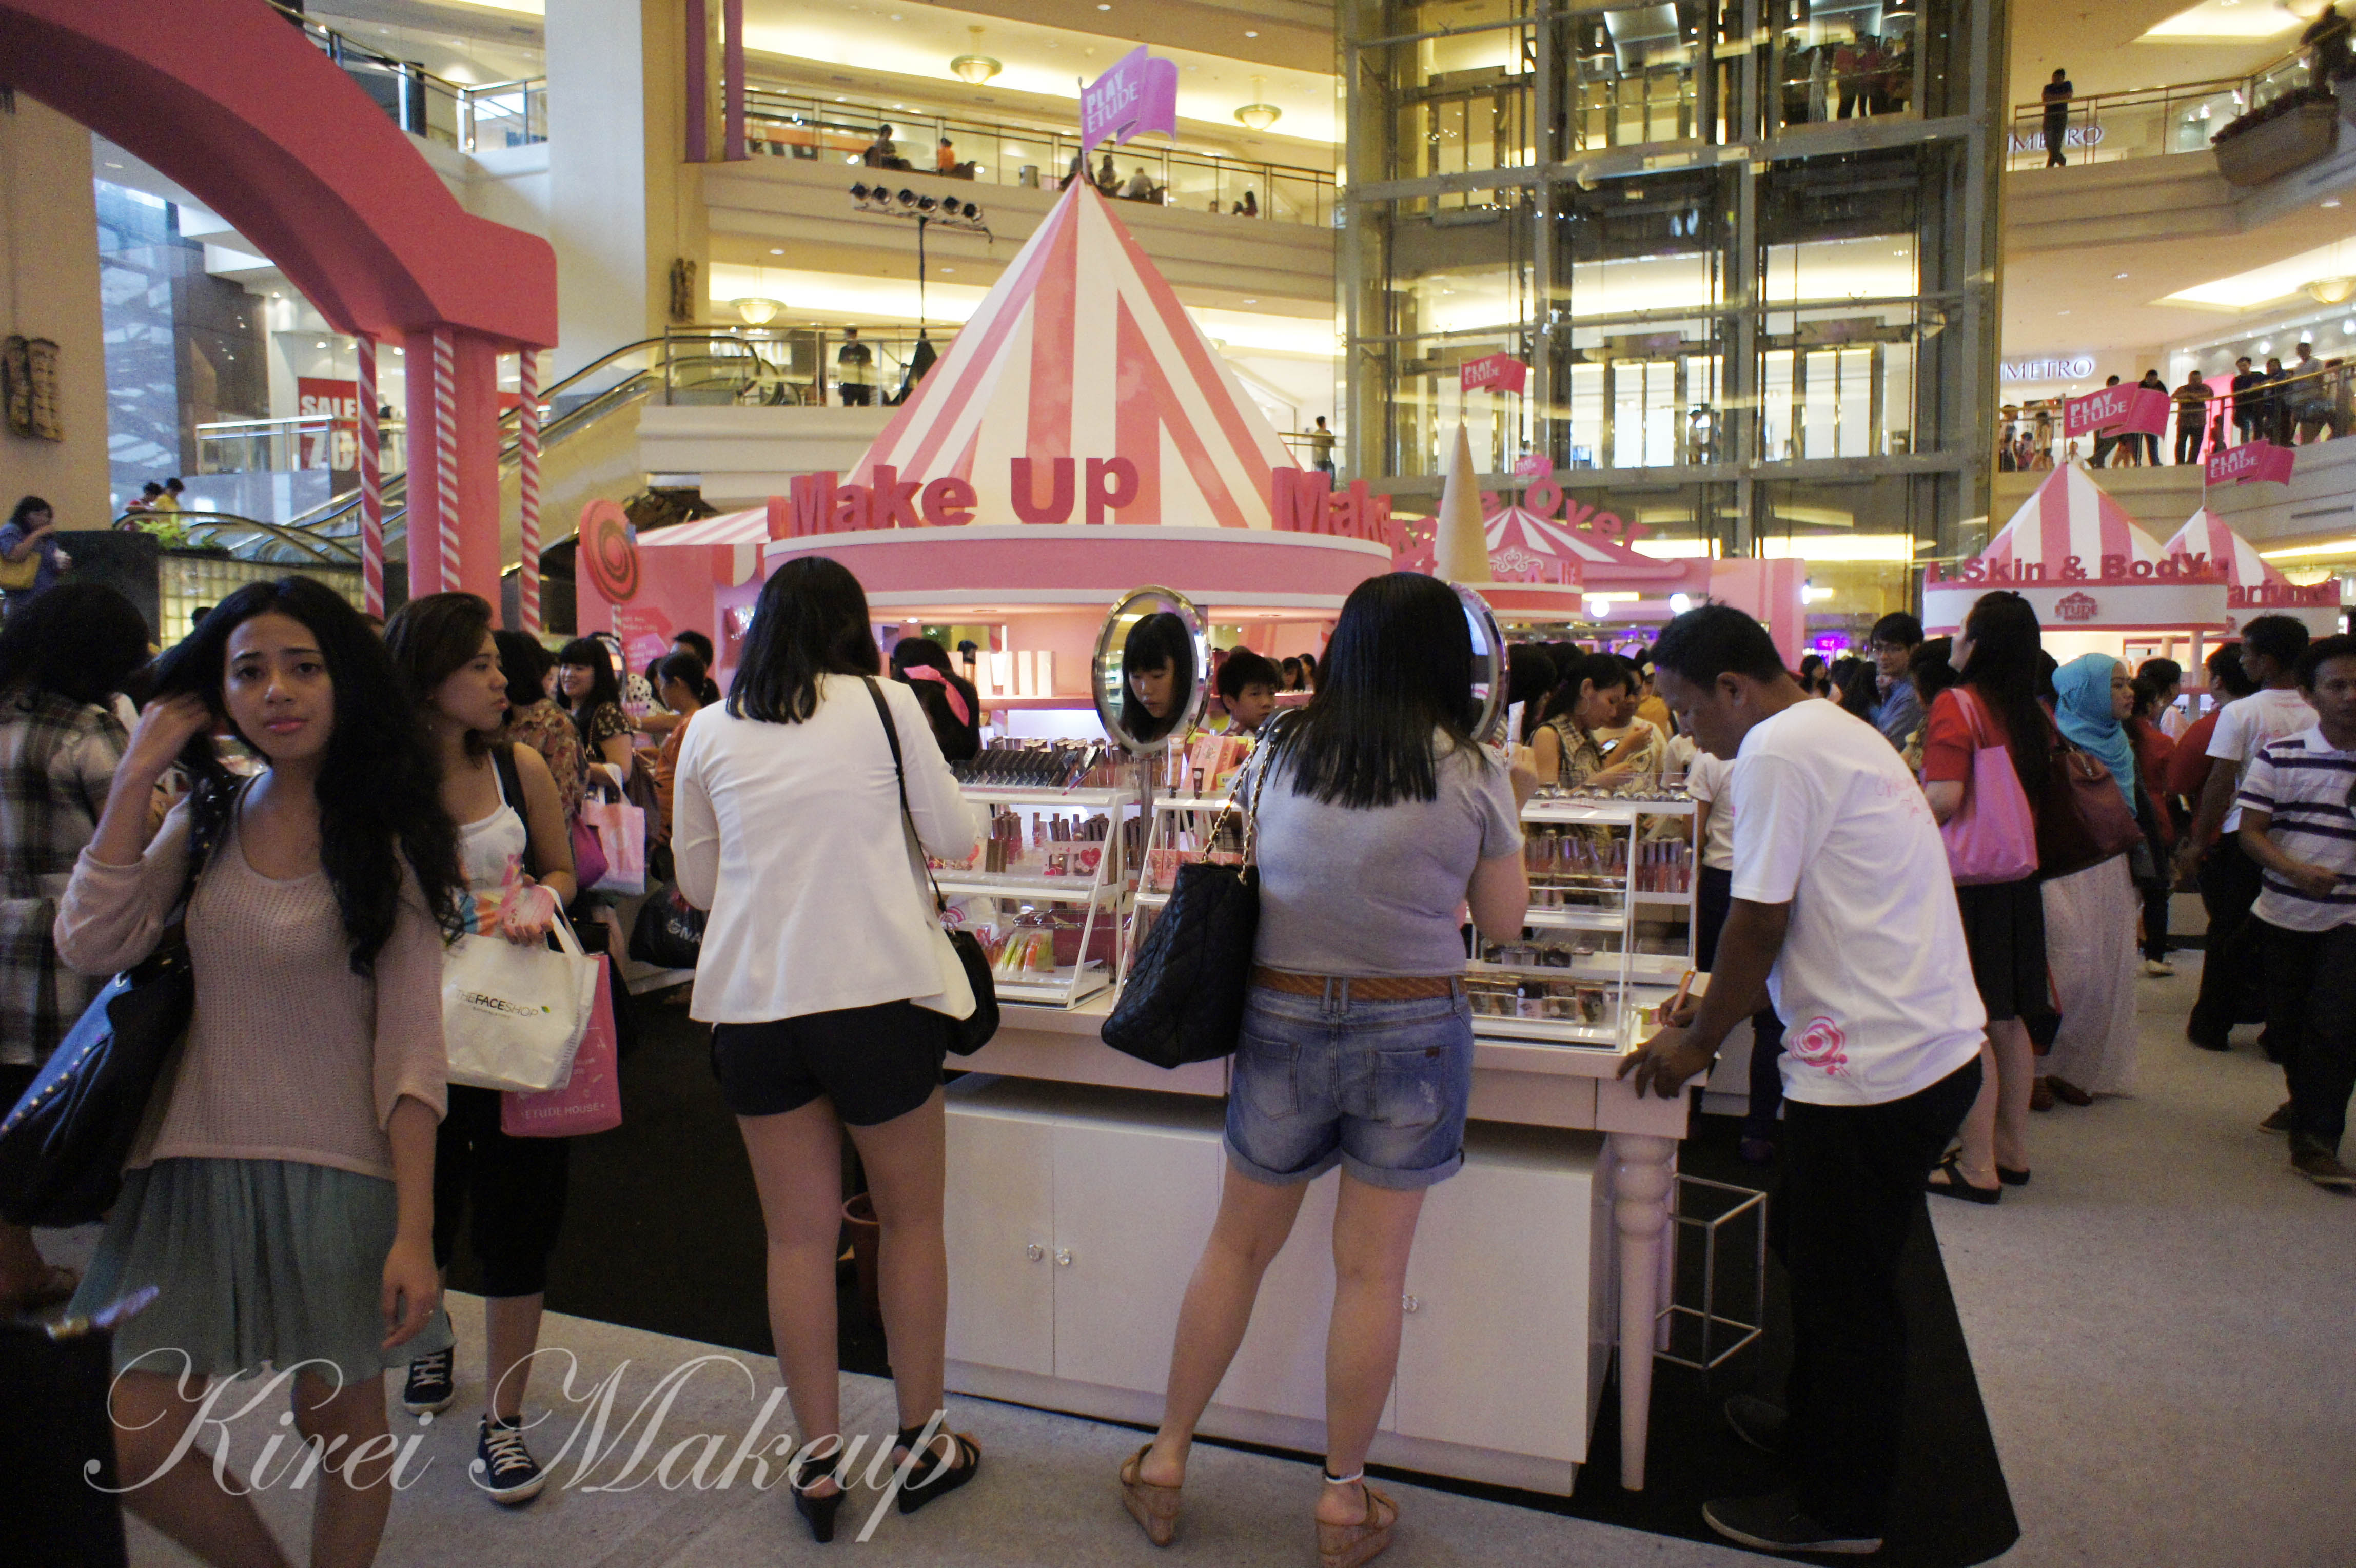
Back to the event itself. So, Etude House Indonesia created an Etude Carnival in the atrium of Mall Taman Anggrek. Pretty much, they’ve turned the mall Pink! Pink is the main colour of Etude House. They even have pink makeup case! Cute much? Not only they turned the atrium into a Pink Carnival, they organized makeover booth, cosmetics stand, manicure stalls, photo booth and a big centre stage.
All bloggers were directed to the Beauty Workshop area where we were introduced to Yohanna and Ivonne. Yohanna, as the media relations staff, explained to us what Healthy Face Movement is. She mentioned about 3Me – my skincare, my makeup application and my makeup removal. This campaign is directed towards Indonesia women to care and give extra attention to their skin using those 3 steps mentioned – cleaning face with skin care, using moisturizer or light primer and cleansing the skin after activity.
For this Healthy Face Movement Campaign, Etude House created a Video Competition for everyone! All you have to do is to create a video testimony and tutorial of the 3Me activity that you have done, and a Daily Makeup Look. For more info please visit Etude House Indonesia Facebook fan page.
Besides that Healthy Face Movement campaign, the event itself was created to officially released the first Korean CC Cream in Indonesia. More on the CC cream on the next post.
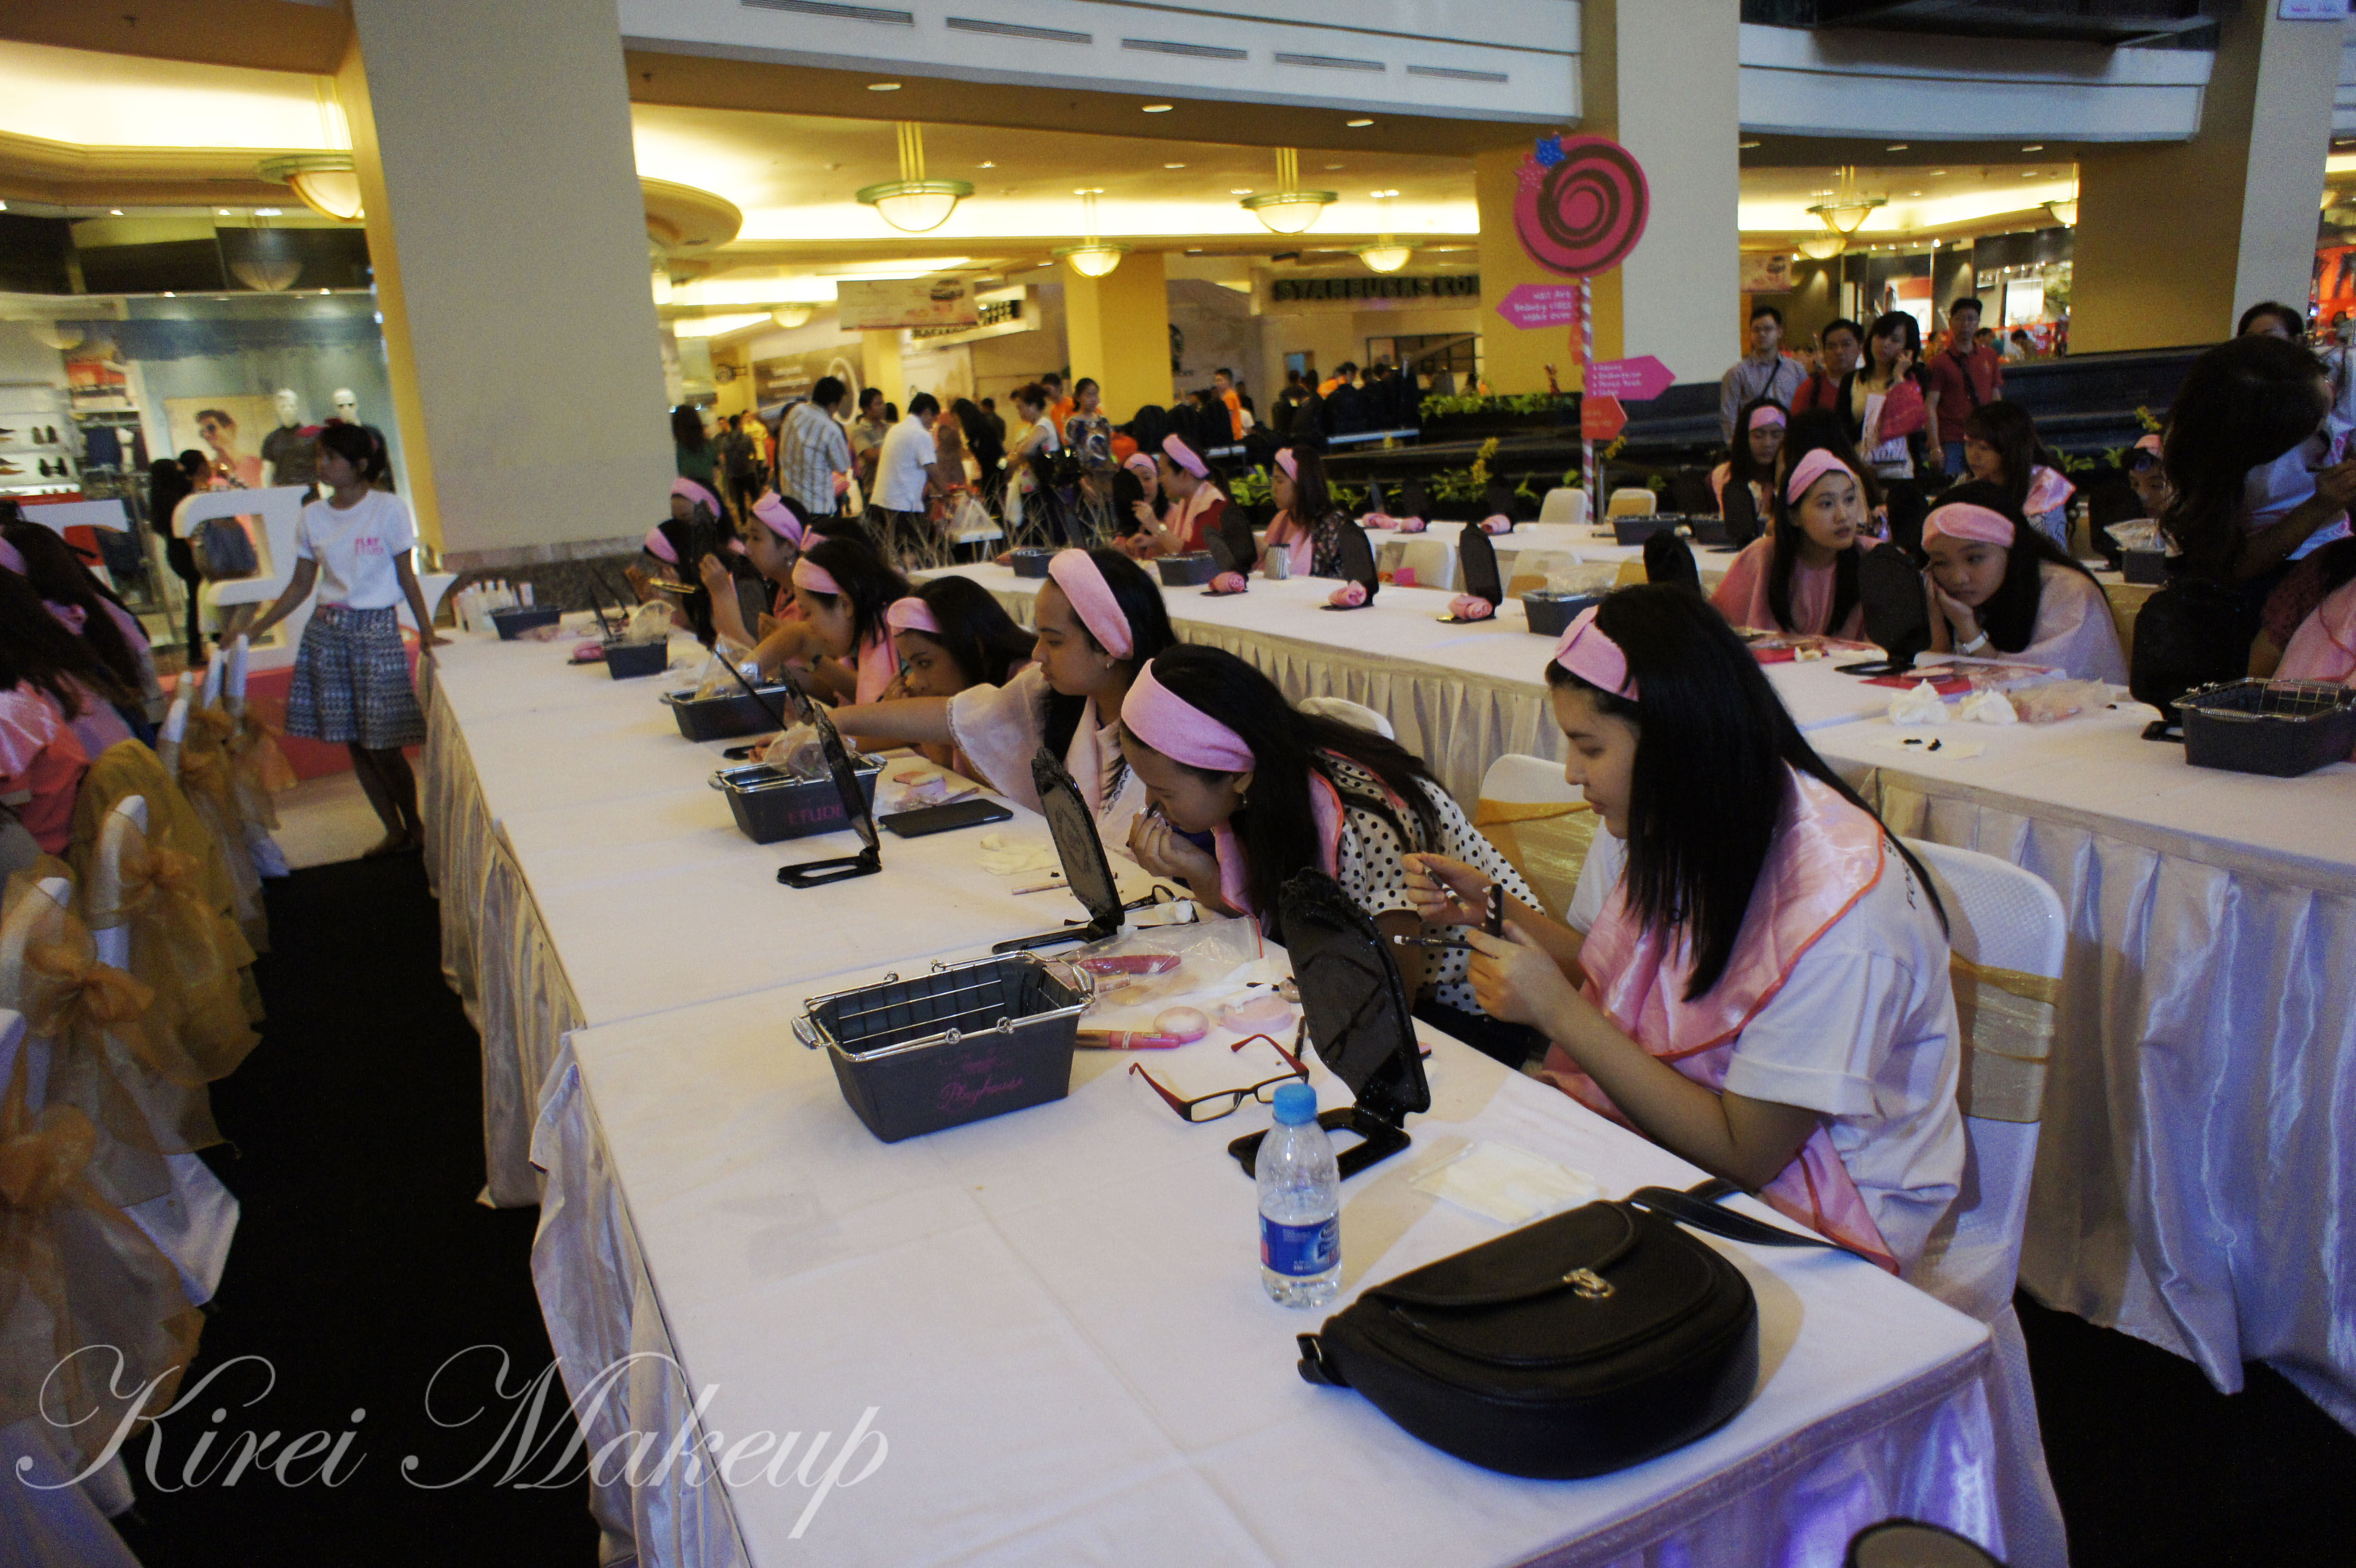
So after Yohanna talked to us a little about the Healthy Face Movement, she introduced Ivonne who is an Etude House Indonesia makeup artist. She talked to us about the little makeup competition that we had to do using Etude’s products. She introduced Michin, Etude House Korea makeup artist, and Michin performed a demo to a model. We were supposed to create a similar look on ourselves using products provided to us on our table.


I just want to say this was the only time in the event that I felt grossed out. First of all, the products given to us were used testers. I’m not sure if these testers were well cleaned with alcohol or not, but the eyeshadows look quite dirty. If you guys don’t know me personally, let me just mention that I hate using testers on my own face. I think it’s nasty! Not to mention products like mascara should NEVER be shared around! Second of all, we were given no brushes, and some of the eyeshadow sponges were dirty, like used dirty with brown stuffs on it. Next, the products like the compact powder does not even match our skin tone. It was my worst nightmare!!! Ok, fine may be I was being a big baby, but anything that’s going to come close to my eyes better be clean! I do not want any eye infections! So I used the clean Q-tips given to us and my fingers to apply my makeup.
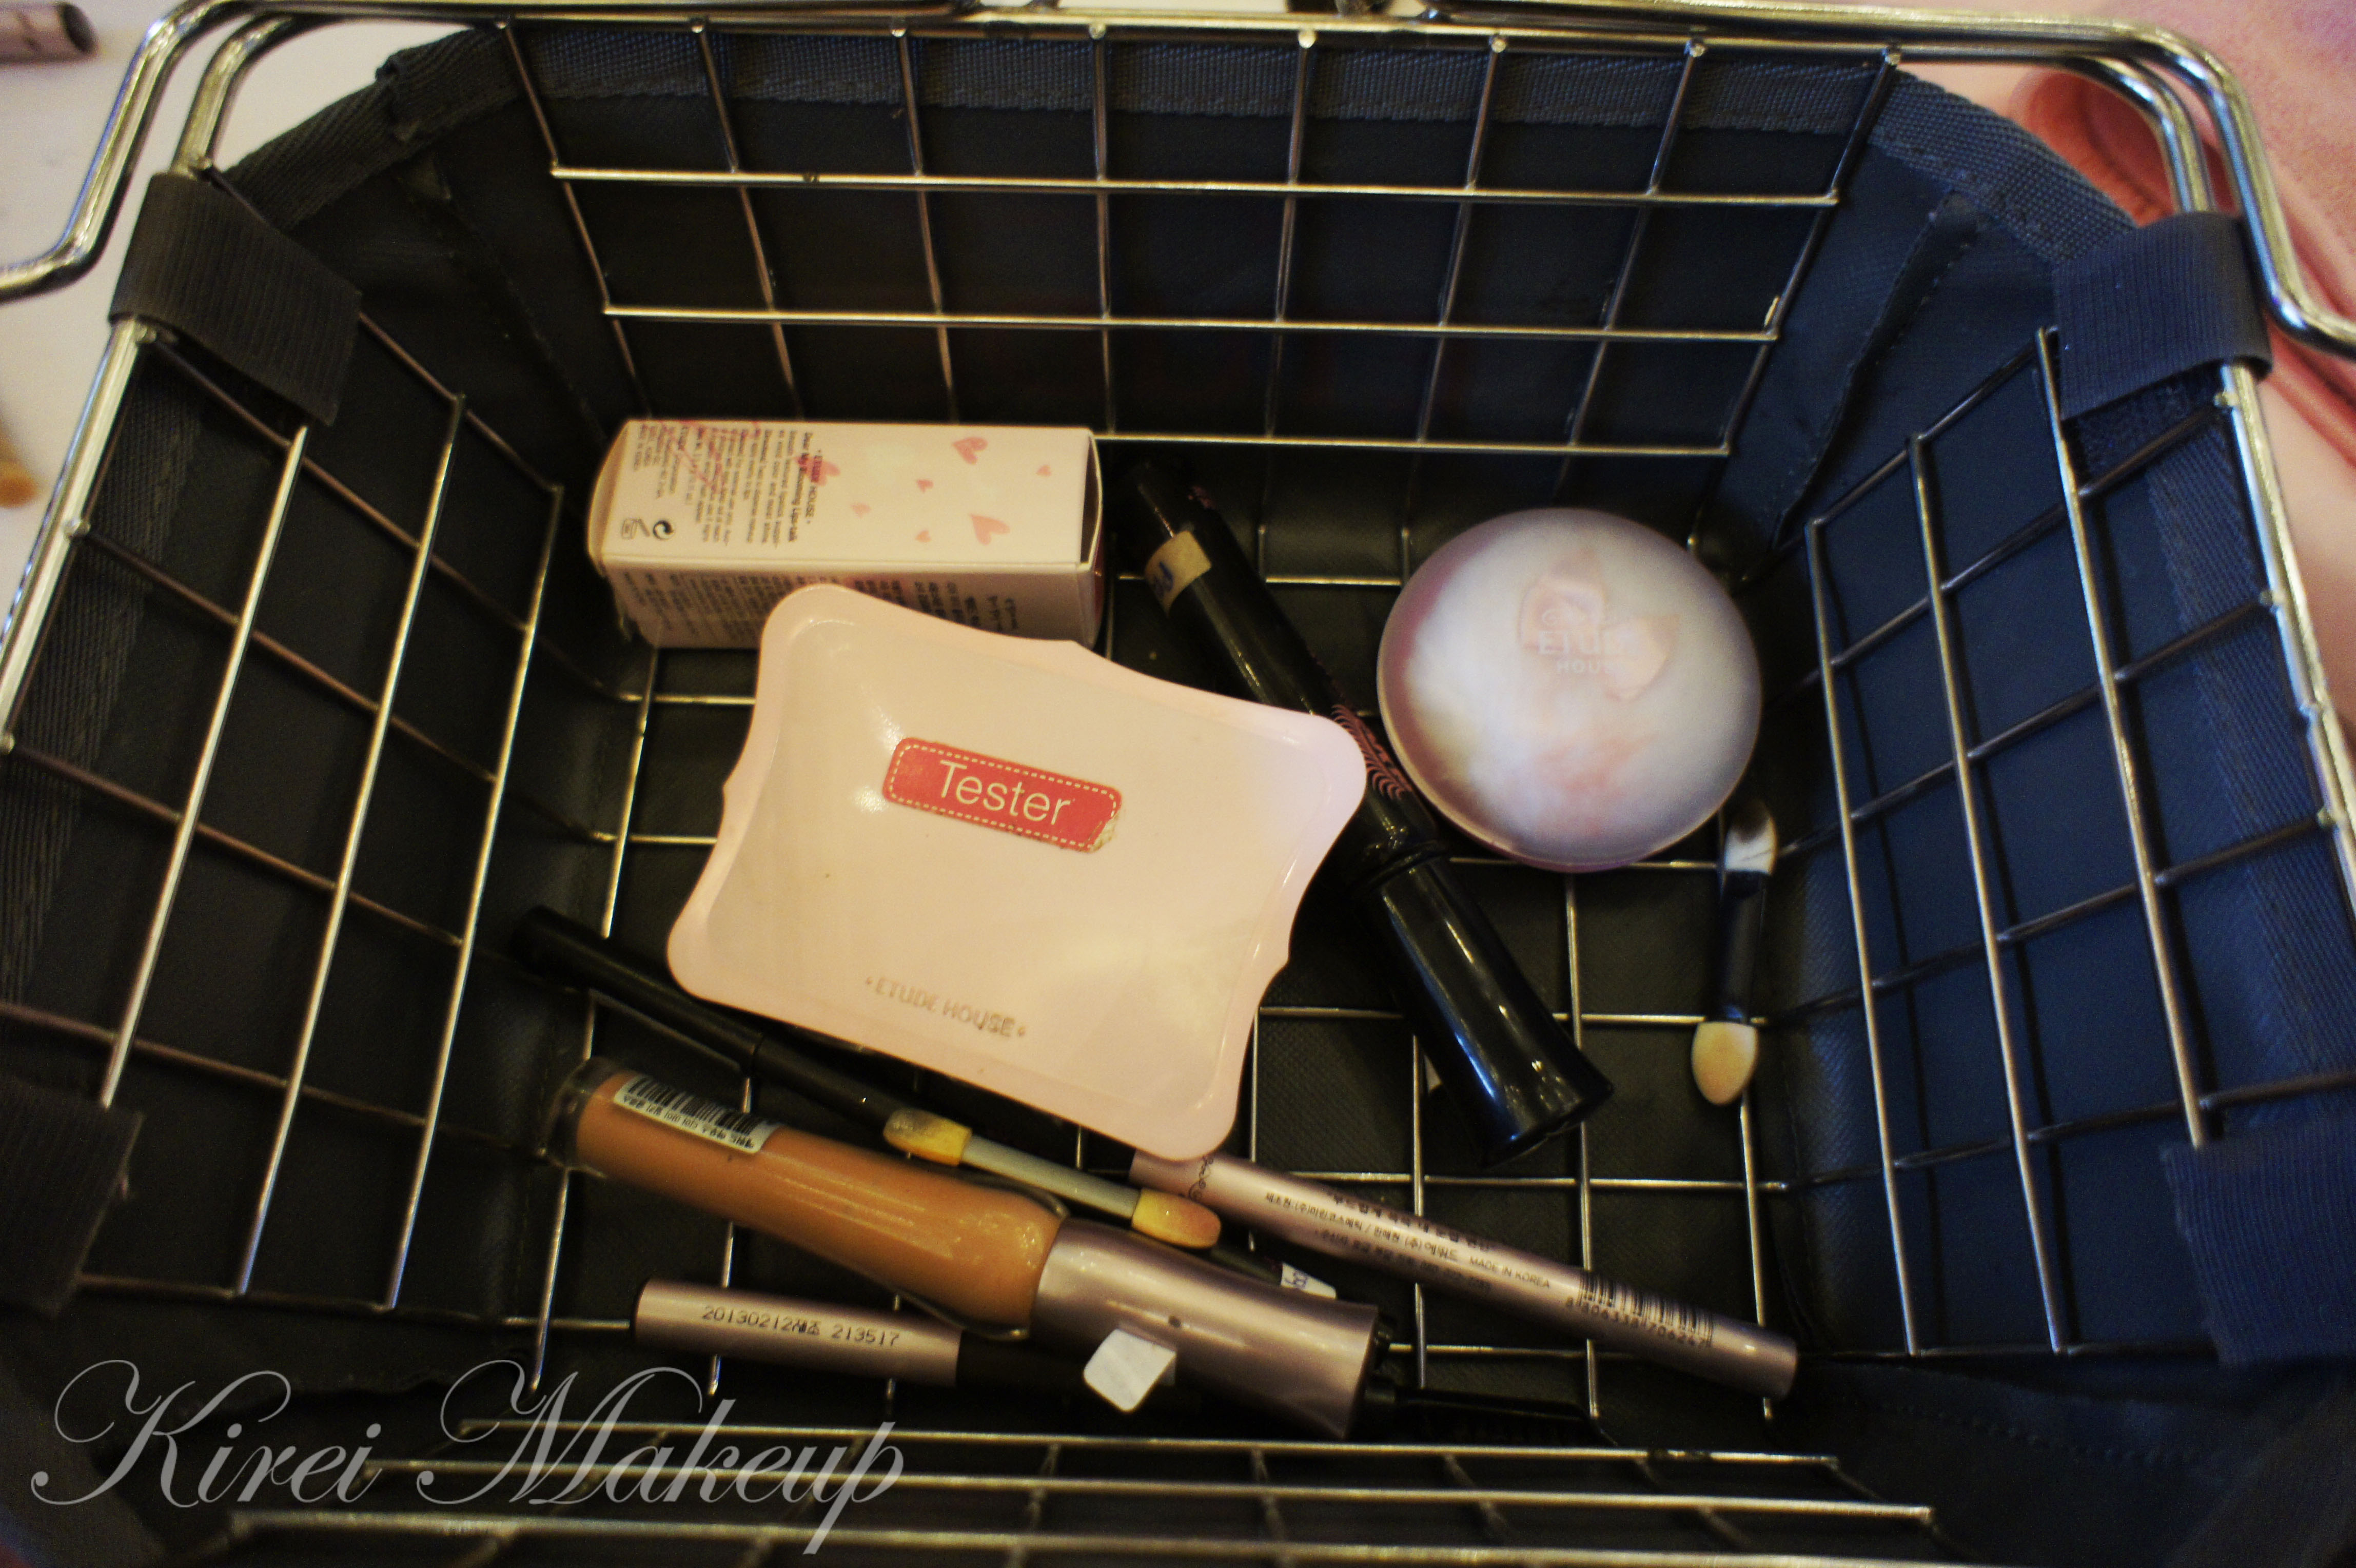
Nevertheless, I wanted to be a good sport and not a party pooper. Thank goodness I brought my own baby wipes. Ladies, please, regardless whether you have a baby or not, always carry baby wipes in your handbag, you never know how useful these things are. I used the wipes to wipe down some of the products, and cleaned my face with it. I was glad I had worn my own mascara before the event, so I avoided using mascara provided by them.
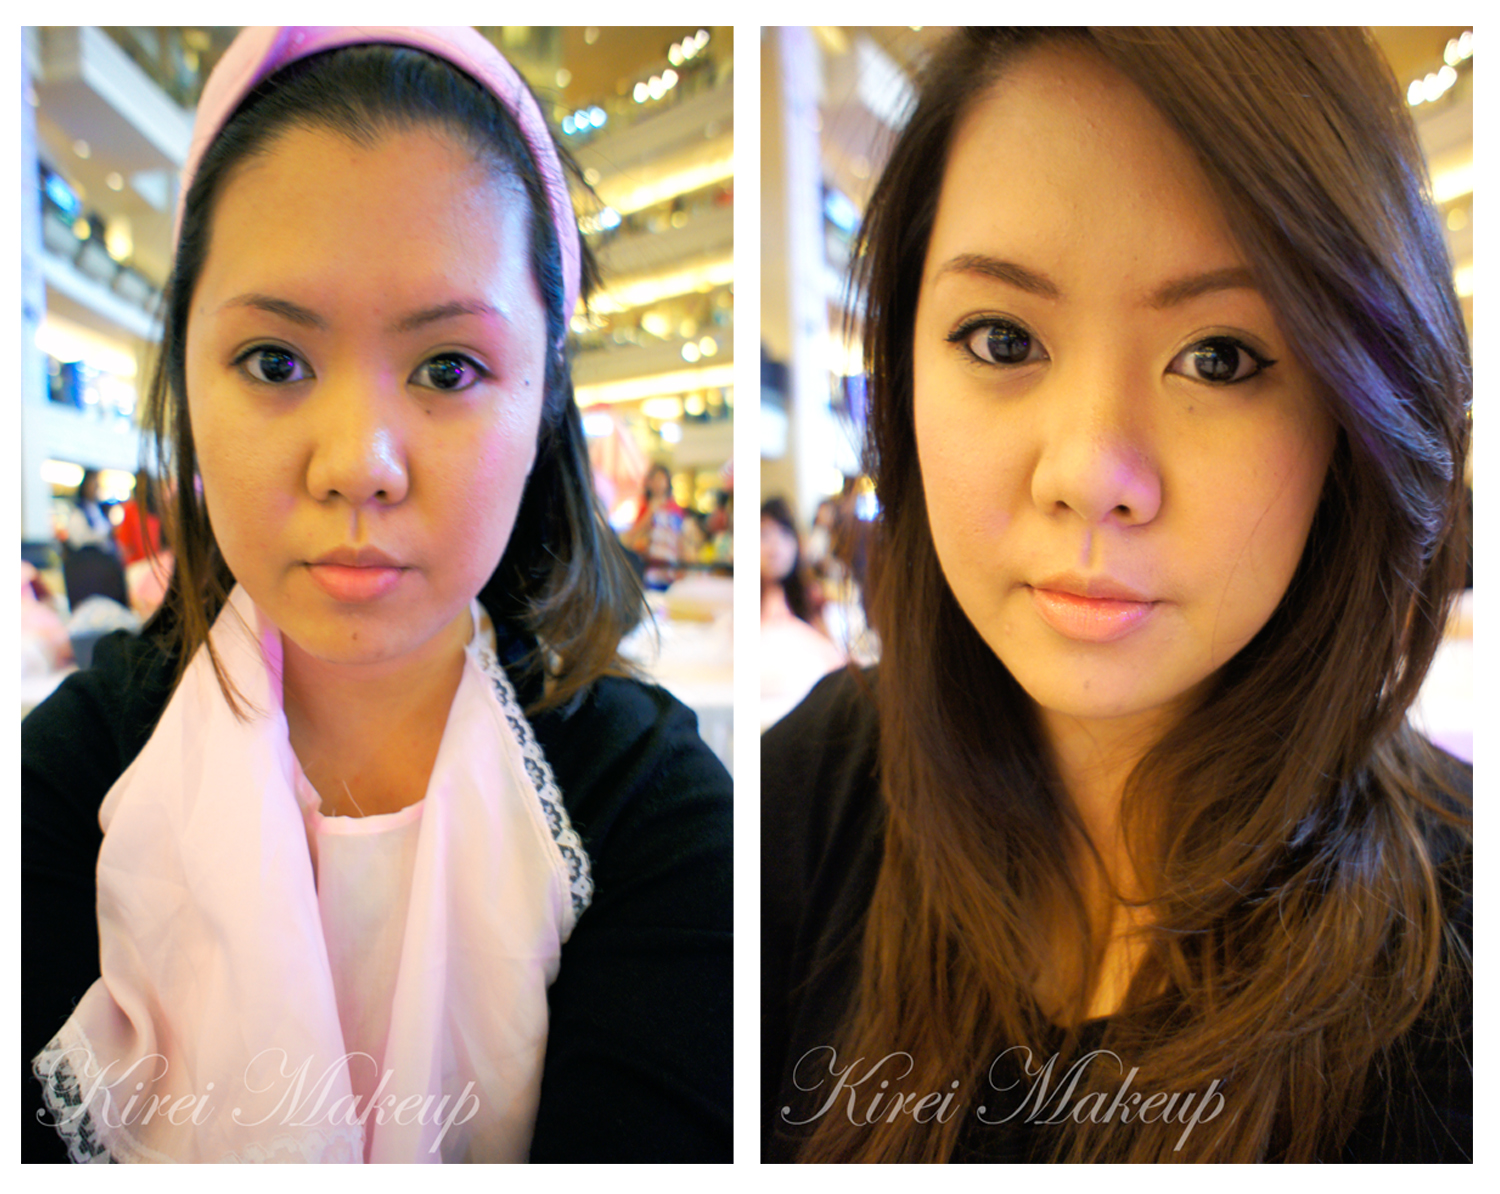
During this time, I get the chance to try on their CC and BB cream. I’m not sure how I feel about these 2 products just yet. You guys should know by now that I think CC and BB creams are just a big marketing hype. I’ll talk more about these 2 products this week.
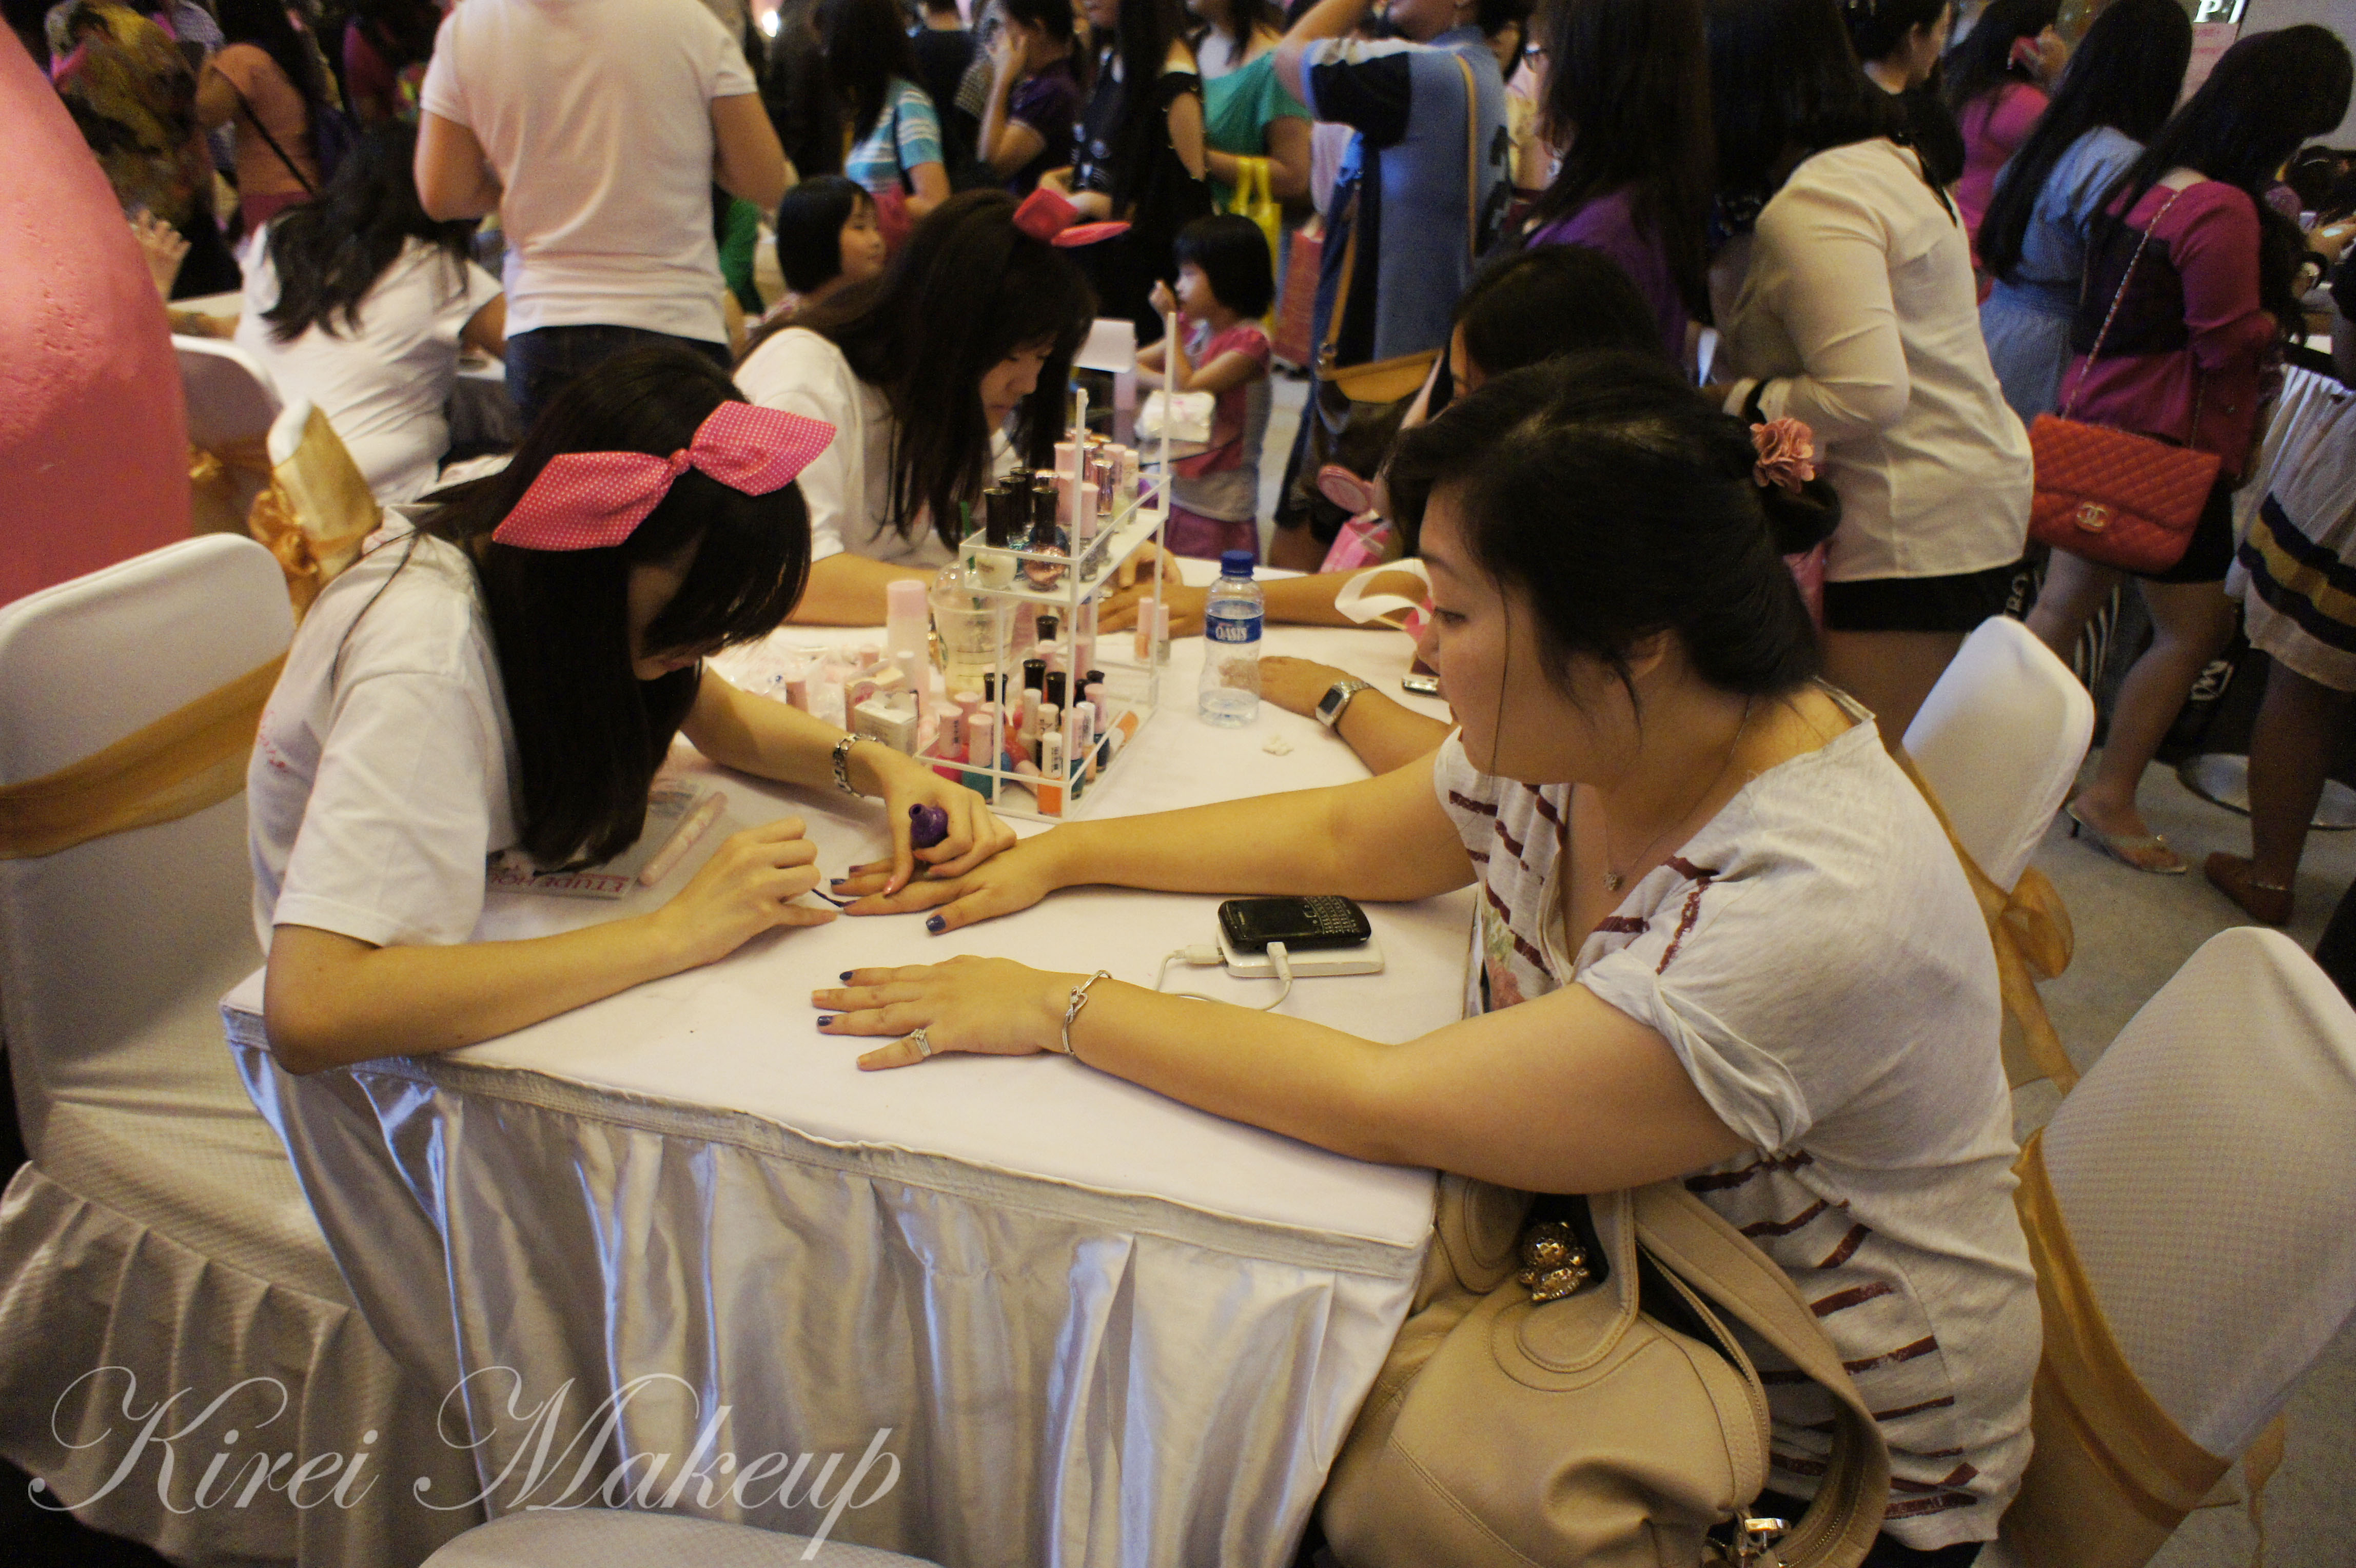
The event ended when Michin chose 2 winners and that’s it. After our blogger event, the area was used for makeup classes. I walked around the atrium for a while and man, it was PACKED! I, especially, loved the nail corner. Since I had to go and meet a friend, I didn’t get the chance to shop around. Nevertheless, it was quite awesome.
Lee Hi It’s Over MV Inspired
Hi all! This look was requested by Sarah over on Facebook! I think the video was super cute and the makeup is very chic. From the video itself, Lee Hi has 4 different looks mainly playing with the lip colors: pink in the center and nude on the outer, bright pink lips all over, orange red lips and lastly peach colored lips. The eyes pretty much stayed the same. It’s a very doll-like makeup. I quite like how she looked in the video. Very cute!
I did the tutorial in a rush and I didn’t get the chance to look closely on the video, but I think she might have a thin eyeliner on the upper lashline, which I skipped (my bad). It also seems that she had individual lashes put it. I only owned the short lashes in my possession currently, since I ran out of the medium ones. She looked like she wore the medium ones, so again, my apologies for the difference.
Anyhow, the rest of the face is very simple and easy. It’s not a lot of makeup, very clean, very little is on her face. I chose the one with the pink lips just cause I think it’s the cutest one, but feel free to change it to peach or the nude or the red.
How-to:
1. I applied MAC Soft Ochre paint pot all over the eyelid using my finger.
2. I applied a nude colored eyeshadow (Foxy by Urban Decay) all over the lid.
3. On the lower lashline, I applied MAC Blunt blush using an angled eyeliner brush. I blended the edge using a clean pencil brush. You can use any reddish-brown eyeshadow for this.
4. I curled my lashes and applied Dior Overcurl mascara.
5. I applied short individual lashes by Elise (Indonesian local brand) on the upper lashes. I think I applied about 6-7 of the short ones, and then pinched my real lashes to the fake ones to blend it together.
6. I filled in my brows using Dolly Winked brow pencil.
7. For the face, I applied MUFE HD Foundation using Sigma Round Kabuki brush.
8. Under the eyes, I applied L’oreal Magic Touche concealer.
9. I applied a little bit of Benefit Moon Beam along the bridge of the nose and on top of the cheekbones. I also applied Benefit Hervana blush on the cheeks.
10. Powder lightly if necessary.
11. On the lips, I applied a very tiny drop of OCC Lip Tar in Queen on the center of the lips.
12. Using a clean lip brush, I blended the liptar outwards.
13. Blot excess with kleenex and applied lip balm/gloss if needed.
Lee Hi Rose MV Inspired
I received a request! Whuaaaat! hahaha..It’s been a while since I gotten requests for makeup tutorials, and it makes me very happy that one of my followers actually requested one! Pdo send me requests on comments below or over on Twitter 😀
Anyhow, so Cahya requested me on Twitter to do Lee Hi’s makeup in her MV Rose. I was like whaaat??? Who’s this Lee Hi girl. I searched her on youtube and found the MV. Lee Hi is a Korean singer, and she has an amazing voice! Being Korean, she obviously has like the most perfect skin just like most of my Korean friends. She has 3 different looks on the video – red eyes and pink lips, red eyes and red lips, yellow/pink eyes with pink lips. I chose the red eyes/pink lips combo for this inspired look just because it showed up most of the time on the MV.
Can we please admire how gorgeous that rose crown on her head is!
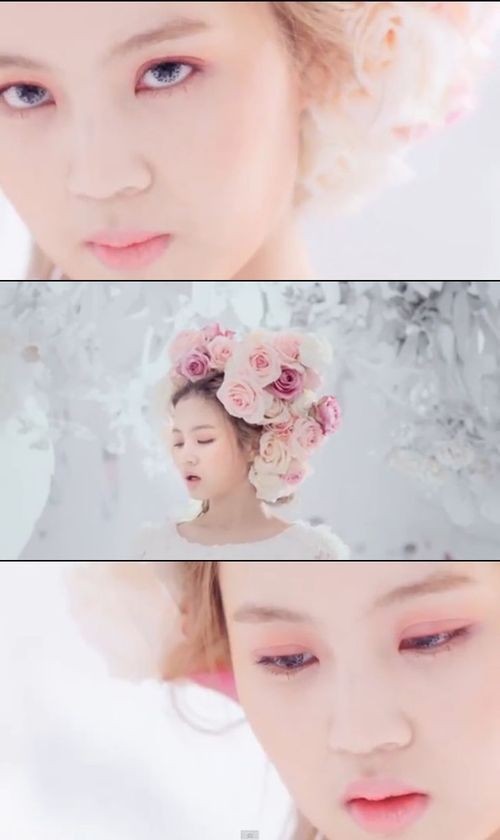
Image is Courtesy of Kpopstarz
Keep in mind that she is probably 2 shades lighter than me. Her makeup is quite minimal. Let’s break it down:
- Her brows are straight across, just like most Korean actresses/singers. Mine has more shaped than hers, so I had to fill mine in more to make it less angular.
- Seeing her video, I don’t think she wore any blushes or contour, which made the red eye more chic and modern.
- It also seemed like she barely has any mascara on, perhaps she wears a brown mascara or even a clear one.
A word of caution! Please make sure that whatever red blush or product you are going to use are allowed to be used for the eyes. Some red lip products or cheeks are not allowed for the eyes due to sensitivity issue. I used Ben Nye blush because I’ve tried and tested it on myself and others, and found no allergic reaction or sensitivity towards it.
How-to:
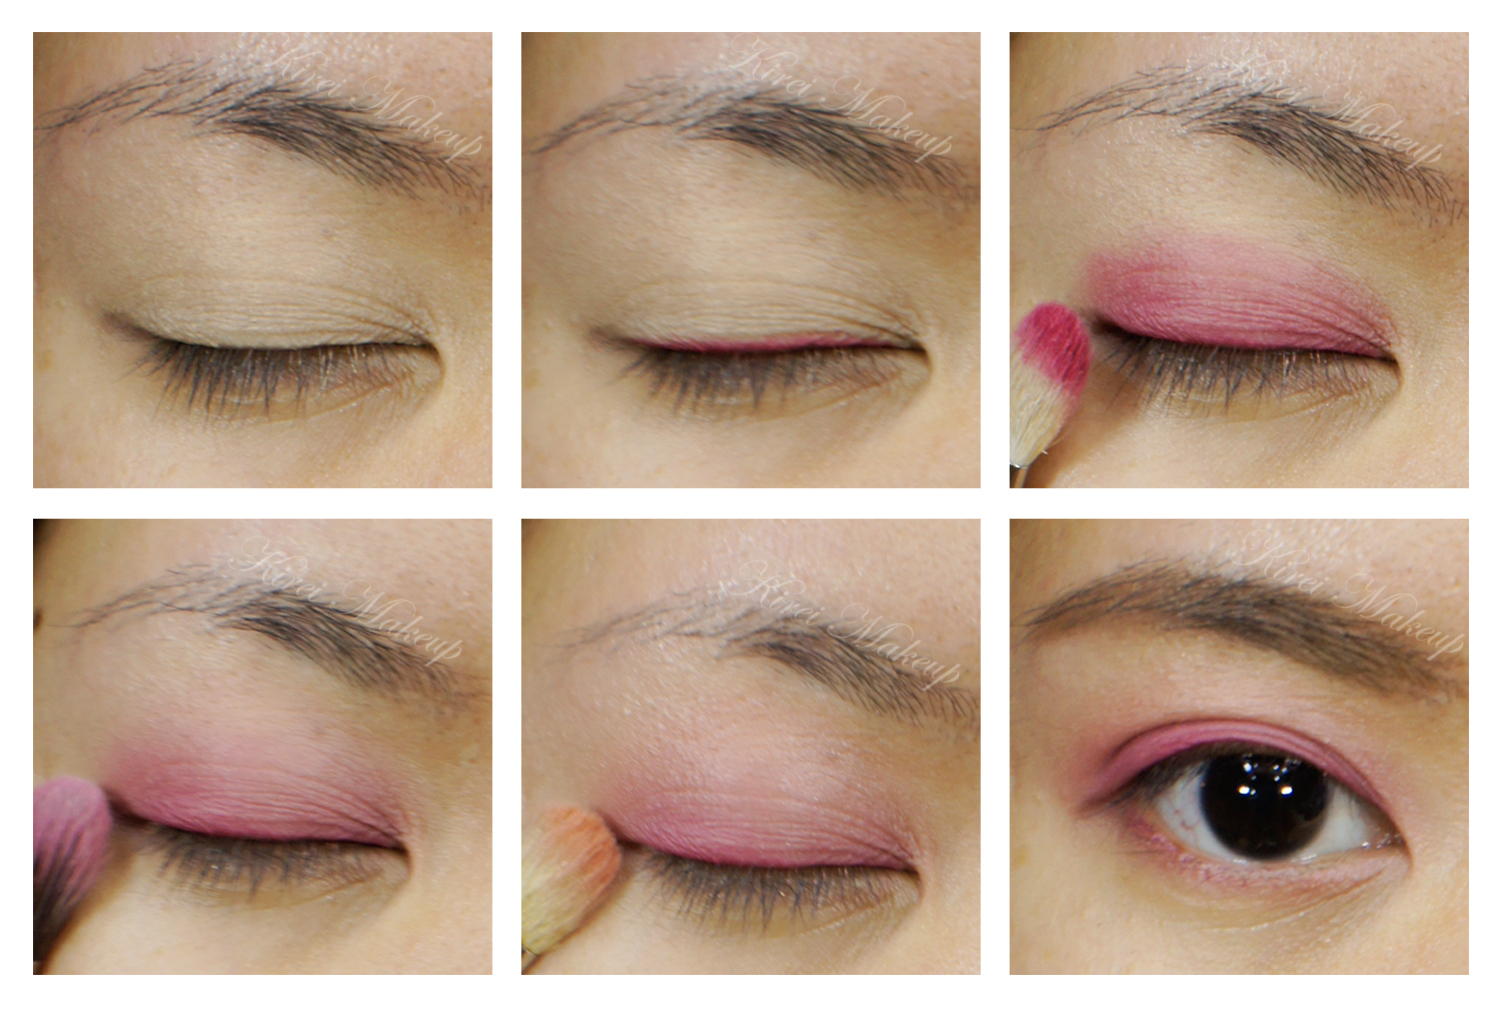
1. I applied MAC Soft Ochre paint pot all over my lid using my finger.
2. Using an angled eyeliner brush, I applied Ben Nye Soleil Red blush along my upper lashline.
3. Using a fluffy blending brush, I picked up a teeensy weensy bit of the blush and applied it lightly on my lid, avoiding the crease.
4. Using a clean blending brush, I blended whatever is on my lid so it fades.
5. Using a clean blending brush, I applied Ben Nye Mango eyeshadow lightly on the crease.
6. Using a clean angled eyeliner brush, I mixed Ben Nye Mango eyeshadow with Ben Nye Soleil Red blush and applied it very lightly on the lower lashline.
7. I applied Urban Decay Woodstock eyeliner along the waterline.
8. You can choose to apply a very light coat of mascara or skip it.
9. I filled it my brows using Dollywinked eyebrow pencil in brown and set it with Anastasia Brow Powder in Brunette.
10. For the face, I applied MUFE HD foundation in 117 all over my face using Sigma Round Kabuki brush, going over my lips with it as well.
11. I applied Revlon Ravishing Red lipstick on the center of my lips using my ring finger, just dabbing on it.
12. Lastly, I applied Chanel Levres Scintillantes Glossimer no. 165 (Volupte) lightly on my lips and then blot it with a piece of kleenex.