Lee Hi Rose MV Inspired

I received a request! Whuaaaat! hahaha..It’s been a while since I gotten requests for makeup tutorials, and it makes me very happy that one of my followers actually requested one! Pdo send me requests on comments below or over on Twitter 😀

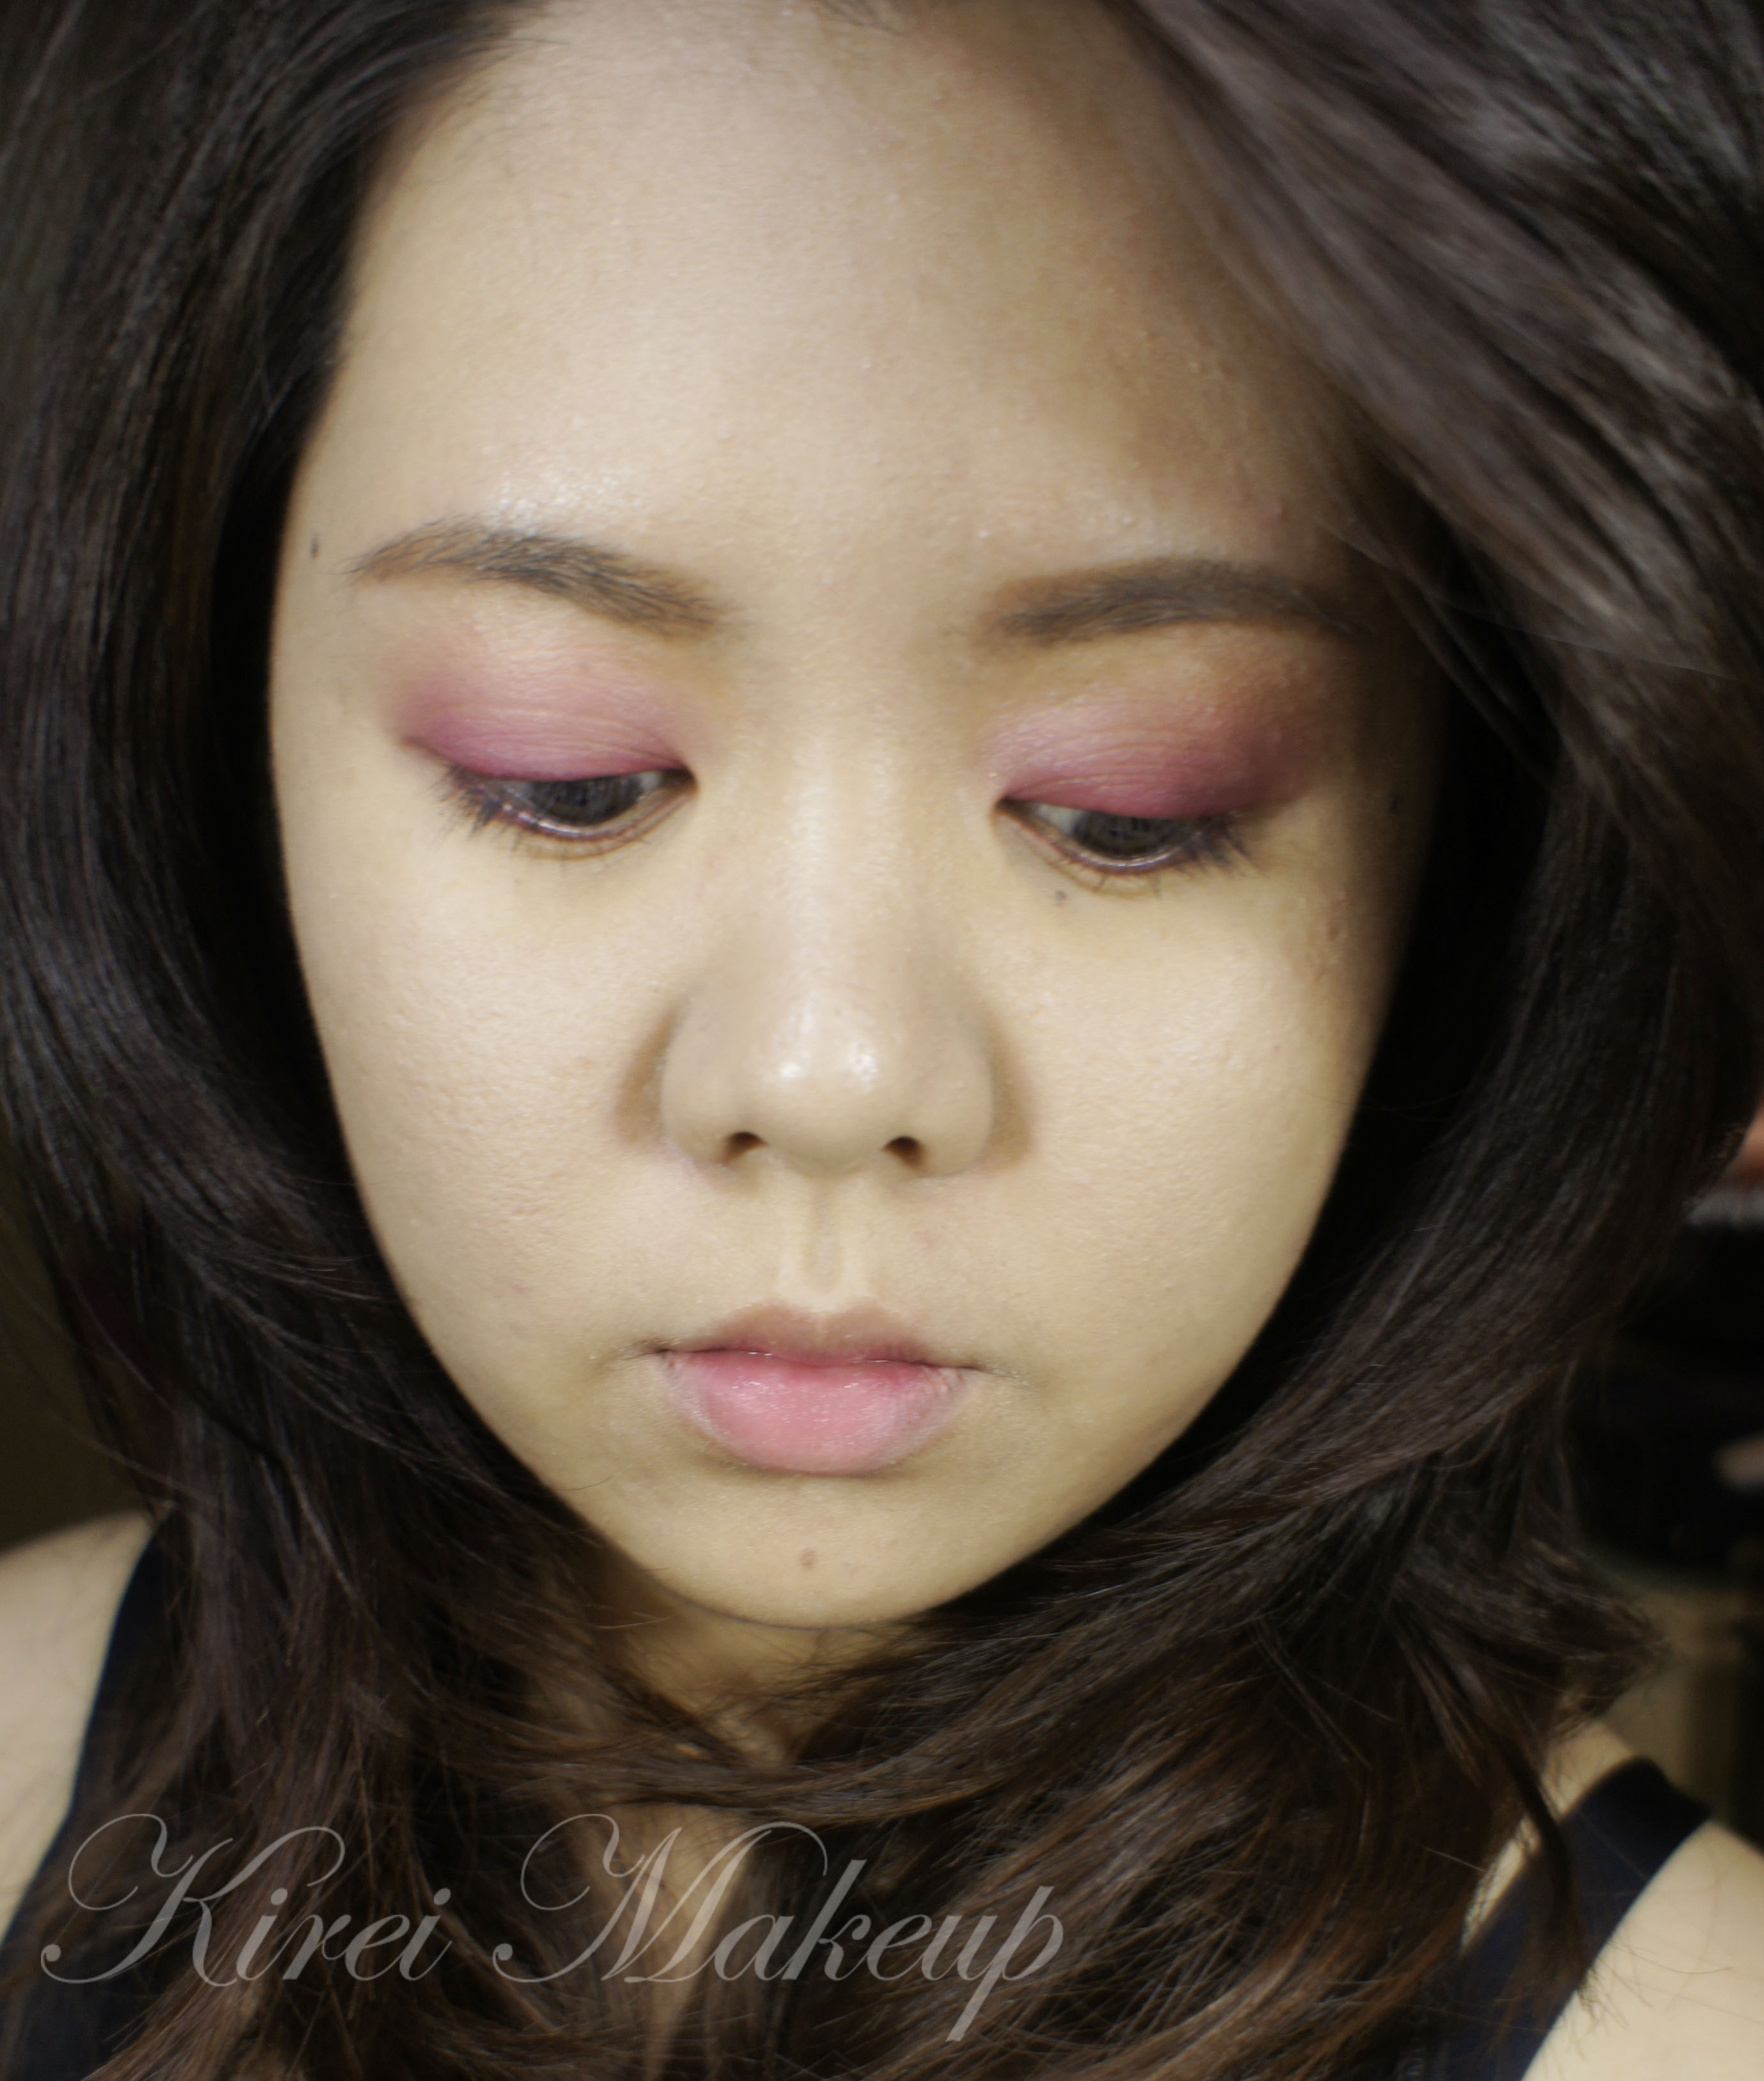
Anyhow, so Cahya requested me on Twitter to do Lee Hi’s makeup in her MV Rose. I was like whaaat??? Who’s this Lee Hi girl. I searched her on youtube and found the MV. Lee Hi is a Korean singer, and she has an amazing voice! Being Korean, she obviously has like the most perfect skin just like most of my Korean friends. She has 3 different looks on the video – red eyes and pink lips, red eyes and red lips, yellow/pink eyes with pink lips. I chose the red eyes/pink lips combo for this inspired look just because it showed up most of the time on the MV.

Can we please admire how gorgeous that rose crown on her head is!

lee hi rose mv

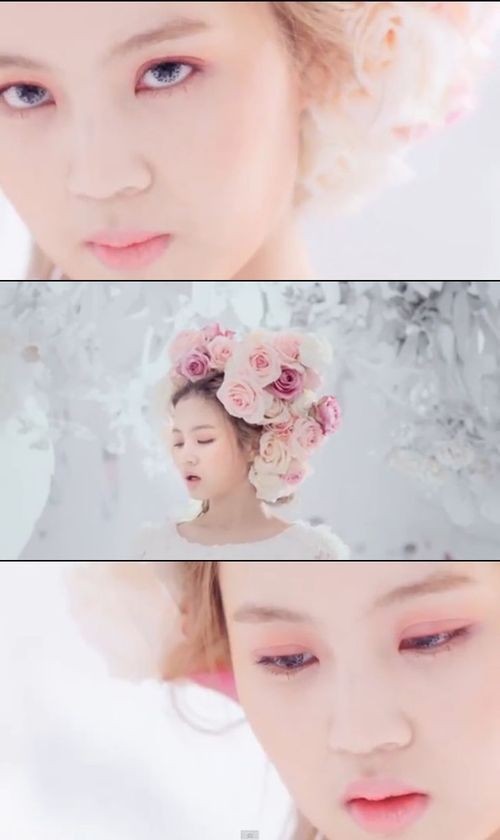
Image is Courtesy of Kpopstarz

Keep in mind that she is probably 2 shades lighter than me. Her makeup is quite minimal. Let’s break it down:

  • Her brows are straight across, just like most Korean actresses/singers. Mine has more shaped than hers, so I had to fill mine in more to make it less angular.
  • Seeing her video, I don’t think she wore any blushes or contour, which made the red eye more chic and modern.
  • It also seemed like she barely has any mascara on, perhaps she wears a brown mascara or even a clear one.

A word of caution! Please make sure that whatever red blush or product you are going to use are allowed to be used for the eyes. Some red lip products or cheeks are not allowed for the eyes due to sensitivity issue. I used Ben Nye blush because I’ve tried and tested it on myself and others, and found no allergic reaction or sensitivity towards it.

How-to:

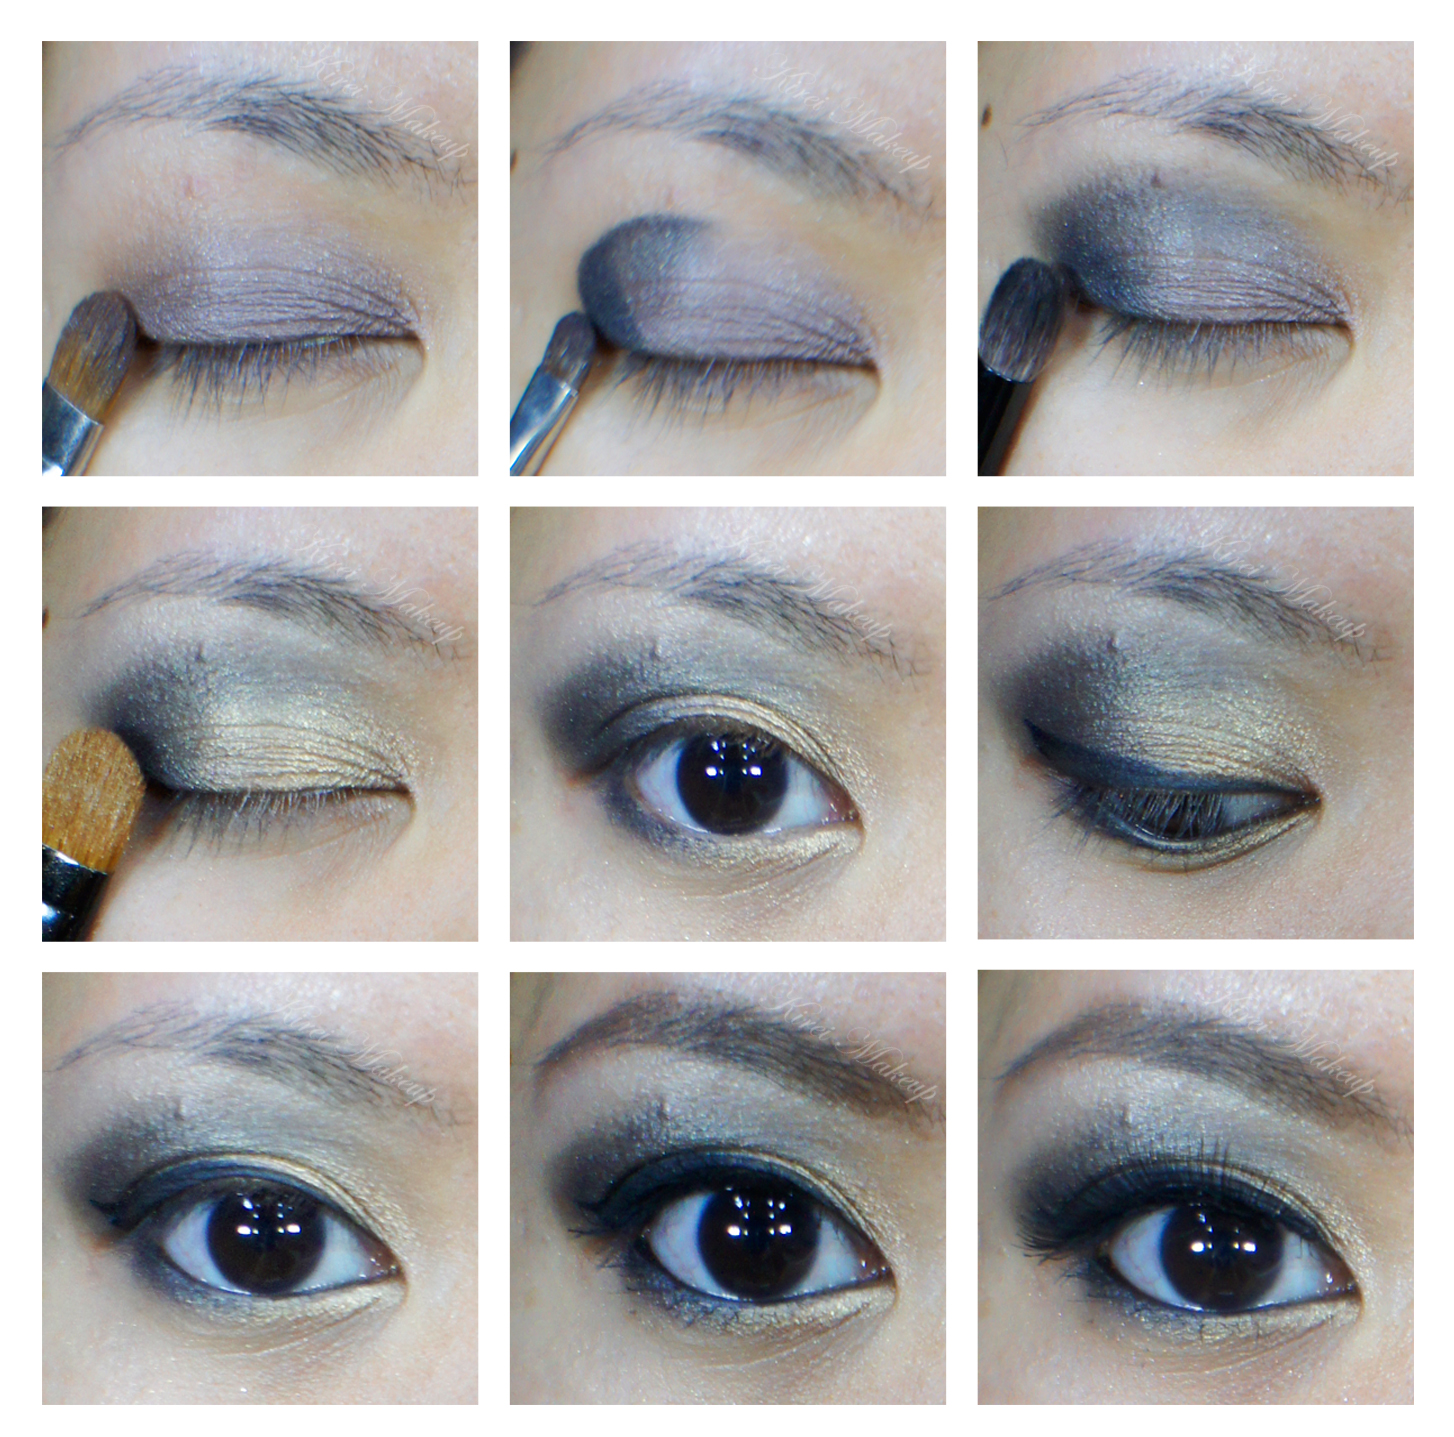
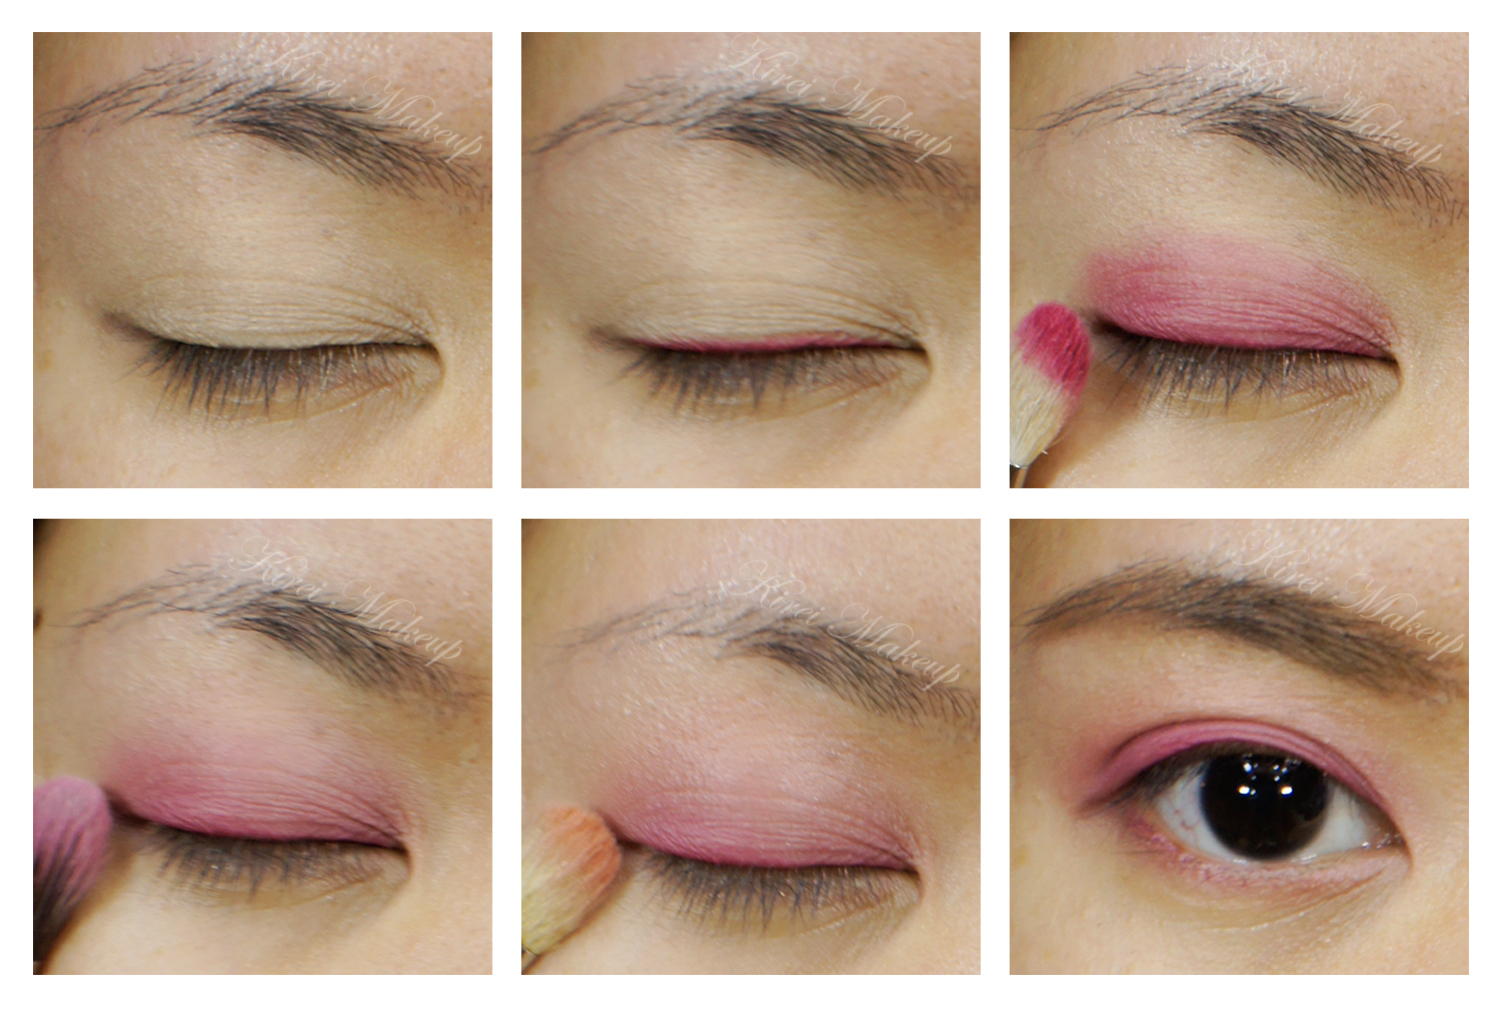
1. I applied MAC Soft Ochre paint pot all over my lid using my finger.

2. Using an angled eyeliner brush, I applied Ben Nye Soleil Red blush along my upper lashline.

3. Using a fluffy blending brush, I picked up a teeensy weensy bit of the blush and applied it lightly on my lid, avoiding the crease.

4. Using a clean blending brush, I blended whatever is on my lid so it fades.

5. Using a clean blending brush, I applied Ben Nye  Mango eyeshadow lightly on the crease.

6. Using a clean angled eyeliner brush, I mixed Ben Nye Mango eyeshadow with Ben Nye Soleil Red blush and applied it very lightly on the lower lashline.

7. I applied Urban Decay Woodstock eyeliner along the waterline.

8. You can choose to apply a very light coat of mascara or skip it.

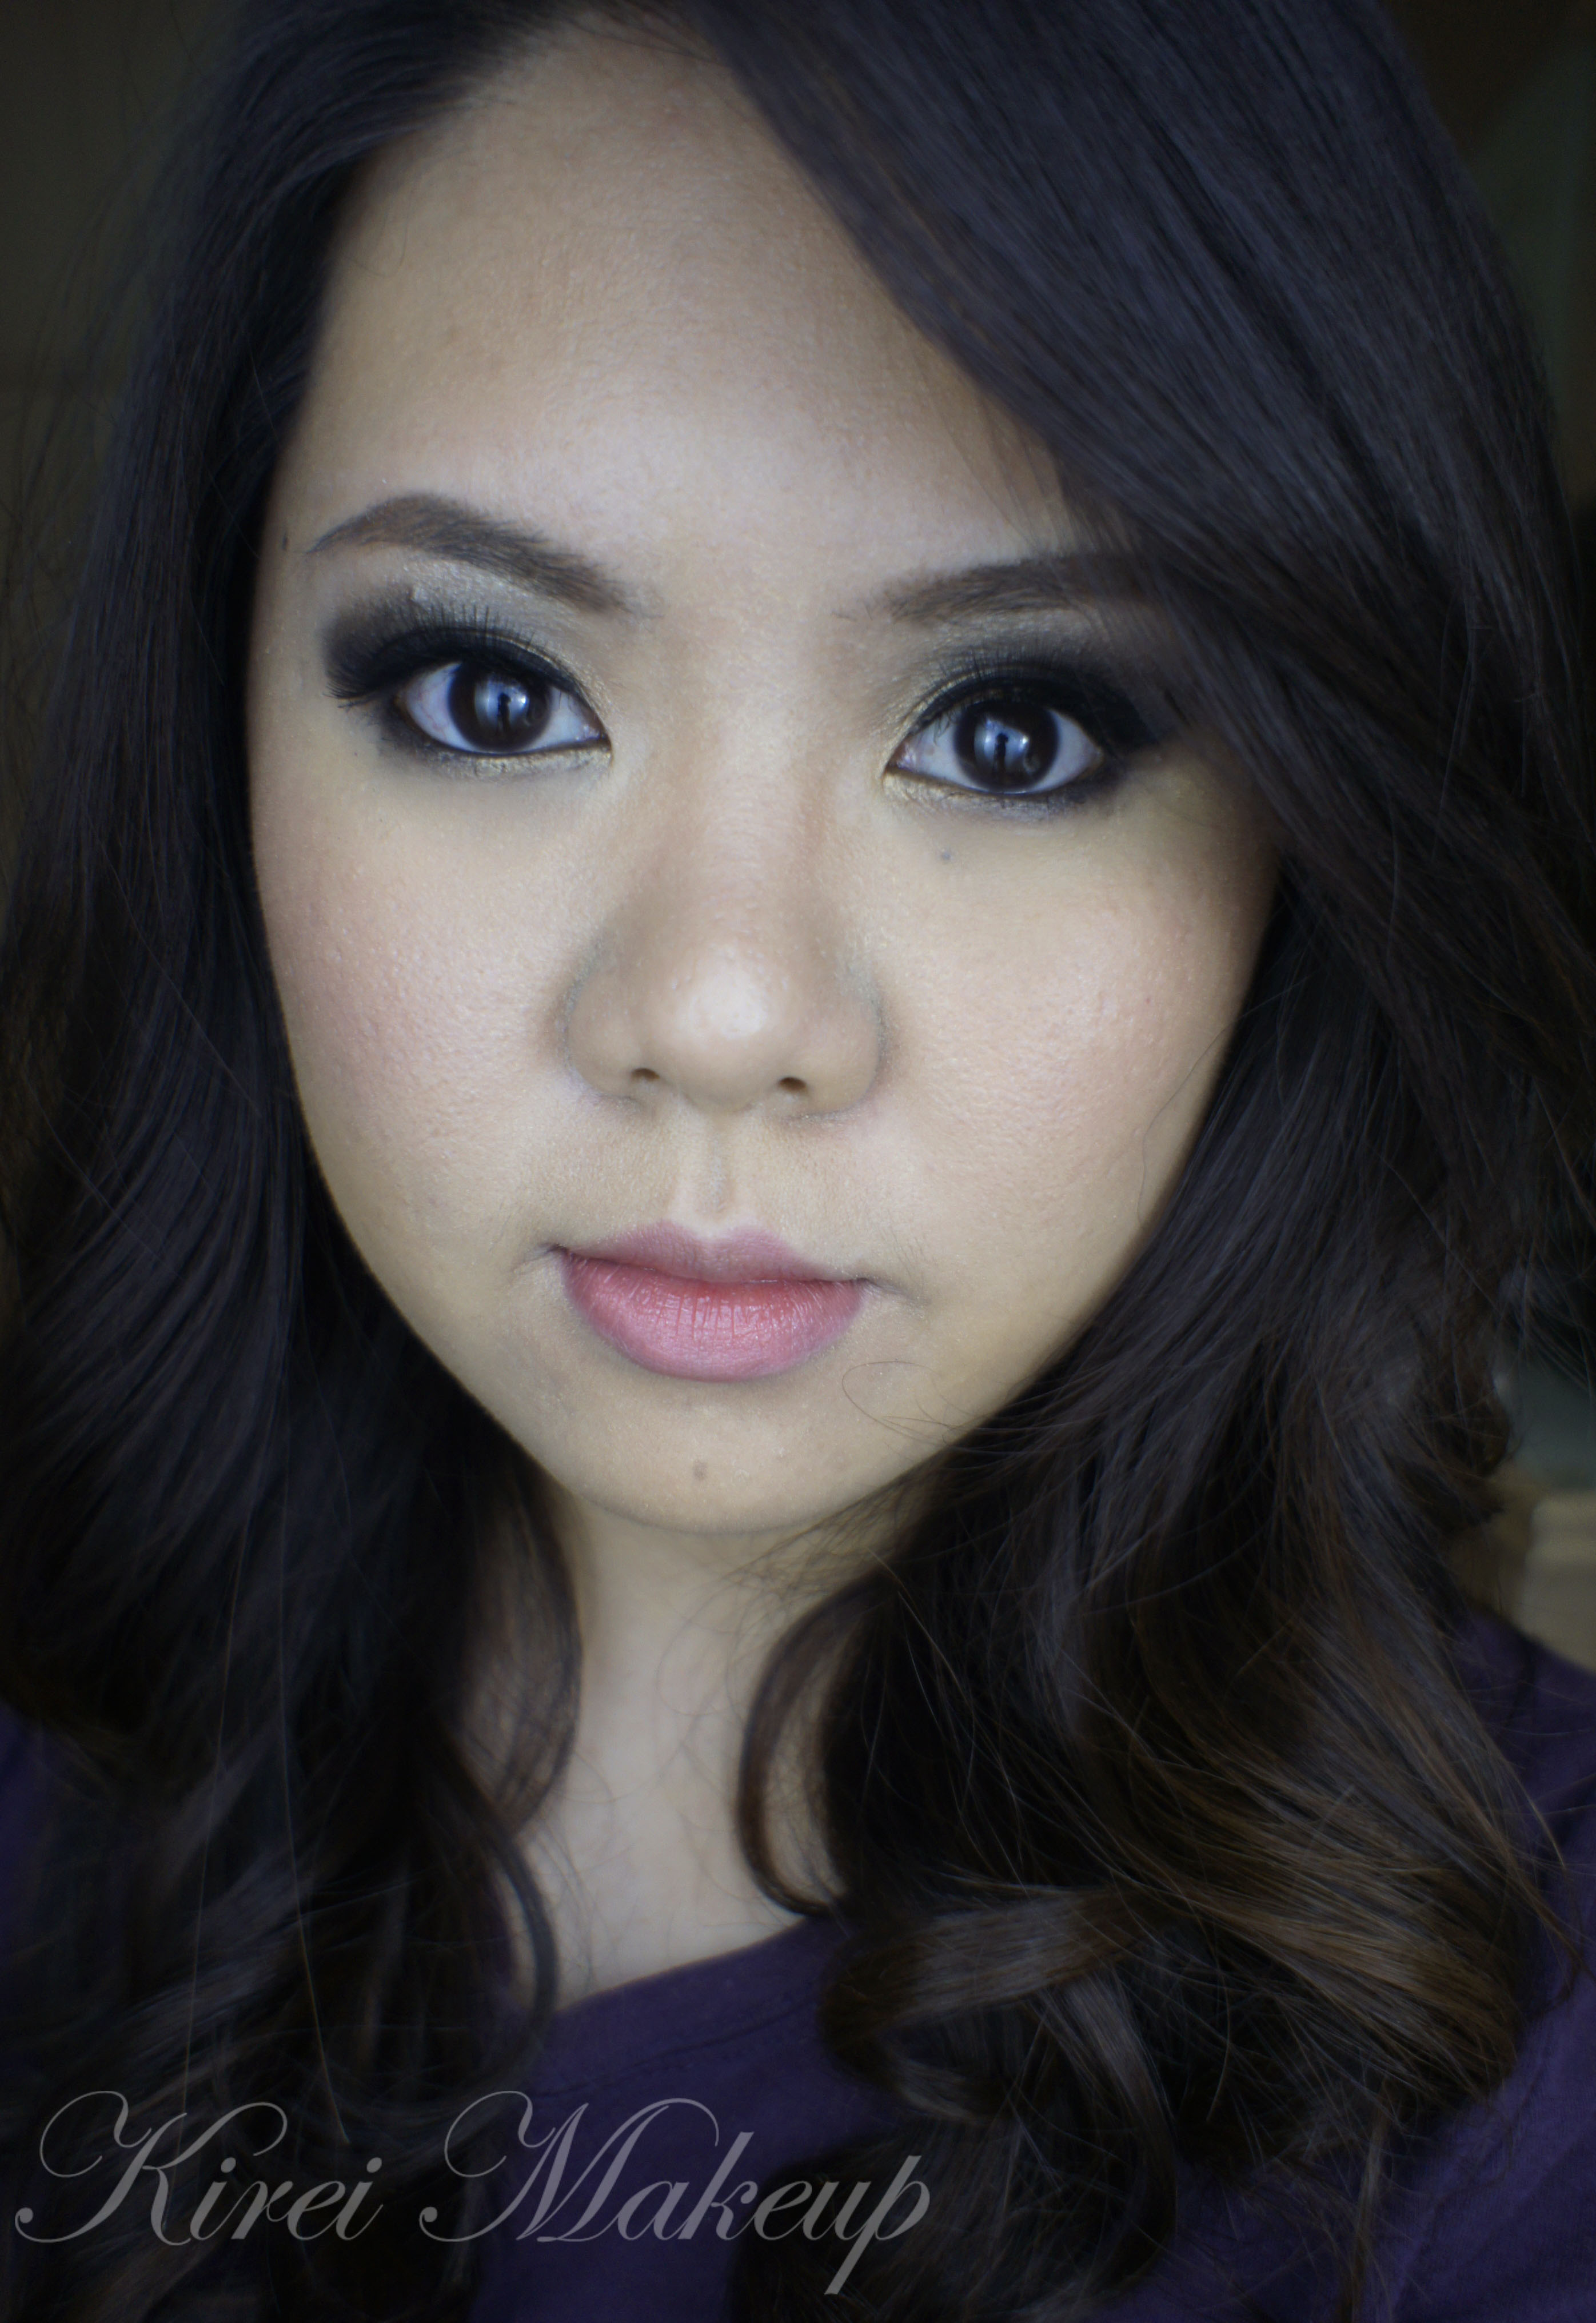
9. I filled it my brows using Dollywinked eyebrow pencil in brown and set it with Anastasia Brow Powder in Brunette.

Ben Nye Soleil Red

10. For the face, I applied MUFE HD foundation in 117 all over my face using Sigma Round Kabuki brush, going over my lips with it as well.

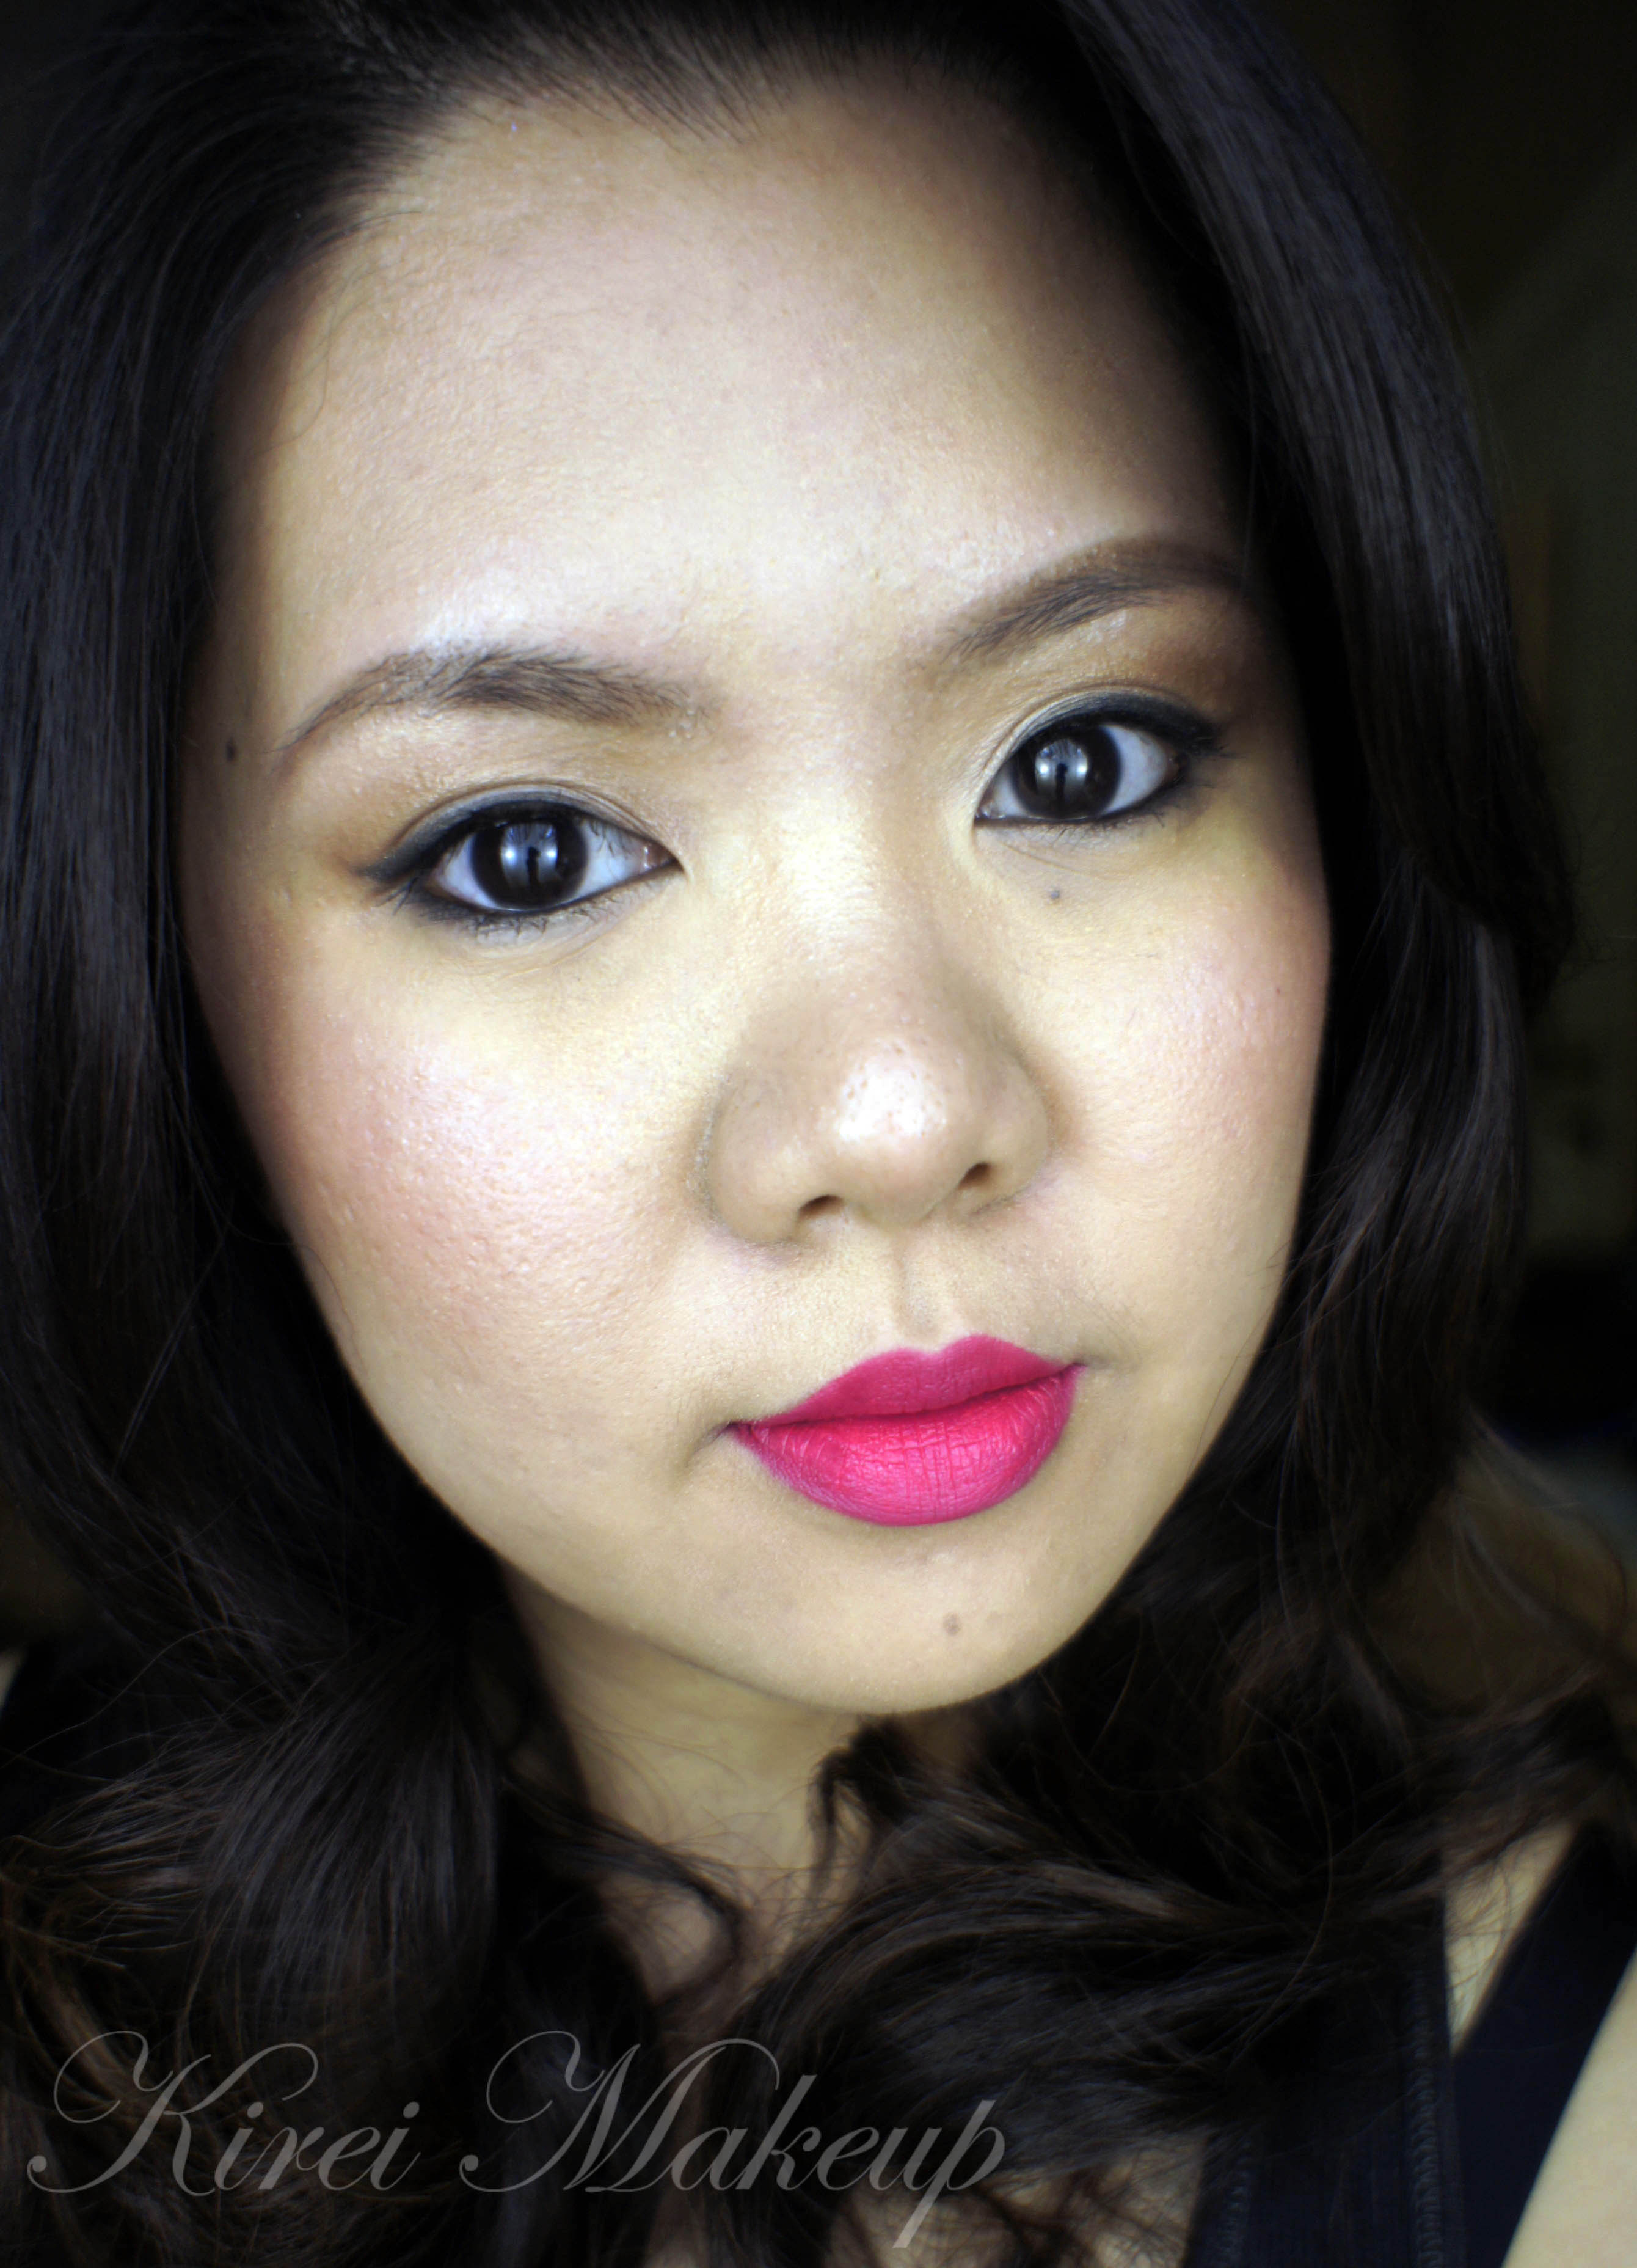
11. I applied Revlon Ravishing Red lipstick on the center of my lips using my ring finger, just dabbing on it.

12. Lastly, I applied Chanel Levres Scintillantes Glossimer no. 165 (Volupte) lightly on my lips and then blot it with a piece of kleenex.

Lee Hi Rose MV Makeup


Neon Pink!

If you want to stand out in a party (or wedding, or prom or anything really), perhaps you’d want to give a bold lips look a try. Today’s tutorial definitely packed a punch of color! I kept the eyes on the low-key to make it wearable during the day. If you like it more intense, you can definitely make it darker, or applied the liner using liquid or gel liner.

It’s really quite a chic look for modern brides! For those who do not want to go with the classic look, and looking for something different, definitely give this a try.

In this tutorial, I used Obsessive Compulsive Cosmetics Lip Tar in Queen. It is described on their website as bright coral pink, but I feel that it’s leaning more towards neon pink. It doesn’t have enough peach in it to make it as coral, I think. Of course, that’s just my opinion.

I’ve done swatches on my lip tars collection and also for the other lip tars tutorial, you can find it here –> Stalker Red, Vintage Red and Marylin Inspired. I’ve also done a fuschia lips and blue eyeliner  in Colour Splash if you want a more colorful look.

Anyhow! Let’s get right into the tutorial!

How-to:

1. I applied Estee Lauder Double Wear Light foundation all over my face using Tarte face foundation brush.

2. To prep my lips, I applied Blistex lip balm.

3. I filled in my brows using Anastasia Brow Powder in Brunette and an angled eyebrow brush.

4. Under the brows, I applied Anastasia highlight brow powder using a flat eyeshadow brush.

5. Using a clean flat eyeshadow brush, I applied MAC Sweet Satisfaction all over the lid.

6. Using Urban Decay blending brush, I applied Urban Decay Smog eyeshadow on the crease.

7. I created a winged liner using Urban Decay Blackout eyeshadow and an angled eyeliner brush.

8. Using MAC 239 brush, I blended the edge of the eyeliner slightly.

9. I also applied Urban Decay Blackout eyeshadow along the lower lashline and used MAC 239 brush to blend it. On the inner corner, I applied MAC Sweet Satisfaction using a clean eyeliner brush.

10. I lined my waterline and tightline using L’oreal Voluminous Smoldering eyeliner.

natural eye makeup

11. For the lips, I remove the remaining of the lip balm. Then, I filled my lips using OCC Queen Lip Tar using a lip brush.

12. I blotted my lips twice using a kleenex to remove the excess lip tar.

13. I applied MAC Fleur Power + MAC Well-Dressed mixture on the cheeks.

Pink Lips

Baked It Up!

Who doesn’t love Urban Decay Half-Baked eyeshadow? It’s bronzy, it’s shiny, it’s shimmery and it’s just gooorgeous! I think it might work for brides-to-be who’d like to go for a smoky look, definitely a party makeup and might look great for prom! It suits every eye colors and skin color. The bronze might pop out even more on medium-dark skin. If you’re pale, opt for brown instead of black eyeshadow if this is too intense.

*Please do ignore the acne on my crease*

How-to:

1. I applied the brown eyeshadow from  Smashbox  Smokeout trio eyeshadow (discontinued) on the eyelid using a flat eyeshadow brush.

2. Using a small shader brush, I applied the black eyeshadow from Smashbox Smokeout trio eyeshadow on the outer V.

3. Using Smashbox bullet brush, I blended the black eyeshadow so there’s no harsh line.

4. Using a flat eyeshadow brush, I applied Urban Decay Half-Baked eyeshadow on the inner lid and center of the lid, carefully blending it towards the black eyeshadow.

5. At this stage, you can opt to add more black eyeshadow, or use the brown eyeshadow to blend the black eyeshadow towards the bronze using the flat eyeshadow brush on step 1.

6. Using a clean small shader brush, I applied Urban Decay Half-Baked eyeshadow on inner part of the lower lid, and the black eyeshadow on the outer part of the lower lid.

7. Using an angled eyeliner brush, I applied Clinique gel liner along the upper lashline as a winged liner.

8. I lined my waterline and tighline using L’oreal Voluminous Smoldering eyeliner.

9. I filled in my brows using Anastasia brow powder in Brunette.

10. I curled my lashes and applied L’oreal Voluminous Carbon Black mascara on both top and bottom lashes.

11. Optional – I applied M.A.C False Eyelashes no. 4 on the upper lashes just for some added drama. Made my eyes look bigger, I think 😀

Party Makeup

12. For the face, I applied yellow corrector from MAC Pro Correct and Conceal palette in Medium. I applied it under my eyes, on the bridge of my nose, on the temples and cupid’s bow.

13. Using MUFE HD foundation and a Sigma Kabuki Round Brush, I buffed the foundation all over my face.

14. I applied Clarins Instant Light Blush in Vitamin Pink on the cheeks using a foundation brush.

15. I powder my T-zone using Cinema Secret loose powder.

16. For the lips, I lined and filled my lips using MAC Dervish lipliner and applied L’oreal Colour Riche Caresse Shine Stain Lipcolour in Eternally Nude on top of it.

Prom Makeup