Grapefruit Acne Spot Treatment

I recently received a Grapefruit Acne Spot Treatment from Citrus Clear, and tested it for a week. Usually with skincare product, I’d prefer to test it for 4-8 weeks before giving a review, but I wanted to share this amazing product with you guys! The result was pretty astounding, that I couldn’t wait to give this a review. Anyways, since I did not have any breakouts on my face, I tested it on my chest where there were couple bumps and redness there.

Grapefruit Acne Spot Treatment review
Grapefruit Acne Spot Treatment

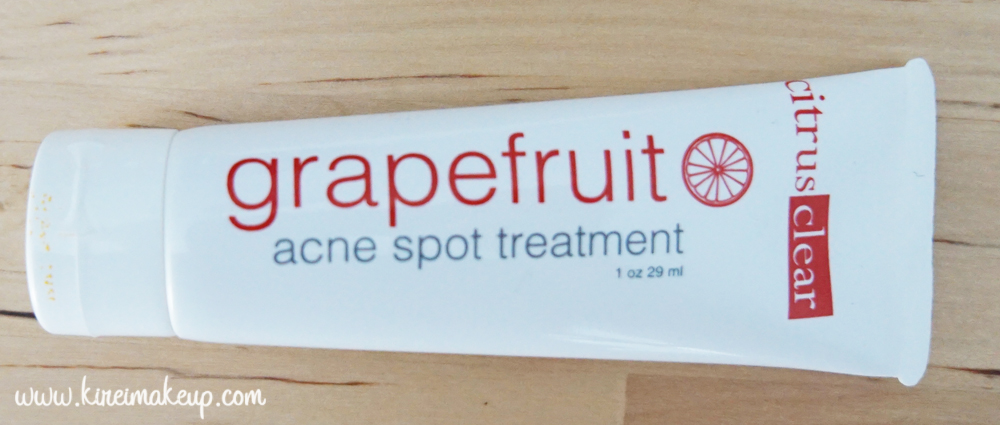
The Grapefruit Acne Spot Treatment is part of Citrus Clear acne treatment program. There are other products that will complement the spot treatment. The best part about Citrus Clear is the fact that this is “a natural and holistic” skin care line. Their products does NOT contain: “petrochemicals, phthalates, parabens, sulfates, mineral oils, silicone, synthetic fragrance, color dyes.”

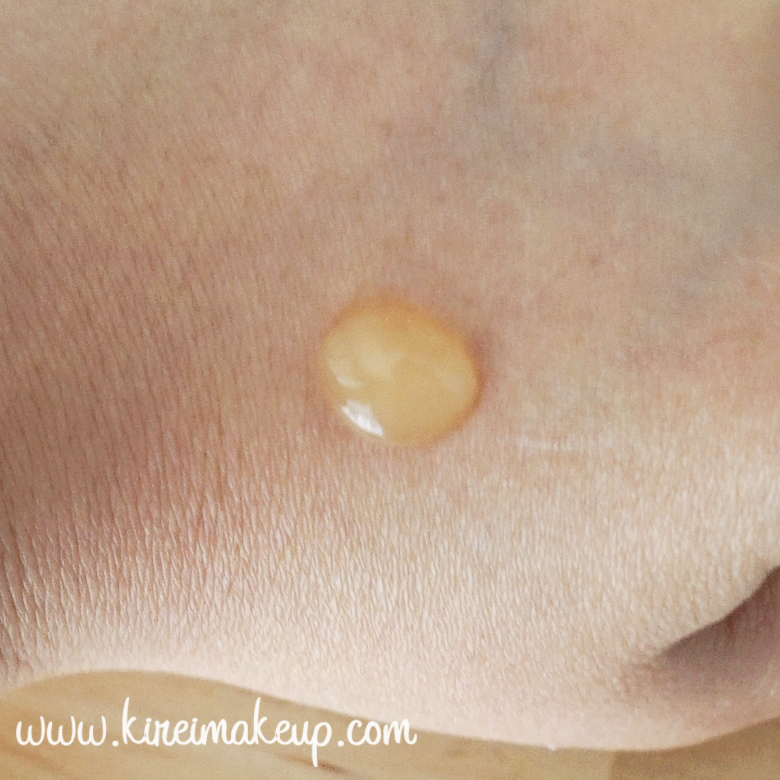
This is the only spot treatment, that I’ve tried so far, that does not cause any redness and itchiness. Usually, any spot treatment that contains salicylic acid or benzoyl peroxide cause a lot of redness and itchiness, as well as dryness. However, this Grapefruit Spot Treatment does not cause any of it, even though it does contain Salicylic Acid. Huge plus for me!

Grapefruit Acne Spot Treatment
Gel-like Grapefruit Acne Spot Treatment

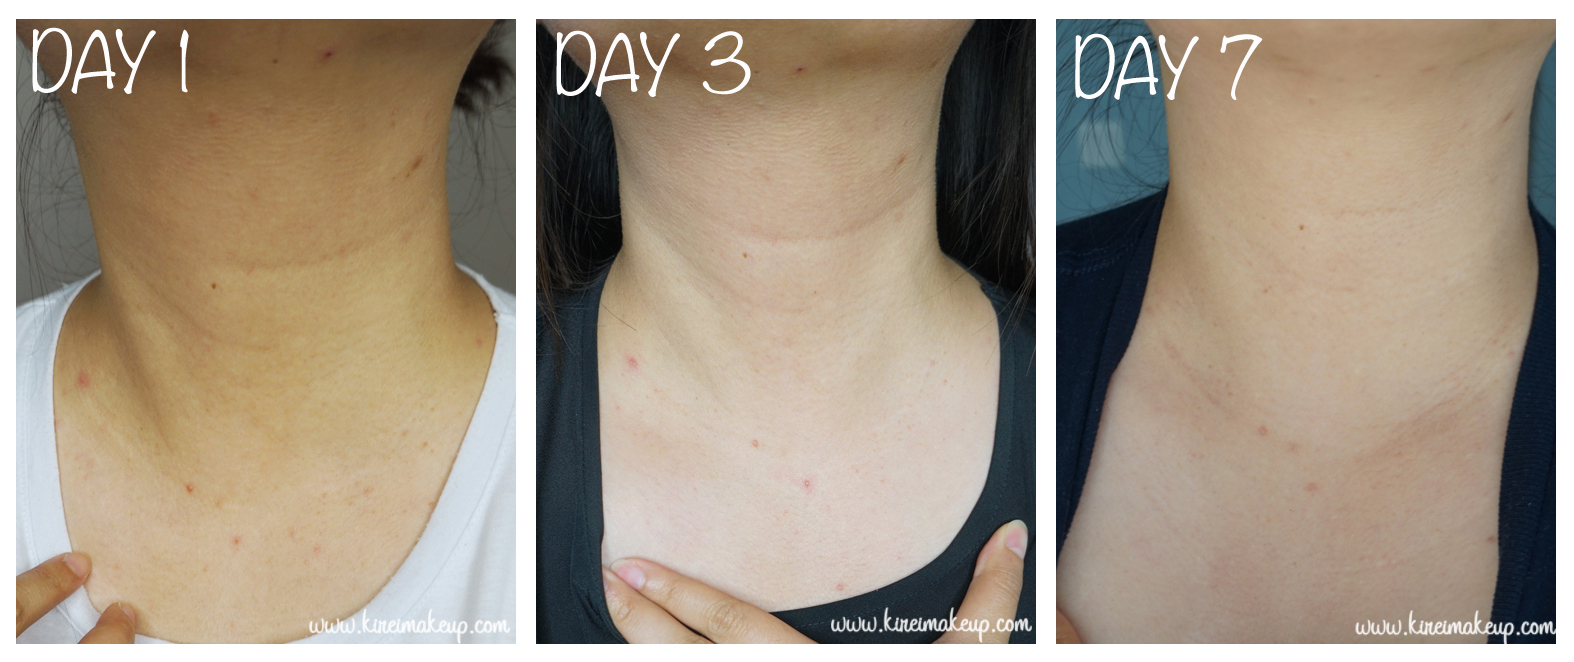
I’ve used this product only for a week, and the pictures below show you on Day 1, Day 3, and Day 7. I’m quite impressed with how quick the little bumps went away in less than a week. The bigger ones are barely noticeable now, but I believe if I keep using it, the breakout will clear out soon enough.

I did put this product on N, he had a huge pimple near his jaw-line. The bump reduced in size drastically, and the redness went away. This is a great spot acne treatment. You can apply this throughout the day (up to 5x/day), but I usually apply it at night only.

I definitely recommend this product for those who are looking for an acne treatment. You can buy this over at Citrus Clear for $12.99 (29ml).

Grapefruit Acne Spot Treatment review
Before and After

Click picture above to enlarge it.


Disclaimer: Even though this product was sent to me for consideration, but my review is based on my own honest opinion and experience. I do not gain any monetary compensation for this review. This post reflects my own opinion and is based on my own experience. Please do a test patch before trying on any skincare product to see if you have any skin sensitivity/allergies towards the product. Different people react differently on a product. What works for me, might not work for you. I shall not be held responsible should any negative reactions occur to you.

Rose Gold Holiday Makeup

I’ve done gold/brown makeup, a silver smoky eyes makeup, natural looking makeup, as well as bold lips holiday makeup. Today, I wanted to do another more wearable, soft and easy holiday makeup. I used Rose Gold since I think it’s fun and feminine. This tutorial is for those of you who are girly, and want to look more on the natural low-key for the holiday. I also feel that this look will be good for those with deep set eyes.

The idea is similar to the Fresh Dewy makeup tutorial post couple days a go. The eyes are simple and high in shimmer, the face is semi-matte and natural finish. This look suits those who don’t like to wear heavy makeup. Everything is very simple and light. You can skip the eyeliner altogether, and just wear mascara. I just like the look of a cat/winged eyeliner to frame my eyes.  Bobbi Brown Rose Gold

How-to:

1. I applied Bobbi Brown Rose Gold long wearing cream eyeshadow on my eyelid using my ring finger.

2. Using a flat eyeshadow, I applied the middle color from the Bobbi Brown Shimmer Brick in Rose Gold on my eyelid to add extra shimmer.

3. Using a fluffy blending brush, I applied the darkest rose gold shimmer from the Bobbi Brown Shimmer Brick in Rose Gold on the crease.

4. Using a small shader brush, I applied L’oreal Infallible eyeshadow in Bronzed Taupe on the outer V.

5. I applied the same rose color on step no. 2 on the lower lid, and then L’oreal Bronzed Taupe on the outer half of the lower lid.

6. Using MUFE aqua cream shadow no. 11 on the waterline just to add the extra gold in it. Of course you do not have to use gold for this. You can use black, beige, white, or anything you want!

7. I created a winged eyeliner using Kanebo Kate Super Sharp eyeliner on the upper lash line.

8. I filled my brows using Anastasia brow wiz in Brunette.

9. I curled my lashes and applied mascara, as well as Ardell no. 109 false eyelashes on the upper lashes. I also applied mascara on the lower lashes.

Rose Gold bobbi brown

10. For the face, I applied L’oreal Lumi Magique foundation in W4 all over my face using CoverFX foundation brush.

11. Under my eyes, I applied concealer in MAC Pro Conceal/Correct palette in Medium.

12. I powdered under my eyes using CoverFX translucent loose powder.

13. I applied MAC Dainty mineralized blush on my cheeks.

14. I also applied Diorskin Shimmer Star Amber Diamond on the bridge of my nose and on my cheekbones.

15. On the lips, I applied Revlon Colorstay Ultimate Suede in Socialite, and added a little bit of L’occitane Lip Balm (the one with olive in it).

Fiery

As mentioned previously and on twitter, I’m having a breakout on my face and so I decided to do just a tutorial for the eyes. I apologize, but there were 2 very persistent ones right above my lips and 1 on the cheek that’s super painful. Anyhow, I hope those pesky pimples will be gone soon. I also just ran out of my benzoyl peroxide (I bought one from Canada), and couldn’t find a replacement for it in Jakarta yet. If anyone has any recommendation, let me know.

For the tutorial, I wanted to use my Sleek Makeup Ultra Matte Brights v1 palette since I find it quite hard to use this palette. I find a difficult time blending the eyeshadow from this palette, and since the colors are matte, I also find it quite hard to create depth for my eyes. However, I actually think I quite nailed this look. I love the combination of the yellow and the bright pink. I know this might not be a wearable look since it’s extremely bright, but I had a fun time doing it. Might work for Halloween or for whoever love wearing bright makeup.

How-to:

1. Using a synthetic brush, I applied PAC face paint cream in Yellow all over my eyelid.

2. I applied PAC face paint cream in Shocking Pink on the outer V and on the crease using a synthetic art brush.

3. Using a flat eyeshadow brush, I applied Bammi from Sleek Makeup iDivine v1 palette on the eyelid.

4. Using a small fluffy brush, I applied Pucker from the same palette on the outer V and on the crease lightly.

5. Using a smaller more dense brush (similar to a small shader brush), I applied Sugarlite from the palette on the crease only.

6. I applied Sugarlite on the lower lid using a smudge brush.

7. (not in picture), I also applied a black matte eyeshadow brush on the outer corner of the lower lid using an angled brush.

8. Using Sigma eyeliner brush, I applied MUFE Aqua Black along the upper lash line creating a winged liner.

9. I lined my waterline using L’oreal Voluminous Smoldering eyeliner pencil.

10. I filled in my brows using Shu Uemura Hard Formula 9 Brow Pencil.

11. I curled my lashes and applied Maybelline Volume Express Turbo Boost on both upper and lower lashes.

 Sleek Makeup Matte Brights v1

Warm Brown Smoky

Who says we have to stick to black and grey in creating a smoky eyes look? Brown gives a more softer approach, and definitely warmed up the face. Brown smoky eyes will look great on any eye color, especially blue and green! In this tutorial, I layered a few different browns to warm up the eyes and it’s okay if it is messy! It gives that bedroom eye vibe, without looking like a panda ;). If you’re having difficulty doing a smoky eyes makeup using black, try using brown, it’s more forgiving.

Funny enough, quite a few of brides also like this type of makeup, especially for those who prefer a more natural look. I think this look goes with anything! Bridal, prom, date, night-out. It’s so simple and easy without being too overpowering.

How-to:

1. Using a flat eyeshadow brush, I applied MAC All That Glitters all over the lid.

2. Using a fluffy blending brush, I applied MAC Mulch on the outer corner of the lid.

3. Using a small shader brush, I applied MAC Sketch on the outer V and crease of the eye.

4. Using a small fluggy blending brush, I dipped the brush very lightly into MAC Bronze eyeshadow and blended it on the crease.

5. I used a clean blending brush to blend the edge of the crease.

6. Using an angled eyeliner brush, I applied MAC Woodwinked on the inner corner of the lower lid and applied MAC Mulch on the outer corner of the lower lid.

7. I lined my waterline using MAC Chromagraphic eyeliner in NC30.

8. Along the upper lashline, I applied MAC Smolder eyeliner and smudged it using a  pencil brush. I also added Smashbox Blackout eyeshadow along the line to set it using an angled eyebrow brush.

9. Using a clean blending brush, I blended the edge of the outer V to erase the harsh line.

10. I filled my brows in using Chanel brow pencil in Mistre.

11. I curled my lashes and applied Maybelline Volume Express Turbo Boost mascara on the upper and lower lashes.

12. Below the brows, I applied MAC Blanc Type lightly using a flat eyeshadow brush.

bridal makeup

13. For the face, I applied MUFE HD Foundation using a Sigma Round Kabuki brush.

14. For the under eyes, I applied MUFE concealer.

15 For the contour, I applied MAC Shadowy on the hollows of the cheeks, temples and sides of the nose.

16. For the blush, I mixed MAC Well-Dressed and MAC Fleur Power and applied it on the cheeks.

17. For the lips, I applied Chanel Levres Scintillantes Glossimer no. 165 (Volupte).

asian smoky eyes