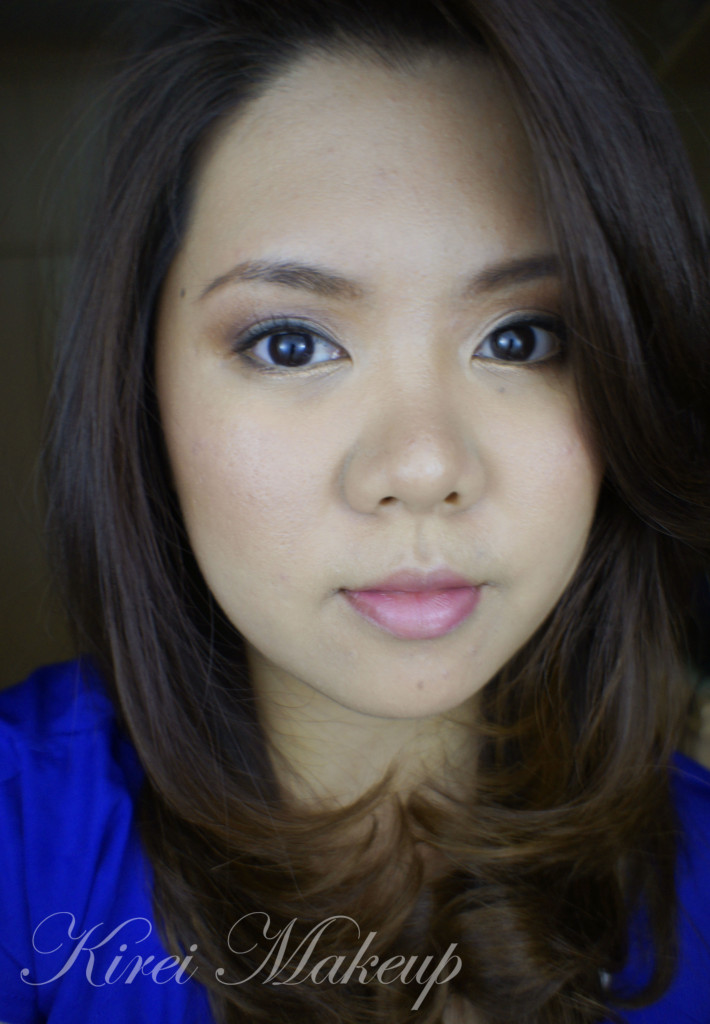
Who says we have to stick to black and grey in creating a smoky eyes look? Brown gives a more softer approach, and definitely warmed up the face. Brown smoky eyes will look great on any eye color, especially blue and green! In this tutorial, I layered a few different browns to warm up the eyes and it’s okay if it is messy! It gives that bedroom eye vibe, without looking like a panda ;). If you’re having difficulty doing a smoky eyes makeup using black, try using brown, it’s more forgiving.
Funny enough, quite a few of brides also like this type of makeup, especially for those who prefer a more natural look. I think this look goes with anything! Bridal, prom, date, night-out. It’s so simple and easy without being too overpowering.
How-to:
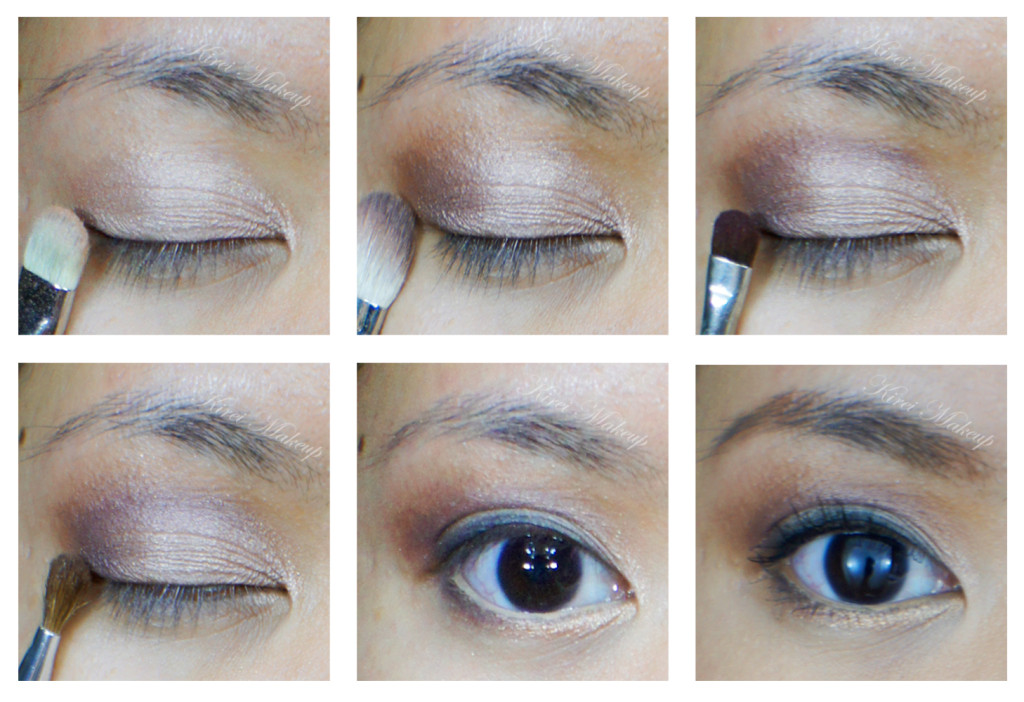
1. Using a flat eyeshadow brush, I applied MAC All That Glitters all over the lid.
2. Using a fluffy blending brush, I applied MAC Mulch on the outer corner of the lid.
3. Using a small shader brush, I applied MAC Sketch on the outer V and crease of the eye.
4. Using a small fluggy blending brush, I dipped the brush very lightly into MAC Bronze eyeshadow and blended it on the crease.
5. I used a clean blending brush to blend the edge of the crease.
6. Using an angled eyeliner brush, I applied MAC Woodwinked on the inner corner of the lower lid and applied MAC Mulch on the outer corner of the lower lid.
7. I lined my waterline using MAC Chromagraphic eyeliner in NC30.
8. Along the upper lashline, I applied MAC Smolder eyeliner and smudged it using a pencil brush. I also added Smashbox Blackout eyeshadow along the line to set it using an angled eyebrow brush.
9. Using a clean blending brush, I blended the edge of the outer V to erase the harsh line.
10. I filled my brows in using Chanel brow pencil in Mistre.
11. I curled my lashes and applied Maybelline Volume Express Turbo Boost mascara on the upper and lower lashes.
12. Below the brows, I applied MAC Blanc Type lightly using a flat eyeshadow brush.
13. For the face, I applied MUFE HD Foundation using a Sigma Round Kabuki brush.
14. For the under eyes, I applied MUFE concealer.
15 For the contour, I applied MAC Shadowy on the hollows of the cheeks, temples and sides of the nose.
16. For the blush, I mixed MAC Well-Dressed and MAC Fleur Power and applied it on the cheeks.
17. For the lips, I applied Chanel Levres Scintillantes Glossimer no. 165 (Volupte).


