We are almost in mid-December, already?! Anyways, most of you must have a lot of parties and events to attend to, so today’s post is a Day to Night Party Makeup Tutorial! This is one way of changing your day makeup to night makeup quickly, and all you need is a lipstick. You can also add a black eyeliner if you prefer, just like what I did for this post, but if you don’t it’s not a big deal.
For this look, I applied falsies just because my real lashes are not that full. You can skip the falsies altogether, I just do it because it looks better in pictures since my real lashes are not full in volume and not curly.
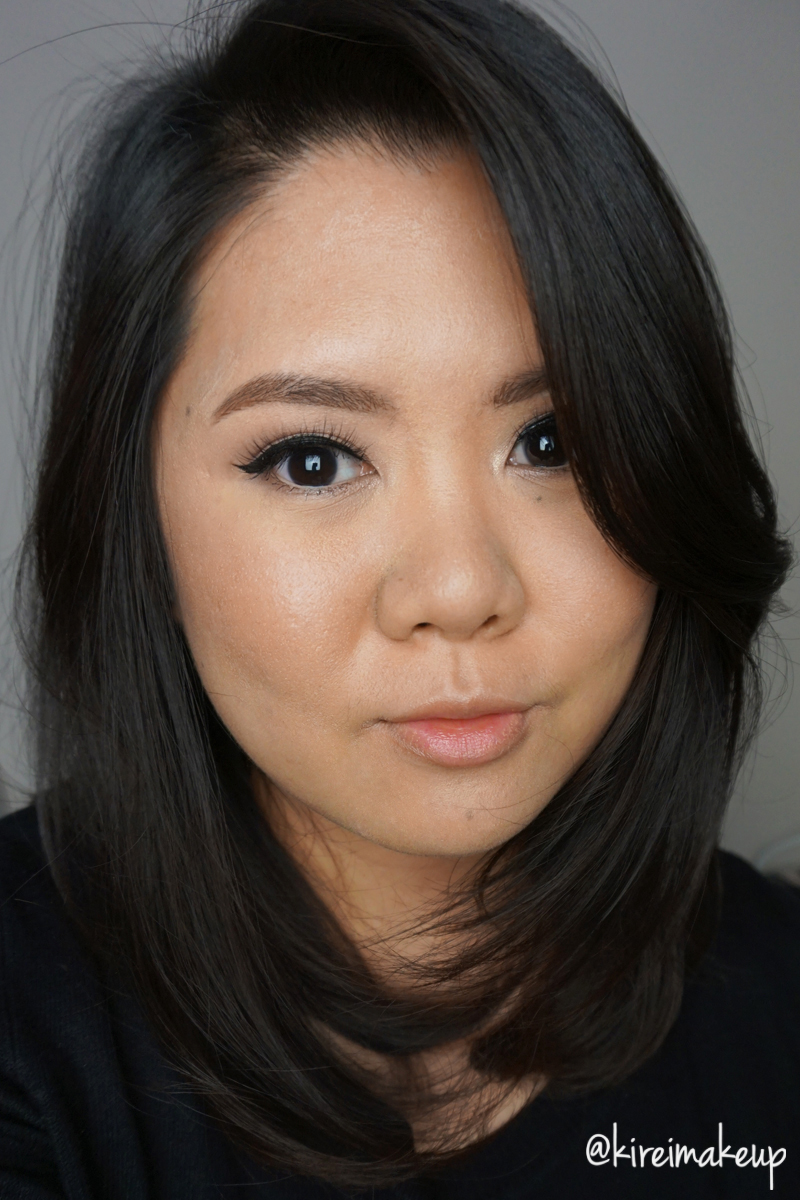
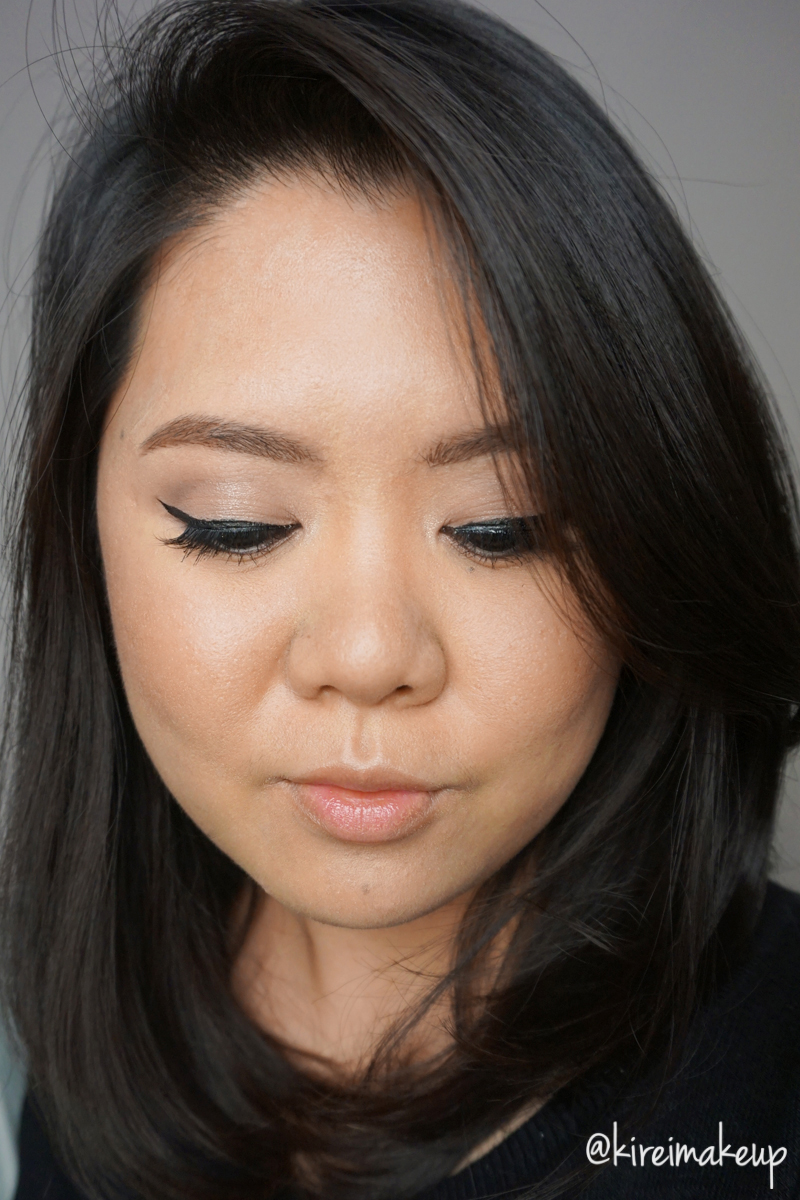
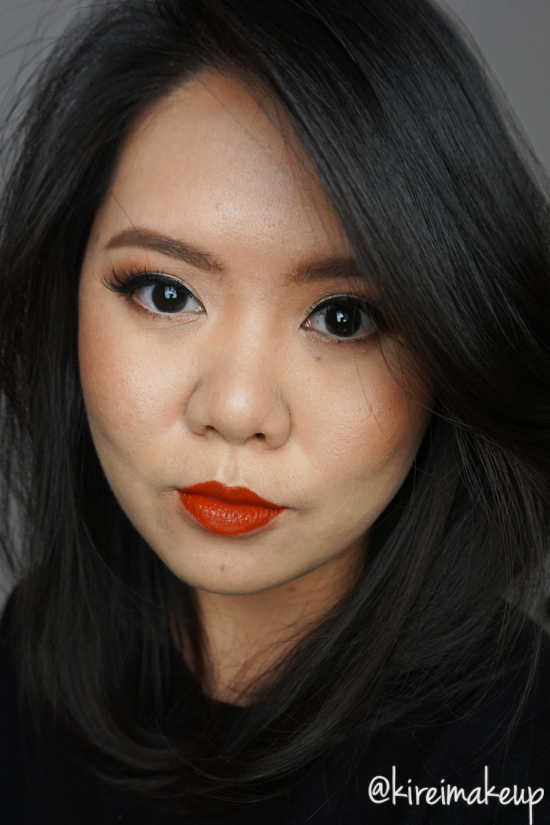
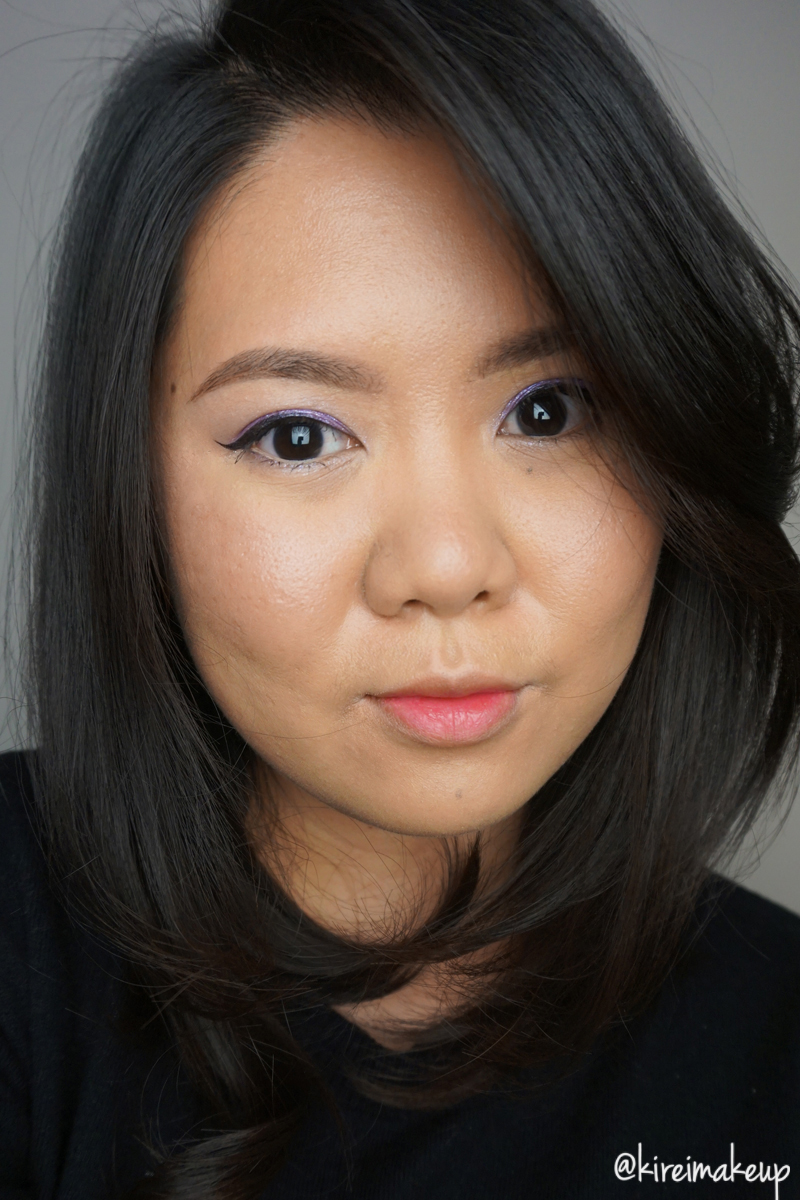
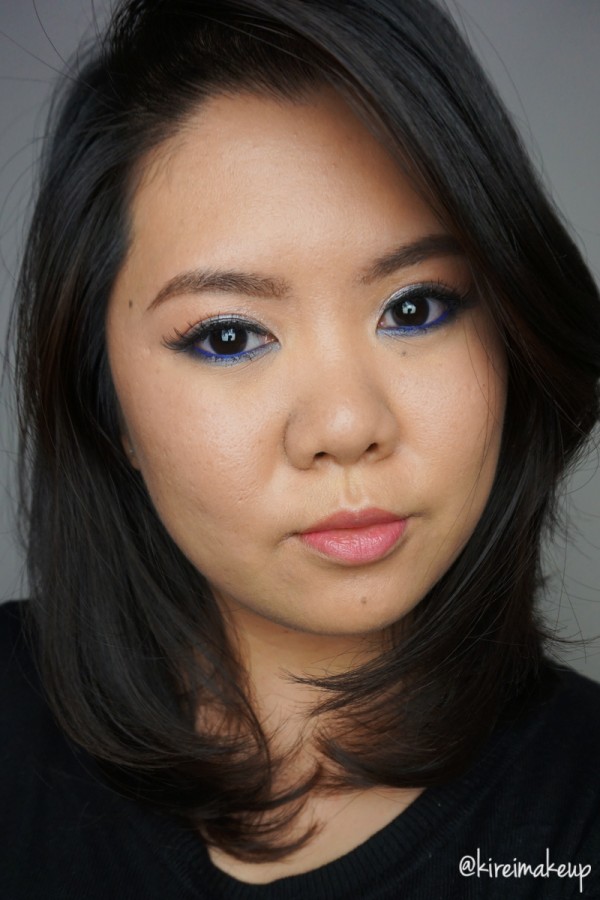
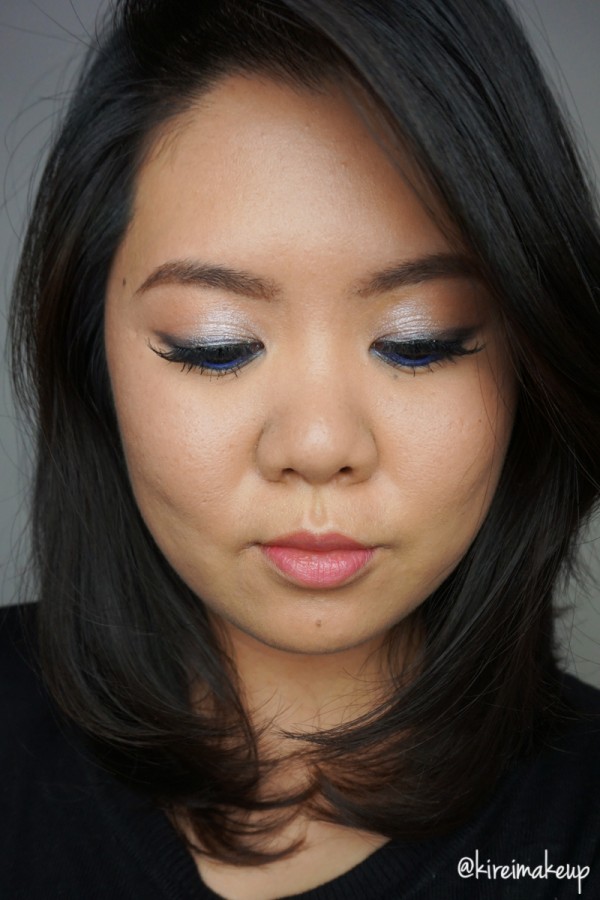
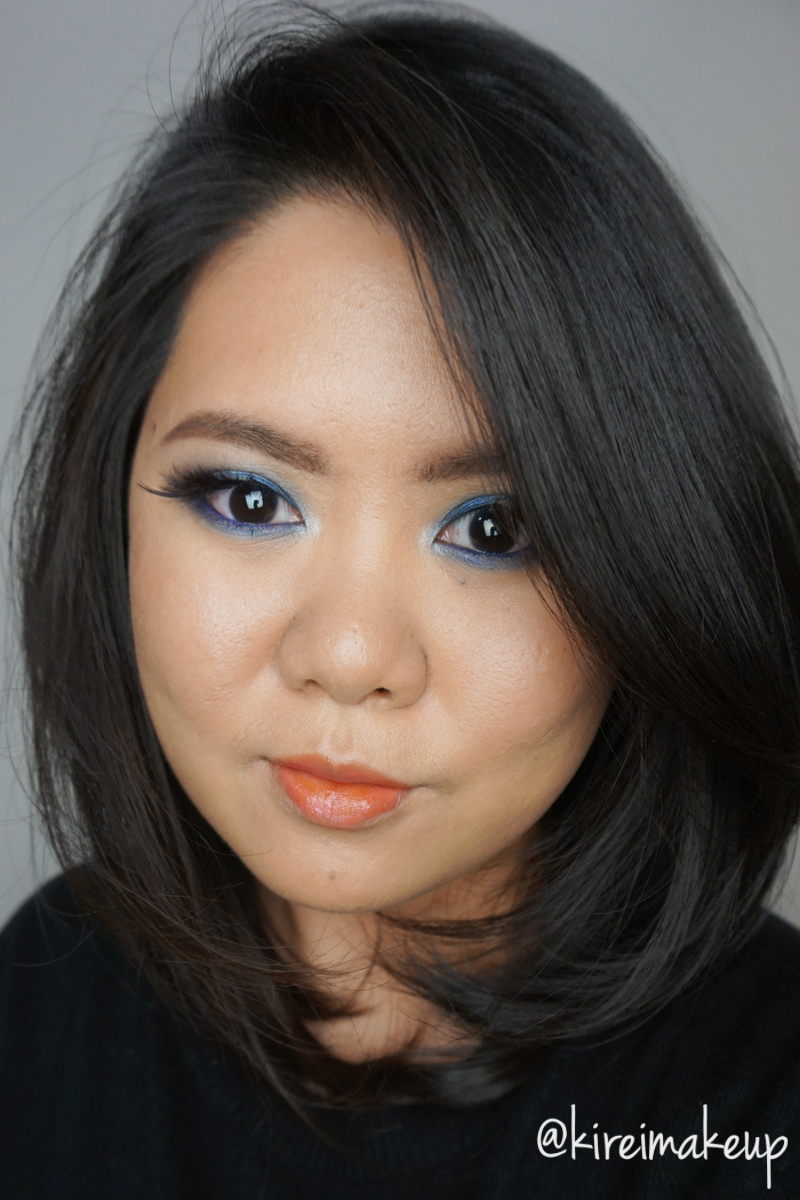
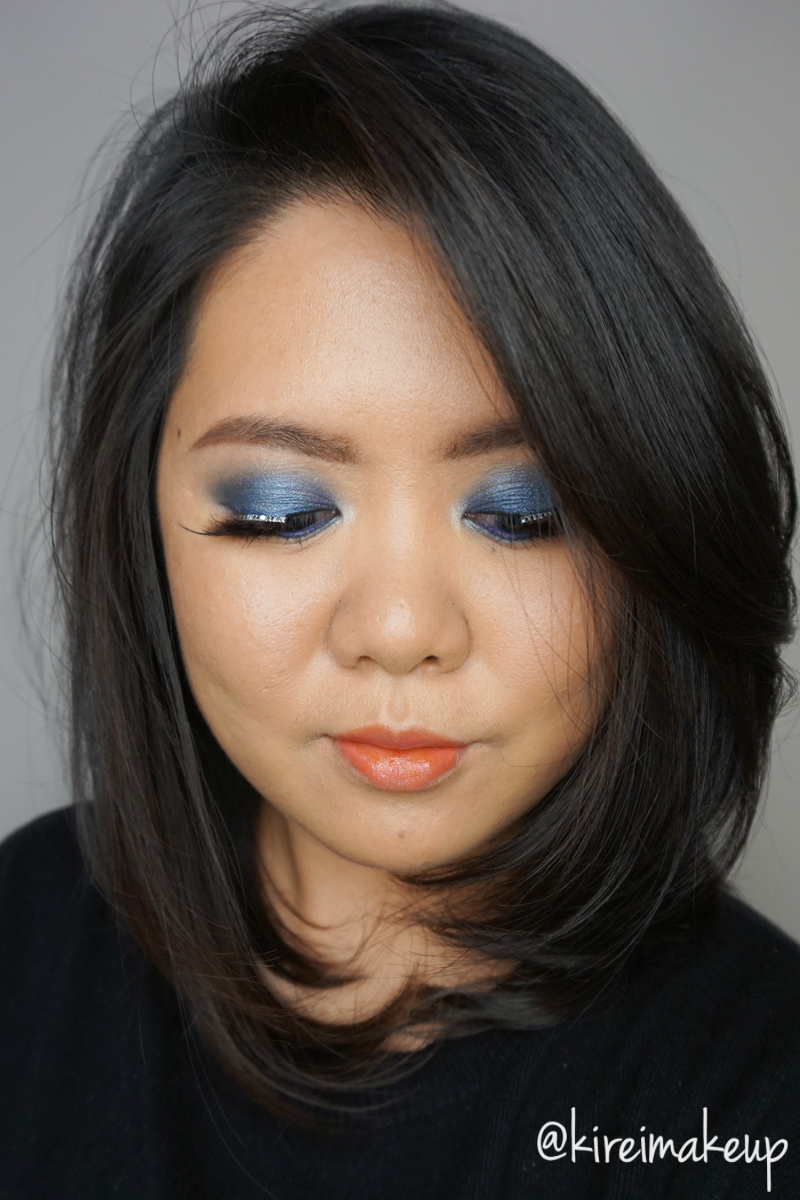
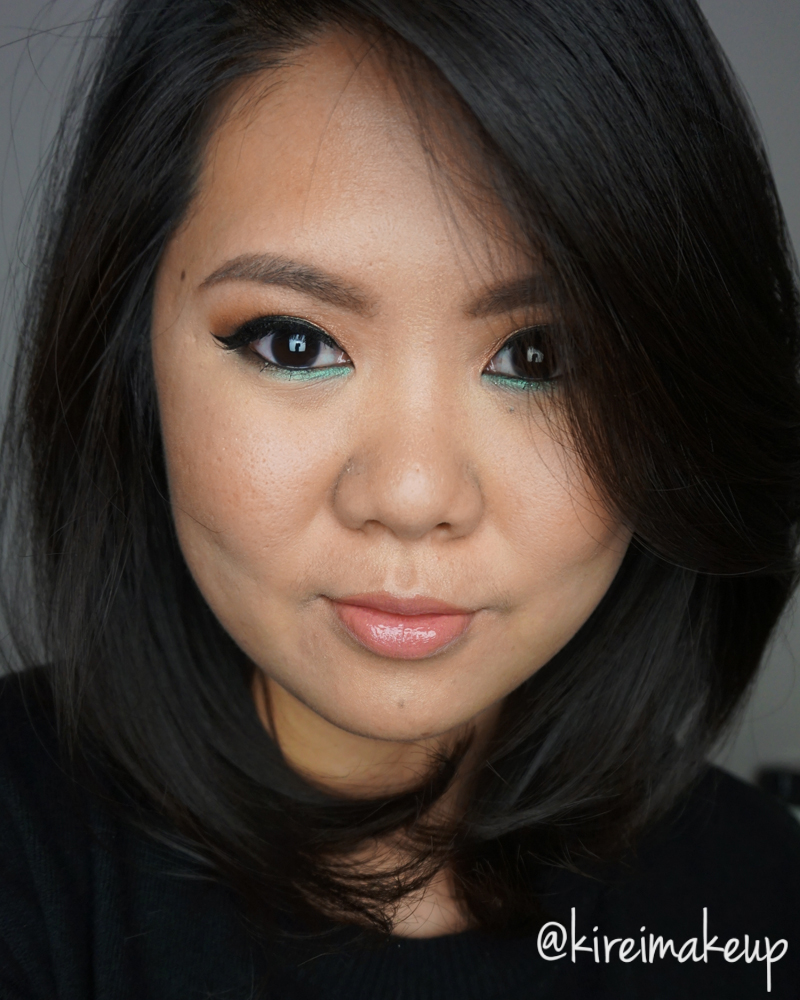
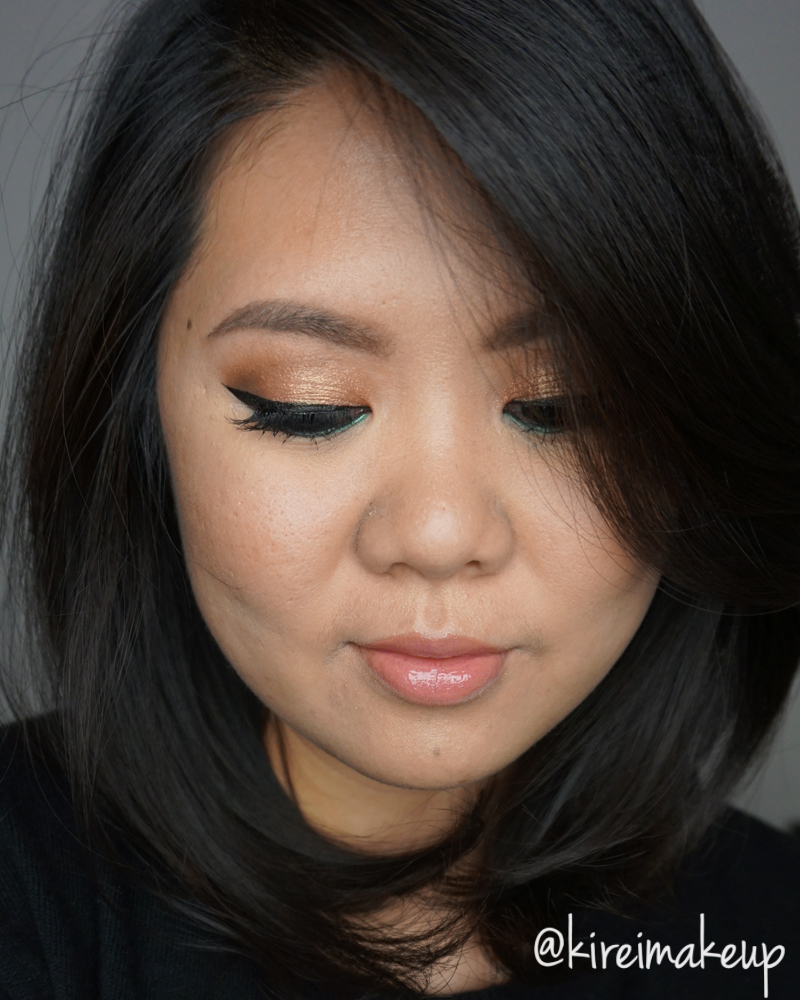
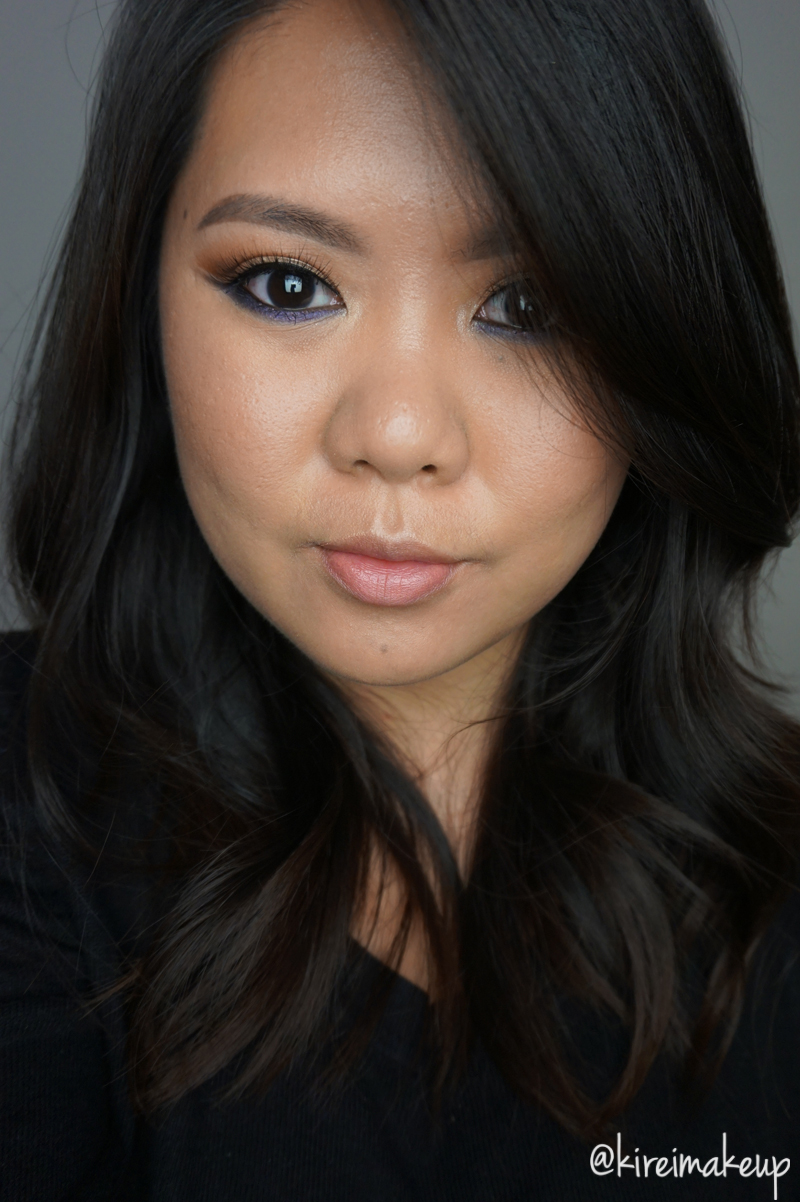
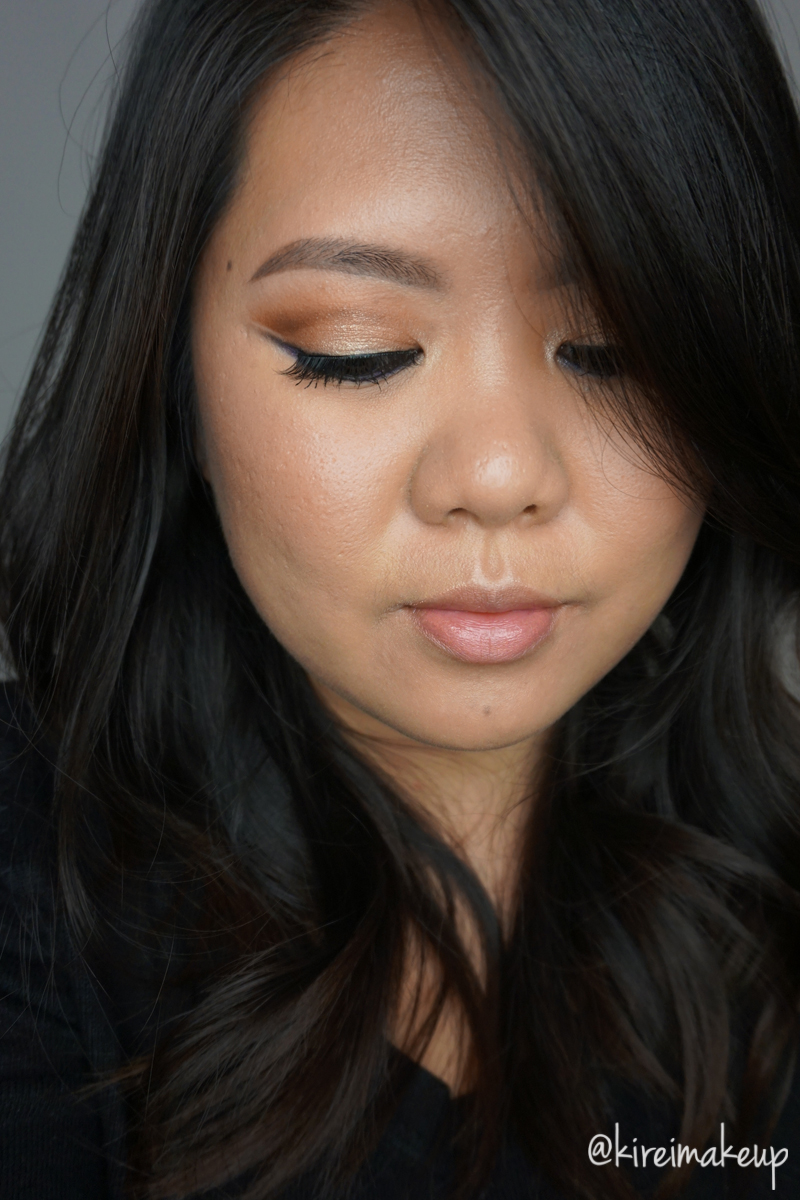
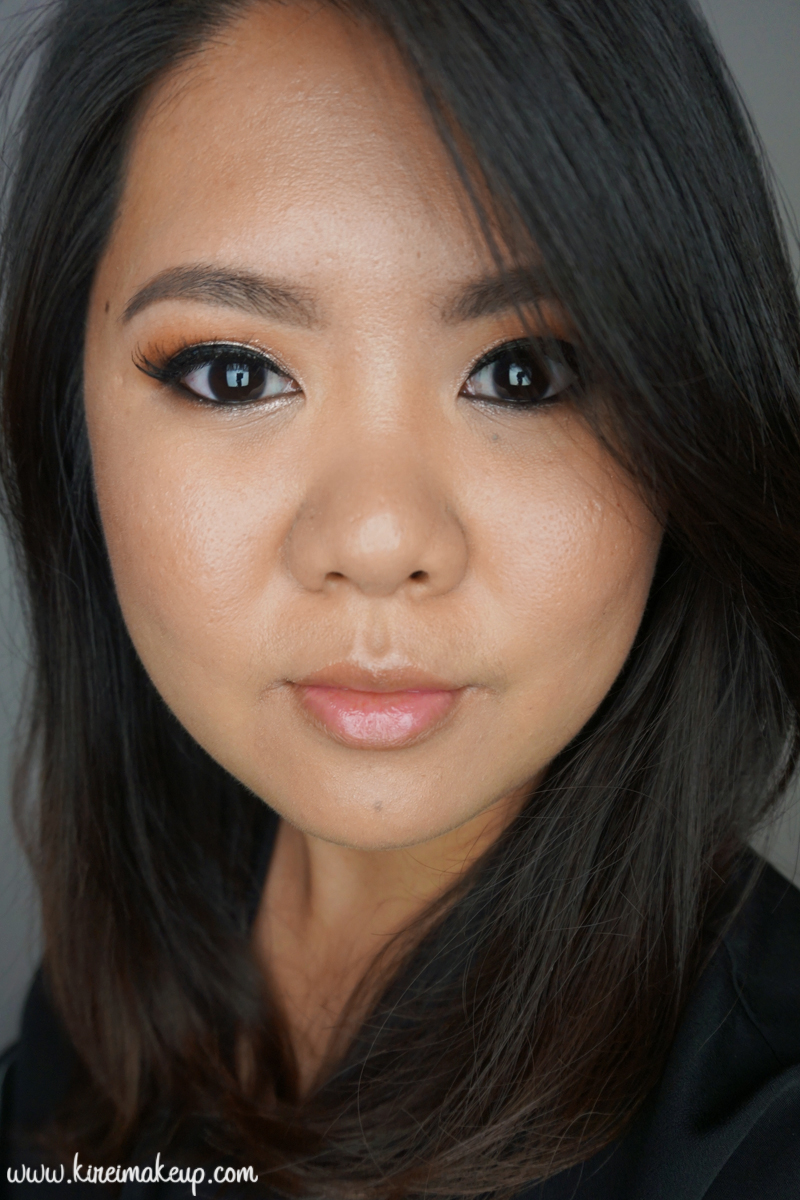
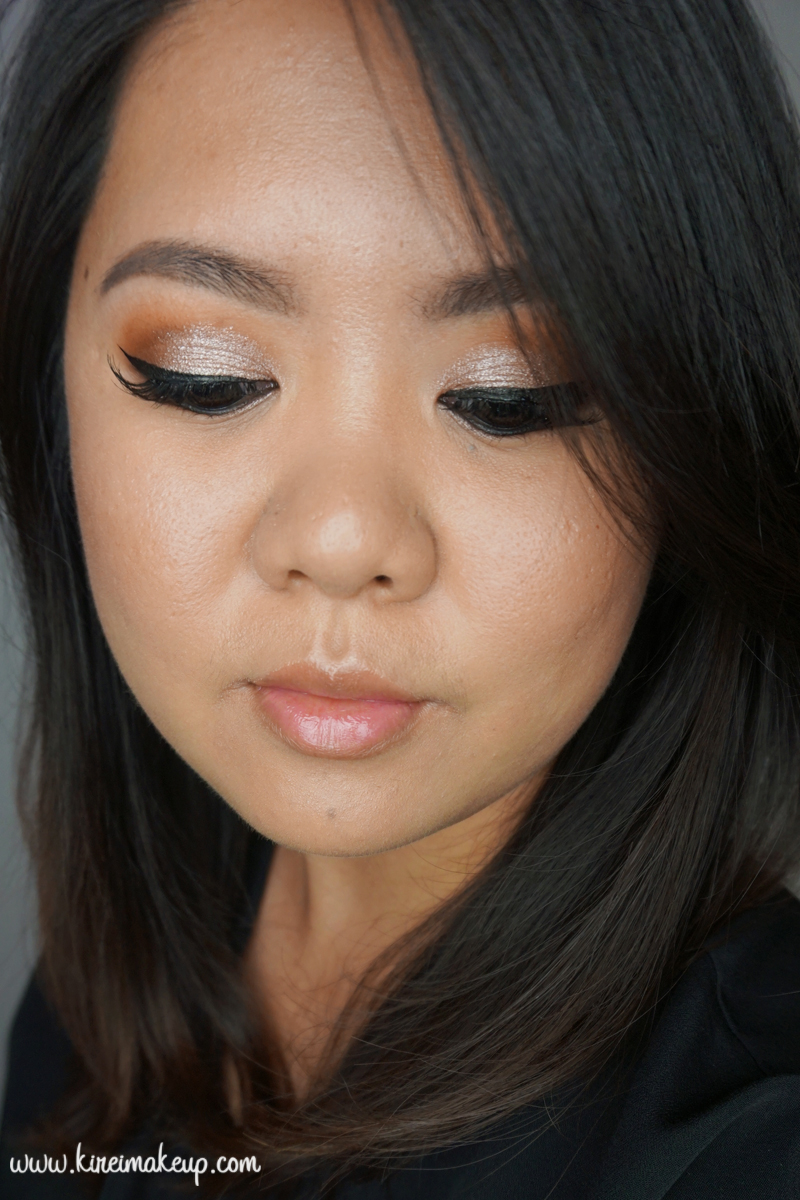
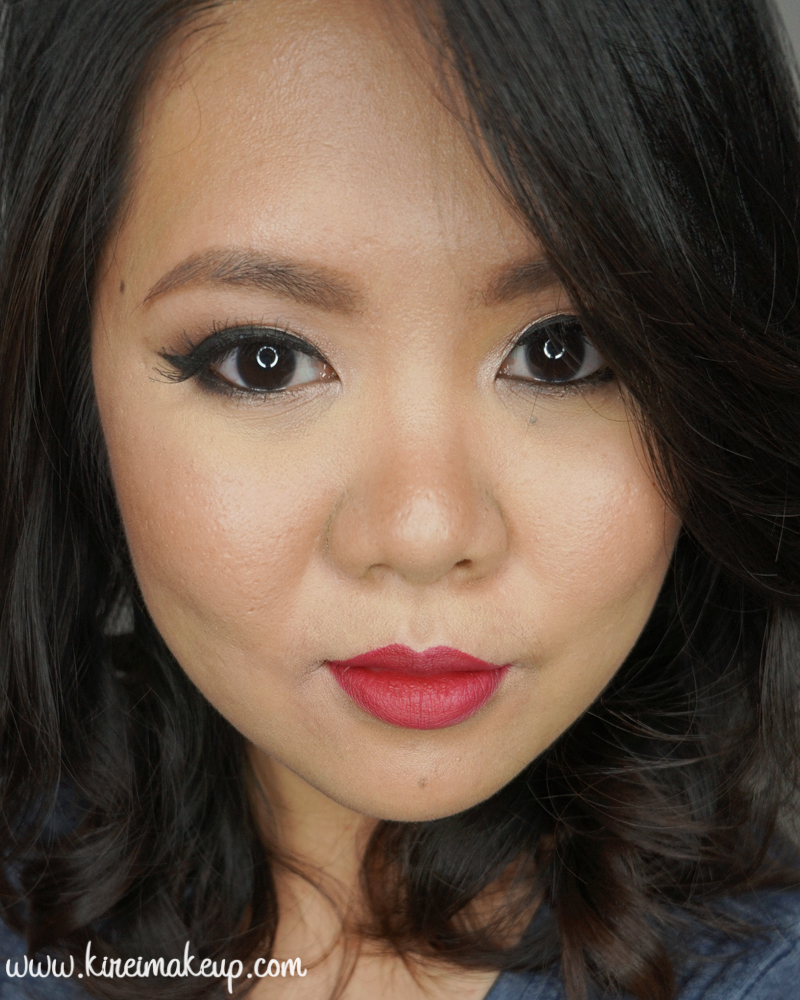
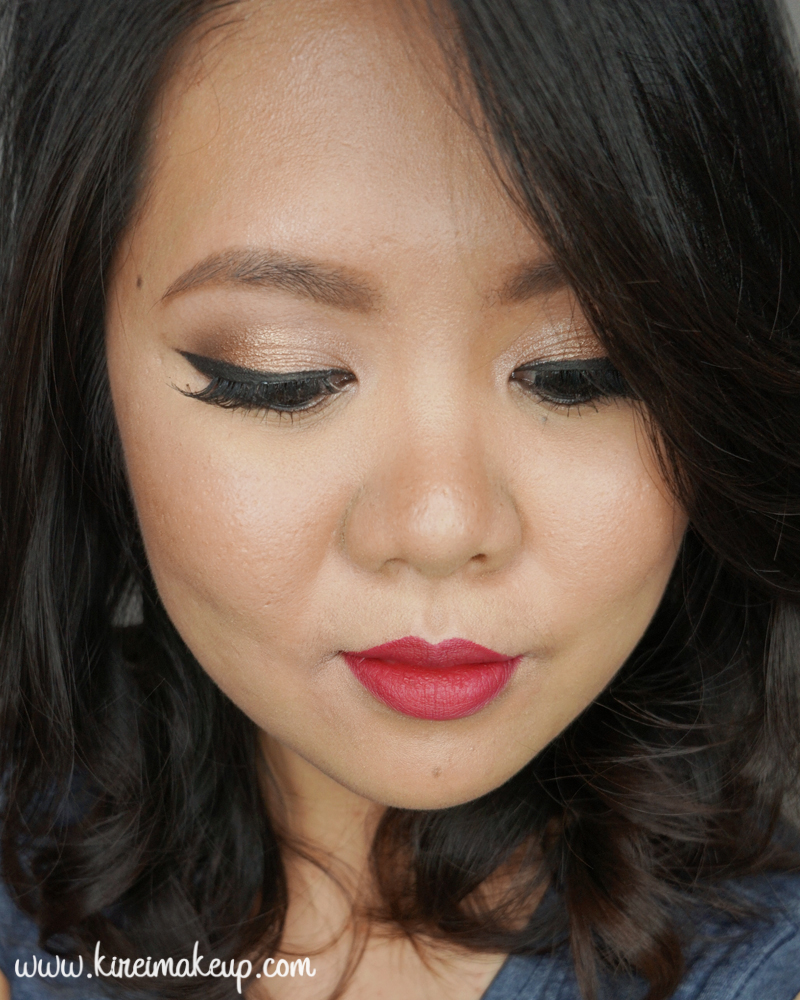
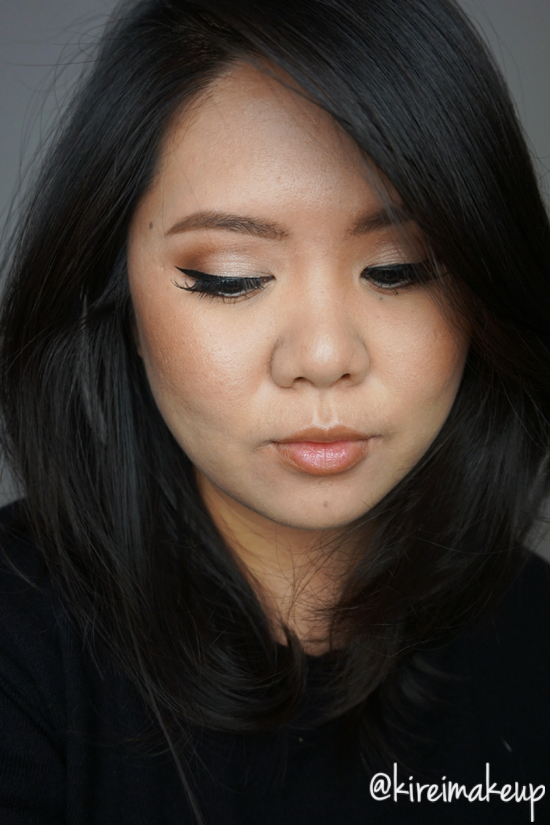
This Day to Night party makeup tutorial is all about creating a strobed-looking skin, nothing too contoured. The eyes are very muted and simple. For the Day look, the eyes are very open and brightened. For the Night look, the focus in on the lips, not too dark but not too bright either.
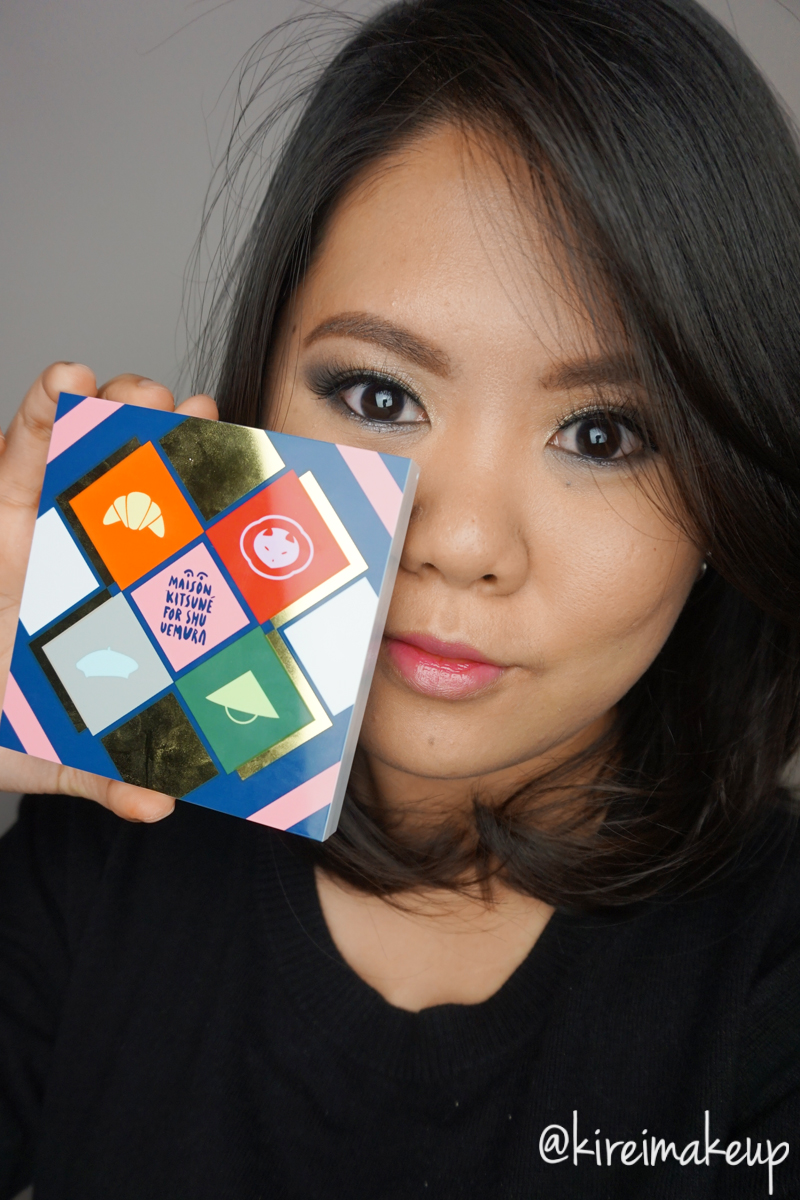
For the eyes and cheeks, I used my new Tarte Light of the Party palette, and can I just say that I’m loving it?! One of the best neutral palette, in my opinion. The colors are very muted and soft, a lot of matte colors too! Absolutely gorgeous. I’ll do the review for this palette soon!
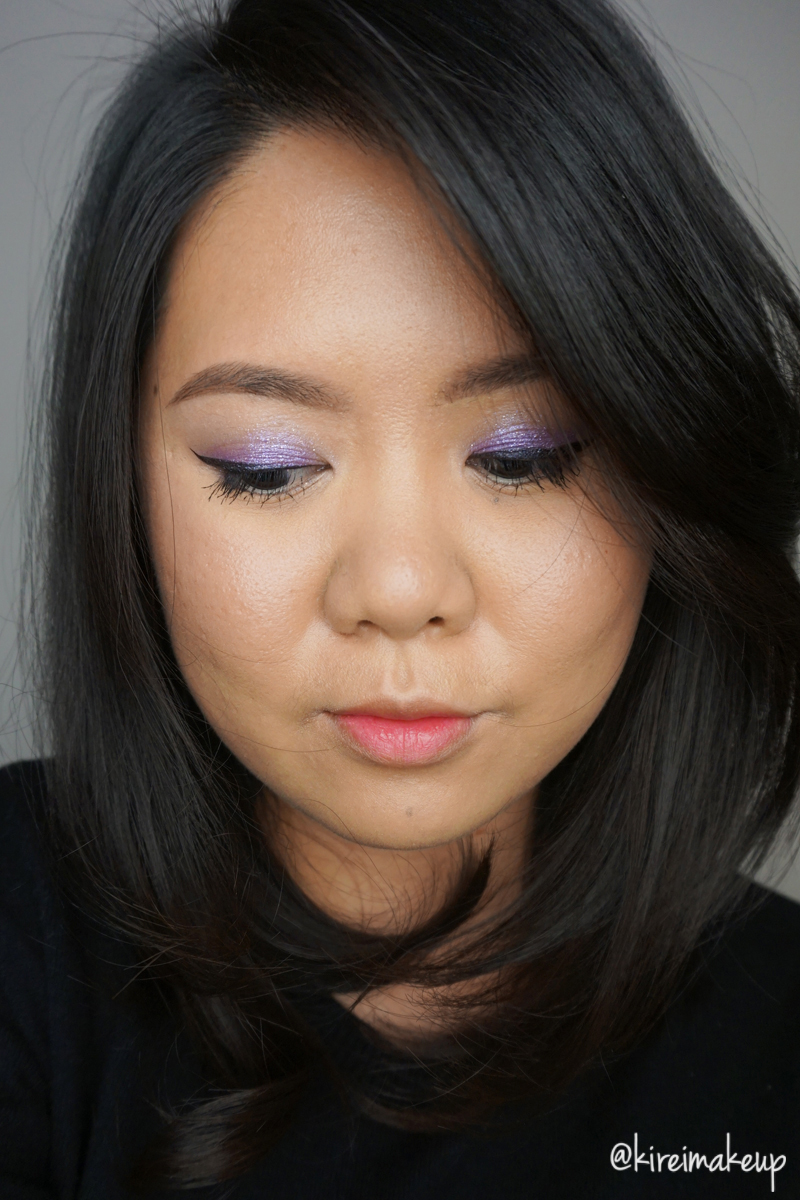
Also, how you liking my luminous/strobed skin? I just bought Becca Backlight Filter primer, and tested it today. Such a gorgeous primer for strobing. I feel like my skin just glow all over! I applied this primer under my eyes, on top of my cheekbones, on the bridge of my nose, & cupid’s bow. I also applied this primer under my NARS foundation so it doesn’t look too dewy.
Products used
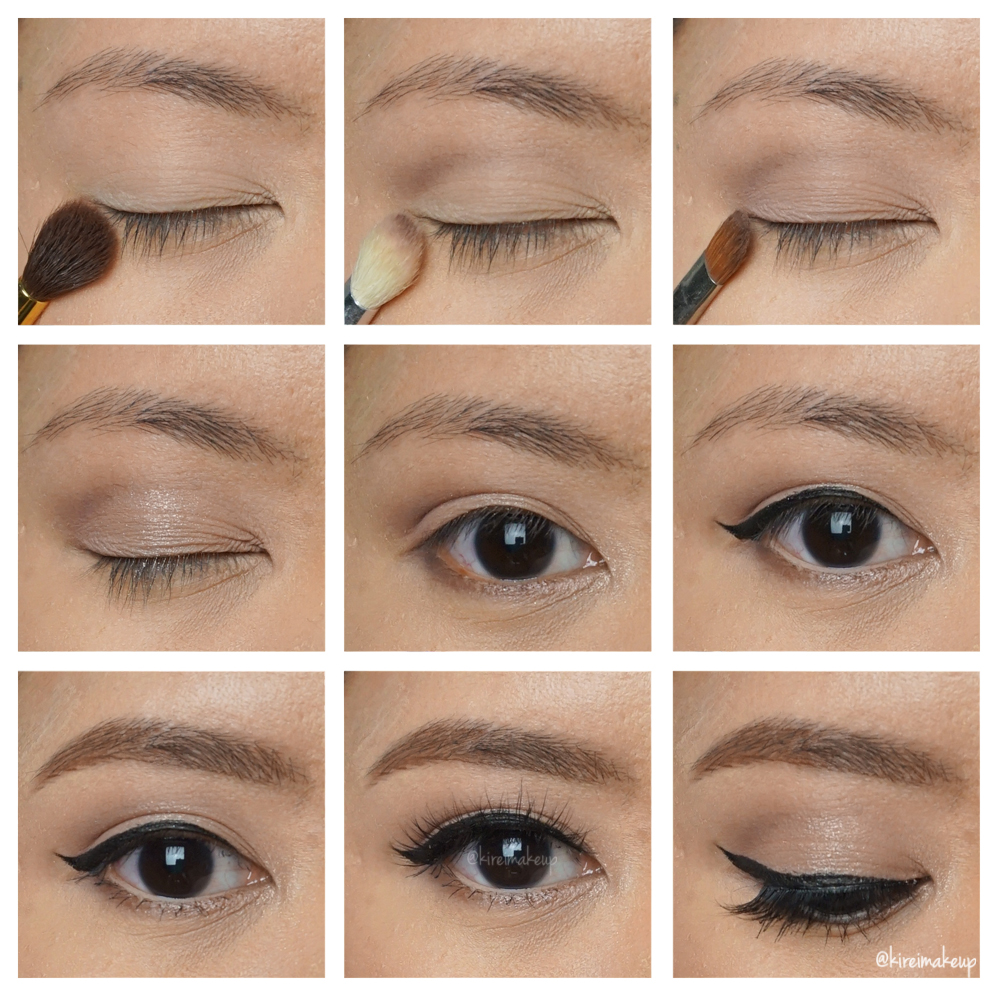
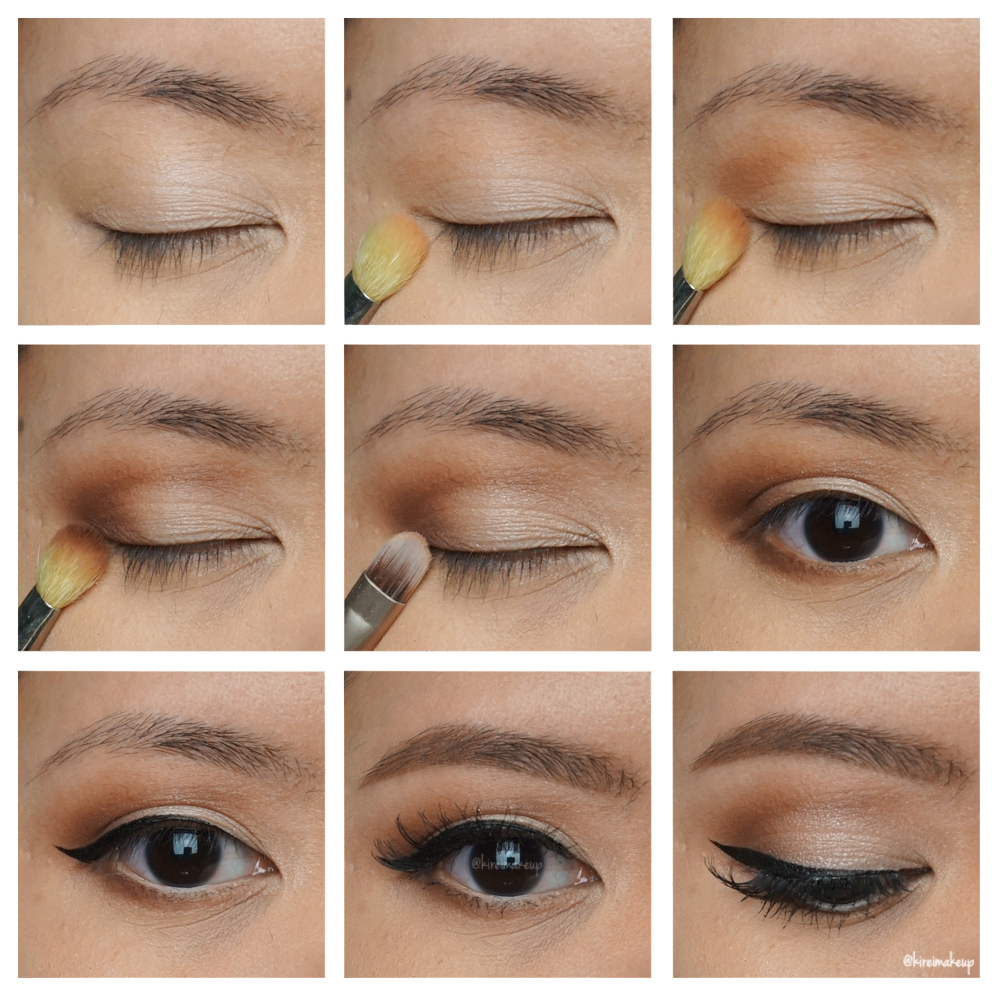
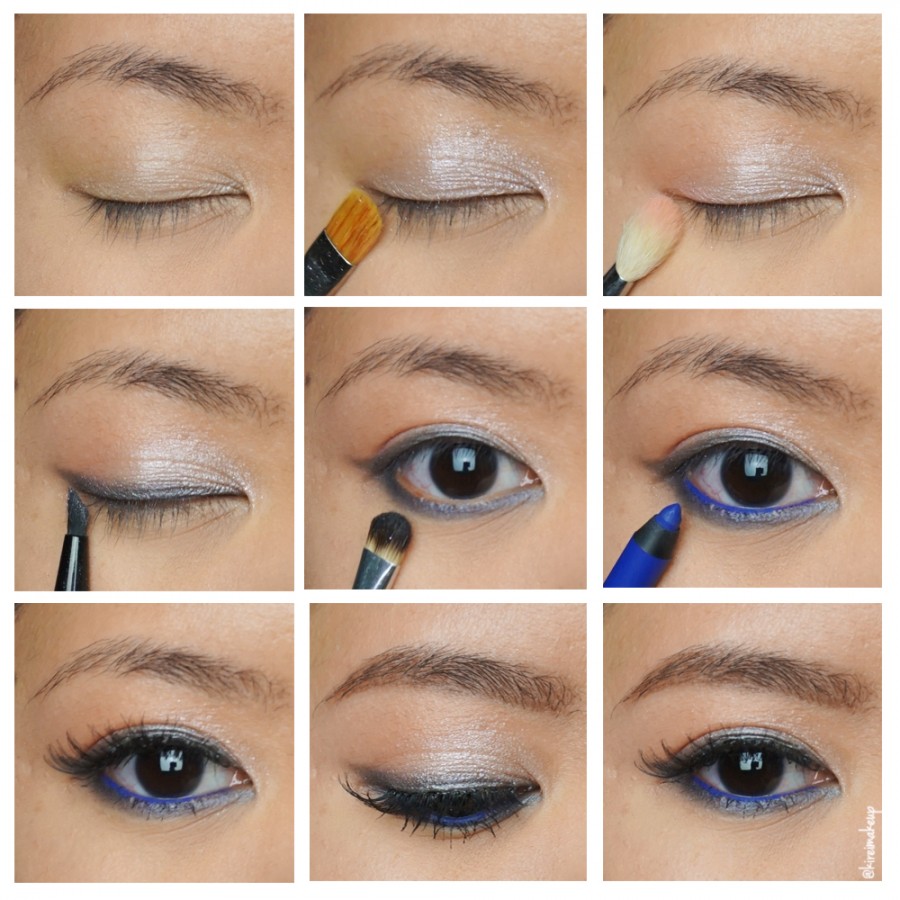
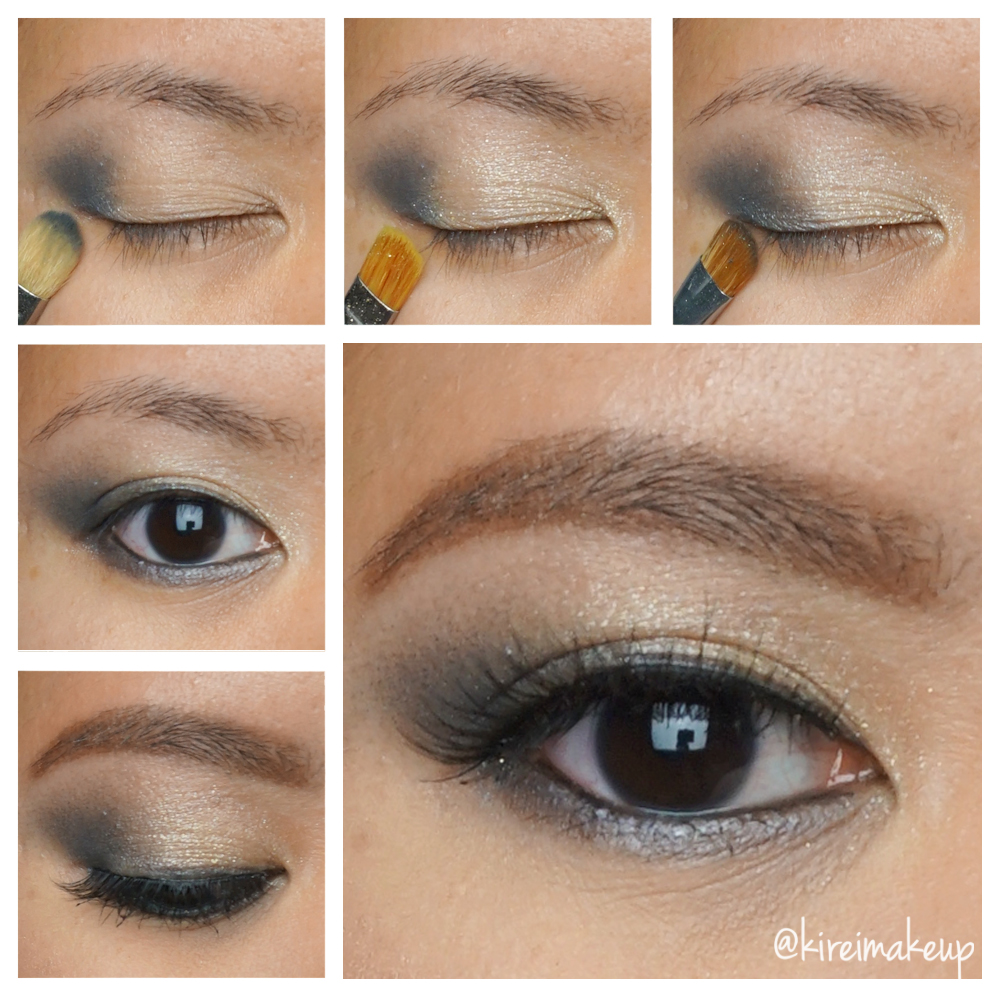
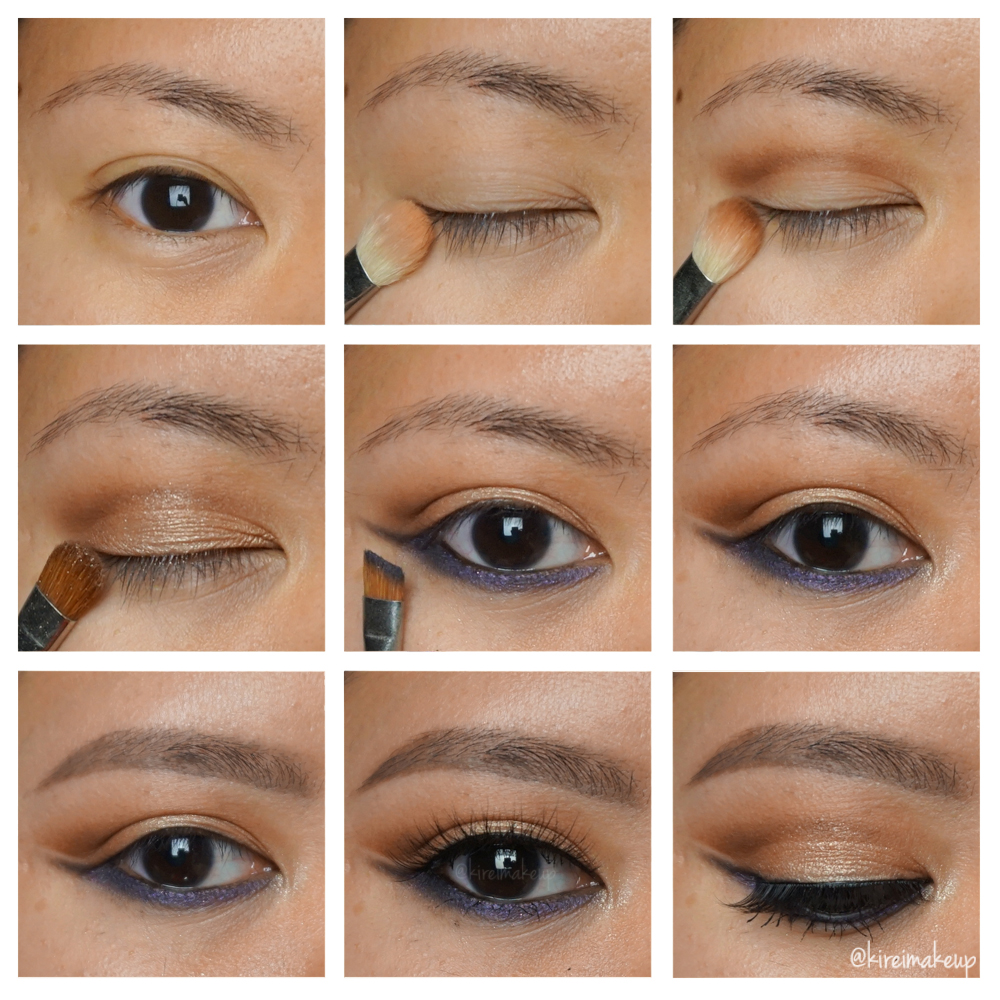
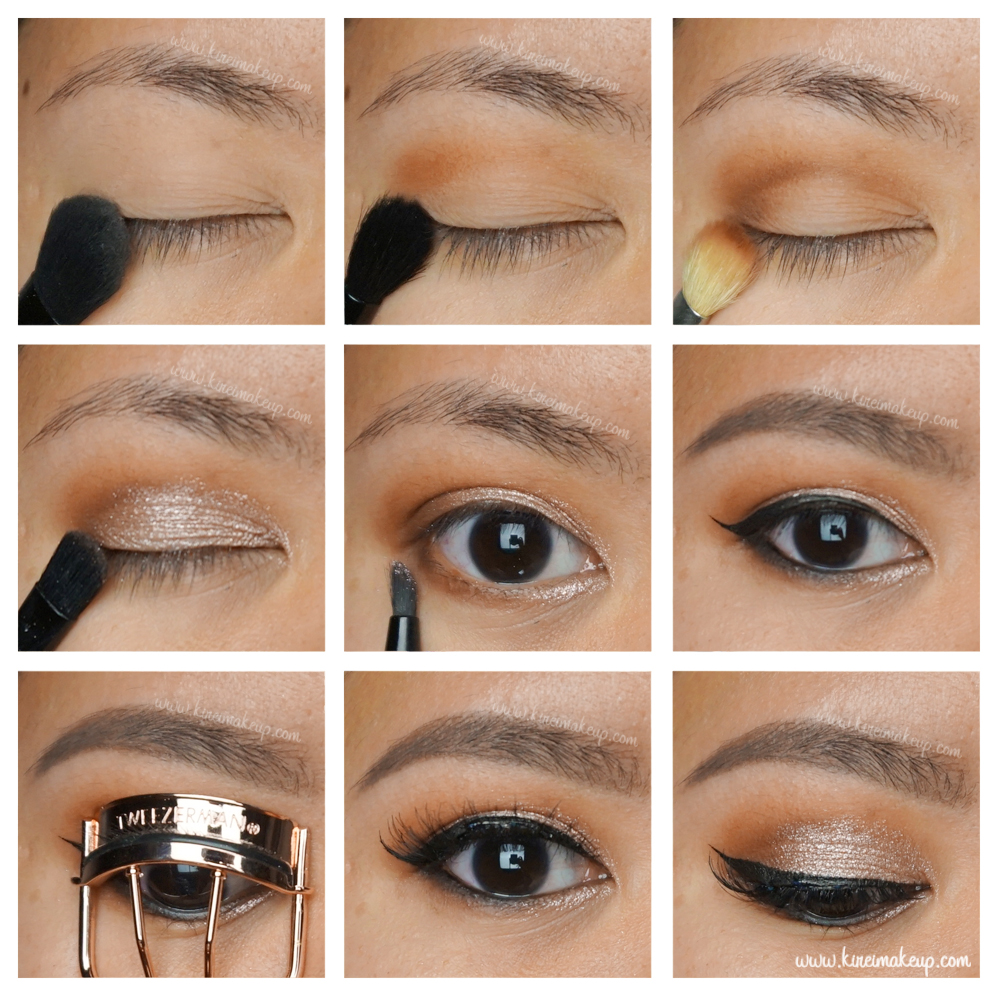
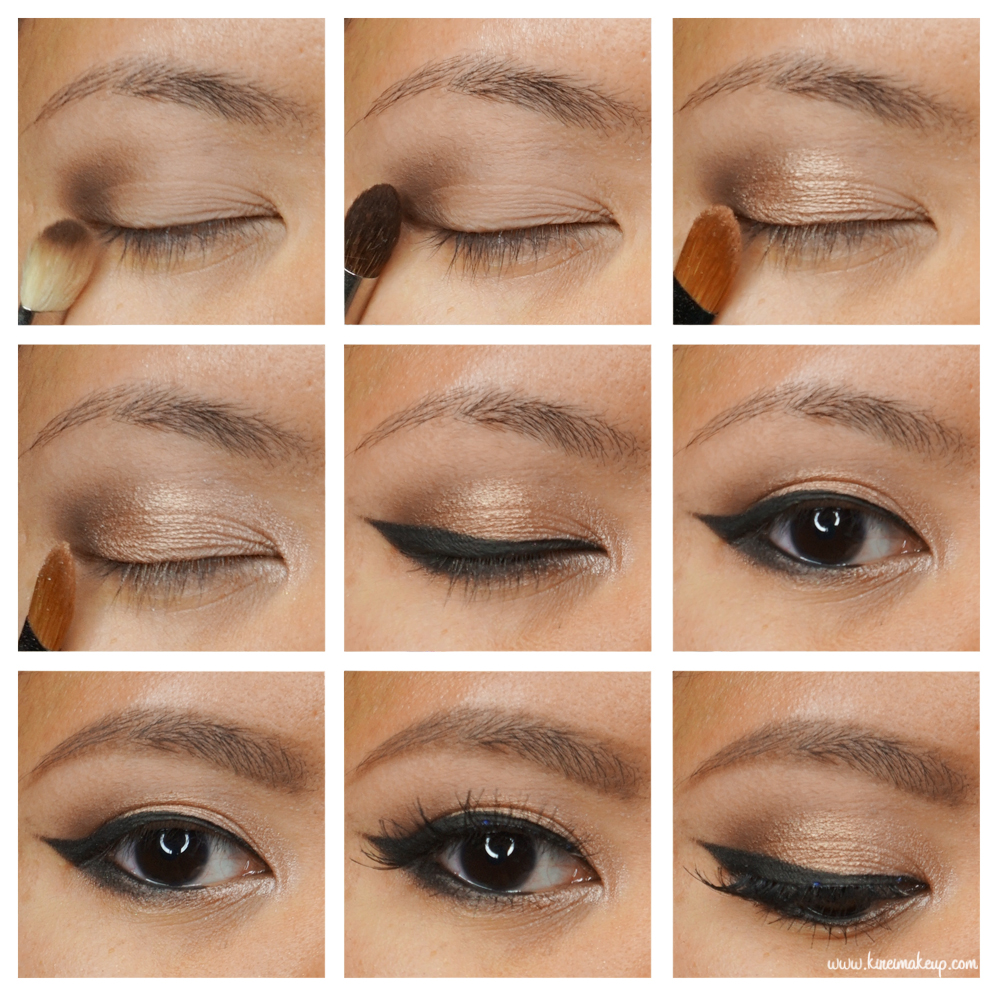
Eyes
- Primer – Urban Decay Primer Potion “Original”
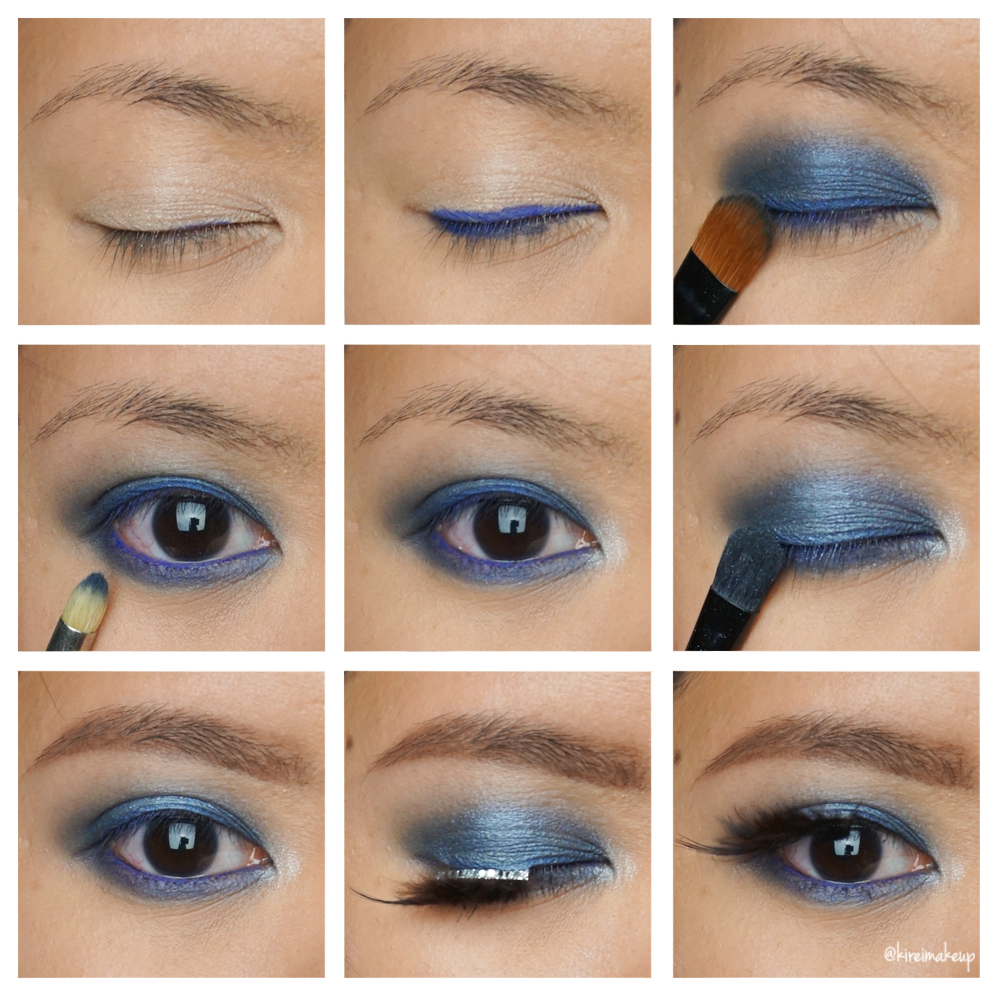
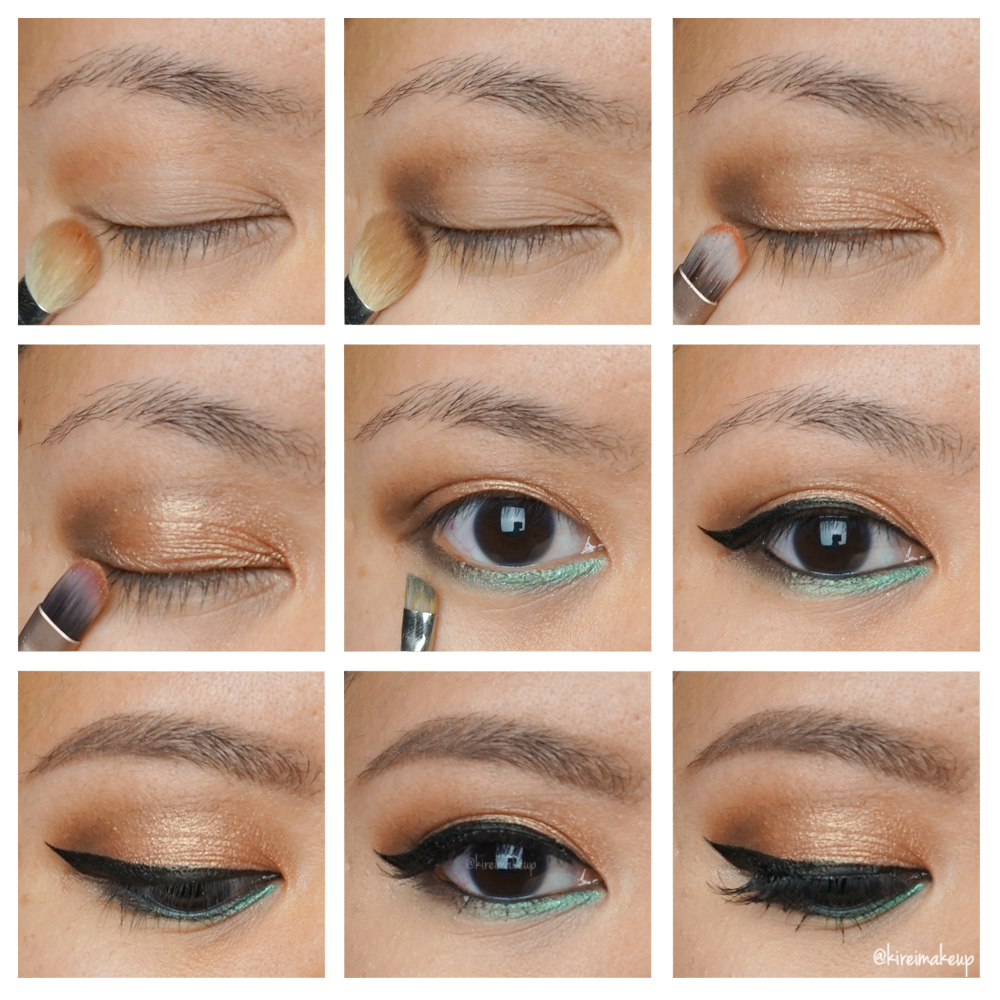
- Base – Tarte Light of the Party “Eggnog”
- Crease – Tarte Light of the Party “Mulled Wine”
- Eyelid – Tarte Light of the Party “Rum Pum Plum”
- Center of lid – Tarte Light of the Party “Fizz the Season” (I applied this using my ring finger)
- Inner lower lash line – Tarte Light of the Party “Ring-a-Ling”
- Outer lower lash line – Tarte Light of the Party “Cocoa What Fun”
- Winged liner – Kanebo “Kate Super Sharp eyeliner”
- Waterline – [Day] MAC Chromagraphic eyeliner “NW25/NC30”; [Night] MAC “Smolder” kohl liner
- Mascara – Tarte “Light, Camera and Lashes” mascara
- Brows – Kat Von D Tattoo Brow “Medium Brown”
- Falsies – Esqido Mink Lashes “Oh So Sweet”
Face
- Primer – Becca “Backlight Priming Filter”
- Foundation – NARS Luminous Weightless Foundation “Punjab”
- Concealer – NARS Radiant Creamy concealer “Custard”
- Powder – Laura Mercier “Invisible Loose Powder”
Cheeks – I used Eve Pearl fan brush only for the cheeks, starting with the Bronzer then Blush & lastly the Highlighter.
- Bronzer – Tarte Light of the Party “Social Butterfly”
- Blush – Tarte Light of the Party “Amazed”
- Highlighter – Tarte Light of the Party “Pink Champagne”
Lips
- Day look
- Lipstick – Sephora Collection Oil Infusion Color & Care “Pink Granita”
- Night look
- Lip pencil – MAC “Nightmoth” lip pencil
- Lipstick – MAC “Media” lipstick

