Dermablend Cover Creme Review [sponsored]

First of all, I’d like to say “Thank You” to Nail Polish Canada for sending me the Dermablend Cover Creme to be reviewed. Also, free shipping for any purchase of Dermablend Professional products from Nail Polish Canada!

 What is Dermablend Cover Creme?

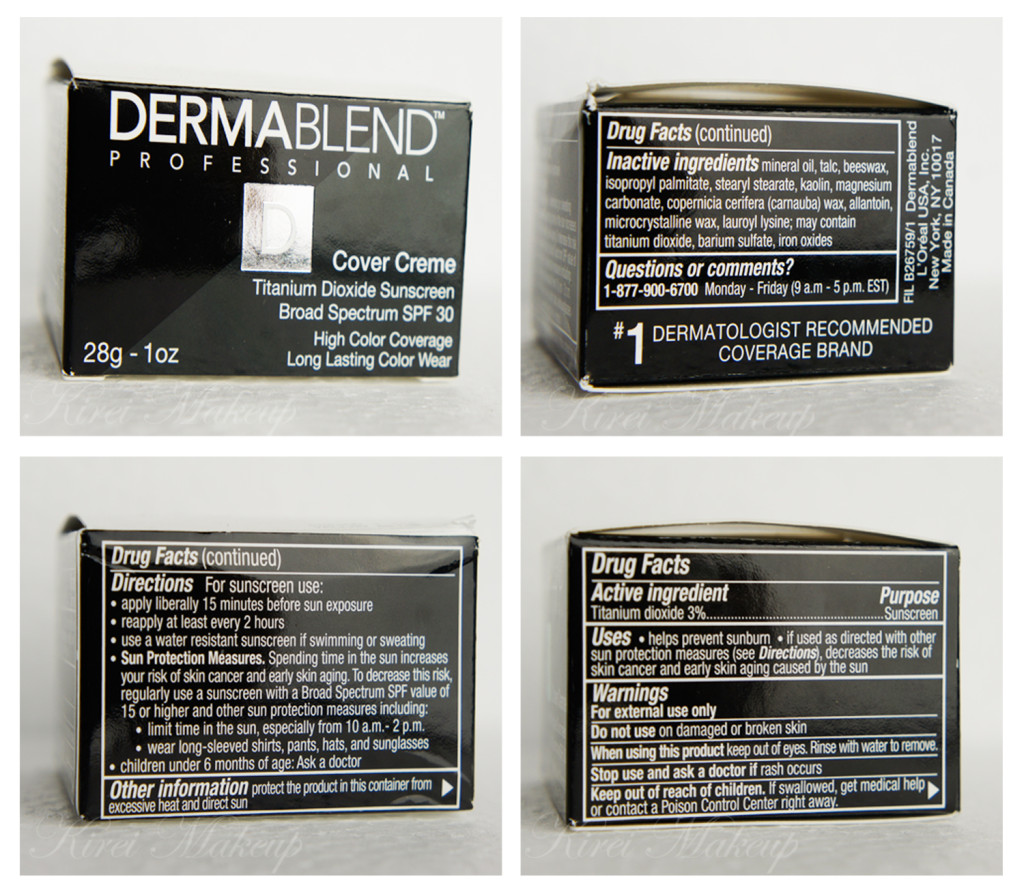
A lightweight creme formula with high coverage and natural skin tone shades. Cover Creme delivers a flawless complexion and 12 hours of consistent color wear.

Cover Creme provides coverage for moderate to major skin flaws including

  • Vitiligo
  • Birthmarks
  • Rosacea
  • Pigmentation Disorders
  • Post-Operative Bruising
  • Scars
  • Burns

Texture: Glides on evenly. Skin looks fresh, feels soft and velvety smooth.

Skin Benefit:All day hydration. Suitable for sensitive skin.

Sun Protection: SPF 30 Sunscreen.

Application

First apply cover creme

  1. Remove a small amount of Cover Creme with either a spatula or fingertips.
  2. Apply directly over imperfection. Tap gently to ensure maximum coverage.
  3. Blend outwardly. If extra coverage is desired, tap on more product over the area. For sunscreen benefits, apply before sun exposure.

Second apply setting powder (sold separetly)

  1. Pat on Setting Powder generously over covered areas.
  2. Brush off excess using a makeup brush.
Size: 28g / 1 oz
(Nail Polish Canada, 2013)

Dermablend Cover Creme review NC30

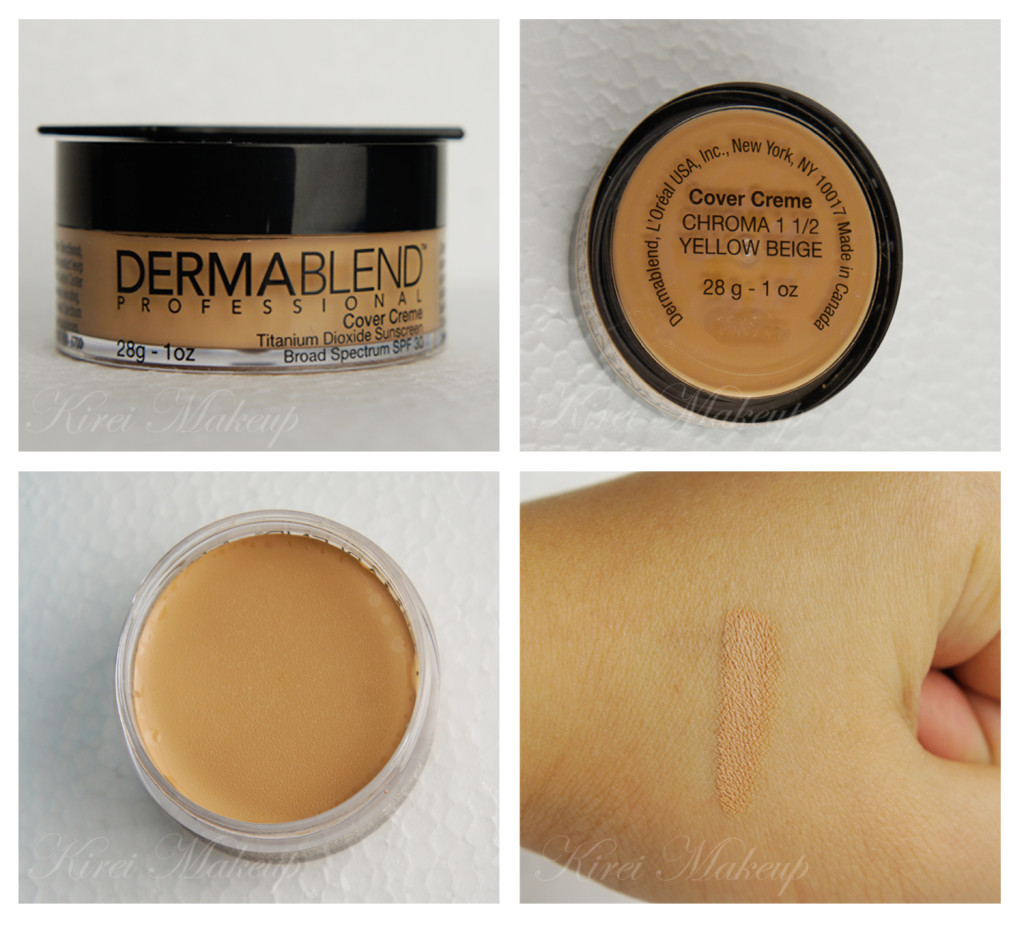
I was asked to choose a shade from the Nail Polish Canada website, but I wasn’t sure which shade I’m in. I decided to go with Yellow Beige, even though I was unsure. I’m usually a MAC NC30 in MAC Pro Longwear. I was also given the option to choose the different Dermablend products, but I chose this foundation since I think it’ll be beneficial for those who’d like to try a full coverage foundation.

I love how the Dermablend Cover Creme comes in a jar and a little spatula. Even if you are not a makeup artist, you might find the spatula to be quite useful. Use the spatula to pick the foundation up from the jar instead of dipping your finger or brush directly into it, to avoid bacterial contamination.

You’ll find that the foundation is very tightly packed into the jar. This little jar will probably last you a good while. A little goes a long way with this foundation.

The foundation also blends very easily and smoothly to the skin. It almost feels like it melts into your skin. I applied the foundation by putting a little bit of it at the back of my hand, and work the product using the spatula. Then, I used the foundation brush to apply it to my face. The foundation is very pliable when you warm it up first.Dermablend Cover Creme NC30
Coverage

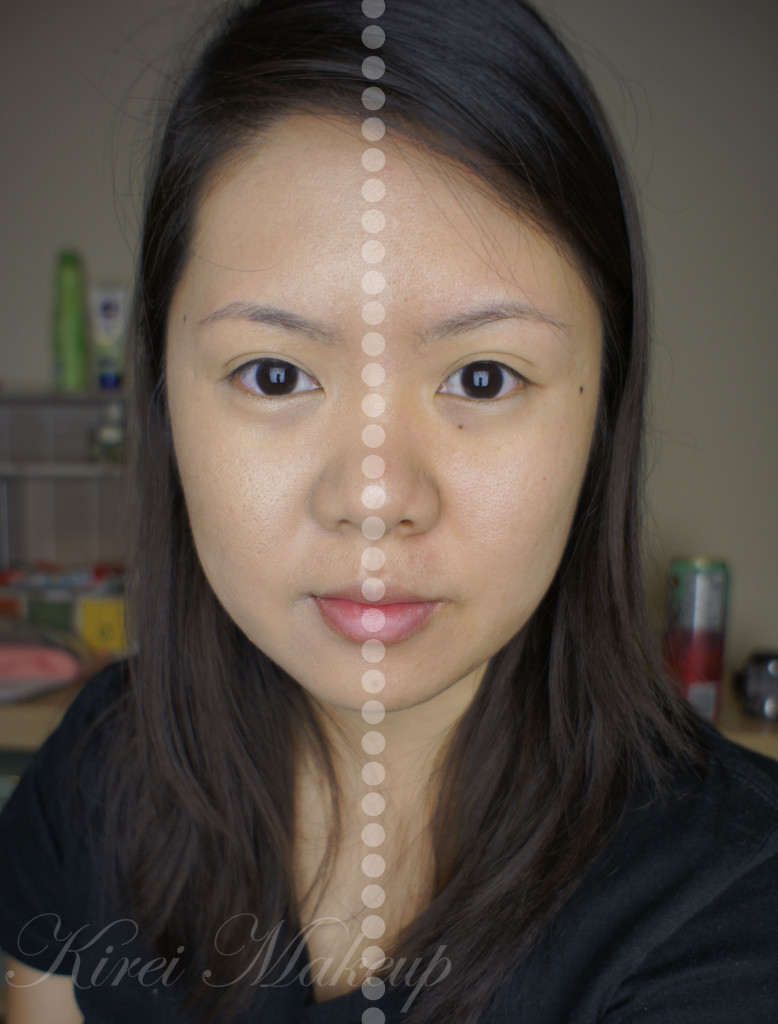
The Dermablend Cover Creme is a full-coverage foundation. However, like any other full-coverage foundation, this product can be applied thinly to create a sheer coverage. You can achieve a sheer to medium coverage by applying it using a damped sponge, or mixing the foundation with a primer or moisturizer.

In the pictures below, I applied a layer of foundation using a foundation brush. There are several ways to create a heavier coverage:

  • Layer your foundation.
  • Stippled or dabbed the foundation to your skin using a dry sponge, or your finger.
  • Buff it to your skin using a buffer brush, something like Sigma Round Kabuki or a Sigma Flat Kabuki brush.

Finish

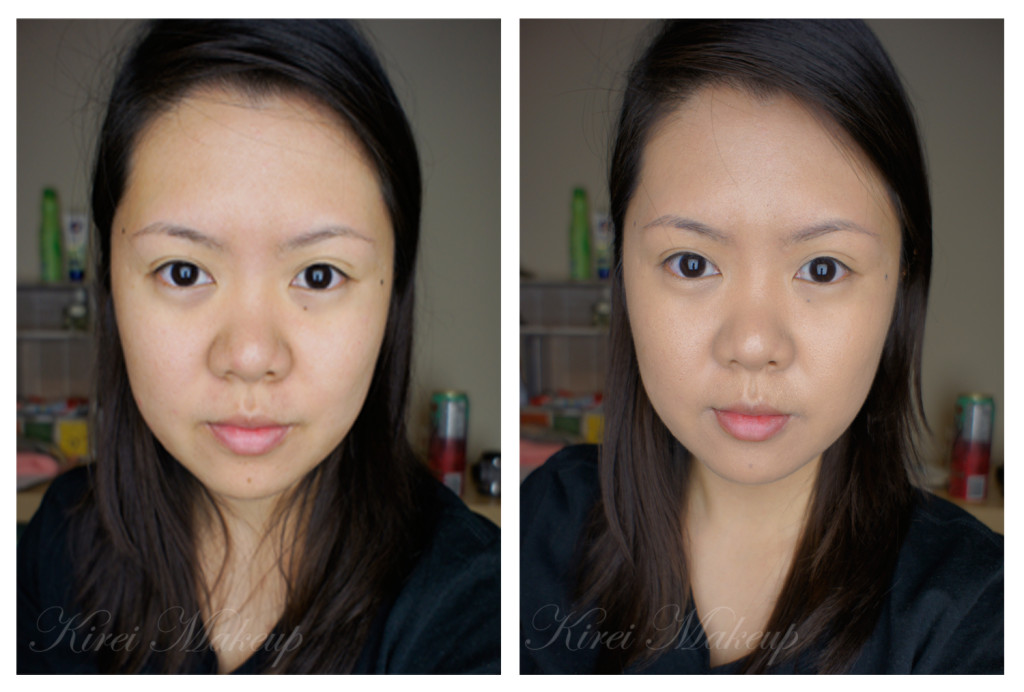
I was expecting the finish to be matte, but I was quite surprised at the result. I mean, look at my “after” picture, it doesn’t look super matte, does it? I feel like it actually has quite a natural finish. I think my “before” picture is more matte than the “after”.

I find the finish to be quite velvety. I like how it looks. It’s not too matte, not extremely dewy either. Just the right amount.

Longevity

The brand claims that it lasted for up to 12-hour. I’m not sure how true it is if you don’t set it. I wore it for couple hours (4hrs), and I noticed the foundation has started to settle on the lines under my eyes. I did not powder it, so may be if I do, it’ll last longer. Keep in mind that I have a combination skin type.

The foundation is quite slippery, so if you have an oily skin, you might want to set it with powder to ensure that the foundation will stay.

Shade

21 shades ranging from light to dark, along with different undertones (yellow, pink, olive, and red).

I picked Yellow Beige, thinking it might have more yellow undertone, but I feel that it has quite a pink undertone. In the picture you might think that it matches my skin tone, but I can assure you it did not. It’s very pink, but I know I can probably neutralize the pink slightly using a very yellow powder when setting it.

Price

Currently it’s sold for CAD $36 (usually $38) from Nail Polish Canada. I don’t know how much it is in other store. I think the price it’s not too bad, considering how much you get out of it. There are lots of other foundation that’s even more expensive and not as good as this one.

Dermablend Cover Creme Asian

Pros

  • Full coverage, but can be thinned out if needed.
  • It covers everything! I didn’t even need to use concealer for this review.
  • A large range of shades is available for all different skin tones.
  • Suitable for all skin type, including those with sensitive skin.
  • Natural to velvety finish, if you prefer a non-matte skin.
  • Blends easily.
  • Consists of SPF 30.
  • Great packaging and love the spatula.

Cons

  • For me, the cons would be the wrong undertone. Too pink, may be better luck for me next time…I think if you want to buy this online, make sure you already tested the foundation before hand to match your skin. If not, you’ll be like me doing a guessing game.
  • Settles on fine lines, but can easily be fixed by setting it with powder.

Dermablend Cover Creme review

(Left: with Dermablend Cover Creme; Right: Bare face)
LUXOLA BIG SALE!

Everyone! There’s a big sale over at LUXOLA on Wednesday, 18 Sept. 2013! Only for 30 hours, you’ll get 30% off! Go check Luxola out before it’s all sold out! Click on image below to take you to the Luxola website.

Luxola Discount Code

p.s.: THis is an affiliated post. Clicking on the image or the links will lead you to luxola website, in which I received store credits for purchases that you make.

Dr. Jart+ Sambut V7, Multivitamin Pencerah Wajah Untuk Semua Gender [Press Release]

Brand Dermatologis Global Korea Garap Pasar Indonesia

Tiap pria dan wanita ingin bebas dari kulit kusam, pigmentasi, flek dan spot hitam. Akan tetapi faktor usia, genetis dan kondisi lingkungan kerap menjadi penyebab munculnya berbagai problem pada kulit wajah. Ditambah lagi, saat ini berbagai golongan usia kerap menghadapi masalah serupa. Maka dari itu, bertempat di Upperroom Annex Building, Dr. Jart+, brand dermatologis global terkemuka Korea hari ini meluncurkan seri pencerah wajah terbaru yaitu V7. Merupakan seri pencerah kulit wajah yang akan mengembalikan rona wajah anda yang kusam akibat sinar matahari maupun polusi udara dengan memberikan 7 vitamin meliputi vitamin A, B3, B5, C, E, F dan H.

Dr. Jart+ berfokus terhadap keamanan produk dengan melarang penggunaan bahan-bahan yang dapat menimbulkan iritasi kulit dengan prinsip bebas aroma buatan, bebas pewarna buatan, bebas pengawet buatan, dan bebas alkohol. Hadir memberikan solusi yang aman dan terpercaya, Dr. Jart+ telah melalui beragam tes untuk kulit hiper-sensitif maupun berbagai macam jenis kulit sensitif.

Vera Liono, Brand Manager Dr. Jart+ Indonesia menuturkan, “Sebagai pionir brand dermatologis global, Dr. Jart+ menghadirkan V7 yaitu produk pencerah pertama dengan kandungan vitamin terbanyak yang berfungsi mengencangkan, menenangkan, memutihkan, kaya akan anti oksidan, menjaga elastisitas dan regenerasi sel aktif. Sejak diluncurkan tahun 2004, Dr. Jart+ mendapat respon yang sangat baik di dunia perawatan kulit wajah internasional dengan angka penjualan tercepat dalam waktu singkat. Setelah melebarkan sayapnya ke berbagai negara seperti Jepang, Hong Kong, Amerika Serikat, Inggris, Thailand, Filipina dan Singapura, sekarang kami hadir di Indonesia. Kini penggemar kosmetik dapat menemukan produk perawatan wajah yang aman dan teruji klinis. Outlet kami dapat ditemukan di Alam Sutera, Matahari Departmen Store Taman Anggrek dan Lotte Shopping Avenue.”

“Merupakan sebuah kebanggan bagi kami untuk merilis Dr. Jart+ di Indonesia. Sejak diluncurkan tahun 2004, Dr. Jart+ menjadi produk perawatan dermatologis terkemuka di Korea. Melalui komitmen dan kinerja berkesinambungan, kami optimis Dr. Jart+ akan menjadi brand skincare terbaik dan terpercaya oleh banyak pelanggan di Indonesia seperti halnya di Korea dan dunia. Kami pun akan terus berkontribusi dalam menjaga serta memberi rasa aman pada kehidupan Anda dengan menghadirkan produk dermatologis No.1. Kami yakin, sekarang pelanggan kosmetik tidak perlu kuatir dan dapat langsung memilih produk perawatan wajah terbaik langsung dari ahlinya” ungkap Lee Jin-Wook, CEO Dr. Jart+ menambahkan.


Saat ‘cantik’ bertemu dengan ‘seni’

Nama Dr.Jart+ tercipta dari inisial pendirinya ‘J’ dan kata ‘Art’ yang dalam bahasa Inggris berarti seni, yang menjadikan konsepnya berbeda dari konsep produk perawatan kulit kebanyakan. Karena mengusung visi nya sebagai merek yang memfokuskan pada pemulihan dan perbaikan kulit sebagai hasil penelitian bionik terbaru, Dr. Jart+ telah membangun merek yang terpercaya dengan harapan akan menunjukkan sisi artistik dari perawatan kulit.

Dr.Jart+ mengedepankan teknologi ilmiah dalam meracik produk-produknya dari bahan alami serta dikemas menggunakan sistem berteknologi tinggi yang mengoptimalkan fungsi dari setiap bahan yang digunakan. Hal ini dilakukan dengan tujuan dapat menciptakan tampilan kulit wajah yang cantik dan sehat serta menjadikan Dr.Jart+ sebuah merek terpercaya.

Solusi cerdas untuk kulit hiper-sensitif

Dr. Jart+ fokus terhadap keamanan produk dengan melarang penggunaan bahan-bahan yang dapat menimbulkan iritasi kulit dengan prinsip bebas aroma buatan, bebas pewarna buatan, bebas pengawet buatan, dan bebas alkohol. Dr. Jart+ memberikan solusi yang aman dan dipercaya serta sudah melalui beragam tes untuk kulit hiper-sensitif dan berbagai macam jenis kulit sensitif.


Rangkaian Produk Dr.Jart

V7
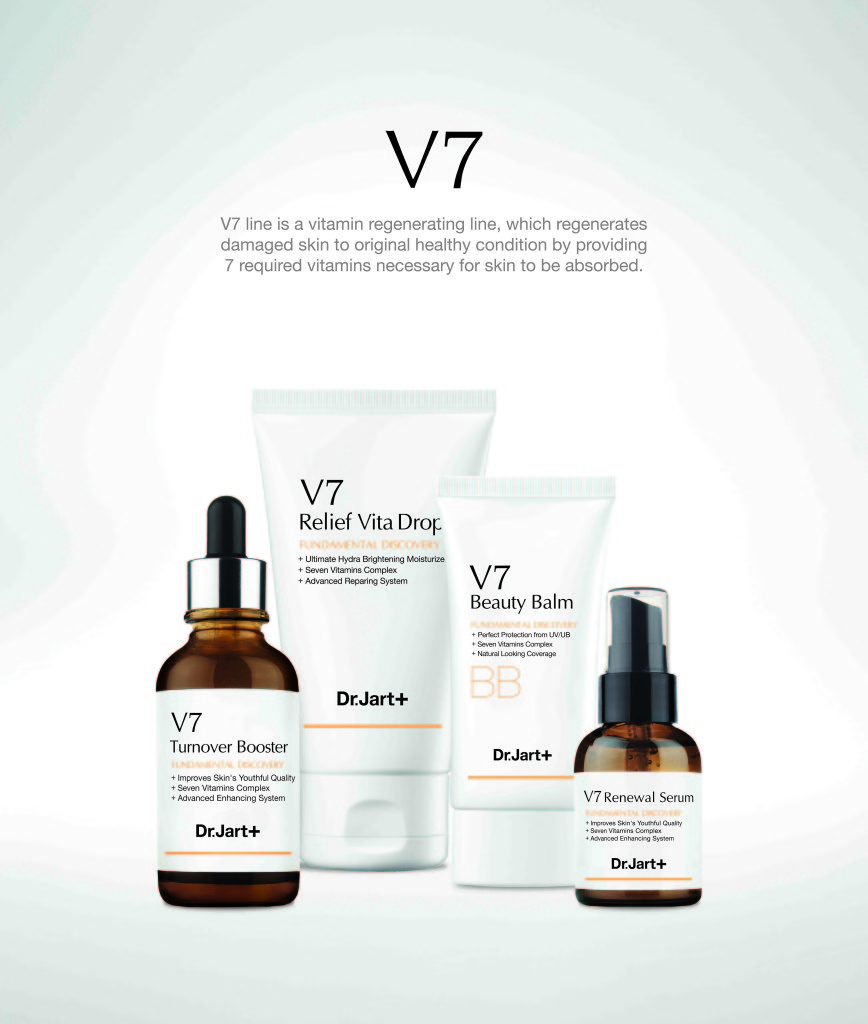
Varian seri V7 merupakan seri dengan kandungan vitamin, yang meregenerasi kulit rusak sehingga kembali seperti sedia kala dan sehat melalui kandungan 7 macam vitamin yang dibutuhkan kulit.
Noda dari pigmentasi, jerawat, atau masalah kulit lainnya akibat stres dan kebiasaan buruk sehari-hari dapat diperbaiki dengan adanya kandungan regenerasi vitamin tersebut. Rangkaian V7 Terdiri dari:
* V7 Turnover Booster (Toner): Rp 508.000,-
* V7 Renewal Serum: Rp 638.000,-
*V7 Relief Vita Drop (Emulsion): Rp 458.000,-
*V7 Vitacream (Spot treatment): Rp 578.000,-
*V7 Beauty Balm (Make Up): Rp 488.000,-


Dr. Jart V7

BB Cream

Satu-satunya BB Cream dengan varian terlengkap sesuai dengan warna kulit, tipe kulit, dan fungsi. Temukan BB Cream yang sesuai dengan karakter kulit Anda. Tersedia dalam beragam jenis:

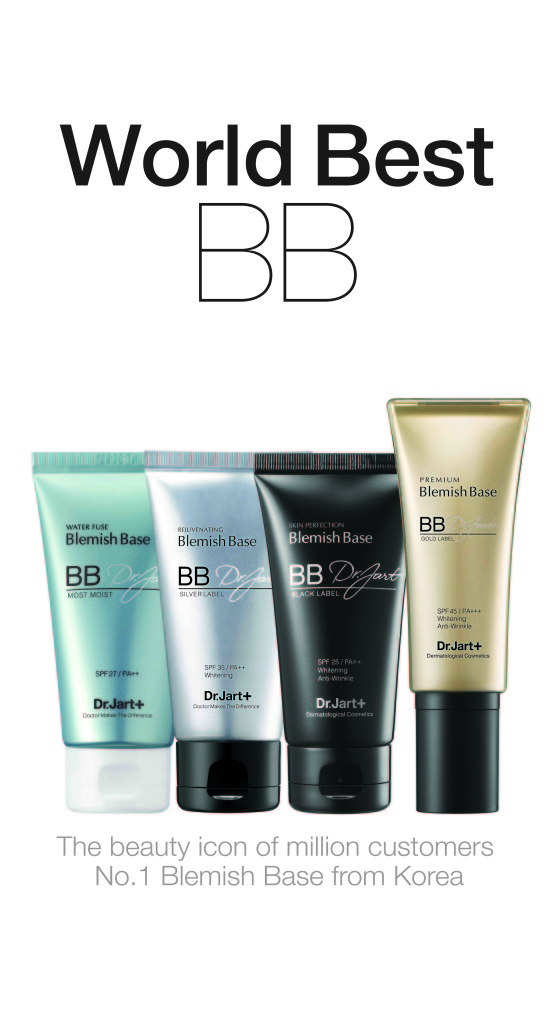
* Rejuvenating Blemish Base (Silver Label): Kulit sensitif: Rp 408.000,-
* Skin Perfection Blemish Base (Black Label): Kulit kering: Rp 488.000,-
* Premium Blemish Base: Kulit kering dan menua: Rp 648.000,-
* Regenerating Blemish Balm: Whitening: Rp 528.000,-
* Renewalist Blemish Balm: Kulit menua: Rp 278.000,-

Dr. Jart BB creams

Most Moist

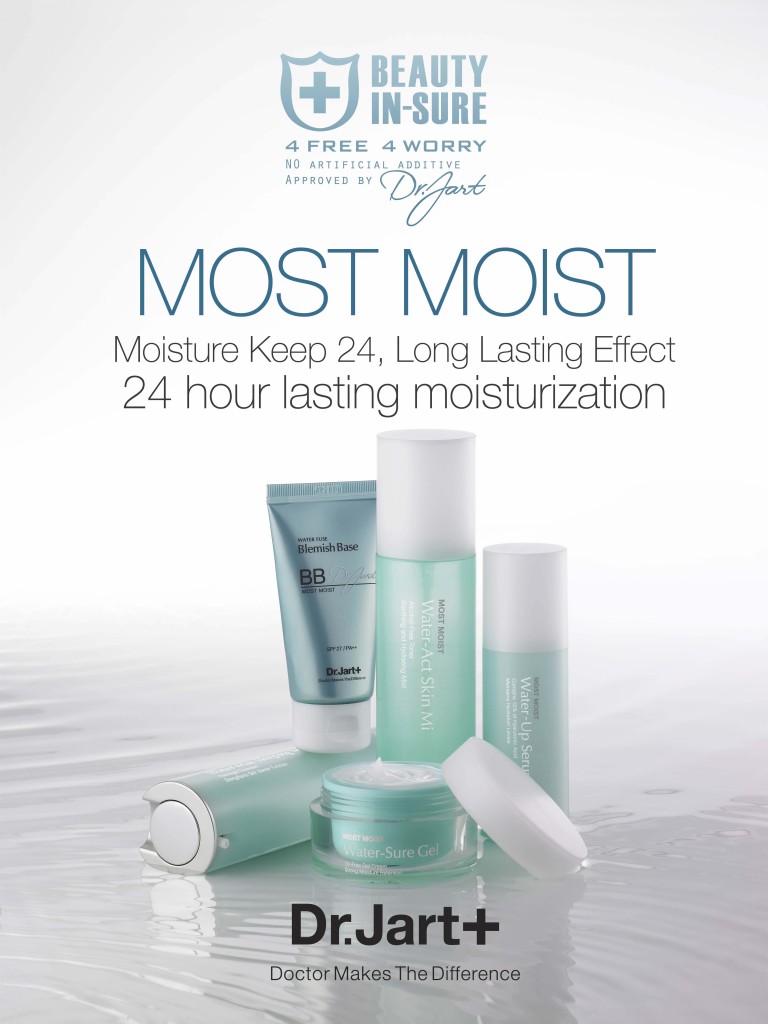
Seri pelembab pertama yang bebas pengawet buatan, melainkan menggunakan pengawet alami dari KIMCHI. Meminimalkan hilangnya kelembaban dan menjaga kelembaban tersebut agar tetap bertahan pada kulit selama 24 jam.

Varian Most Moist terdiri dari:

* Most Moist Water Act Skin Mist: Rp 328.000,-
* Most Moist Water Up Serum: Rp 548.000,-
* Most Moist Water Sure Gel Cream: Rp 458.000,-
* Most Moist Water Max Sleeping Mask: Rp 458.000,-
* Most Moist Waterfull Hydrogel Mask: Rp 488.000,-
* Most Moist Water Fuse Blemish Base: RP 458.000,-

Dr. Jart Most Moist

Ctrl+A

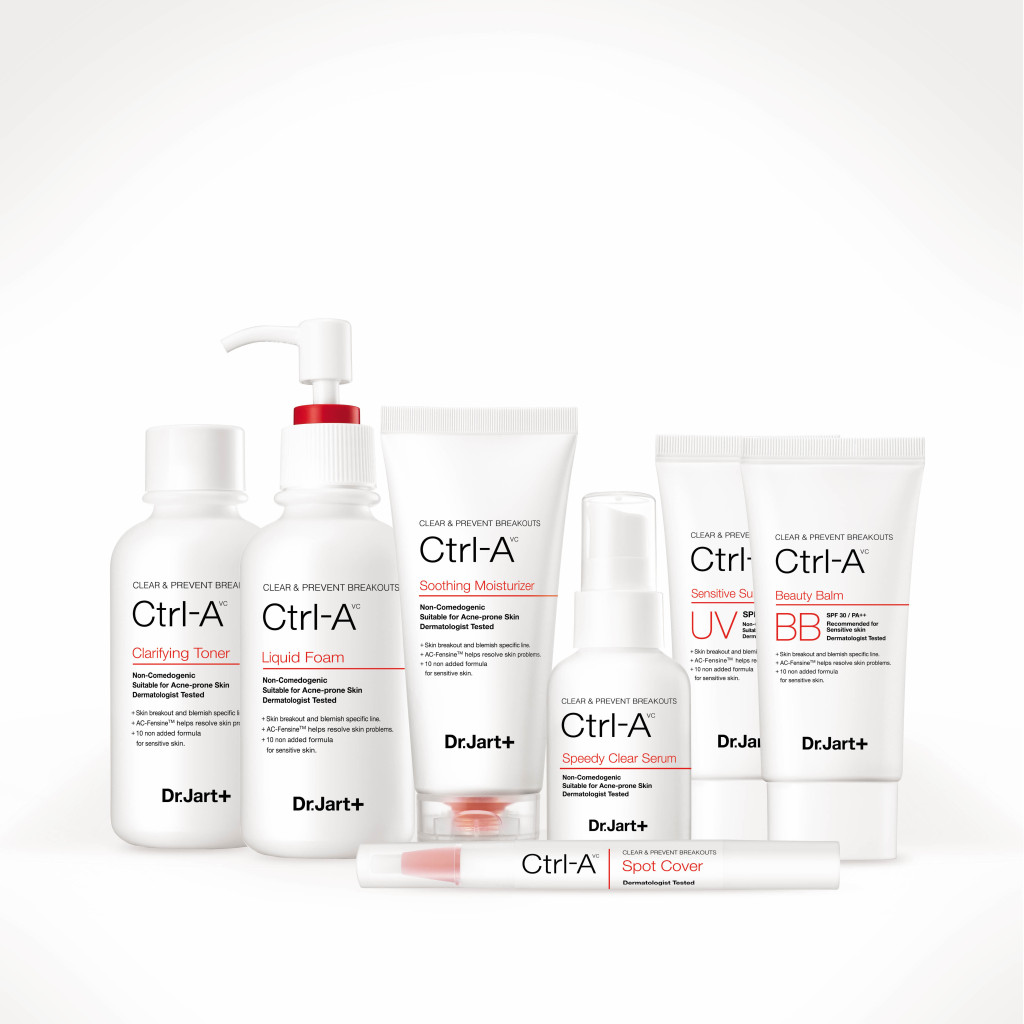
Seri perawatan dengan bahan aktif AC-Fensine untuk kulit berjerawat ini bekerja dengan meningkatkan sistem pertahanan/perlindungan kulit terhadap bakteri jerawat untuk membantu kulit memperbaiki jerawat dengan sendirinya dan mencegah timbulnya jerawat baru.

Varian Ctrl-A terdiri oleh:

* Drying Spot Corrector: Rp 378.000,-
* Sensitive Sun Protector: Rp 338.000,-
* Spot Out: Rp 338.000,-
* Soothing Moisturizer: Rp 348.000,-
* Clarifying Toner: RP 328.000,-
* Speedy Clear Serum: Rp 458.000,-
* Liquid Foam: Rp 338.000,-
* Spot Cover: Rp 298.000
* Beauty Balm: Rp 448.000,-

Dr. Jart Ctrl-A Line


Lil’ Adventure [non-makeup]

Hi all! I’m so excited to be back to the blogging world again! Sorry for missing for couple weeks, I had quite a trip with my bff, Liz, who came all the way from Canada! Pretty much we were in Jakarta, Bandung, Singapore and Hong Kong. We were just so excited to be reunited! hahaaha..Let me just mention at this moment when Liz touched down in Jakarta, she had been traveling around Europe on a backpack. She’s the real DORA!

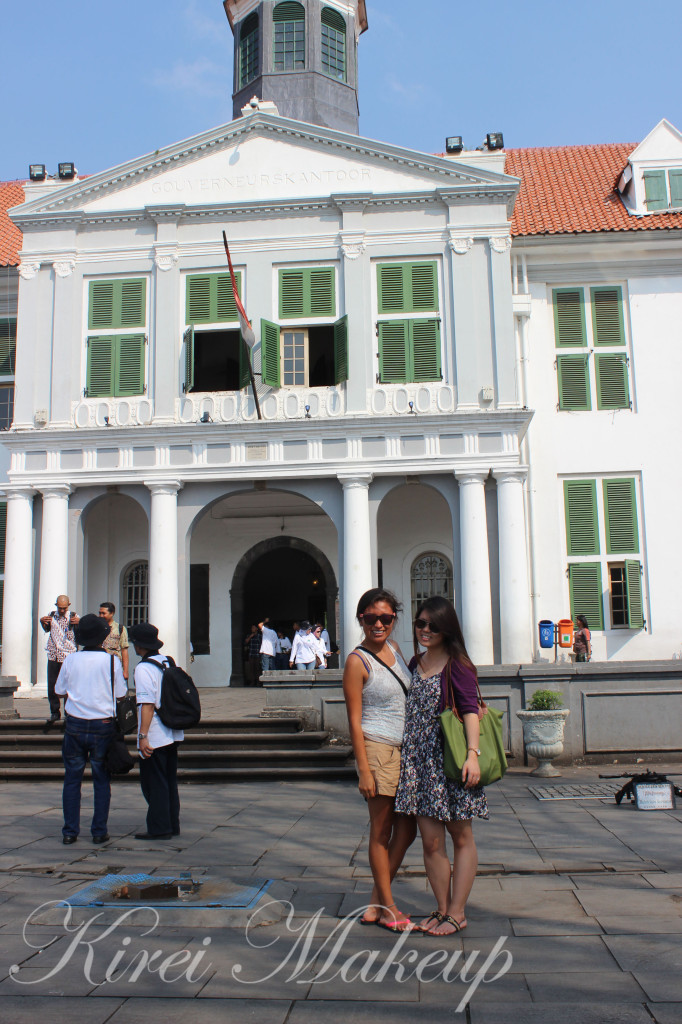
Anyways, in Jakarta, we obviously hit most of the malls, and a few of the tourist attraction area here. Below is a picture of Jakarta Kota Tua (i.e. Old Town). We also went to Taman Mini Indonesia Indah (Beautiful Indonesia Miniature Park).

Jakarta Tourist Attraction

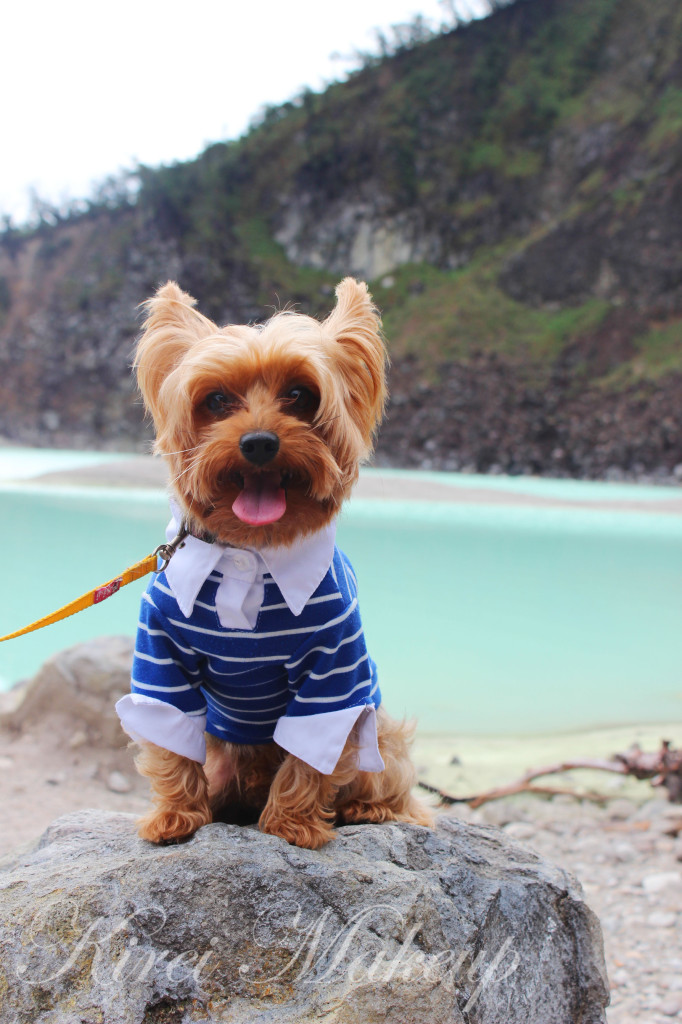
Next we went to Bandung. We visited the 2 craters there – Kawah Putih (White Crater) and Kawah Ratu (Queen’s Crater). I have more pictures, but my mom and my sis are in it, and I prefer not to put those up. So, below is a picture of our Yorkie in Kawah Putih.

If you are a tourist and want to go to the White Crater from Jakarta, please be aware that it is a long drive from Jakarta (around 3-4 hours to actually reach the crater itself). If you are thinking “is it worth the long drive”, I’d say YES! This crater is gorgeous! See the photo below? No photoshop! The lake is filled with blue and yellow water due to the Sulphur content. It’s amazing!

Indonesian Crater

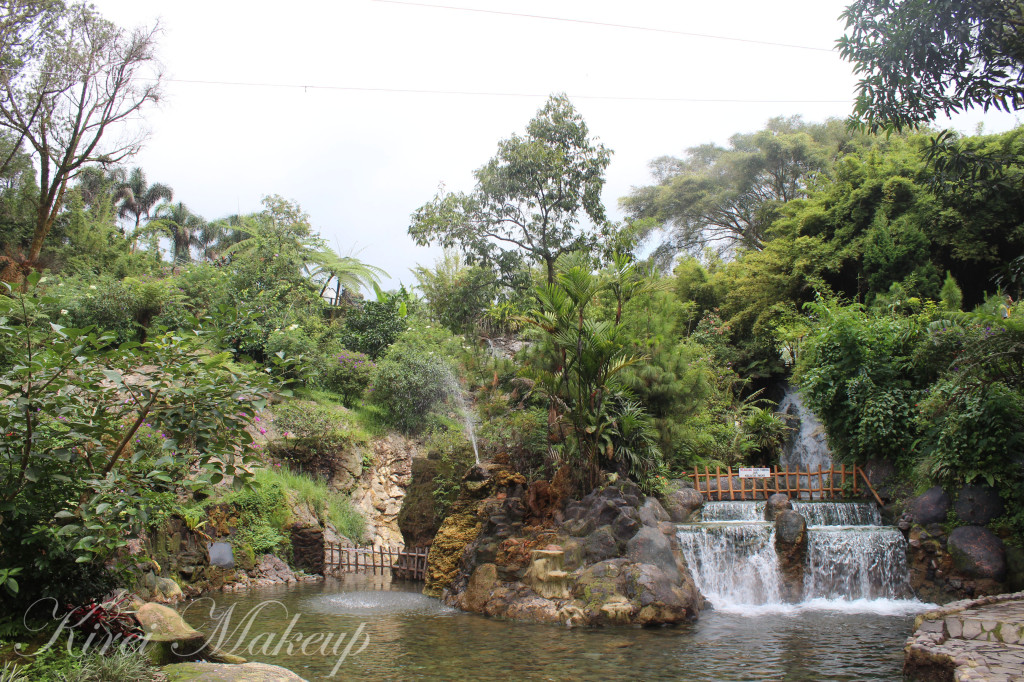
Next in Bandung, from the Queen’s Crater we went towards the Hot Spring! We were quite skeptical about the Hot Spring ever since we’ve tried Onsen in Japan. We were like “naah, it’s probably not even that hot”, “it’s probably small”…Nooooo nonono! Boy, were we wrong or what! This hot spring was HUGE! It’s amazing!

You can choose to go to the swimming pool, or to actually go further in and enjoy the hot spring in nature. There’re several hot springs where you can just dip your feet in, or you can go with your clothes on and take a dip in this huge “lake”. There’re also several waterfalls.

The water temperature ranged from 30 deg. Celcius to 40 deg. Celcius. The one in the photo below is one of the warmest they have there. I believe this one is 40 deg. This hot spring place is called Ciater Hot Spring. There’s a hotel right in front of it, but we didn’t stay there.

Bandung Pemandian Air Panas

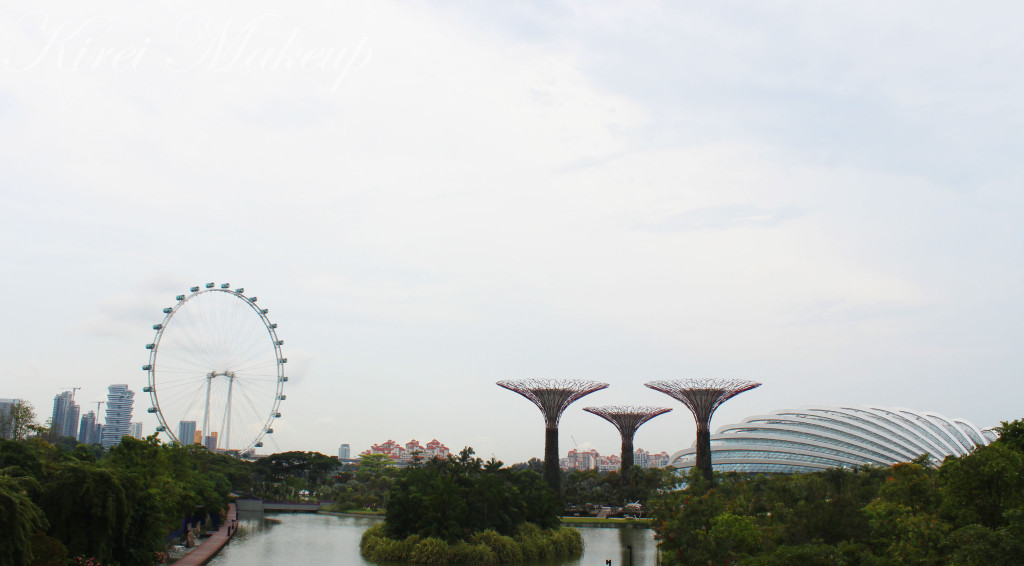
Next after Bandung, we went back to Jakarta and then prepared ourselves to fly to Singapore! Obviously, we went to Marina Bay Hotel and the mall to meet up with some of our friends there. We also went to Gardens by the Bay, which is located right across from the hotel. If you do go to Singapore, I strongly recommend going to Gardens by the Bay. Amazing place, and it’s free! You get to see all these amazing “Tree structures” and it’s just a great big garden.

I’d also like to give a shout out to Royal Plaza on Scott Hotel in Singapore. If you’re looking for a place to stay, I’d definitely recommend this hotel. The service, the staff and the room were one of the best that I’ve seen so far. Their customer service is TOP-NOTCH!

Marina Bay Singapore

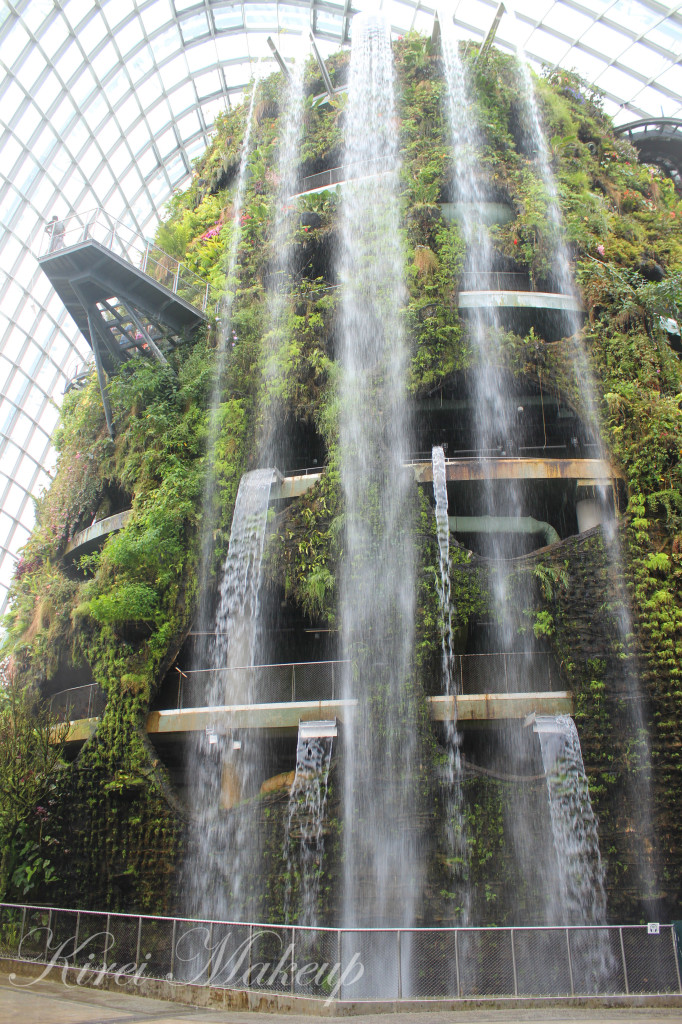
Now, in Gardens by the Bay there are 2 domes which you have to pay to get in – $28 for both domes, or $14 each per person. We went to both domes – Flower Dome and Cloud Dome. Inside the Flower Dome, there’s a lot of flowers, cactus, Baobab trees etc. It’s all fun and very pretty. If you love beautiful roses and orchids, you’ll love being there!

My favorite, however, is the Cloud Dome which is shown below. Inside the Cloud Dome there’s a 7-floor high man-made waterfall! Amazing, much? The idea of the Cloud Dome is to replicate Cloud Forests all around the world. You can take the elevator to go all the way up and slowly work your way down. Simply a must-go!

Singapore Gardens by the Bay

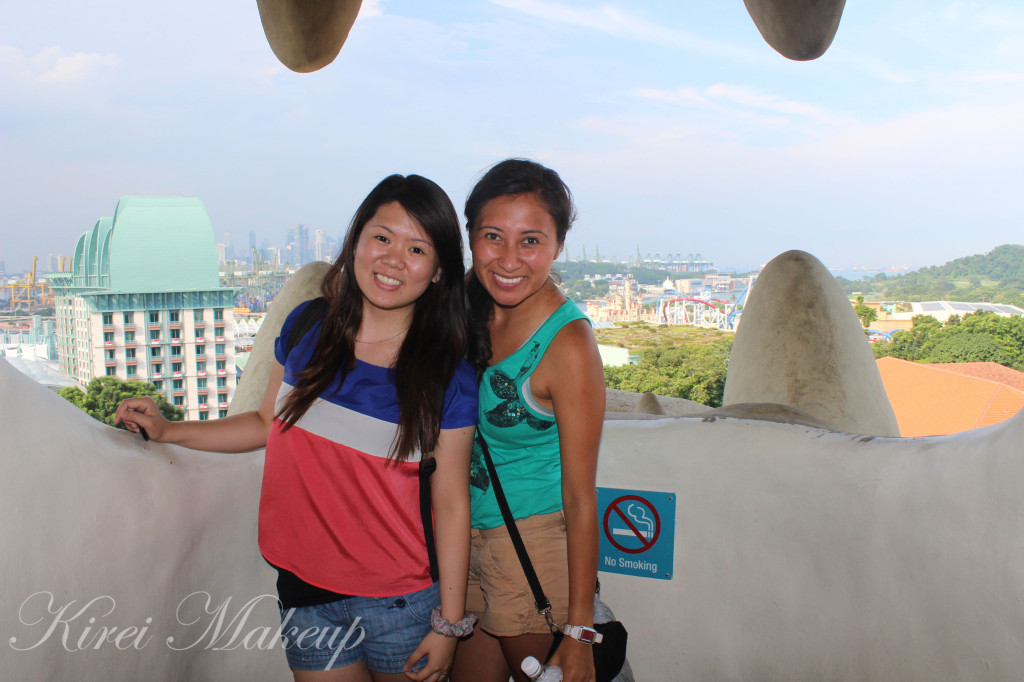
Next we went to Sentosa and of course, it’s not complete without going inside the Merlion! Below is a picture of us inside the Merlion’s mouth! There’s a photographer there who’s willing to help take a picture for you with your camera (and with his camera so you can buy the photo in the gift store).

Merlion

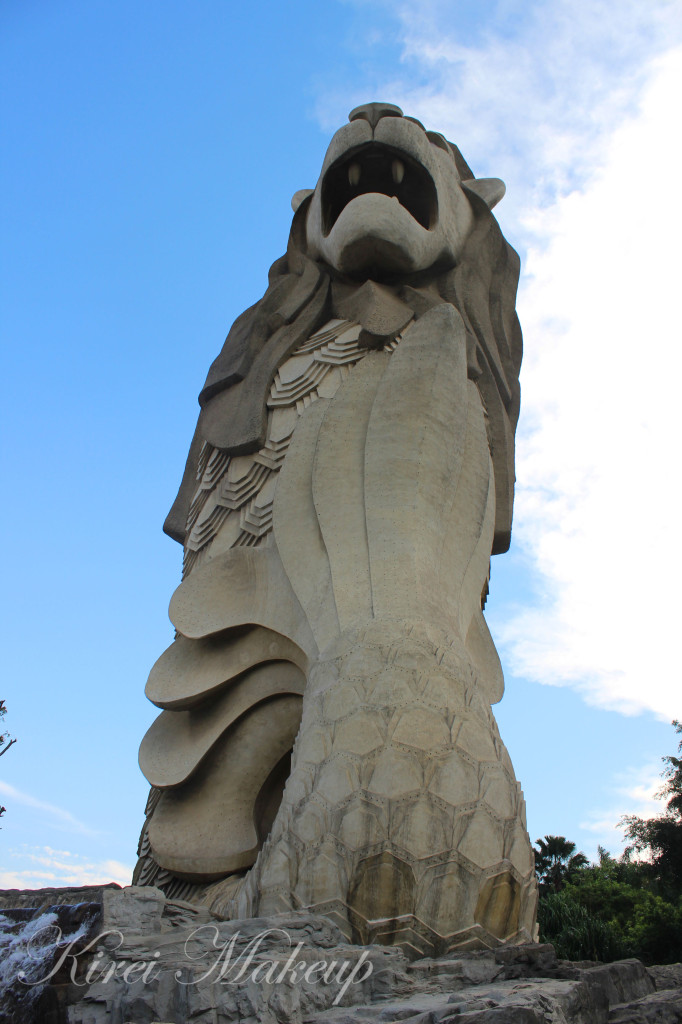
Below is a picture of the Merlion we were in the picture above! We also managed to go all the way up to the Head of the Merlion, but there were a lot of people there.

Singapore Merlion

Next up was Hong Kong! We went to several of the tourist areas there, and obviously there were loads of pictures, but due to the presence of other people in there, I chose not to share the pictures on the blog to respect their privacy.

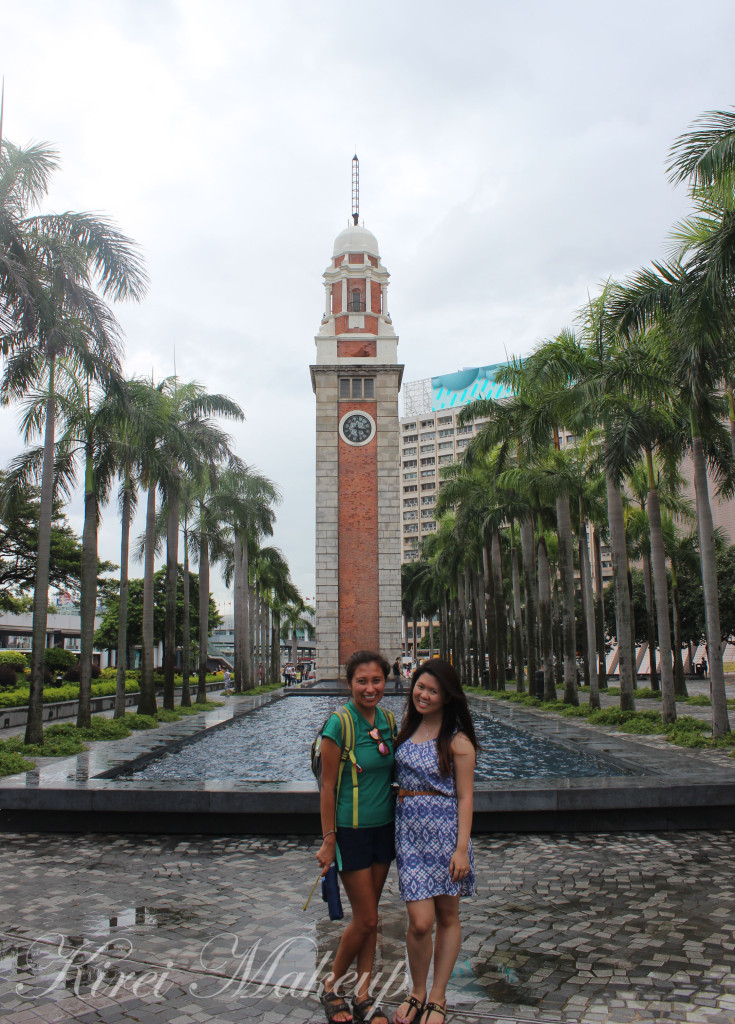
So, we went to The Peak, but to get there we had to pass some of the cool places. If you see my Instagram feed, you’ll see some cool photos of buildings and such. Below is a picture of us in front of what was left of a train station (if I’m not wrong).

Hong Kong Old Train Station

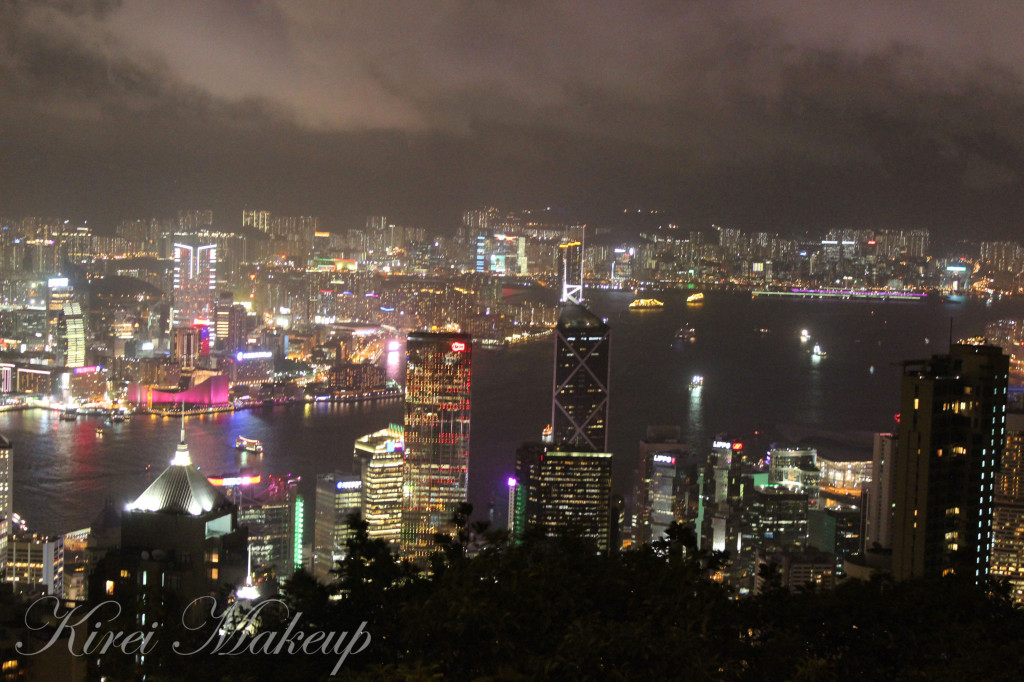
Below is a view from The Peak at 9pm. Amazing, eh? In Hong Kong, we also managed to go hiking, went to see the Big Buddha, took the crystal cable car, went to Cheung Chau Island etc. You’ll find all those photos on my Instagram!

Hong Kong the Peak

We were supposed to go to Macau, however, there were typhoon/cyclone warning and Liz had to leave. I went to Macau with N the week after since I stayed in HK longer. Macau was great! I went for a day-trip and managed to hit all the tourist spot. There’s a local day tour when we reached the Macau Ferry Terminal, so that was the best way to do Macau in a day.

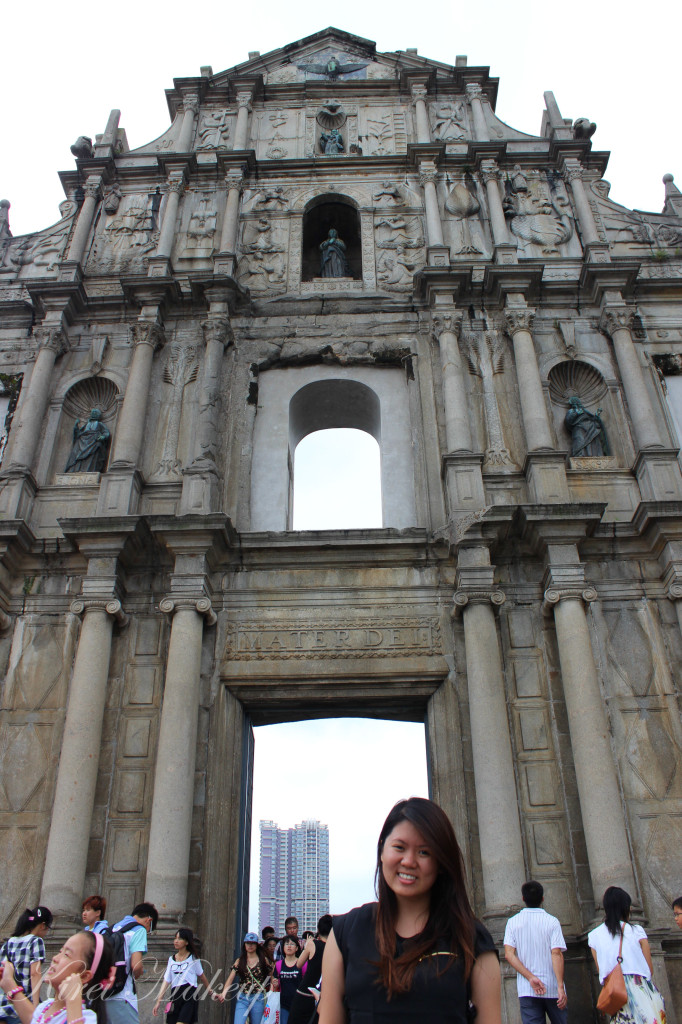
Below is a picture of Macau’s St. Paul’s ruin. Lots of people there! It’s one of the famous tourist spot in Macau. We also get to see the casinos (obviously), the temple of the Sea Goddess and several other locations.Macau Ruins of St. Paul

Now, if you do have the chance to be in Macau, I’d suggest you buy a ticket to a show called House of Dancing Waters in the City of Dreams. We bought our tickets in advance, but you can buy the ticket when you get there. This show is FANTASTIC! It’s like Cirque du Soleil’s “O”, but a smaller scale.

Words cannot describe how great this show is, just go and watch it, will ya!

The House of Dancing Water

With that, I ended my trip and so is this post! Will see you on the next post! 😀

Disclaimer: I am not paid or endorsed to promote any of the attractions above. This is purely out of my own travel experience and out of my own pocket.

Six Homemade Skin Tightening Mask using Flour, Egg and Yogurt [Guest Post]

Women, well we want to control every thing- from our men, to our work, to our kids and off course our age. Every female has complained at one point of time or other about getting old, and trust us, the feeling is so contagious that now people in their mid 20’s has picked up these worries. And who could cash on them? Well obviously our branded skin care products. So, what if we told you that you could avoid those signs of ageing- be it in the form of wrinkles, fine lines, uneven skin tones or worse that loosening of the skin by using simple skin tightening masks with ingredients right from your kitchen? Well here is your guide to natural skin rejuvenation with three elements namely Flour, Egg and Yogurt:

The Gooey Egg Mask

All you would need for this are two or three eggs, based on your area of application. Crack those eggs carefully and separate out the yellow from the white. Once separated beat the white to form a consistent mixture. Avoid having any lumps, so we would suggest using a blender to beat that white. If the smell of the egg is not really your thing, add 3-4 tablespoon of fresh lemon juice to the mixture, which would minimize the smale. Use your index finger to apply the paste smoothly over your face and neck area, keeping it on for 20 minutes and wash off with slightly lukewarm water.

The Flour and Yoghurt Mask

Flour is well known for its amazing properties of skin tightening, where as Yoghurt is a natural de-tanning agent, hence this is skin rejuvenation at its best. Take 4 table spoon of flour in a glass bowl and add 2 tea-spoon of honey or lemon into the mixture. Use a spoon to mix the ingredients, which would finally form a dry sticky pale yellow mixture. Add 2 tablespoon of yoghurt into the mixture and start beating the ingredients to form a thick paste. Apply it on the face before bath and keep it for 20 minutes, and finaly rinse off with plain water.

The Yoghurt and Egg Mask

To get that flawless skin, take an egg and crack it to separate the yolk from the White. Take a bowl and put in two table spoon of yoghurt and 3 tea-spoon of brown sugar. Mix it well to dissolve the sugar into the yoghurt. Thereafter add the egg white to the mixture and beat it uniformly to form a smooth paste. Apply it on the face and keep it till the time the mask dries out- ideally 15 minutes. Finally. Wash off and Damp dry.

The Egg and Flour Mask

You would need the egg white for this mask, so separate it from the yolk, and add to a mixture of 4 tablespoon of Flour, 2 Tablespoon of Yoghurt and 3-4 drops of glycerin based on your skin type. Whip the mixture well to avoid formation of any lumps. Apply it on the face and neck area and let it rest, till the paste starts drying and thereafter wash off with cold water.

The Rice-Flour and Cabbage Mask

Pluck out two three juicy cabbage leaves, dice them and finally grind them to form a gooey green paste. Add two tea-spoon of almond oil and 3 table spoon of rice flour to the mixture and blend it well. Using the egg white can be a substitute for almond oil. Apply the mixture and let it stay for a maximum of 20 minutes and rinse off with normal water.

The Cabbage and Yoghurt Mask

Take 3-4 leaves of a juicy and green cabbage and blend it well to form a sea-green paste, minus the lumps. Add 3 table spoon of Yoghurt and 2 tea-spoon of honey to the mixture and continue blending it to form a sticky mixture. Keep it on the face for 15 minutes and wash off with slightly luke-warm water.

Well, the list ends here. We would recommend a skin patch test before directly applying any of these masks on the skin. And just an additional tip including that egg, flour and yoghurt into your diet can also bring out amazing results.

About the Author:

The above article is composed by CJ, a beautician by profession associated with mynewa.com who loves to share her beauty and health tips via her articles.

Instain by The Balm [sponsored post]

Joy (Hi!!) from Nail Polish Canada contacted me earlier last week to see if I want to give The Balm Instain products a try. I wanted to get my hands on the Instain since it’s The Balm new blush product range, but sadly I’m not in Canada. Nevertheless, I wanted to share more info about these blushes with you guys. So, read on below and if you (my Canadian readers) are interested in purchasing them, you can grab them from Nail Polish Canada website for CAD$22/each. I’m not sure if this line is out yet in Indonesia. I know The Balm has several booth in Jakarta, but I don’t know if it is going to be available here.

The Balm Cosmetics line boasts a wide range of high quality make-up including powders, bronzers, lips stains, blushes and more.  The Balm’s philosophy is “Beauty in five minutes” and with their multi-use and quick fix products it is easy to achieve stunning looks within minutes.

The Balm Cosmetics has just released a new long-lasting blush, Instain.  Instain was created in six different shades and comes in the brand’s trademark nostalgic packaging.  With it’s high pigmentation and long lasting ability, Instain blush would make for a great addition to any makeup bag.  The blush comes in a compact case, perfect for travel or on-the-go make-up applications.

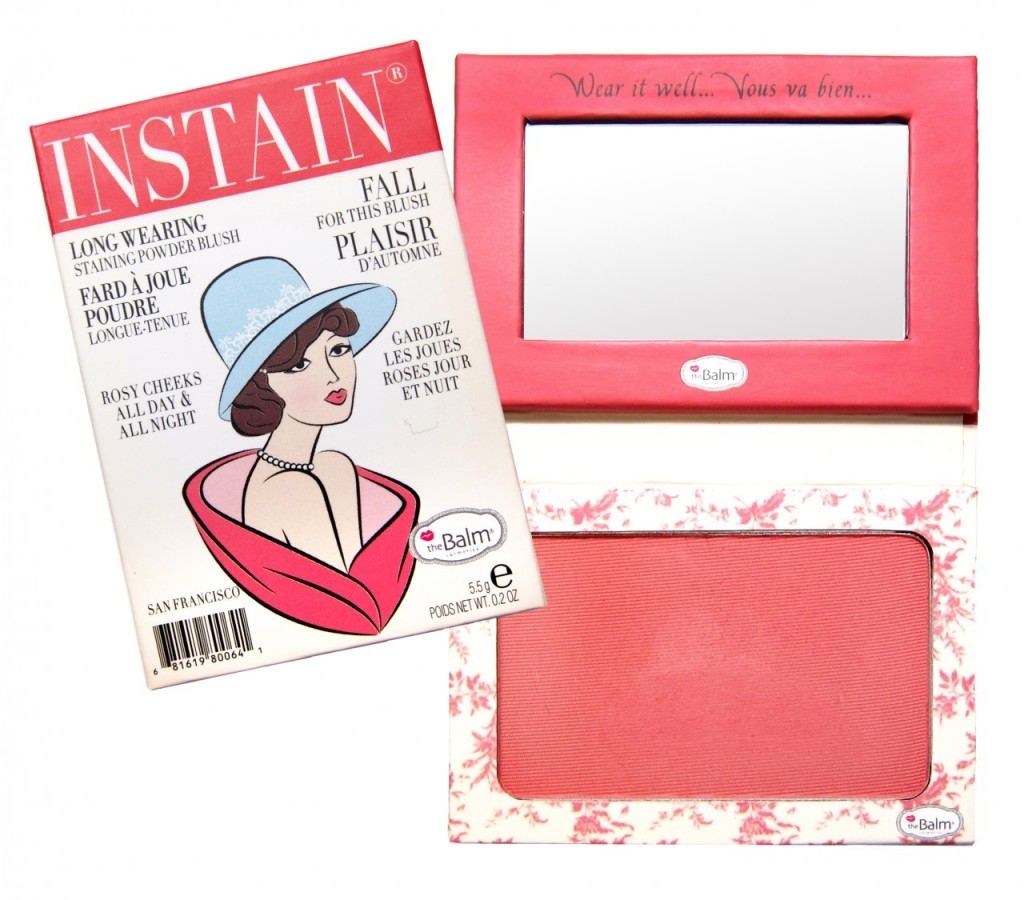
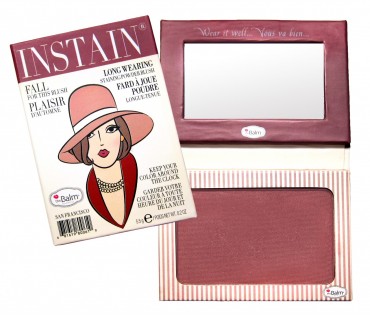
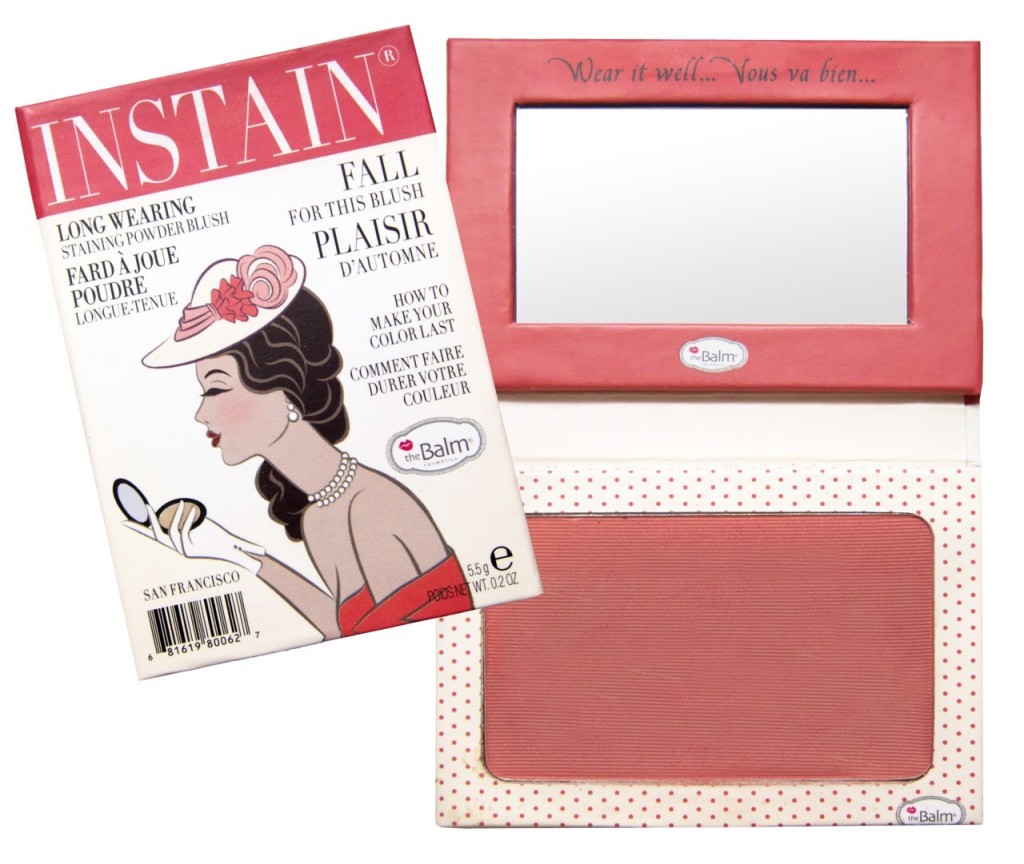
The Balm Instain blushes come in:

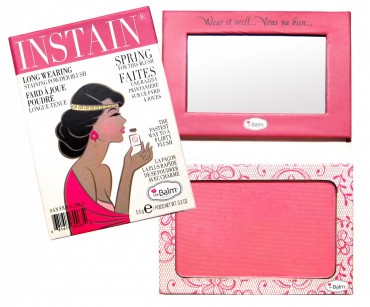
1. Lace Instain Blush Bright Pink

The Balm blush

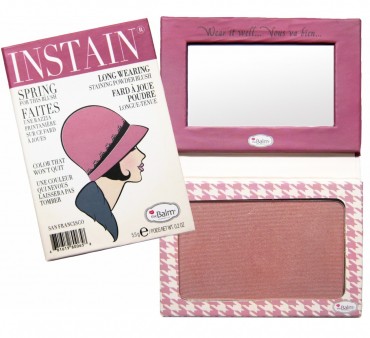
2. Houndstooth Instain Blush – MauveThe Balm Instain blush

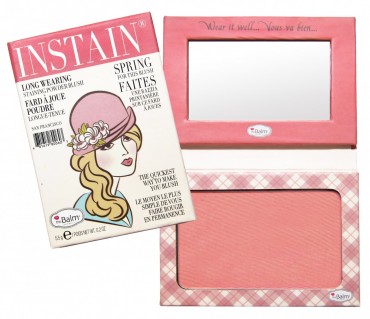
3. Argyle Instain Blush  – Petal PinkInstain The Balm

4. Toile Instain Blush – StrawberryThe Balm Instain

5. Pinstripe Instain Blush – PlumThe Balm Instain

6. Swiss Dot Instain blush PeachThe Balm Instain blush

Top 100 Beauty Blogs To Follow in 2013

I was emailed couple days a go and to my surprise, I was listed as one of the Top 100 Beauty Blogs to Follow in 2013! I’m no. 83!!! I’m extremely grateful that my blog is even considered as Top 100 Beauty Blogs to Follow in 2013! I mean, I know I don’t constantly update my blog regularly, or even do as much as other bloggers in the social media side of things. I’m very personal and don’t really share my life outside makeup into my blog. So, it was SUPER AWESOME to know that I made it into the list!

Anyhow, let’s not get all cheesy and sobby and thanking everyone..hahaha..I know I’ve my READERS and FOLLOWERS to thank to, as well as those who’ve been supporting me! So for those of you who’s been following my blog from when I was a student till now, THANK YOU SO MUCH! 😀

I know most of my readers are probably like me, a silent reader, but I’m totally cool with that cause I know you guys returned to read the posts 😉 hahaha..

Anyways, again, thank you for following my blog! Don’t forget to SUBSCRIBE to the mailing list (I promise it only sends email when I publish a new post), follow and chat with me on Twitter (don’t forget to tweet this!) , like my Facebook page and follow me on Instagram! Oh, don’t forget to keep track with my daily routine in Pinterest..more like an addiction really 😀


An infographic by the team at CouponAudit

.