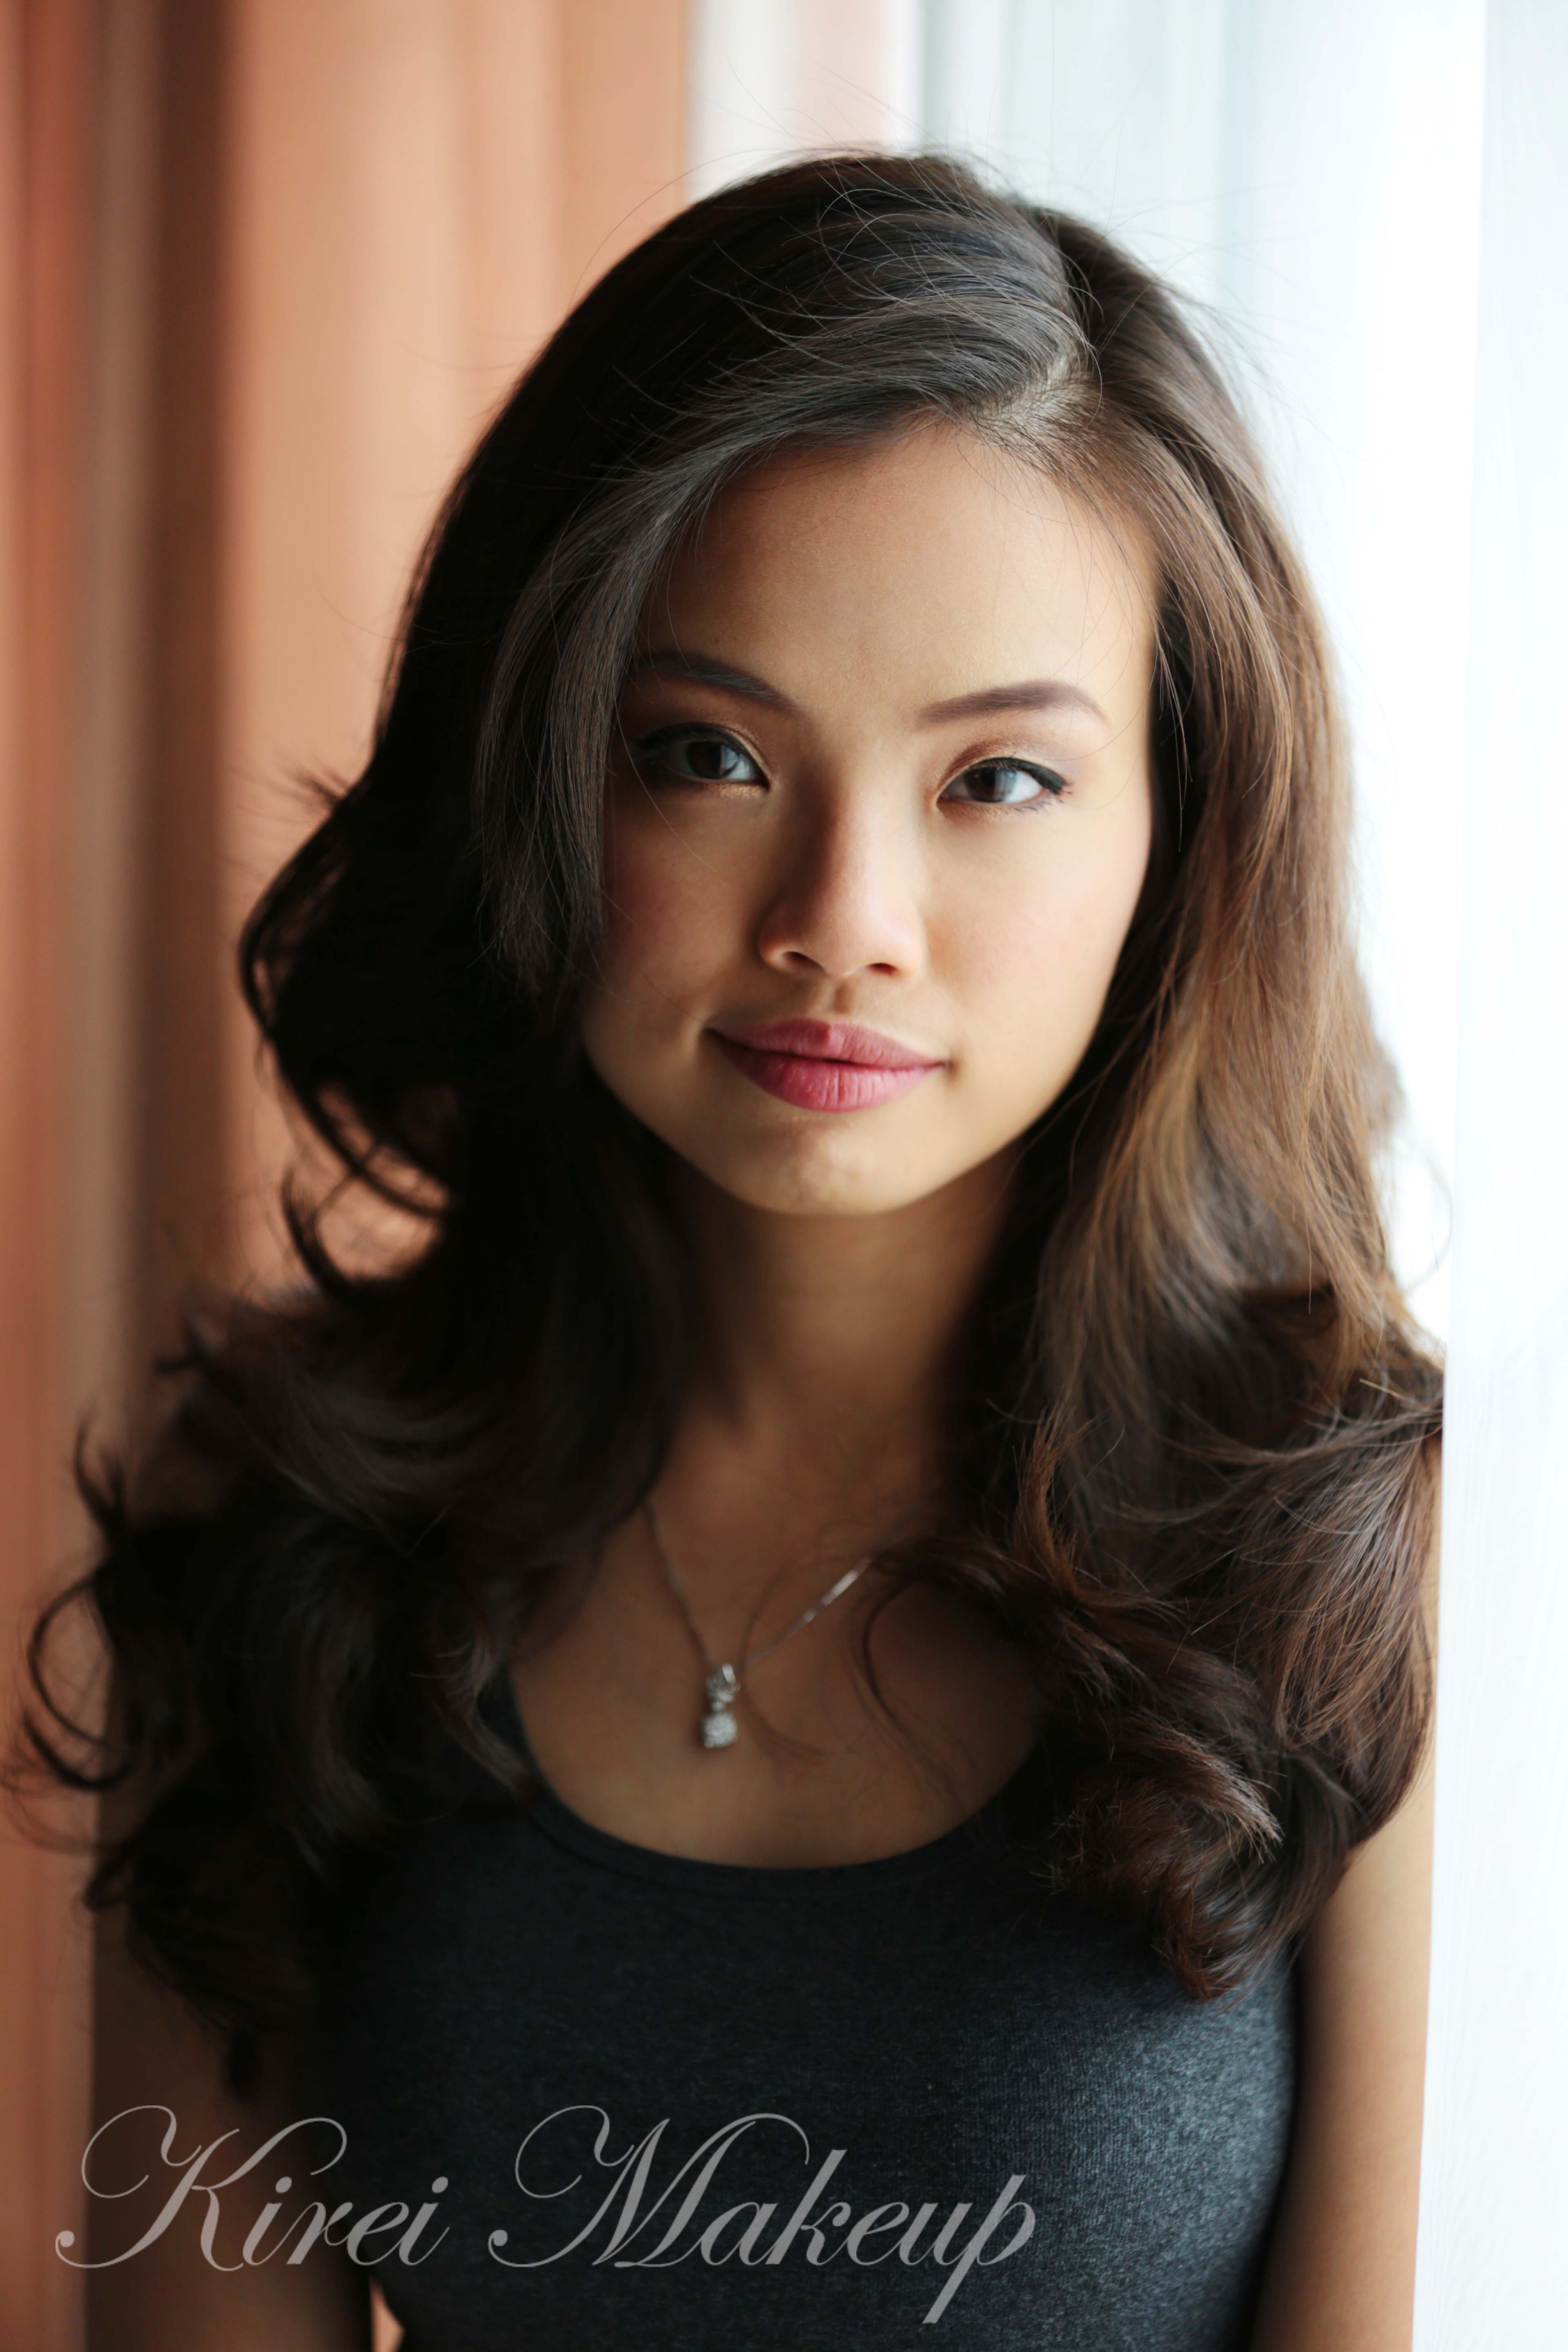
Last Sunday, I was offered to do bridesmaid makeup (all thanks to the wonderful Keirsten) for 5 bridesmaids. The first girl, Kristin, came up to me and showed me what kind of makeup she wanted and after she was done with the makeup, the next 3 girls wanted the same look! The last girl, Amanda, had a different look which was similar to a tutorial that I’ve already done in this post. Also, you’ll be able to see Amanda’s makeup if you follow me on Instagram!
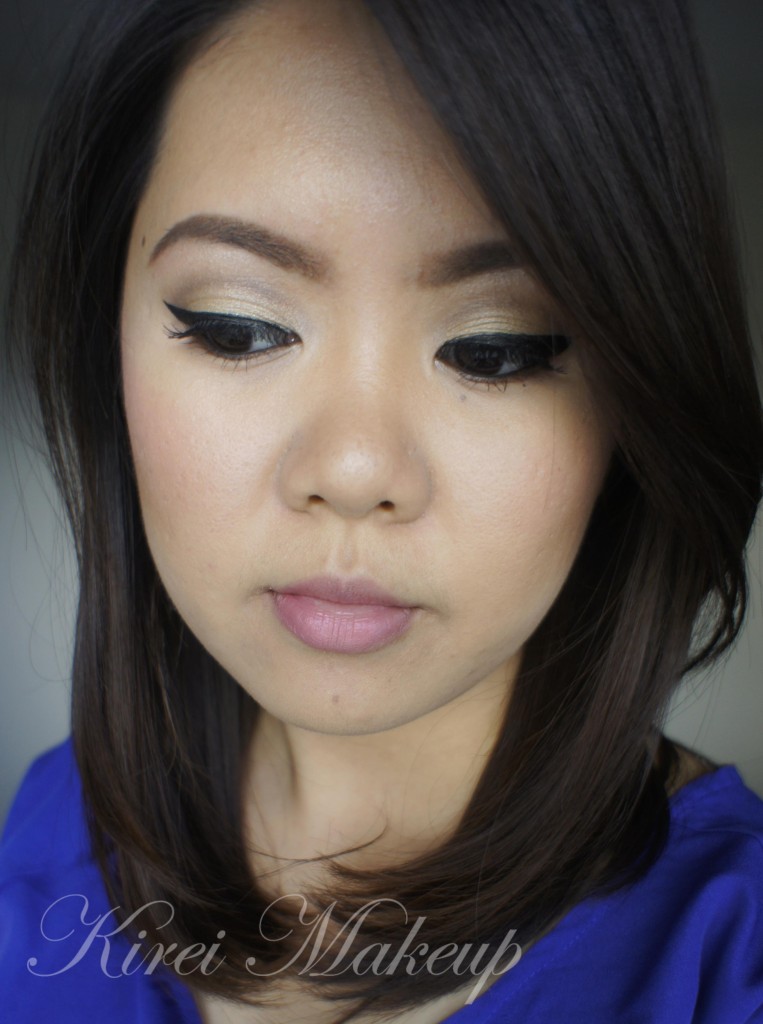
Anyways, this look obviously can be used for anyone, bridesmaids or brides. It’s not too smoky, but at the same time there’s some intensity on the eyes. Not a lot of contouring for the face, since the focus is on the pink flushed cheeks. The lips is kept neutral,however one of the bridesmaids, Mimi, had a bright pink lips which also works with this makeup.
The look is very fresh and brightening. Nothing too smoky or too contoured. Very youthful, and the overall look for the face is semi-matte. That way, the bridesmaids didn’t stand out from the bride, since the bride went for a more smoky eyes makeup.
How-to:
1. I primed my face by applying MUFE Elixir all over my face and down to my neck. This will ensure that the face is moisturized and primed for foundation. This also will ensure your foundation stays all day long. The Elixir works for every skin type.
2. For the eyes, I applied UD Primer Potion from the eyelid all the way to just below the brow. This will ensure your eyeshadow stays put the whole day.
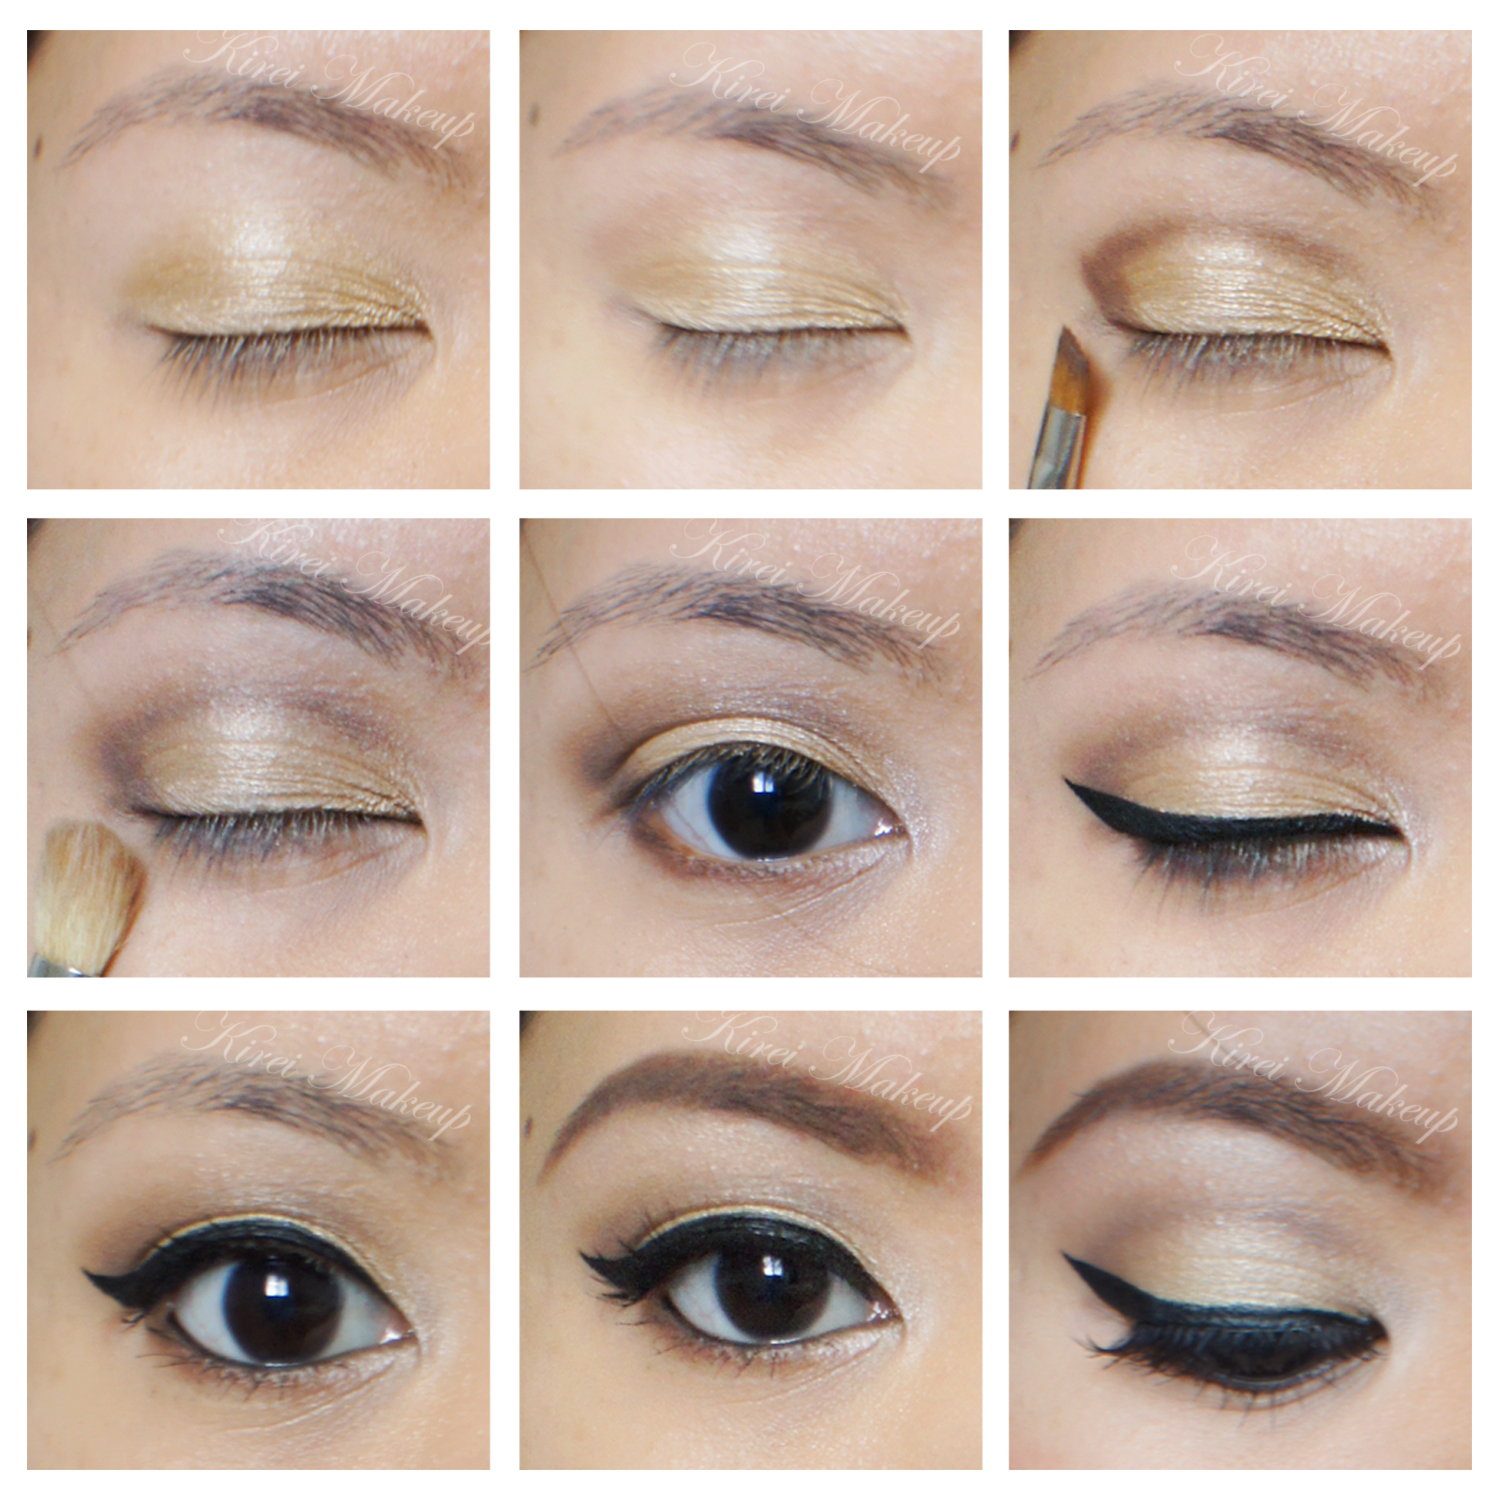
3. Using a flat eyeshadow brush, I applied A from Sleek Makeup iDivine Storm palette (see picture below) all over the eyelid.
4. Using a small shader brush, I lightly applied B from Sleek Makeup iDivine Storm palette on the crease.
5. Using an angled brow brush, I applied a mixture of C and D from Sleek Makeup iDivine Storm palette on the outer V, and right on the crease/socket.
6. Using a fluffy blending brush, I blended C + D so there’s no harsh line.
7. Using whatever was left on the brush on step 5, I ran it along the lower lash line.
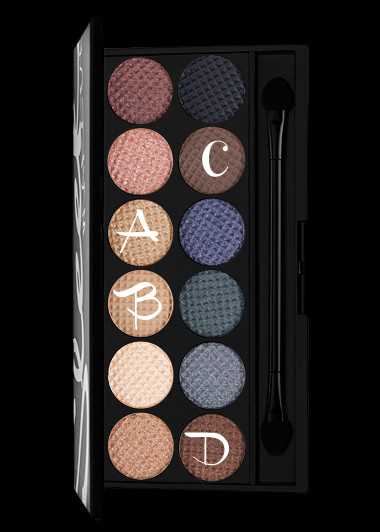
image is courtesy of Sleek Makeup
8. I created a winged liner using Kate Kanebo Super Sharp liquid liner. (For the bridesmaids, I used MUFE Aqua Black gel eyeliner since it’s waterproof).
9. I lined my waterline and tightline using MAC Smoldering eyeliner. (For the bridesmaids, I used L’oreal Voluminous Smoldering eyeliner).
10. I curled my lashes and applied Tarte Light, Camera and Lashes mascara on both top and bottom lashes.
11. I also applied Quo false eyelashes (I think this is 803). (Bridesmaids brought their own false lashes).
12. I filled my brows using Anastasia Express Brow Powder kit in Brunette.

13. For the face, I applied MAC Pro Long Wear foundation in NC 30. (for bridesmaids, I used either MUFE HD or Kryolan HD, whichever matched them better).
14. Under the eyes, I applied Benefit Erase Paste. (For bridesmaids, I used MAC Pro Correct/Conceal).
15. I lightly applied Benefit Moon Beam on the high planes of my cheeks (cheekbones, bridge of the nose, cupid’s bow)
16. I set my face using Cover FX Translucent powder.
17. I slightly contoured my face using Smashbox contour/highlight palette (discontinued).
18. On the cheeks, I applied MAC Dainty mineralized blush, which seemed to be the favorite for the girls!
19. For the lips, I applied Revlon Colorstay Ultimate Suede lipstick in Socialite.