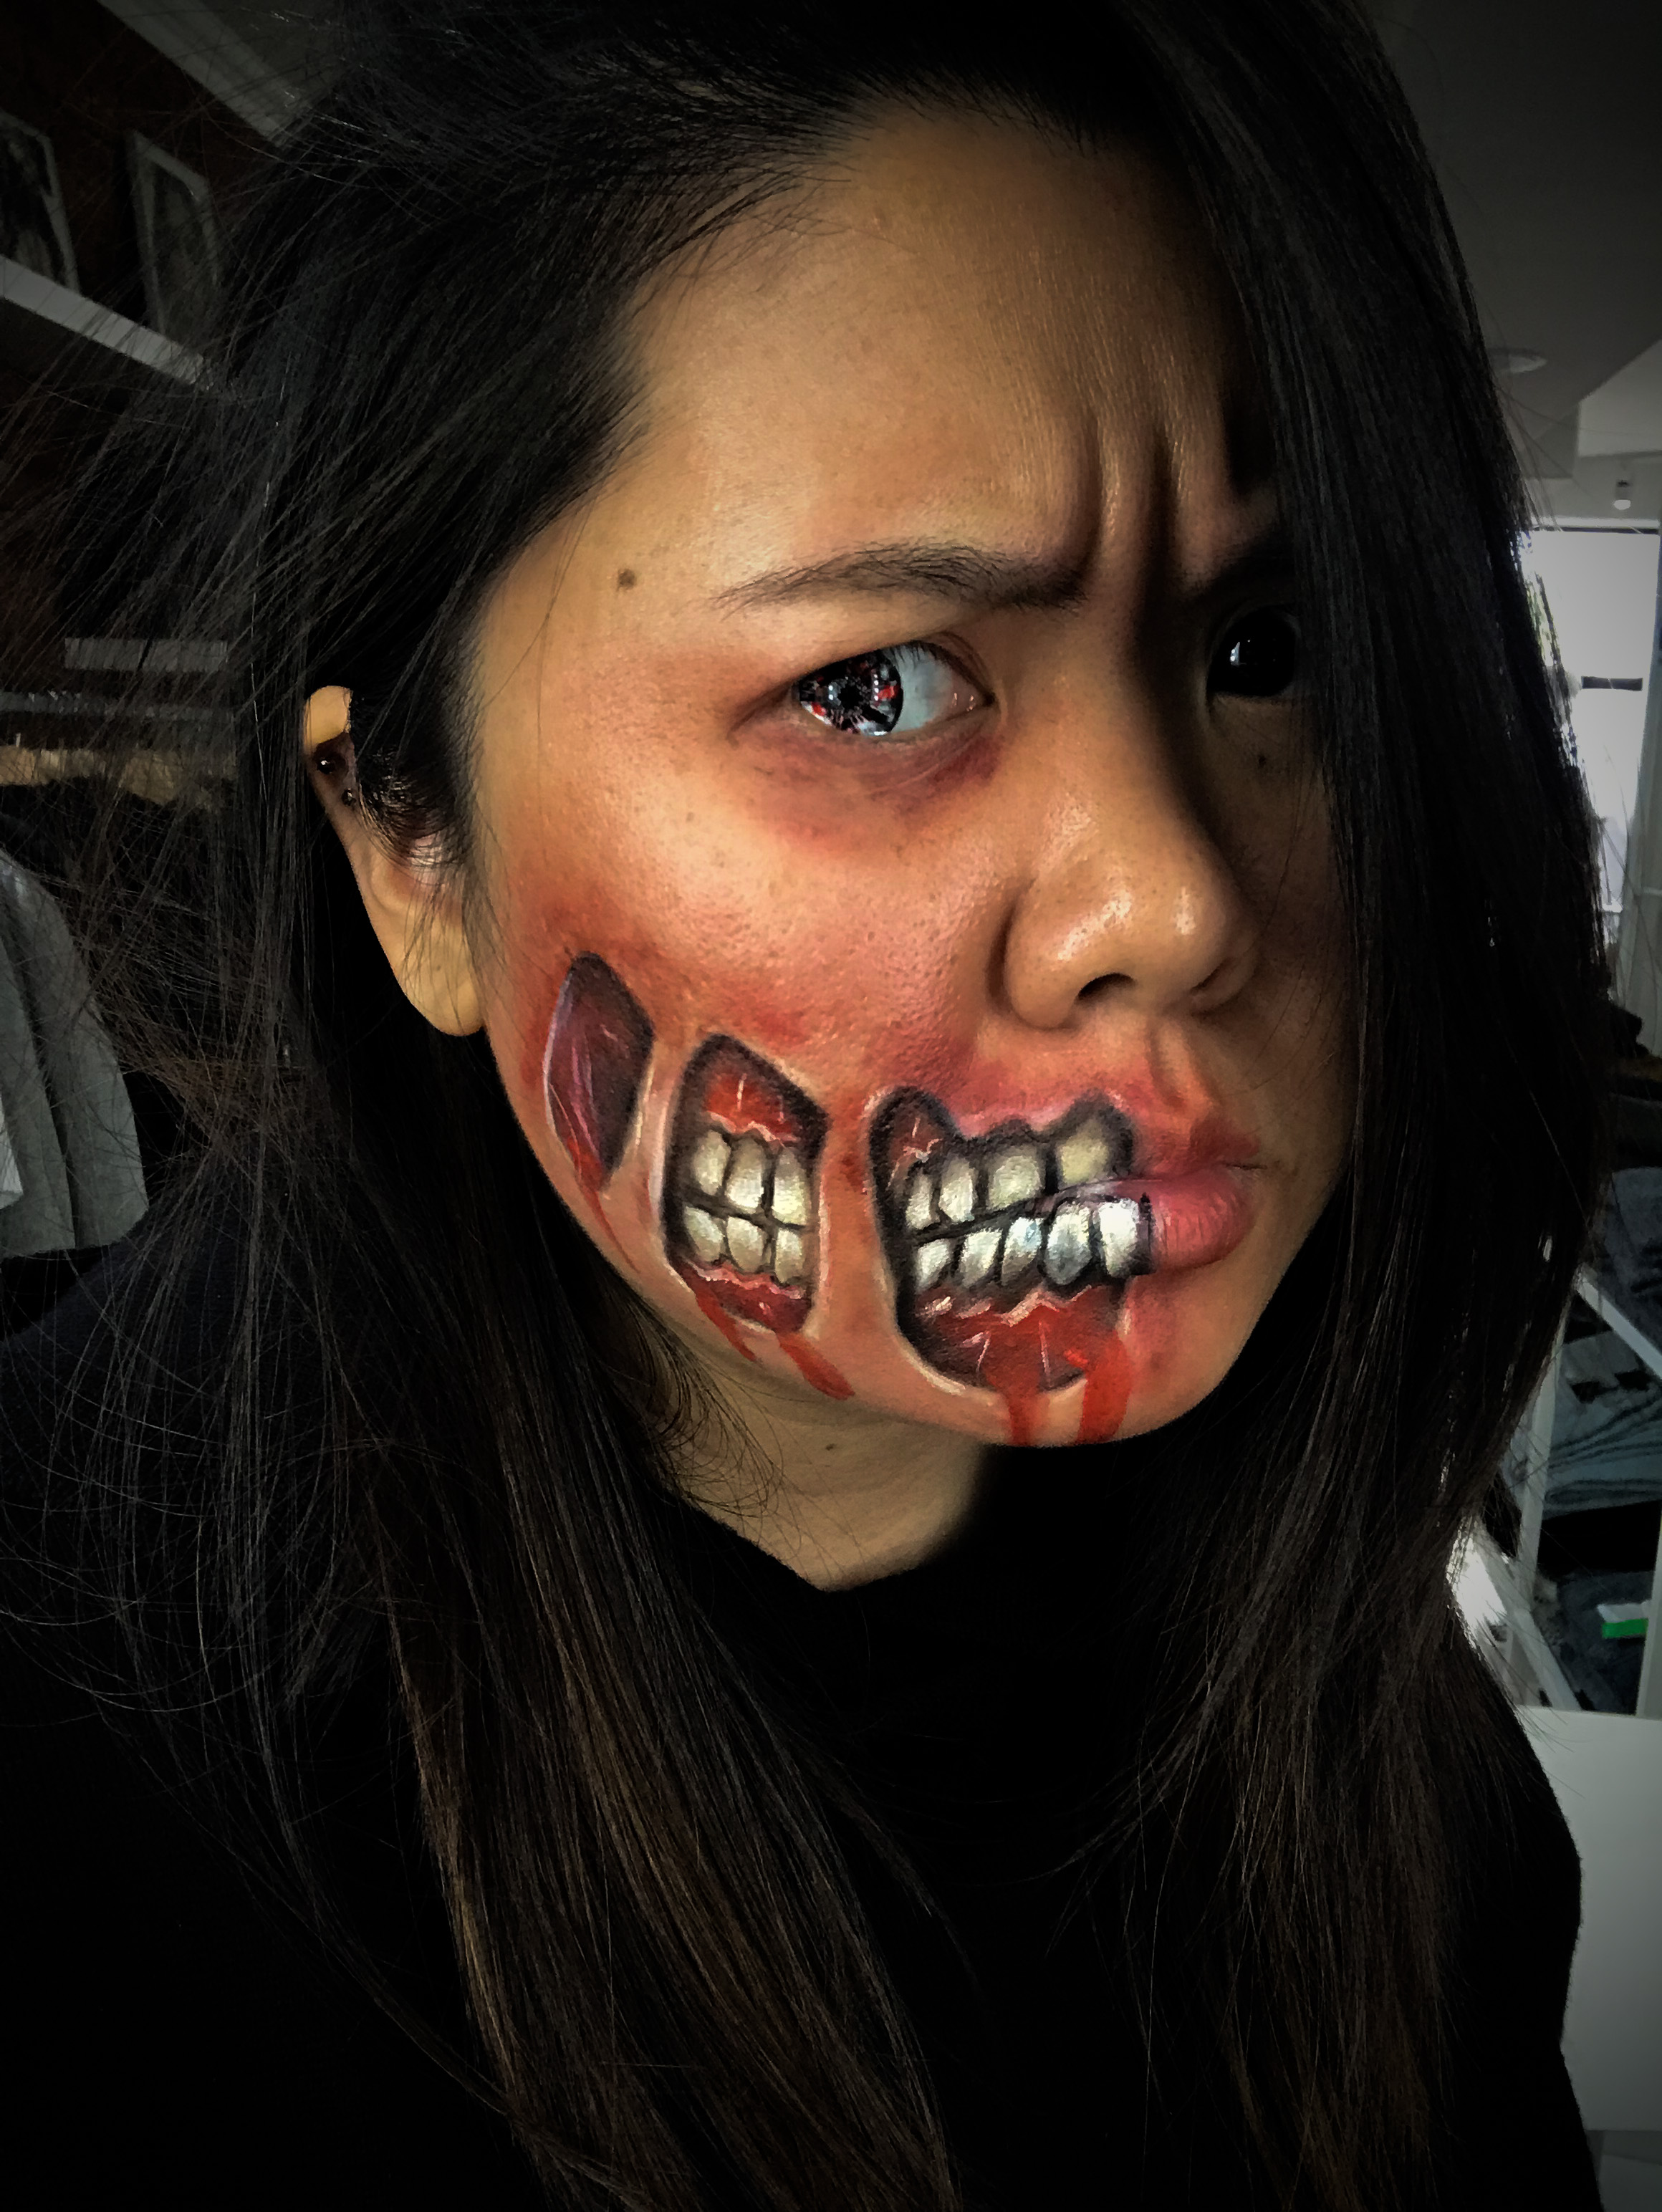
Hello, hello, hello! It’s been a while! How is everyone doing? I hope you’ve been following my Instagram account & watching my Instagram stories! As you know, I’ve done a Neon/Blacklight Skull makeup on Instagram. Today, I’m going to share my with you a Zombie sorta makeup.
Read more below to check out the tutorial.

Click here to see my other Halloween tutorials
Alright! So for the Zombie makeup, I just did something simple and quick. I didn’t have much time to create a tutorial, so everything has to be done at my store taken using an iphone.
For this Zombie makeup, all I used is:
- Kryolan Aqua Colour palette – black, cream, white, red, dark red
- Brown/Black/White pencil liner for outline
- Blush – any soft pink blush will do
- KVD Trooper tattoo liner (optional)
- KVD Shade + Light eye palette – Black, brown, grey eyeshadows (any brands will work)
- A couple good brushes – paint brushes will work too. Just get several sizes. Grab something that can be used as a liner brush to add details.
For the Zombie makeup, you’ll need to use a reference photo. Use some great pictures from Pinterest (follow my face painting board for inspiration) to create the look. I find that having several photos printed out or even have it on your phone helps a lot.
How-t0:
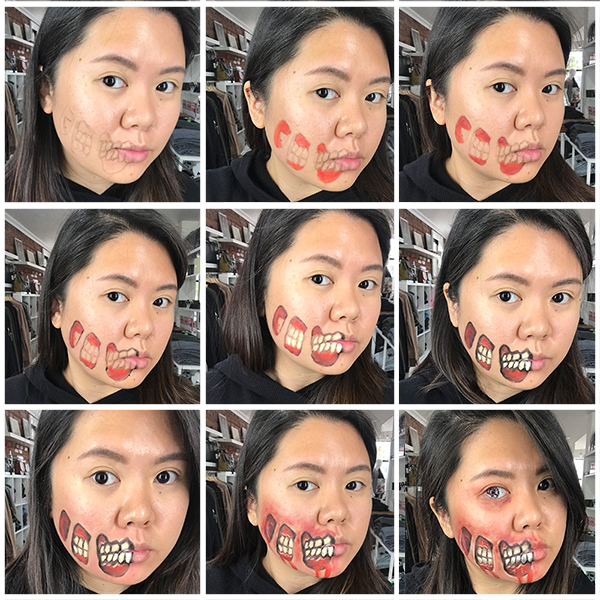
- Outline the ripped mouth and teeth so you know where to place the colours. I’m using my ABH Brow Wiz in medium brown, but you can use any pencil liner.
- I fill in the gum line with a lighter red face paint.
- Using a slighty darker red, I applied this colour around the edges of the rip for added depth. I know it’s not fully visible in the picture below but it does add a bit of dimension in real life.
- I outlined the edges using a black face paint. At this stage, I should just outlined it using my liquid liner for a finer line, but oh wells!
- For the teeth, I filled them in using a cream colour first for placement.
- Using KVD Trooper tattoo liner, I outlined the edge of the teeth. I also added some shading using black eyeshadow around the edges of the ripped. This will add extra depth perception
- Using a fluffier brush, I added pink blush around the wound area. This helps to make the area looks pink, swollen and painful. I also added some white highlight around the gum line and on the teeth.
- Next, I went back to the light red colour. I dilute this colour really well with water and just randomly placed it around the wound area. I blend the colour using my fingers.
- The rest is just really detailed works. I used a cream colour and add highlight around the ripped area to make it more dimensional. I added a mixture of grey and brown eyeshadow on the teeth, and dripped some red face paint along the wounded area & my eyes.