Lime Crime Wicked Tutorial

It has been a rough week! How is everyone holding up? My week has been crazy so far, and today I finally have the chance to update my blog! Anyways, don’t forget to follow me on Instagram for daily updates! Anyways, I recently purchased Lime Crime Wicked Velvetine lipstick,  which I’m sure you’d have known from my 2 previous post a go. I absolutely love the color, and I wanted to create another tutorial with it.

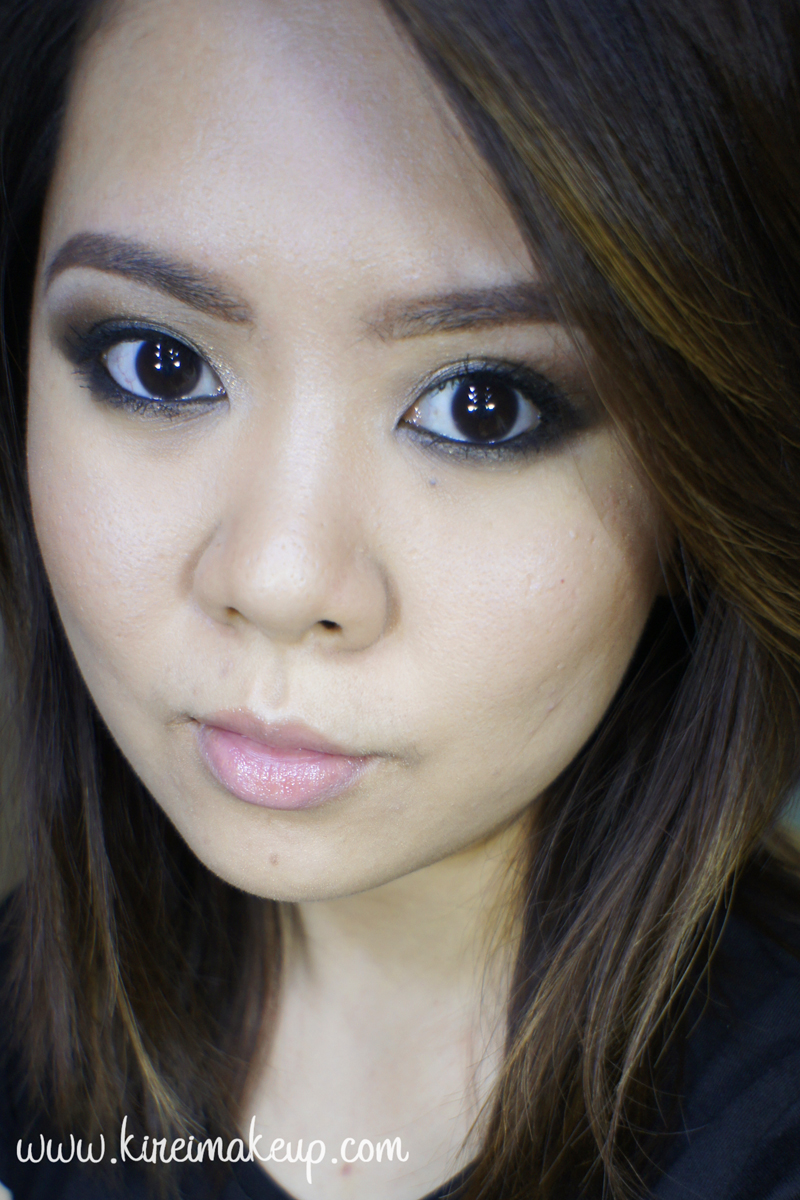
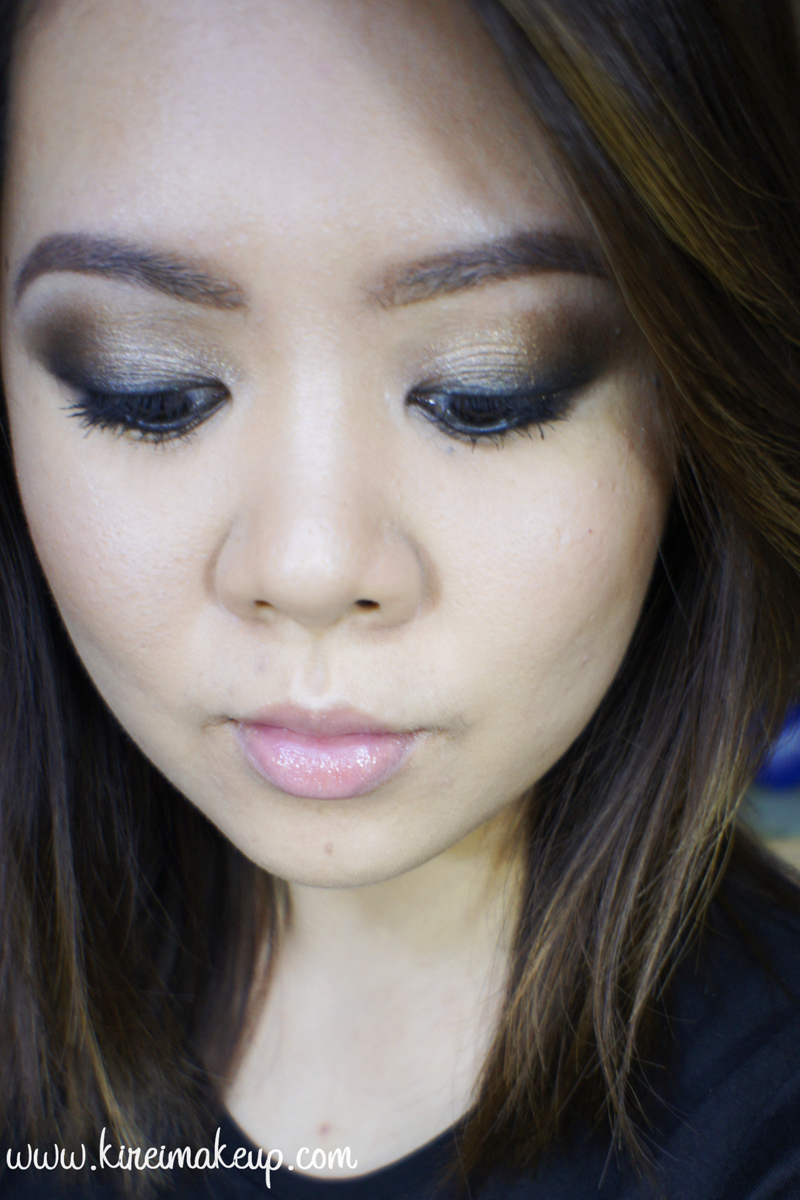
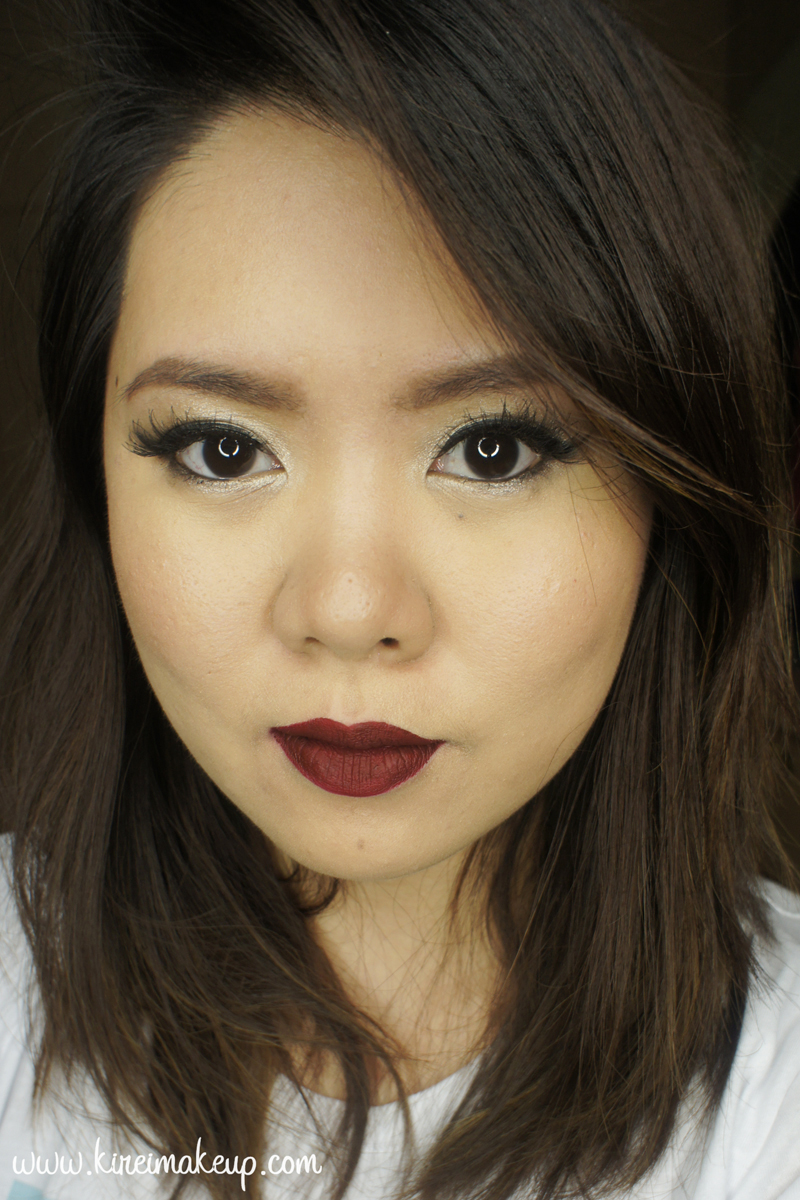
Since Wicked is such a strong bold color, I felt that wearing too much on the eyes might take the attention away from it. I decided to play with different texture and finish for this look, what do you guys think? I actually was quite happy with how it turned out. The eyes has a brightening effect without going too overboard with the shine, the face was kept semi-matte, and the lips were the center of attention.

*Check out my other Kat Von D Monarch palette related tutorials*

silver eyeshadow tutorial

My eyelids were prepped using Urban Decay Primer Potion. My face was prepped using Benefit Porefessional primer.

How-to:

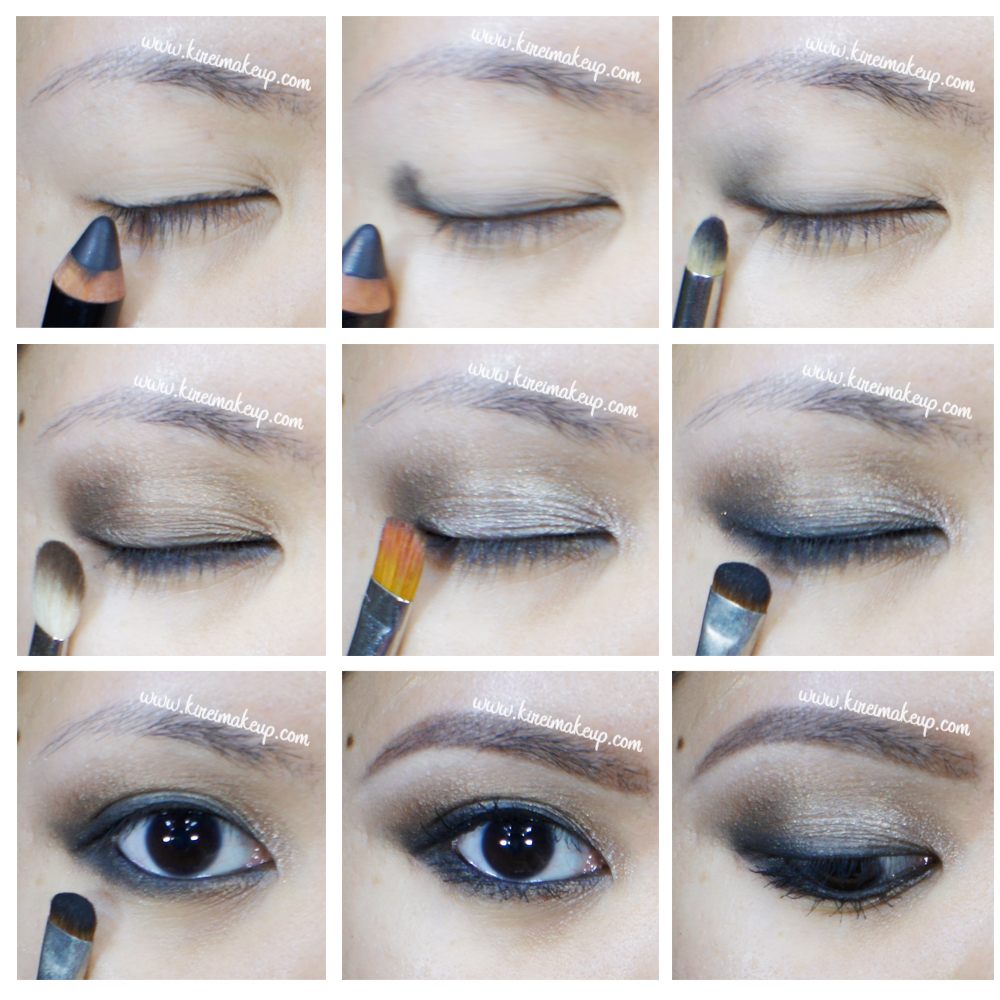
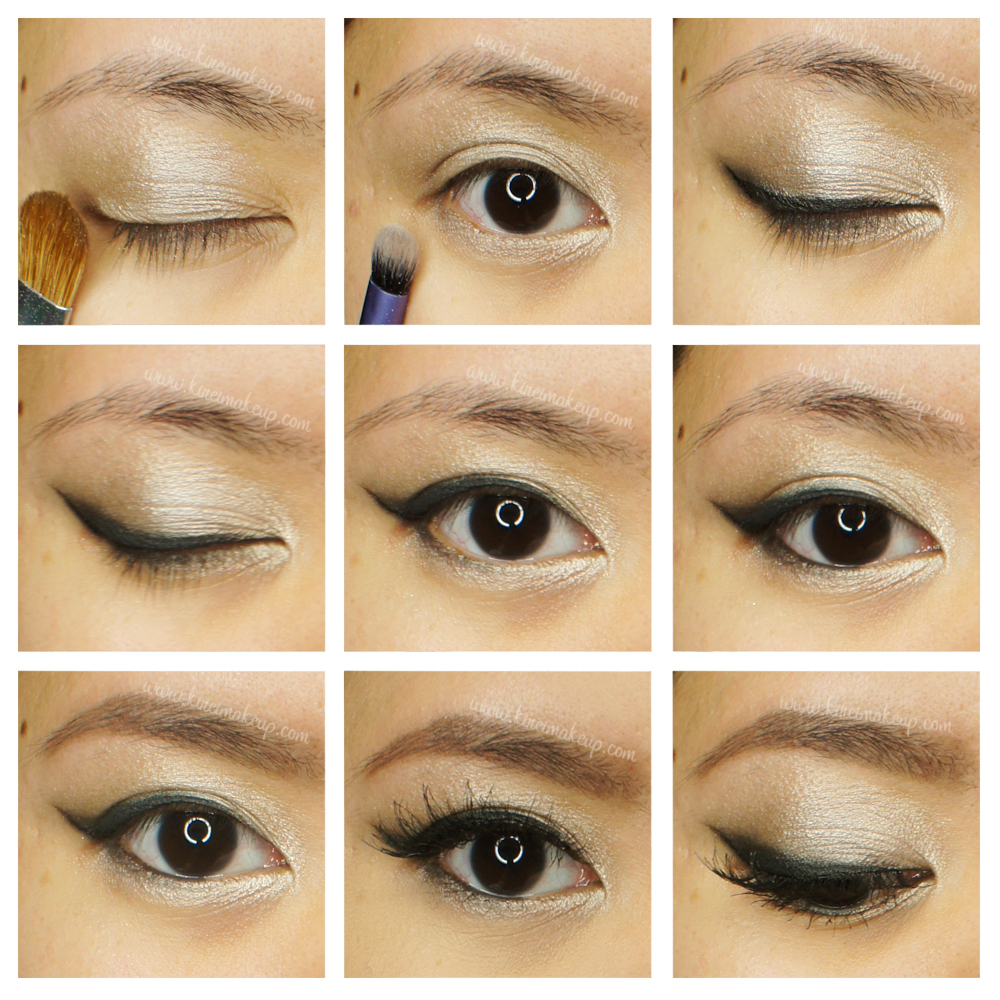
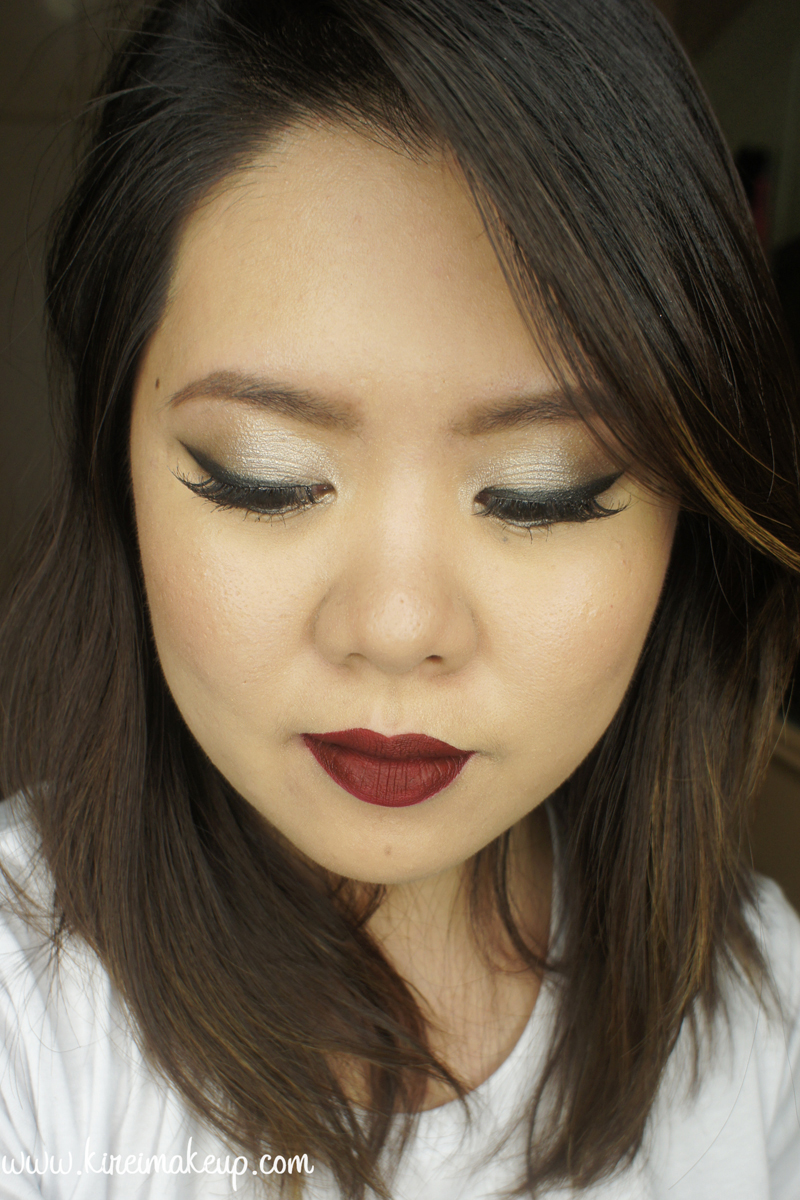
1. I applied Delaney from Kat Von D Monarch Palette all over my eyelid using a flat eyeshadow brush. I brought this color up above my crease but just below the brow bone.

2. Using Real Technique Shading brush, I applied Telepathy from Kat Von D Monarch palette on the inner corner of my eyelids.

3. I applied Delaney along the lower lash line using Real Technique Shading brush.

4. I created a winged liner using Kat Von D Trooper eyeliner along my upper lash line.

5. Using an angled eyebrow brush, I stamped Deadhead from Kat Von D Monarch palette on top of the liquid eyeliner. I did this to create a matte finish since the eyeliner dries slightly shiny.

6. I lined the outer half of my waterline using Revlon Photoready Kajal eyeliner in Carbon Cleopatra (the black end).

7. I filled my brows using Anastasia Brow Wiz in Taupe and Brunette.

8. I curled my lashes and applied Maybelline Volume Express Turbo Boost mascara.

9. I also applied Gwiyomi no. 3 false eyelashes.

SONY DSC

10. For the face, I applied MAC Pro Longwear foundation using my fingers.

11. I applied Bobbi Brown Peach corrector and MAC Pro Longwear concealer under my eyes.

12. I applied Benefit Moon Beam highlighter on the bridge of my nose, on top of my cheeks, and cupid’s bow.

13. I lightly contour my face using Smashbox contour kit and NARS Kabuki Ita brush.

14. On my cheeks, I applied MAC On a Mission beauty powder blush.

15. I set my face using Cover FX translucent setting powder.

16. I also lightly applied Hourglass Ambient Lighting powder all over using a powder brush.

17. On the lips, I applied Lime Crime Wicked.

SONY DSC

Products used

Eyes – Urban Decay Primer Potion (original); Kat Von D Monarch Palette (upper/lower lids: Delaney, inner corner: Telepathy; liner: Deadhead); Kat Von D Trooper eyeliner; Revlon Photoready Kajal eyeliner Carbon Cleopatra; Anastasia Brow Wiz in Taupe and Brunette; Maybelline Express Volume Turbo Boost mascara; Gwiyomi falsies #3.

Face – Benefit Porefessional face primer; MAC Pro Longwear foundation; Bobbi Brown Peach corrector; MAC Pro Longwear Concealer; Cover FX setting powder; Hourglass Ambient Lighting powder.

Cheeks – Benefit Moon Beam highlighter; Smashbox Contour Kit; MAC On A Mission beauty powder blush.

Lips – Lime Crime Velvetines Wicked.

Grunge Smokey Eye Tutorial

Ah, yes, the grunge smokey eye look. This has been my go-to makeup for any night-out or parties since it’s so easy and simple. I could go as dark and intense as I want, and I could even go messier if I need to. Smoldering, sexy and effortless! You can achieve this look in less than 10 minutes, seriously!

For this look, you can use black eyeshadow all around, but I like some warmth on my smoky eyes, so I prefer adding non-black shadow. The technique I showed you in the photo below would be great for those who have troubles creating crease to create smoky eyes.

The key to this look is to use an eyeliner that is soft, and doesn’t set easily. You don’t have to be precise for this look, and I suggest skipping the falsies altogether if you want it to look a bit more grunged or rocker chic! No falsies, falsies = glam! Well, of course you can use falsies, just in my opinion once you use falsies it’s no longer grunge and messy. It becomes very glam.

*Don’t forget to check out my other Smoky Eyes tutorial!*

Kat Von D monarch palette tutorial

Eyelids are prepped using Urban Decay Primer Potion original.

How-to:

1. Using L’oreal Voluminous Smoldering eyeliner, I lined my upper lash line. Don’t worry about it being imperfect.

2. I dotted the same eyeliner on the outer part of my eyelid.

3. Using a pencil brush, I lightly smudged the eyeliner before it has the chance to set.

4. I applied Kat Von D Disintegration eyeshadow (from Kat Von D Monarch palette) all over my eyelid all the way up to my crease using a blending brush.

5. I sprayed water on my flat eyeshadow brush, and applied loose pigment from Gosh Tan Mineral Colour pigment on the inner half of my eyelid.

6. Using a smudging brush, I applied Kat Von D Deadhead eyeshadow (from Monarch palette) along my upper lash line, winging it slightly on the outer part.

7. I used the same eyeshadow and brush as no. 6 on the lower lid. I also lined my waterline and tightline using L’oreal Voluminous Smoldering eyeliner.

8. I curled my lashes and applied several coats of MUFE Aqua Smoky Lash mascara on both upper and lower lashes.

9. I filled my brows using Anastasia Brow Wiz in Brunette.

10. I lightly applied Entomology from Kat Von D Monarch palette just above the crease to blend out the eyeshadow a bit more.

grungy smoky eyes

11. On my face, I applied Diorstar foundation using Cover FX cream foundation brush.

12. Under my eyes, I applied MUFE HD concealer.

13. I set my face by dusting Cover FX translucent powder lightly with a large powder brush.

14. I also applied a Smashbox contour powder under my cheekbones and on my temples, and very lightly on the sides of my nose.

15. I applied Benefit Hervana on my cheeks, and The Balm Mary Lou highlighter on top of my cheeks, on the bridge of my nose and on my cupid’s bow.

16. On my lips, I applied a little bit of foundation (from whatever was left on my foundation brush). Then, I added YSL Glossy Stain in Peche Cerra-Colla (27) for that nude peachy lips.

easy grunge smoky eyes

 Products used

Eyes – Urban Decay Primer Potion (original); Kat Von D Monarch palette (Disintegration, Deadhead, Entomology); Gosh Mineral Colour Pigment (Tan); L’oreal Voluminous Smoldering Eyeliner; Make Up For Ever Aqua Smoky Lash; Anastasia Beverly Hills Brow Wiz (Brunette).

Face – Diorskin Star foundation; Make Up For Ever HD Concealer; CoverFX Translucent powder.

Cheeks – Smashbox contour powder; Mary Lou Manizer highlighter; Benefit Hervana blush.

Lips – YSL Glossy Stain in Peche Cerra-Colla (27).