Killer Clown Halloween Makeup

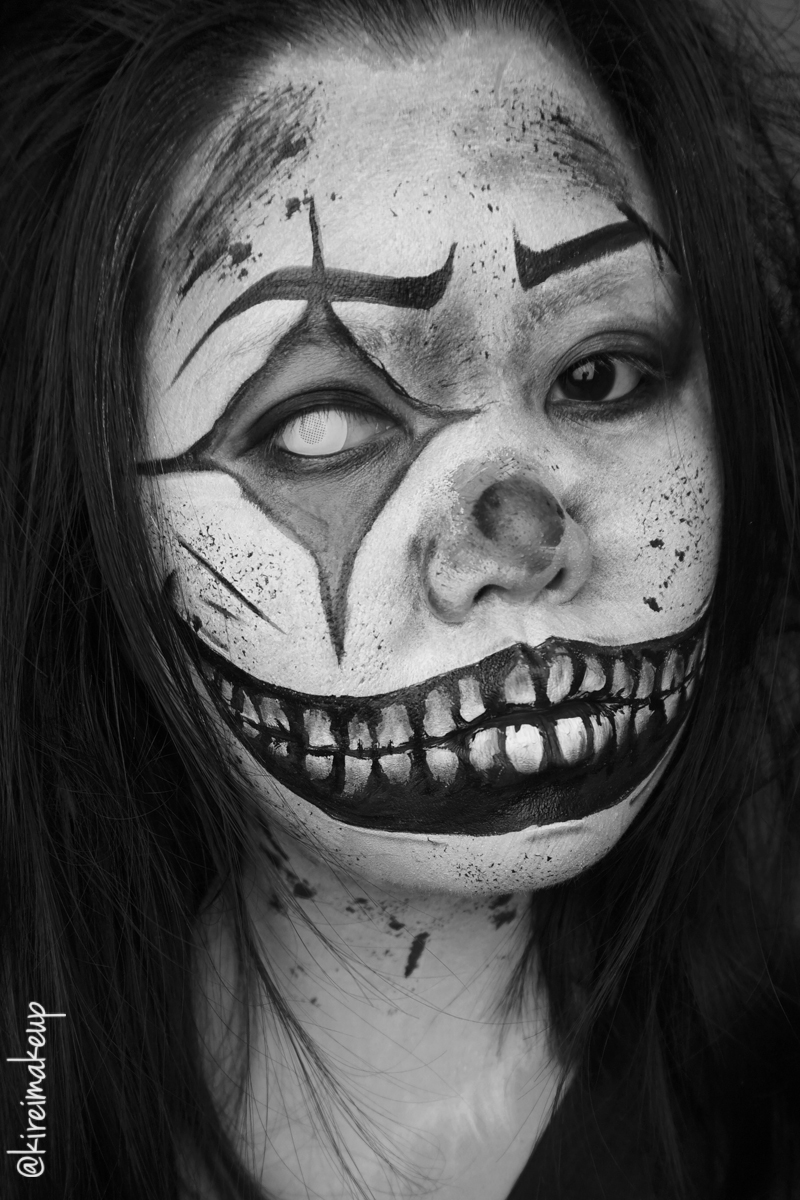
I’m back with another Halloween tutorial! This time I’ve decided to do a Killer Clown Halloween makeup. This look is fairly easy, and all you need is a simple basic face paint along with some artist brushes. For this tutorial, I used Wolfe FX Face painting palette called Hydrocolor Essentials, which are water activated. Other water-activated brands that are easier to find in Canada include MAC Pro Chromacake (can be found on their website or MAC Pro store at Bloor, Toronto), and Snazaroo face paints which can be found in most Art Stores (Curry’s, Michael’s).

Even though water-activated face paints are easy to use, they can also be easily removed. So, be very careful if you like to lick your lips or if you’re going to drink a lot of liquid while wearing this makeup. Also, please note that certain colors are not recommended to be used near the eyes, esp. those with red and orange dyes.

*For Monster Grin tutorial, please check out my Monster Grin post*

*Please check out my other Halloween post*

Killer Clown makeup tutorial

A trick to make the face paint stays well on the skin, and not crack is to dip the brush very lightly into water. Try not to cake on the face paint, the thinner the layer, the less likely it’ll crack. For this Killer Clown look, I didn’t want a smooth white face since why would a killer pay so much attention to their white base anyways, right?! So, don’t worry about the imperfect and streaky white base since it’ll add a bit more to the character.
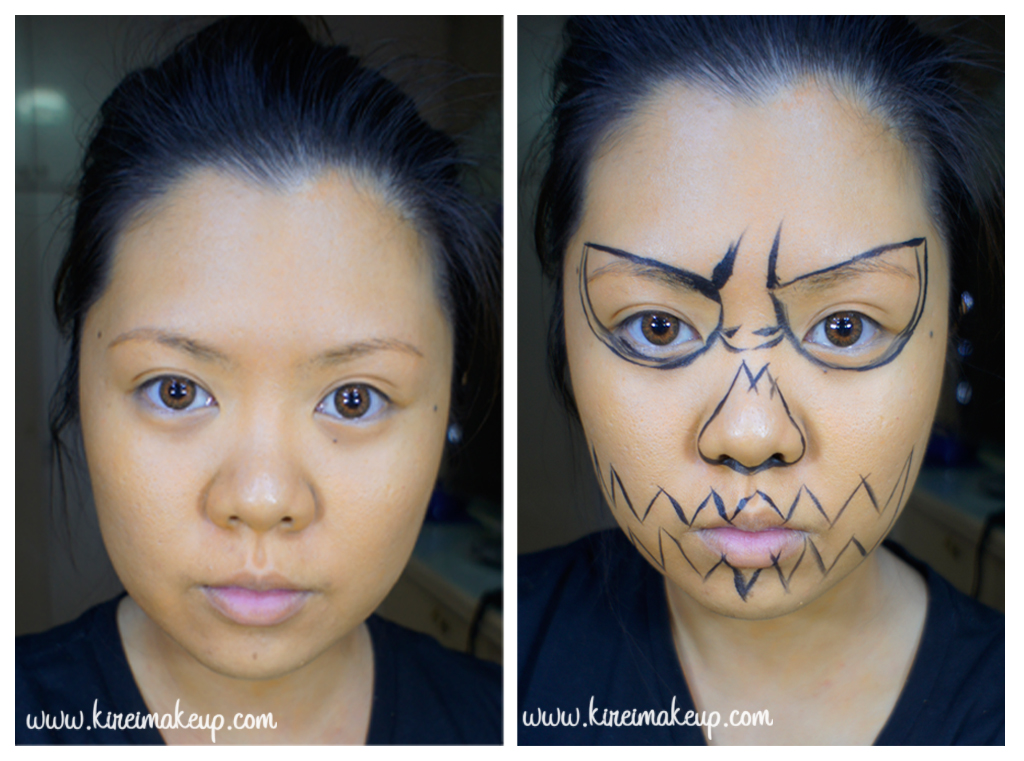
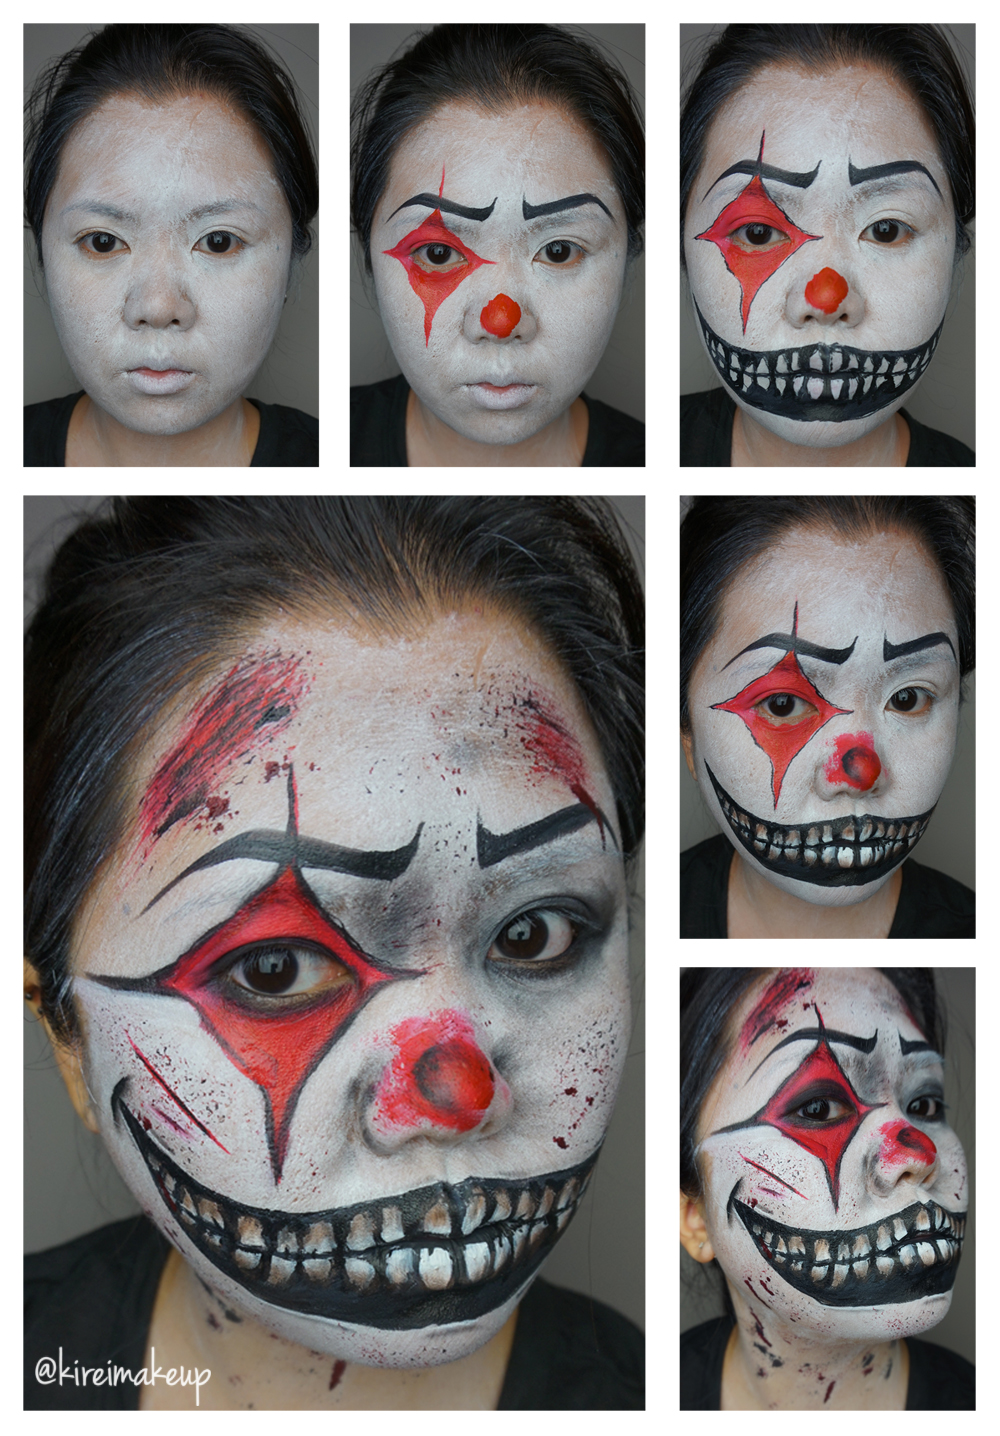
How-to:

  1. I applied White face paint all over my face, and on my neck.
  2. Using a Black face paint, I created some evil looking brows.
  3. With a red paint, I created a diamond shape on my right eye. As well as a round shape on my nose.
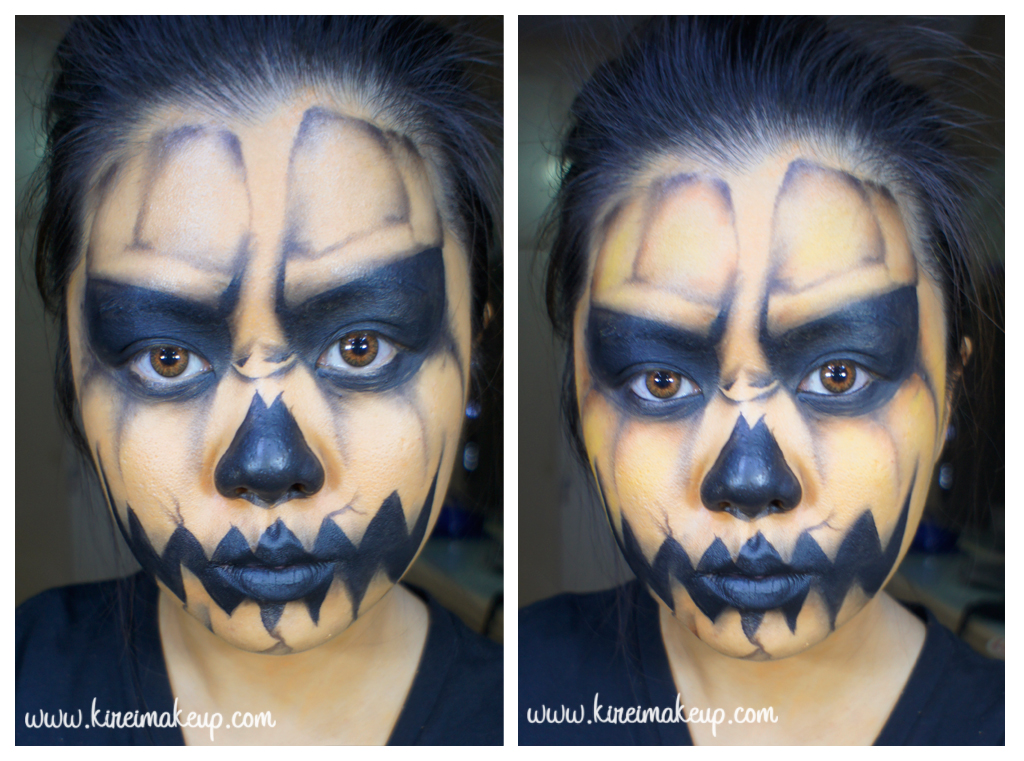
  4. I created a huge smile on my face, and the outlines of teeth using a Black face paint.
  5. Add details on the teeth by adding light brown, then dark brown at the edges of the teeth. I also added some cracks on the teeth.
  6. Add some scracthes, blood splatter, dirt splatter all over the face for added effect.

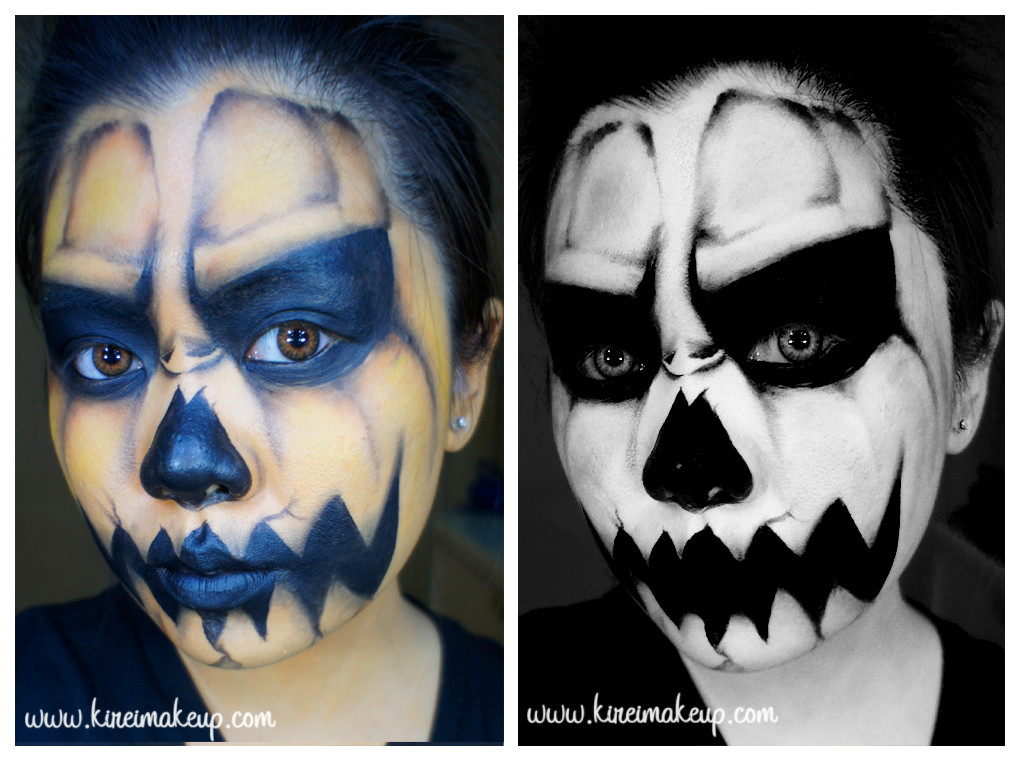
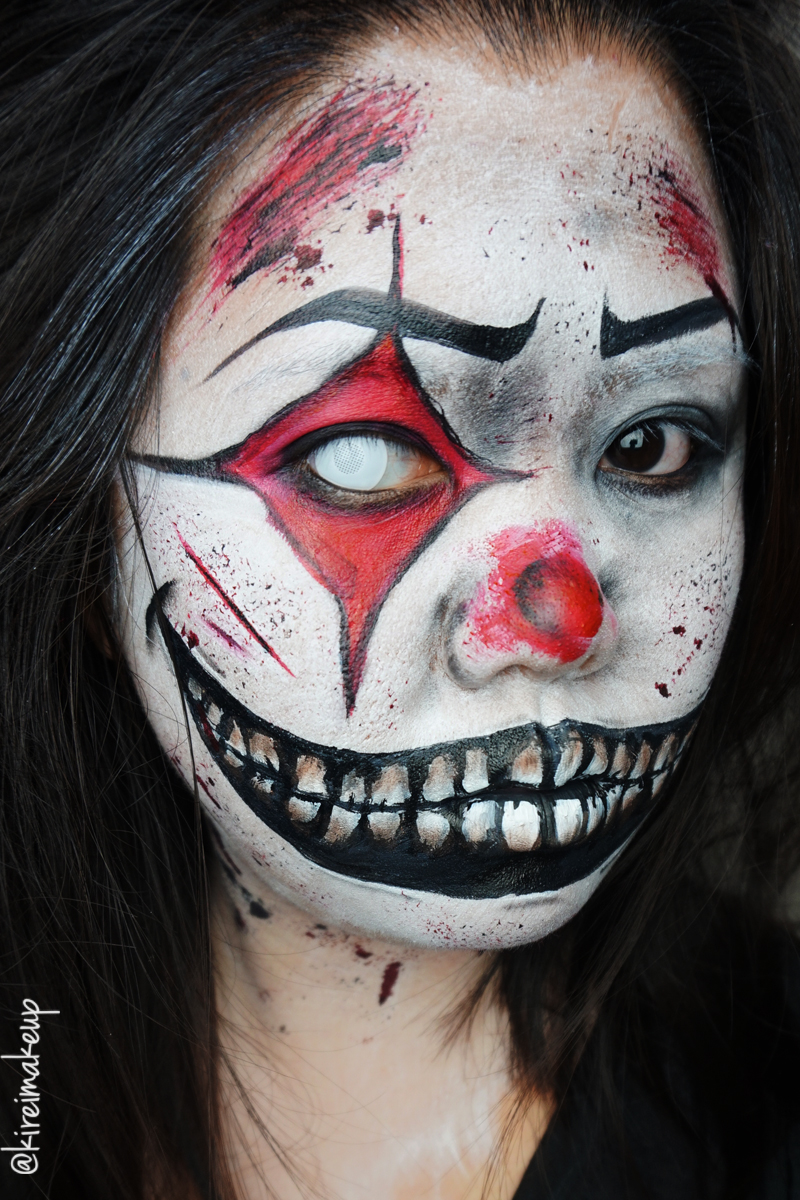
The pictures above are pretty self explanatory, I think. If you have any questions/inquiries feel free to comment or message me.

Products used

  • Wolfe fx Hydracolor Essential palette
  • Kat Von D Shade + Light eye palette

Killer Clown makeup tutorial

Disclaimer:

  • Please do your research before buying and/or trying  contact lenses
  • Please seek professional advice from an eye doctor/opthamologist before buying/wearing contact lenses
  • If you decide to wear contact lenses, you might do so at your own risk
  • I shall not be held liable for any reaction/irritation/infection should you decide to wear contacts lenses

Killer Clown makeup tutorial

Halloween #2 Jack-O-Lantern Makeup

Are you ready for Halloween?! I sure am! So, for the second installment of my Halloween series, I decided to do a Jack-O-Lantern makeup tutorial. WHY you ask? Well, that’s because Jack-O-Lantern aka pumpkin carving is very popular in Canada during Halloween month. My sister and I actually love carving pumpkins! We love the scary face ones!

JUST FYI – I am accepting Halloween makeup jobs! If you need a makeup artist to do your scary makeup, I’m available! Contact me through email jilly@kireimakeup.com, or line – KireiMakeup!

Anyways, for this tutorial, you need:

1. Orange face paint (water or cream) – I mixed red and yellow cream face paint to create the orange base. I used a local Indonesian brand called PAC.

2. Black water based face paint – you can use cream too if you prefer cream product, or even an eyeliner.  I used Snazaroo.

3. Eyeshadow – matte black, matte orange, matte yellow for highlight and contour.

4. Brushes – I used mostly synthetic artist brushes.

  • For large area, I used an angled brush (similar to MAC 263 but slightly bigger).
  • For details like the lines and contouring, I used the Rigger type (similar to MAC 209, but with longer bristles)
  • For highlight I used a blending brush, like MAC 217

5. Contacts (optional) – you don’t have to use contacts, or you can use a brighter one than mine. I could only find this honey colored ones from Fresh Kon, since it’s pretty hard to find specialty contact lenses here in Jakarta.

halloween tutorial

How-to:

1. I applied an orange cream-based face paint all over my face using a wedged sponge. Lightly stippled it all over my face, neck, and ears for an even coverage.

2. I outlined where I want the mouth, nose, eyes, wrinkles to be using black water-based face paint.

halloween makeup tutorial

3. I filled in the areas on step no. 2 with black face paint.

4. Then, using an eyeliner brush and a matte black eyeshadow, I lightly create lines all over the face to create the crease of the pumpkin. I also created some cracks near the mouth area.

pumpkin king makeup tutorial

5. Using a small blending brush, I blend out the edges of the lines. I also carefully added some shading on the areas where I want it to look like it’s receding.

6. On top of those black shadows, I applied a matte Orange eyeshadow (I used the orange from Sleek Makeup Ultra Mattes V1 palette).

7. In the area where I want it to pop out a bit more (to mimick the shape of pumpkin), I applied a matte Yellow eyeshadow (from Sleek makeup Ultra Mattes v1 palette) with a blending brush. I put it in the middle of the “squares” on my forehead, above the eyebrows, on my cheeks area. I really want to make these areas to poof out a bit more.

creepy jack-o-lantern face paint

Voila! You are done! Looks pretty cool in black and white, but looking more like a scary clown. I love how the orange/yellow contour/highlight really helps with the whole pumpkin look!