The return of an old favourite – Club Smoky Eyes. Lately, I’ve been drawn back to the old classics and my past favourites from MAC. I’m not sure why, but I have yet to be wow-ed by the new launches from many of the brands out there, may be because there were just so many products but with very little variations between brands. So, I decided to look back to what has worked in the past, and I found myself drawn to Club eyeshadow again.
Alright, so I went back to Club because I’ve a lot of people (clients, models, friends, family) who kept saying they can’t figure out how to create a nice smoky eyes without looking like they have a black eye, or that they felt smoky eyes are just simply too complicated.
I am here to let you know that this Club Smoky eyes makeup look is very simple. All you need is an eyeliner (or a black cream eyeshadow), Club eyeshadow from MAC and mascara. That’s it!
I also have a video tutorial on my instastory for this look if you’d like to check it out RIGHT HERE.
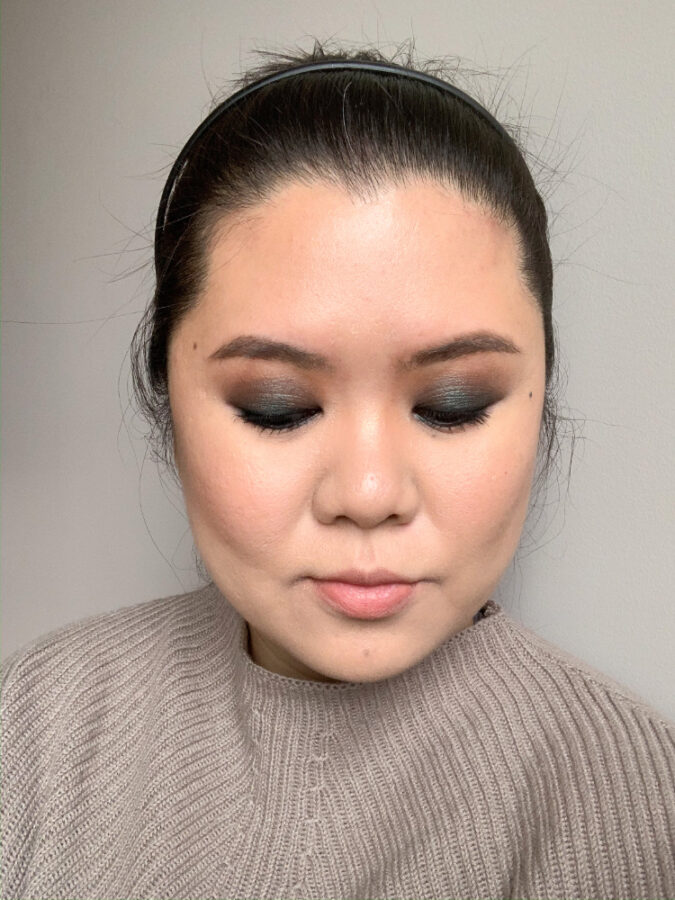
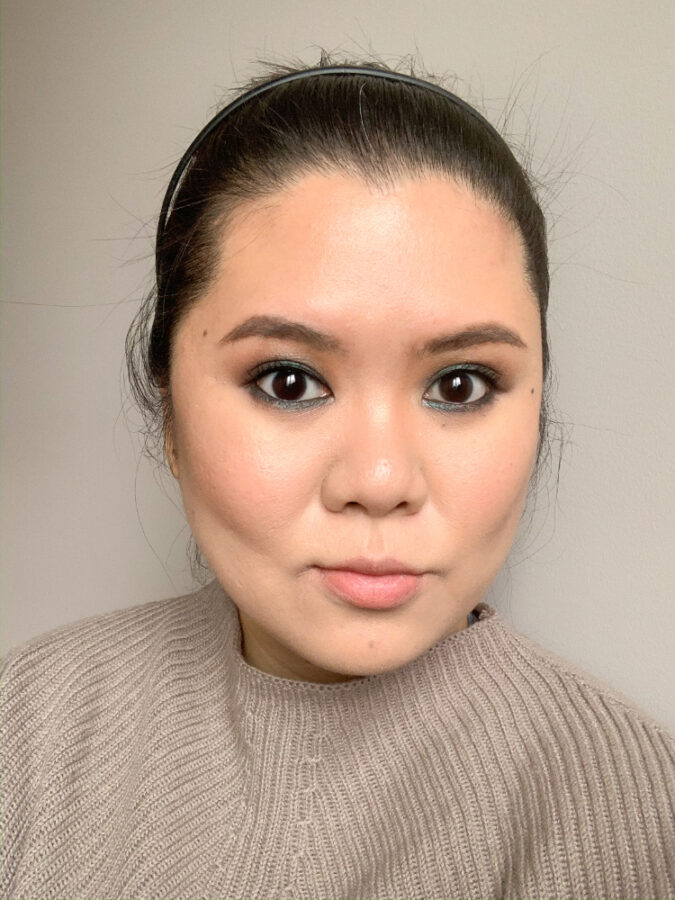
The Club eyeshadow is a duo-chrome – it looks brown AND green in certain lights or when you have a different coloured base placed under it. So if you’re just using a neutral primer/base, this eyeshadow looks brown. However, when you use a black base/primer, you’ll get this very gorgeous emerald-ish green instead. So in a way, you get a 2-in-1 colours! So in this case, you don’t need a separate “transition” or “crease” colour for this look at all.

Alright, let’s get to the tutorial so you can see what I’m talking about.
- Optional: apply primer to prime your eyes, but if you don’t need it you can skip it.
- Apply a black eyeliner all over the eyelid. Apply a thin layer to avoid it from creasing. I actually applied MUFE Aqua Black to make this eyeshadow last for the whole day. Also apply this on the lower lash line.
- Apply Club eyeshadow all over your eyelid using an eyeshadow brush, all the way to your crease. If you have a hooded eye, you want to make sure this colour is applied slightly above the hooded part so the colour can be seen when your eyes are open and relaxed.
- Apply the same colour on the lower lash line using the tip of the flat eyeshadow brush.
- Optional: apply a silver metallic pigment on the inner corner of the eye to brighten up the look.
- Use a clean blending brush to blend out the edge of the crease as well as to soften and feather out the edge of the lower lash line.
- Apply eyeliner, tightliner and waterline with a black eyeliner.
- Curl your lashes, apply mascara (and add falsies if you’d like) to finish up the look.
For my face, because the eyes are so bold and strong, I try to keep it light and fresh. I do added a bit of contour on my cheeks as well just to make this look a little bit more edgy and chiseled.
Product breakdown:
- Foundation – YSL All-in-One Glow foundation in B30
- Contour – MAC Sculpt powder
- Blush – Marc Jacobs Beauty Air Blush Soft Glow Duo no. 505
- Highlighter – Becca Champagne Pop
- Eyes:
- Base –
- Eyelid & lower lid – MAC Club Eyeshadow
- Inner Corner – Pat Mcgrath Metamorphosis in Sterling
- Eyeliner – L’oreal Voluminous Smoldering eyeliner
- Mascara – Chanel Inimitable waterproof mascara
- Lips – MAC Mull It Over powderkiss lipstick