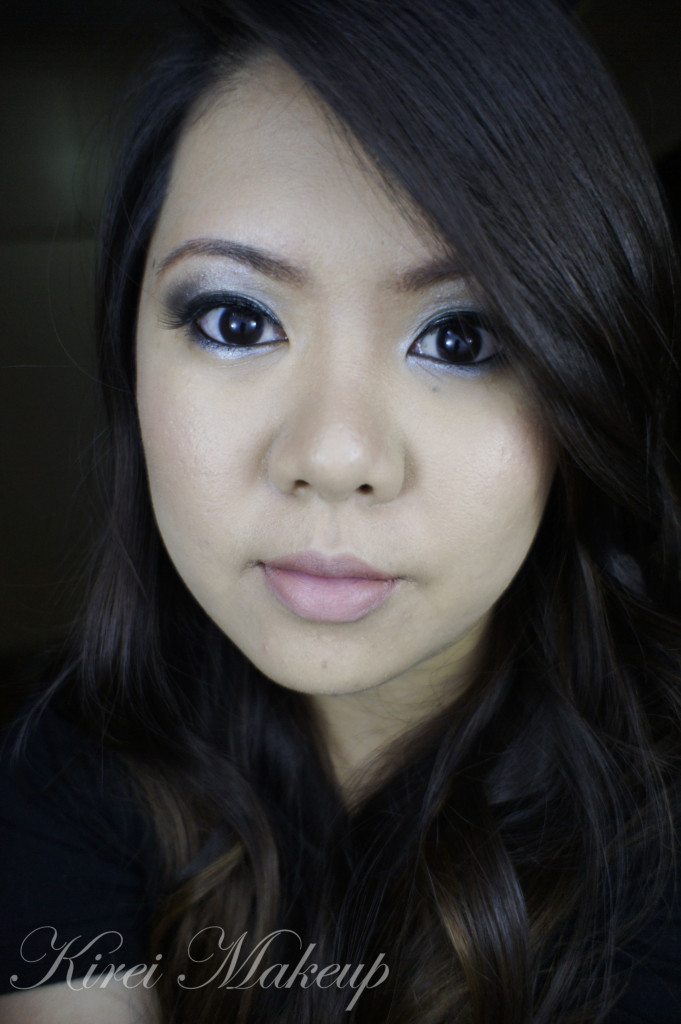
Night Out Makeup Tutorial

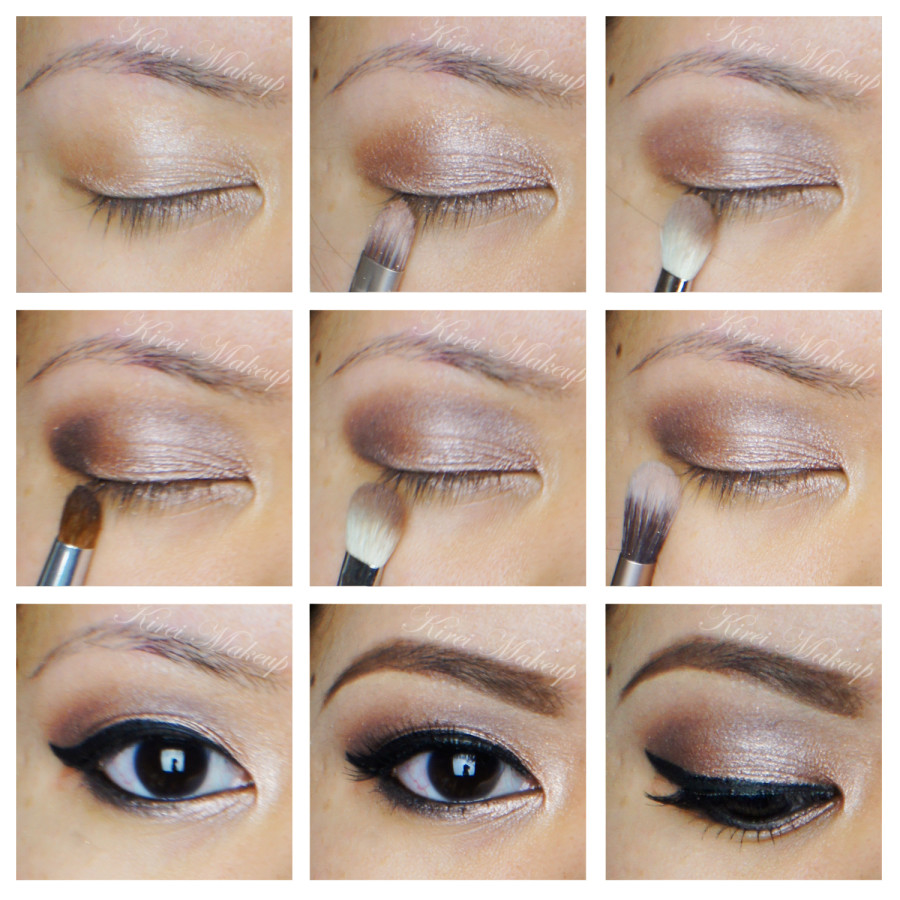
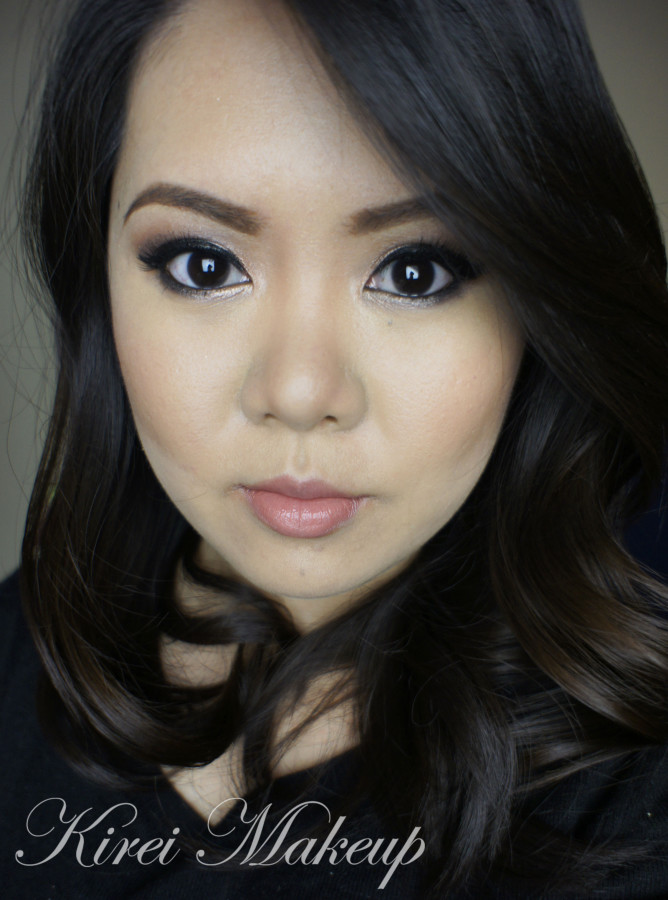
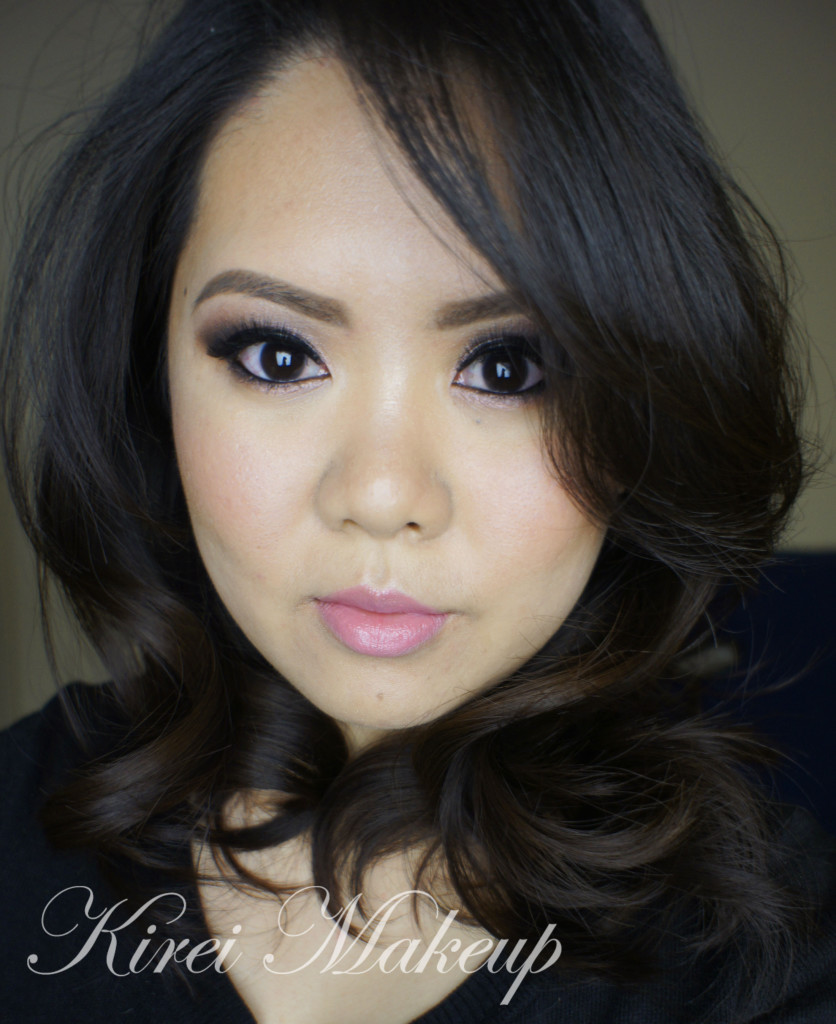
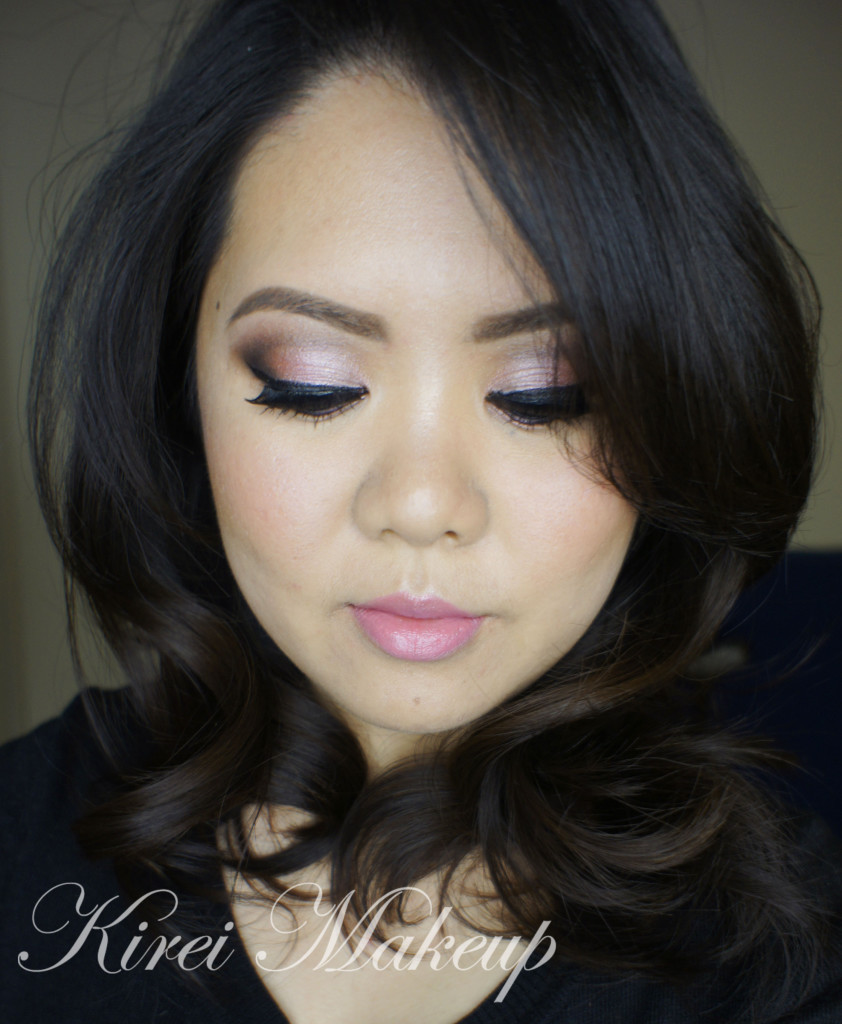
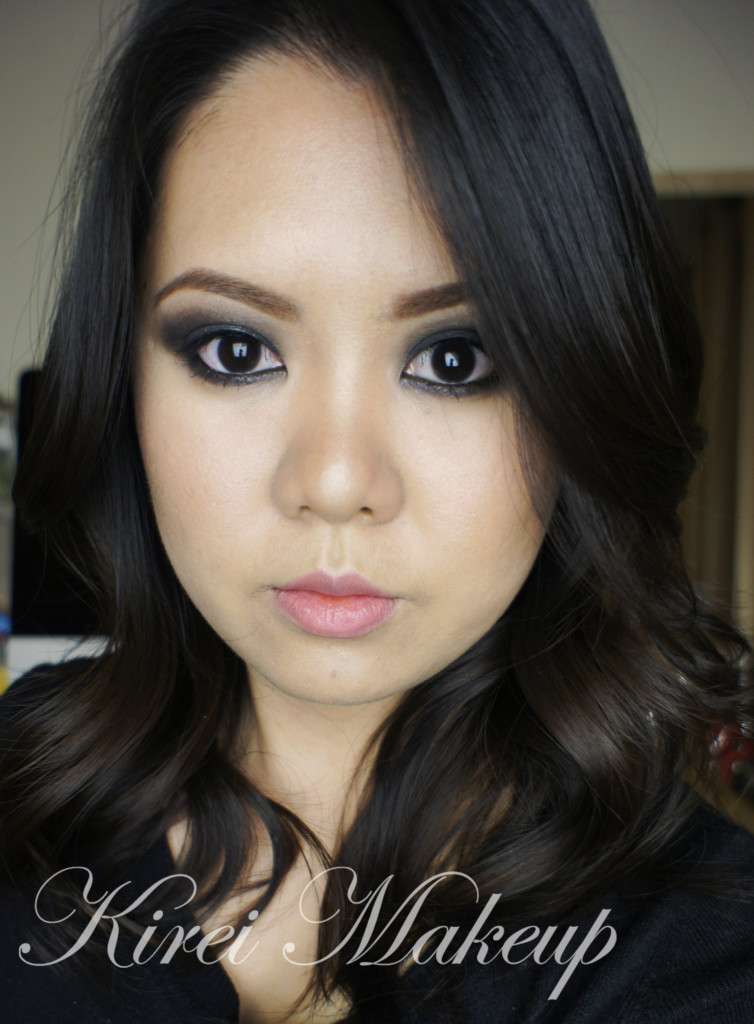
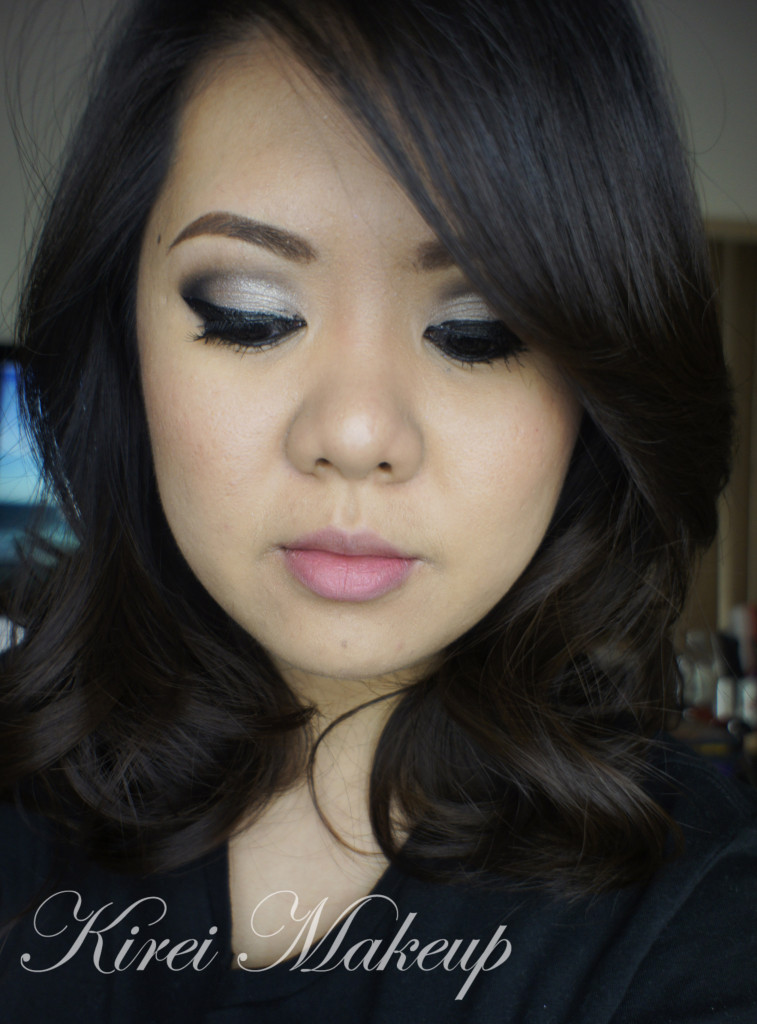
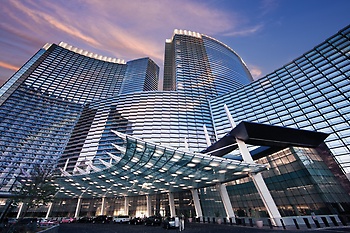
Today’s Night Out Makeup tutorial is a collaboration with Aria Resort in Las Vegas. I was approached by them to create a look for a night out in town. I took a look at pictures of their beautiful resort, and was inspired to do this gorgeous metallic smoky eyes. So, I used the picture below to create today’s look. I wanted to add more color, but decided to create something that’s more wearable instead. Perhaps next time, I’ll do a different look for Aria again.

Aria Resorts Las Vegas

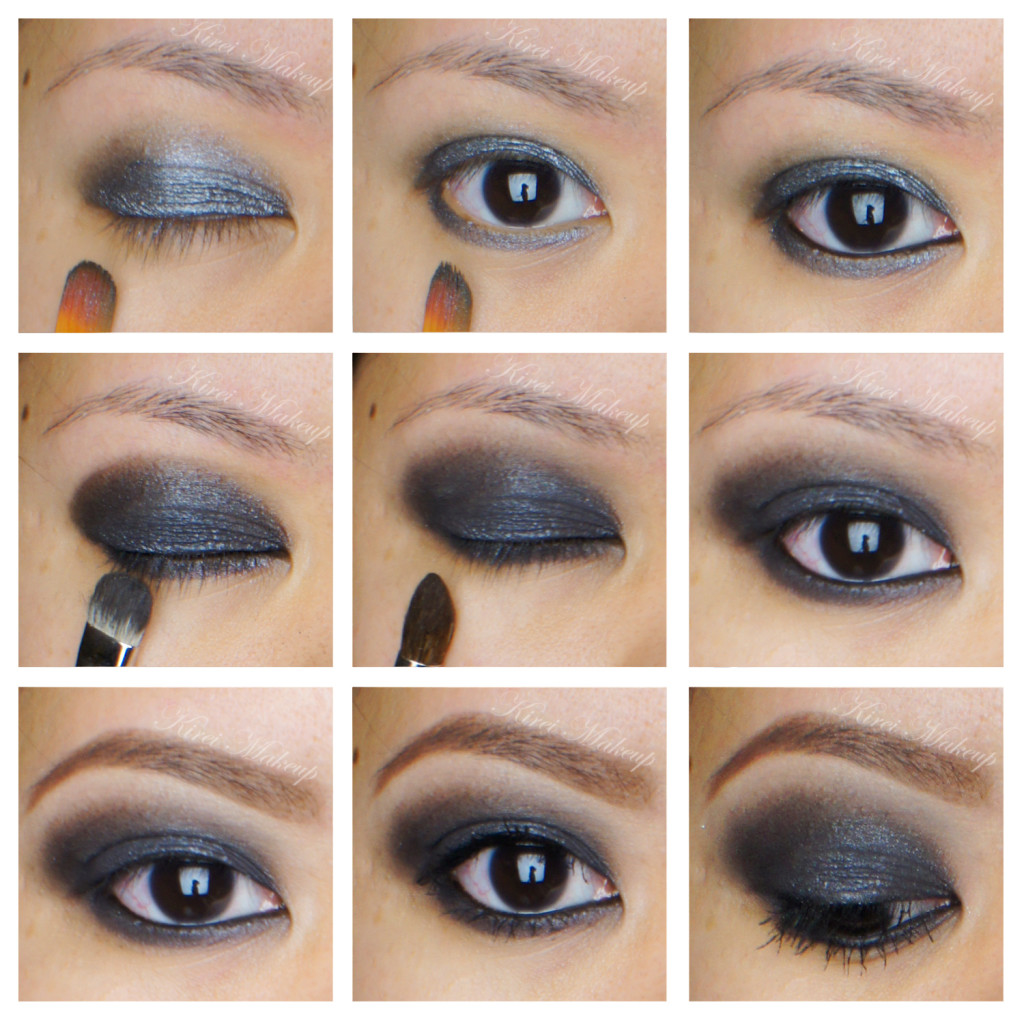
Inspired by the glass windows of Aria Resort’s building, and of course the awesome lights in Vegas, I decided I want to create a smoky eyes with a hint of sparkles. So, I took out my MAC Blue-Brown pigment, and MAC Raindrops crushed metallic pigment for this look.

This look is a little bit over the top if you aren’t used to wearing makeup. Of course you can always take it down a notch, but hey, it’s Vegas, baby! Go big or go home, yes? hahaha..

For the face, I didn’t want to do anything too much since the eyes are already quite dramatic. Of course, you can contour and highlight to your heart’s content. I, personally, prefer a fresh dewy face look over a heavily contoured face to balance out the eyes, since it is a wearable look. You can wear this for a night-out, or to go clubbing. Whenever you blink, the shades will create beautiful sparkles when lights hit them.

Scroll all the way down for product list!


wearable blue smoky eyes

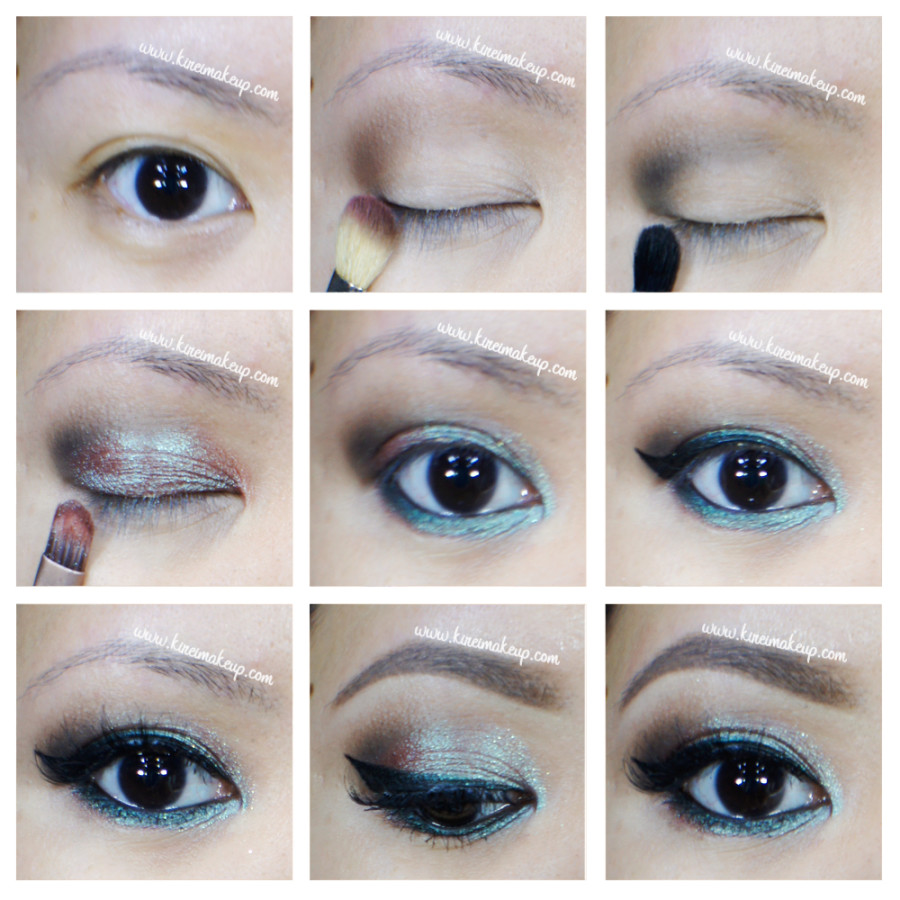
How-to:

1. I prepped my eyelid using Urban Decay Primer Potion in Eden.

2. Using a fluffy blending brush, I applied Shadow Box from Kat Von D Monarch palette on my crease.

3. Using a bullet crease brush, I applied Deadhead from Kat Von D Monarch palette on the outer V, blending it to the crease.

4. I applied (dry) MAC Blue-Brown pigment using a flat eyeshadow brush. You can apply this pigment wet if you want a more intense look.

5. On the waterline and lower lid, I smudged L’oreal Voluminous Smoldering eyeliner.

6. Then, I applied MAC Raindrops crushed metallic pigment on top of the smudged liner on the lower lash line. I also applied this pigment on the inner corner of my eyes, and just a tiny bit in the center of my eyelid.

7. I created a winged liner using Kanebo Kate Super Sharp eyeliner.

8. I curled my lashes and applied MUFE Aqua Smoky Lash mascara. I also applied Lavie Lash false eyelashes in Fleur.

9. For the brows, I filled it in using Anastasia Brow Wiz in Ash Blonde and Brunette.

night out makeup tutorial

10. On my face, I applied Marc Jacobs Gel foundation using Cover FX cream foundation brush.

11. Under my eyes, I applied MUFE HD concealer.

12. I applied Benefit Moon Beam highlighter on top of my cheekbones, bridge of my nose, and cupid’s bow.

13. I set my foundation using MAC Mineralized skin finish in Medium.

14. I lightly contoured the hollows of my cheeks and sides of my nose using MAC Mineralized Skin Finish in Deep.

15. On my cheeks, I applied Smashbox Halo Blush in In Bloom.

16. I lined and filled my lips using MAC Lip Liner in Spice. On top of it, I applied Vaseline to keep it moist.

mac blue brown

Products used:

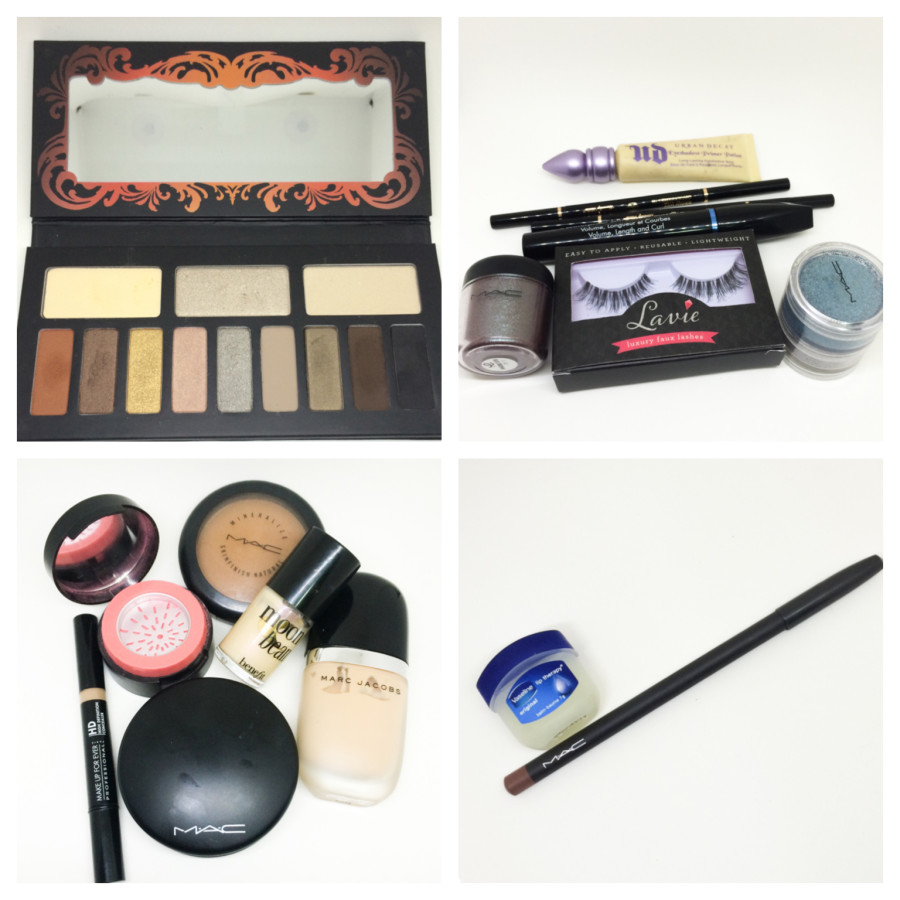
Eyes – Urban Decay Primer Potion in Eden; Kat Von D Monarch Palette (crease: Shadow Box, outer V: Deadhead); MAC Blue-Brown loose pigment; MAC Raindrops crushed metallic pigment; Make Up For Ever Aqua Smoky Lash; Lavie Lash in Fleur, Anastasia Brow Wiz (Ash Blonde, Brunette).

Face – Marc Jacobs Gel foundation; Make Up For Ever HD Concealer; Benefit Moon Beam highlighter, MAC Mineralized Skin Finish (setting powder: Medium, contour: Deep); Smashbox Halo Blush in In Bloom.
Lips – MAC Spice lip liner; Vaselinelavie lash

Smoky Eyes with a Neon Eyeliner

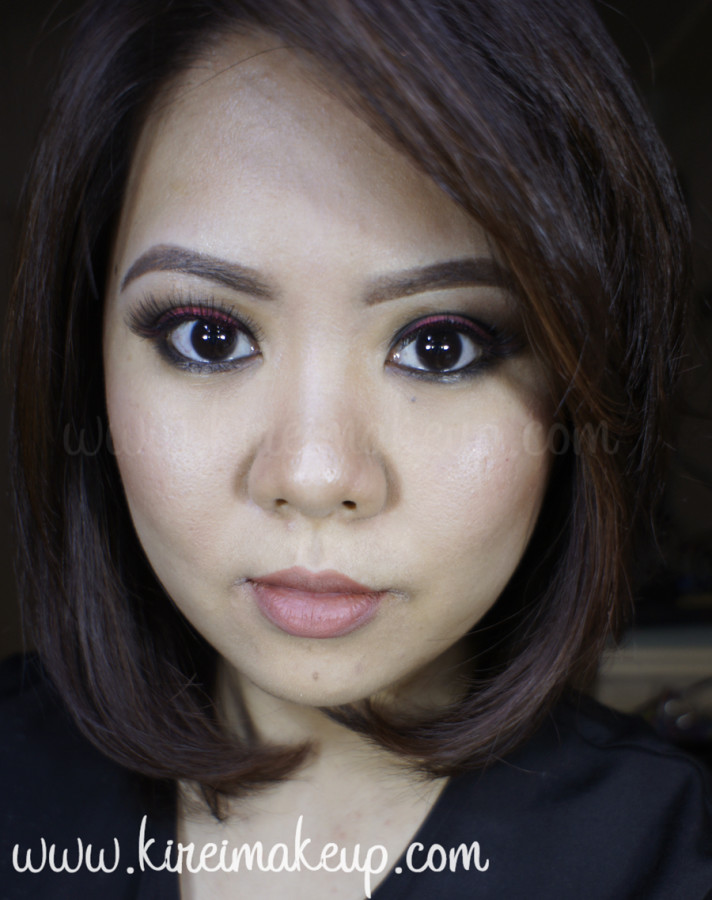
Hey ya’ll! I hope everyone is doing great this weekend! I posted this look on Instagram last night, and I almost forgot to upload it today. Anyways, as mentioned on my Instagram account, this smoky eyes with a neon eyeliner look is a recreation from @jenmiamakeup. She’s one of the many great makeup artists who I follow on Instagram. I love how she does hers with a neon yellow. I tried this one with the only neon pigment I owned – MAC Neo-orange loose pigment.

If you are going to recreate this look, I’d suggest using a mixing medium instead of water, like I did. I used water and for some reason the pigment didn’t want to mix smoothly. I ran out of my mixing medium so I have to go get one in the near future. The other issue that I kept having is the fact that my smoky eyes kept creasing. Ugh, I should have used a different eyeshadow base (and probably should have prime my eyelid first). So, I’d suggest for you to use an eyelid primer to avoid creasing.

Anyhow, let’s get the tutorial started!

smoky eyes for asian

How-to:

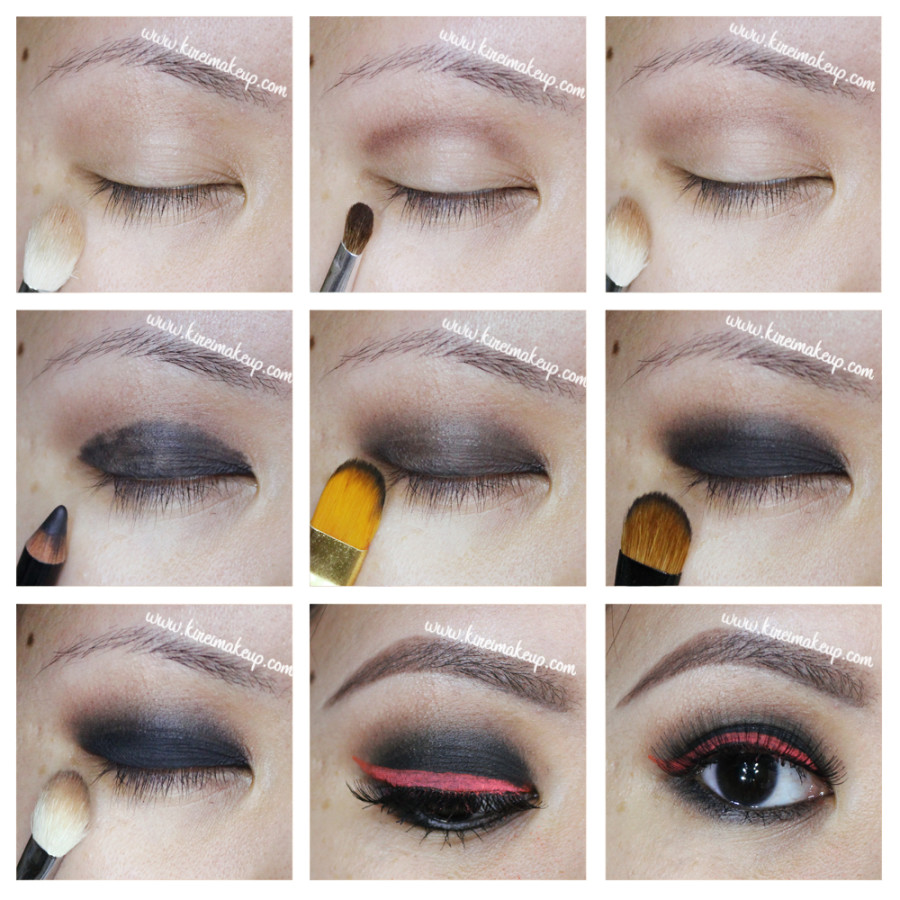
1. Using a light brown eyeshadow (mine was a sample, and it has no brand nor name), I applied this shade just above my crease using a clean blending brush. I used this shade as a transition color, the shade is just slightly darker than my own skin color.

2. Using a deep chocolate brown (again, this was a sample with no brand and no name), I applied this shade right on the crease using a small crease brush.

3. Using the same blending brush as step no. 1, I blended the chocolate shade.

4. I applied Revlon Photoready Kajal eyeliner in Carbon Cleopatra, I applied the black eyeliner all over my eyelid, and waterline.

5. I lightly blended the eyeliner using a synthetic art brush.

6. I applied Kat Von D Monarch palette Deadhead eyeshadow on top of the black base using a flat eyeshadow brush. I also applied this eyeshadow along the lower lash line using a small shader brush.

7. Using the same brush as step no. 1, I blended out the edge of Deadhead so there’s no harsh line.

8. I mixed water and MAC Neo-Orange loose pigment to create the neon winged eyeliner.

9. On my brows, I used Anastasia Brow Wiz in Medium Ash to fill them.

10. On my lashes, I applied Ardell 105 false lashes.

mac twig lipstick

11. On my face, I applied MARC JACOBS gel foundation using CoverFX foundation brush. I concealed using MUFE HD concealer, and set my face using CoverFX translucent powder.

12. I applied Benefit Moon Beam highlighter on the bridge of my nose, cupid’s bow, chin and cheekbones.

13. I lightly contoured my face (sides of the nose, under my cheeks, jawline, and temples) using NARS ITA kabuki brush and MAC Blunt powder.

14. I applied MAC Dainty on my cheeks.

15. For the lips, I applied MAC Spice lip pencil all over.

Lavender Grey using NARSissist Palette

For this week’s tutorial, I decided to use my NARSissist Palette again! I fell in love with this palette all over again. I feel like it’s such a great palette with a more mature color option. For today’s tutorial, I picked out my favorite shades which were in the range of grey, lavender, and violet. I know the picture doesn’t show much of the lavender/violet on the lid, but I assure you it’s such a pretty grey with very subtle hint of lavender/violet in it. If you’re one not to wear color, and prefer a much neutral option, this would be a great addition to your makeup wardrobe.

Oh, just to let you guys know, I have been trying to update my Instagram daily. I’m going to try to do a weekly “Monday Makeup Inspiration”, and regram/repost-ing every look that YOU guys do if you FOLLOW me (@kireimakeup) and add #kireimakeup to your Instagram pictures! I’d love to see your makeup and/or your re-creation of any of my looks!

narsissist smoky eyes

How-to:

1. I’ve prepped my eyelid using Urban Decay Primer Potion in original. Using a blending brush (from UD Naked 3 palette), I applied NARS Brousse II on my crease.

2. Using a small shader brush, I applied NARS Pandora II on the outer V of my eyelid.

3. I blended my crease by applying NARS Madrague I using a clean blending brush. I used this shade as a transition color.

4. I applied NARS Ashes to Ashes on my entire eyelid using a flat eyeshadow brush. I also added a little bit of NARS Lhasa on top of it.

5. I created a winged liner along my upper lash line using L’oreal Infallible Gel Lacquer 24hr in Blackest Black and an angled eyeliner brush. Using whatever was left on the brush, I ran it along the lower lash line, and waterline.

6. I also used a small shader brush and applied NARS Ashes to Ashes along my lower lid.

7. I filled my brows using Anastasia Brow Wiz in Ash Blonde and Brunette. I cleaned up the edges of my brows using Cover FX G20 cream foundation. If you want to know how I fill my brows, please check my brow tutorial.

8. I curled my lashes and applied Cover Girl Lash Blast mascara. I also applied falsies (Korean’s falsies, not sure what it’s called since the brand is not in English).

NARSissist Lavender Grey smoky eyes

9. On my face, I applied Cover FX Cream Foundation in G40 using MAC Masterclass Brush Oval 6.

10. I lightly applied highlight and contour using CoverFX cream foundations in G20 & N110. Check out my BACON post to find out how I used CoverFX to do my highlight and contour.

11. On my cheeks, I applied Revlon cream blush in Pinched.

12. On my lips, I applied Revlon Mauve it Over matte lipstick.

Soft Smokey Eyes using Urban Decay Naked 2

Happy Lunar New Year, everyone! I hope this year will bring more luck, health, and prosperity for you! Oh, how I miss being home for Lunar New Year, all those yummy food and family gathering together!

Anyways, for this tutorial, I wanted to use my Urban Decay Naked 2 palette to create a soft smokey eyes. Ever since I’ve been using my Naked 3, I felt that the Naked 2 and 1 were being left out in the corner, crying for my attention.

I also wanted to practice some contouring and highlight using my Kryolan HD Foundation palette, and I do have to say the foundation is so creamy and it blends so nicely into the skin. If you don’t like the heavy makeup on this tutorial, feel free to skip the contour/highlight part.

easy smoky eyes for asian

How-to:

1. I applied MUFE Aqua Shadow in 28E all over my lid, blending it out using my finger.

2. Using a flat eyeshadow brush, I applied YDK from UD Naked 2 on my eyelid.

3. Using a fluffy blending brush, I applied Tease from UD Naked 2 on my crease.

4. I applied Busted from UD Naked 2 on the outer V using a crease brush.

5. I blended Busted using the brush I used on step 3.

6. Using a clean blending brush, I applied Foxy from UD Naked 2 under the brow.

7. On my lower lid, I applied Chopper from UD Naked 2 on the inner half and UD Blackout on the outer half.

8. I lightly applied Verve from UD Naked 2 on the inner corner of my eyelid using a clean fluffy blending brush.

9. I created a winged liner using L’oreal Infallible Gel Lacquer Liner in Blackkest Black.

10. I lined my waterline using L’oreal Voluminous Smoldering eyeliner.

11. I curled my lashes and applied Cover Girl Lash Blast mascara on both upper and lower lashes.

12. I applied Gwiyomi false eyelashes (sold in Jakarta, please check my Instagram)

13. I filled my brows using Anastasia Duo Brow Powder.

urban decay naked 2 tutorial

14. On my face, I applied Urban Decay Naked Skin foundation using a Sigma Round Kabuki Brush.

15. I contoured and highlight my face using Kryolan HD Foundation palette.

16. I applied MAC Fleur Power on my cheeks.

17. For the lips, I applied Revlon Mauve It Over matte lipstick, and dabbed L’occitane clear lip balm on top of it.

Products used:

Eyes – MUFE Aqua Shadow 28 E, UD Naked 2, L’oreal Infallible Gel Lacquer Liner in Blackkest Black, L’oreal Voluminous Smoldering Eyeliner, Cover Girl Lash Blast mascara, Gwiyomi False Eyelashes, Anastasia Brow Powder.

Face – UD Naked Skin foundation, Kryolan HD Foundation palette, MAC Fleur Power blush, Revlon Mauve it Over lipstick, L’Occitane lip balm.

Rose Smokey Eyes III with UD Naked 3

I think I’ve made my obsession with UD Naked 3 palette pretty clear – I’m in love with it! The colors are wonderful, the pigments are so easy to blend, the double-ended brush is pretty amazing. What’s not to love?! So, to show another appreciation for this palette, I’ve decided to do another the third Rose Smoky Eyes tutorial. This look is far more intense and darker than the first rose smokey eyes that I did. I also think this one is prettier than the 2nd smoky eyes that I did with Naked 3. If you prefer a more natural looking one, I do have a post for you in my Berry Lips post.

I’ve also added a Youtube Video tutorial using UD Naked 3 palette!

This look is perfect for those who’re not afraid to play with the darker color, and already feel comfortable with blending. You can make it even darker and more intense if you’d like by adding a matte black eyeshadow (i.e. MAC Carbon) on the outer V. I like doing it this way since I want to showcase the Rose eyeshadow.

I hope you enjoy this look! I know a lot of people on Pinterest enjoyed my first tutorial! I’m so grateful that it’s getting 700+ repins on Pinterest.

I know I’ve said I was going to do a review, I’ll try to do it soon. It’s just so cold in Canada right now, it caused me to go on hibernation mode..hahaha..In all seriousness, though, -40 deg. Celsius is not a joke!

rose smoky eyes

How-to:

1. I prepped my eyelids using Urban Decay Primer Potion in Sin.

2. I applied Burnout on the inner third of my eyelid using the flat-end of the brush.

(I wiped away excess shadow on the brush on a clean towel before step 3)

3. Using the same brush, I applied Liar on the middle of the eyelid.

(I wiped away excess shadow on the brush on a clean towel before step 4 )

4. Again, using the same brush, I applied Mugshot on the outer third of my eyelid.

5. Using the blending-end of the brush, I blended the edge of the eyeshadow.

6. I applied Blackheart using a small crease brush on the outer V.

7. After wiping excess eyeshadow from the crease brush I used on step 6, I dragged Blackheart on to my crease, and blended it out.

urban decay naked 3

8. Using a fluffy brush, I applied Limit right at the edge where Blackheart meets with my skin. This helps to blend out Blackheart, and make a nice transition to my skin.

9. I lined my waterline and tightline using L’oreal Voluminous Smoldering eyeliner. On the lower lid, I applied Mugshot using an angled eyeliner brush, then Blackheart very close to the roots of the lower lashes.

10. Then, I created a winged eyeliner on the upper lash line using L’oreal Super Liner Ultra Sharp Tip.

11. I curled my lashes and applied Buxom Lash mascara on both top and bottom lashes.

12. For extra drama, I added false lashes for extra length and volume. These falsies were samples from my friend, which is currently in production.

13. I filled my brows using a mix of Anastasia Brow Wiz in Ash Blonde and Brunette.

rose smoky eyes

14. I applied Giorgio Armani Maestro foundation on my face, blending it using my fingers.

15. On my cheeks, I applied Revlon Cream Blush in Charmed Enchantment using a foundation brush.

16. Then, I applied MAC cream base in Pearl on top of my cheekbones, bridge of my nose, and cupid’s bow using my finger.

17. I applied MAC Please Me lipstick on my lips using a lip brush. Then, I added a little bit of L’occitane lip balm just to keep my lips moist since it’s so cold here in Canada!!!

18. My hair was set using a velcro rollers set and 1.5in Chi curling iron.

Black Smokey Eye Tutorial

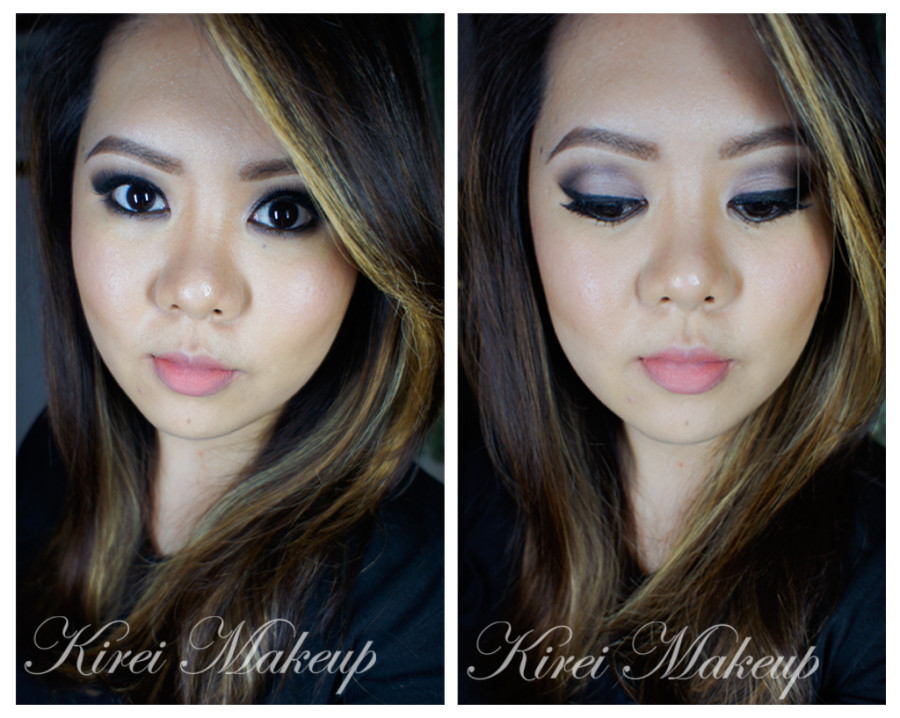
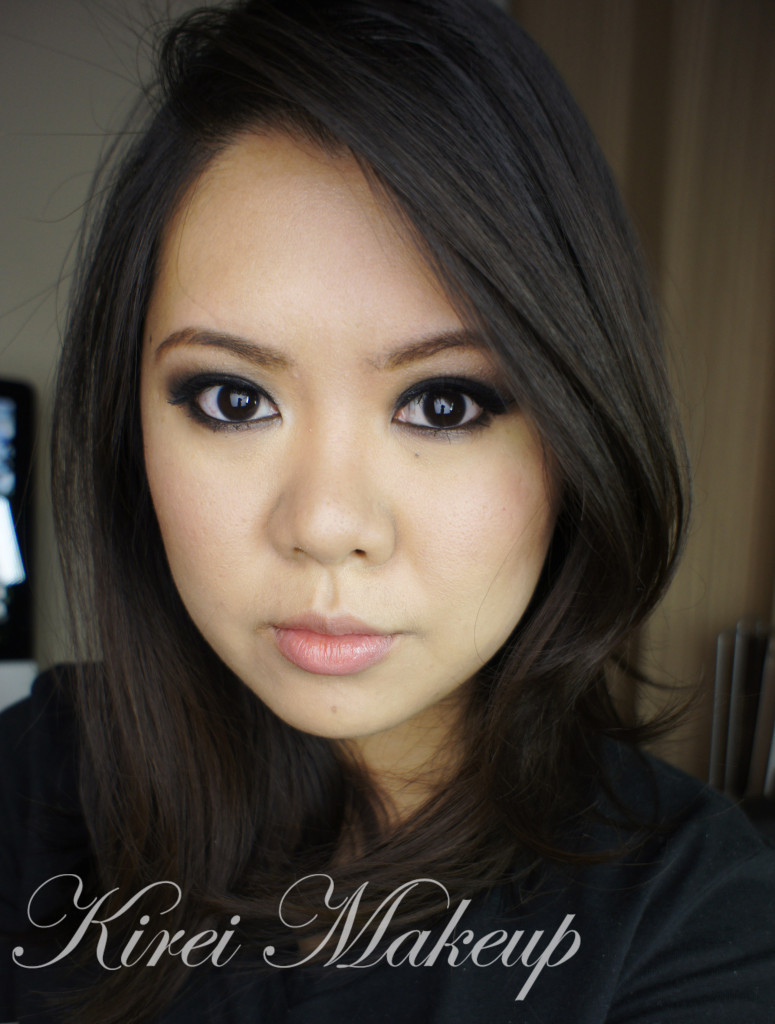
Today black smokey eye tutorial is a requested look by  Nurina, who asked for a Taylor Momsen look. I decided to do Taylor’s signature look – the black smokey eyes. Anyways, I’ve done something similar to this look in my Classic Smoky Eyes using UD Naked post.

Since this tutorial is a bit more intense, I brought the black eyeshadow up above the crease. Taylor Momsen signature smoky eyes look is very messy, very dark and sometimes she paired it with red lips. You can pair it with red lips, or dark red lips to make it more goth-like.  However, I prefer to go with a peachy lips instead, keeping the focus just on the eyes.

Keep in mind this is an inspired look, so I’ve modify it to suit my face as well as my style. Taylor Momsen’s smoky eye sits too low on the lower lid to my liking. Be warn if the black eyeshadow is very low on the lid, it might make you look older, or it can make you look like you have panda eyes! As cute as pandas are, I’m sure you don’t want to look like you have panda eyes, right?!

black smoky eyes

How-to:

1. I applied MUFE Aqua Cream #1 Anthracite using a synthetic paint brush on both upper and lower lid. I’ve decided to use this so I can get interesting texture on the eyes. If you want to use a matte eyeshadow only, please check my Classic Smoky Eyes post.

2. I lined my waterline and tightline using a black kohl pencil eyeliner by Annabelle.

3. Using a shader brush, I applied Crave eyeshadow from UD Naked Basics palette on top of my eyelid. I extended the eyeshadow to slightly above the crease.

4. Using a clean blending brush, I applied Foxy eyeshadow from UD Naked Basics right at the edge of the black eyeshadow.

5. I applied Crave eyeshadow from UD Naked Basics palette on the lower lid.

6. I filled my brows using Shu Uemura Hard Formula brow pencil, and then set it using Anastasia Brow Powder in Brunette.

7. I curled my lashes and applied L’oreal Carbon Black mascara on both lower and upper lashes.

taylor momsen makeup tutorial

8. I applied UD Naked Skin foundation using a Sigma Flat Top Kabuki Brush.

9. I contoured and highlight my face using Smashbox Contour kit.

10. I applied Chanel Blush de Horizon very lightly on my cheeks.

11. On my lips, I applied Revlon Colorstay Ultimate Suede lipstick in Socialite, and add a few dabs of YSL Glossy Stain in Pêche Cerra-Cola (27).

NYE Makeup Using Smashbox Full Exposure Palette

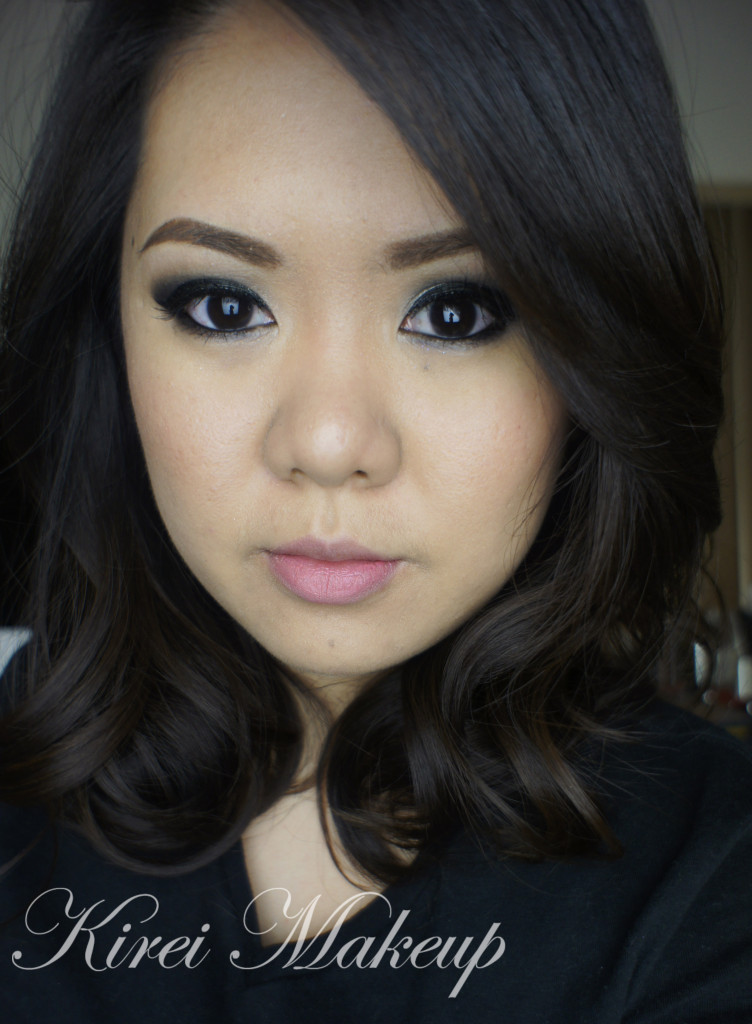
For this NYE Makeup tutorial, I decided to use my Smashbox Full Exposure palette, which I love! I’ve done a review/swatch post on Smashbox Full Exposure Palette Review. I’ve also done a few tutorial using the same palette in Smashbox Full Exposure Look #1 and Smokey Eyes using Smashbox Full Exposure Palette.

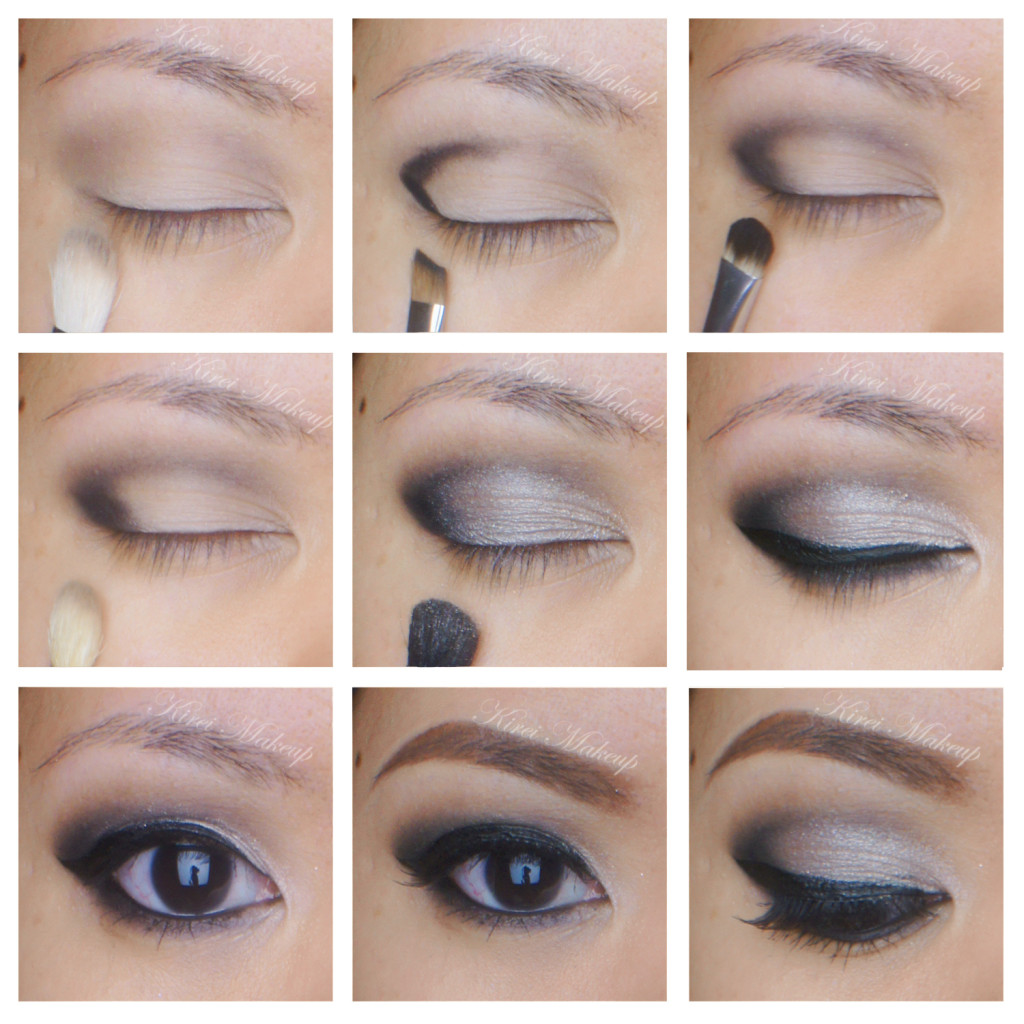
I wanted to create a more cat-eye effect with this smoky eye look, so if you want to create a more rounded smoky eyes please check my Glitter Holiday Makeup. My step-by-step picture looks slightly out of focus, that’s because I did not realize that my lens was dirty! So, my apologies if the pictures are not clear.

Smashbox Full Exposure tutorial

How-to:

1. I prepped my lids using UD Primer Potion.

2. I applied M6 on the crease using a blending brush.

3. Using an angled eyebrow brush, I applied M7 on the outer V.

4. Using a clean small shader brush, I blended M7 towards the inner part of the eyes.

5. I repeated step 3 and 4 until I get that outer V really dark.

6. Using a fluffy blending brush, I applied M5 slightly above the crease.

7. Using a flat eyeshadow brush, I applied S6 on the eyelid, and S4 just on the inner tear duct.

8. I created a thick winged eyeliner using Kanebo Kate Super Sharp eyeliner.

 Smashbox Full Exposure tutorial

9. Using an eyeliner brush, I lined my lower lid using M7.

10. I lined my waterline using L’oreal Voluminous Smoldering eyeliner.

11. I curled my lashes and applied Tarte Lights, Camera, Flashes mascara on both upper and lower lashes. I also applied false eyelashes.

12. I filled my brows using Anastasia Brow Powder in Brunette.

13. I applied Marc Jacobs Gel Foundation on my face using CoverFX Cream Foundation.

14. I applied MAC Dainty blush on my cheeks.

15. I also applied Revlon Socialite lipstick on my lips.

Smashbox Full Exposure tutorial


Classic Smoky Eyes using Urban Decay Naked Basics

I’ve been wanting to do a classic black smoky makeup tutorial, but I ran out of my MAC Carbon eyeshadow. Then, I remembered I have Urban Decay Naked Basics, and I wanted to give the palette another try. I wasn’t sure how the black eyeshadow from this palette is going to work, since I do find black eyeshadow to be a bit harder to blend. Not to mention, the skin around my eyelid is quite dry, so lots of factor going on here.

I know this tutorial uses a lot of blending brush, which I have on my kit. If you only have 1 blending brush, just make sure you wipe the brush on a clean towel or tissue before trying to blending the eyeshadow.

Also, let me just mention how much I love the YSL glossy stain! I thought it was just a big hype, but now I see why people love it. I’ll do a review soon!

How-to:

1. Using a flat eyeshadow brush,I applied Crave from Urban Decay Naked Basics all over my eyelid, stopping just right on the crease.

2. Using a clean fluffy brush, I blended the crease.

3. Using another fluffy brush, I applied a mix of Faint and Naked 2 on the crease, and slightly above it.

4. Using another clean blending brush, I blended out the edge of the crease.

5. I applied black pencil eyeliner on my waterline and tightline.

6. Then, using an angled eyebrow brush, I applied UD Crave eyeshadow on the lower lid.

7. I created a winged eyeliner using an angled eyeliner brush and L’oreal Infallible Lacquer Liner 24H in Blackest Black.

8. I curled my lashes and applied L’oreal Butterfly mascara on both upper and lower lashes.

9. I filled my brows using Anastasia Brow powder in Brunette.

(optional: appplied false eyelashes)

10. I applied Venus from Urban Decay Naked Basics on the inner corner of my eyes.

Urban Decay Naked Basics

11. I applied MAC Pro Longwear foundation on my face.

12. I contoured my face slightly using MAC Blunt.

13. On my cheeks, I applied Benefit Hervana blush.

14. On lips, I applied YSL Glossy Stain in Pêche Cerra-Cola (27).

Classic Smoky Eyes

Sleek Makeup Showstoppers – Smoky Purple Tutorial

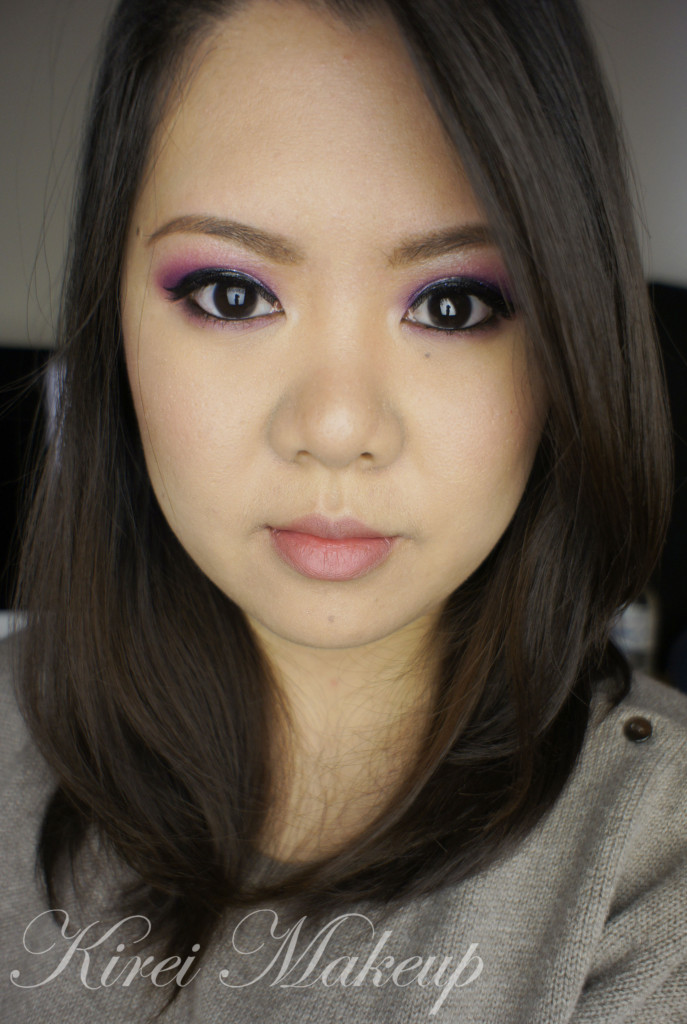
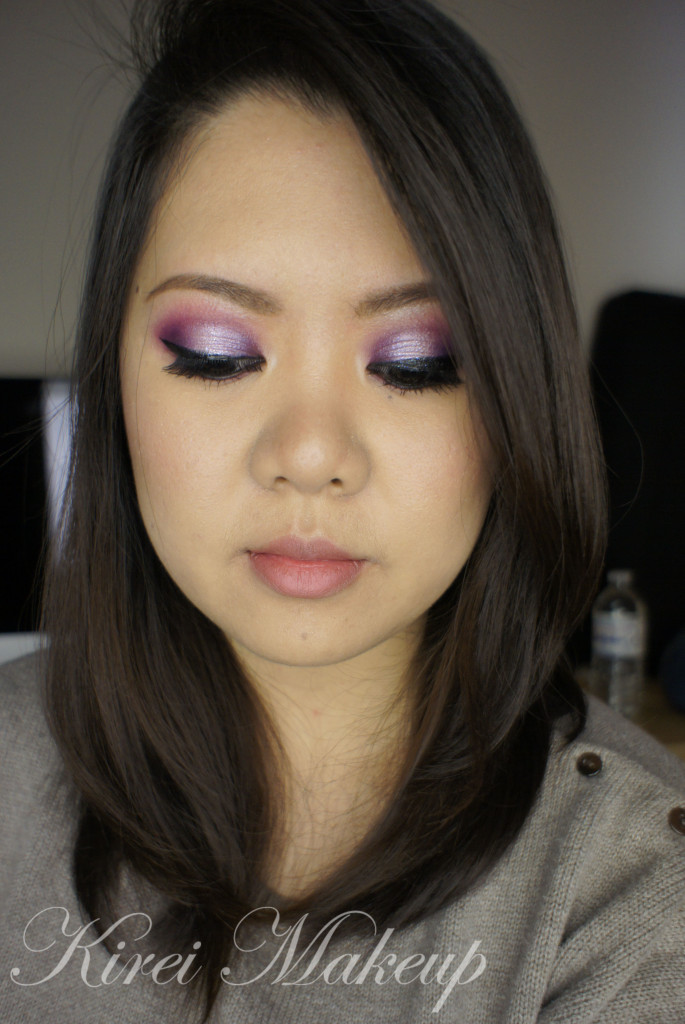
I’ve bought several Sleek Makeup iDivine palettes back when I was in Jakarta from Luxola website. I love the iDivine palettes, and have used some of the palettes regularly for my makeup job. Today, I want to showcase the Sleek Makeup Showstoppers palette since I haven’t do a tutorial using this palette yet.

I’ll try to do a review and swatches of the Sleek Makeup Showstoppers next time. I love the combination of sparkles, matte and shimmers in this palette. For today’s tutorial, I wanted to use some colors since I’ve been doing quite an earthy, brown, neutrals on my previous tutorials.

I’ve done a similar tutorial like this one using a more wearable color in my Pearlescent post. I love having the highlight in the center of the lid. It looks so gorgeous when you blink. You can obviously do this tutorial with any colors you like. I’ll try to do another tutorial using another color, something more wearable.

Anyways, let’s get to the tutorial!

Sleek Makeup iDivine ShowstopperHow-to:

1. I applied Sparkle from Sleek Makeup Showstoppers palette on the outer corner, and the inner corner of my eyelid using a flat eyeshadow brush. I also applied the eyeshadow on the crease as well. Leave the center of the lid empty.

2. Using a clean flat eyeshadow brush, I applied Bad Girl eyeshadow from Sleek Makeup Showstoppers on the center of my eyelid.

3. Using a fluffy blending brush, I picked Oh So Special from the Showstoppers palette and applied it to the crease. Do it very lightly at first, and add more color if needed.

4. Using the flat eyeshadow from step 2, I blended out Bad Girl eyeshadow. Do not add anymore eyeshadow at this time. Just use whatever is left on the brush.

5. Using a small angled eyebrow brush, I applied Sparkle on the lower lid.

6. I created a cat eyeliner on the upper lash line using Kanebo Kate Super Sharp eyeliner.

7. I lined my waterline and tightline using L’oreal Voluminous Smoldering eyeliner.

8. I filled in my eyebrows using Anastasia Duo Brow Powder, and an angled eyeliner brush.

9. I applied L’oreal Carbon black mascara on both upper and lower lashes, then I applied false eyelashes (haphazardly because I was rushing…sorry).

Sleek Makeup Showstopper

10. I applied MUFE HD Foundation in 118 all over my face.

11. I applied Blush Horizon de Chanel on my cheeks.

12. On the lips, I applied MAC Whirl lip liner and then Revlon Socialite lipstick on top.

Sleek Makeup iDivine Showstopper

L’oreal Cookies and Cream

Finally! A tutorial, whaaat?! Well, beauty lovers, I hope this will satisfy you for a while. I do have a few more stuffs lining up, but one by one, shall we?

So, I’ve owned this L‘oreal Cookies and Cream palette for a while (please check my post for the swatches here). However, I didn’t really get the chance to play with until now. For the tutorial below, I followed the instruction from the back of the palette. Personally I won’t do it this way since I find that it’s not smoky enough for me.

Also, I recommend everyone to use a primer on the lid before eyeshadow application. Although the pigments are pretty good, the eyeshadows didn’t really have any staying power. The reason why I didn’t apply any primer is because I was testing for creasing and such. If you have an oily lid, you’d probably want to apply primer.

How-to:

1. I applied the 2nd lightest eyeshadow (a silver) from the palette all over the lid.

2. On the crease, I applied the medium (silver grey) eyeshadow using a fluffy blending brush.

3. Using Smashbox bullet brush, I applied the darkest eyeshadow (graphite) on the outer V.

4. I blended the outer V using a clean blending brush.

5. Using a clean blending brush, I applied the highlighter color (vanilla) under the brow.

6. I applied the medium color (silver grey) along the lower lash line using an angled brush, and the darkest color on the outer half of the lower lash line.

7. I created a slight winged liner using L’oreal Super Slim Liquid Eyeliner along the upper lash line.

8. I also lined my waterline using L’oreal Smoldering Voluminous pencil liner.

9. I curled my lashes and applied mascara.

10. I also applied false eyelashes Fleur Fleur in 201.

11. I filled my brows using Shu Uemura Hard Formula no. 9.

Asian Smoky Eyes

12. For the face, I applied UD Naked foundation.

13. On the cheeks, I applied L’oreal Rose Gold Visible Lift blush.

14. Slightly contoured my nose using Smashbox contour/highlight trio palette (discontinued).

15. On the lips, I filled it in using L’oreal Infallible lipliner in Rose.

Asian Smoky Eyes