Kat Von D Shade + Light Eye Contour Tutorial

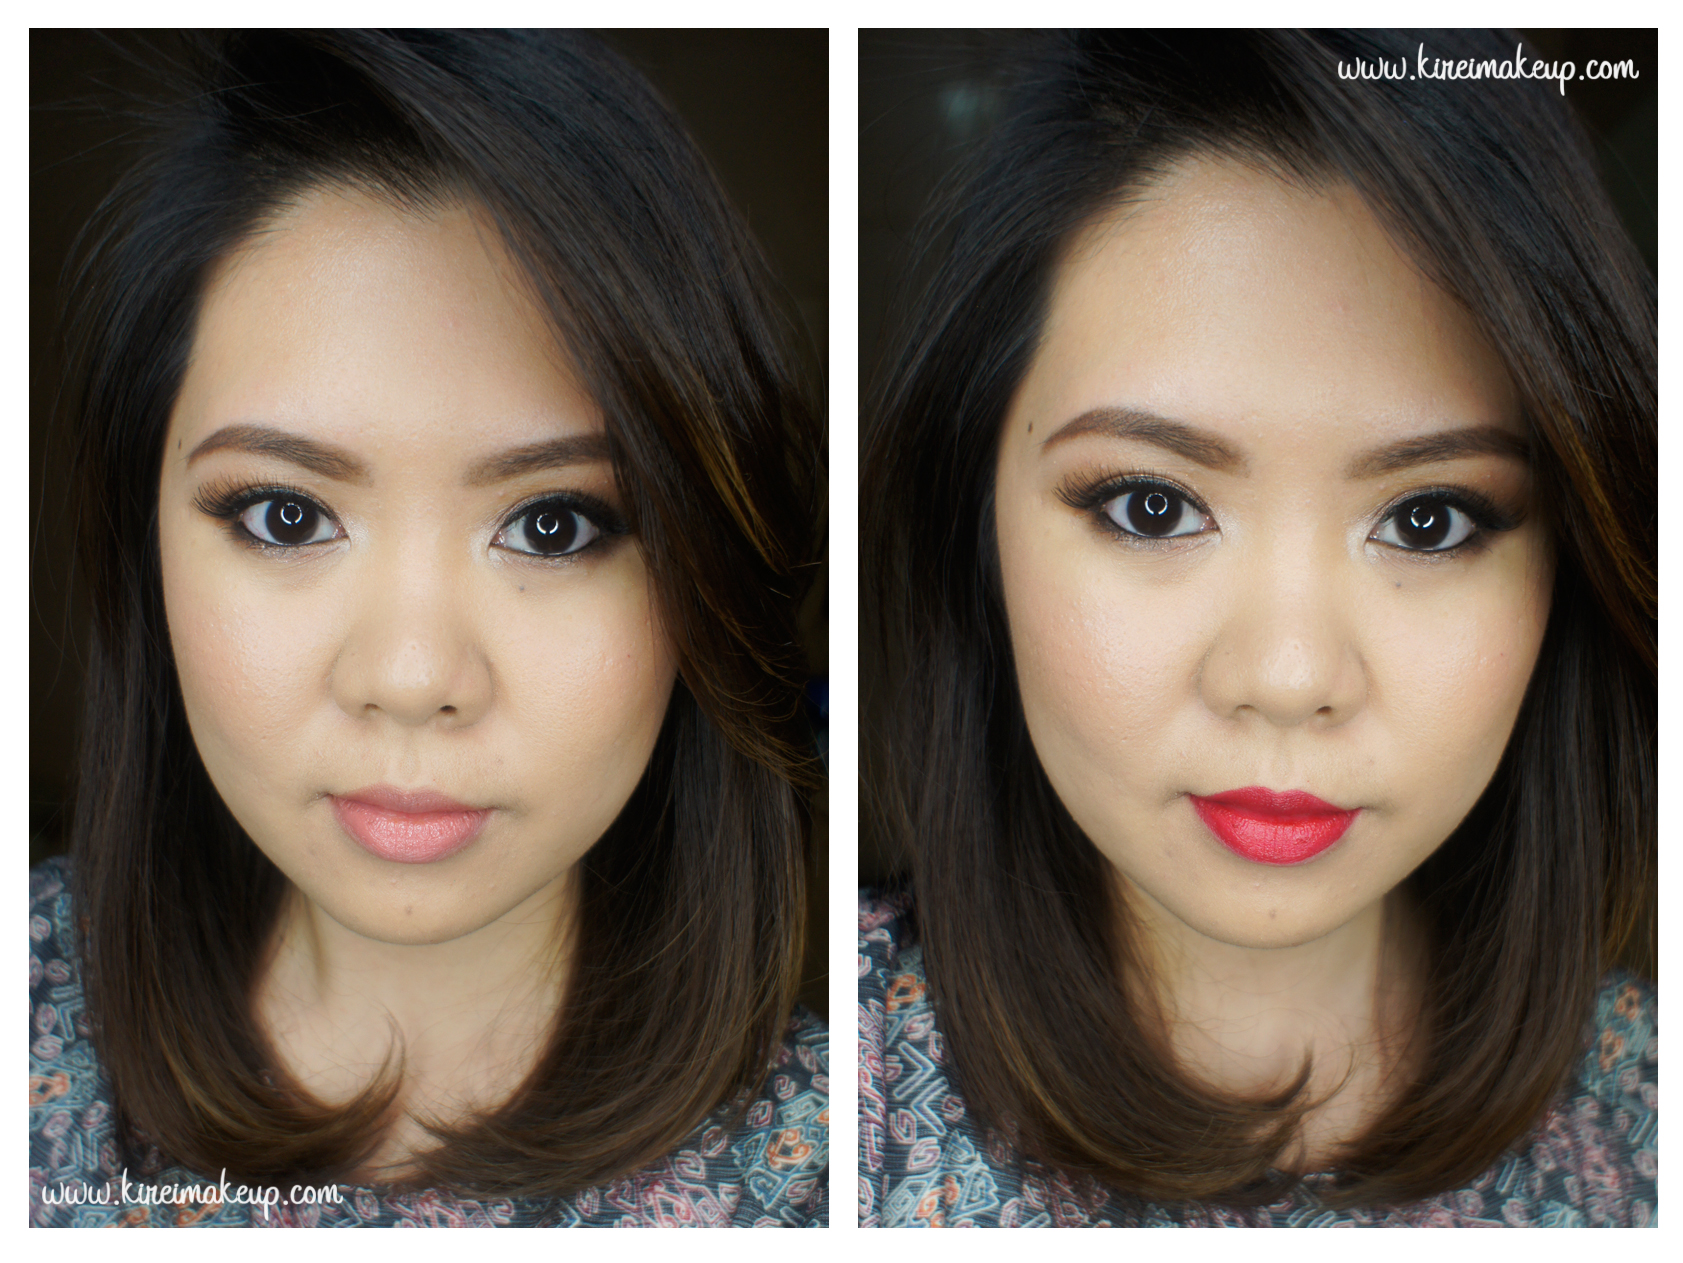
For this Kat Von D Shade + Light Eye contour tutorial, I’ve decided to follow the instruction that came with the palette – the natural look from the Neutral Quad. As you all know, I’m a big fan of Kat Von D’s products, especially her tattoo eyeliner and eyeshadow palette. Her products are amazingly pigmented, very smooth, and buttery. For this tutorial, I’m using mostly Kat Von D products.

I cannot sing enough praises on how great Kat Von D’s products are, you have to try it out for yourself! This palette is no different, I really recommend this Shade + Light eye contour tutorial for those of you who are interested in learning how to contour/highlight your eyes.

I’ll try to do swatches and perhaps a quick review next time. Here’s my review for this palette! I think I’ll do more tutorials using this palette, I want to use this palette to its fullest extent!

Shade Light eye contour tutorial

Products used

Eyes

  • Primer – Urban Decay Primer Potion “Original”
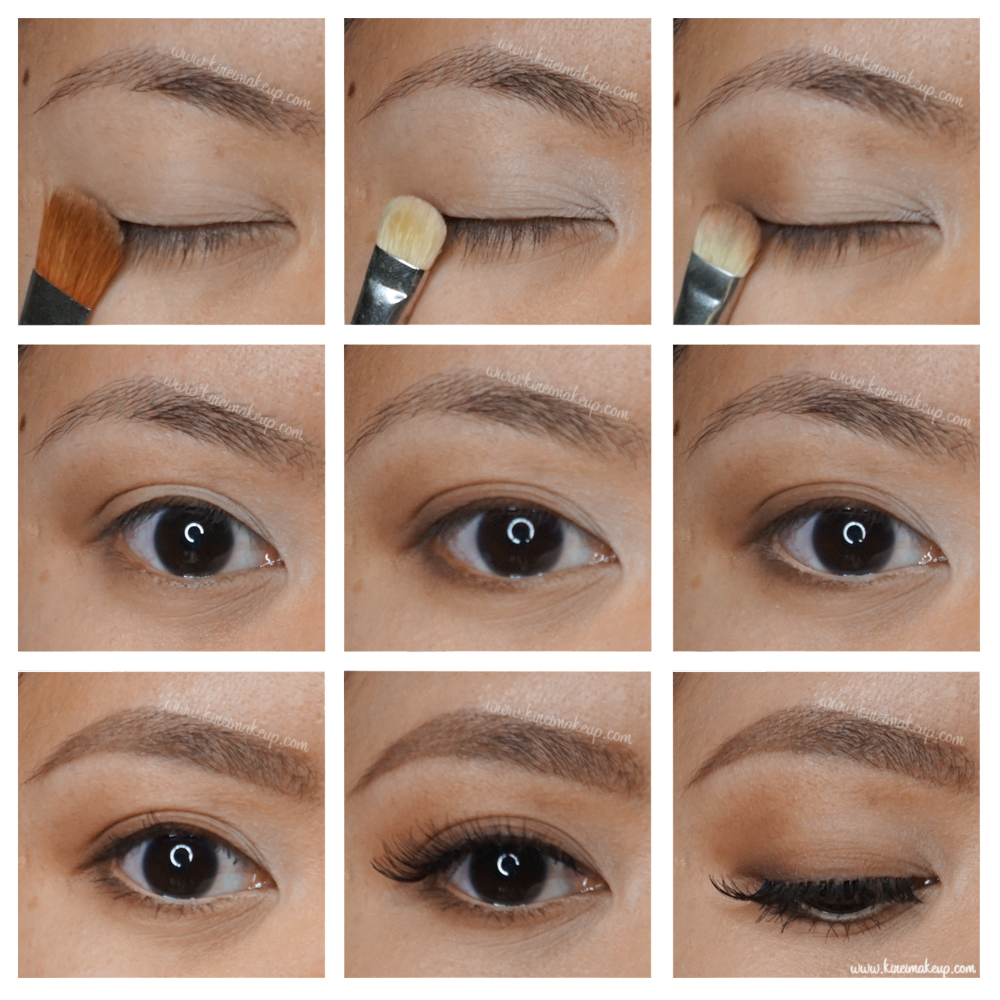
  • Base – Kat Von D Shade + Light Eye Contour “Laetus”
  • Inner Lid – Kat Von D Shade + Light Eye Contour “Lucius”
  • Crease/Lower lid – Kat Von D Shade + Light Eye Contour “Samael”
  • Upper & lower lash line – Kat Von D Shade + Light Eye Contour “Solas”
  • Waterline – MAC Chromagraphic pencil liner “NC15”
  • Brows – Stila All Day Waterproof Brow Color “Medium”; Anastasia Beverly Hills Brow Wiz “Taupe”
  • Brow gel – L’oreal Brow Stylist
  • Mascara – Lancome “Hypnose” mascara
  • Falsies – Gwiyomi falsies no. 3

Kat Von D Shade Light eye contour palette

Face

  • Primer – Kat Von D Lock-it Featherweight Primer
  • Foundation – Kat Von D Lock-it Tattoo Foundation
  • Concealer – NARS Radiant Creamy concealer “Custard”
  • Setting Powder – CoverFX translucent powder

Cheeks

  • Contour – Kat Von D Shade + Light Contour Palette “Shadowplay”
  • Highlight – Kat Von D Shade + Light Contour Palette “Lyric”
  • Blush – Benefit blush “Hervana”

*Check my Subtle Highlight/Contour post on how-to contour*
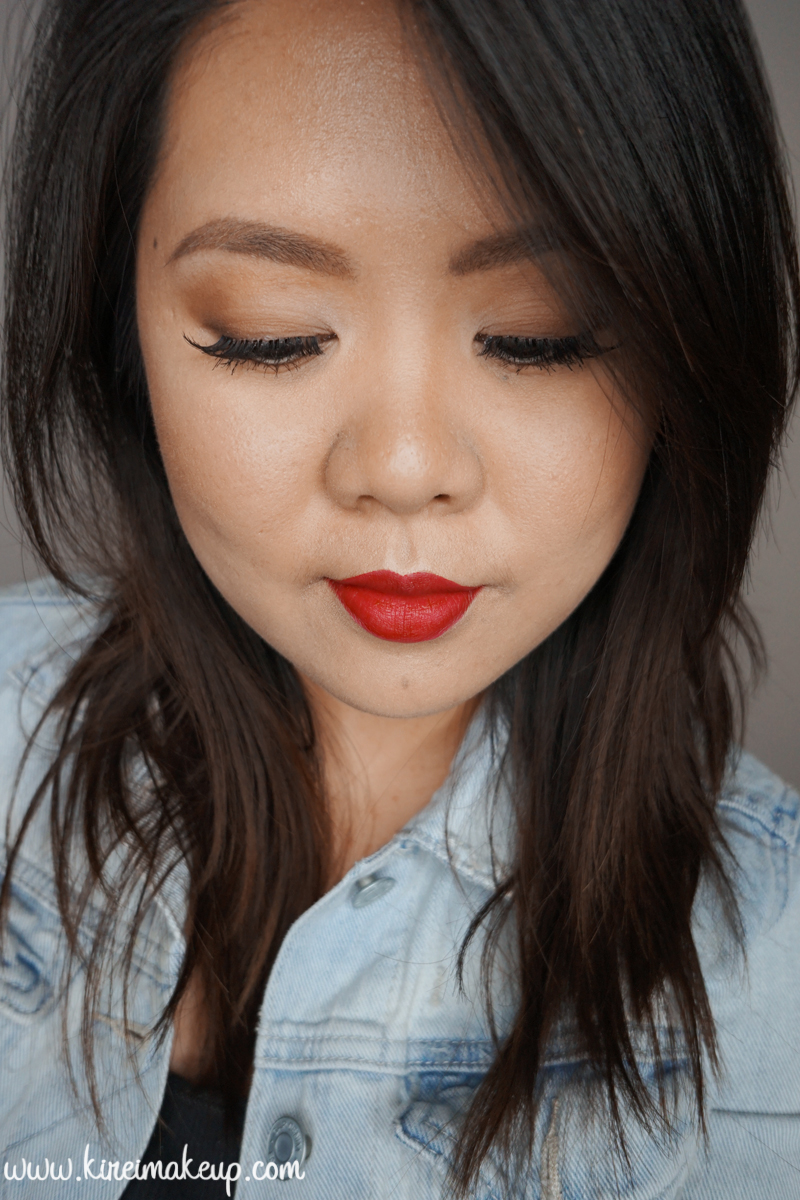
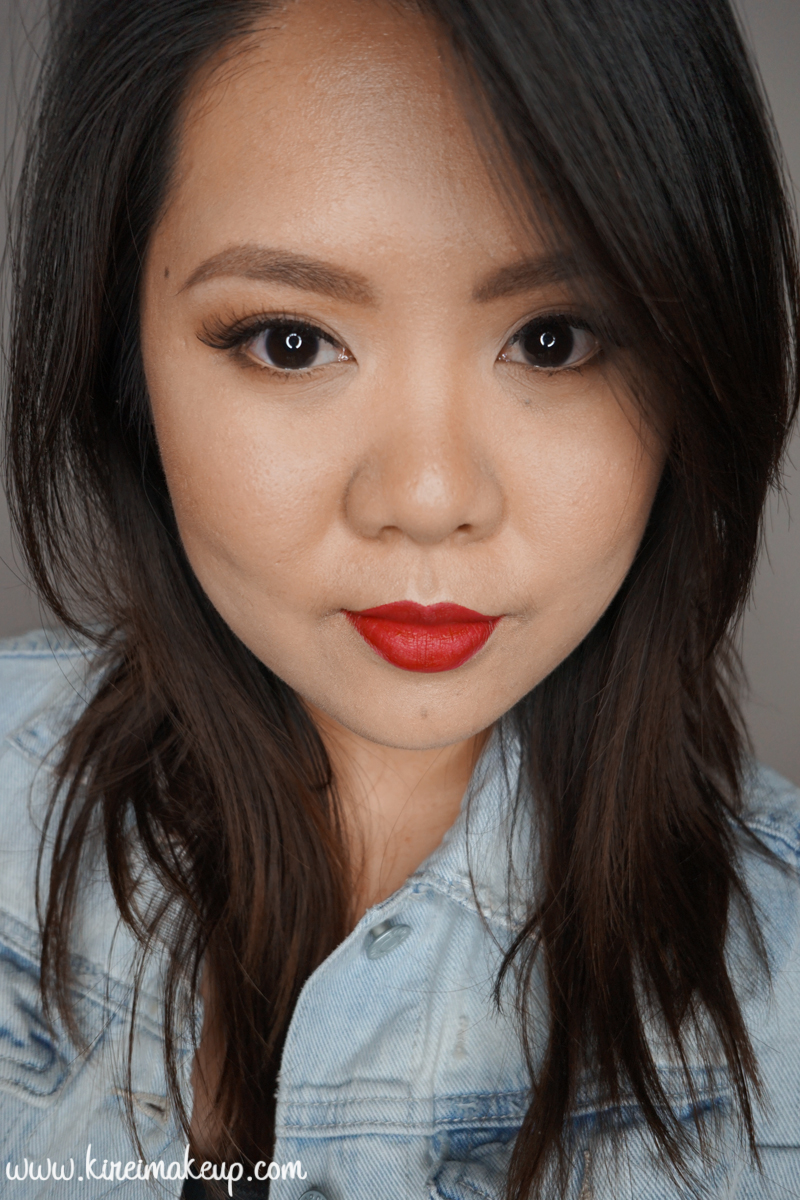
Lips

  • Lip pencil – Make Up For Ever Aqua Lip Pencil “11c”
  • Lipstick – NYX Soft Matte Lip Cream “Monte Carlo”

nyx monte carlo


Simple Everyday Makeup

How is everyone’s Monday going? The Holiday is approaching real soon, eh?! I wanted to share with you guys this super easy and simple everyday makeup tutorial which can be worn by everyone, especially those who don’t usually wear much makeup. I did 2 version – one with a simple peachy lips, and another with red lips.

I think this look is great for those who prefer a simple no-fuss makeup. Nothing too dark, nothing too bright, but with a bit of colors. This is also a look for those who prefer earthy brown tones over black. I probably would wear this for a brunch (with peachy lips), or even a dinner party (with red lips).

Eyeshadows used in this tutorial are from the Smashbox Full Exposure Palette.

*You can find other tutorials using this palette right HERE!*

smashbox full exposure makeup tutorial

How-to:

1. I applied MAC Groundwork paint pot on my eyelids using my ring finger.

2. Using a fluffy blending brush, I applied Smashbox Full Exposure palette in M2 above my crease.

3. Using Smashbox bullet crease brush, I applied Smashbox Full Exposure palette in M1 on the outer half of my eyelid.

4. Using a flat eyeshadow brush, I applied S1 on the inner half of the eyelid, blending it towards the outer half.

5. I applied S4 on the inner corner of my eyes using Real Technique shading brush (skip this step if you have wide-set eyes).

6. I lined my waterline and tightline using L’oreal Voluminous Smoldering eyeliner.

7. I also applied M7 along my upper lash line using an angled eyeliner brush. I applied this along the outer half of my lower lash line as well.

8. I curled my lashes and applied Maybelline Express Turbo Boost mascara on my lashes.

9. I filled my brows using Anastasia Beverly Hills Brow Duo Powder.

10. I also applied Mata Nona no. 15 falsies.

nyx monte carlo tutorial

11. On my face, I applied MAC Pro Long-Wear foundation using Real Technique Expert Face brush.

12. Under my eyes and on my blemishes, I applied MAC Pro Long-Wear concealer. I set my face using CoverFX Translucent powder.

13. On my cheeks, I applied Chanel Blush de Horizon.

14a. (left) For the peachy lips, I filled my lips using MAC Spice lip liner. Then I applied YSL Glossy Stain in Peche Cerra-Colla (27).

14b. (right) I removed the previous lip color, and then applied NYX Monte Carlo on my lips.


Products used

Eyes – MAC Groundwork paintpot; Smashbox Full Exposure Palette (crease – M2, outer lid – M1, lid – S1, inner corner – S4, liner – M7); L’oreal Voluminous Smoldering eyeliner; Maybelline Expres Turbo Volume mascara; Anastasia Beverly Hills duo brow powder; Mata Nona falsies no. 15.

Face – MAC Pro Long-Wear foundation NC30; MAC Pro Long-Wear concealer NC25; CoverFX translucent powder.

Cheeks – Chanel Blush de Horizon.

Lips – MAC Spice Lip pencil; YSL Glossy Stain no. 27; NYX Monte Carlo