I’m just going to say please ignore that red dot on my eyebrow. It hurts and it’s a slightly irritated. Thanks! I accidentally scratched it cause it was itchy when I was doing my eyes, and in the pictures below it was irritated and a bit swollen.
Anyhow, I just recently watched Percy Jackson and the Sea Monster (I also watched Elysium!). Anyways, I saw the Hippocampus from the movie and I love its color. Gorgeous! Anyways, I took some of the colors that I can see prominently on the Hippocampus as an inspiration. Not to mention, I just bought the new Clinique Chubby Eye Tint in Two Ton Teal, so a good excuse to do a teal look!
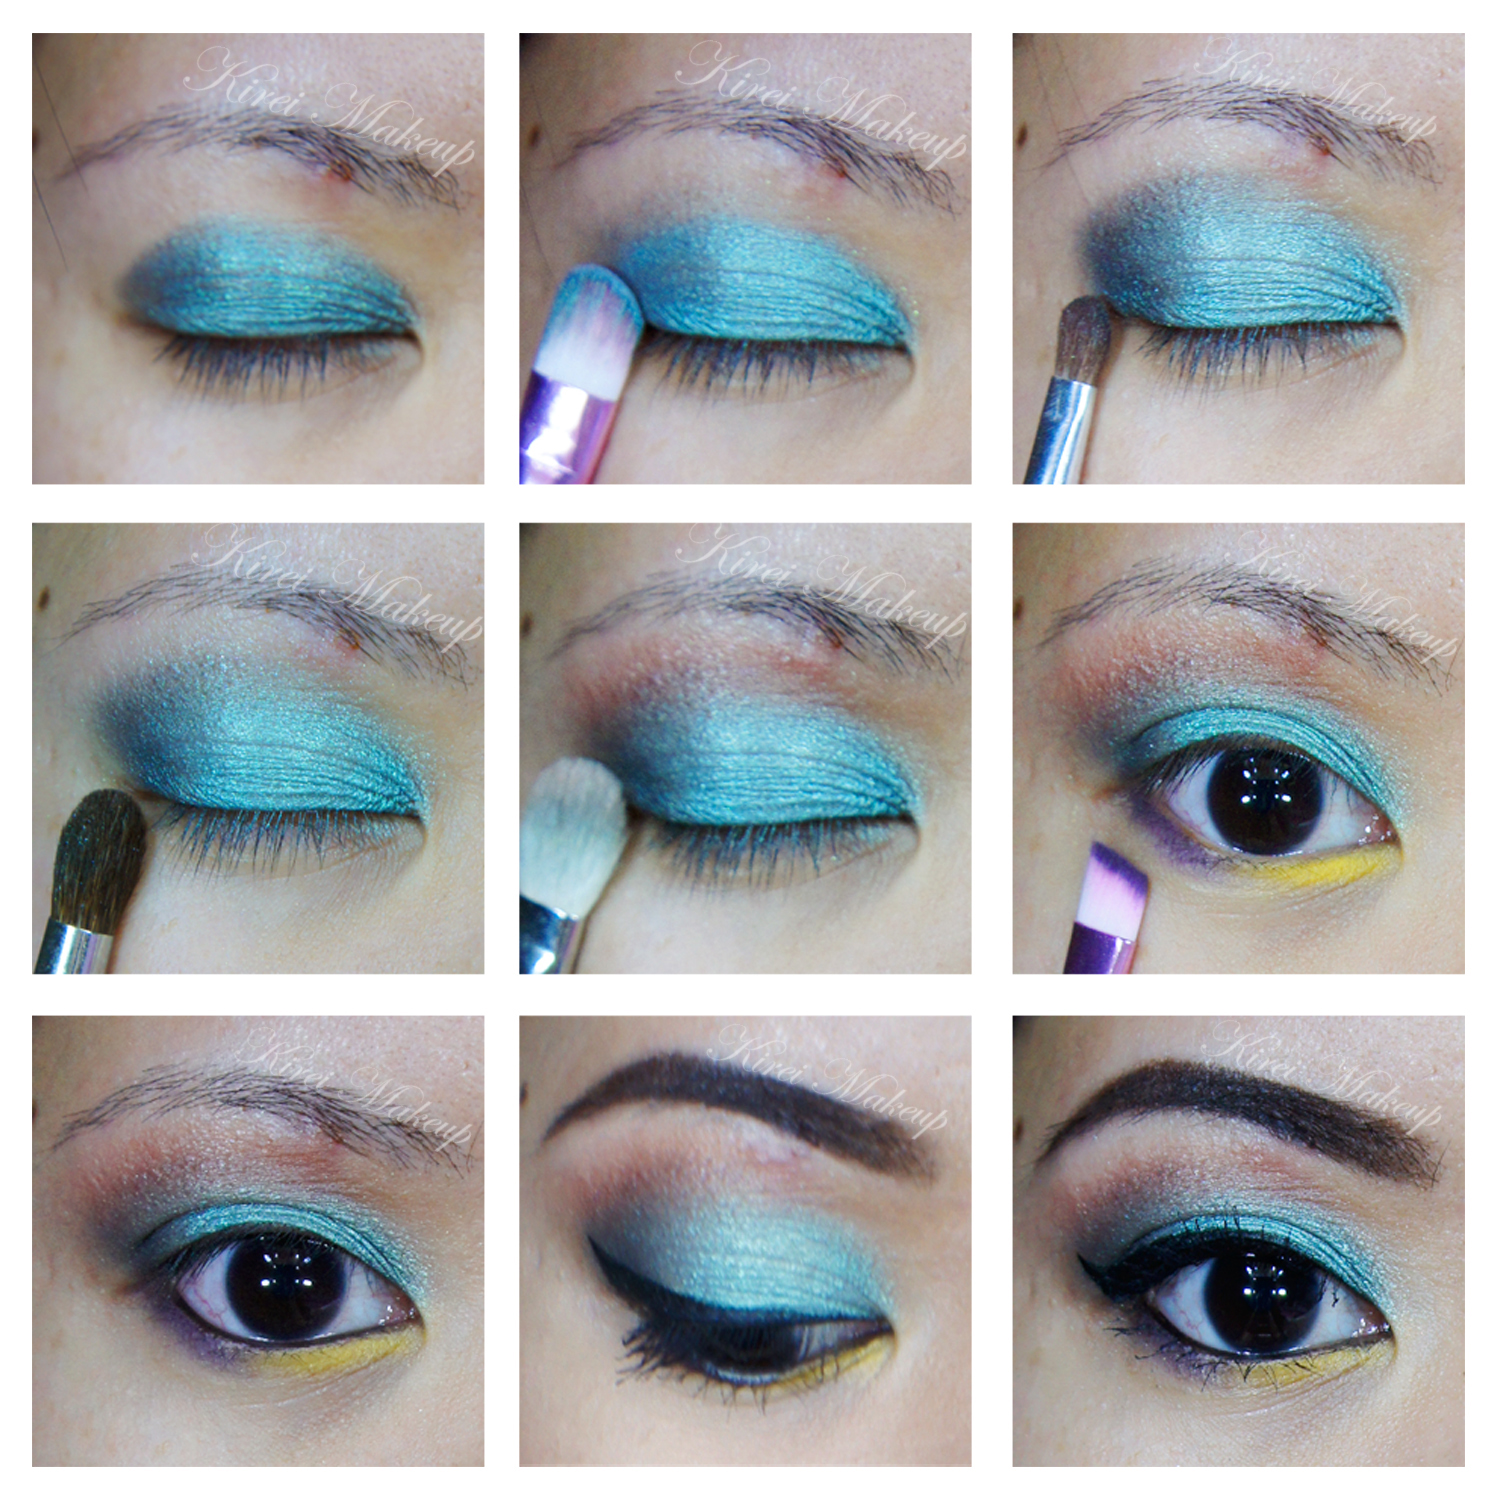
Let’s get the tutorial started!
How-to:
1. I applied Clinique Chubby Stick Eye Tint in Two Ton Teal all over the lid. I layered this product several times to get the intensity I want.
2. Using a flat eyeshadow brush, I applied MAC Shimmermoss on top of the Two Ton Teal.
3. I used a small shader brush and applied no-brand black eyeshadow on the outer V of the lid.
4. Using a clean fluffy blending brush, I clean up the crease.
5. Using another clean blending brush, I applied MAC Coppering just slightly above the crease.
6. I used an angled brush to apply MUFE no. 71 on the inner corner of the eyes and MAC Indigo Ink on the outer corner of the lower lid.
7. I lined my waterline and tightline using L’oreal Voluminous Smoldering eyeliner.
8. I created a feline flick (or winged eyeliner) along the upper lashline using Kanebo Kate Super Sharp eyeliner.
9. I filled my brows in using MUFE Aqua Brow Gel.
10. I curled my lashes and applied L’oreal Double Extended Curl mascara on both top and lower lashes.
11. For the face, first I applied Clinique CC cream to prep the skin, and then applied MUFE HD Foundation all over using a foundation brush. I covered my blemishes and under eye circles using MUFE HD concealer
12. I also contoured my cheeks and nose using MAC Shadowy.
13. I applied a mix of MAC Cubic and MAC Fleur Power on the cheeks.
14. On the lips, I applied Clinique Bountiful Blush chubby lipstick.


