MAC Russian Red

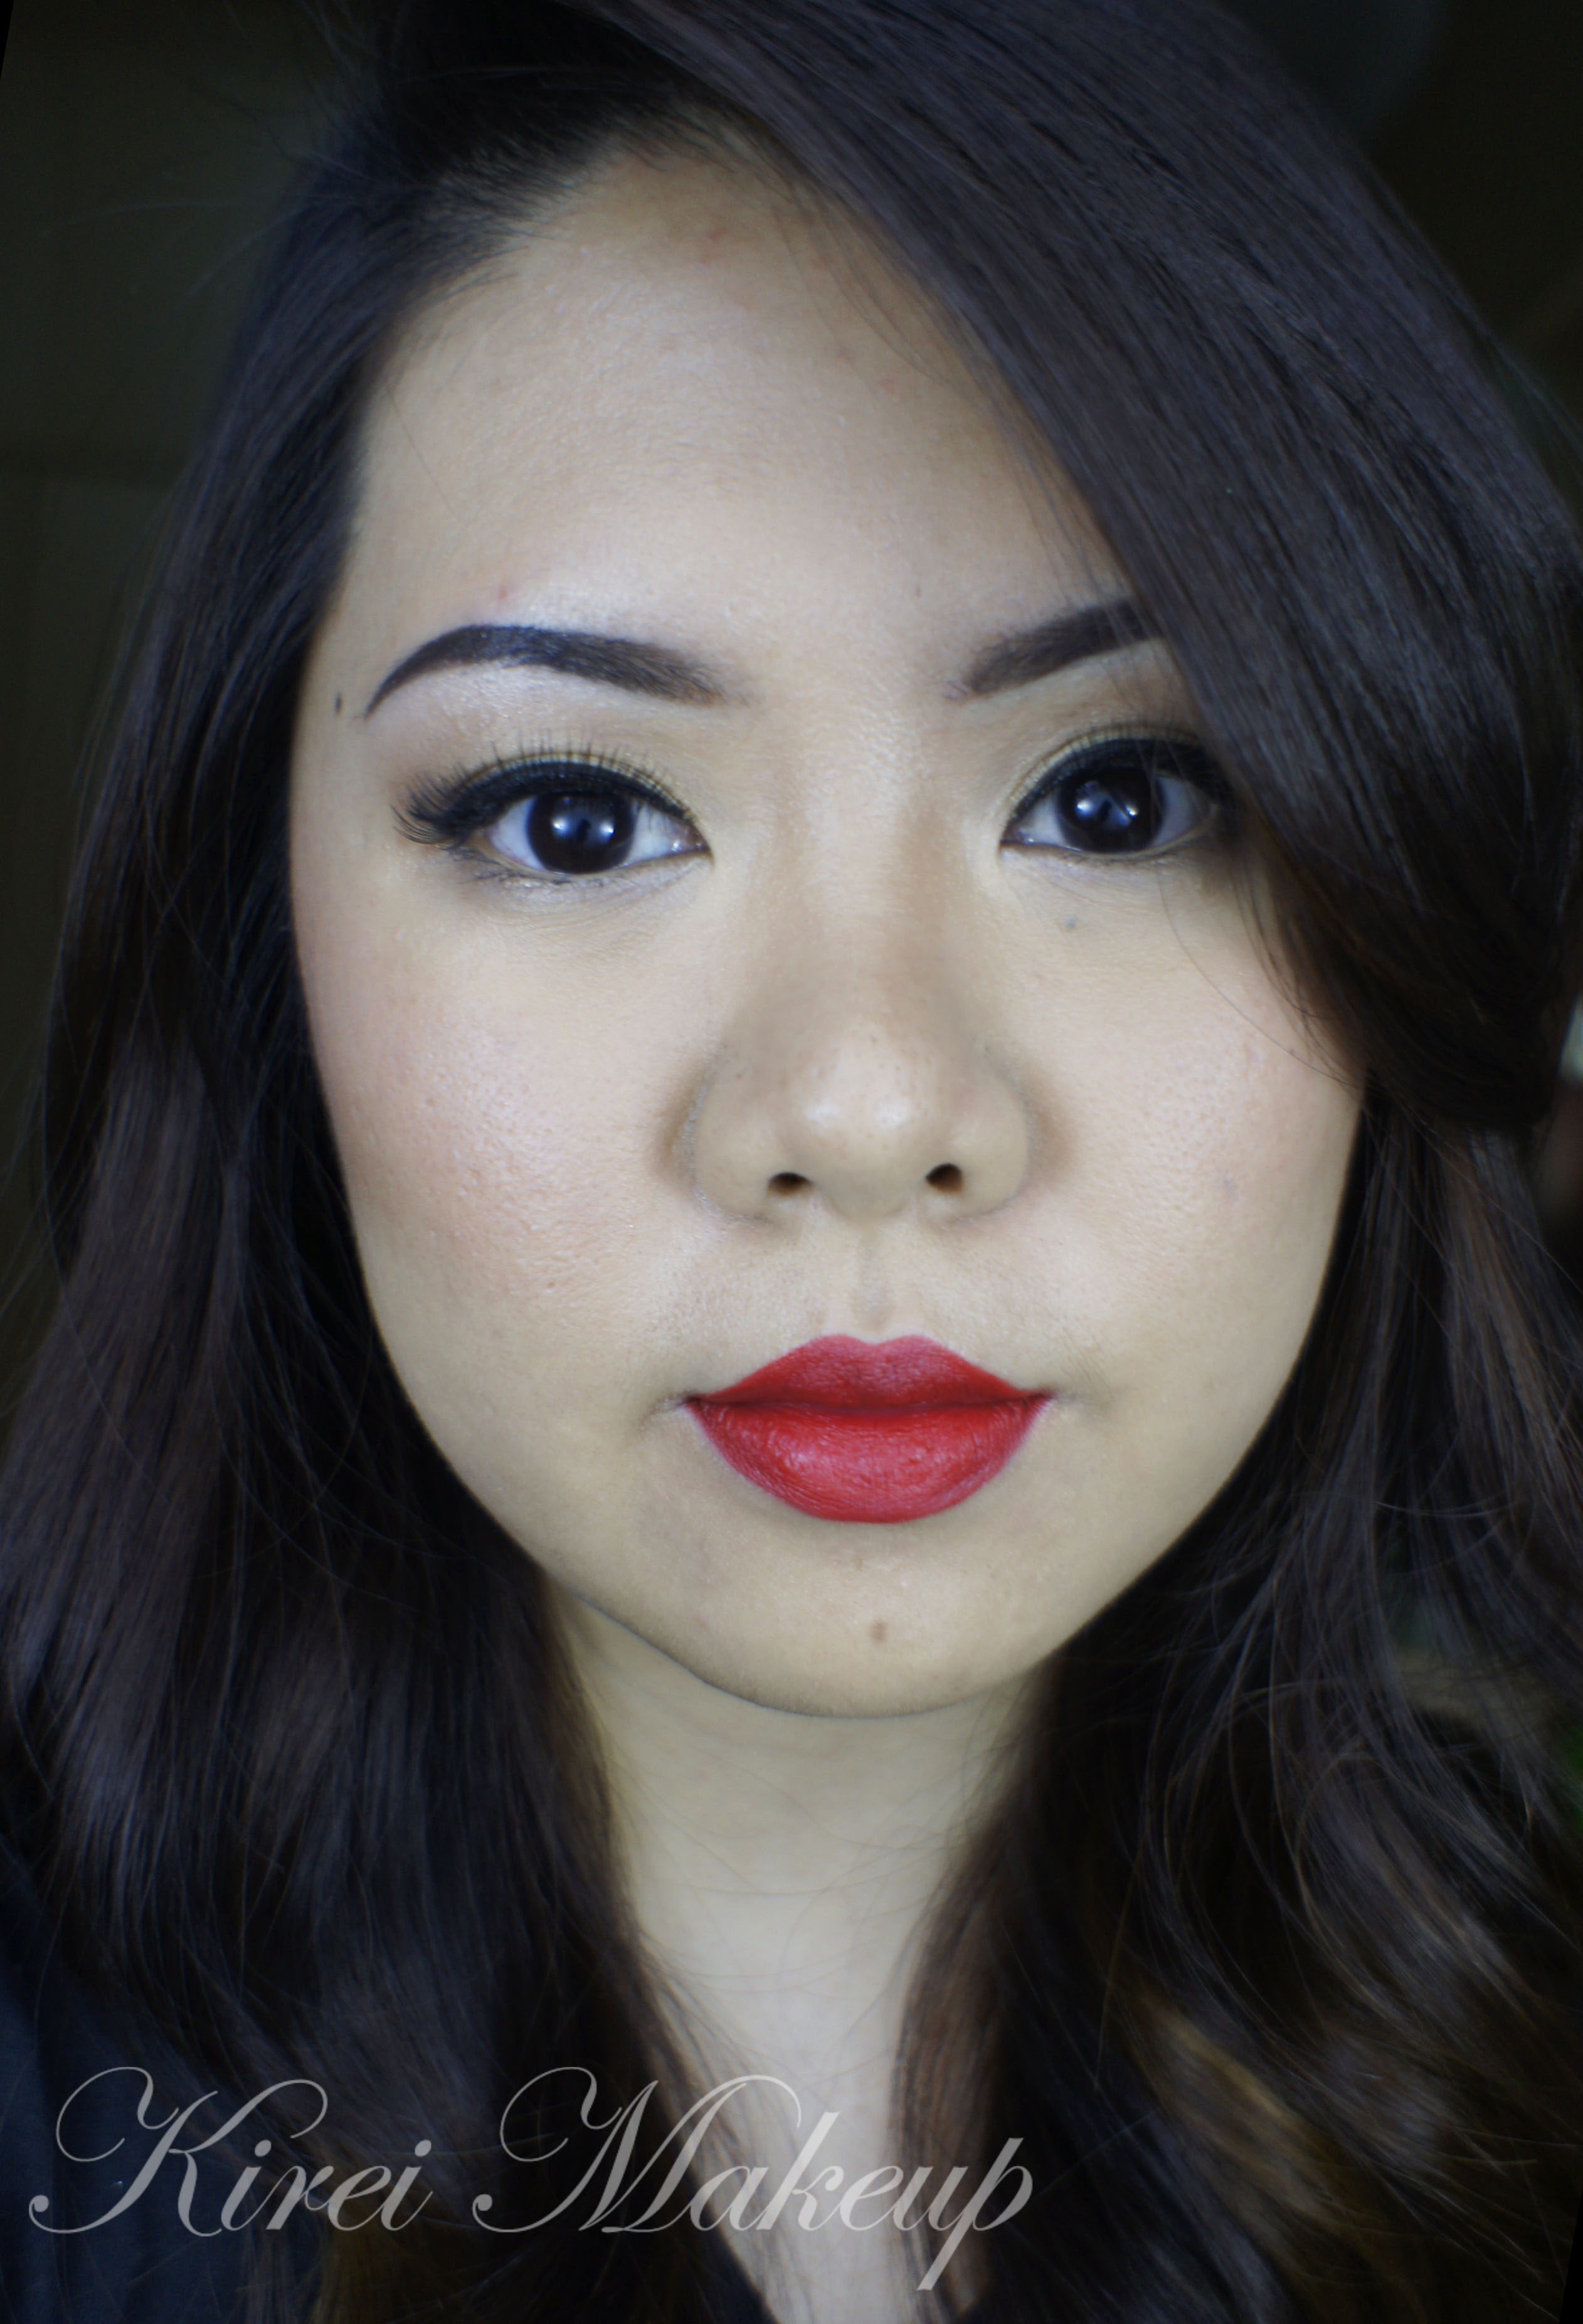
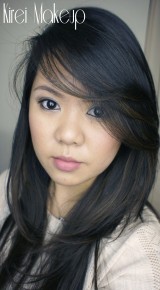
As you all know from my Twitter, I’ve been looking forward to use my M.A.C Russian Red lipstick again. I know, I know, it seems like this week is a MAC week. Well, can’t be helped, I’m trying to fall in love with MAC again! Afterall, MAC was one of the reasons why I went into makeup in the first place.

So, talking about MAC Russian Red, this is the best true-red lipstick. If you want a cooler red, you can try MAC Ruby Woo instead. I also love how this lipstick has a matte finish to it. I’m not a big fan of shiny or glossy lips, so I love how even though this lipstick has a matte finish, it is not drying. It also helps if you prep your lips before application to ensure your lips aren’t chapped.

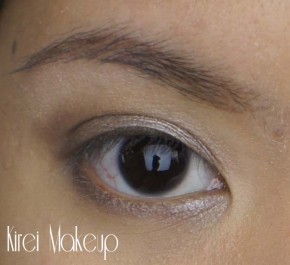
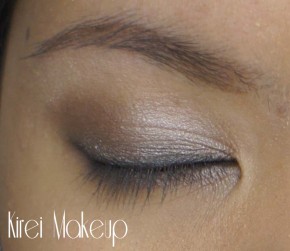
I purchased this Chanel quads in Intuition in February and didn’t have the chance to play with it, so I had to use it for this look. I love how soft and pretty the eyes look. If you are looking for a neutral, day makeup, do try the eye-look and you can skip the red lipstick.

I’ve done a similar look in Battle of the Classics.
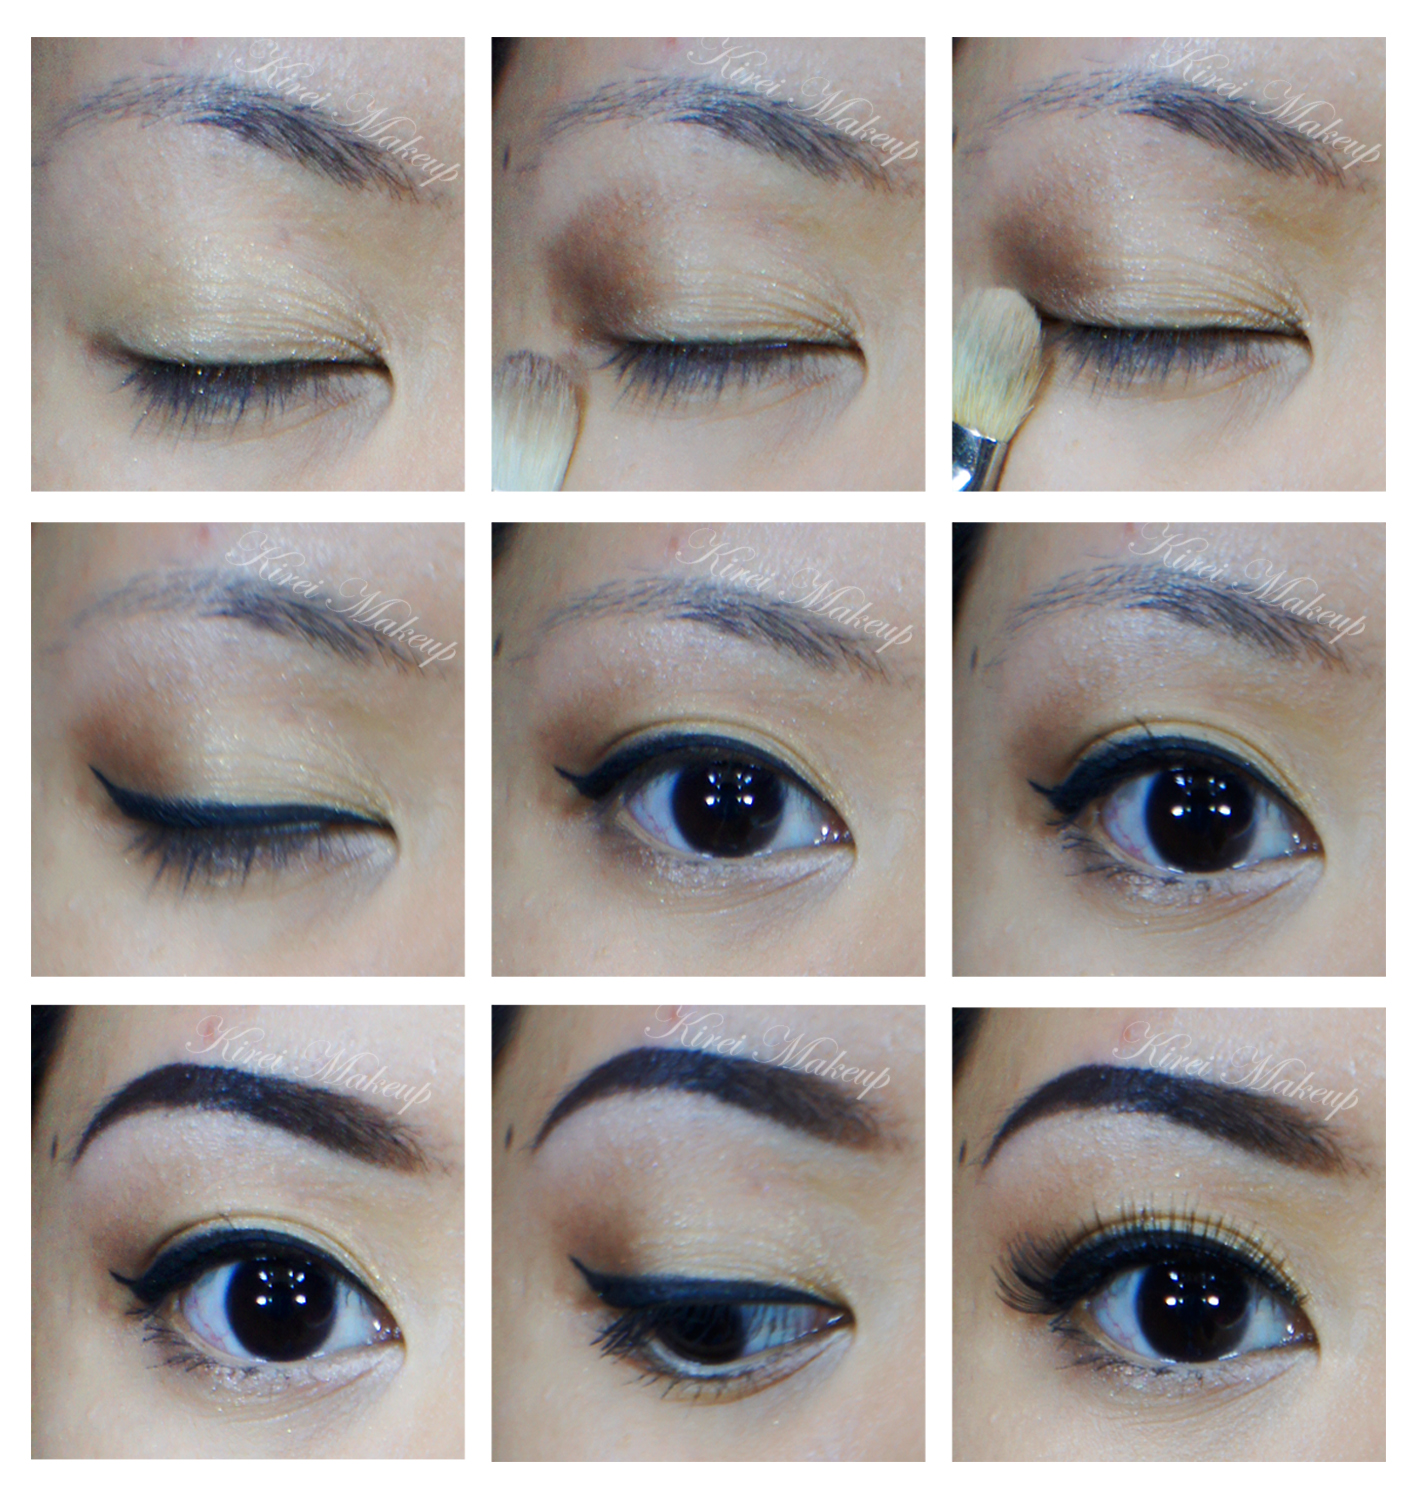
How-to:

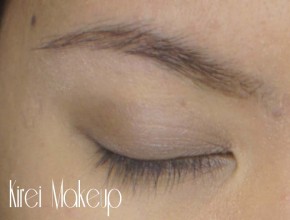
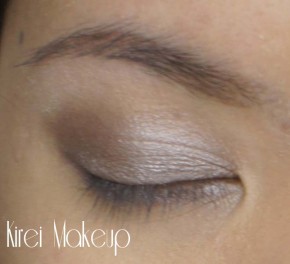
1. Using a flat eyeshadow brush, I applied the gold eyeshadow from the Chanel Intuition quad.

2. Using a fluffy blending brush, I applied the deep brown shade from the same quad on my  outer V and on the crease. I used whatever was left on the brush and swept it along the lower lash line.

3. I blended out the crease using a clean fluffy brush.

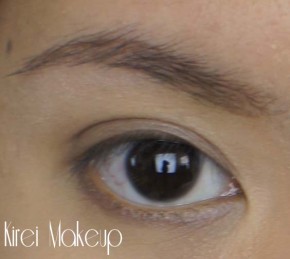
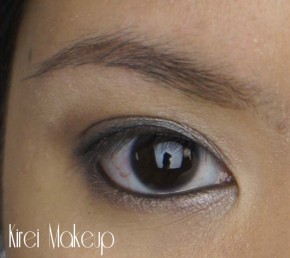
4. Using an angled eyeliner brush, I created a winged liner along the upper lashline.

5. I applied MAC Chromagraphic liner in NC30 on my tightline.

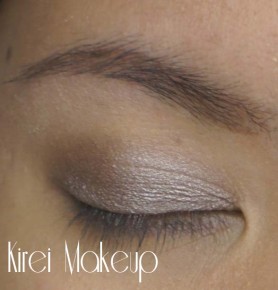
6. Using a small flat shader brush, I applied the pink highlighter shade from Chanel Intuition quad on the inner corner of the lower lid and under the brow.

7. I curled my lashes and applied Maybelline Volume Express mascara on both upper and lower lashes.

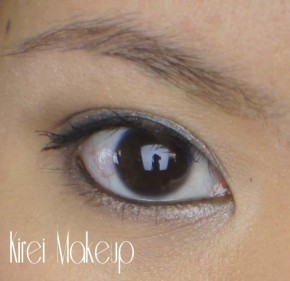
8. I filled my brows in using MUFE Aqua Brow Gel.

9. For extra drama, I applied Quo false eyelashes.

natural wedding makeup

10.  For the face, I applied MUFE HD Foundation using a foundation brush.

11. Using whatever was left on the brush, I swept it across my lips.

12. I lined and filled my lips using MAC Redd lip pencil.

13. Using a lip brush, I applied MAC Russian Red on my lips.

14. I powdered my face using a loose translucent powder.

15. I contoured my face using MAC Shadowy and applied MAC Fleur Power on the cheeks as blush.

asian red lips

Nude Shimmer Palette by Physician’s Formula

If you’re looking for a cute idea for your girl friends, sisters or yourselves this Christmas try going to Shoppers and get the Nude Shimmer Palette by Physicians Formula. The packaging is super adorable (pink case with black lace)! The price won’t break your wallet (only cad$ 17.99), and the colour payoff is awesome! I think a neutral or nude eyeshadow palette is always a good basic palette that you should have. Whether you’re currently a working woman or a student, you can never go wrong with a neutral palette.

The nice thing about this Nude Shimmer palette is that it comes with 9 eyeshadows. They paired the eyeshadows into trios – base, medium tone and darkest tone. I think it’s a genius idea! The colours look excellent on everybody! In the box, there’s 3 different looks that you can follow – natural, playful and dramatic.

Personally, I tend to mix and match the colour to create my own look. If you are looking for a nude palette that can go from day to night look in an instant, this might just work for you.

In this tutorial, I used the palette to create a party look that is no hassle and will look good in any party dresses. It’s classy and has just enough intensity. If you want to add more drama, feel free to add false eyelashes.

How-to:

1. I applied Lise Watier Portfolio colour corrector on my face.

2. Using a stipling brush, I applied Giorgio Armani Silk Foundation all over my face.

3. Using a big fluffy brush, I tapped Smashbox Halo Powder gently all over my face. I dusted off excess powder afterwards.

4. I applied Physicians Formula eyeliner in Champagne all over my lid. I blended the colour using my ring finger. I also applied this eyeliner on my lower lid.

5. Next, using a flat eyeshadow brush, I applied colour no. 5 (counting from the top), a taupe-y colour, on my eyelid. I blended the edge using a clean blending brush.

6. I applied the same colour on my lower lid.

7. Then, I used my blending brush to apply colour no. 6 on the crease, just to add a little depth. I applied this colour on the outer corner of my lower lid.

8. I lined my upper lash line using Physicians Formula eyeliner in Black. I used a pencil brush to blend this eyeliner. I also used this eyeliner to line my waterline.

9. To ensure that my eyeliner will last, I take an angled brush, dipped it in the black eyeshadow from the palette and stamp the colour on my upper lash line (on top of the eyeliner) and on my waterline.

10. I curled my lashes and applied Benefit They’re Real mascara on my upper and lower lashes.

11. I applied Physicians Formula blush in Rose and complete the look by applying Tarte Lipsurgence in Hope on my lips.