Neon Pink!

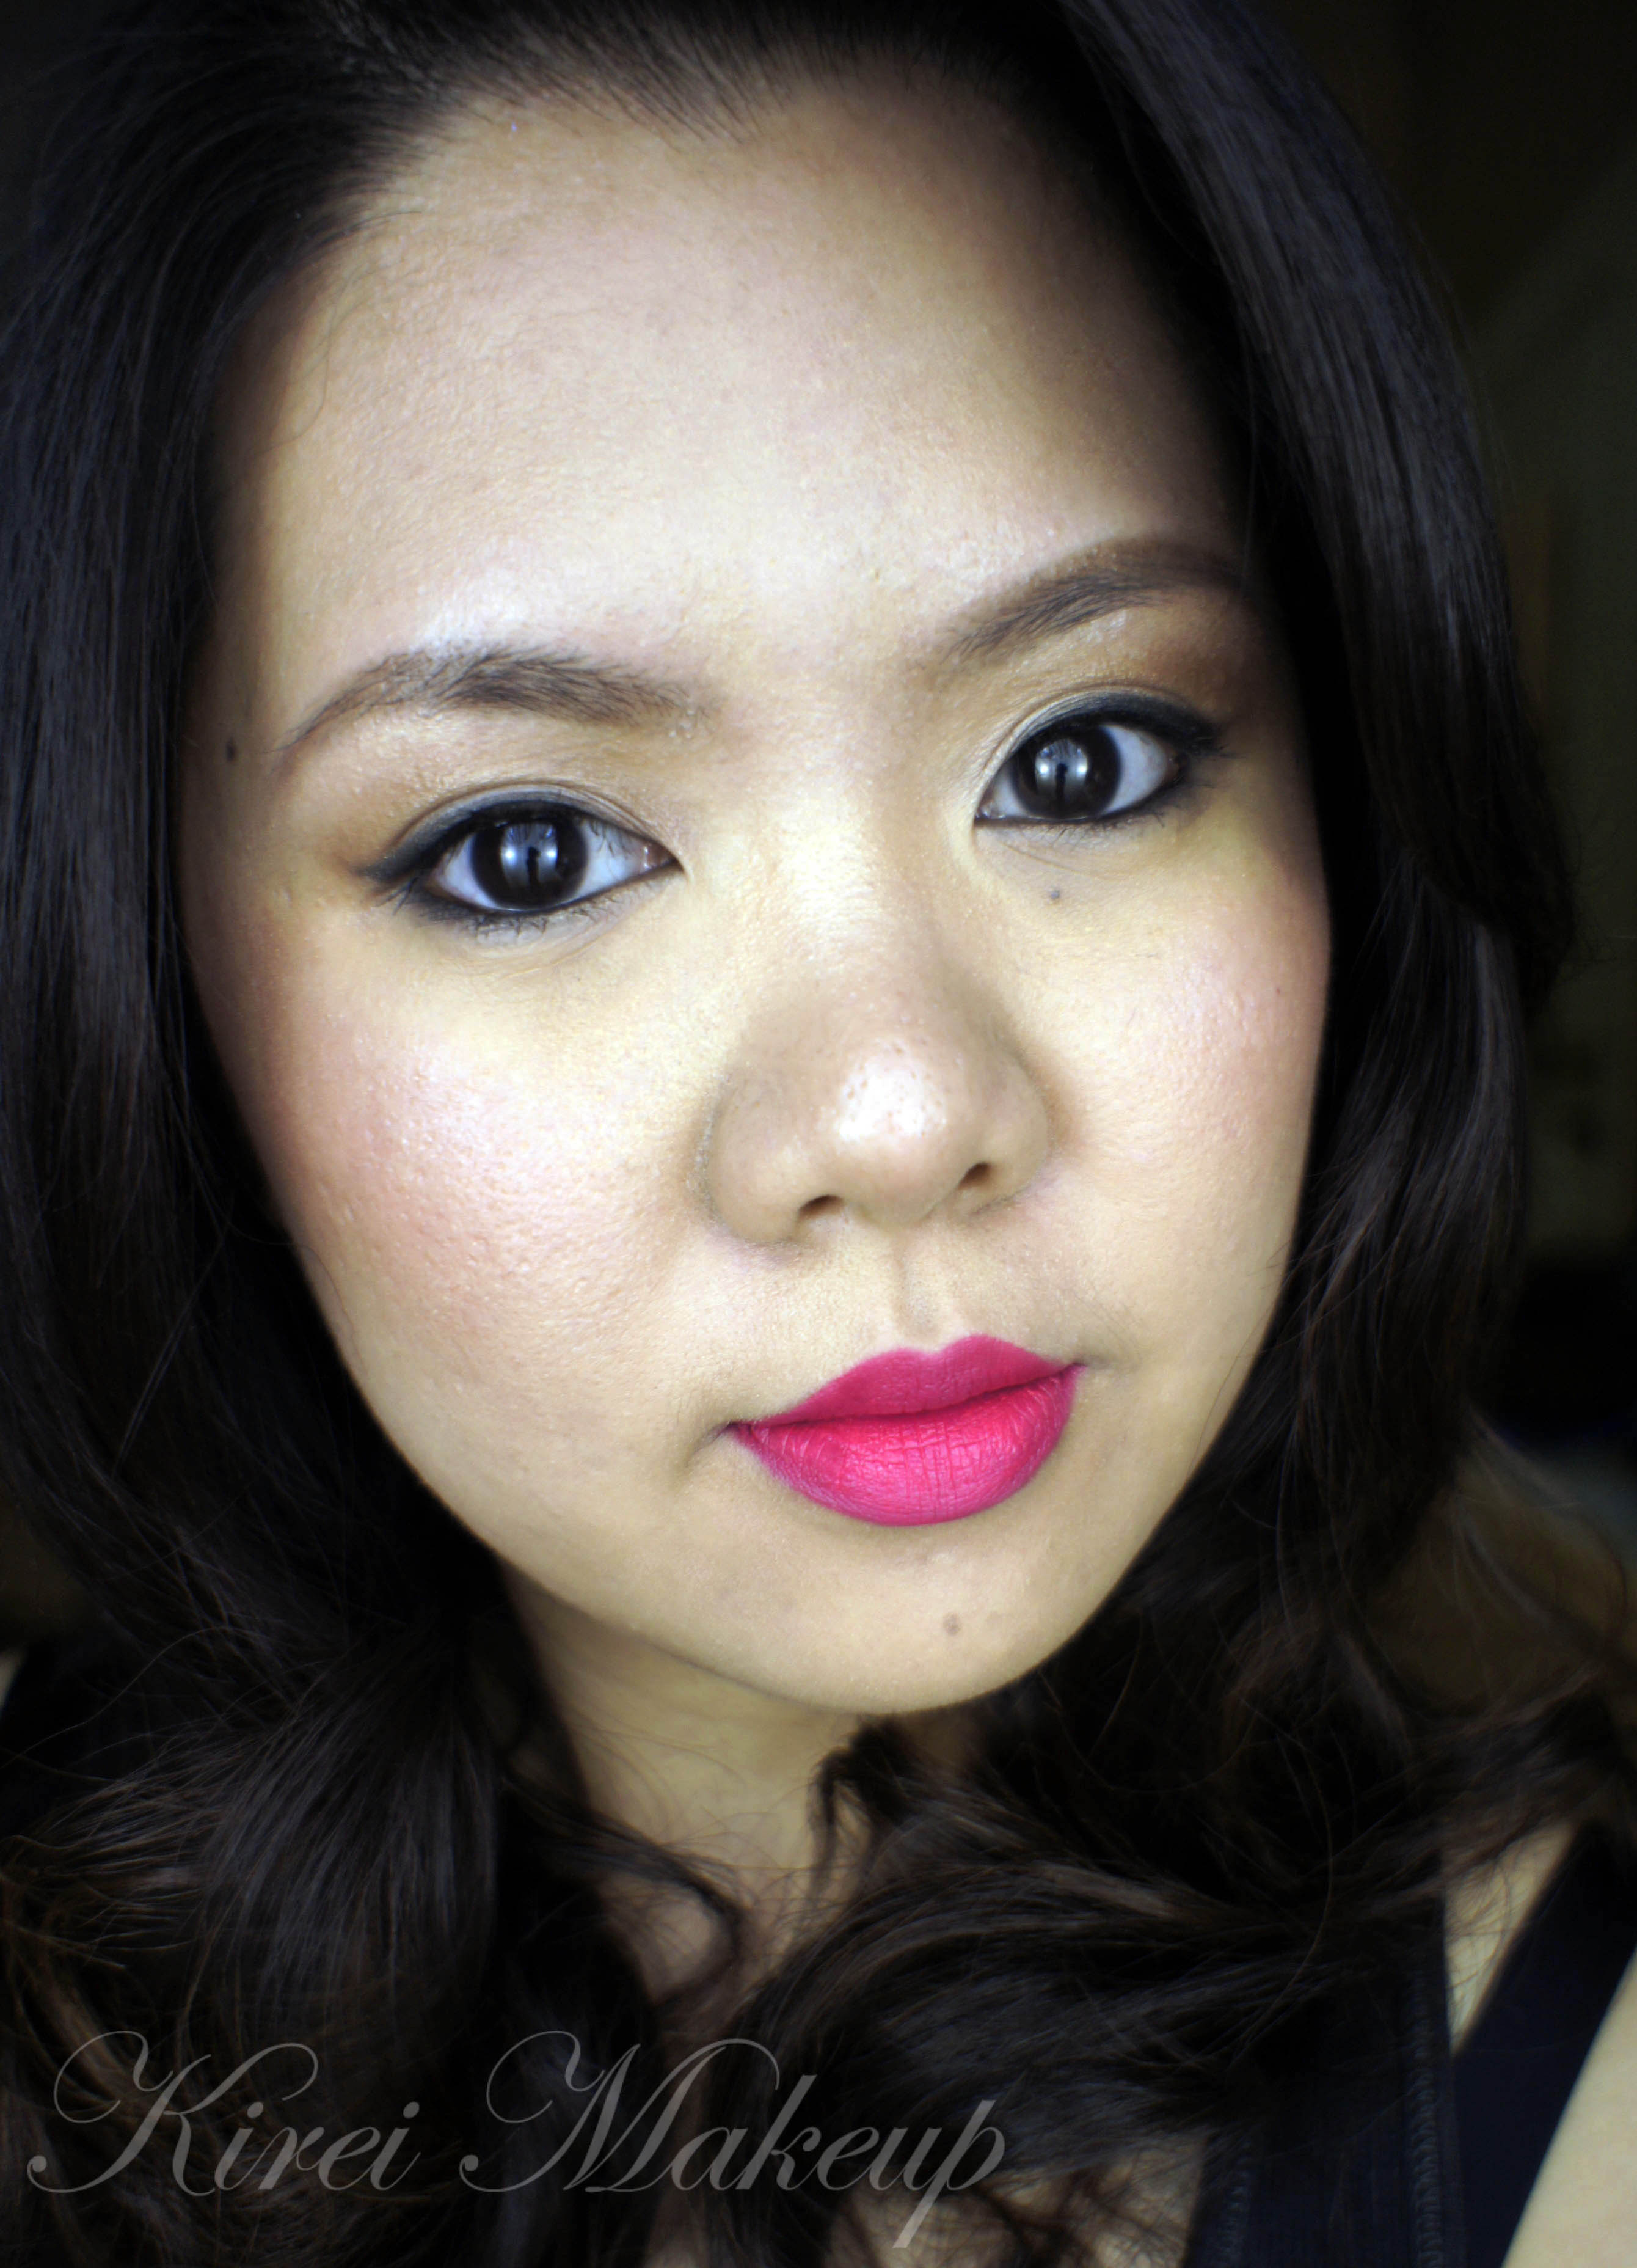
If you want to stand out in a party (or wedding, or prom or anything really), perhaps you’d want to give a bold lips look a try. Today’s tutorial definitely packed a punch of color! I kept the eyes on the low-key to make it wearable during the day. If you like it more intense, you can definitely make it darker, or applied the liner using liquid or gel liner.

It’s really quite a chic look for modern brides! For those who do not want to go with the classic look, and looking for something different, definitely give this a try.

In this tutorial, I used Obsessive Compulsive Cosmetics Lip Tar in Queen. It is described on their website as bright coral pink, but I feel that it’s leaning more towards neon pink. It doesn’t have enough peach in it to make it as coral, I think. Of course, that’s just my opinion.

I’ve done swatches on my lip tars collection and also for the other lip tars tutorial, you can find it here –> Stalker Red, Vintage Red and Marylin Inspired. I’ve also done a fuschia lips and blue eyeliner  in Colour Splash if you want a more colorful look.

Anyhow! Let’s get right into the tutorial!

How-to:

1. I applied Estee Lauder Double Wear Light foundation all over my face using Tarte face foundation brush.

2. To prep my lips, I applied Blistex lip balm.

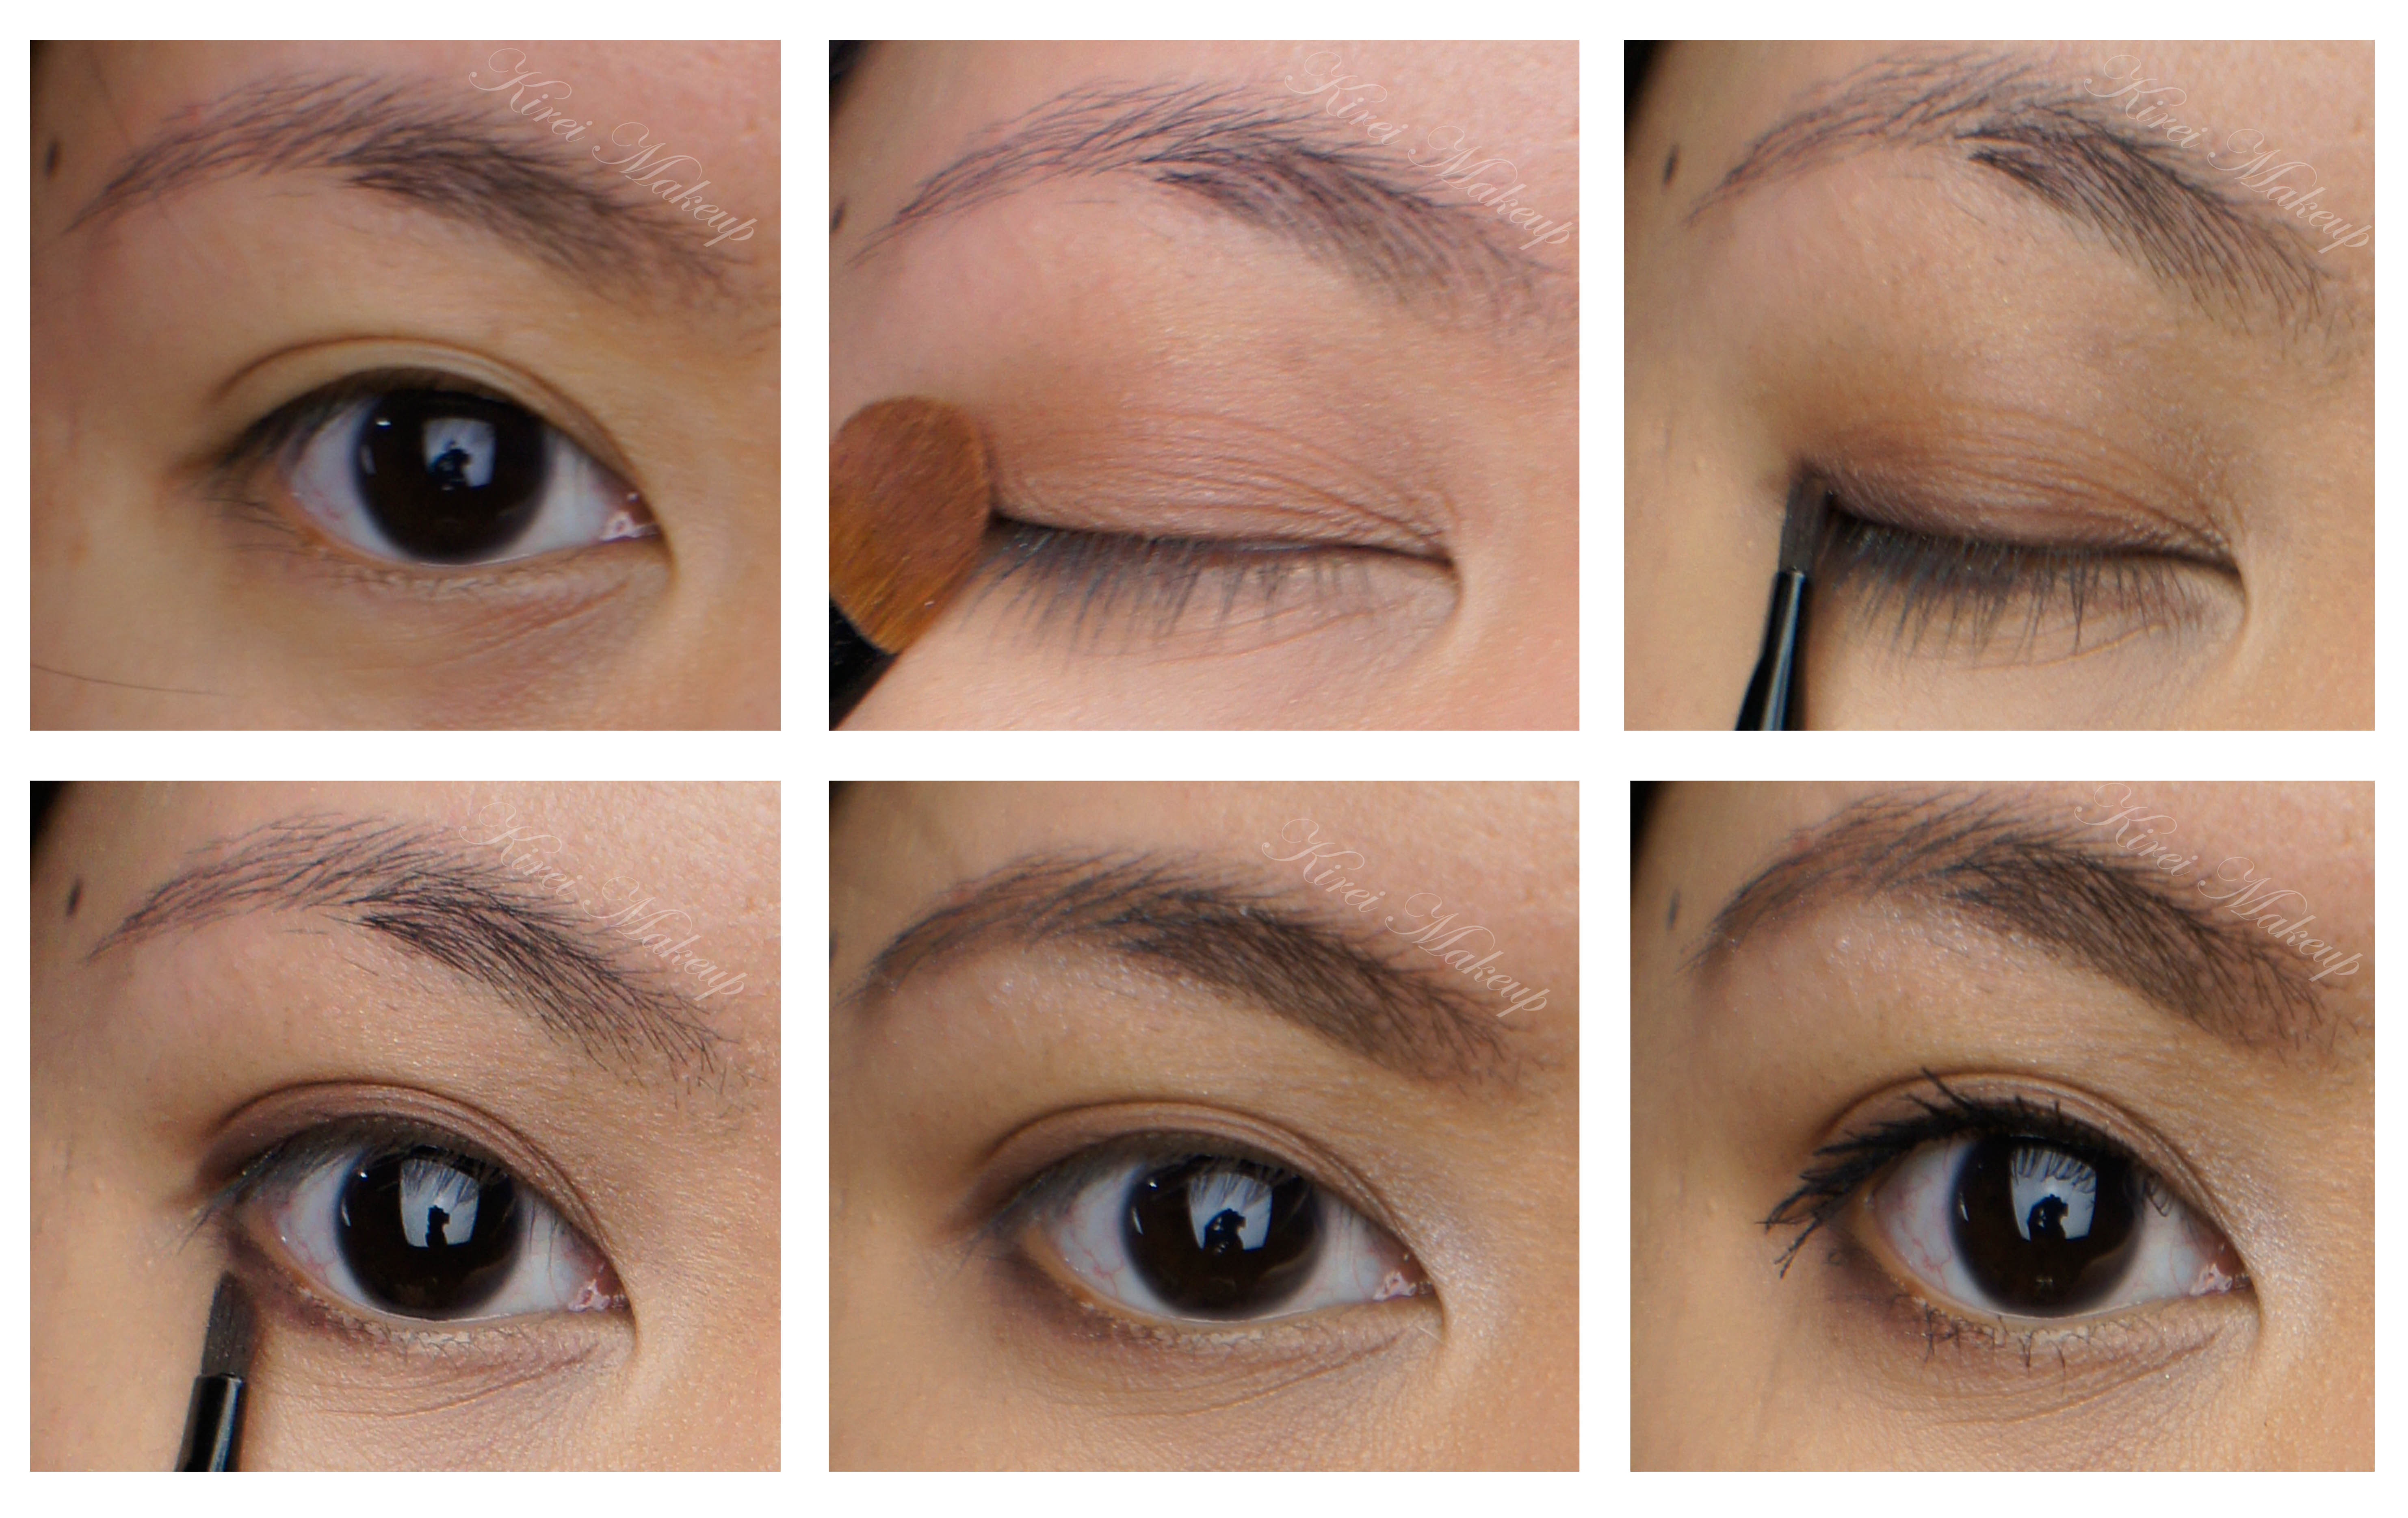
3. I filled in my brows using Anastasia Brow Powder in Brunette and an angled eyebrow brush.

4. Under the brows, I applied Anastasia highlight brow powder using a flat eyeshadow brush.

5. Using a clean flat eyeshadow brush, I applied MAC Sweet Satisfaction all over the lid.

6. Using Urban Decay blending brush, I applied Urban Decay Smog eyeshadow on the crease.

7. I created a winged liner using Urban Decay Blackout eyeshadow and an angled eyeliner brush.

8. Using MAC 239 brush, I blended the edge of the eyeliner slightly.

9. I also applied Urban Decay Blackout eyeshadow along the lower lashline and used MAC 239 brush to blend it. On the inner corner, I applied MAC Sweet Satisfaction using a clean eyeliner brush.

10. I lined my waterline and tightline using L’oreal Voluminous Smoldering eyeliner.

natural eye makeup

11. For the lips, I remove the remaining of the lip balm. Then, I filled my lips using OCC Queen Lip Tar using a lip brush.

12. I blotted my lips twice using a kleenex to remove the excess lip tar.

13. I applied MAC Fleur Power + MAC Well-Dressed mixture on the cheeks.

Pink Lips

Vintage Red

My love for OCC lip tars grows stronger every day! I’ve never been the “lipstick” kinda gal but I have a certain fondness for anything red lips. So, I’ve another version of the red lips look using OCC lip tars in Stalker. In this tutorial, I’m using OCC lip tars in Vintage. Stalker is blue red, while Vintage is burgundy red.

I bought mine from Sephora Eaton Center in Toronto. It comes in a small pouch with a small lip brush (I’ll do swatches and all that jazz on my next post).

For the look, the eyes are kept to a bare minimum and I skipped the winged liner. The face is dewy with a little contour. I love how the look turned out. The look is wearable for party or a night-out, or even bridal makeup!

Make sure to re-check the blush after you complete the lips. Since the lip color is quite strong, you might need to add more blush so your face don’t look wash-out.

How-to:

1. I applied L’oreal Magic Lumi foundation with my fingers. I applied it on the center of my face, blending it outwards.

2. I applied Bobbi Brown Corrector in Peach under my eyes, tapping it using my ring finger.

3. I applied L’oreal Magic Touche Concealer on my blemishes and under my eyes.

4. I powdered my T-zone with Cinema Secret loose powder and a tapered face brush.

Brown eyeshadow

5. For the eyes, I applied the light brown eyeshadow from L’oreal Paris Good Luck Charm quad eyeshadow with a flat eyeshadow brush, and blended the crease using a clean blending brush.

6. I applied the dark brown eyeshadow from L’oreal Paris Good Luck Charm along my upper lash line and lower lash line using an angled brush.

7. I used a clean blending brush and applied the highlighter color from L’oreal Paris Good Luck Charm quad under the brow.

8. Using whatever is left on the brush, I applied the highlighter color on the inner corner of my eyelid.

9. I curled my lashes and applied L’oreal Telescopic Shocking Extension mascara on both upper and lower lashes.

10.  I filled my brows using an angled brush and a mix of MAC Omega + MAC Brun.

OCC Lip Tars Vintage

11. Using a face fan brush, I applied Smashbox Fusion Soft Lights in Baked Stardust on the cheekbones.

12. Using the same fan brush, I applied MAC  Sculpting Powder in Shadowy on the hollows of the cheeks.

13. Using a blush brush, I applied a mixture of MAC Cubic and MAC Fleur Powder on the cheeks.

14. Using the lip brush that comes with the OCC Lip Tar, I applied OCC Vintage lip tar on my lips.

  • I applied a thin layer at first on the center of the lips.
  • Using whatever is on the brush, I traced the outline of my lips to make sure I like the shape.
  • I applied another thin layer to complete the look.