GlamGlow Super Mud Review

This week started out with a GlamGlow Super Mud review post since I’ve been holding in back last week! I was going to post it on the weekend, but I was invited to join GlamGlow Power Mud product launch, so I decided to compile everything for today’s post. If you followed me on Instagram (if you haven’t please do!), you’d noticed that I’ve posted a few photos regarding the mask and the event. I’ll post more photos from the event on Instagram, so please do follow me there!

Glam Glow Super Mud

Everyone knows about GlamGlow right? The masks that took Hollywood by storm, the masks that everyone talks about, THE MUD MASK that’s in everyone’s wish list! Finally, I decided to BUY it last week and gave it a try. I was having issues with breakouts and clogged pores, so I decided to grab the GlamGlow SuperMud.

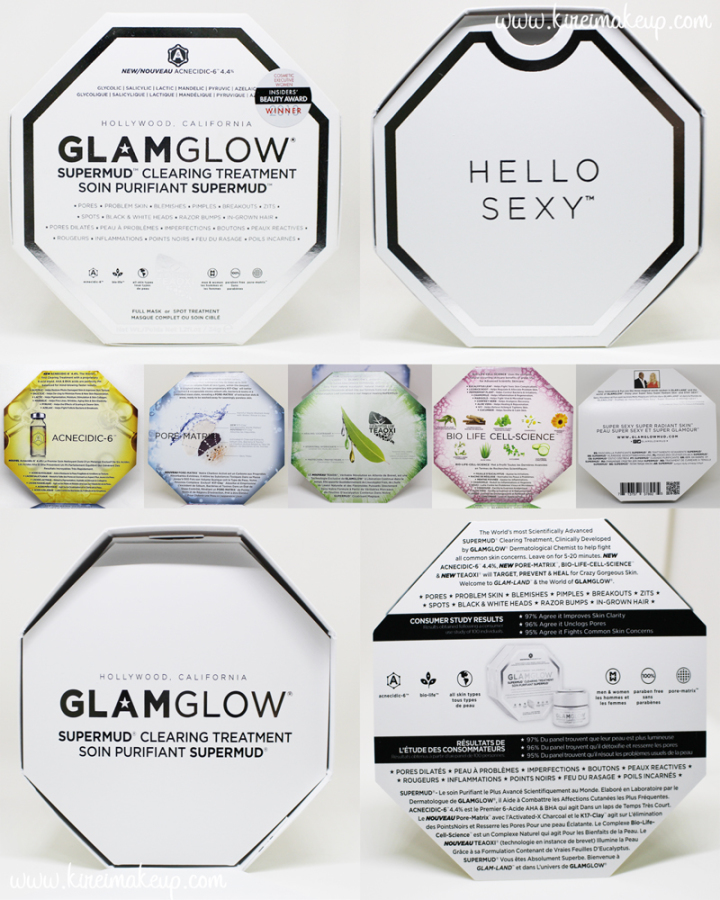
Let’s unbox the SuperMud together! Photo below as reference.

  1. So the SuperMud came in a beautiful white box.
  2. When you open the cover, you’ll notice their tagline “Hello Sexy”
  3. Then, you’ll receive a pamphlet that talks about the benefits of each ingredients in the mask, as well as a few words about the creators.
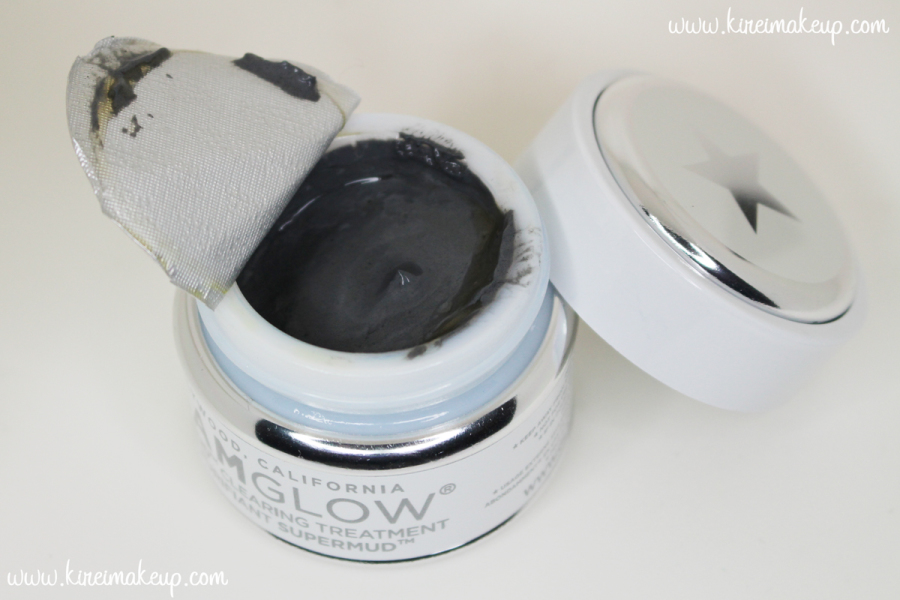
  4. You’ll get a jar of mask in the middle of the box.
  5. The back of the box talks about instructions, ingredients etc.

Glam Glow Super Mud review

Curious yet??? So, what exactly is GlamGlow SuperMud Clearing Treatment?

What it is:
A scientifically advanced SUPERMUD™ clearing treatment to target, prevent, and heal problem skin.

What it is formulated to do:
This formula was clinically developed by GLAMGLOW® dermatological chemists to help fight all common skin concerns including breakouts, discoloration, black and white heads, razor bumps, and in-grown hair. Powerful, skin-clearing mud visibly draws out dirt and congestion while a proprietary six-acid blend dramatically brightens and softens skin. It works to magnetically draw out dirt and pores with Activated-X Charcoal, leaving skin smooth and healthy-looking.

What it is formulated WITHOUT:
– Parabens
– Sulfates
– Phthalates

Research results:
Based on consumer trials:
After 1 day of use:
– 94% felt their skin looked renewed
– 91% saw an improvement in skin clarity
– 94% felt it gently cleared their skin

On day 7 after using it 3 times in a week:
– 98% felt their skin looked renewed
– 97% saw an improvement in skin clarity
– 97% felt it gently cleared their skin

Sephora Canada, 2014

Glam Glow Super Mud

Ingredients:

ACNECIDIC-6™ 4.4%: A proprietary six-acid blend of AHA and BHA acids perfectly PH balanced to deal with damaged skin, de-clog, and minimize pores, pigmentation, scaring, and breakouts.
Activated-X Charcoal: An extreme absorption carbon, attracting toxic substances into its mass up to 500 times its volume from all skin types.
K17-Clay™: Extracts and encapsulates excess sebum oils, bacteria, and toxins in a controlled stasis state.
TEAOXI™: Delivers daily fresh natural eucalyptol, natural-linalool oil, and powerful flavonoids direct into the formula from real pieces of eucalyptus leaf.

Water, Kaolin, Magnesium Aluminum Silicate, Sodium Hydroxide, Eucalyptus Globulus, Mandelic Acid, Charcoal, Parfum [Benzyl Benzoate, Linalool], Glycolic Acid, Lactic Acid, Azelaic Acid, Pyruvic Acid, Salicylic Acid, Xanthan Gum, Aloe Barbadensis Leaf Juice, Maltodextrin, Iron Oxides, Peppermint Oil, Butylene Glycol, Glycyrrhiza Glabra Root Extract, Glycerin, Chamoilla Recutita Flower Extract, Calendula Officinalis Flower Extract, Cucumis Sativus Fruit Extract, Hendera Helix Extract, Symphytum Officinale Leaf Extract, Phenoxyethanol, Ethylhexylglycerin, Caprylyl Glycol, Hexylene Glycol, Methylchloroisothiazolinone, Methylisothiazolinone.

Sephora Canada, 2014

Glam Glow Mud Mask

Impression and Verdict

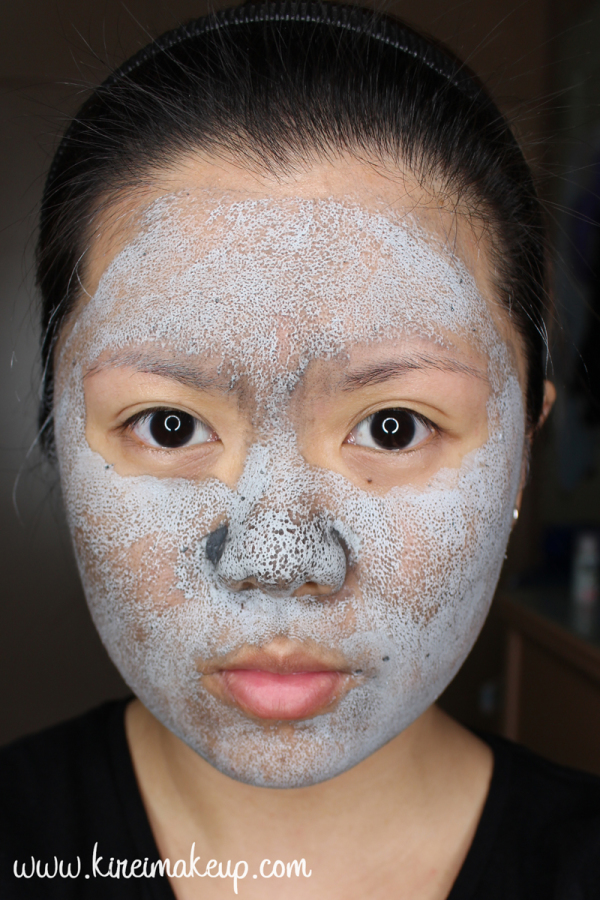
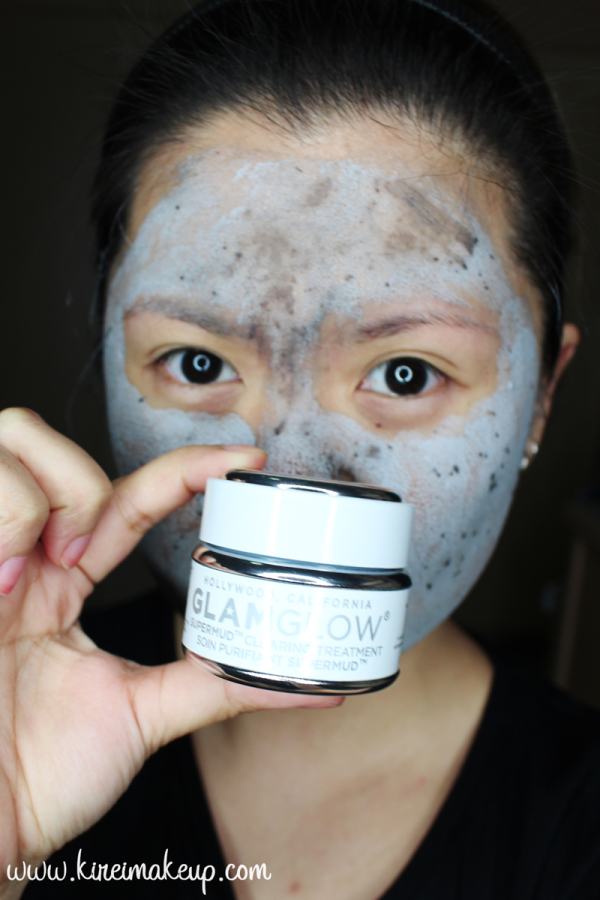
So, I’ve only tried this mask once as an overall mask, and once as a spot treatment. Both times, I loved it! The mask has a minty smell to it, it doesn’t really give much sensation when you apply it all over your face. I applied my mask using a clean foundation brush, you can use your finger if you want.

The mask is of a dark grey color when it’s wet (you can see it on the side of my nose), and when it dries, it hardens and turns into a light grey color. If you notice my nose area, you’ll see there’s a few spots, that’s all oil. Yep, I’ve oily nose, and those oil started to secrete onto my skin when the mask was drying out. The oil was absorbed by the mask.

Glam Glow Super Mud

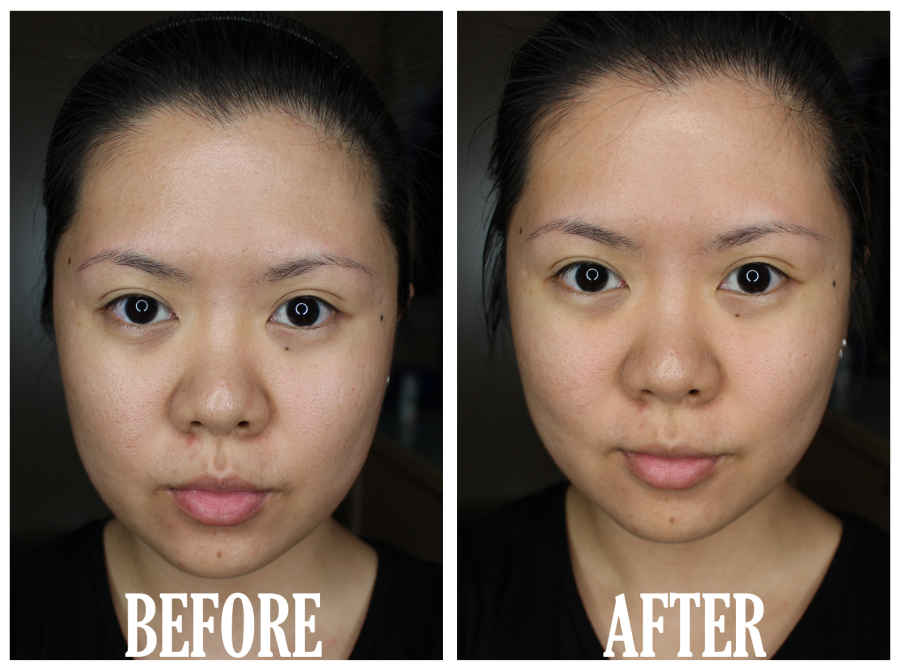
After leaving the mask on my skin for 10-minute, I went to wash my face, then continued with my normal skincare routine. My face felt fresh, a little bit tight, but my skin looks a bit brighter than before. My sis even commented how good my skin looks the day AFTER, even though she didn’t know I’ve tried the mask. She said my skin looks smoother than before. So, YAY!

I think the biggest difference before and after the mask is my pores. It doesn’t feel clogged anymore. I felt cleaner, fresher, and definitely feel my skin looks brighter. I have yet to notice any big difference in my skin yet, but that’s probably I’ve only tried this product once. When doing the spot treatment, I left the mask on my zits and leave it overnight. The next morning I noticed the swelling has reduced.

I definitely would buy this mask again, and probably would try their other masks! This mask is great for weekly treatment. The price is a bit steep though. For a jar (1.7 oz) it costs IDR 780K in Sephora Jakarta, and CAD$76 (before tax) in Canada. It’s a luxury item, not a must have.

If you live in Indonesia, you can grab the GlamGlow mud masks at Sephora Indonesia or Glam Glow Studio both located in Plaza Indonesia, Jakarta. If you do go to the Glam Glow Studio, you can ask them to let you try the mask first!

Glam Glow Super Mud

So, AFTER I bought the mask, I was invited to join Glam Glow PowerMUD product launch event as a Clozette Ambassador. Curious what a Clozette Ambassador is? Check out my Clozette Indonesia post!

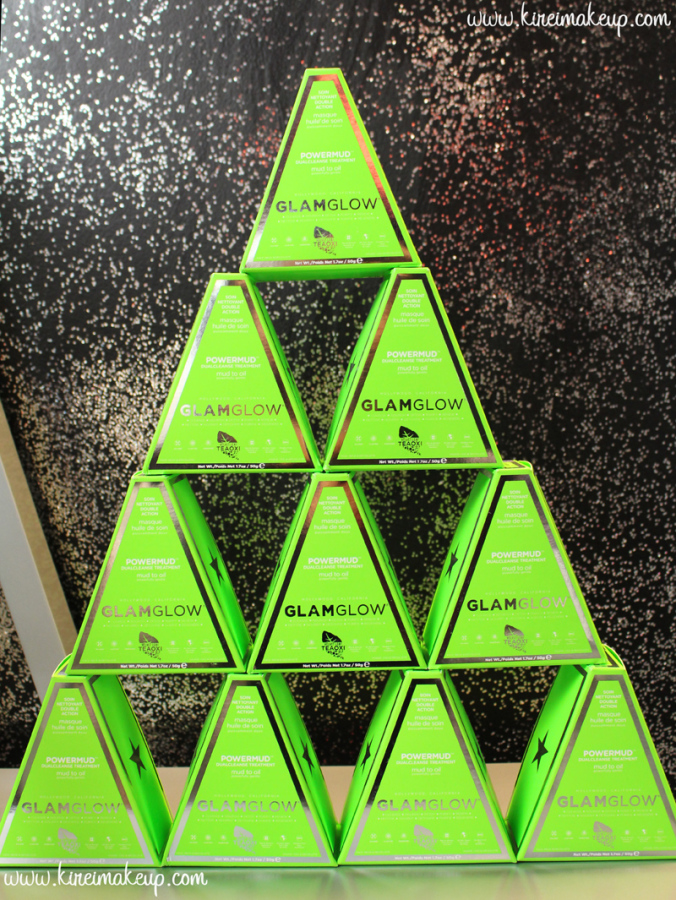
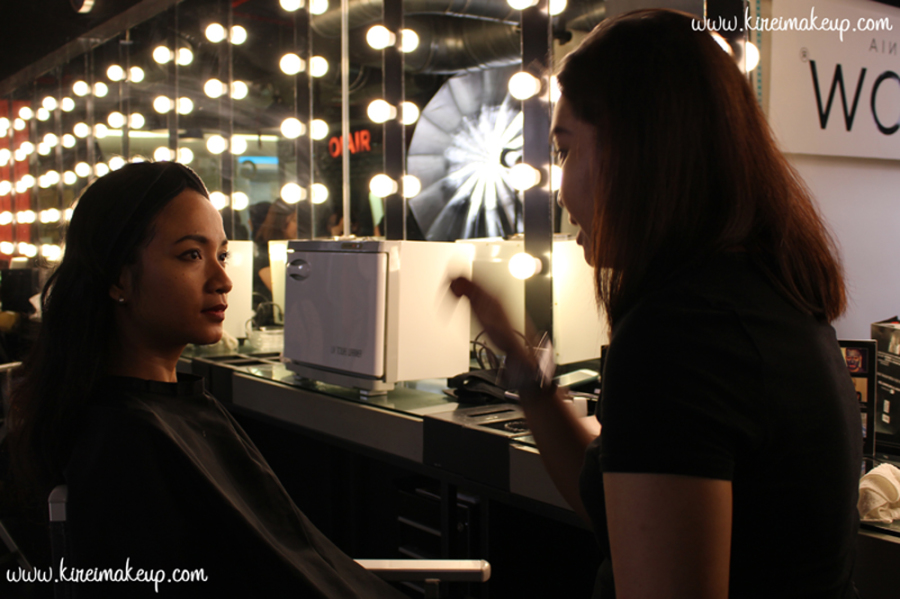
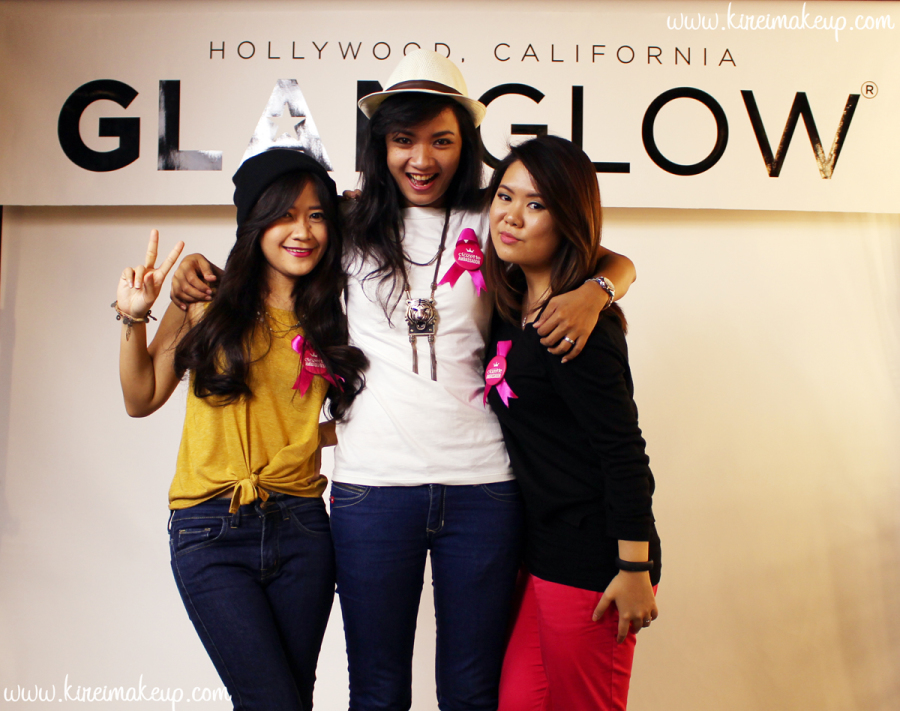
Anyways, so on Saturday I went to the product launch event along with fellow Clozette Ambassadors and bloggers. There, we were given a chance to try out the PowerMud mask. I didn’t give it a try since I was in a rush for another appointment, but I did take a lot of photos with the other bloggers! So, please do go over to my Instagram to check them out!

Glam Glow Power Mud

The POWERMUD mask is a mask I wished I had bought earlier! I wished this mask was there when I bought the SuperMud. Nothing wrong with the SuperMud, but the PowerMud is infused with cleansing oil. This mud mask is meant to be used after you remove your makeup. It also contained exfoliators and astringents which help to deep clean your skin! I do love the SuperMud, but I feel like the SuperMud would be an excellent mask to deep cleanse the skin weekly to remove makeup build up.

I did open up the tester jar for the PowerMud and it smells amazing! Smells like apples or pears, can’t really quite put my finger on the smell, but smells so good! It also has bits of scrubs which will help to exfoliate your skin. I received 5 sample size PowerMud, and can’t wait to give it a try!

Glam Glow Power Mud

Again, don’t forget to sign up at Clozette Indonesia, and if you become Clozette Ambassadors, you might just see us on the next event! Can’t wait to see everyone again!

xoxo
Glam Glow Power Mud


Bioderma Sensibio H2O Review

I’m back with a new post ya’ll! Today is my Bioderma Sensibio H2O review! Apologies for the late update, been super duper busy with work, and my health condition wasn’t at its best. However, if you have followed me on Instagram, you would have known that I was recently featured on a talkshow called Ping Me at RTV in Indonesia. Just a small segment, but it was a pretty cool experience. Photos are over on my Instagram!

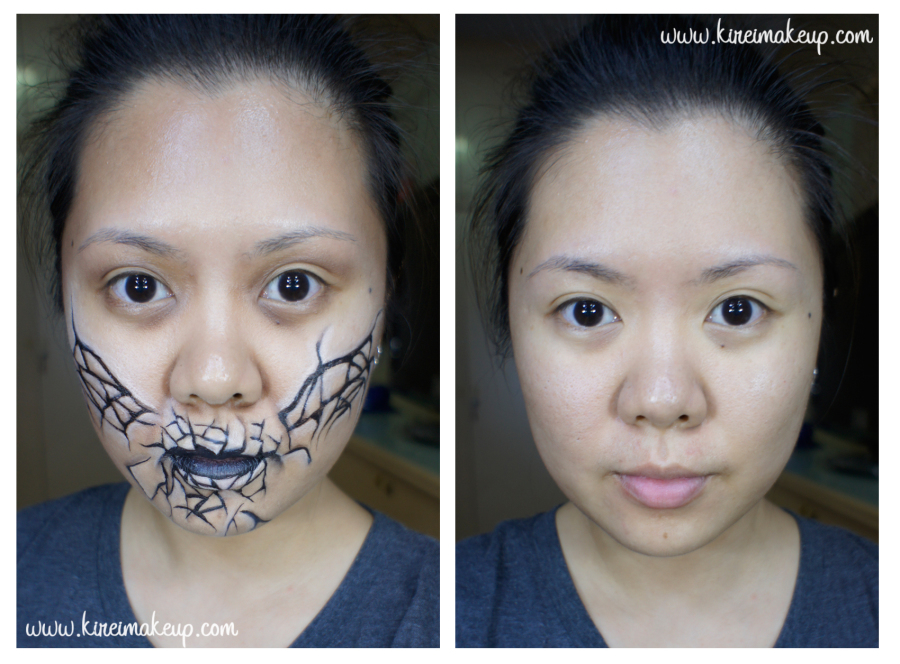
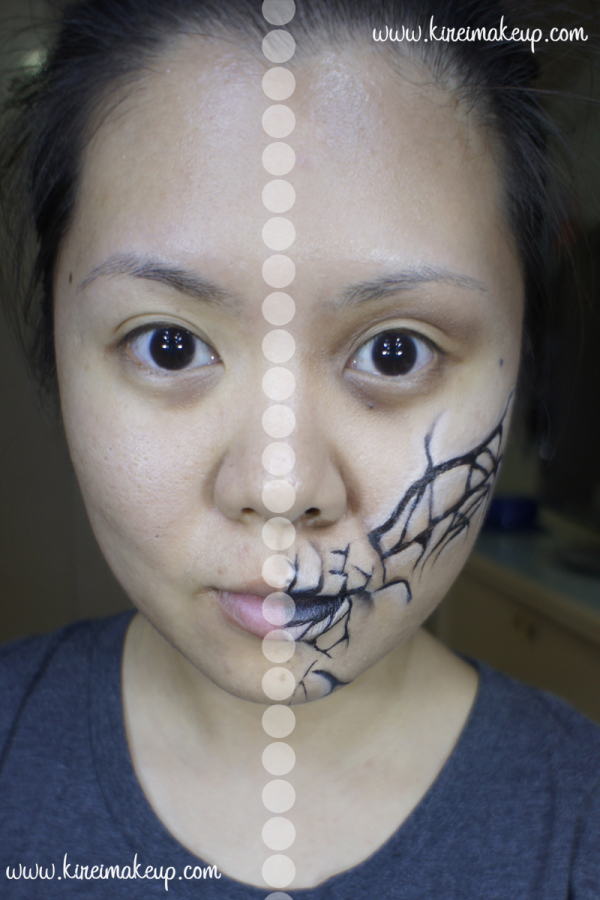
Anyways, let’s get back on today’s topic: Best makeup remover ever! If you have not heard of this makeup remover, shame on you! Let’s take a look at the before and after photos below shall we?

  • On the left, my face was filled with makeup products from my “Dr. Who the Waters of Mars” makeup tutorial.
    • I have foundation on, eyeshadows, eyeliner, and face paint.
  • On the right, my face after I removed all the makeup using Bioderma Sensibio H2O makeup remover.
    • 2 cotton pads somewhat half-soaked in the makeup remover.

Bioderma Indonesia

So, I’ve used Bioderma since 2010, and when I returned to Indonesia in 2012, I couldn’t find any. However, in 2013, Bioderma entered the Indonesian market, and I was thrilled!  I was even more excited this year when Bioderma’s Brand Manager and Marketing Director invited me for a coffee break last month! Amazing! So awesome to have meet both of them, and they were so kind as to give me their 2 best-sellers! Thank you and thank you and thank you Bioderma Indonesia!

Let’s get back on track a little, shall we? What exactly is Bioderma?

” The Laboratoire Dermatologique BIODERMA, based in Lyon, France, develops and markets, in close collaboration with dermatologists and renowned institutional research centers (CNRS. INSERM, CHU, Universities,…), dermo-cosmetic products intended for medical prescription and medicinal consultancy.

BIODERMA is among the most frequently prescribed laboratories by French dermatologists. Present in more than 70 countries, BIODERMA is growing very fast at international level. (…)

Bioderma’s reserach is performed by a team of highly qualified scientists and extremely reputable operators. (…) These works gave birth to numerous innovations which since became references:

  • The 1st non detergent shampoo : NodéFluid.
  • The 1st cleansing waters : the micellar solutions Sensibio H2O and Sébium H2O.
  • The 1st biologically-active sunscreen ingredient that counters the long-term damaging effects of UV exposure :  Photoderm and the patent Cellular BIOprotection®.
  • The 1st skincare product that corrects the quality of sebum : Sébium AKN and its patented ingredient, Fluidactiv®.
  • The first skincare who acts directly on the main cause of skin redness : Sensibio AR and its patent Rosactiv®. “

Bioderma, 2014

As you all can see, Bioderma is the pioneer in creating “Cleansing Water”. The micellar technology comes from Bioderma, and they are still the best at it. I’ve tried other micellar-based makeup remover, but none of them are as superior as Bioderma’s.

What is a micellar technology?

(…) Micelles (…) effectively micro-emulsify impurities while maintaining the skin’s balance (soap-free, physiological pH).

Bioderma, 2014

So there’s 2 actions in the Micellar technology:

  1. Break down impurities
  2. Restore skin to its optimal condition

This makeup remover has these tiny molecules called Micelles. What micelles do is to break down any impurities (dirt, oil, makeup etc) as soon as it touches your skin. However, instead of breaking down your skin cells along with all these impurities, it detects and recognizes your skin cells. The micelles molecules will then restore your skin’s condition to its optimum balance.

Isn’t Science amazing?! Awesome!

Best Makeup Remover

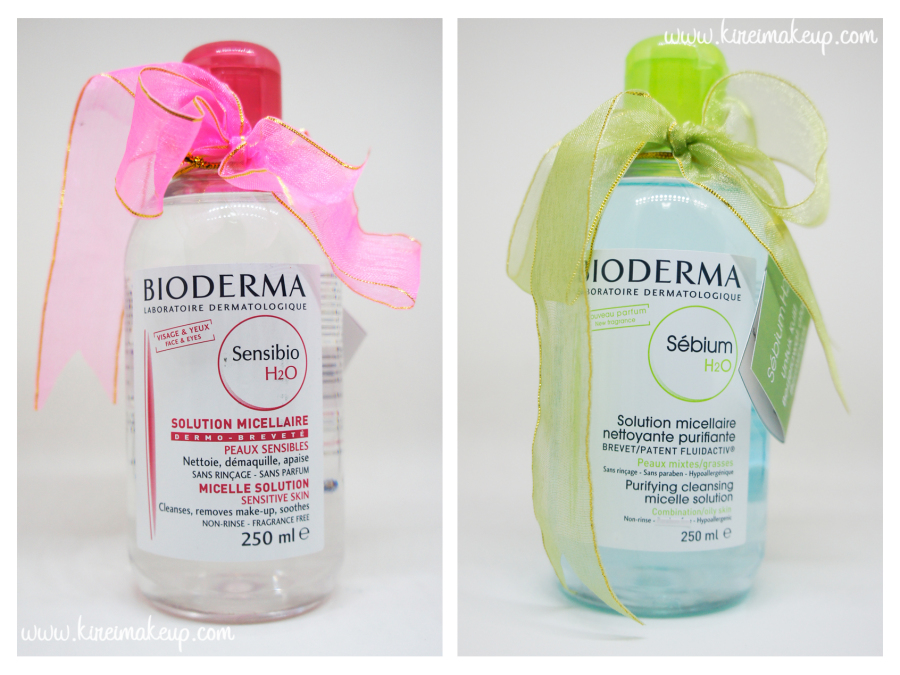
So, I was given 2 products – the Sensibio H2O and the Sebium H2O. I’ve only been using the Sensibio H2O, so I cannot say much about the Sebium. However, I’d have think that the Sebium would give similar result to the Sensibio.

There’s 2 main difference between the Sensibio and the Sebium:

  • The Sensibio is catered towards sensitive skin, while the Sebium is for oily skin.
  • The Sebium cannot be used in the eyes and lips area while the Sensibio can be used in those areas.
    • The reason why the Sebium cannot be used in the eyes and lips area is because those areas are more sensitive. Since the Sebium is made for oily skin, it’ll absorb excess oil on the skin. However, since the eye and lip areas aren’t as oily as the skin, using the Sebium in those areas might cause it to be dried out and thus irritated.
    • Please do avoid using the Sebium on the eye and lip areas.


best makeup remover for sensitive skin

Below is a list of pros and cons for Bioderma Sensibio H2O

Pros

  • Removes makeup without the need to rinse.
  • Will remove even the hardest waterproof mascara and eyeliner.
    • Soaked the remover on a cotton pad, leave it on eyes for 3-5 minutes and wipe away.
  • Suitable for every skin type.
  • Does not dry out skin.
  • Does not leave any weird sticky or oily residue on skin.
  • Does not irritate the skin and eyes.
  • PERFECT to clean up the edges of your WINGED LINER.
  • Fast and quick makeup removal, especially for makeup changes.

Cons

  • Removing mascara and eyeliner might take a few minutes for the remover to break it down. I prefer using Shu Uemura cleansing oil for this instead, since I always rinse my face after removing my makeup anyways.


Classic Red Lips Makeup

Hello, everyone! How are you guys doing? I am back! Super busy at work, haven’t have the time to take a breather yet. Anyways, I’ve been trying to post 2 tutorials/review up every week, so since this Classic Red Lips makeup would be the first one for this week, hopefully I can squeeze another tutorial (perhaps a Halloween tutorial), or a product review by Sunday. I do have a few products lined up to be reviewed, and also a few more Halloween looks before the 31st.

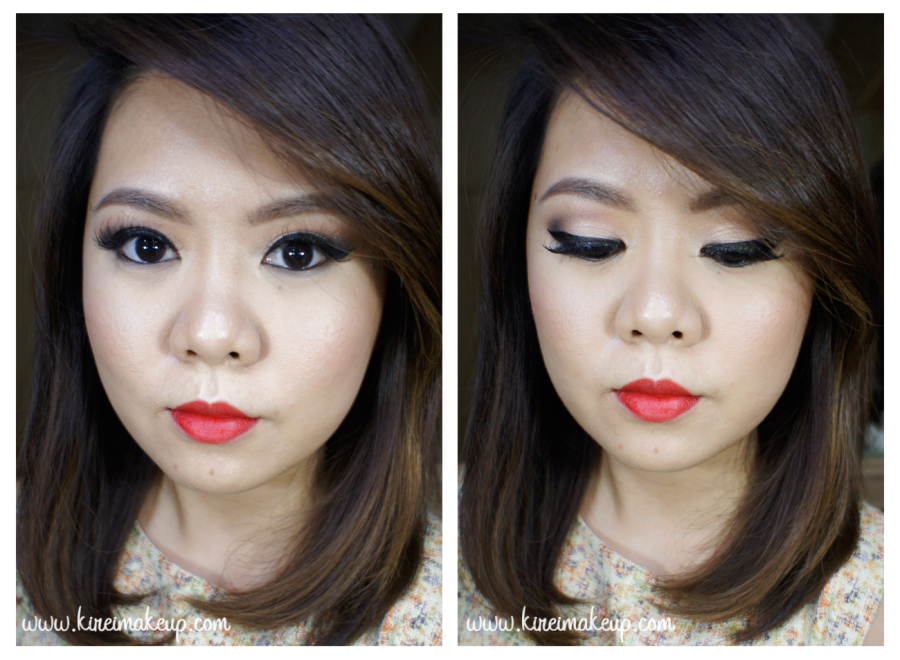
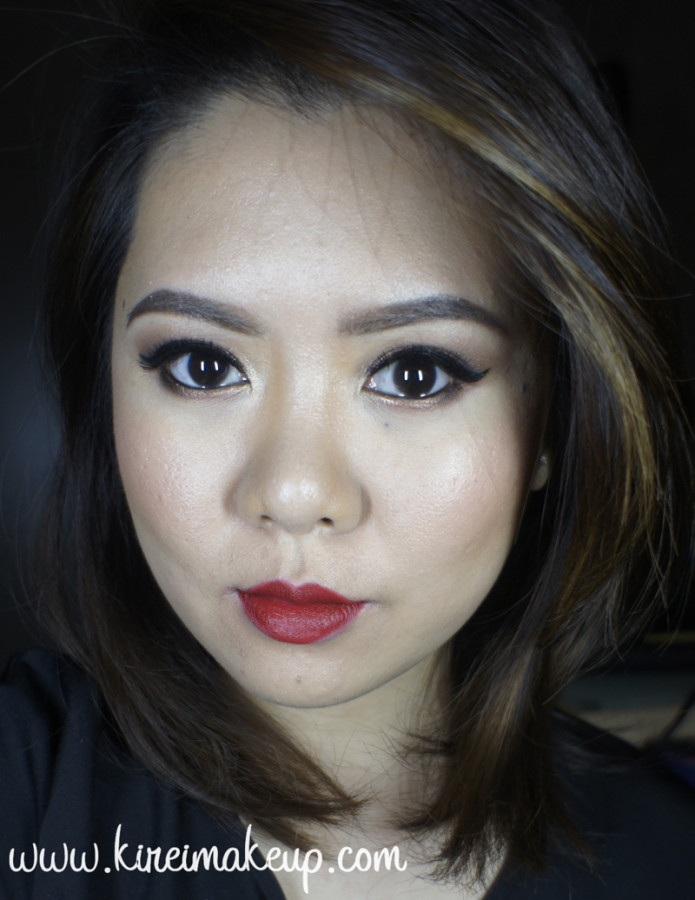
Anyways, for this tutorial, I actually wore this look out for my friend’s wedding on Sunday. I’m sure you’ve seen what I wore with this makeup over on Instagram! Anyways, I used mostly newly bought products – The Balm Meet Matt(e) Nudes & Mary-Lou highlighter, Too Faced Chocolate Bar palette (smells heavenly), along with Shu Uemura Calligraphy Ink eyeliner & Shu Uemura Dear Matte Rouge Unlimited Diva Red lipstick.

If you are of an Asian descent and looking for the perfect red lipstick, you might want to check out Shu Uemura Dear Matte Rouge Unlimited lipstick in Diva Red. It’s a really pretty red lipstick with a warm (orange) undertone, which will compliments nicely the yellow undertone in our skin. If you prefer a cooler (blue) undertone red lipstick, check out MAC Russian Red.

Anyways, let’s get on the tutorial!

How-to:

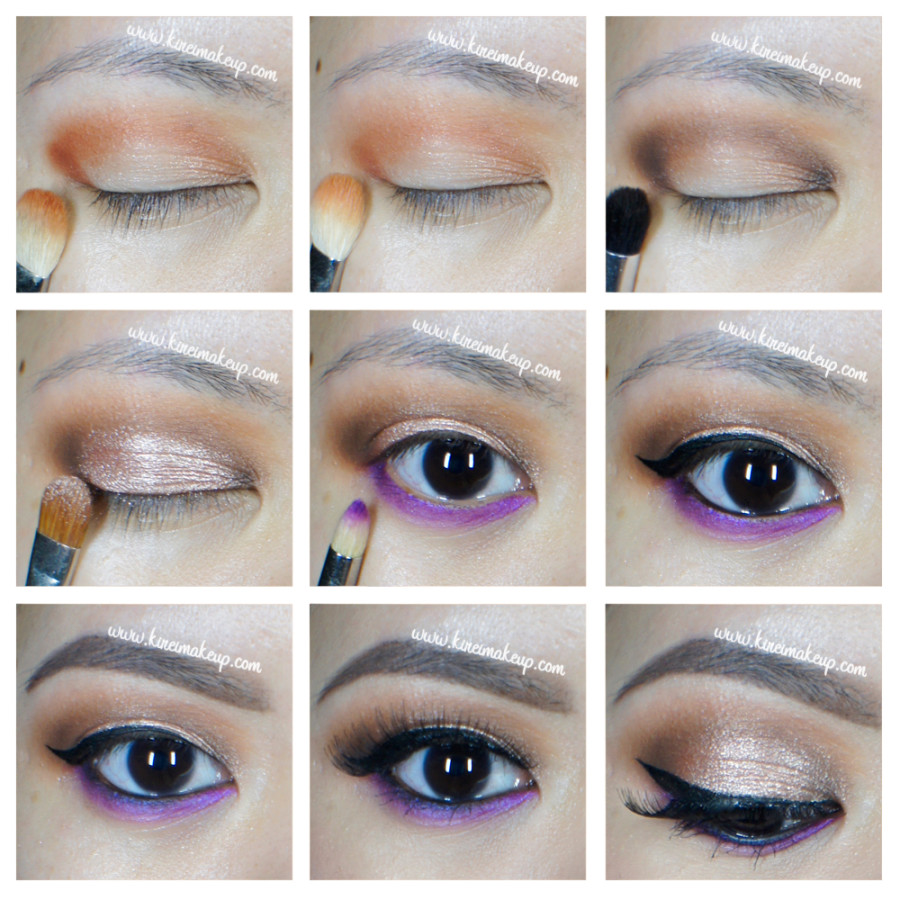
1. I prepped my eyelid using Urban Decay Primer Potion. Then, I applied Matt Singh from The Balm Meet Matt(e) Nude palette on my crease blending it upwards towards the brow bone.

2. I layered in Matt Rossen, again from The Balm Meet Matt(e) Nude palette, on top of Matt Singh. This time, I focused most of the color on the outer part of the crease, blending the color inwards.

3. To add an extra depth, I applied Matt Wood right on the crease. The color was concentrated on the outer part of the crease, and blended inwards.

4. I applied MAC Carbon just on the outer V of the eyelid.

5. Using a flat eyeshadow brush, I applied Marzipan from Too Faced Chocolate Bar Eye palette on my eyelid.

6. I lightly applied MAC Carbon on my lower lash line and blended it out using a pencil brush.

7. I lined my waterline using L’oreal Voluminous Smoldering eyeliner, and applied a thick winged liner using Shu Uemura Calligraphy Ink eyeliner.

8. I filled my brows using Anastasia Brow Wiz in Taupe.

9. I applied Lavie Lash false eyelashes in Bluebell.

Thick winged eyeliner

10. On my face, I applied MUFE HD Foundation.

11. I also applied MUFE HD concealer under my eyes.

12. I set my base using Cover FX translucent powder.

13. I very lightly applied The Balm Mary Lou highlighter on the bridge of my nose, cupid’s bow and cheek bones.

14. I lightly contoured my face using Smashbox Contour Kit – sides of my nose, temples, jawline and hollows of the cheeks.

15. For the cheeks, I applied Smashbox Halo blush in In Bloom.

16. On my lips, I applied Shu Uemura Dear Matte Rouge Unlimited lipstick in Diva Red straight from the tube. I did this because I was pressed for time, and I have the lipstick on my clutch for the night, so I can easily touch it up. However, if you want a long lasting lipstick with very little need to touch up, please check out my How-to apply Red lipstick tutorial!

Classic hollywood glam makeup

Products used:

Eyes – Urban Decay Primer Potion (original); The Balm Meet Matt(e) Nude (crease: Matt Singh, Matt Rosen, Matte Wood); MAC Carbon (outer v); Too Faced Chocolate Bar Eye palette (eyelid: Marzipan); Shu Uemura Calligraphy Ink eyeliner; L’oreal Voluminous Smoldering eyeliner; Anastasia Brow Wiz (Taupe); Lavie Lash (Bluebell).

Face – MUFE HD foundation; MUFE HD concealer; The Balm Mary-Lou highlighter; Smashbox contour kit; Smashbox In Bloom blush; Cover FX translucent powder.

Lips – Shu Uemura Dear Matte Rouge Unlimited lipstick in Diva Red.

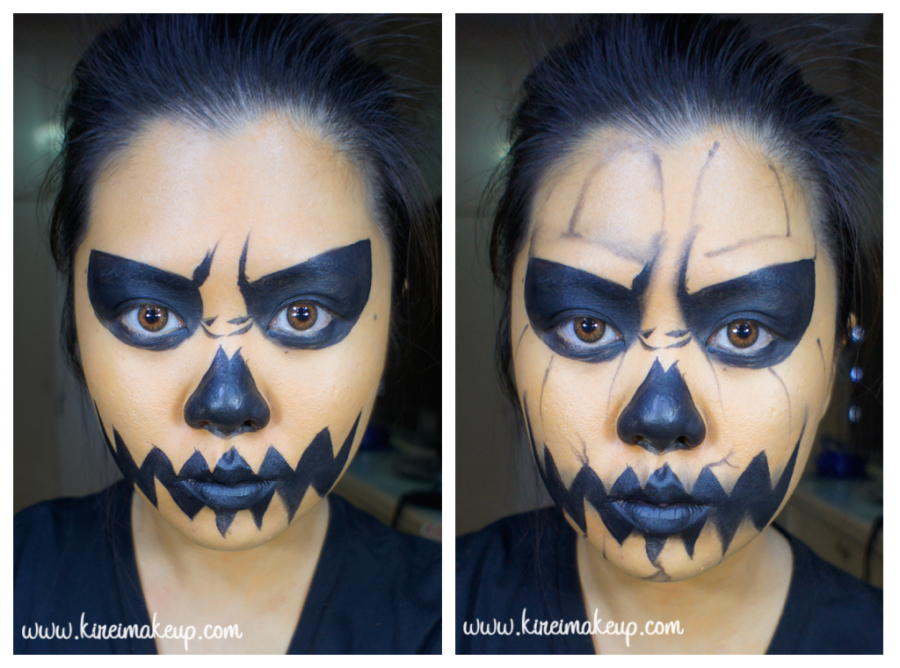
Halloween #2 Jack-O-Lantern Makeup

Are you ready for Halloween?! I sure am! So, for the second installment of my Halloween series, I decided to do a Jack-O-Lantern makeup tutorial. WHY you ask? Well, that’s because Jack-O-Lantern aka pumpkin carving is very popular in Canada during Halloween month. My sister and I actually love carving pumpkins! We love the scary face ones!

JUST FYI – I am accepting Halloween makeup jobs! If you need a makeup artist to do your scary makeup, I’m available! Contact me through email jilly@kireimakeup.com, or line – KireiMakeup!

Anyways, for this tutorial, you need:

1. Orange face paint (water or cream) – I mixed red and yellow cream face paint to create the orange base. I used a local Indonesian brand called PAC.

2. Black water based face paint – you can use cream too if you prefer cream product, or even an eyeliner.  I used Snazaroo.

3. Eyeshadow – matte black, matte orange, matte yellow for highlight and contour.

4. Brushes – I used mostly synthetic artist brushes.

  • For large area, I used an angled brush (similar to MAC 263 but slightly bigger).
  • For details like the lines and contouring, I used the Rigger type (similar to MAC 209, but with longer bristles)
  • For highlight I used a blending brush, like MAC 217

5. Contacts (optional) – you don’t have to use contacts, or you can use a brighter one than mine. I could only find this honey colored ones from Fresh Kon, since it’s pretty hard to find specialty contact lenses here in Jakarta.

halloween tutorial

How-to:

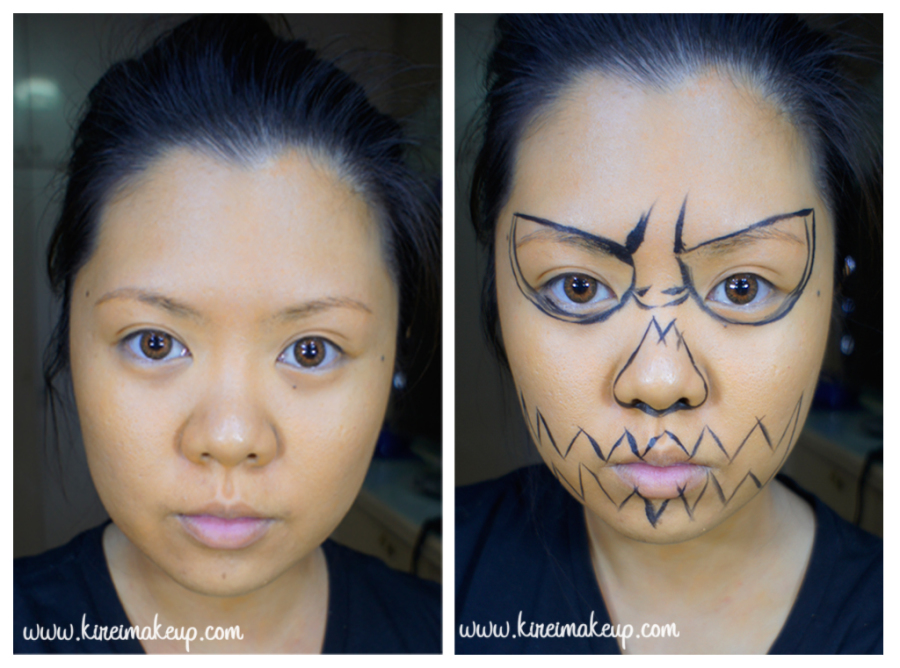
1. I applied an orange cream-based face paint all over my face using a wedged sponge. Lightly stippled it all over my face, neck, and ears for an even coverage.

2. I outlined where I want the mouth, nose, eyes, wrinkles to be using black water-based face paint.

halloween makeup tutorial

3. I filled in the areas on step no. 2 with black face paint.

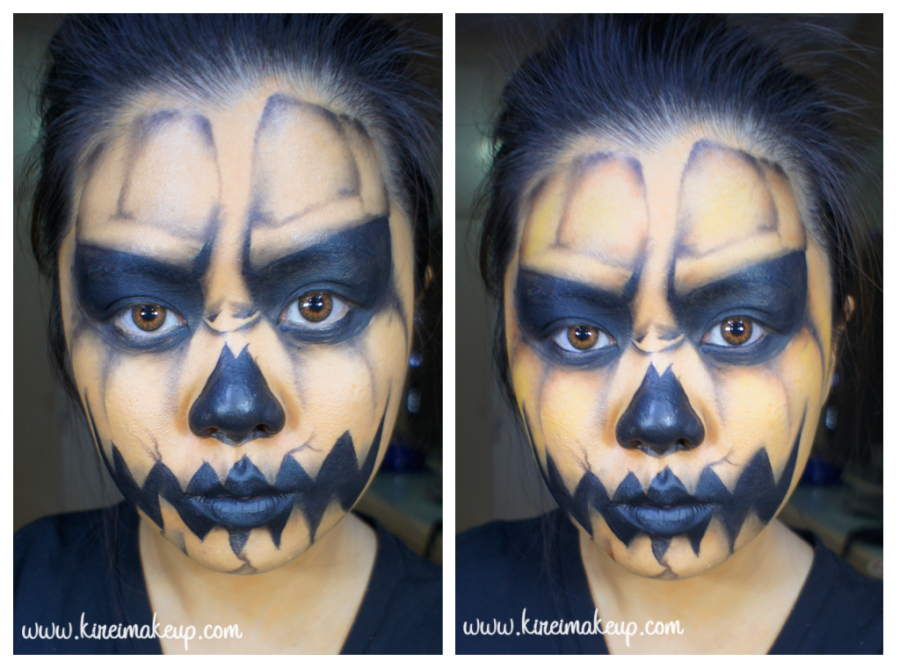
4. Then, using an eyeliner brush and a matte black eyeshadow, I lightly create lines all over the face to create the crease of the pumpkin. I also created some cracks near the mouth area.

pumpkin king makeup tutorial

5. Using a small blending brush, I blend out the edges of the lines. I also carefully added some shading on the areas where I want it to look like it’s receding.

6. On top of those black shadows, I applied a matte Orange eyeshadow (I used the orange from Sleek Makeup Ultra Mattes V1 palette).

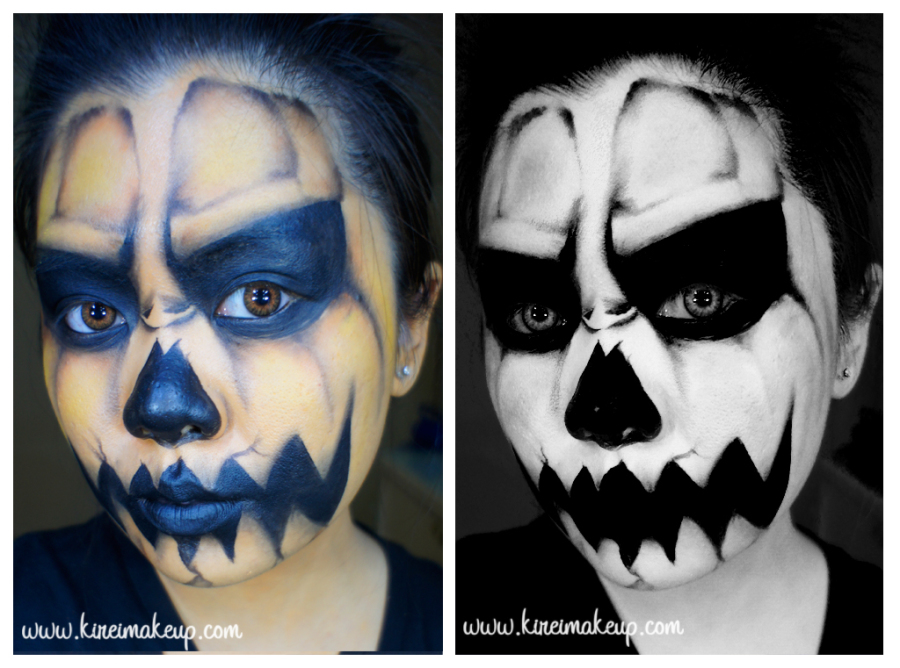
7. In the area where I want it to pop out a bit more (to mimick the shape of pumpkin), I applied a matte Yellow eyeshadow (from Sleek makeup Ultra Mattes v1 palette) with a blending brush. I put it in the middle of the “squares” on my forehead, above the eyebrows, on my cheeks area. I really want to make these areas to poof out a bit more.

creepy jack-o-lantern face paint

Voila! You are done! Looks pretty cool in black and white, but looking more like a scary clown. I love how the orange/yellow contour/highlight really helps with the whole pumpkin look!


L’oreal Colour Riche Moist Matte in Lincoln Rose

I was watching Kat Von D video tutorial on Sephora’s youtube channel, and I absolutely love how she created the ombre dotted eyeliner, similar to pointilism. I think it’s a pretty cool way to get creative with your eyeliner while keeping it simple. You can pair this dotted eyeliner with a rich-colored lips, like the L‘oreal Colour Riche Moist Matte in Lincoln Rose to brighten up your look.

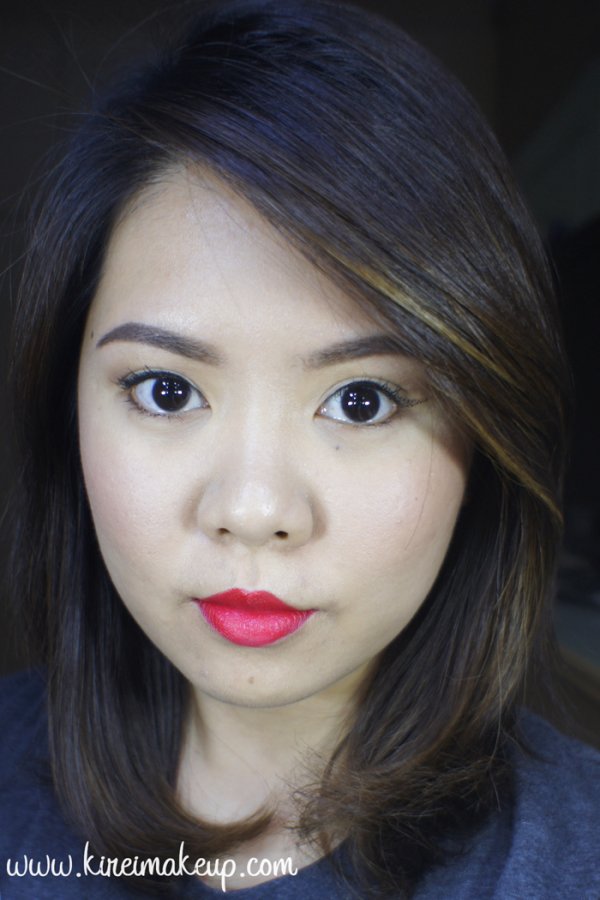
As promised on my L’oreal Colour Riche Moist Matte swatches, I wanted to show you guys how the lipsticks look on my skin. This time I played around with Lincoln Rose, but I’ll try to work on the other shade next time. I’m quite surprise at how bright the lipstick shade is on my lips. I did not line my lips at all for this tutorial since I want to see how the real color is against my skintone. I think if you have a medium or dark complexion, this would work really well on you. I personally find this shade to be a little bit overpowering.

The shade itself is a very interesting red. It does have quite a warm undertone to it. I think it’s a very pretty shade for summer, or for us in the Tropics where everyday is pretty much summer. Very warm, bright, and tropical. I applies very smoothly on the lips. Although it is a “matte” line, it doesn’t dry out your lips like some other brands “matte” lipsticks are. It is still creamy, while the finish is matte. Overall, I think the L’oreal Colour Riche Matte line is worth a try. I definitely am going to look for another one or two the next time I go to the mall!

how-to dotted winged liner

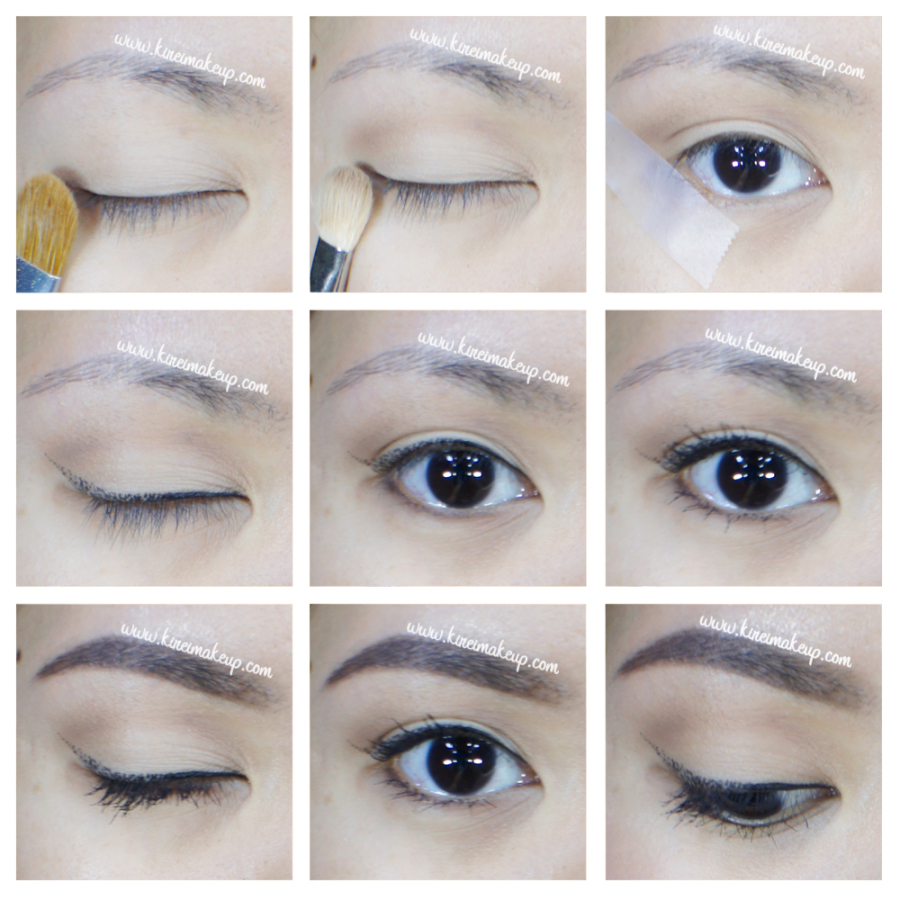
How-to:

1. I applied a nude eyeshadow on my eyelid, all the way to the brow bone using a flat eyeshadow brush. For this look, I used Entomology from Kat Von D Monarch palette.

2. On the crease, I applied Vanish from Kat Von D monarch palette, using a clean fluffy blending brush.

3. I placed a tape on where I want my “wings” to be as my eyeliner. You can skip this step if you have steady hand.

4. Using Kat Von D Trooper tattoo ink eyeliner, I started drawing a solid line from the inner corner to the middle of my lash line.

5. Then, using the tip of the eyeliner, I started drawing dots from the middle to the end-tip of the eyeliner. I placed more dots on the middle, and it gets more spaced out as it approaches the end of the wing.

6. I ran Vanish slightly on the lower lash line using an angled eyeliner brush.

7. I curled my lashes and applied MUFE Aqua Smoky Lash mascara on both upper and lower lashes.

8. On my brows, I filled it in using Anastasia Brow Wiz in Medium Ash.

L'oreal Colour Riche Matte Rose Bud

9. On my face, I applied Giorgio Armani Maestro foundation.

10. I applied Smashbox Halo blush in In Bloom.

11. On my lips, I applied L’oreal Colour Riche Matte in Lincoln Rose.

Halloween #1- Monster Teeth

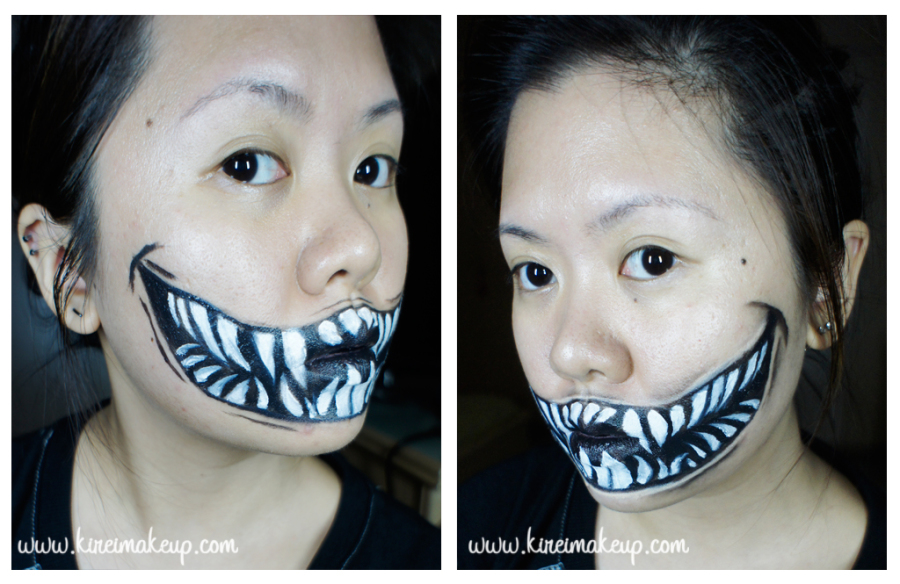
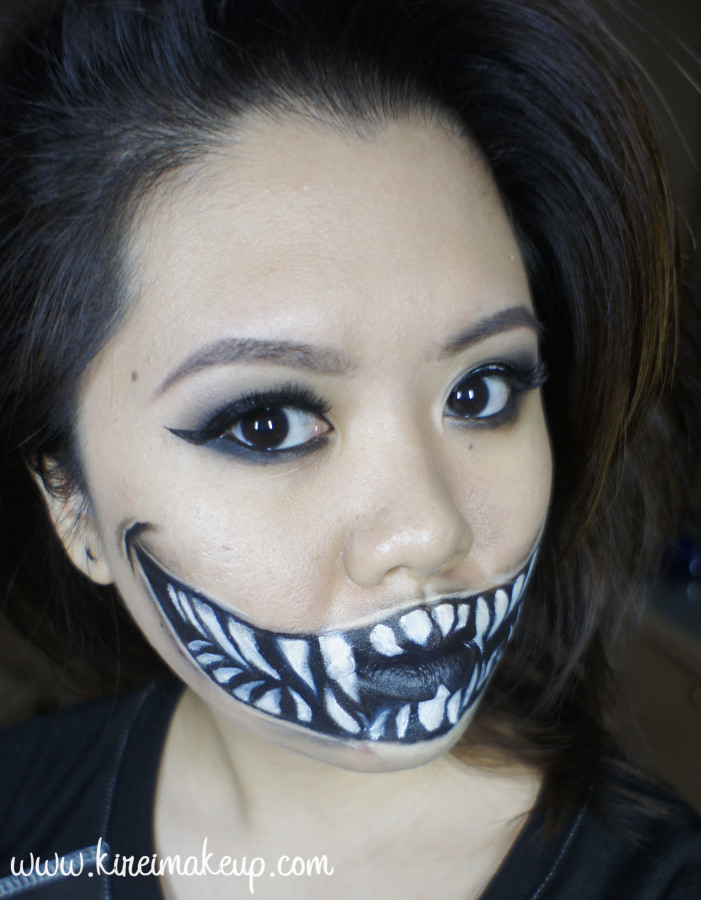
Alright! I finally decided to start my Halloween tutorials early this year! I’m super pumped since my parents are setting up a haunted house at work for everyone to enjoy! Anyways, you can be sure I’m going to be there with full makeup on! For my first tutorial, I decided to do a Monster Teeth or monster smile, since I always find difficulty creating these teeth. I’m not that happy with the result, but oh well, I think it worked pretty well.

One tip that I should keep in mind for myself, is to use water-based white paint for the teeth instead of cream face paint. I think the cream is hard to work with since it moves around so easily, but that’s just my preference. Also, funny story (not so funny when it happened), I was so close to finishing the whole look, and I decided to “fix” the two teeth on the bottom lip, then my hand slip and smudged everything. I had to remove the 2 teeth and just created 1 since it was getting late, and I had to go to bed.

*For Killer Clown tutorial please check out my latest post*

*Please check out my other Halloween post*

Ok, let’s get this whole thing started!

How-t0:

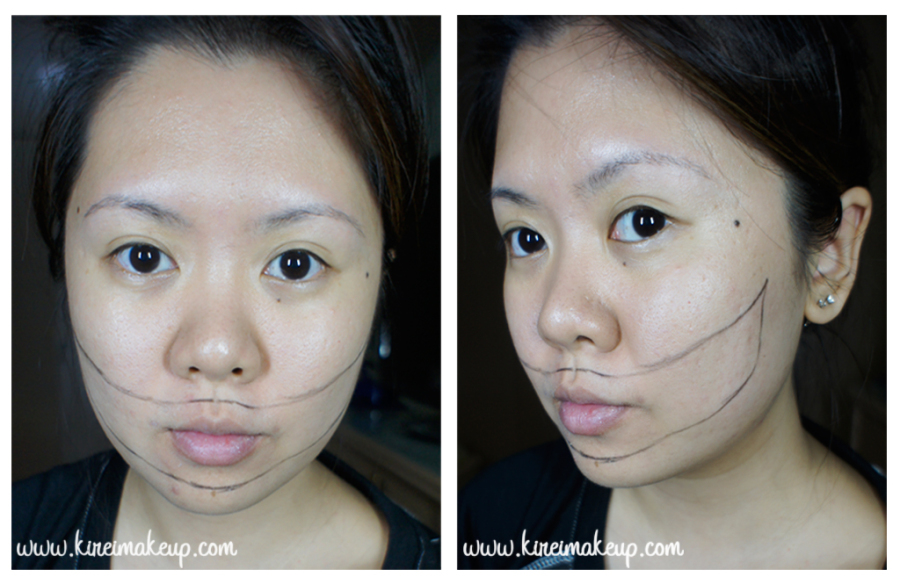
1. I started out by drawing an outline of the smile using a black eyeliner pencil.

halloween makeup tutorial

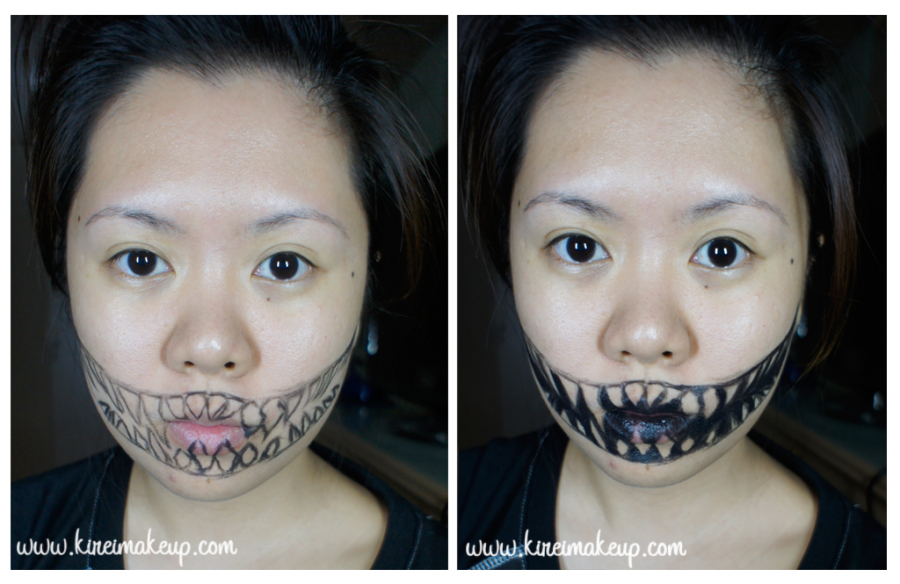
2. Using the same eyeliner pencil, I started drawing the outline of the teeth. It doesn’t have to be pretty, it can be as sharp or as big as you want. I drew the teeth at the back of the mouth a little bit curved in to create an eerier smile.

3. Using a small synthetic artist brush, I applied black cream face paint outside the teeth area.

halloween makeup tutorial

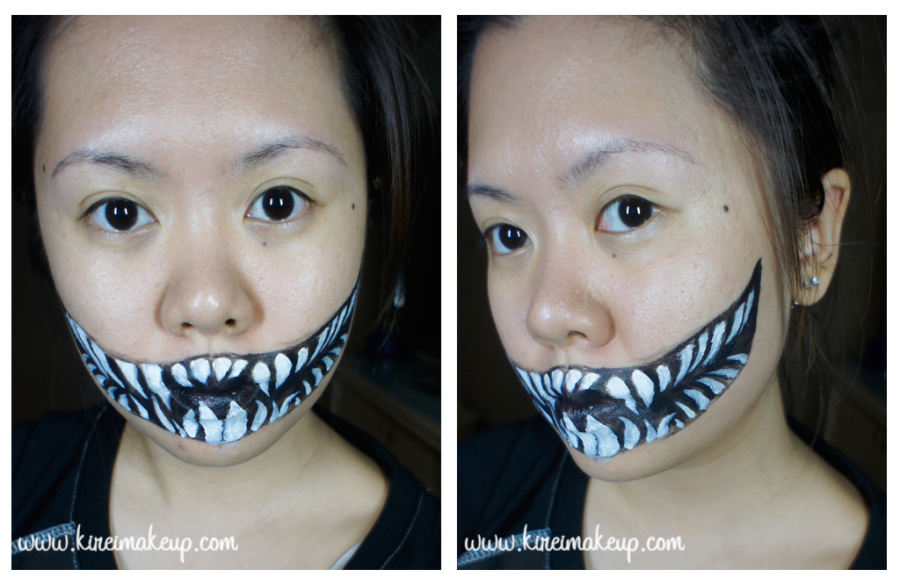
4. Using a clean synthetic artist brush, I applied white cream face paint inside the teeth.halloween makeup tutorial

5. To create some depth, I created some smile lines at the end of the monster mouth, above and below the monster lips.

6. Using an angled eyeliner brush, I blended the lines down for the lines on below the lips, and upwards for the lines above the lips. This will create an illusion of depth.

halloween makeup tutorial

7. For the rest of the face, I applied foundation and smoky eyes just for fun.

8. I also set the cream face paint using eyeshadow of similar colors – black for the black areas, and white mixed with beige for the teeth.

halloween makeup tutorial

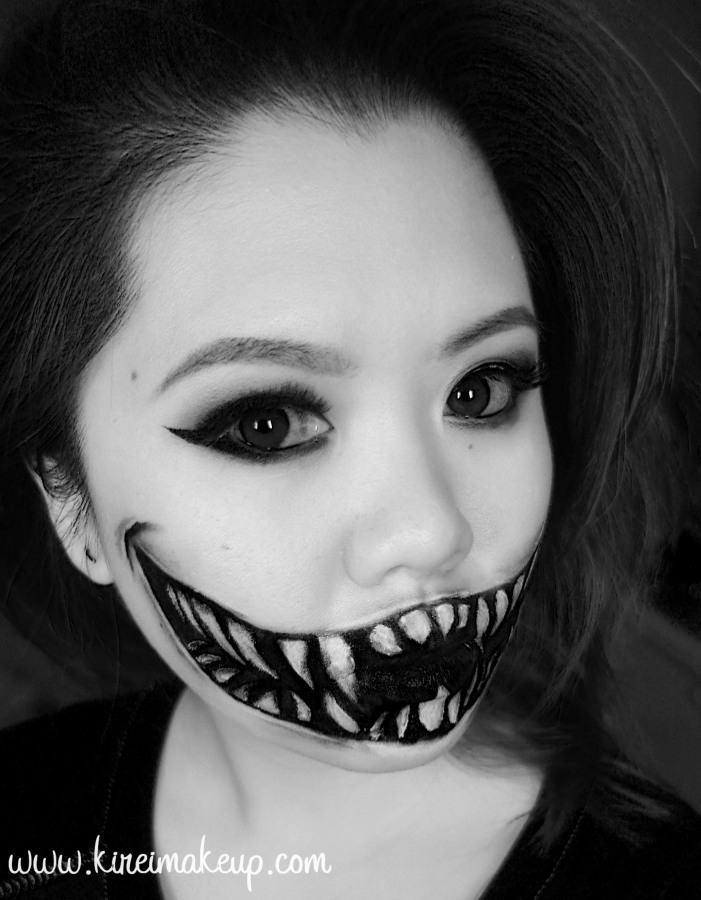
It looks really good in black and white!

halloween makeup tutorial

Ta-daaaah! So, let me know if you have any request for Halloween, ‘kay?!


xoxo
MAC Viva Glam 1 Look #1

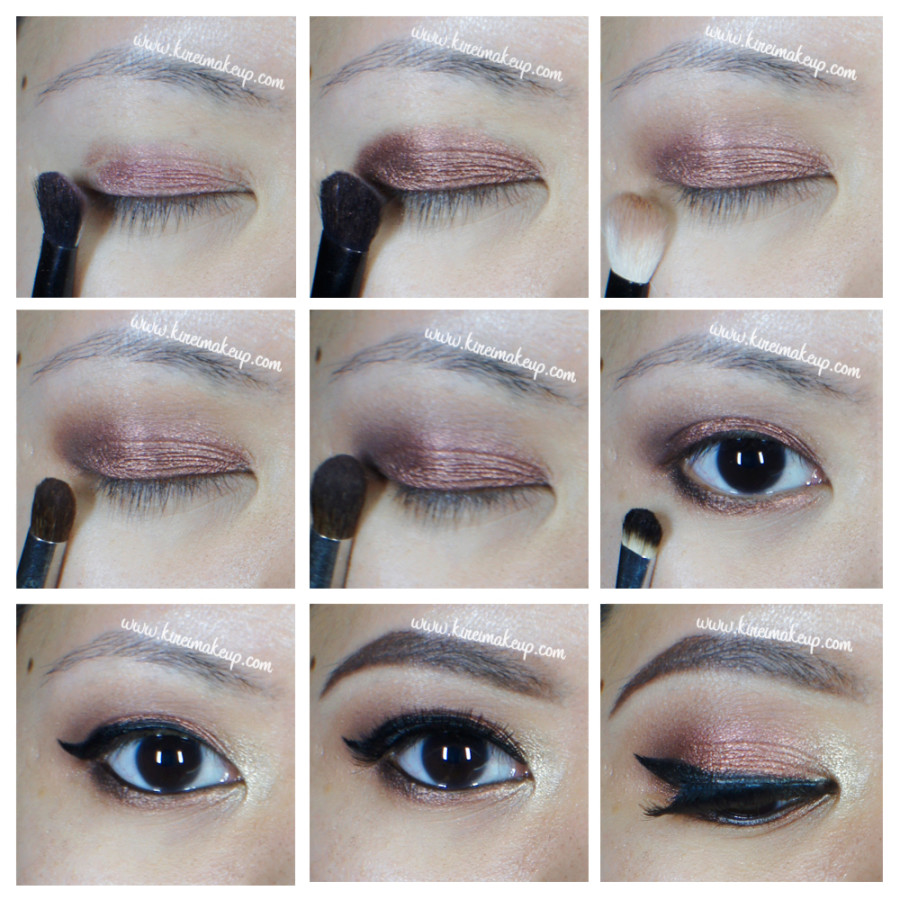
My friend, Elfa, and I went to Tex Saverio Trunk Show last week (photos on instagram). I did Elfa’s makeup, she wanted smoky eyes with red lips, and I actually loved how she looked. So, today I decided to recreate the makeup she wore, but twist it to suit me. I also wanted to use my the Original Viva Glam lipstick (MAC Viva Glam 1), so that look was perfect!
For the eyes, I decided to use my Sleek Makeup iDivine Storm palette since I wanted to do a warmer, coppery smoky eyes. I really seem to like a warmer, redder shades lately. Anyways, if you’re in Southeast Asia and want to purchase Sleek Makeup, you can do so with Luxola. Since this palette doesn’t have the names of each eyeshadow, I decided to number them for this post.

Sleek Makeup iDivine Storm tutorial

image courtesy of Sleek Makeup

Eyes are prepped using Urban Decay Primer Potion.

How-to:

1. I applied no. 1 on the center of my eyelid using a flat eyeshadow brush.

2. Using the same flat eyeshadow brush, I applied no. 2 all over the eyelid.

3. Using a fluffy blending brush, I blended out the edge all the way to above the crease using shade no. 3

4. I applied  no. 4 just on the outer V using a small crease brush.

5. Using a clean blending brush, I applied shade no. 5 under the brows.

6. I applied shade no. 2 along the lower lash line, and no. 6 just on the outer half using a small shader brush.

7. I lined my upper lash line using Kanebo Kate Super Sharp eyeliner, and on the waterline I used L’oreal Voluminous Smoldering eyeliner.

8. I applied a golden eyeshadow (above shade no. 3 – I forgot to add it) just on the inner corner of the eyes.

9. I filled my brows using Anastasia Brow Wiz in Medium Ash and Brunette. Also added Gwiyomi false eyelashes no. 18.

Copper smoky eyes

10. I applied Dior Star foundation on my face using CoverFX cream foundation brush.

11. I highlight and contour my face using Motives Fire sculpting palette. (Will do a highlight/contour tutorial using this palette soon).

12. I set my face using Cover FX translucent setting powder.

13. I added extra highlight using MAC Soft and Gentle highlighter powder. Then, I applied Smashbox Halo Blush in In Bloom.

14. On my lips, I applied MAC Viva Glam 1 straight from the tube.

Ru Paul MAC lipstick

Kat Von D Monarch Palette Tutorial #2

I kept forgetting how amazing this palette is, so I decided to remind myself and created this Monarch palette tutorial. Like I said on my first tutorial using this palette, the eyeshadows are unbelievably smooth and so easily blended. Love it! I promise I’ll do swatches and review for this palette. If you have the chance to grab it, you should really consider it.

Anyways, I’m quite busy this week, as well as the whole September due to work. I think I’ll try to post twice a week, hopefully more. If you do follow me on Instagram, I’ll do micro-blogging from there. Also, don’t forget to comment here or on my twitter/instagram on what you’d like to see more. I know I still have to do a few requests, and I’ll try to get on it ASAP. What a busy month!

Ok, let’s get the tutorial started! I just want to mention that for some reason my camera picks up Wrath really orange this time round. Not sure why, I did reverted back to my glamcor lights, so that might be the cause. Trust me, it doesn’t look that orange in real life. It’s a very pretty warm reddish-brown, almost like a brick color.

warm brown smoky eyes

I prepped my eyelids using Urban Decay Primer Potion.

How-to:

1. Using a fluffy blending brush, I applied Wrath on the outer V and just above the crease.

2. Using a clean blending brush, I blended out the crease.

3. I applied Shadow Box on the outer V, inner V, and crease of my eyelid using a bullet crease brush.

4. Using a flat eyeshadow brush, I applied MAC Tan loose pigment on the center of my eyelid.

5. I applied Urban Decay Jilted eyeshadow (from the electric palette) along my lower lash line using an angled eyeliner brush, then I applied Urban on top of it using a pencil brush.

6. I lined my waterline using L’oreal Voluminous Smoldering eyeliner.

7. I also created a winged liner using Kanebo Kate Super Sharp eyeliner.

8. I filled my brows using Anastasia Brow Wiz in Medium Ash.

9. I applied MUFE Aqua Smoky lash mascara on top and bottom lashes. Also applied Lavie Lash falsies in Snowdrop.

kat von d monarch palette makeup look

10. On my face, I applied Diorskin Star foundation using a foundation brush.

11. I also applied MUFE HD concealer under my eyes.

12. I wanted an extra glow on my skin, so I applied Smashbox Halo Highlighting wand. I applied this highlighter on the high points of my face – cheekbones, bridge of the nose, cupid’s bow, chin, forehead.

13. I lightly dust Cover FX translucent powder to set everything.

14. I applied contour very lightly on my face using Smashbox Contour Kit (they’re selling it again for a limited quantity on their website!).

15. On my lips, I applied MAC Spice lip liner all over, and then applied Clinique Heaping Hazelnut chubby lip stick.

mac tan makeup tutorial

Diorskin Star Foundation Review

I am back, ya’ll! Ok, so for any updates please go check my Instagram! Anyways, as you all know, I bought a new foundation, and as promised here’s my Diorskin Star foundation review! I’ve been trying to find this foundation all over the web, but it seems that this foundation is totally brand new. Sephora has it but it’s out of stock, and written as “new”. Anyways, when I bought it, the lady who was helping me actually told me they just received this foundation that morning, and I was the first person to purchase it. So, yay me!

Anyhow, I actually have a very high expectation for this foundation due to the hefty price tag, and the fact that it is Dior! I have never tried any of Dior foundation previously, only their eyeshadows and highlighter. So, I was totally curious about this foundation. Without further ado, let’s get on the review!

Diorskin star foundation review

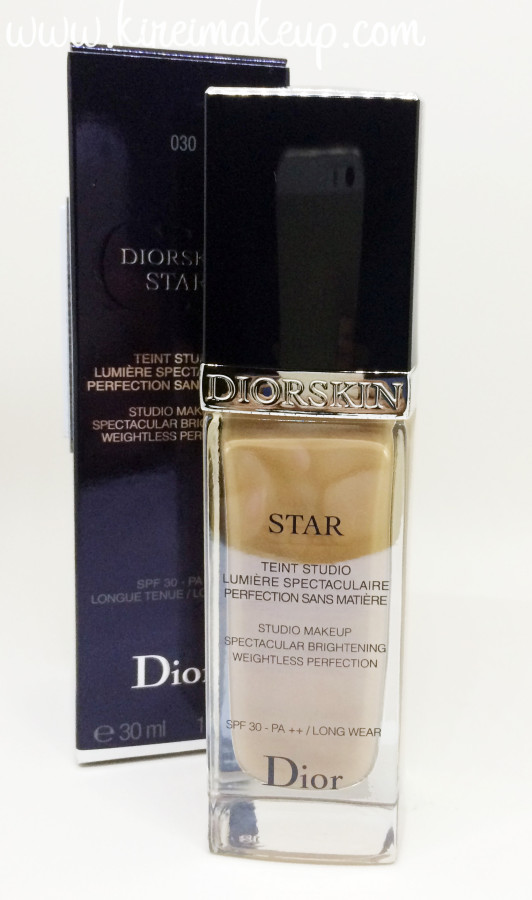
The description below is taken from the leaflet provided inside the foundation box.

What is Diorskin Star Foundation?

“Diorskin Star Studio Makeup Spectacular Brightening Weightless Perfection SPF 30 (is) inspired by the professional illuminating techniques and expertise of its makeup artists. Dior invents Diorskin Star, its 1st brightening foundation: a weightless fluid capable of instantly and over time recreating the spectacular and perfecting light of Dior’s studios.

Innovative formula: a complexion bathed in light. Boasting Light Pulsion technology, Diorskin Star formulas give a whole new dimension to light with 2-fold brightening action.

1. A complexion that is instantly more luminous and visibly evener – a new generation of hollow silica beads captures and diffuses light in a correcting halo with no shine. At the same time, colour-filter pigments adapt to each skin tone and neutralize color imbalances to recreate the perfect light.

2. Day after day, a clarified, purer, more dazzling complexion – anti-“light trap” skincare ingredients target action at the source of the skin’s brightness and radiance, with each application they help reduce the appearance of dark areas, pigment spots and redness.

Innovative Texture: a weightless fluid: with extreme finesse and incredible glide, this fluid boasts an evanescent texture with a barely-there feel that leaves nothing on the skin but a correcting veil of pure light. A texture with a new sensation and flawless coverage, it provides comfort and hold all day long.”

source: Dior leaflet from its foundation box

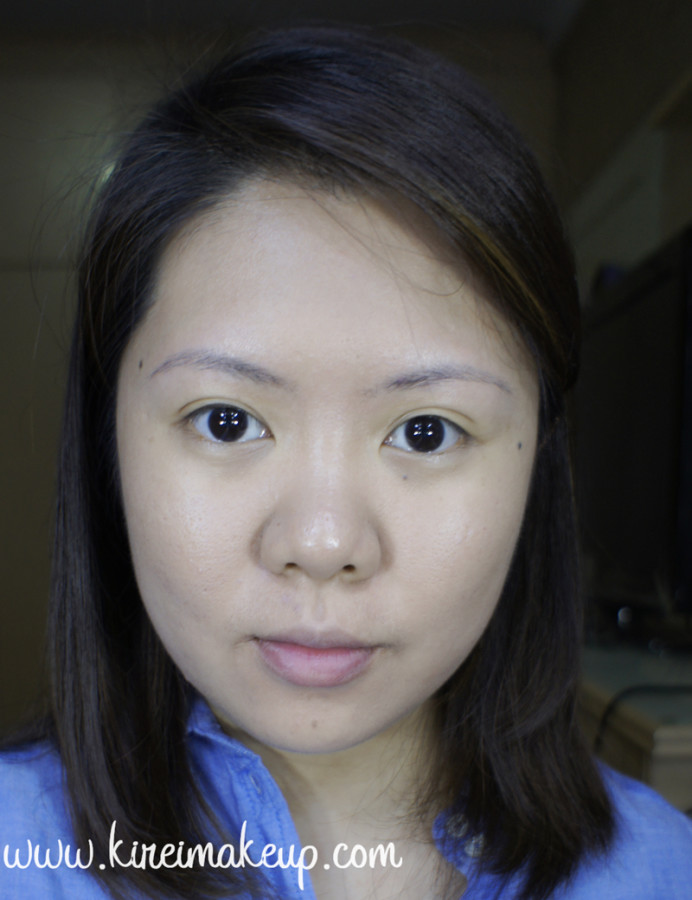
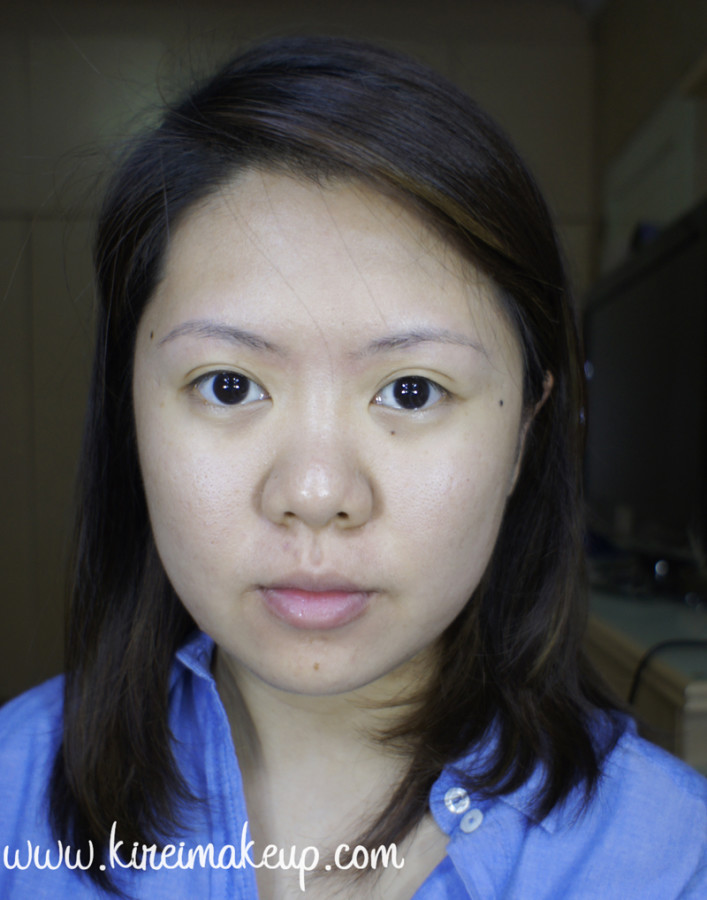
Diorskin Star NC30Bare Face

Just a quick reminder on my shades in other brands: MAC NC25/30, MUFE HD foundation 120, Cover FX cream foundation G40, Estee Lauder Double Wear Light foundation 3.0, Urban Decay Naked Skin foundation 4.0, MAC Face and Body C3, and L’oreal Magic Lumi foundation W2/4.

First impression

I actually love it! I’m quite picky when it comes to foundation, especially since I’m an in-between shade kind of person. I knew I’ll probably be a shade 30 (there was no shade 31 for this line), and I actually told the lady who helped me to try the 30 on my face. She said it was a perfect match. I think it was close enough, but not perfect. I find shade 30 to be of a neutral undertone, so it doesn’t match me perfectly since I have a yellow undertone. It looks slightly pink, but it’s bearable.

*UPDATE: a few readers have been telling me that they were able to find shade 31, if you can find shade 31 go for it! If I can find shade 31, I’ll probably ditch 30 and go for 31. Like I said, 30 is not a perfect match, but it’s workable for me*

UPDATE (JULY 11, 2015) – I FOUND SHADE 31 AND BOUGHT IT! It matches my skin a lot better now since it has a yellow undertone! Perfection! Absolutely beautiful, especially since I’m a bit more tanned now in the Summer.

Anyways, getting back on the foundation, I love how it’s very light when I put it on my face. It doesn’t feel sticky, nor tacky. It just feel absolutely like my skin, like it’s barely there. Since I expected this foundation to be light-weight, I didn’t expect much coverage. I think this foundation has a light to medium coverage. I didn’t mind it at all. It covers just enough, but still let my skin shows through.

I was expecting some kind of light-reflecting particles on this foundation, since they claimed it was “brightening”. To my surprise, there wasn’t any particles that I can see, no shimmers, no glitters, just normal foundation. It reminds me a lot of my old favorite foundation, the Lancome Teint Miracle.

I think this foundation might be suitable for all skin-type. I have a combination skin, and this foundation works well on both my dry patches, as well as the oily areas. It doesn’t look overly dewy/glowy, and it doesn’t cling to any of the dry patches.

I’d like to mention that I applied this foundation using my favorite Cover FX cream foundation brush. For the entire face, I only used 2 pumps of foundation. Even then, I still have quite a bit of excess foundation left.

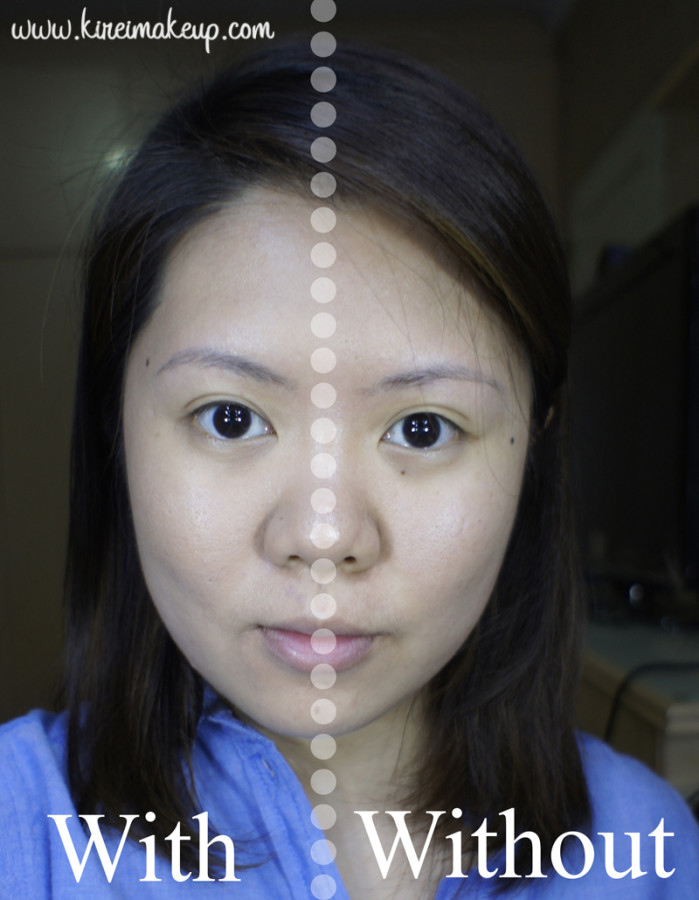
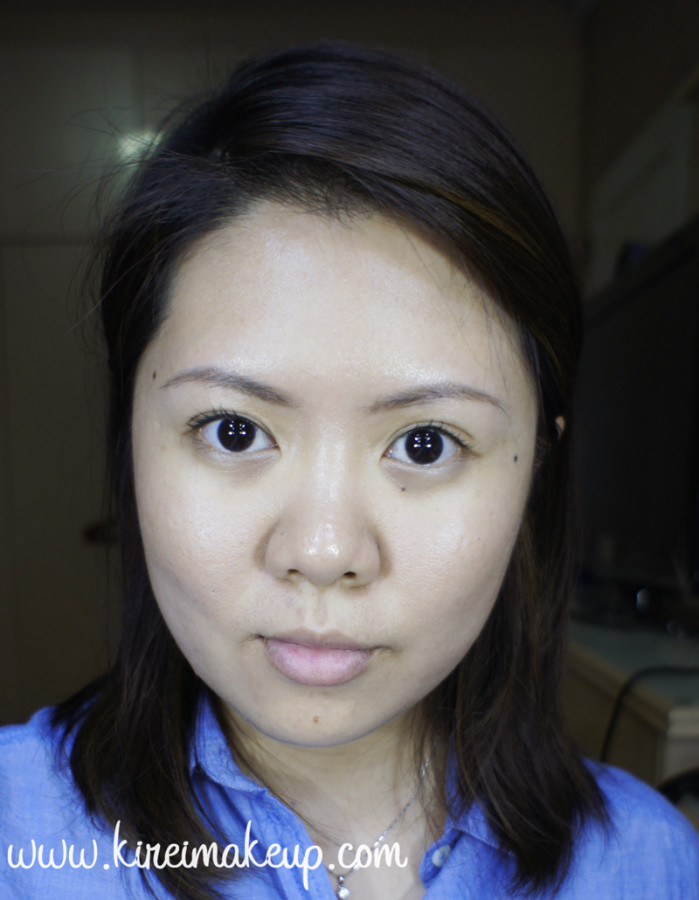
Dior star foundation before and afterLeft: with foundation; Right: bare face

Coverage

As mentioned above, I think this foundation has a light to medium coverage. If you are looking for a heavier coverage, then you might want to look at another foundation. This foundation covers just enough, but as you can see from the above pictures, it doesn’t cover everything. The redness was covered well enough, but my acne scars (e.g. above my lips) is still noticeable.

Finish

Dior claims that this foundation has a natural “barely-there” finish. I’m not sure if this is a “new texture” as they claimed, but again, it does feel very natural and weightless. It doesn’t have a glowy or dewy finish, it just looks like my skin but the better version of it. Do you guys get what I mean? It just looks like my skin, but better!

I actually do have to give credit to this foundation. When I wore it today, I received a lot of compliments regarding my skin. Actually my cousin asked me if I’ve been to a dermatologist for a new skin-care regime since my skin looks really smooth and flawless. The fact that people thought my skin looks great meant the foundation does its job!

No one came up to say “oh you wore makeup today”, all of them actually didn’t even notice I wore foundation at all. In fact, I don’t usually wear makeup, so when I do, everyone at office notice it. Today, however, I had this foundation on, brows filled, a bit of blush, and some mascara, and everyone complimented only on my skin. Isn’t that awesome?

Shades

7 shades available in Sephora North America. I’m not sure how many shades Sephora Singapore carries. When I bought it, they literally was putting it out of the boxes on to the shelves. So, I didn’t get to see if they have all the 7 shades or not.

The 7 shades are: 010 (Ivory), 020 (Light Beige), 021 (Linen), 030 (Medium Beige), 033 (Apricot Beige), 040 (Honey Beige), 050 (Dark Beige), 070 (Dark Brown).

I got shade 030, which has a neutral undertone. As mentioned above, I didn’t mind it even though I have yellow undertone, since the difference in undertone is barely noticeable. I’ve put a picture of me with a natural light while wearing this foundation on Instagram so you guys can see that the foundation still match me pretty well.

Diorskin star before afterFoundation on whole face – taken at 10am

Longevity

I started wearing this foundation at 10am. I didn’t set it with powder since I want to see how long this foundation will actually last without being set. I took the last picture (see below) at 9pm. As you can see within the 11-hour time frame, the foundation seems to have last the whole time.

I noticed I looked visibly oily on my T-zone, but that’s to be expected since I have a combination skin plus I didn’t set my face. Also, the acne scars above my lips were visible after 11-hour, but that’s because I had my meals and wiped my mouth with napkins. So, the foundation was transferred to the napkins when I wiped my mouth.

Other than that, I think the foundation looked pretty intact after 11-hour. It did not settle on my pores, it did not oxidizes, and it still maintains that natural finish even after 11-hour.

Packaging

Oh, you sweet beautiful packaging. I feel like half of the price goes to the packaging. Dior truly knows how to make beautiful product with beautiful packaging. Love the glass bottle, love everything about that glass bottle. It just looks so luxurious and gorgeous. This foundation comes with a pump, so there’s no need to pour the foundation out. Just pump it twice to cover your entire face and neck.

Price

I bought this in Sephora Singapore for SG$78. In Sephora website (.com and its canadian part) they’re selling it at $48. Let me say how I’m super upset that I’m not in Canada right now.  What a big price difference between Asia and North America Sephoras. Not sure how much this would be in Indonesia, probably will be expensive too!

Diorskin star foundation NC30Taken at 9pm

Pros

  • My skin looks amazing.
  • Definitely not cakey, very natural, and light-weight.
  • Doesn’t feel heavy at all.
  • Fragrance doesn’t bother me, has a faint scent.
  • Lasted the whole day.
  • Doesn’t have any shimmers.
  • Doesn’t settle on my pores, thus not making it look big.
  • Beautiful, luxurious packaging

Cons

  • Expensive in Asia! (looking at you Singapore!!!)
  • Limited amount of shades – only 7. I find mine to be slightly on the neutral side, while I’m actually yellow. So, this shade did not match me perfectly.
  • Not for those looking for a full coverage.

The reason why I am not putting it on my Product of the Week is because I have only tried this foundation once. I think it’ll probably go on my favorite foundation list soon enough, though!

Disclaimer: I am not affiliated nor endorsed by Dior or Sephora. I bought this product using my own money. All opinion, review, and pictures are my own unless otherwise noted. My review is based on my own experience, and my own skin. I am not a dermatologist, nor an expert on skin care. Please note that results might vary on different skin types. Do a skin patch test should you worry for any skin reaction. I bear no responsibility should any issues arise on your own skin.

Introduction to Clozette Indonesia

As most of you should know by now, I’m quite active on Instagram. If you realized, I’ve been hashtagging a lot of my beauty, skincare, fashion posts using #clozetteid and/or #clozette. If you are curious as to why I’ve been doing this, keep reading!

So, a year ago I started seeing Clozette Indonesia advertisement on Facebook, being a curious person, I decided to click on it and found out that Clozette Indonesia is a large beauty- and fashion-related social network in Indonesia. I decided to sign-up for it, connected my Instagram account to it and started hashtagging my works with #clozetteid.

Fast forward to a few months later, a few of my friends, followers and I started to realize that my tutorials have been popping up on Clozette Indonesia facebook ads. You would know if you follow me on Instagram, because I actually took a few screen shots of those ads and posted it there. Curiosity had gotten me, and I decided to email the staff over at Clozette Indonesia to ask why were my pictures were used. To my surprise, they asked me to become a Clozette Ambassador!

So, I’m certainly looking forward to meet the other ambassadors, and hopefully I can continue to inspire more people through Clozette Indonesia! I was quite surprised to see I’ve increased the number of followers over on Instagram, as well as Clozette’s website just from hashtagging my work with #clozetteid. I know the numbers are still low, but hey, baby steps!

Clozette Daily

Anyways! I’ve been talking a lot about Clozette Indonesia, and I’m sure you’re curious by now. So let’s get started on the website itself, and what does it do. Like I’ve mentioned previously, Clozette Indonesia is a fashion- and beauty-related social network. It is an online community, where you can share and discover beauty secrets, fashion must-have items and many more! Not to mention, you can find out what’s the latest videos and pictorials to keep your fashion and makeup wardrobe up-to-date.

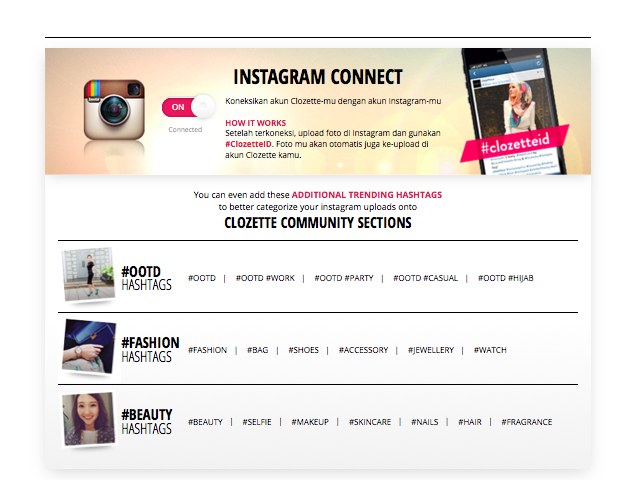
What I love the most about this website is the hashtagging feature; you can add #clozetteid #clozette on your Instagram description (only works on description, not comments), and it’ll automatically get uploaded to your Virtual Closet in Clozette’s website.

Clozette Indonesia

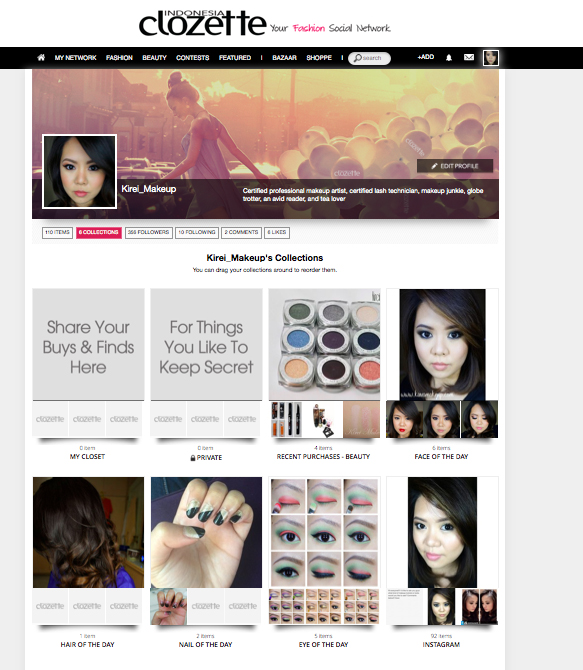
What is Virtual Closet, you ask? See, on Clozette Indonesia’s website, you can categorize your pictures into many “folders” to make everything organized. These “folders” are your Virtual Closet, much like your wardrobe at home. You know how you separate your wardrobes into “dresses”, “pants”, “sweaters”, “shirts” etc? Virtual Closet works like that, except you can make it into anything you want! If you take a look over on Kirei Makeup Virtual Closet (that’s mine), I have several closets such as “Face of the Day”, “Eye of the Day”, “Instagram”, “Recent Purchases – beauty” etc.

So, I’ll try to upload more pictures into my Collection (all of my virtual closets are called Collection), and not just on Instagram. But, as you can see, this is a neat idea, isn’t it? Everything is organized in its own closet! You can add whatever you want – wish list, fashion, look of the day, shoes, etc.

Clozette Indonesia Kirei Makeup

The other feature of Clozette Indonesia that, I think, is pretty cool, is their Store Management So, tell me, do you have a tons of clothes or makeup that you don’t even use anymore, and it’s collecting dust? Or, have you been wanting to start your own fashion/beauty business but don’t know where to start? Well, take a look at their Bazaar! This feature allows you to create your own store, and start selling your own fashion- and/or beauty-related products FOR FREE! All you need to start selling is just 10 items, and you can start making your money!

Clozette Indonesia

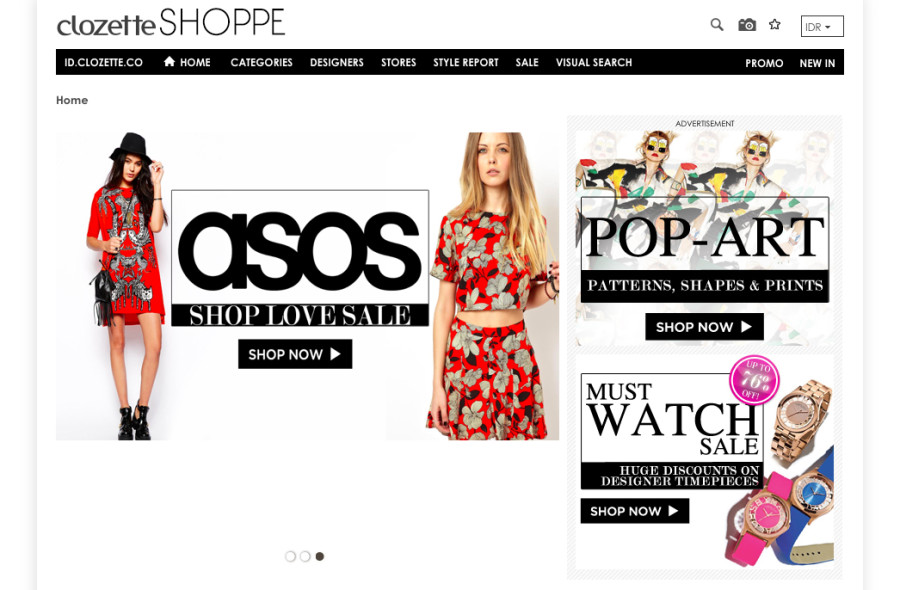
The other feature, related to shopping again because let’s face it we do love to shop, is Shoppe. What is shoppe? Shoppe is like an online store, but unlike Bazaar, the brands in Shoppe are affiliated with Clozette. Local and international online stores, like Zalora, Dian Pelangi, ASOS, Neimann Marcus etc can be found in Shoppe. So, if you’re like me, definitely check Shoppe out! You can shop many different international and local brands in just 1 website! How convenient!

See, Clozette Indonesia isn’t just about inspiring, and getting inspired. It also enables you to become an entrepreneur, for free! I think this website has so much more potential, and I’m so happy to be able to become a part of Clozette Indonesia.

clozette daily

Have I piqued your interest? Well then, what are you waiting for? Come, sign up over at Clozette Indonesia, and start following me! Comment, like, and I’ll be waiting for you! I hope my pictures can inspire you, and you inspire me!

Psst, if you are not from Indonesia, you can still join us! Just take a look at Clozette website right now!

Disclaimer: I am a part of Clozette Indonesia Ambassador program, however, I am not being paid to do this post. All links are NOT affiliated links. I do not earn any commission from Clozette Indonesia.