I hope you guys have been enjoying all these Holiday Makeup tutorials I’ve been creating lately. Today’s tutorial is all about this Casual Glitter Holiday Makeup look. This look is fun, easy and simple. It’s definitely the opposite of what I’ve been doing so far with all those glam holiday makeup look. Anyways, watch the tutorial and read more below!
Tag: glitter makeup
Gold New Year Party Makeup Tutorial
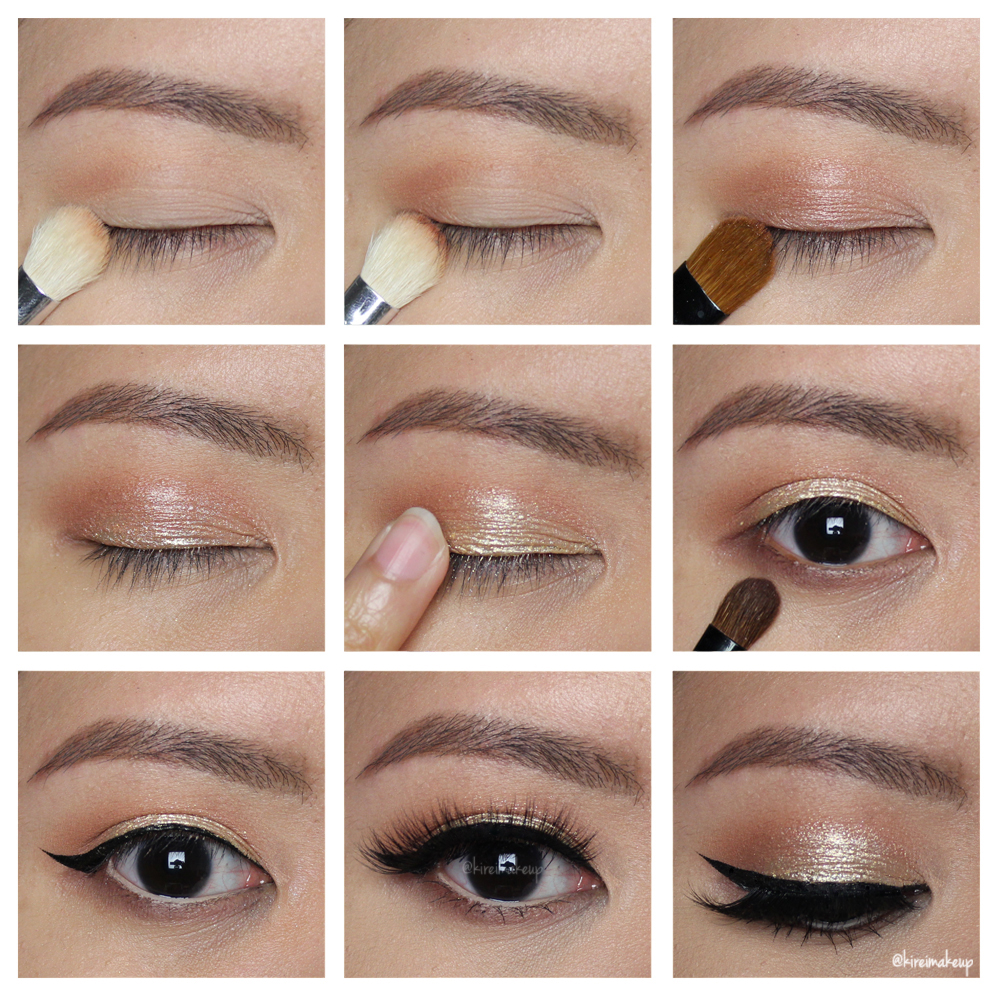 Today’s Gold New Year Party Makeup tutorial would by my last post for 2015. Almost time for 2016, and so I shall end 2015 with a gold sparkly makeup. This look is super simple, and it doesn’t require much. It’s sparkly, it’s light, it’s super pretty for the New Year. I, myself, prefer this kind of look to attend parties and such.
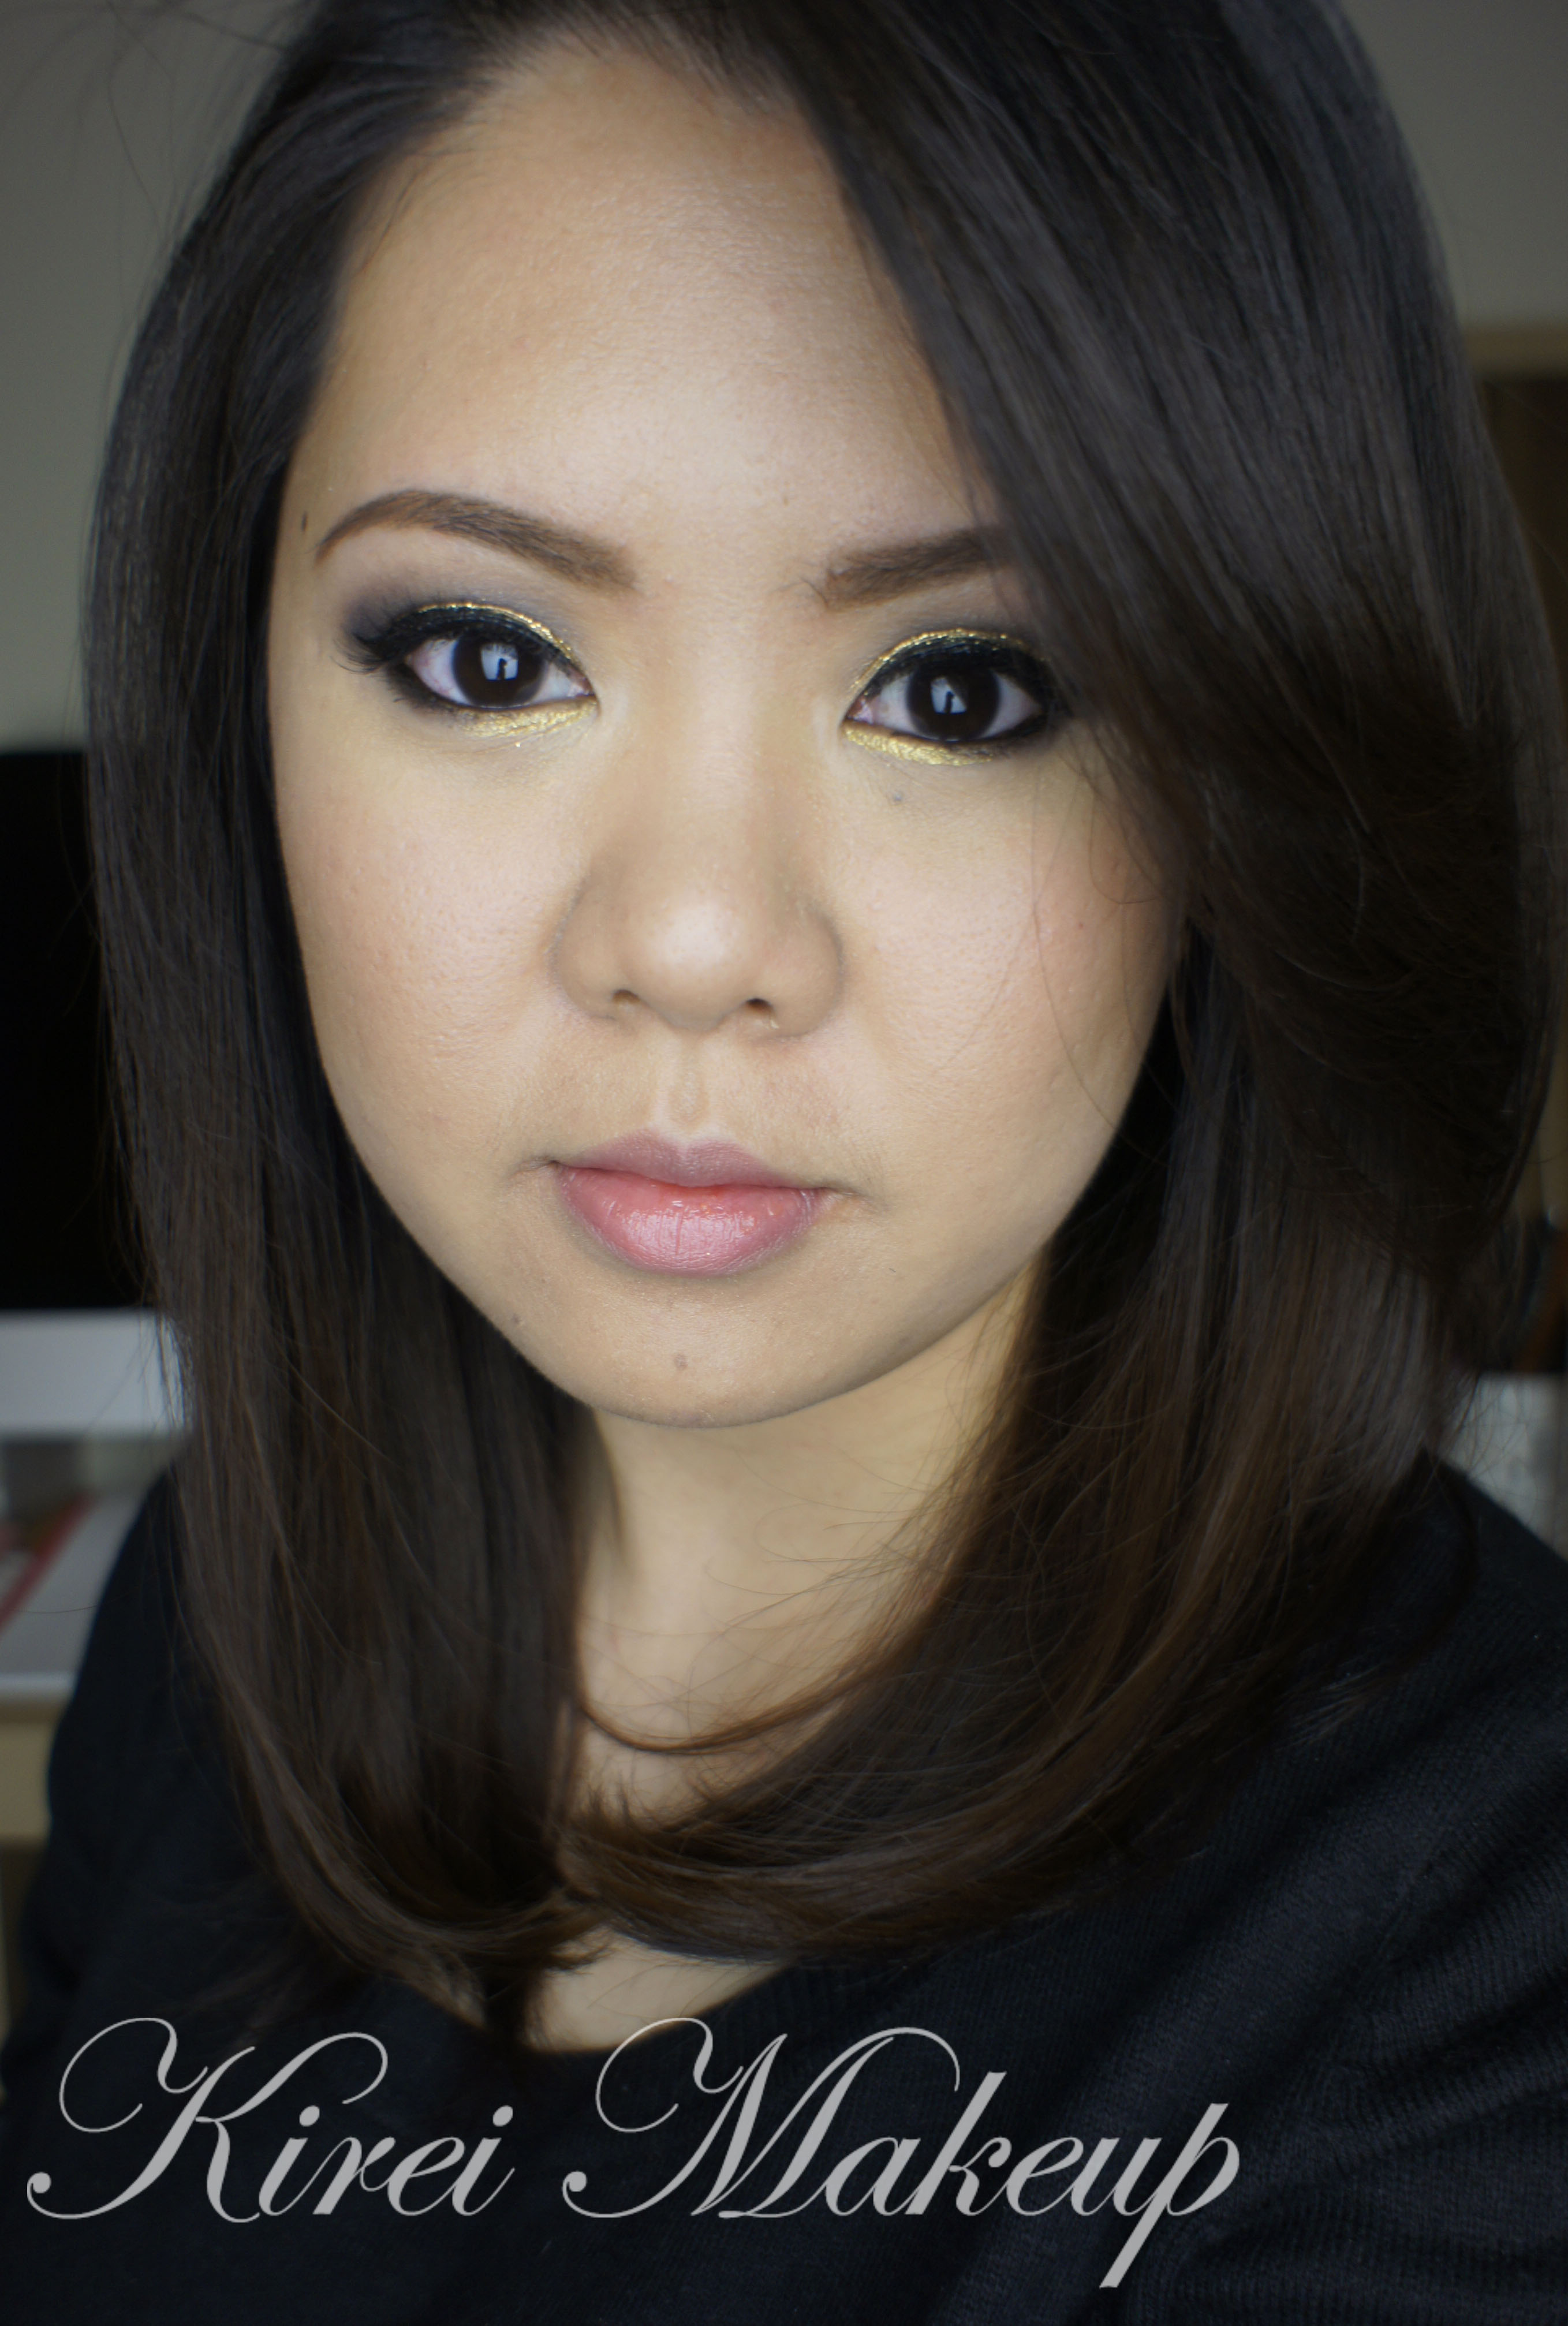
Glitter Holiday Makeup
As Christmas approaches fairly quickly, I decided that it is a tradition to do a glitter holiday makeup! Last year, I did a gold glitter eyeliner, this year I decided to do more glitter all over the eyelid. I just love how it sparkleees! Don’t you?
Oh, a word of warning, if glitter fall all over your face, you can get rid of it by using a clean mascara wand – use the tip of the wand to pick the glitter. You can also use masking tape (the sticky side, obviously) and carefully stick it to your face to remove the glitter.
The trick to avoid fall-out from the glitter is to apply it with a damped brush. That way, the glitter sticks itself to the brush. You packed on that glitter on the eyelid and voila! Minimal to no fall-out.
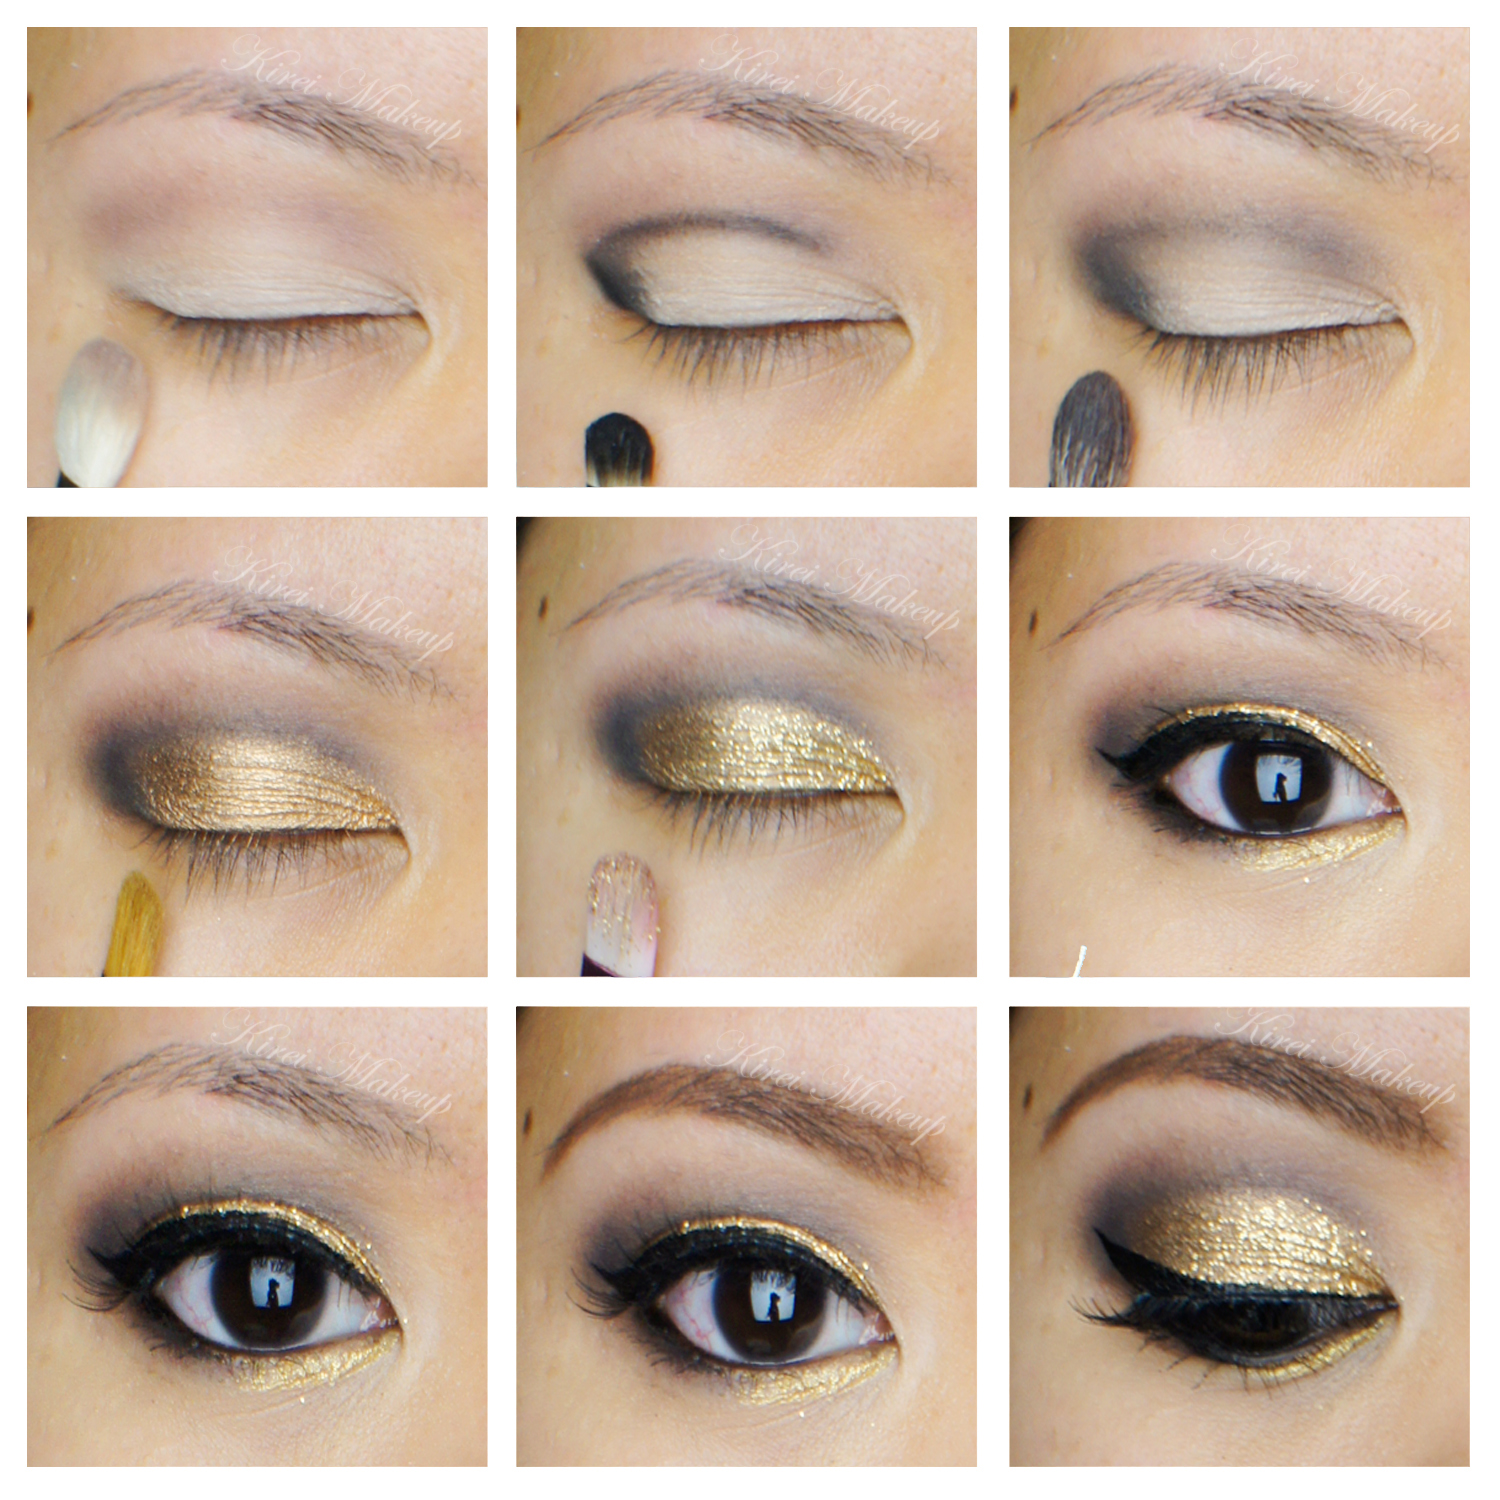
How-to:
1. I applied UD Tease eyeshadow slightly above the crease using a fluffy blending brush.
2. I applied UD Blackout eyeshadow on the crease using a small shader brush.
3. Using a clean Smashbox Bullet brush (or any blending brush), I blended UD Blackout to soften the edge.
4. Using a flat eyeshadow brush, I applied MAC Rose Gold loose pigment on the eyelid.
5. I applied gold glitter from Faces glitter stack on a wet flat eyeshadow brush.
6. I created a winged liner on the upper lash line using Kanebo Kate Super Sharp Liner.
7. On the lower lid, I applied the same glitter as step 5 using a wet angled eyeliner brush on the inner half.
8. On the outer half of the lower lid, I applied UD Blackout eyeshadow using a clean dry angled eyeliner brush.
9. I also lined my waterline using L’oreal Voluminous Smoldering eyeliner.
10. I curled my lashes and applied Buxom mascara on both upper and lower lashes.
11. I applied Ardell 109 false eyelashes just for an extra touch.
12. My brows were filled using Anastasia Duo Brow Powder in Brunette.
13. Under the brows, I applied UD Foxy eyeshadow using a fluffy blending brush.
14. For my face, I applied L’oreal Magique Lumi Foundation in W3 using CoverFX Cream Foundation brush.
15. On the cheeks, I applied MAC Cubic blush.
16. I filled my lips using MAC Dervish lip liner, and then lightly dabbed YSL Glossy Stain in Pêche Cerra-Cola (27) on top of it.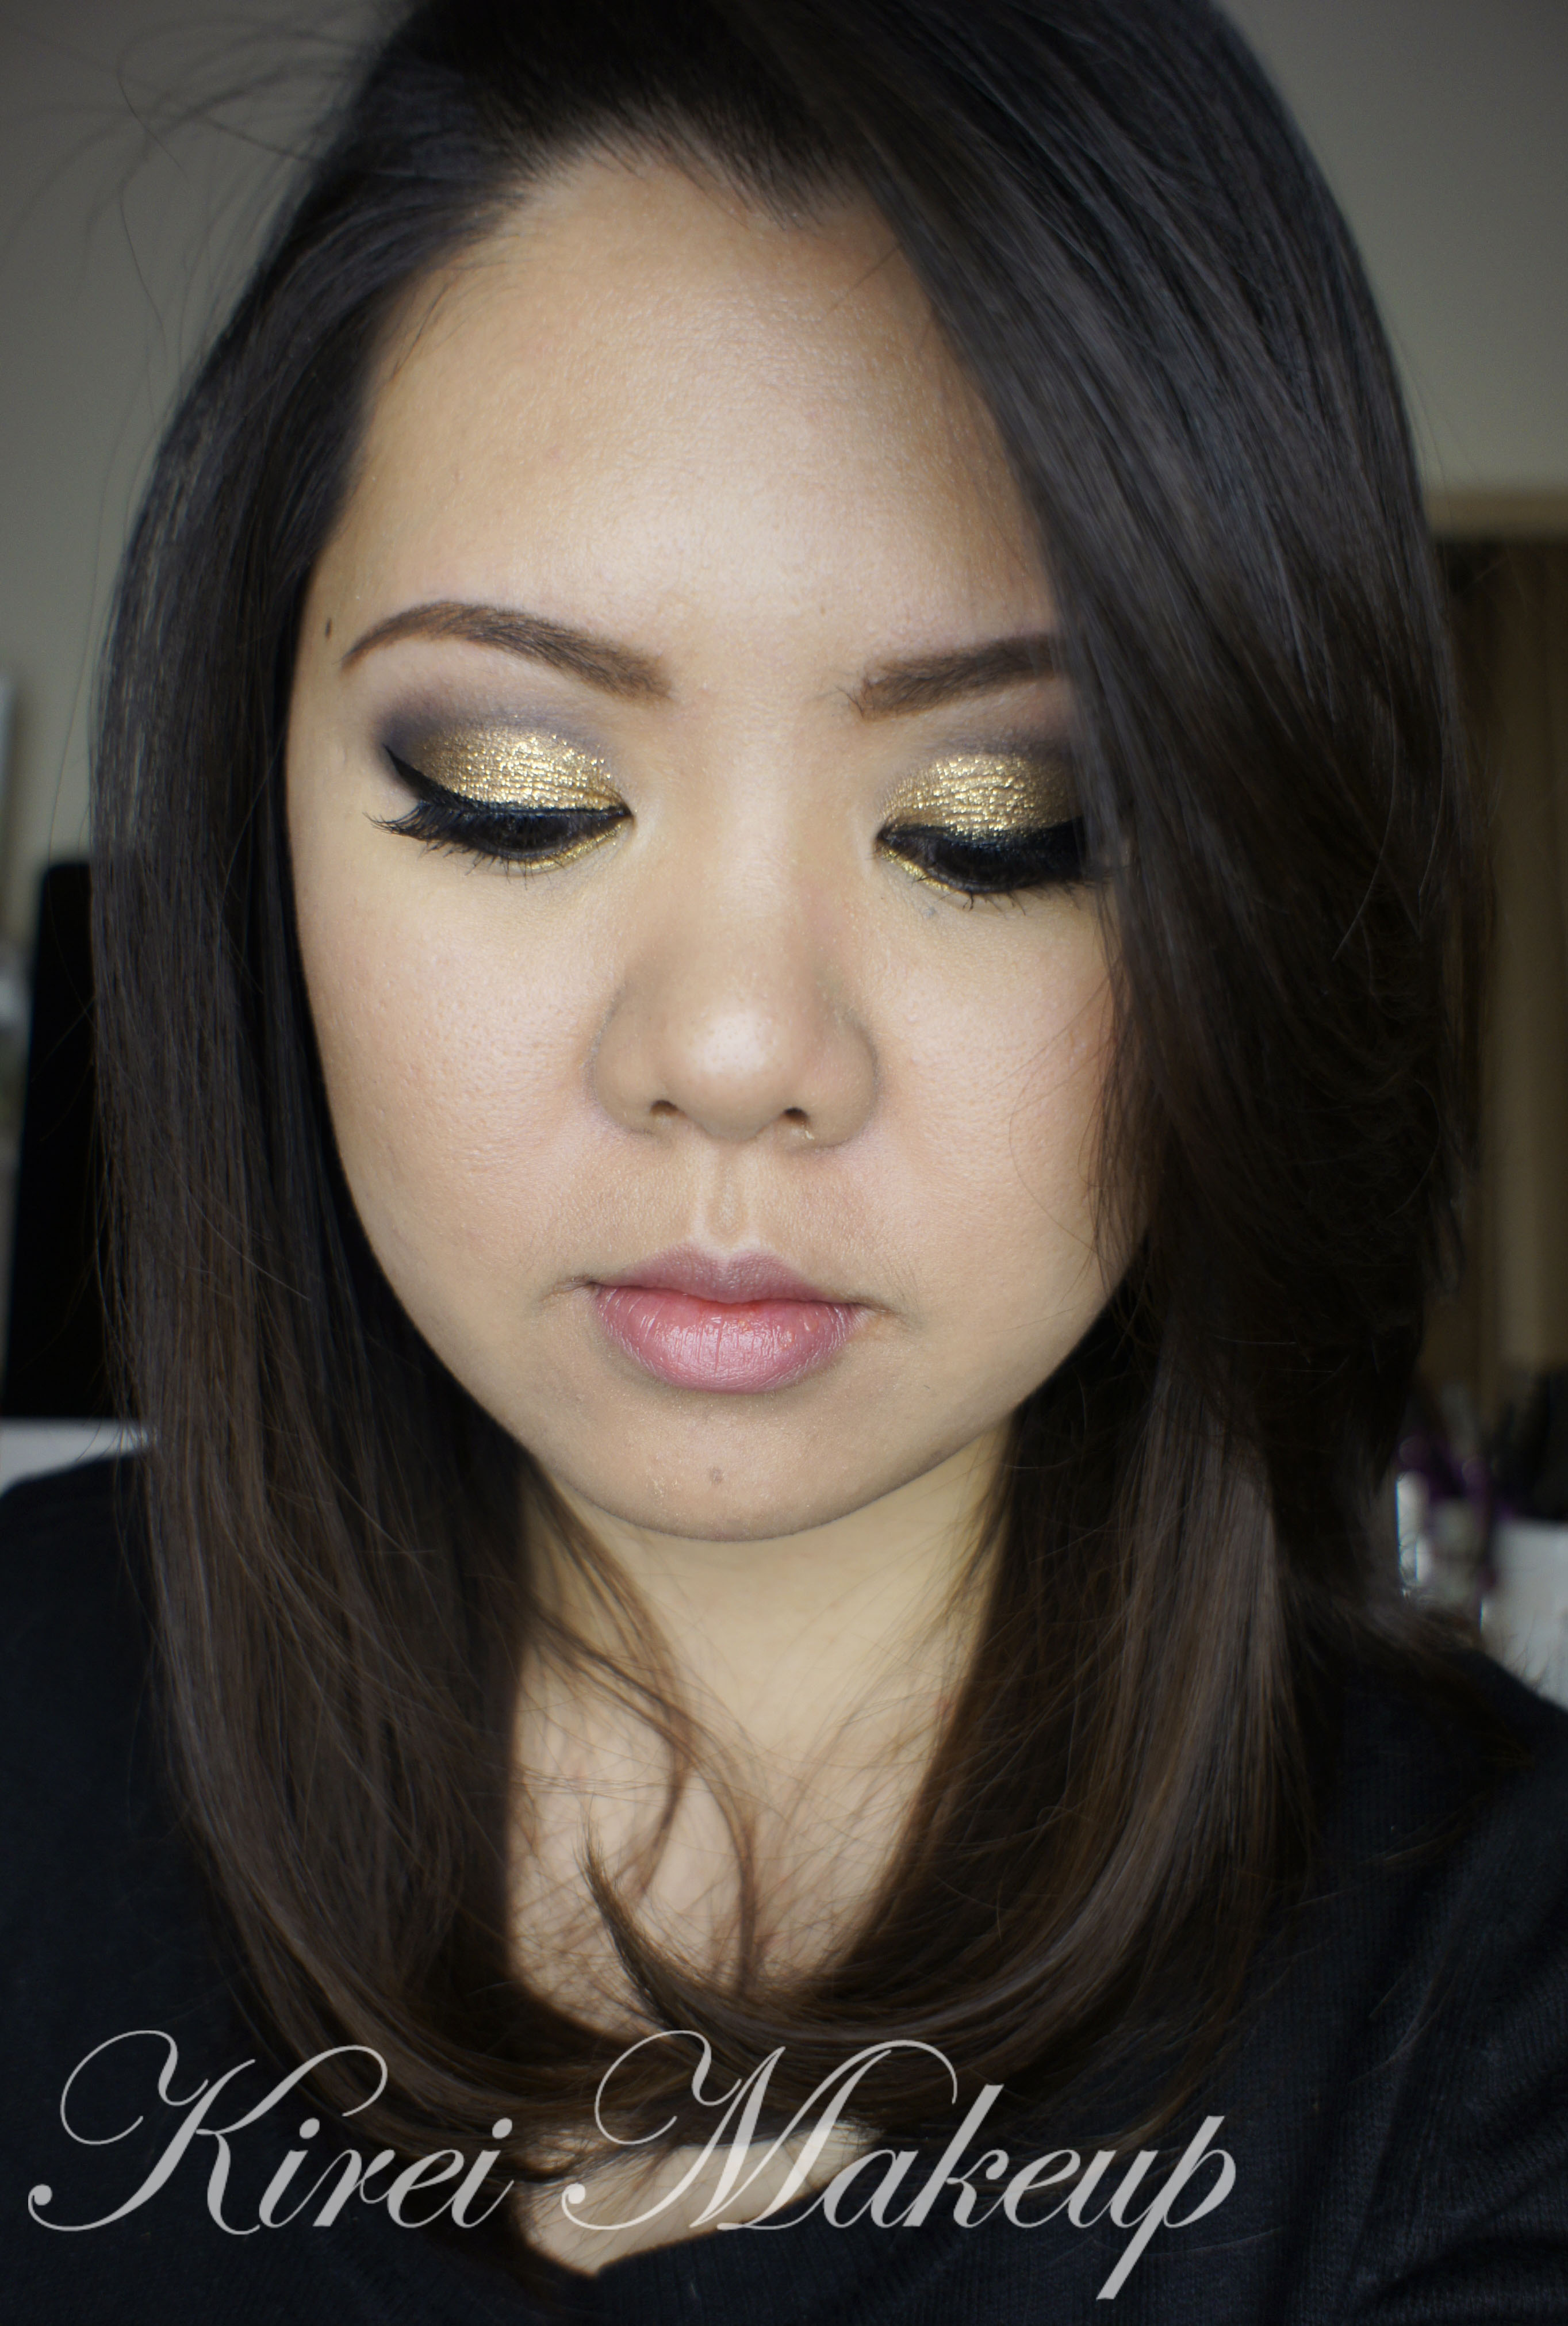
All That Glitters
Lights are still not up :(…Last week was a busy week for me with work and all that. I’ve decided to de-activate my Twitter account for personal reasons, so that’s the reasons as to why you might not be able to find me on twitter anymore. Please follow me on Pinterest or Like my Facebook Page for updates.
I’m also still working on moving my blog to a self-hosted site, and working on a new header image. If anyone is interested in taking makeup classes, please feel free to contact me at jilly.ijoe@gmail.com.
Anyhow! Let’s get back to makeup. Today’s tutorial I wanted to use my old MAC Reflect pigment. I loved this glitter! It has a teal undertone, so if you put a dark base underneath it, you can see the teal shining so prettily. I paired it with an earthy crease so to not overpower the glitter. The brown colour on the crease is there to add depth to the eyes. I think this is the perfect look if you want to play with glitter but not go overboard with it.
How-to:
1. I applied L’oreal Magique Concealer underneath my eyes and all over the eyelid to prep the eyes.
2. Using a clean blending brush, I applied Urban Decay Darkhorse on my crease.
3. Using a clean flat eyeshadow brush, I applied MAC Reflect Transparent Teal on the eyelid, pressing it slowly to the lid.
4. Taking Urban Decay eyeliner in Perversion, I ran this liner on my waterline and tightline.
5. Using a pencil brush, I smudged the liner on the bottom lid.
6. I applied MAC Reflect Transparent Teal on the lower lid using a small angled brush.
7. I curled my lashes and applied several coats of Cover Girl Lash Blast 24-hr mascara.
8. I filled my brows using Anastasia Express Brow Kit.
9. Once I completed my eyes, I proceeded in applying MAC Face and Body foundation all over my face using Sigma Round Kabuki Brush.
10. I applied Benefit Hervana lightly on my cheeks and top my lips off by applying Tarte Lipsurgence in Hope.

