Burgundy Lips

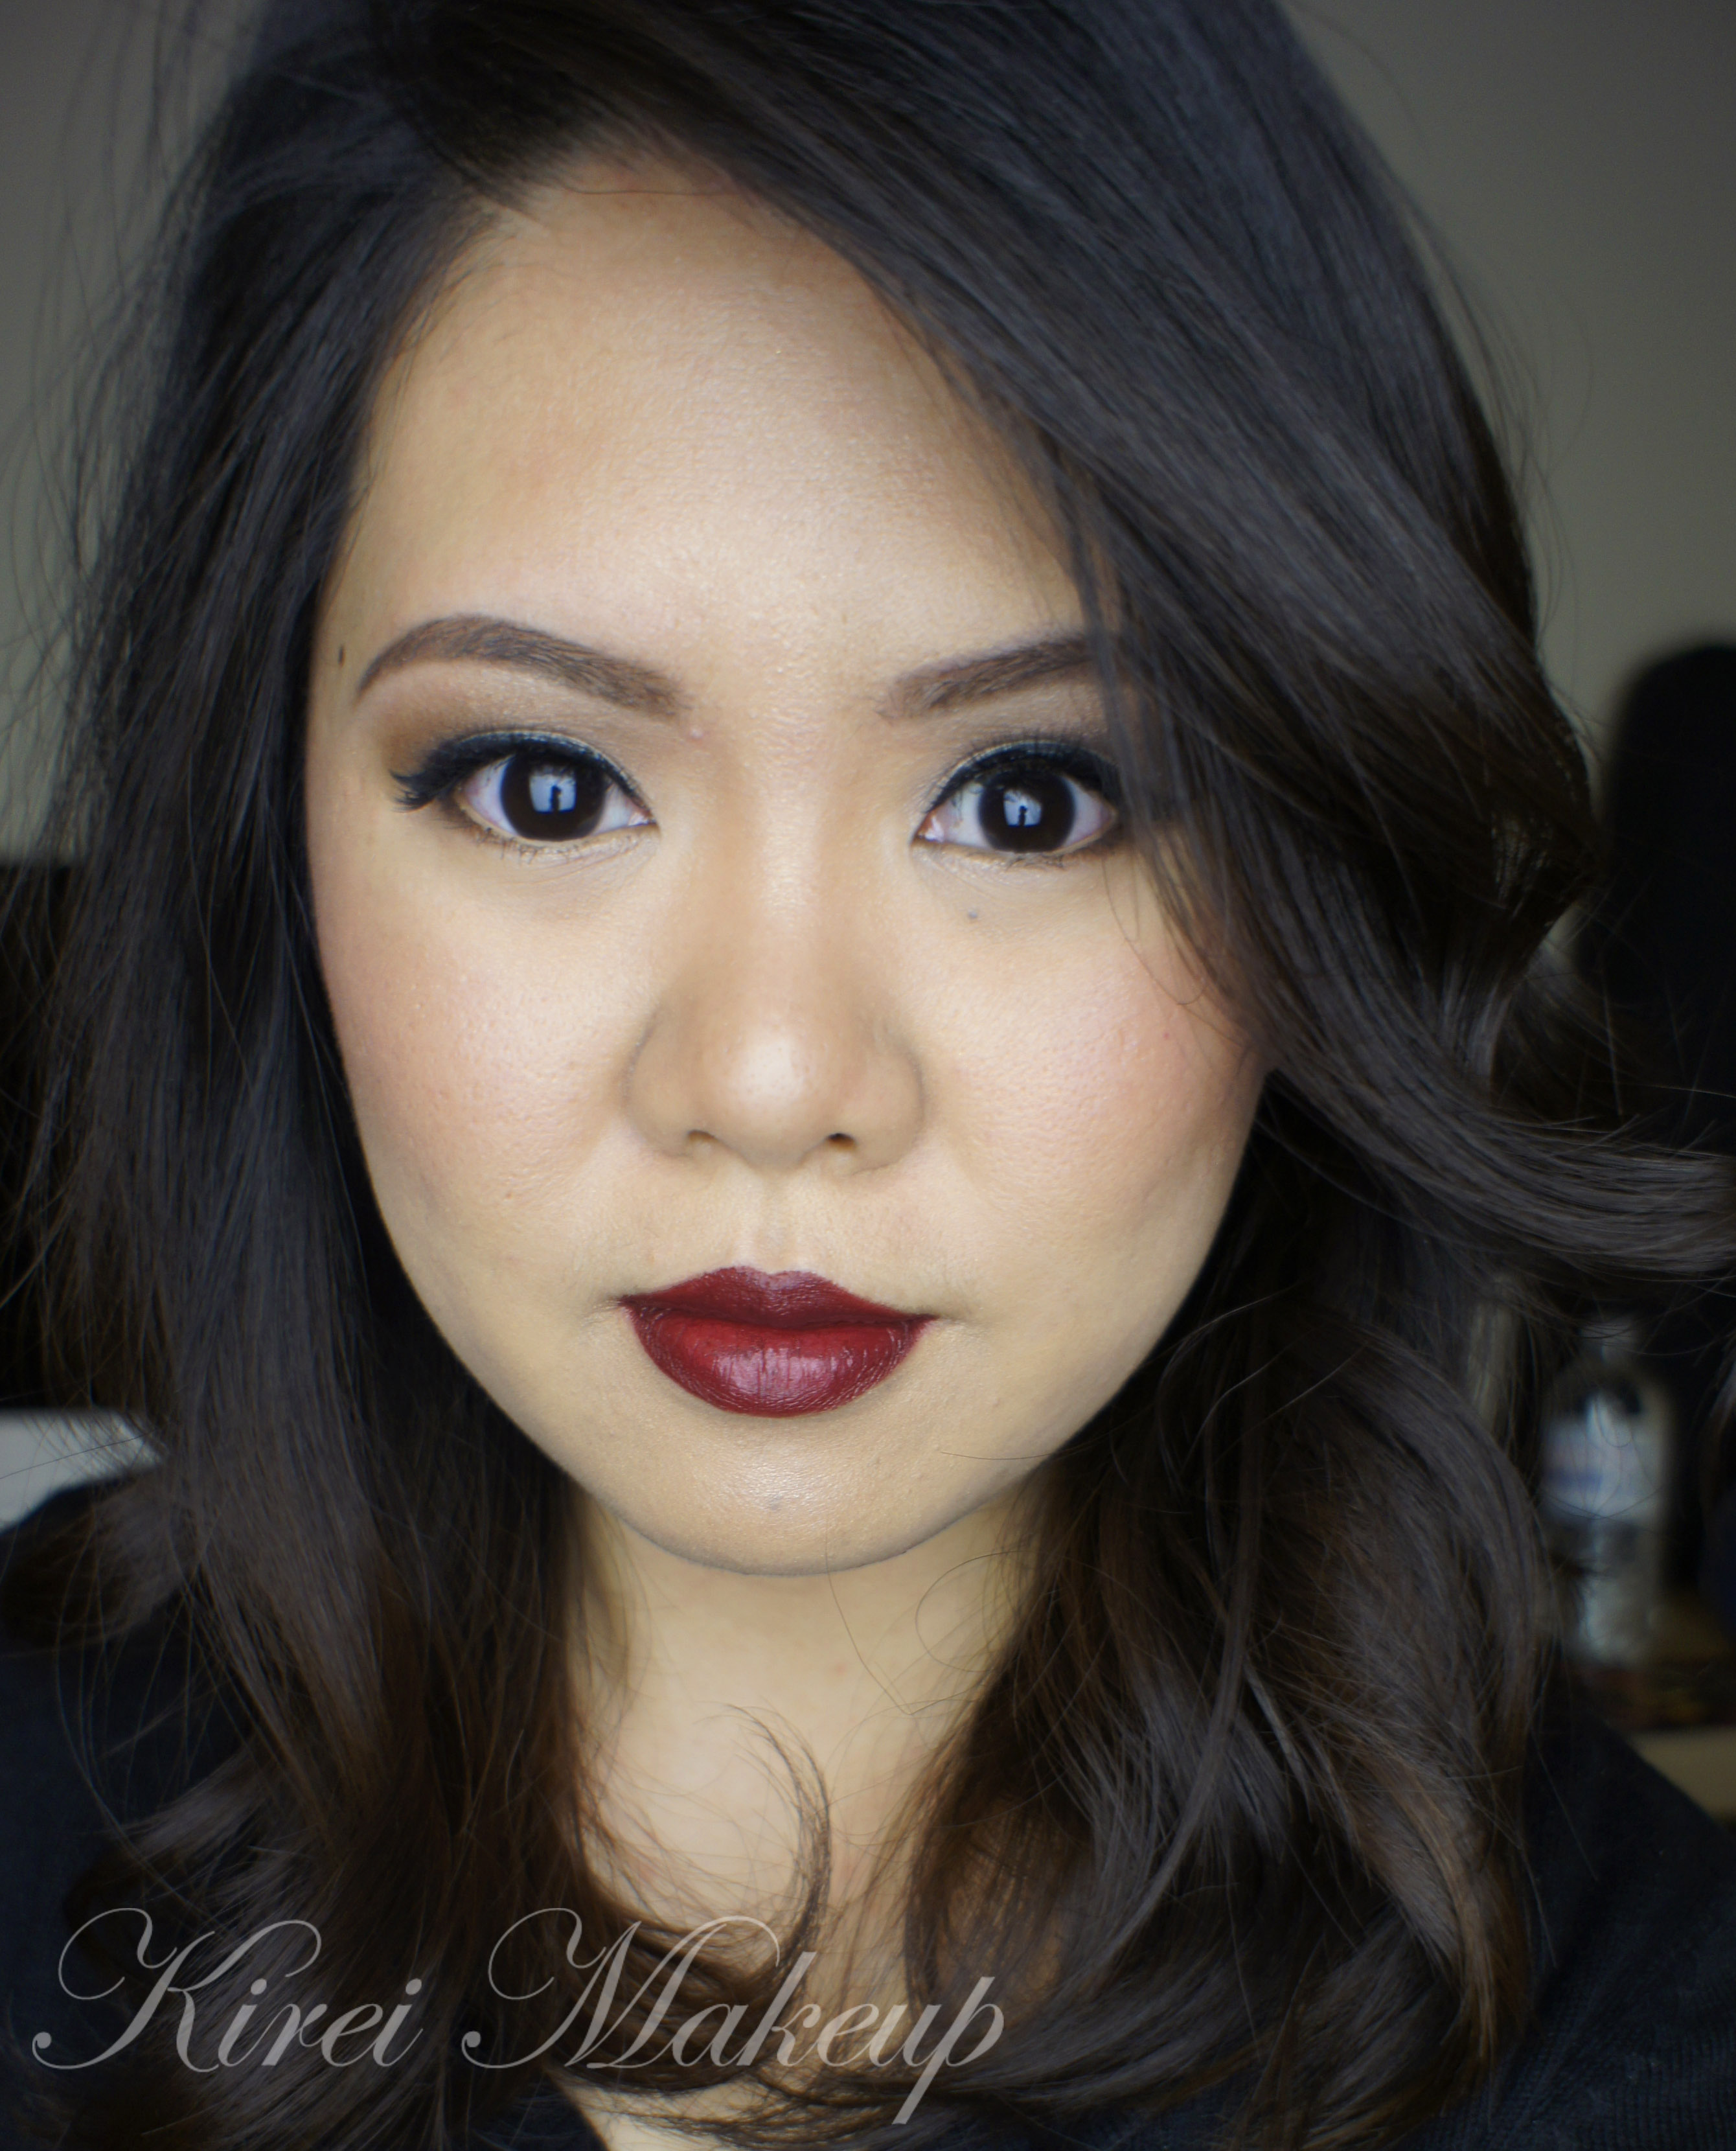
Quick tutorial today, since I wanted to try out my new L’oreal Color Riche lipliner in Truly Burgundy as well as L’oreal Infallible Lacquer Liner 24Hr in Blackest Black. To be honest, I wasn’t sure where I was going with the tutorial since I started out lining my lips first. I just wanted to play around, but I think it turned out to be not bad. If you’re one who’d like to try the bold lips look, give this lip color a try. I, personally, feel the burgundy lips look is perfect for this cold season. What do you think?

For the eyes, you can skip this whole contouring on the crease altogether if you prefer a simpler look. I just wanted to compliment the warmth of the lips with warm eyes.

Let’s get on the tutorial!

How-to:

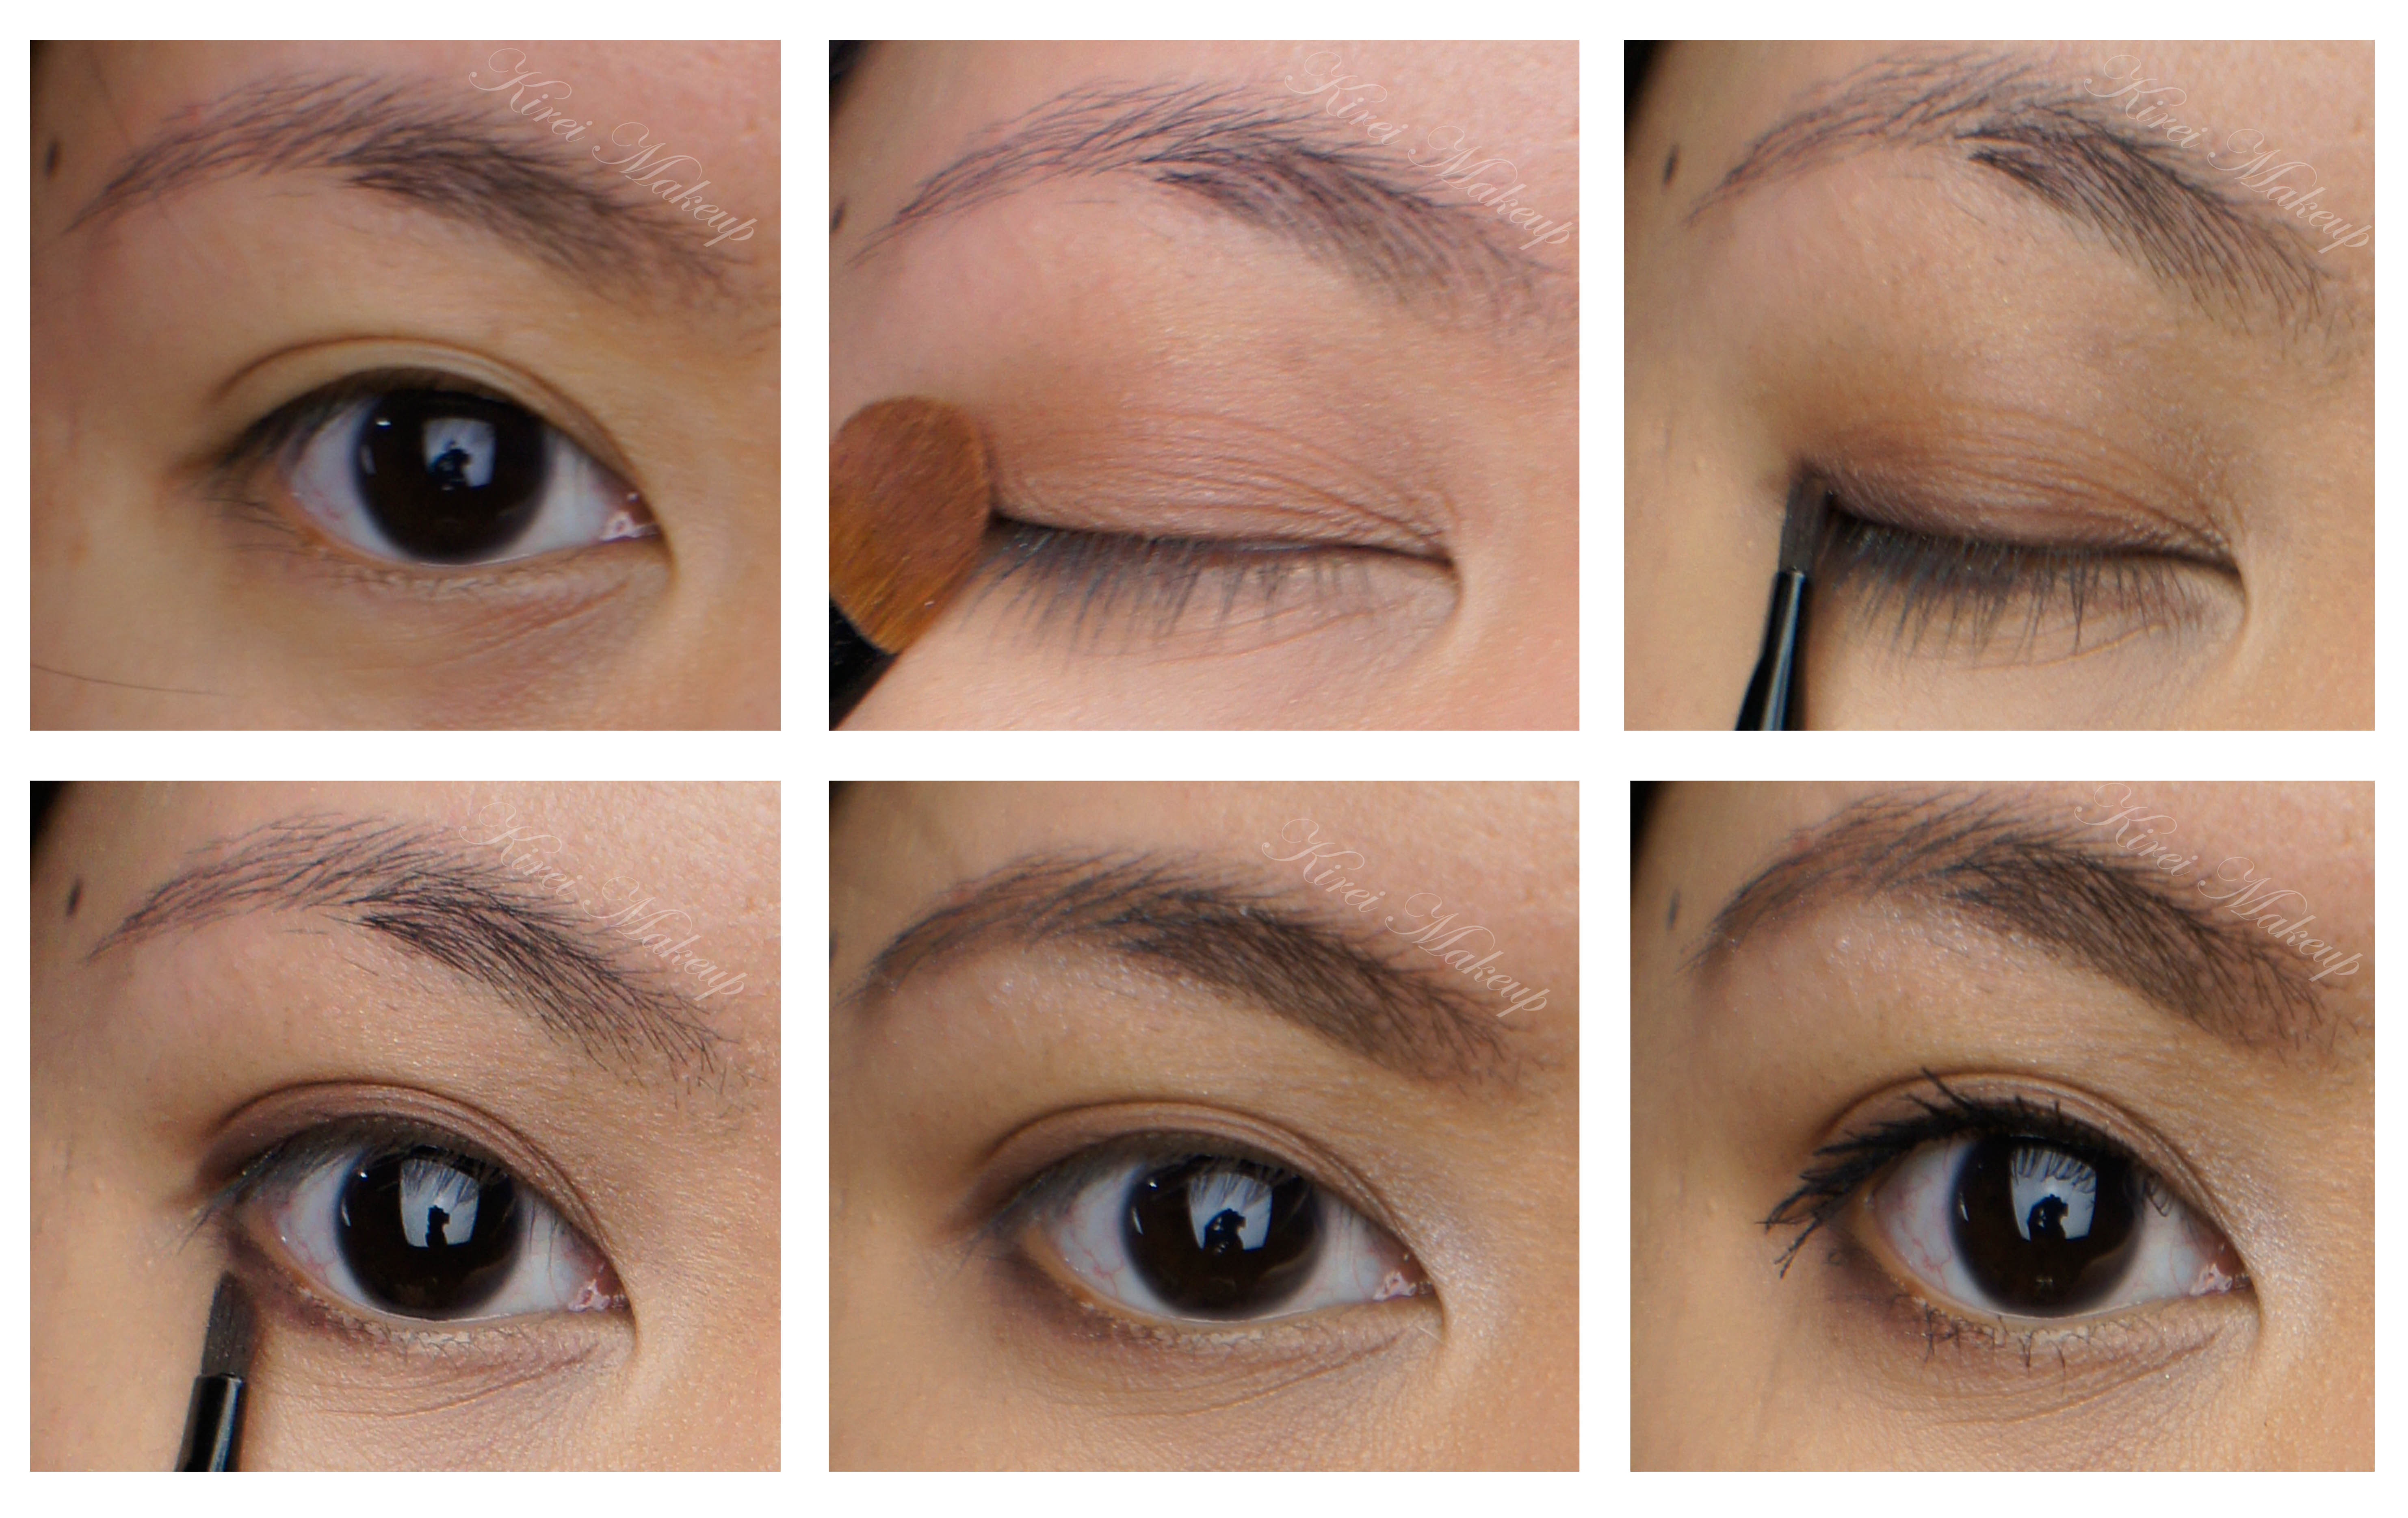
1. I applied the brown (second darkest color) eyeshadow from Ombres Matelassees De Chanel Charming on my crease using a fluffy blending brush.

2. Using a flat eyeshadow brush, I applied Smashbox Full Exposure palette in s3 on my eyelid area.

3. (not in picture) Using another fluffy blending brush, I applied the bronze eyeshadow (middle color) from Ombres Matelassees De Chanel Charming just slightly above the crease.

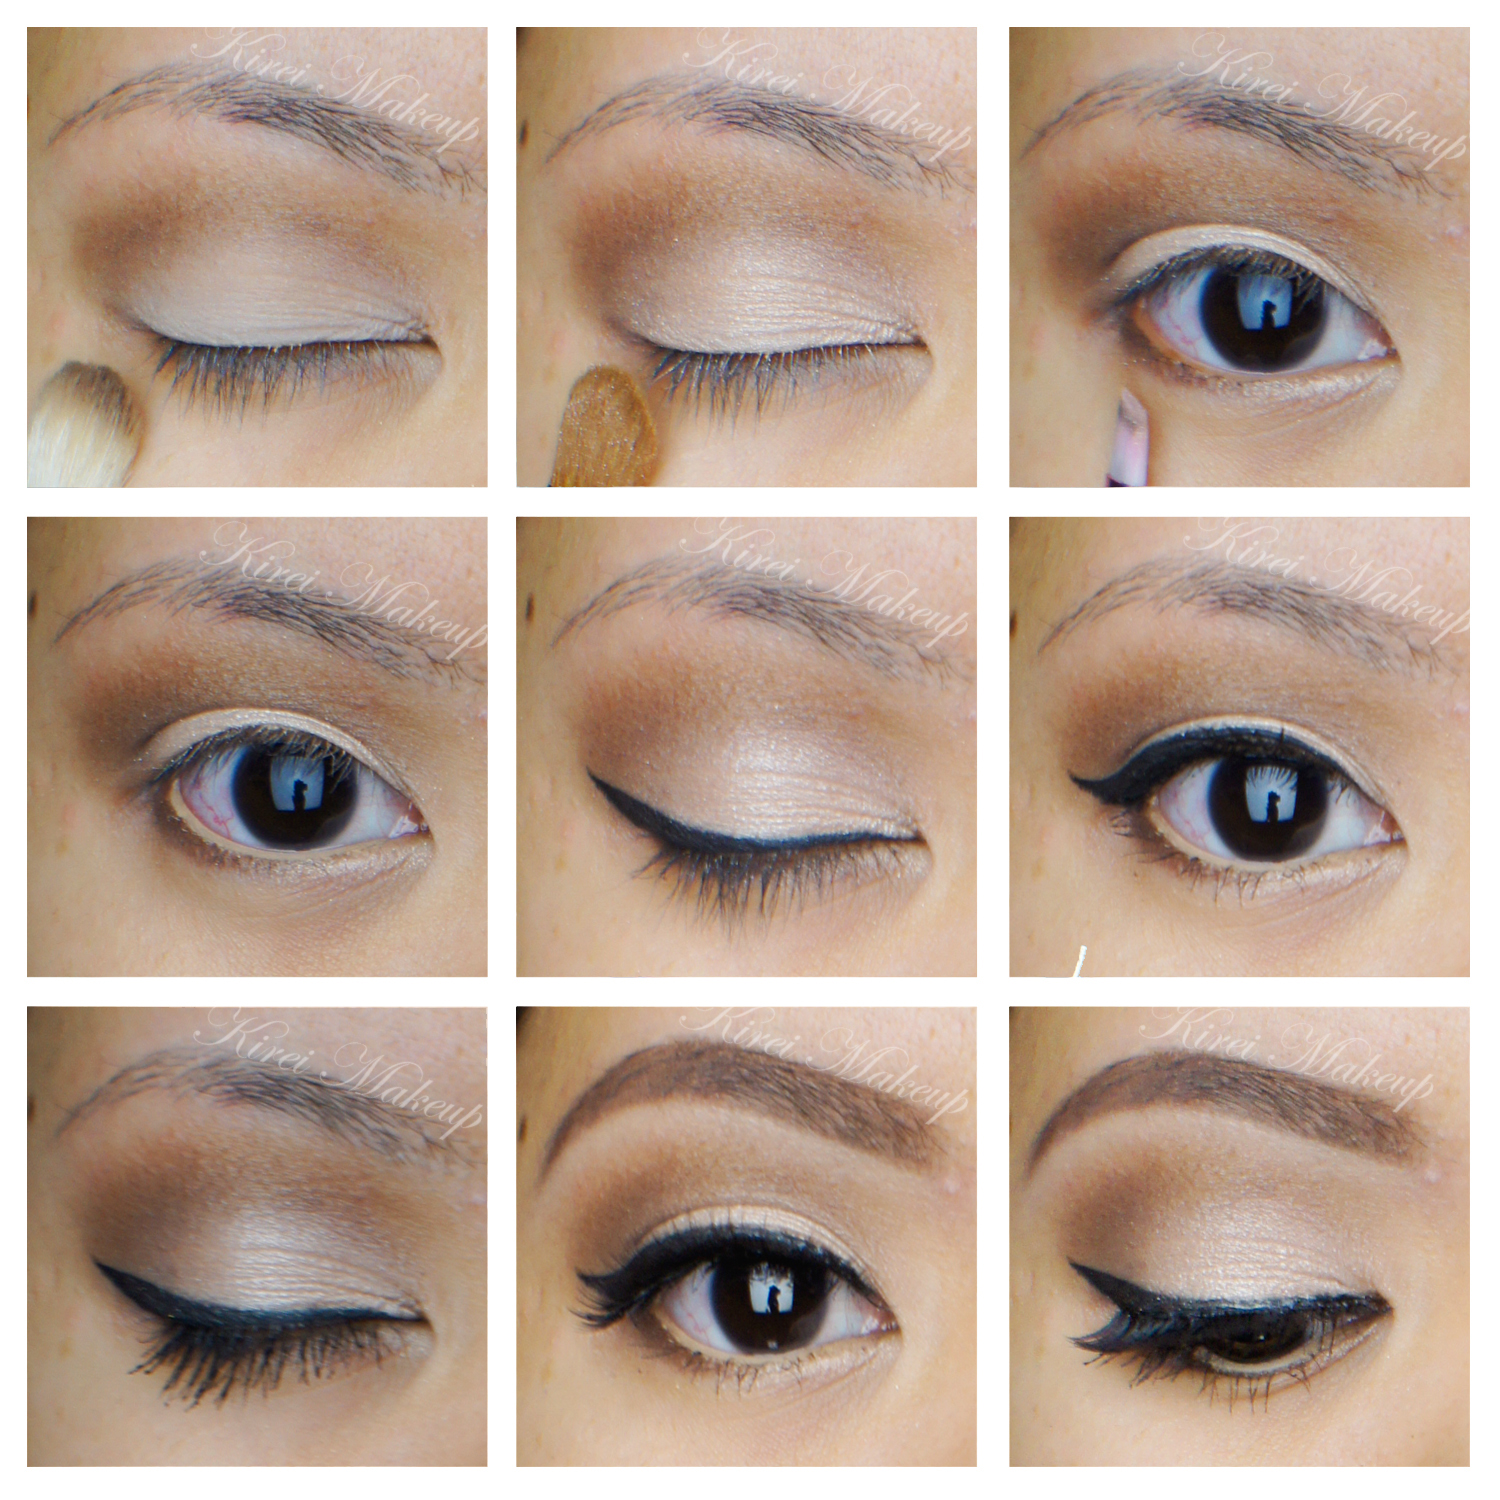
4. Using an angled eyeliner brush, I applied eyeshadow in step no. 1 on the outer corner of my lower lid, and S3 on the inner corner.

5. I applied MAC Chromagraphic eyeliner in NC30 on my waterline.

6. I created a winged eyeliner using L’oreal Infallible Lacquer Liner 24Hr in Blackest Black.

7. I curled my lashes and applied L’oreal Butterfly mascara on both upper and lower lashes.

8. I also applied a set of false eyelashes (again, sample from a friend) to thicken up my lashes.

9. I filled my brows using Anastasia Brow Wiz in Brunette.

10. I applied a little bit of concealer under my brows. If you want to know how I fill my brows, please check my Shu Uemura Brow Pencil post.

asian eye makeup

11. For the face, I applied MAC Pro Longwear foundation in NC30 using CoverFX Cream Foundation brush.

12. I contoured my face using MAC Blunt powder and NARS ITA Kabuki brush.

13. On the cheeks, I applied MAC Breezy Sheertone Shimmer Blush.

14. I highlighted my face using Diorskin Shimmer Star Amber Diamond.

15. I lined and filled my lips using L’oreal Colour Riche in Truly Burgundy. On top of that, I applied a thin layer of Revlon Wine Not matte lipstick.

If you want to find out how I do my lips, please check my How-to Apply [Red] Lipstick

Revlon Wine Not

Vintage Red

My love for OCC lip tars grows stronger every day! I’ve never been the “lipstick” kinda gal but I have a certain fondness for anything red lips. So, I’ve another version of the red lips look using OCC lip tars in Stalker. In this tutorial, I’m using OCC lip tars in Vintage. Stalker is blue red, while Vintage is burgundy red.

I bought mine from Sephora Eaton Center in Toronto. It comes in a small pouch with a small lip brush (I’ll do swatches and all that jazz on my next post).

For the look, the eyes are kept to a bare minimum and I skipped the winged liner. The face is dewy with a little contour. I love how the look turned out. The look is wearable for party or a night-out, or even bridal makeup!

Make sure to re-check the blush after you complete the lips. Since the lip color is quite strong, you might need to add more blush so your face don’t look wash-out.

How-to:

1. I applied L’oreal Magic Lumi foundation with my fingers. I applied it on the center of my face, blending it outwards.

2. I applied Bobbi Brown Corrector in Peach under my eyes, tapping it using my ring finger.

3. I applied L’oreal Magic Touche Concealer on my blemishes and under my eyes.

4. I powdered my T-zone with Cinema Secret loose powder and a tapered face brush.

Brown eyeshadow

5. For the eyes, I applied the light brown eyeshadow from L’oreal Paris Good Luck Charm quad eyeshadow with a flat eyeshadow brush, and blended the crease using a clean blending brush.

6. I applied the dark brown eyeshadow from L’oreal Paris Good Luck Charm along my upper lash line and lower lash line using an angled brush.

7. I used a clean blending brush and applied the highlighter color from L’oreal Paris Good Luck Charm quad under the brow.

8. Using whatever is left on the brush, I applied the highlighter color on the inner corner of my eyelid.

9. I curled my lashes and applied L’oreal Telescopic Shocking Extension mascara on both upper and lower lashes.

10.  I filled my brows using an angled brush and a mix of MAC Omega + MAC Brun.

OCC Lip Tars Vintage

11. Using a face fan brush, I applied Smashbox Fusion Soft Lights in Baked Stardust on the cheekbones.

12. Using the same fan brush, I applied MAC  Sculpting Powder in Shadowy on the hollows of the cheeks.

13. Using a blush brush, I applied a mixture of MAC Cubic and MAC Fleur Powder on the cheeks.

14. Using the lip brush that comes with the OCC Lip Tar, I applied OCC Vintage lip tar on my lips.

  • I applied a thin layer at first on the center of the lips.
  • Using whatever is on the brush, I traced the outline of my lips to make sure I like the shape.
  • I applied another thin layer to complete the look.