Neutrally Blue

I LOVE Urban Decay Naked Basics Palette! There, I said it! At first I thought that the UD Naked Basics is just another hype. I mean, I like my UD Naked 1 and 2, but I didn’t love it. I thought that the Naked Basics would be another palette that’s just so-so. Boy, was I wrong or what?!

I’ll talk more about the palette itself on my review, but today I wanted to share this look with you. The overall look is very soft and feminine. This look can be worn during the day if you want some definition on your eyes, or for engagement pictures. Obviously you can skip the blue eyeliner on the tightline and change it to beige/white/black instead.

The reason why I chose to wear the Stila Cobalt Blue eyeliner on the waterline is to show you guys that you can add color into your makeup without having to wear it on your lid. This is a good way to incorporate color, especially if you are not used to it. Not to mention, the blue eyeliner makes the white part of your eyes look whiter, thus making you look more awake.

How-to:

1. I applied MUFE Aqua Shadow in 28E all over my lid.

2. Using a clean blending brush, I applied UD Naked Basics in Faint on the crease.

3. Using a Sephora Bullet Crease (no. 221) brush, I applied UD Naked Basics in Crave on the outer V.

4. Using the same brush as step 2, I blended the eyeshadow on the crease.

5. I applied UD Sin eyeshadow all over the lid, focusing the color on the center of the eyelid using a flat eyeshadow brush.

6. Using a small shader brush, I applied Faint on the inner half of the lower lid and then Crave on the outer half.

7. I lined my waterline using Stila Cobalt Blue eyeliner.

8. I created a winged liner along the upper lash line using Kanebo Kate Super Sharp Liner.

9. I curled my lashes and applied L’oreal Carbon Black mascara on both upper and lower lashes.

10. I also applied false eyelashes sample given to me by a friend (currently not for sale to public).

11. I filled my brows in using Anastasia Brow Wiz in Brunette.

12. Using a clean fluffy blending brush, I applied Venus from UD Naked Basics palette under the brow.

Stila Cobalt Blue eyeliner

13. I applied MUFE HD foundation using Shiseido foundation brush all over my face.

14. I applied MAC Shadowy powder as contour, and Benefit Hervana blush on my cheeks.

15. On the lips, I applied Tarte Lipsurgence in Hope.

Natural makeup using Urban Decay Naked Basics

Red Invasion [Collaboration]

Lately, my Twitter has been flooded with chats between several Indonesian Beauty Bloggers and myself. These bloggers are: Yonna Kairupan, Iva Asih Era Chrysta, Lauren Renturquise, Sha Aullia, and Riyanti Teressa. So, we decided to do a little collaboration and we wanted to paint the town red 😉 By town, I mean the Indonesian Beauty Bloggers Facebook page.

Anyhow, we decided to do red lips look, and Yonna had posted hers on her youtube page. I decided to post mine next and the obvious choice for me was to use MAC Russian Red (again). I can never get tired of MAC Russian Red, it’s just so gorgeous! It’s definitely my favorite.

For the eyes, I think I wanted to pack more punch on it, so I did a slightly more smoky look than the other tutorial in MAC Russian Red post. I also added a set of false eyelashes on me lashes, since I bought a new one. I don’t love the falsies, but I don’t mind it. Not long enough and not thick enough. Oh well! I also used my new Sleek Makeup iDivine Storm palette, but there’s no name for each shade for this palette. So, I named the shades on the tutorial below based on the hue of each eyeshadow. If you’re confused, just leave the question below 🙂

How-to:

1. I applied MUFE Aqua Shadow in 28E all over the lid.

2. Using a clean fluffy brush, I applied the matte light brown from Sleek Makeup iDivine Storm palette.

3. Using another clean fluffy brush, I applied matte dark brown from Sleek Makeup iDivine Storm palette.

4. I applied the champagne shade from Sleek Makeup iDivine Storm palette on top of the MUFE Aqua Shadow 28E with a flat eyeshadow brush.

5. Using another blending brush, I applied black from Sleek Makeup iDivine Storm palette.

6. I applied both champagne (inner corner) and black (outer corner) from Sleek Makeup iDivine Storm palette on the lower lid using an angled brow brush.

7. Using Kanebo Kate Super Sharp eyeliner, I created a feline flick/cat-eye liner/winged liner on the upper lash line.

8. I curled my lashes and applied Maybelline Volume Express Turbo Boost mascara on both top and bottom lashes.

9. I lined the outer half of my waterline using L’oreal Voluminous Smoldering eyeliner.

10. I applied DUP eyelashes in 906 on the top lashes.

11. For the brows, I applied MUFE Aqua Brow Gel.

sleek makeup storm

12. On my face, I applied Urban Decay Naked Skin foundation.

13. I applied MUFE HD concealer to cover my blemishes and under eye circles.

14. I powdered my face using Cinema Secret loose powder.

15. I contoured my face using NARS Kabuki Ita brush and MAC Shadowy powder.

16. I applied MAC Fleur Power on my cheeks.

17. I lined and filled my entire lips with MAC Redd lip liner.

18. I, then, applied MAC Russian Red on my lips.

asian red lips

MAC Russian Red

As you all know from my Twitter, I’ve been looking forward to use my M.A.C Russian Red lipstick again. I know, I know, it seems like this week is a MAC week. Well, can’t be helped, I’m trying to fall in love with MAC again! Afterall, MAC was one of the reasons why I went into makeup in the first place.

So, talking about MAC Russian Red, this is the best true-red lipstick. If you want a cooler red, you can try MAC Ruby Woo instead. I also love how this lipstick has a matte finish to it. I’m not a big fan of shiny or glossy lips, so I love how even though this lipstick has a matte finish, it is not drying. It also helps if you prep your lips before application to ensure your lips aren’t chapped.

I purchased this Chanel quads in Intuition in February and didn’t have the chance to play with it, so I had to use it for this look. I love how soft and pretty the eyes look. If you are looking for a neutral, day makeup, do try the eye-look and you can skip the red lipstick.

I’ve done a similar look in Battle of the Classics.

How-to:

1. Using a flat eyeshadow brush, I applied the gold eyeshadow from the Chanel Intuition quad.

2. Using a fluffy blending brush, I applied the deep brown shade from the same quad on my  outer V and on the crease. I used whatever was left on the brush and swept it along the lower lash line.

3. I blended out the crease using a clean fluffy brush.

4. Using an angled eyeliner brush, I created a winged liner along the upper lashline.

5. I applied MAC Chromagraphic liner in NC30 on my tightline.

6. Using a small flat shader brush, I applied the pink highlighter shade from Chanel Intuition quad on the inner corner of the lower lid and under the brow.

7. I curled my lashes and applied Maybelline Volume Express mascara on both upper and lower lashes.

8. I filled my brows in using MUFE Aqua Brow Gel.

9. For extra drama, I applied Quo false eyelashes.

natural wedding makeup

10.  For the face, I applied MUFE HD Foundation using a foundation brush.

11. Using whatever was left on the brush, I swept it across my lips.

12. I lined and filled my lips using MAC Redd lip pencil.

13. Using a lip brush, I applied MAC Russian Red on my lips.

14. I powdered my face using a loose translucent powder.

15. I contoured my face using MAC Shadowy and applied MAC Fleur Power on the cheeks as blush.

asian red lips

Summer Splash

This look today is one of my fav. summer makeup. It doesn’t matter where I am in the summer, somehow I always seem to resort back to this look. It’s very light and bright, and of course you can always eliminate some of the steps below to make it easier and to suit your own look. Most of the time, I only used the MAC Melon pigment on my lid with mascara, skipping the liner and the contour colors altogether.

Anyways, the 2nd look to this post used an orange lip liner. I don’t know where my orange lipstick is, so I only used the lip liner to fill my entire lip. Of course you can change the lips to whatever color you want, red, pink, or even nude. No rules, just fun playful makeup.

How-to:

1. Using a synthetic brush, I dipped the brush in water and then dipped it in MAC Melon pigment. I mixed it at the back of my hand to turn it into a paste form and applied this paste to my lid, and on the inner corner of the lower lid.

2. Using a shader brush, I applied MAC Bronze eyeshadow on the outer V and on the crease. I used whatever left on the brush and ran it through the lower lid.

3. Using a clean fluffy brush, I blended the crease to remove any harsh edge.

4. I applied Smashbox Deep Golden Brown on the outer corner, blending it inwards. I focused most of the color on the outer V of the lid.

5. Using whatever left on the brush, I applied it on the lower lid.

6. Using an angled eyeliner brush and MUFE Aqua Black, I created a winged liner along the upper lash line.

7. I lined my waterline using whatever product remained on the brush from step 6.

8. I curled my lashes and applied Maybelline Express Volume Turbo Boost mascara on both top and bottom lashes.

9. I filled my brows in using Shu Uemura Hard Formula 9 brow pencil.

natural makeup

10. I applied UD Naked foundation all over my face using a foundation brush.

11. I contoured my face using MAC Studio Tech in NW 55. (If you want to know how I contour my face, check out this post for powder contouring or here for cream contouring)

12. I applied MAC Peaches blush on the cheeks.

13a. For the lips, I applied YSL Pur Couture rouge no. 17 using a lip brush.

natural bridal makeup

13b. For the orange lips, I lined and filled my lips using MAC Entertain Me lipliner.

orange lips

Product of The Week: MUFE HD Foundation

Sorry for the late Product of the Week installment! I’m still recuperating from my flu. Anyhow, here’s one of my fav. foundation on my kit! Make Up For Ever HD Foundation! I’m sure you’ve been hearing a lot of people raving about it. I’m going to share with you why I choose this as My Product of the Week!

It wasn’t until last year that I completely fell in love with this foundation. I think it was just a big rave and overrated. I’ve used it on models and brides, they absolutely love the finish. It’s great for sensitive skin, no reaction whatsoever (so far). It looks great photographed too, no flash back. However, I didn’t seem to like it on myself until just recently, for some reason. I’m not even sure why. Might be because currently my shade is quite hard to match to most of the foundation in the market.

Anyways, I bought mine for CAD$49 (not incl. tax) in Sephora Canada. It’s a big price tag, just CAD$1 difference than luxury brand foundation like Chanel or Dior. I decided that no. 118 would be a good match for my skin. Back in 2009, I had to mix 117 and 123 for my shade since I already owned those shades for my kit.

What is MUFE HD Invisible Foundation?

The MAKE UP FOR EVER HD Complexion products use innovative formulas to create a new generation of make up which is both invisible on HD cameras and to the naked eye. The HD Foundation is an oil-free medium-to-full coverage liquid foundation which covers skin imperfections, while remaining invisible on-screen and in real life. Its extremely fine texture is supple and easy to apply. Enriched with moisturizing agents, it leaves the skin soft and radiant. It is available in a wide range of shades to suit all skin tones.

MUFE HD foundation 118 review

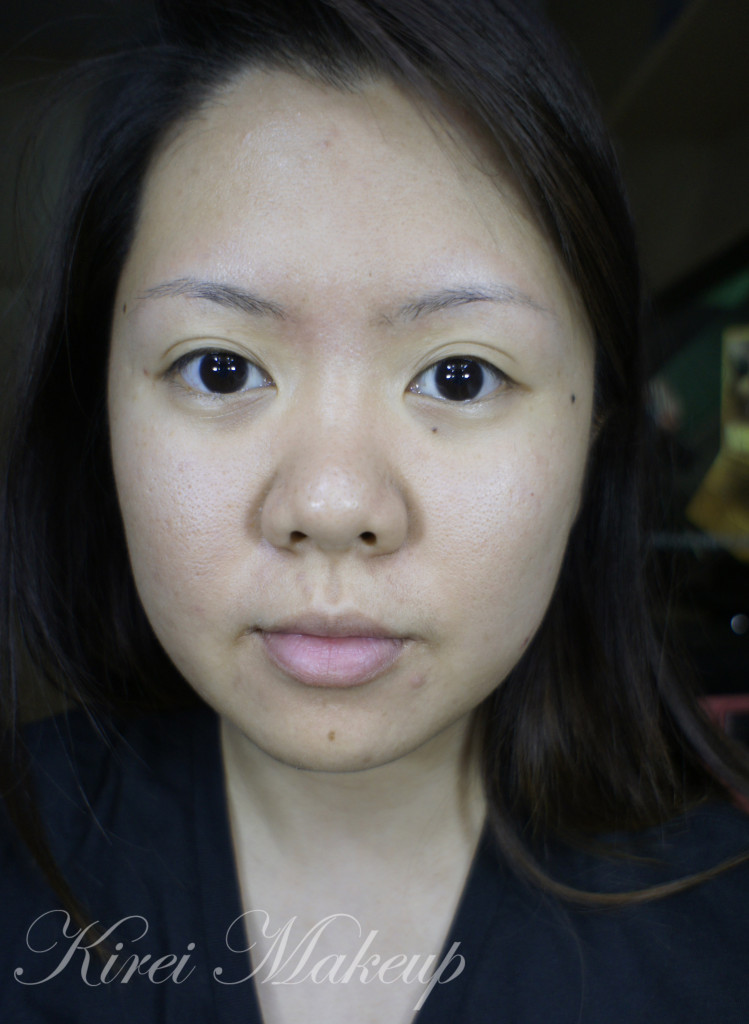
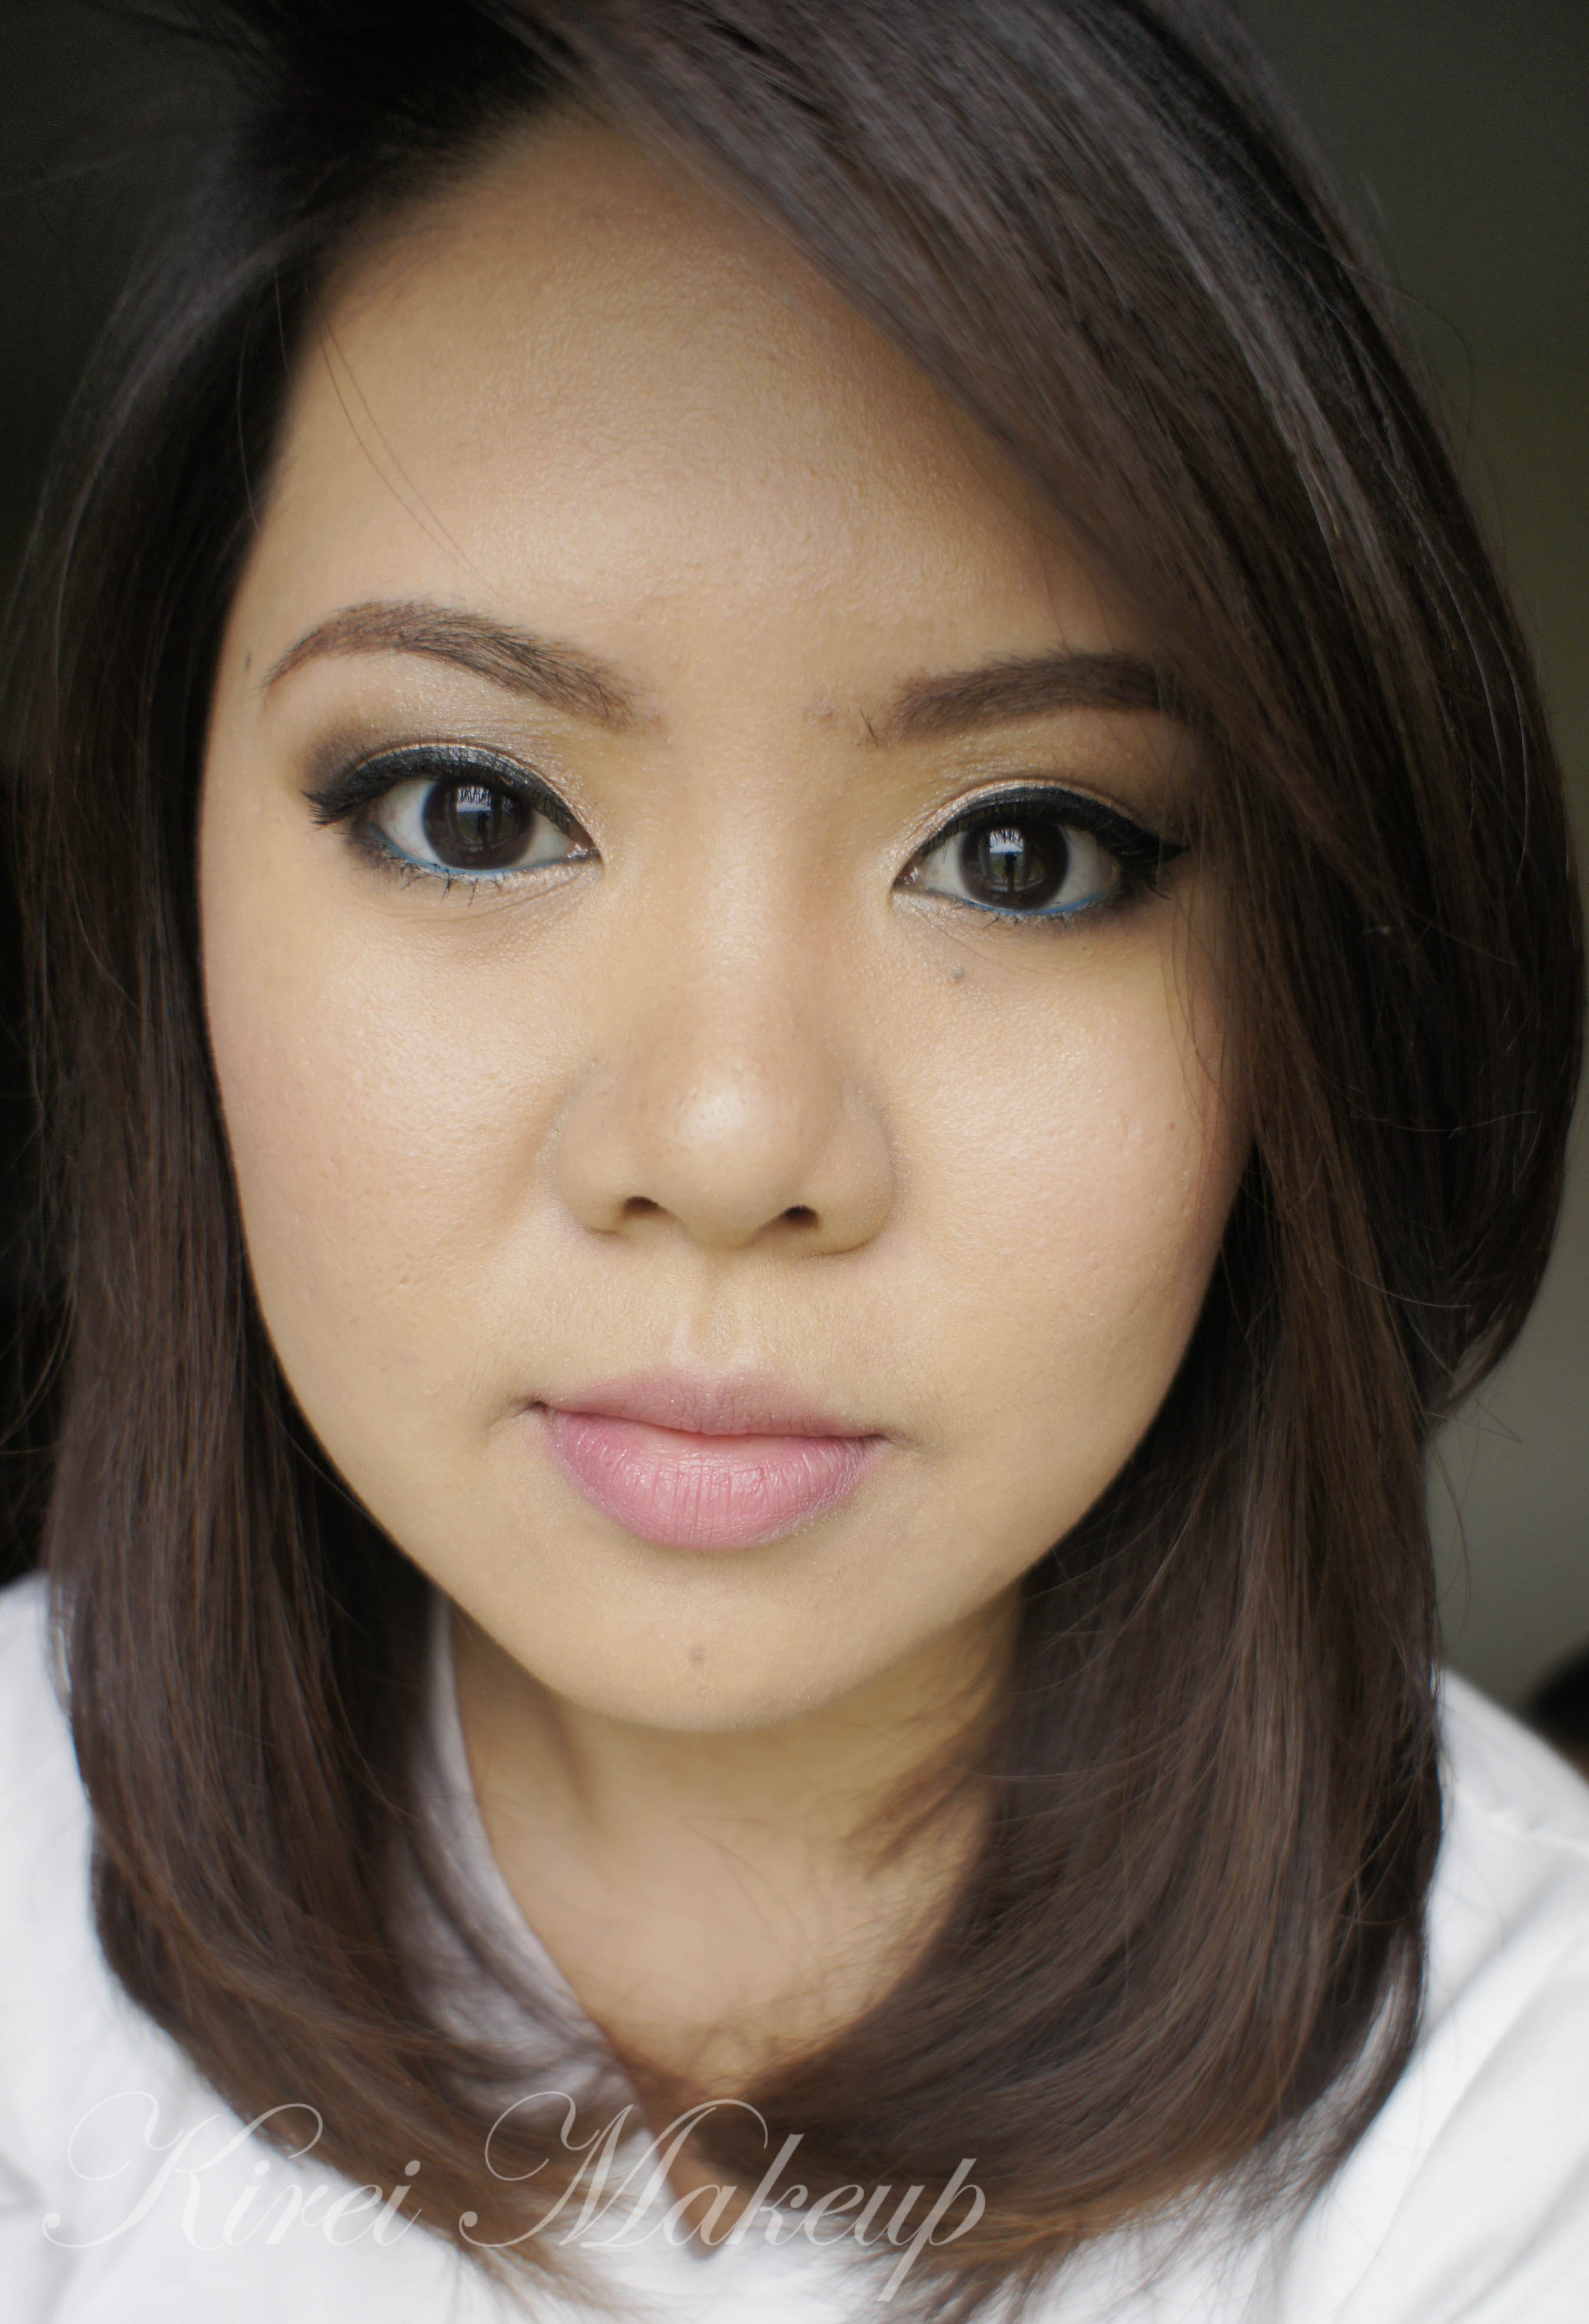
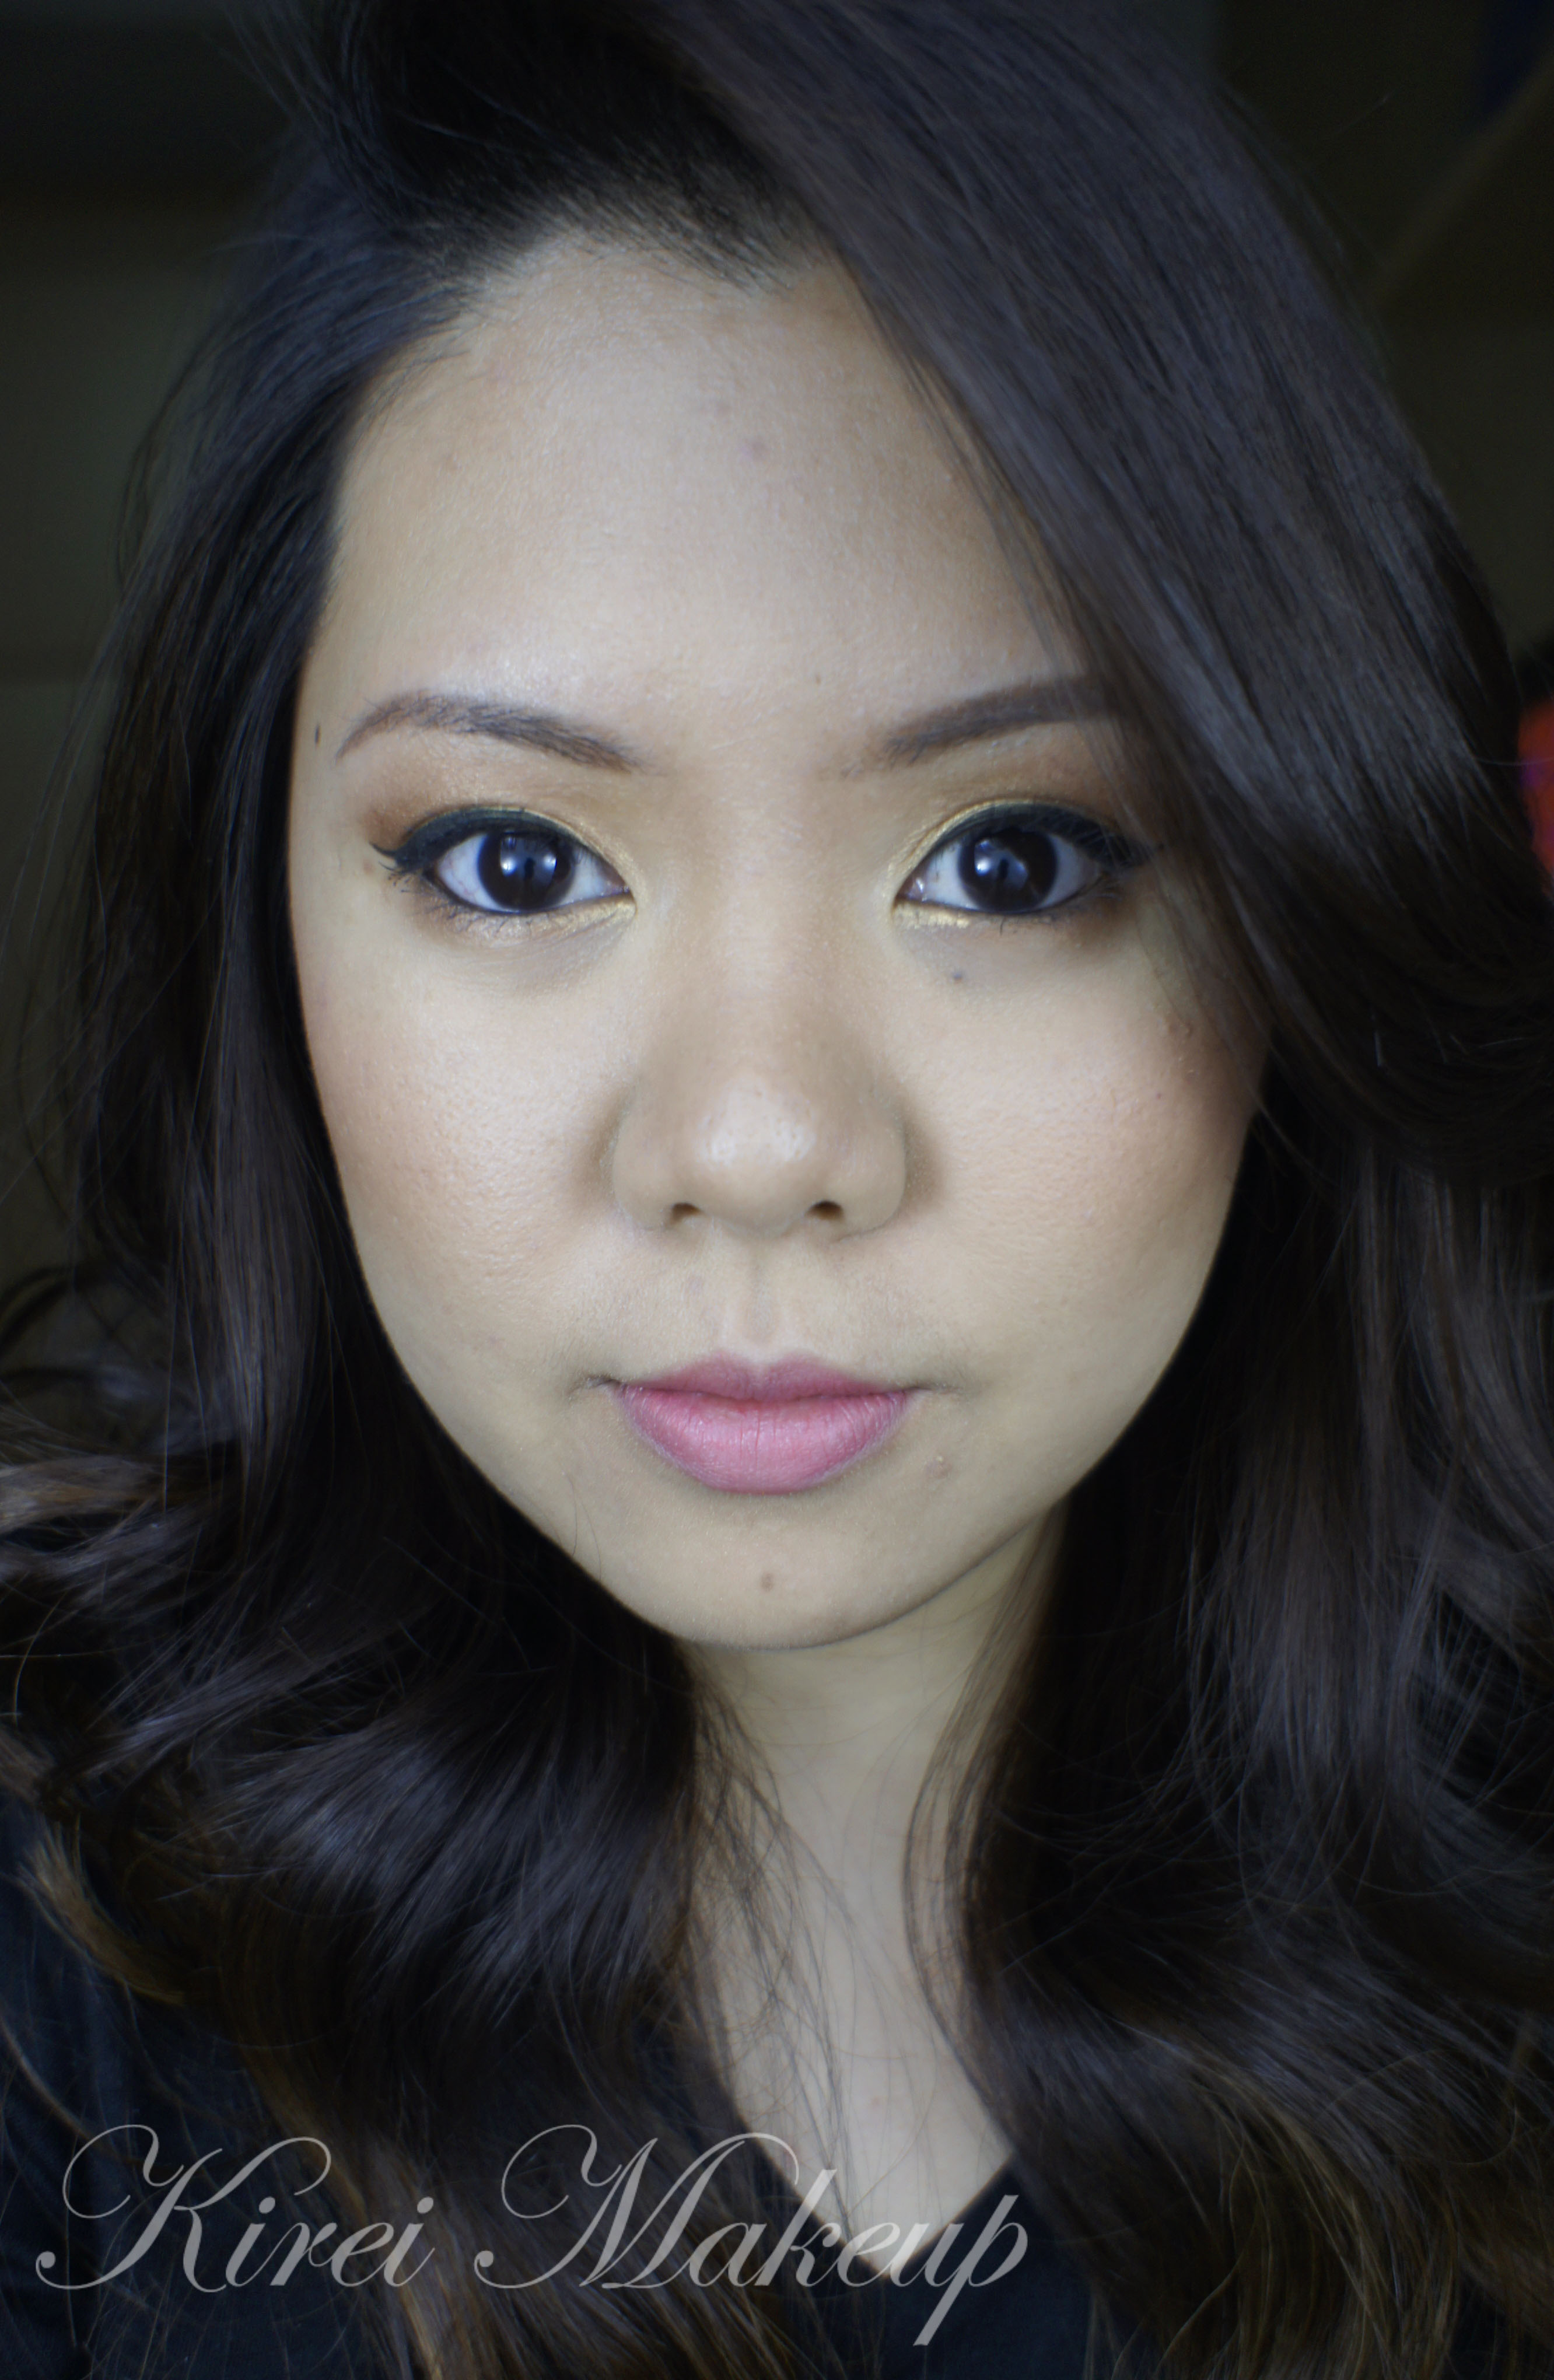
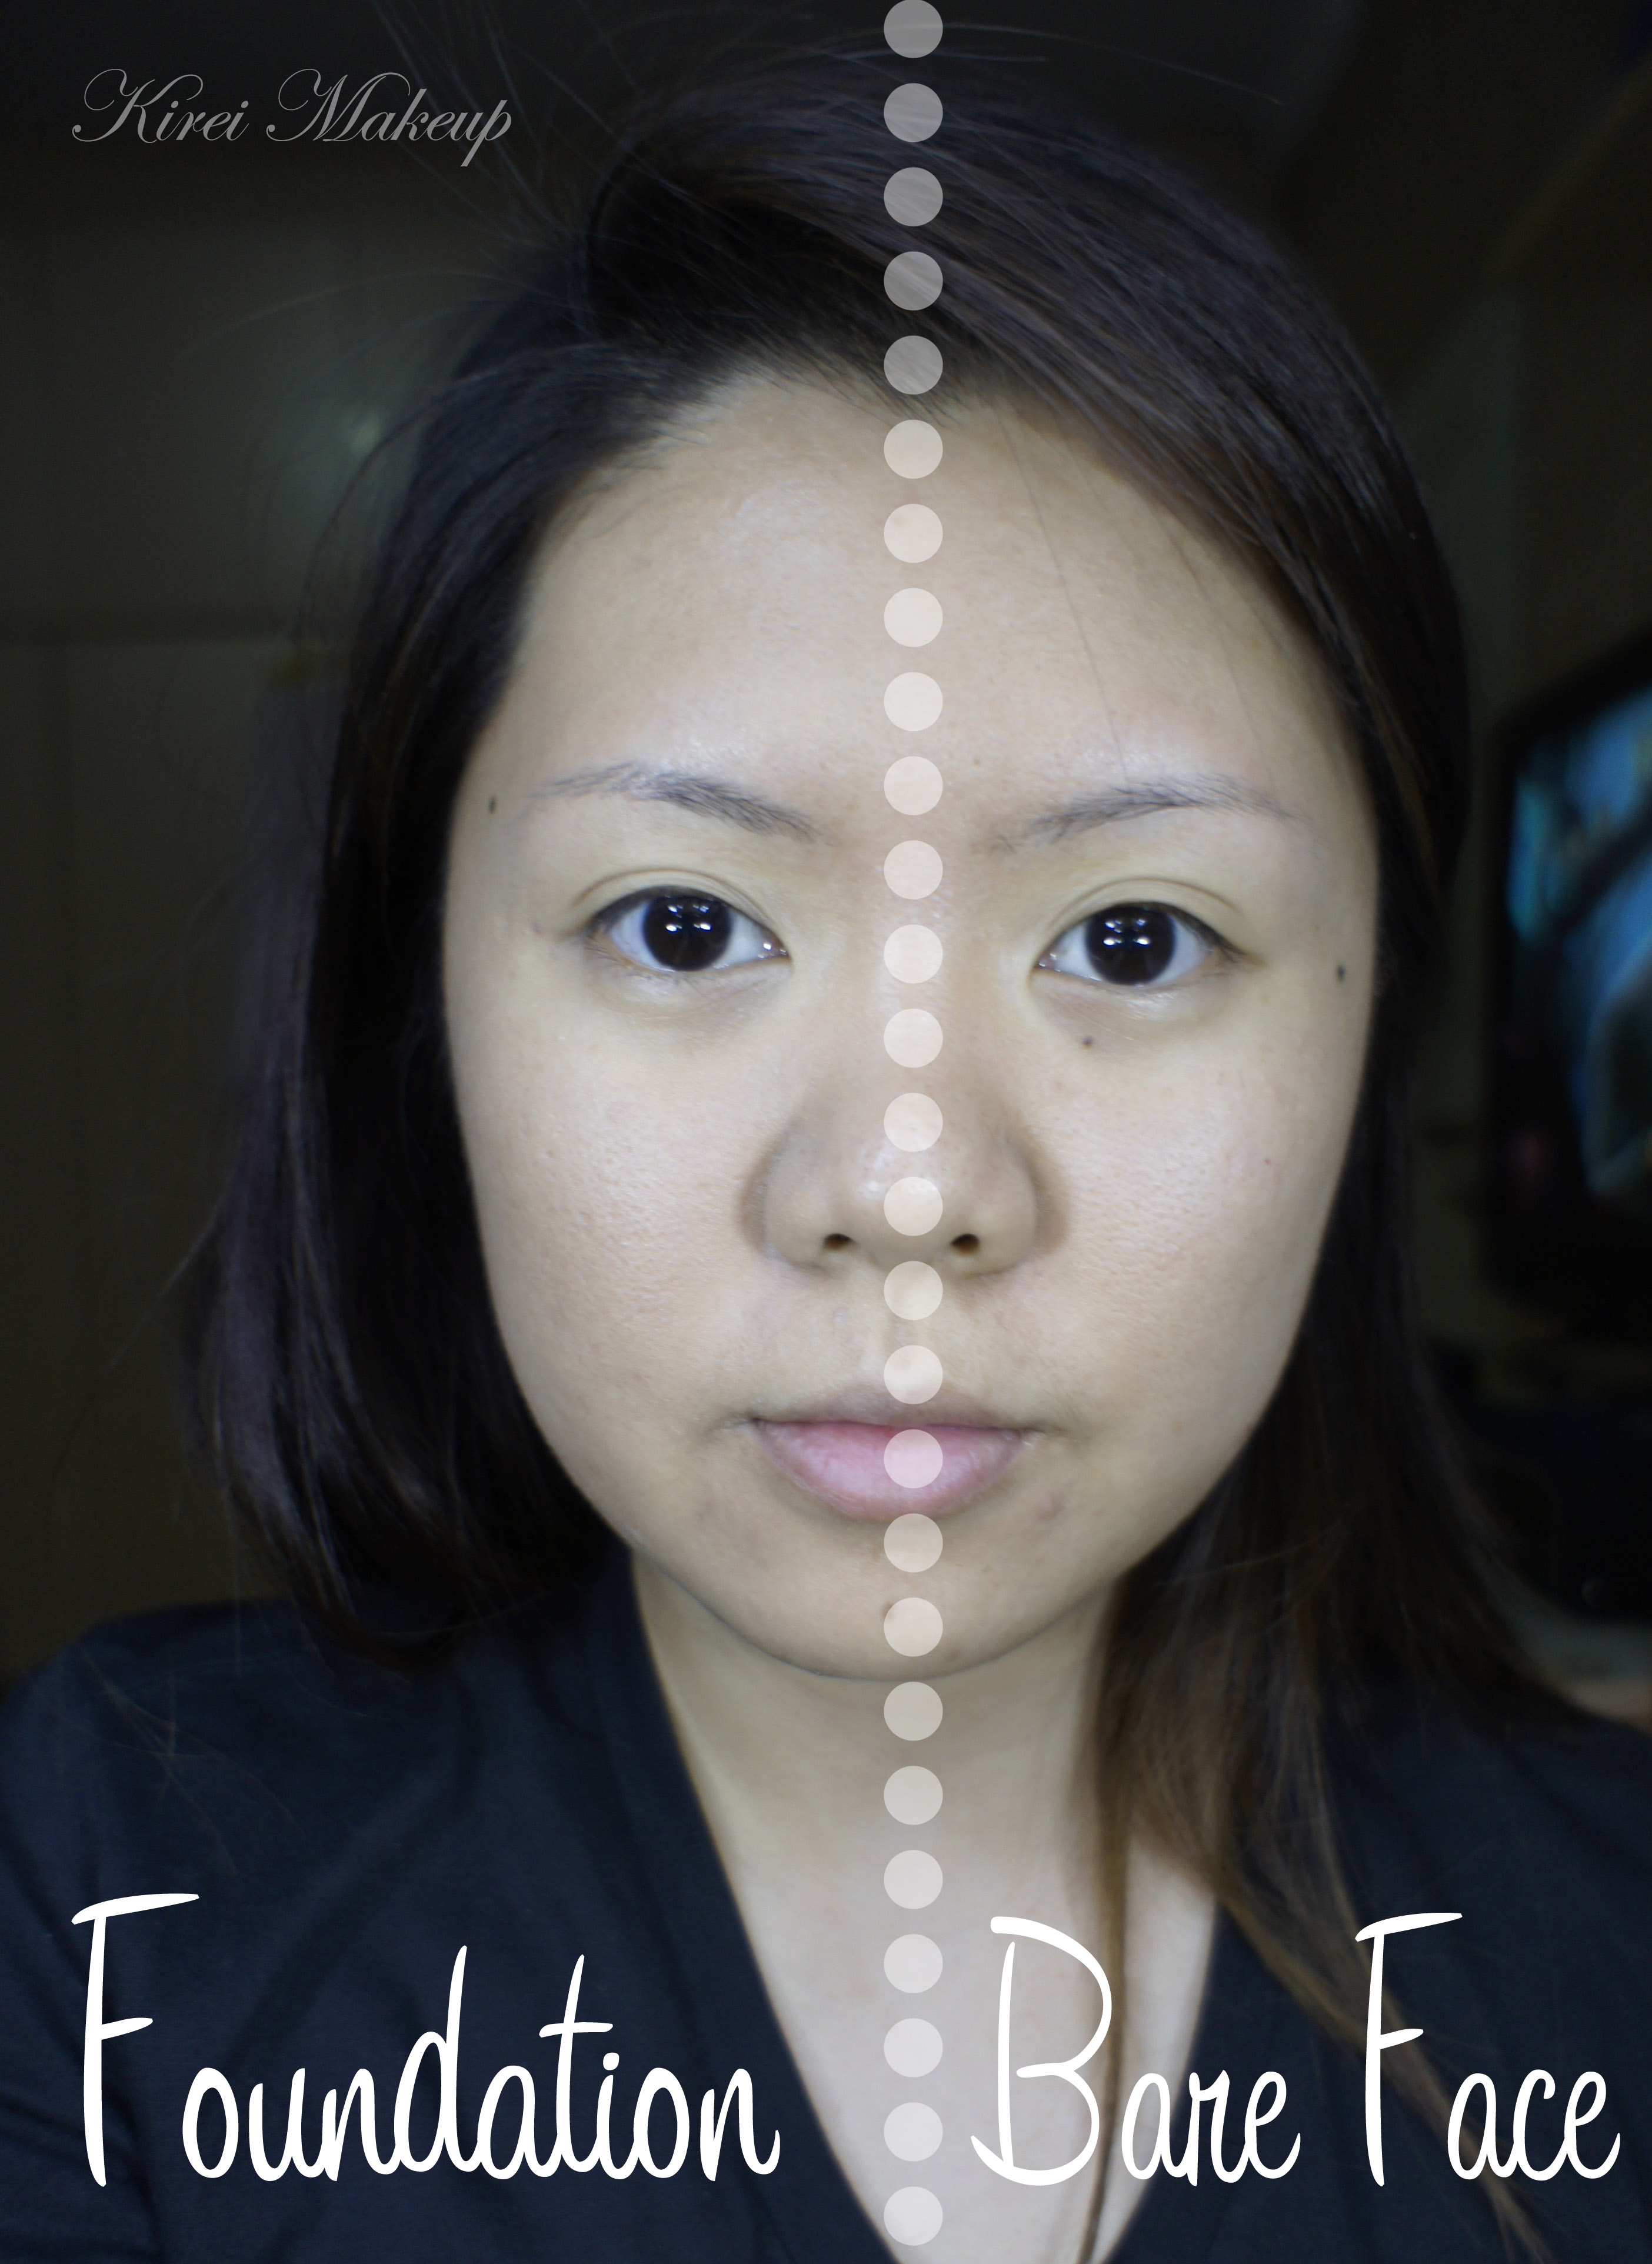
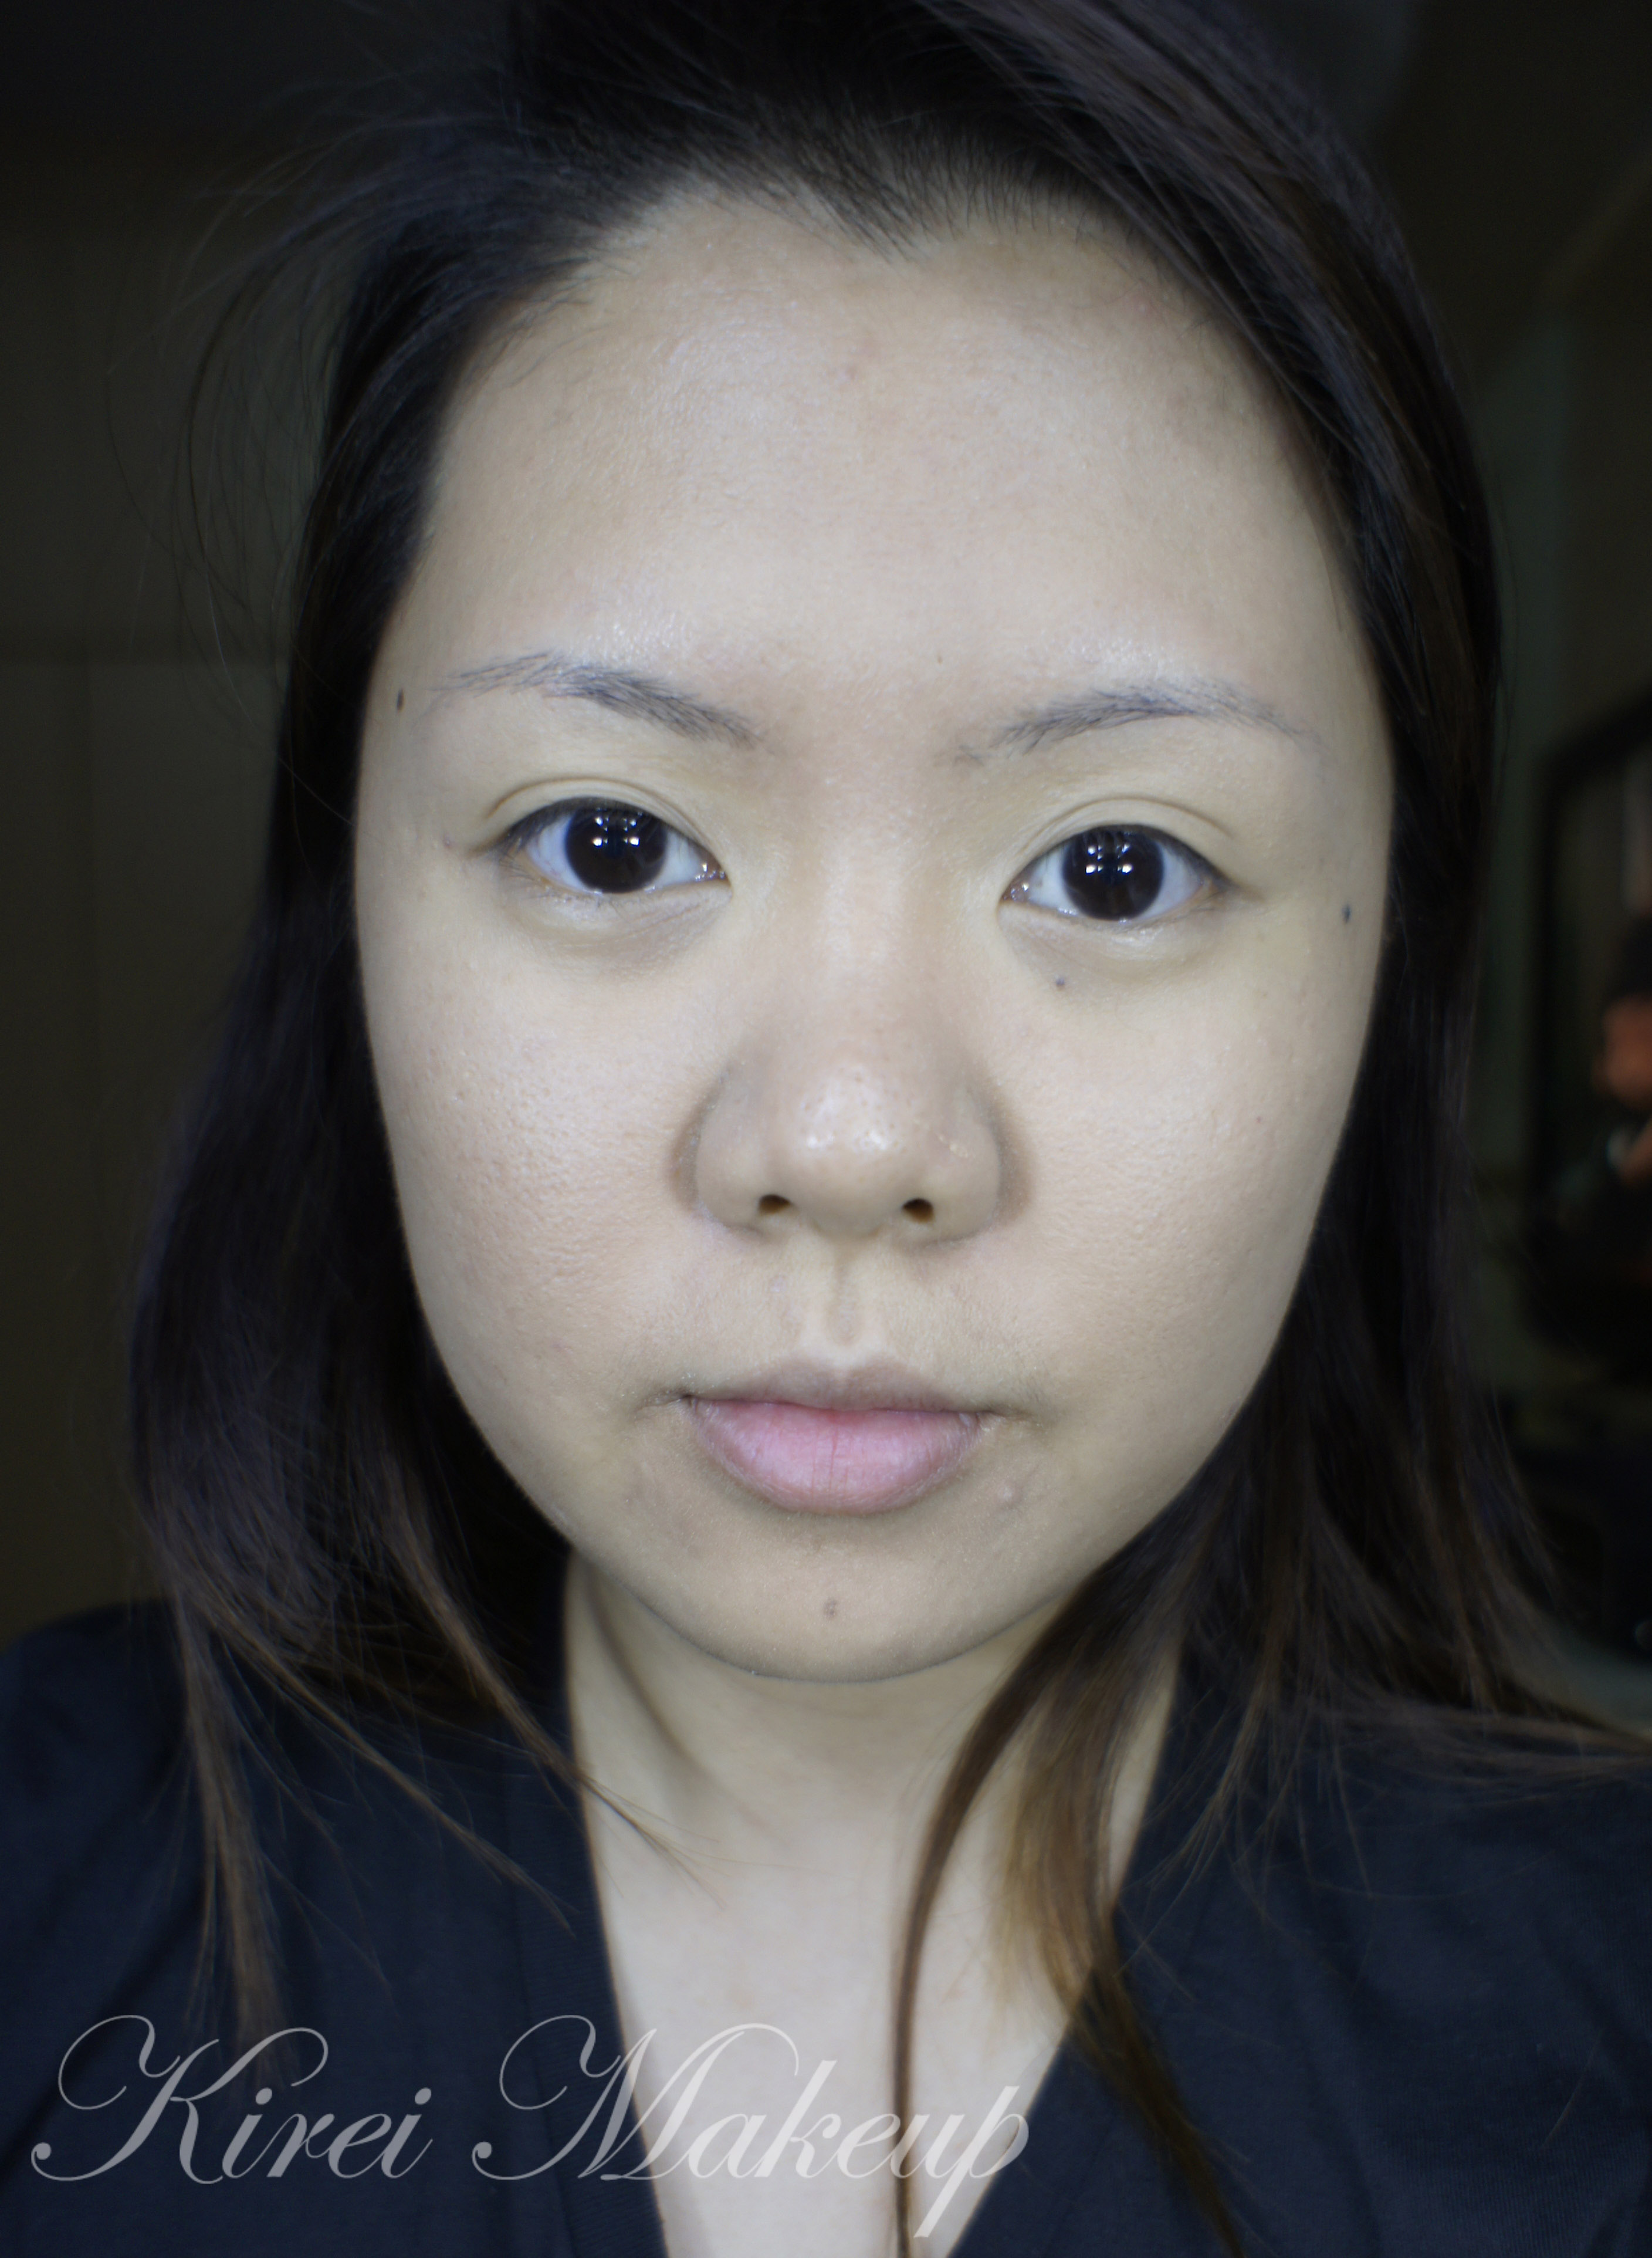
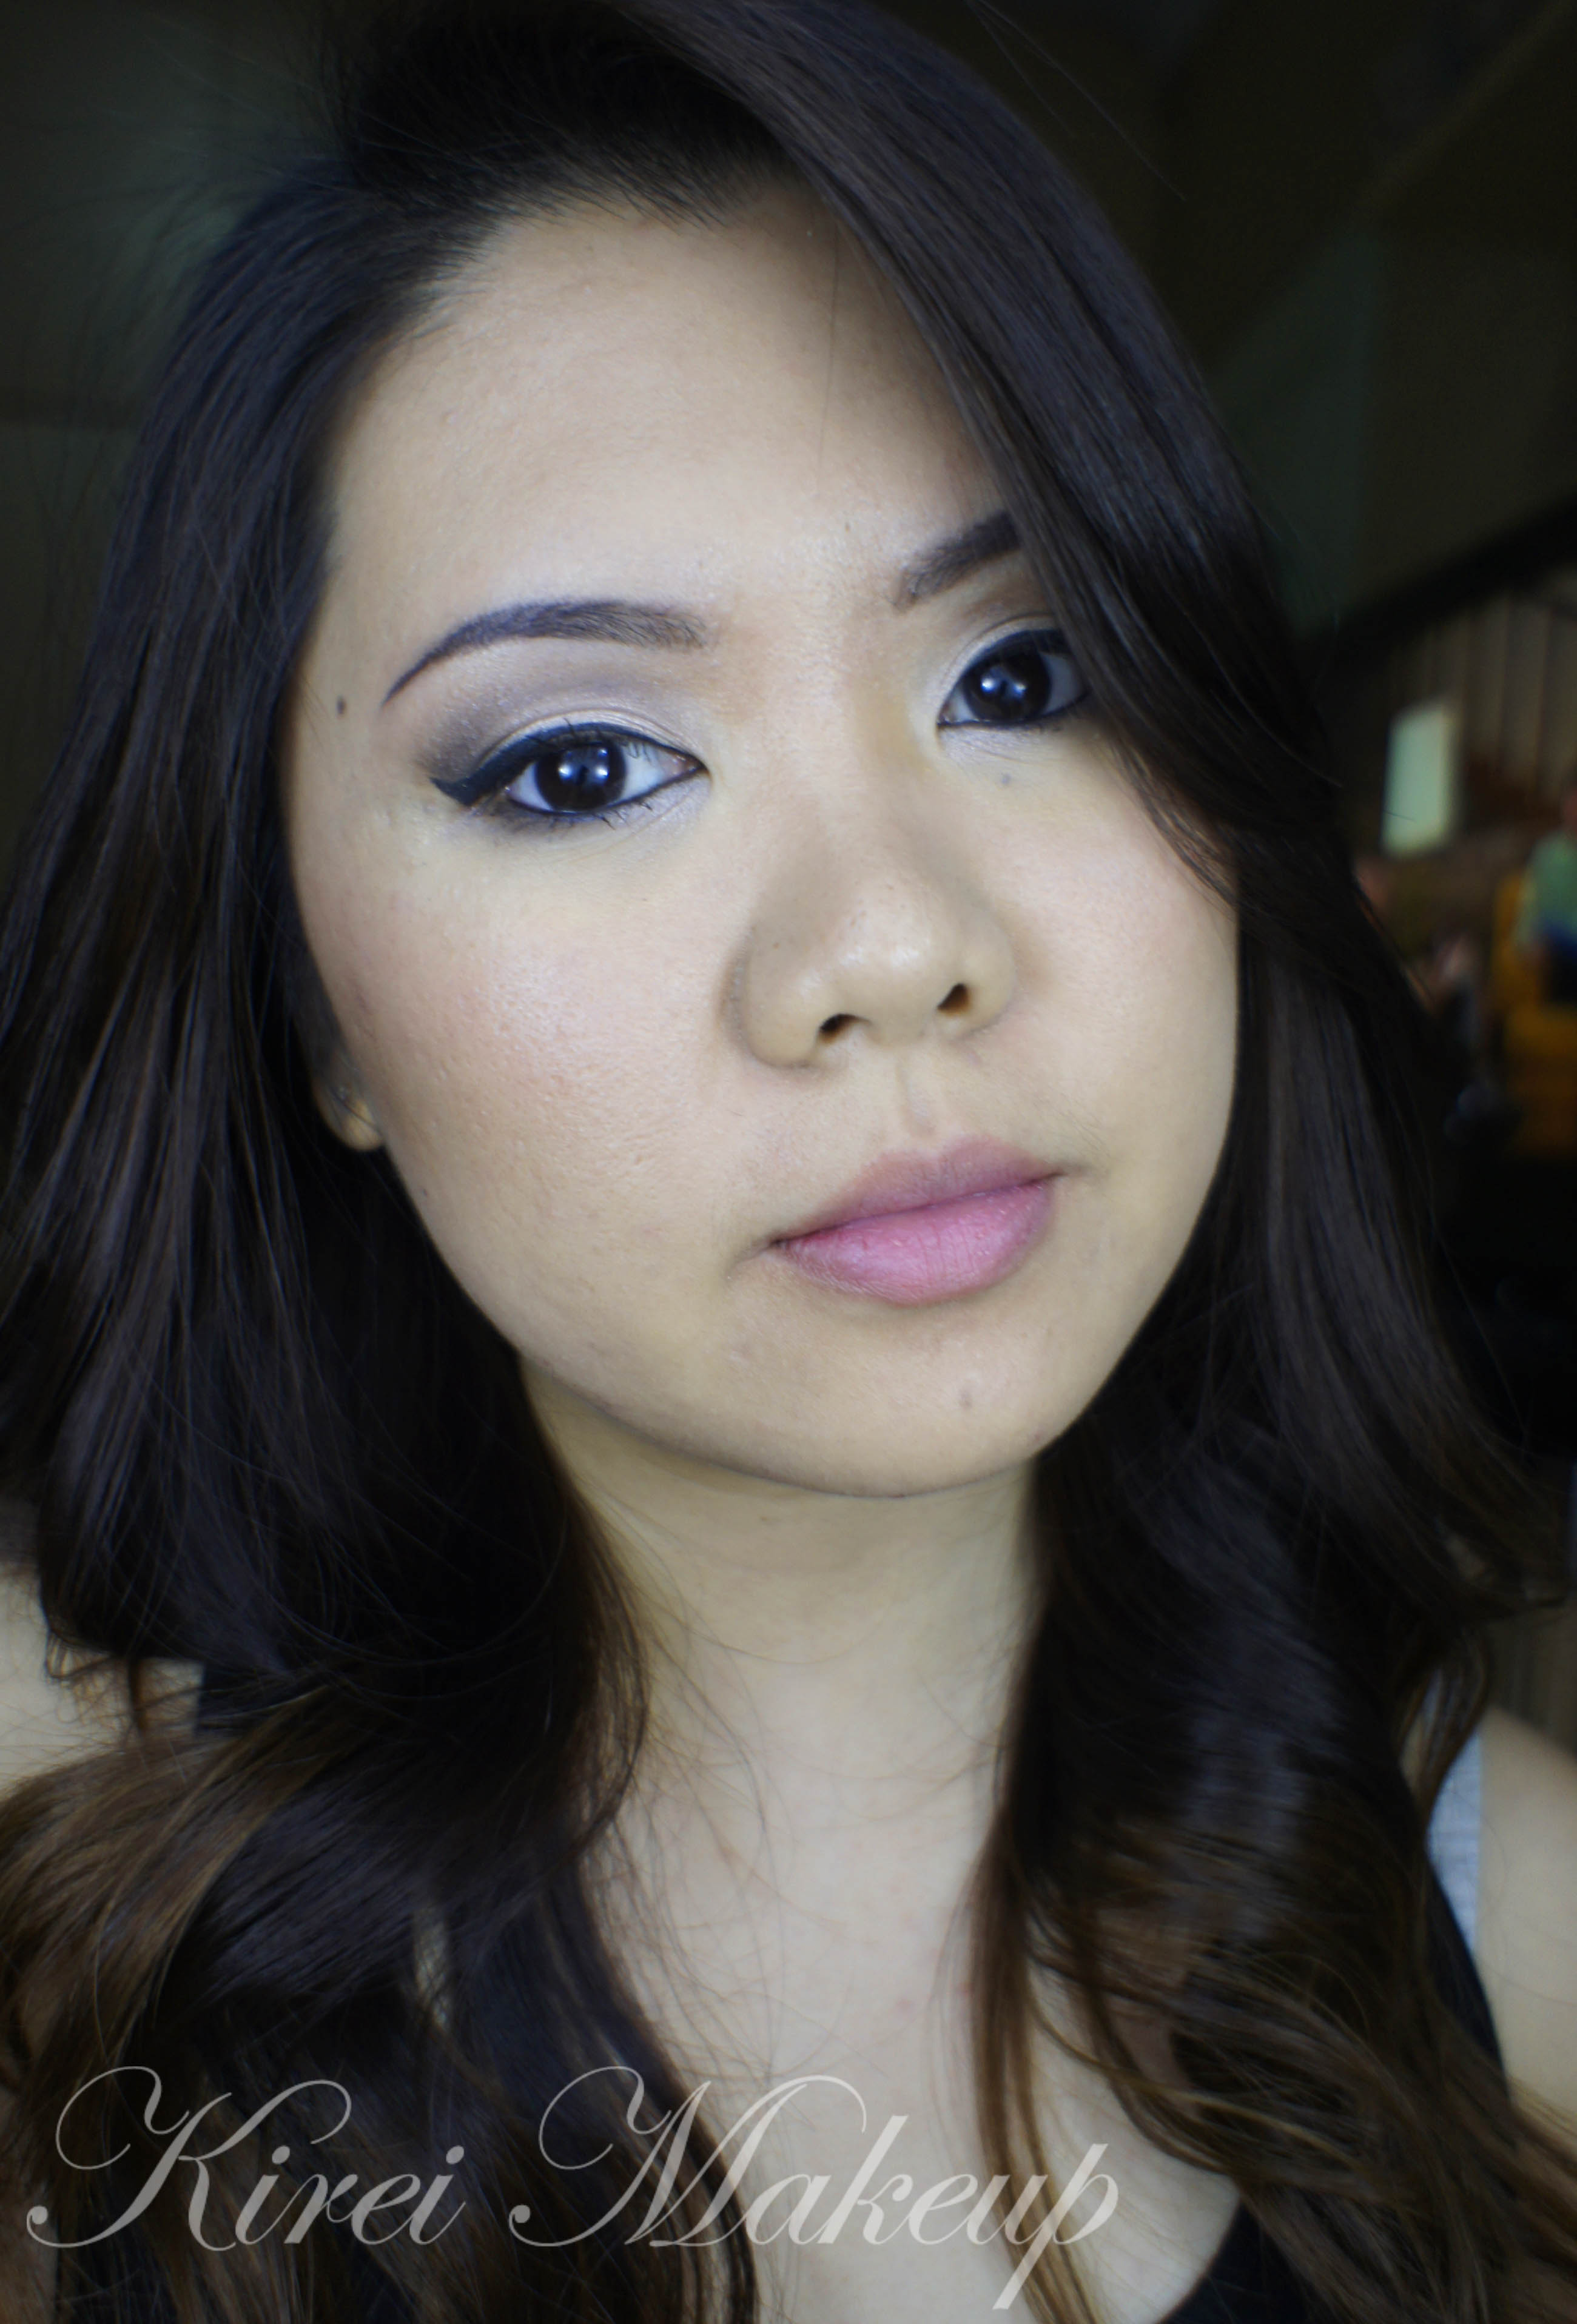
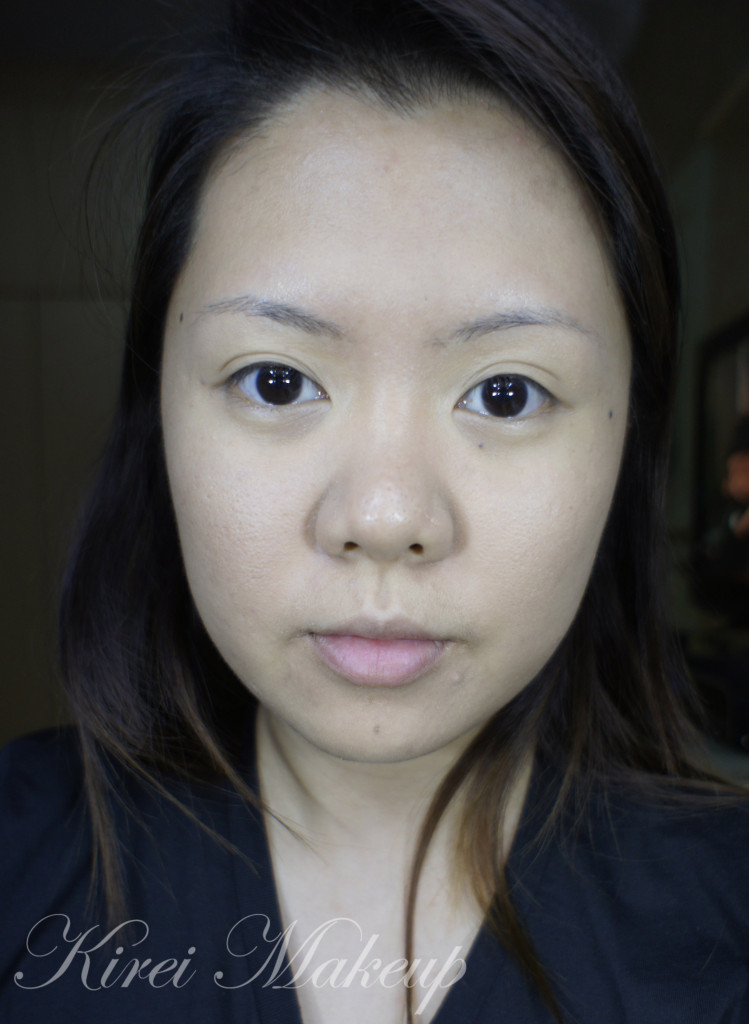
I’m not wearing any makeup on the photo above and as you can see, I have a lot of redness and acne scars, and a gigantic pimple! My skin condition at the moment is combination oily.

No. 118 is described as Flesh – for light skin with beige undertone (Sephora Canada).  I tend to use this shade 118 or 117 on Chinese-descendant Indonesians as well. 118 is a good match for those with skintone like mine  *UPDATE: I bought shade 120 and it was perfect for my skintone! It’s yellow based, while 118 is more on a neutral shade (beige). So, I went from a good match to a perfect match! Those who are quite fair might like 117. As a comparison, I’m slightly lighter than an NC 30, but darker than NC 25 in MAC Studio Fix Fluid. I’m an NC 27 for MAC Studio Tech foundation. I’m 4.0 in Urban Decay Naked foundation.

MUFE HD foundation 118 review

Coverage

This product is supposed to have a medium-to-full coverage. I agree. With this foundation (as well as other medium/full coverage foundation) you can actually play around with the coverage. If you want a thin, sheer coverage, apply this to your face with a damped sponge or you can mix it with your moisturizer.

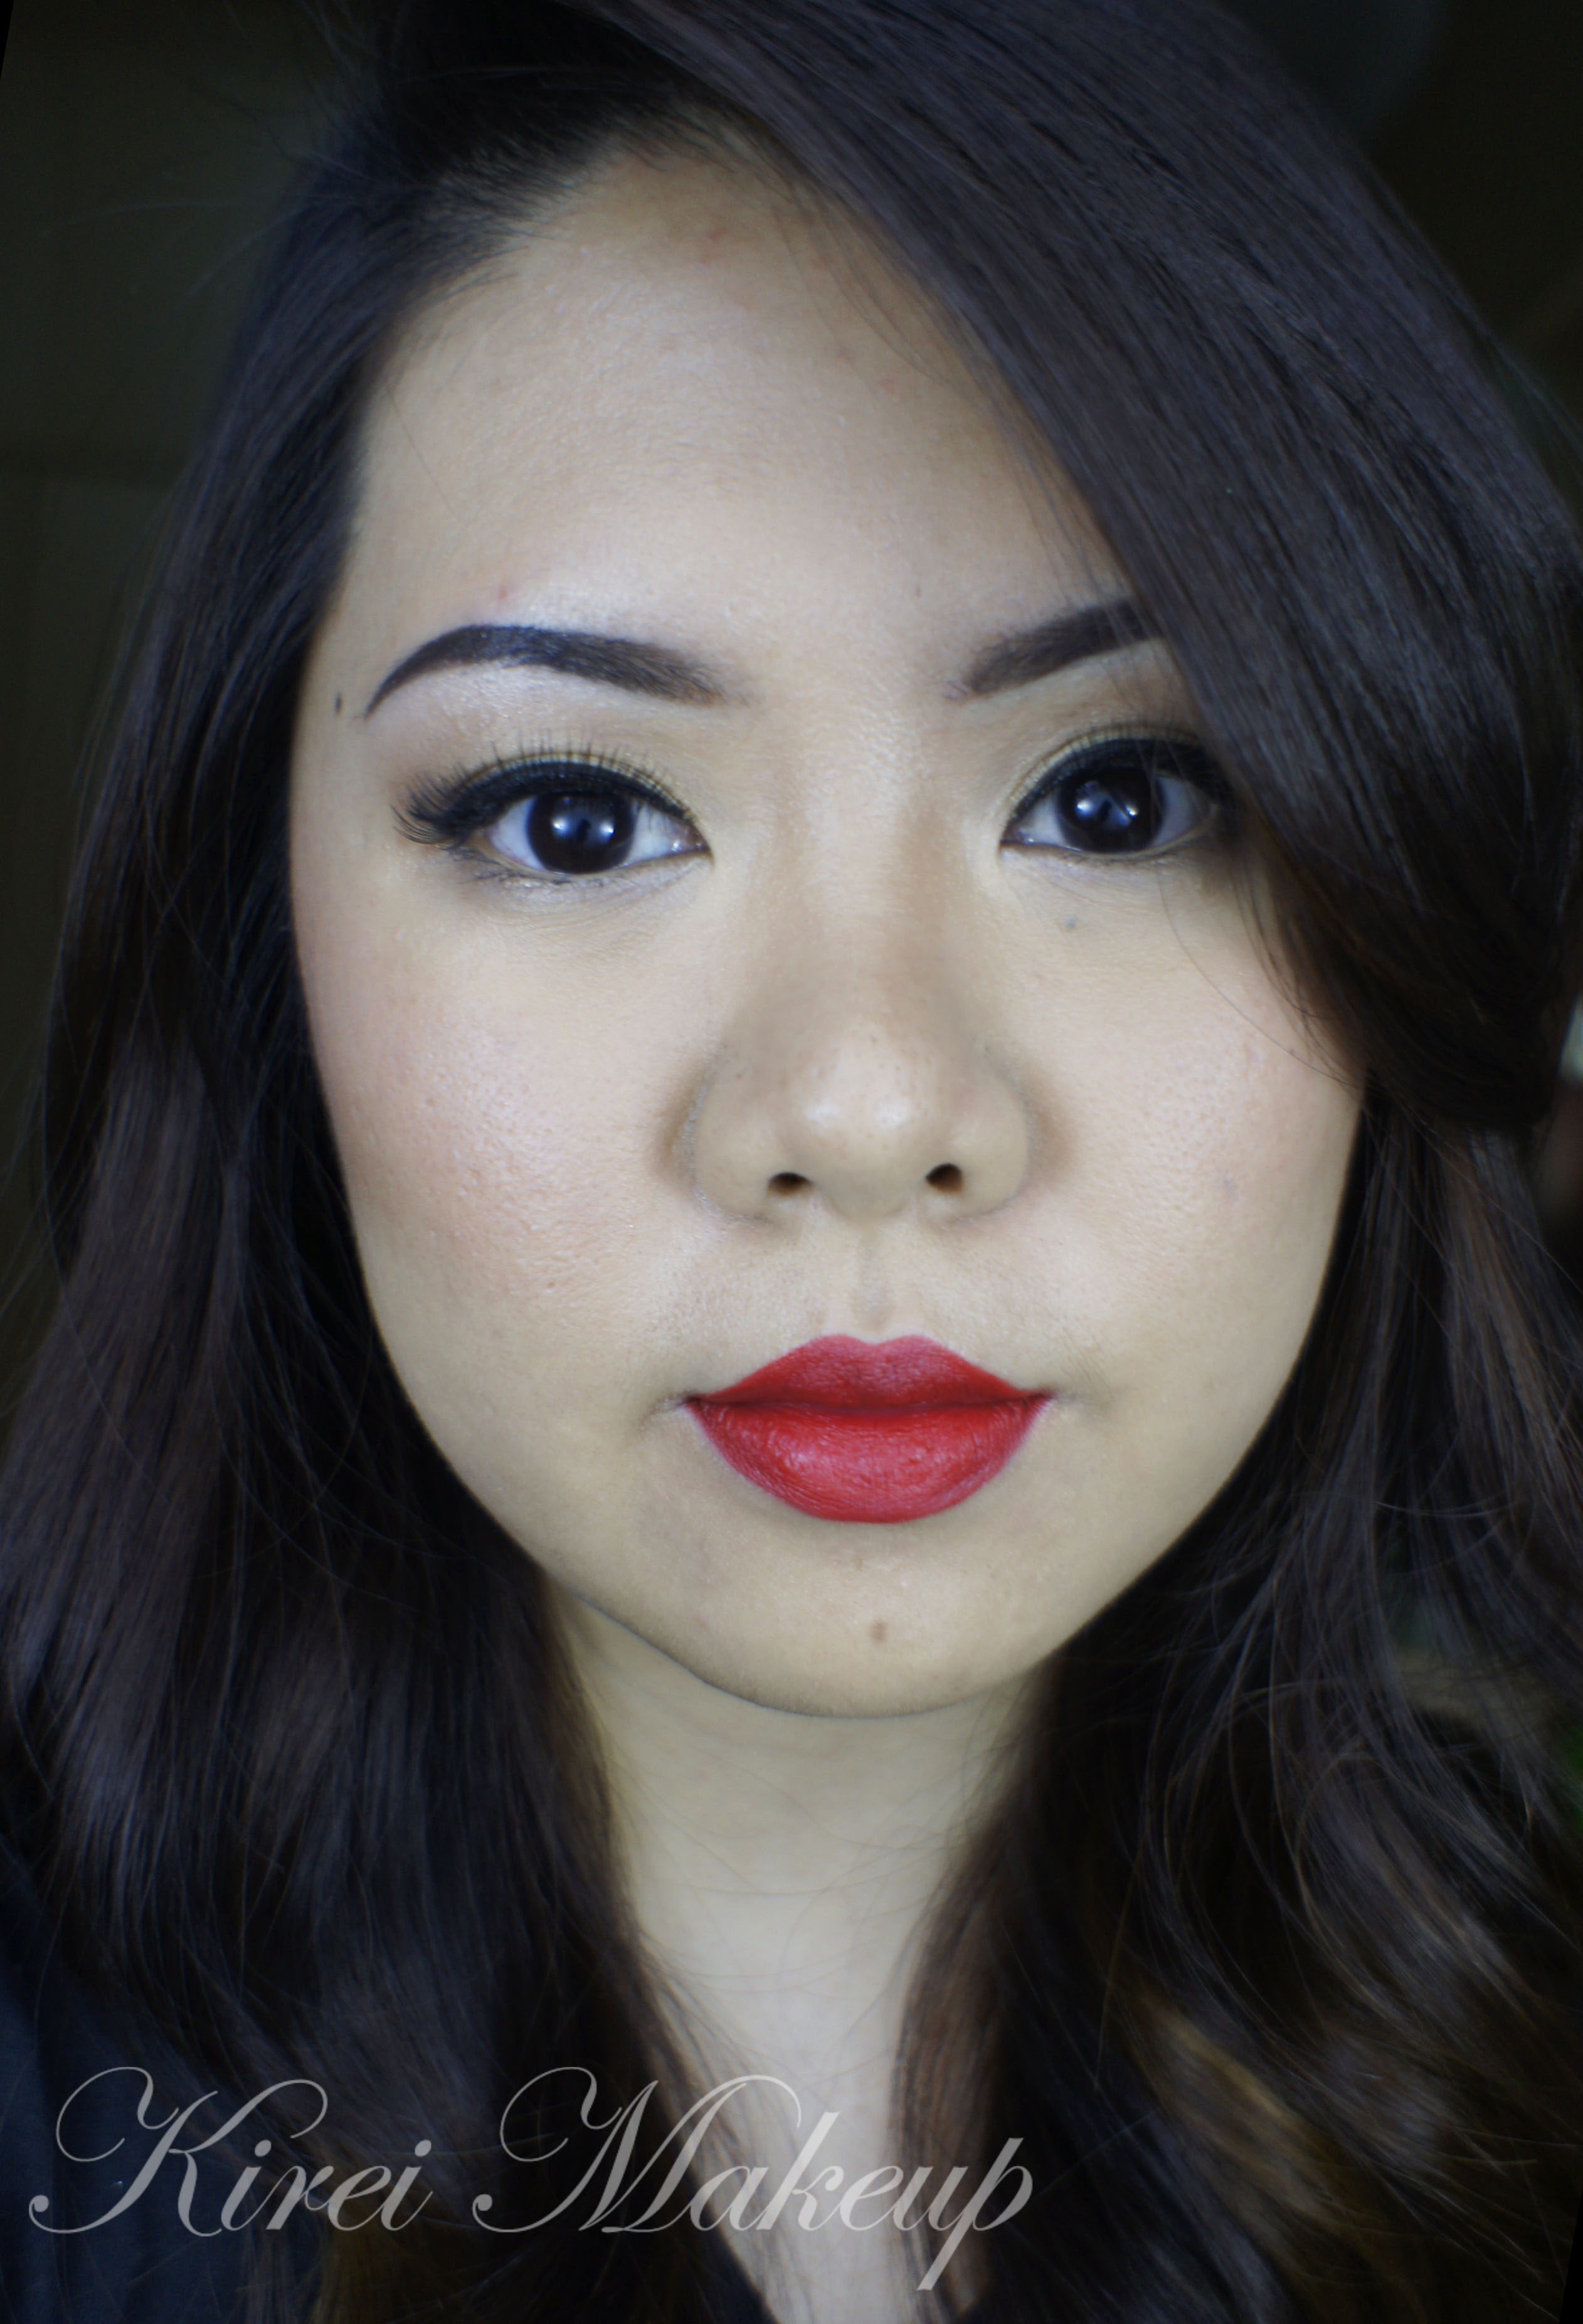
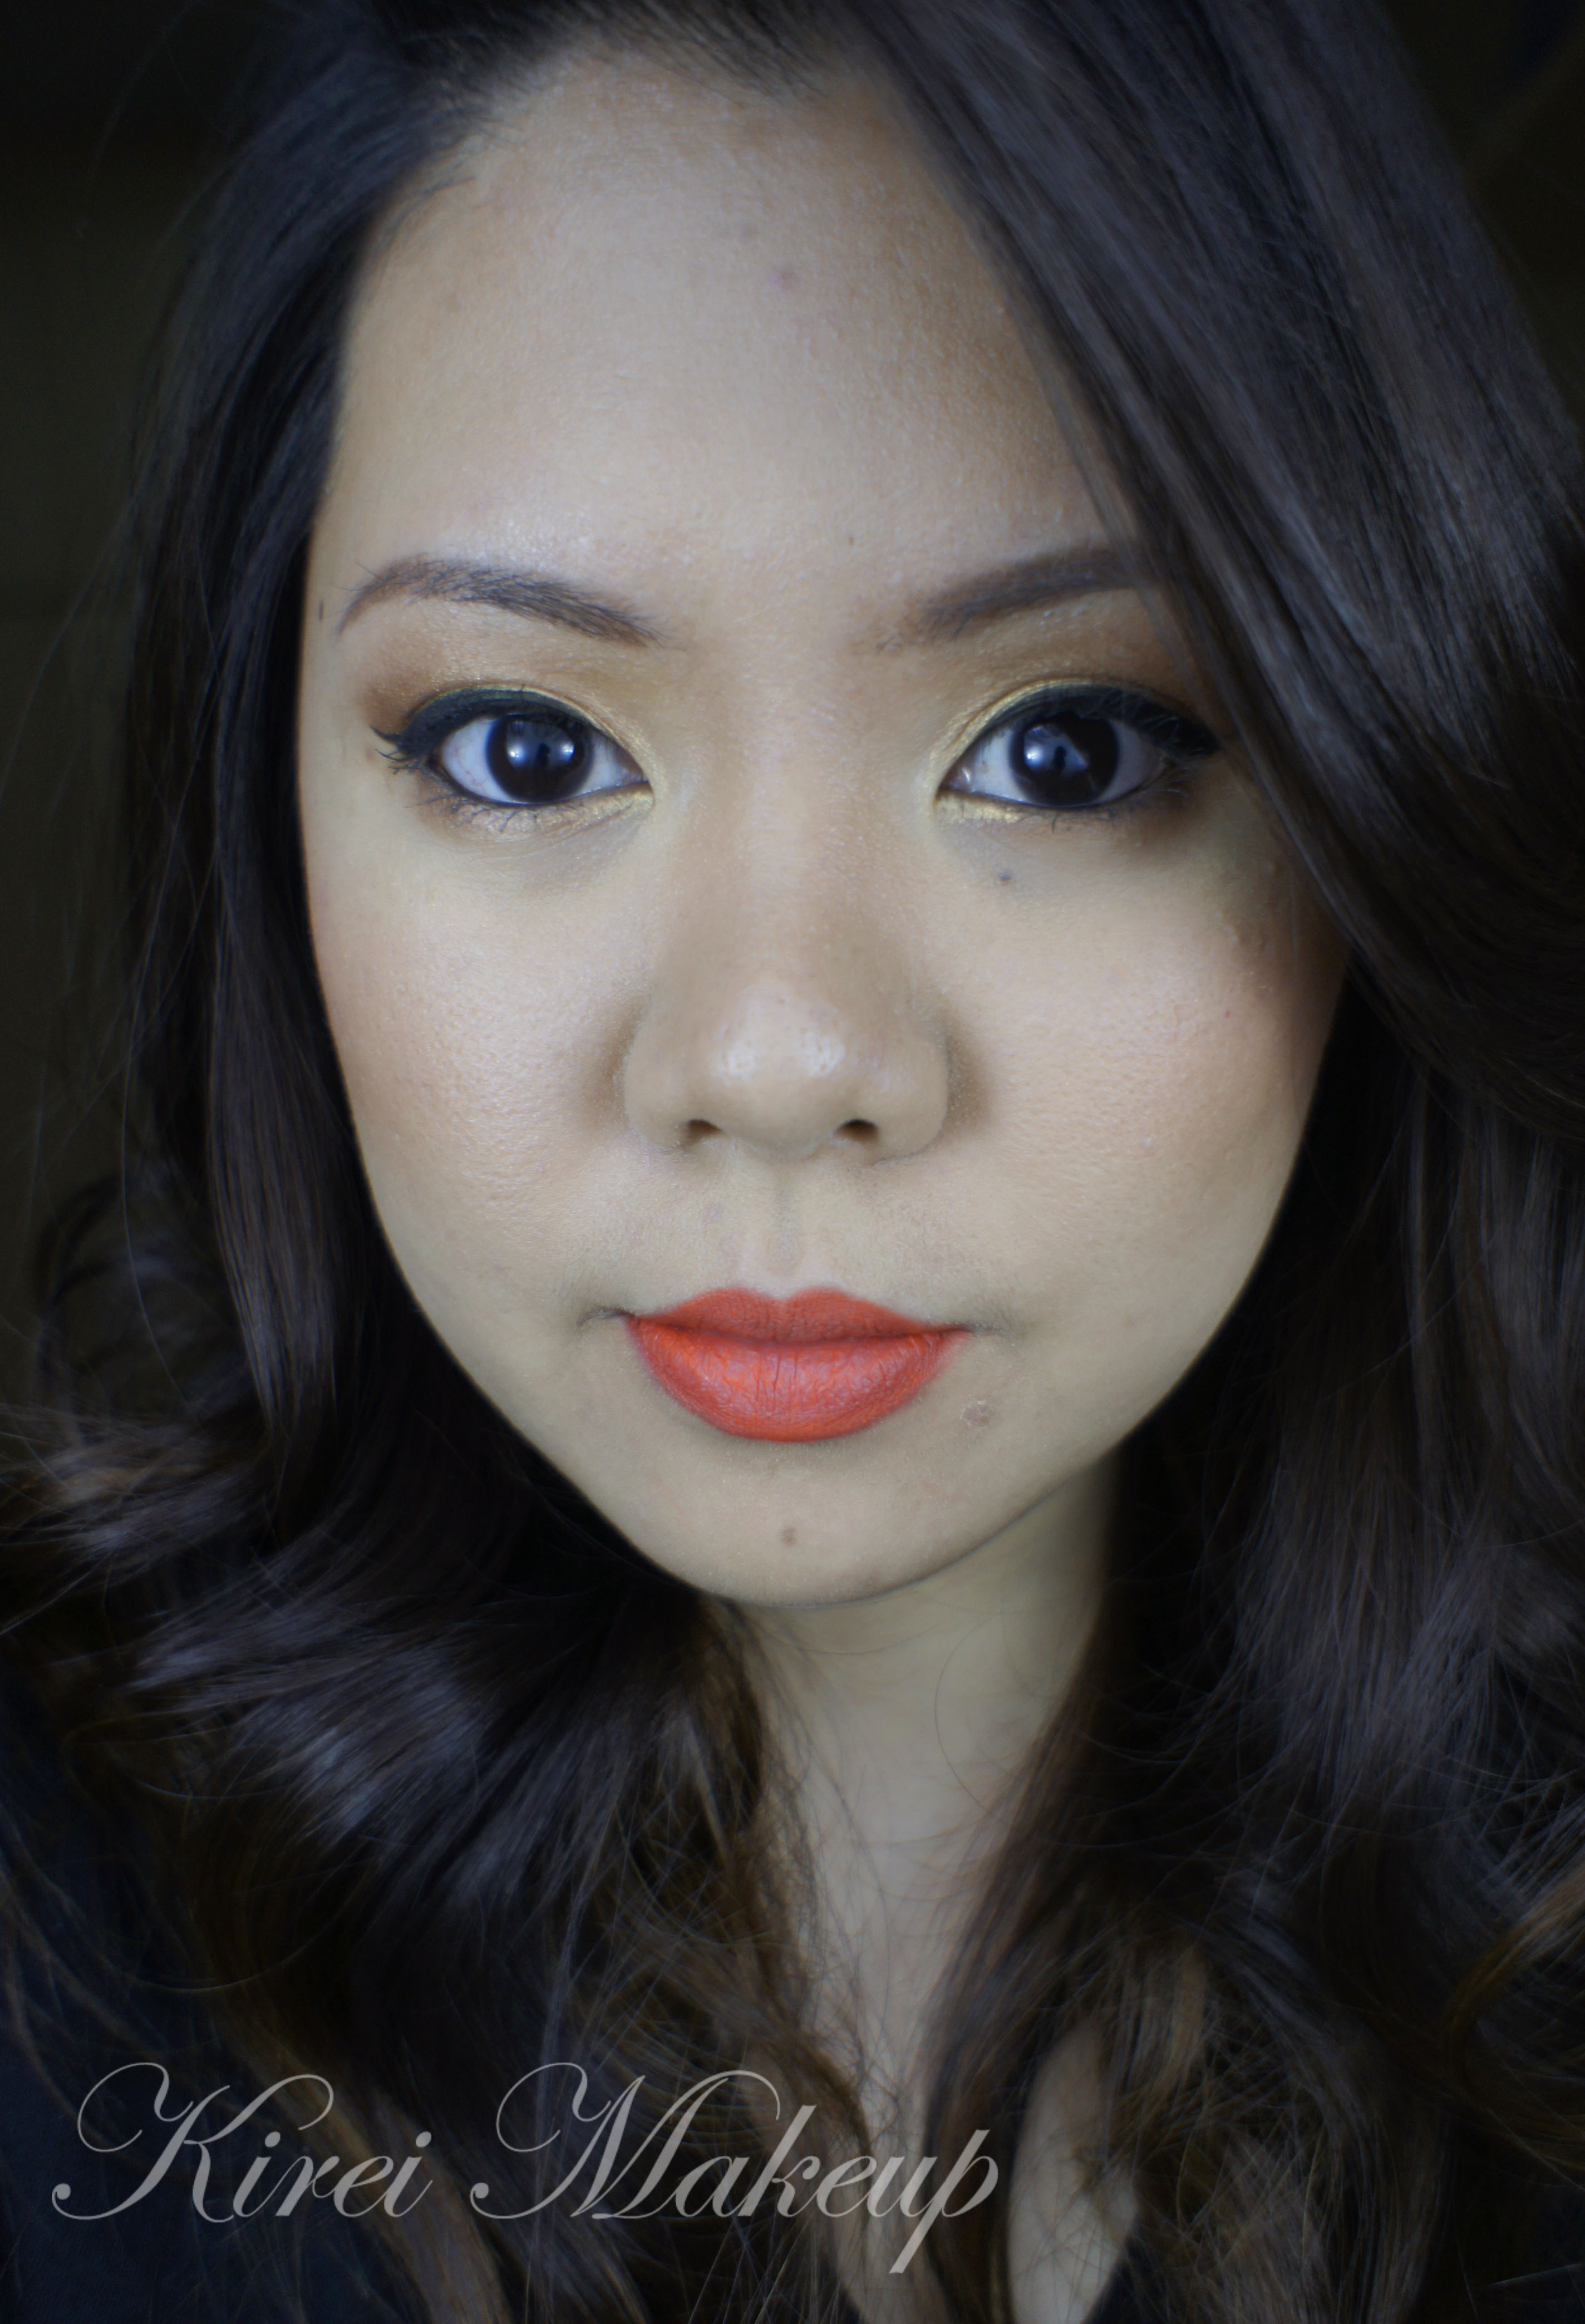
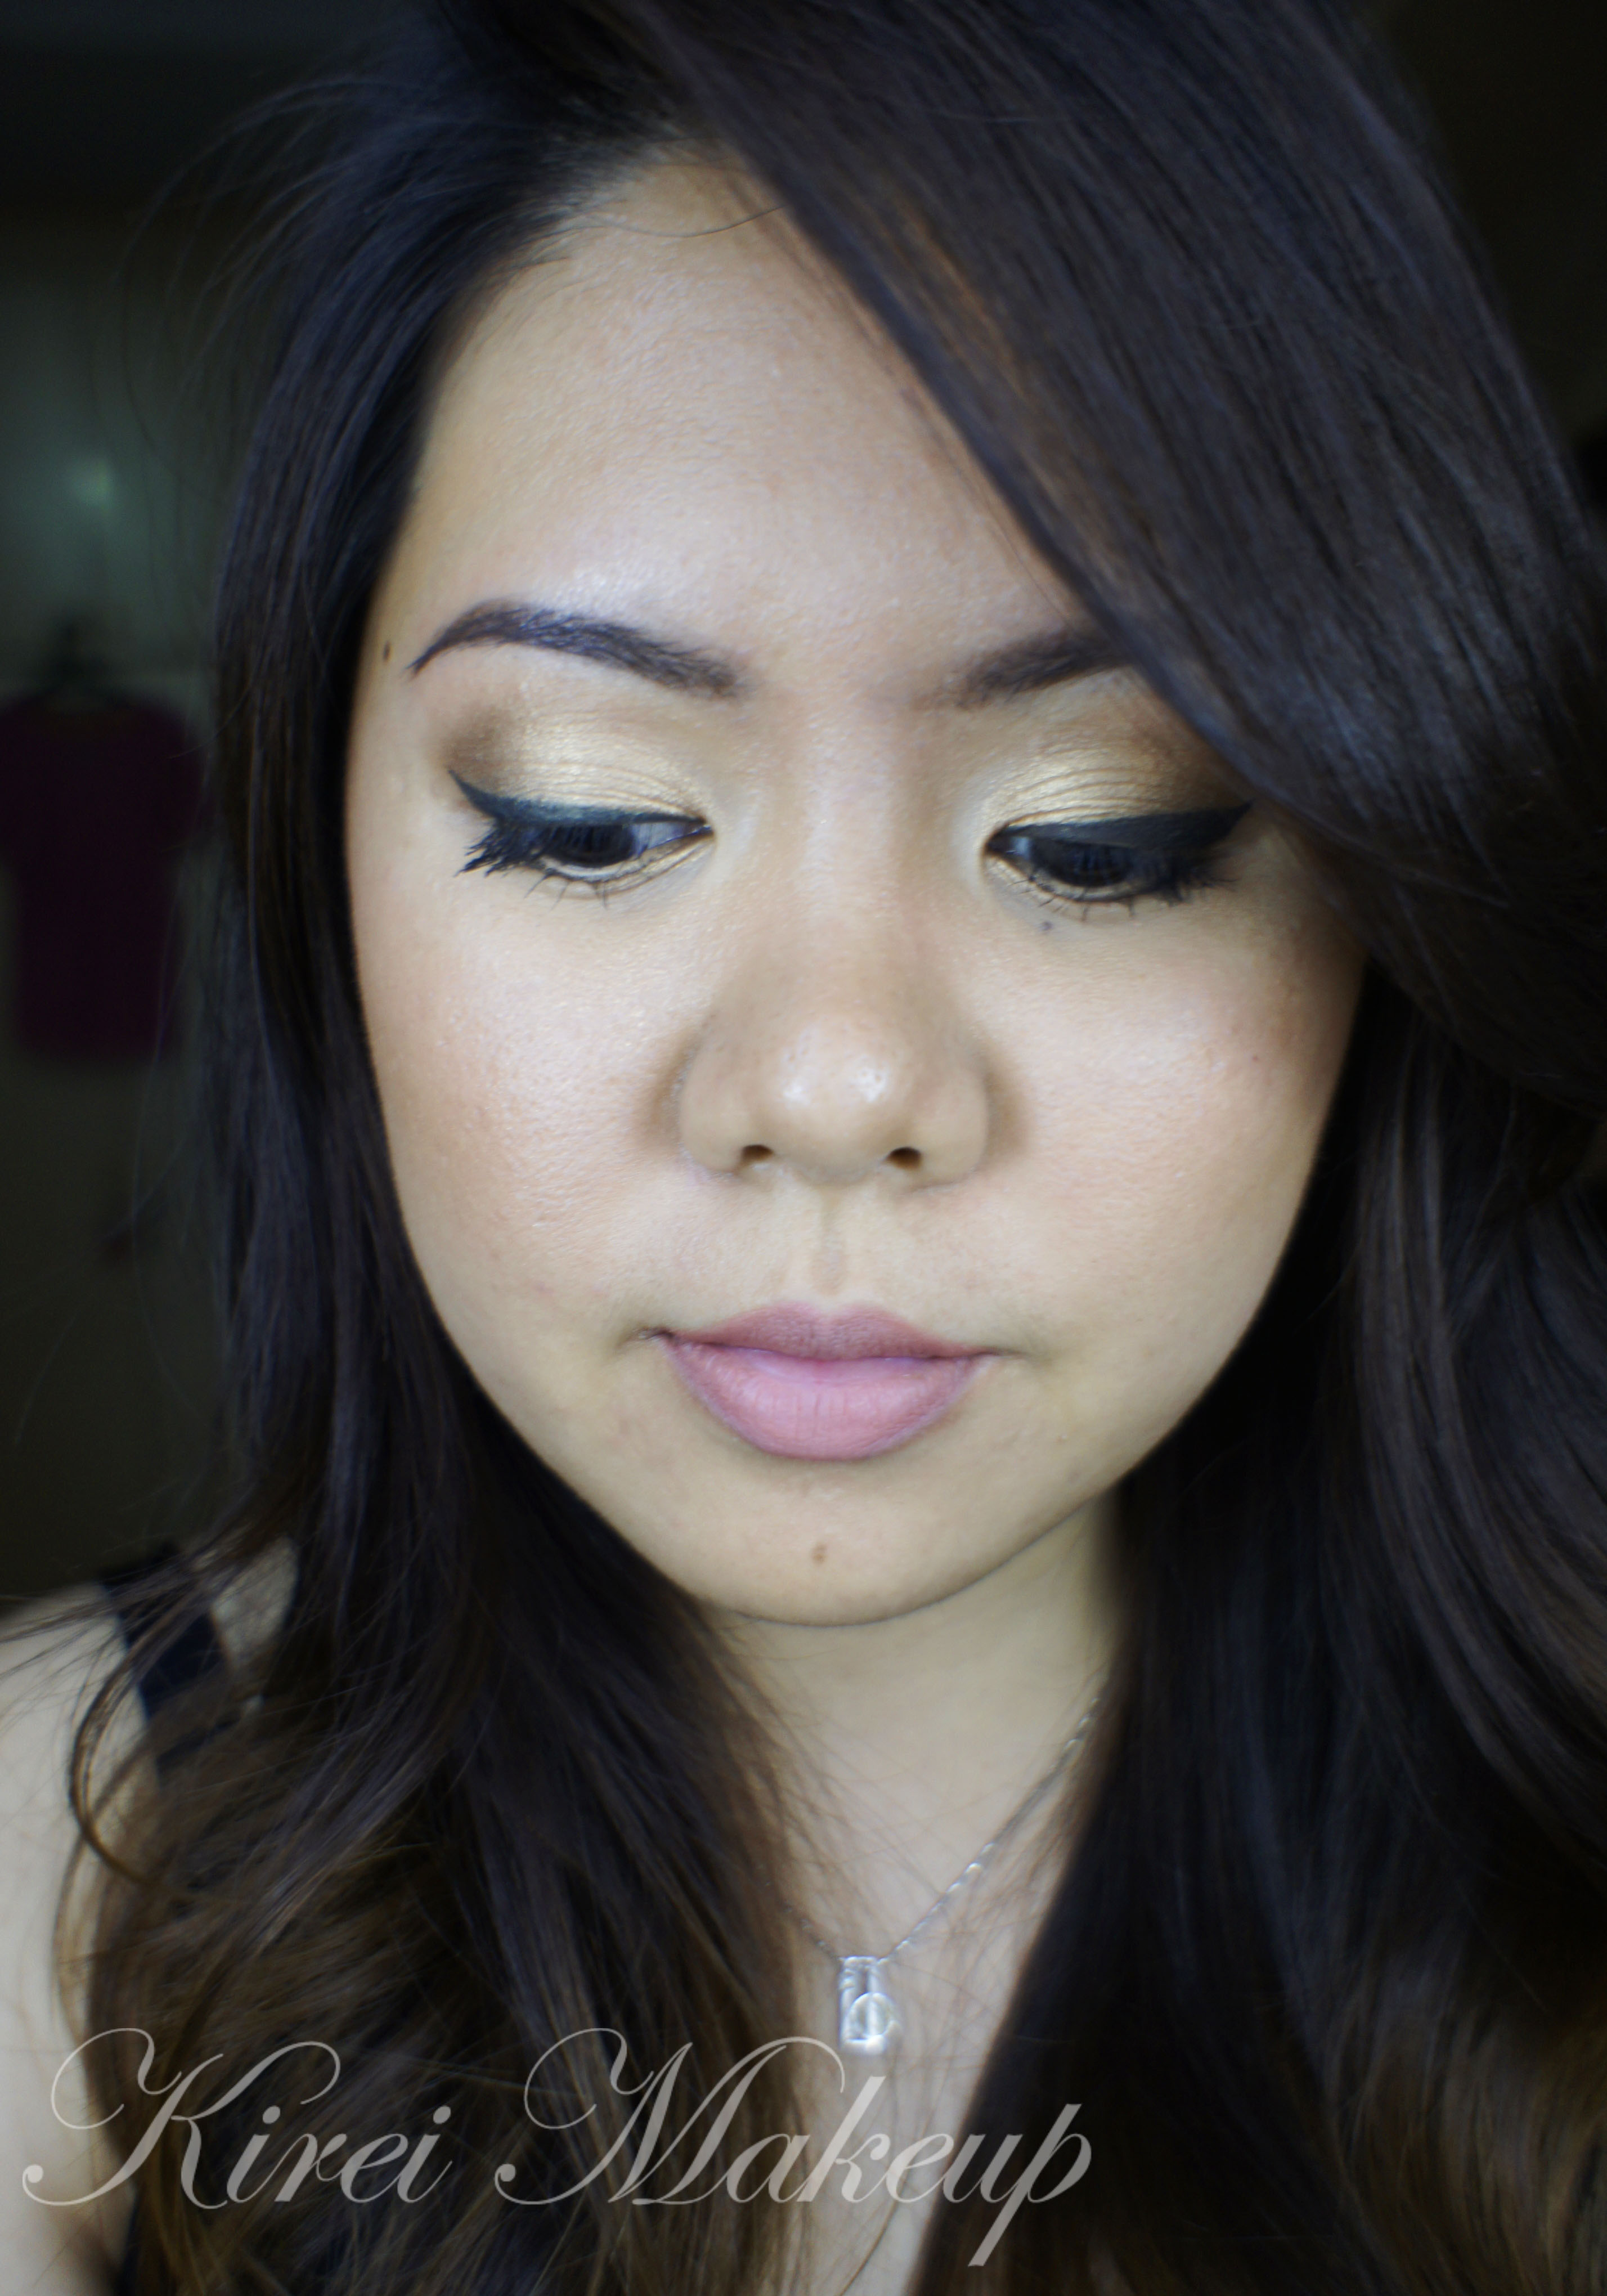
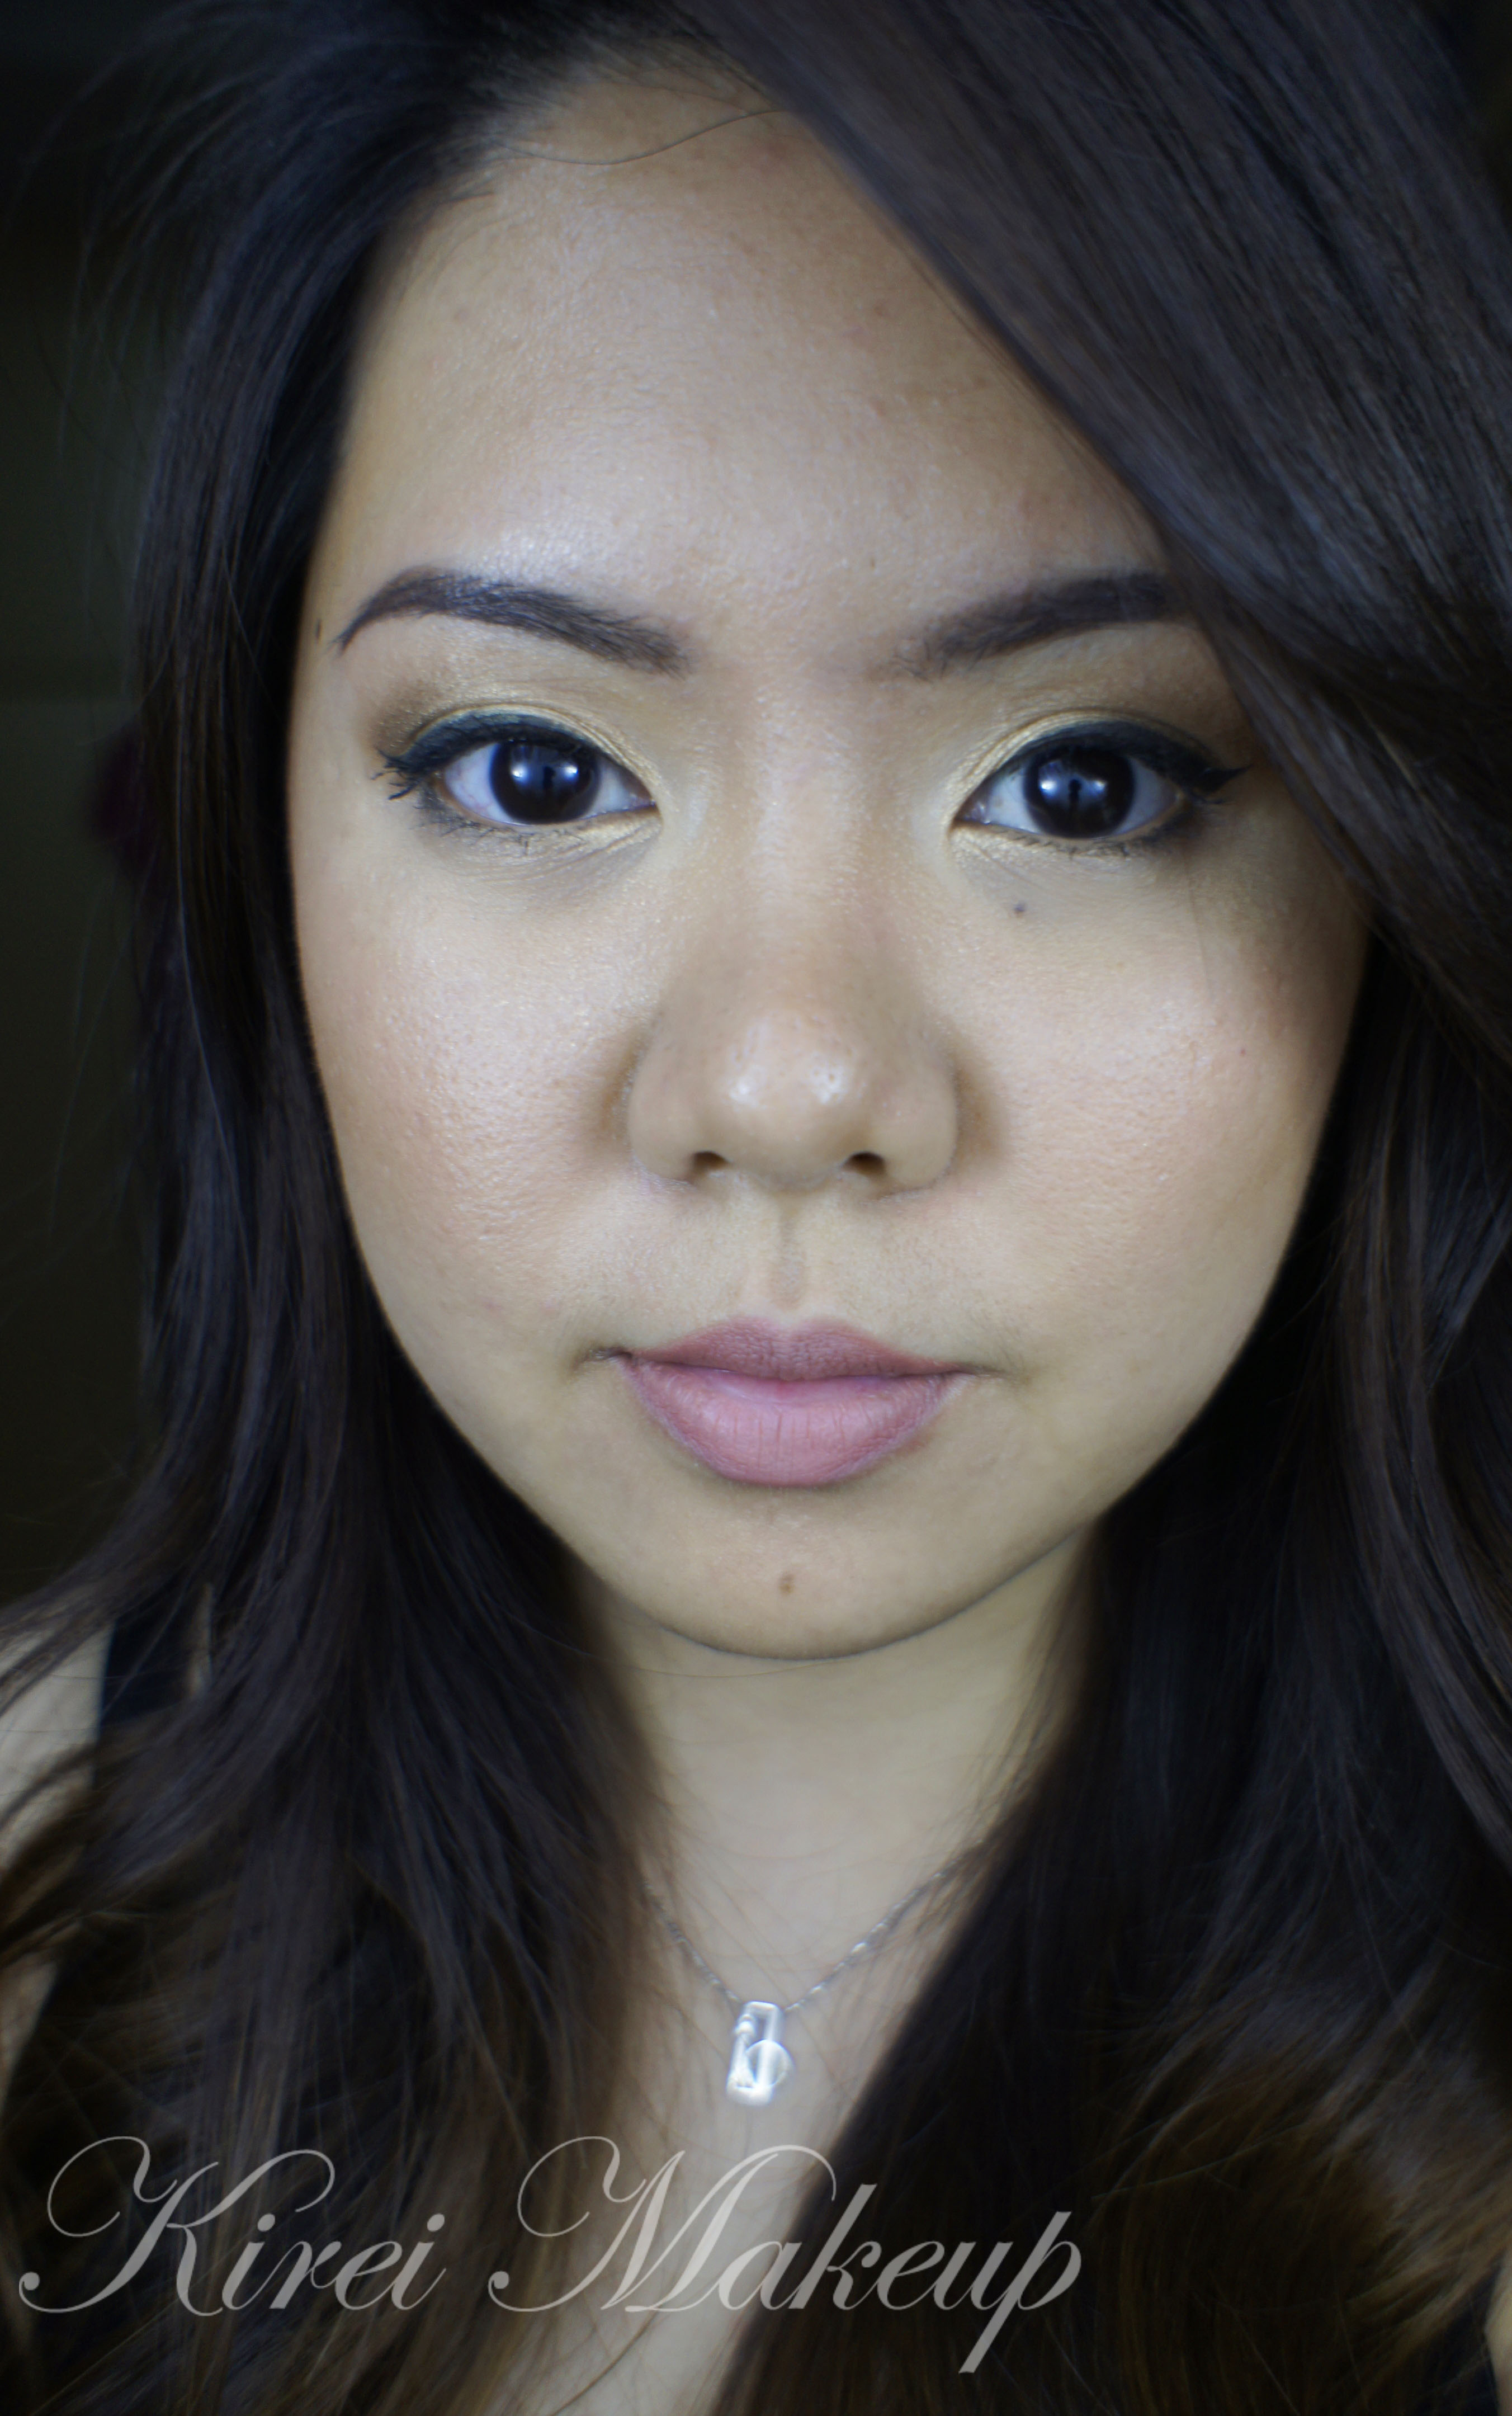
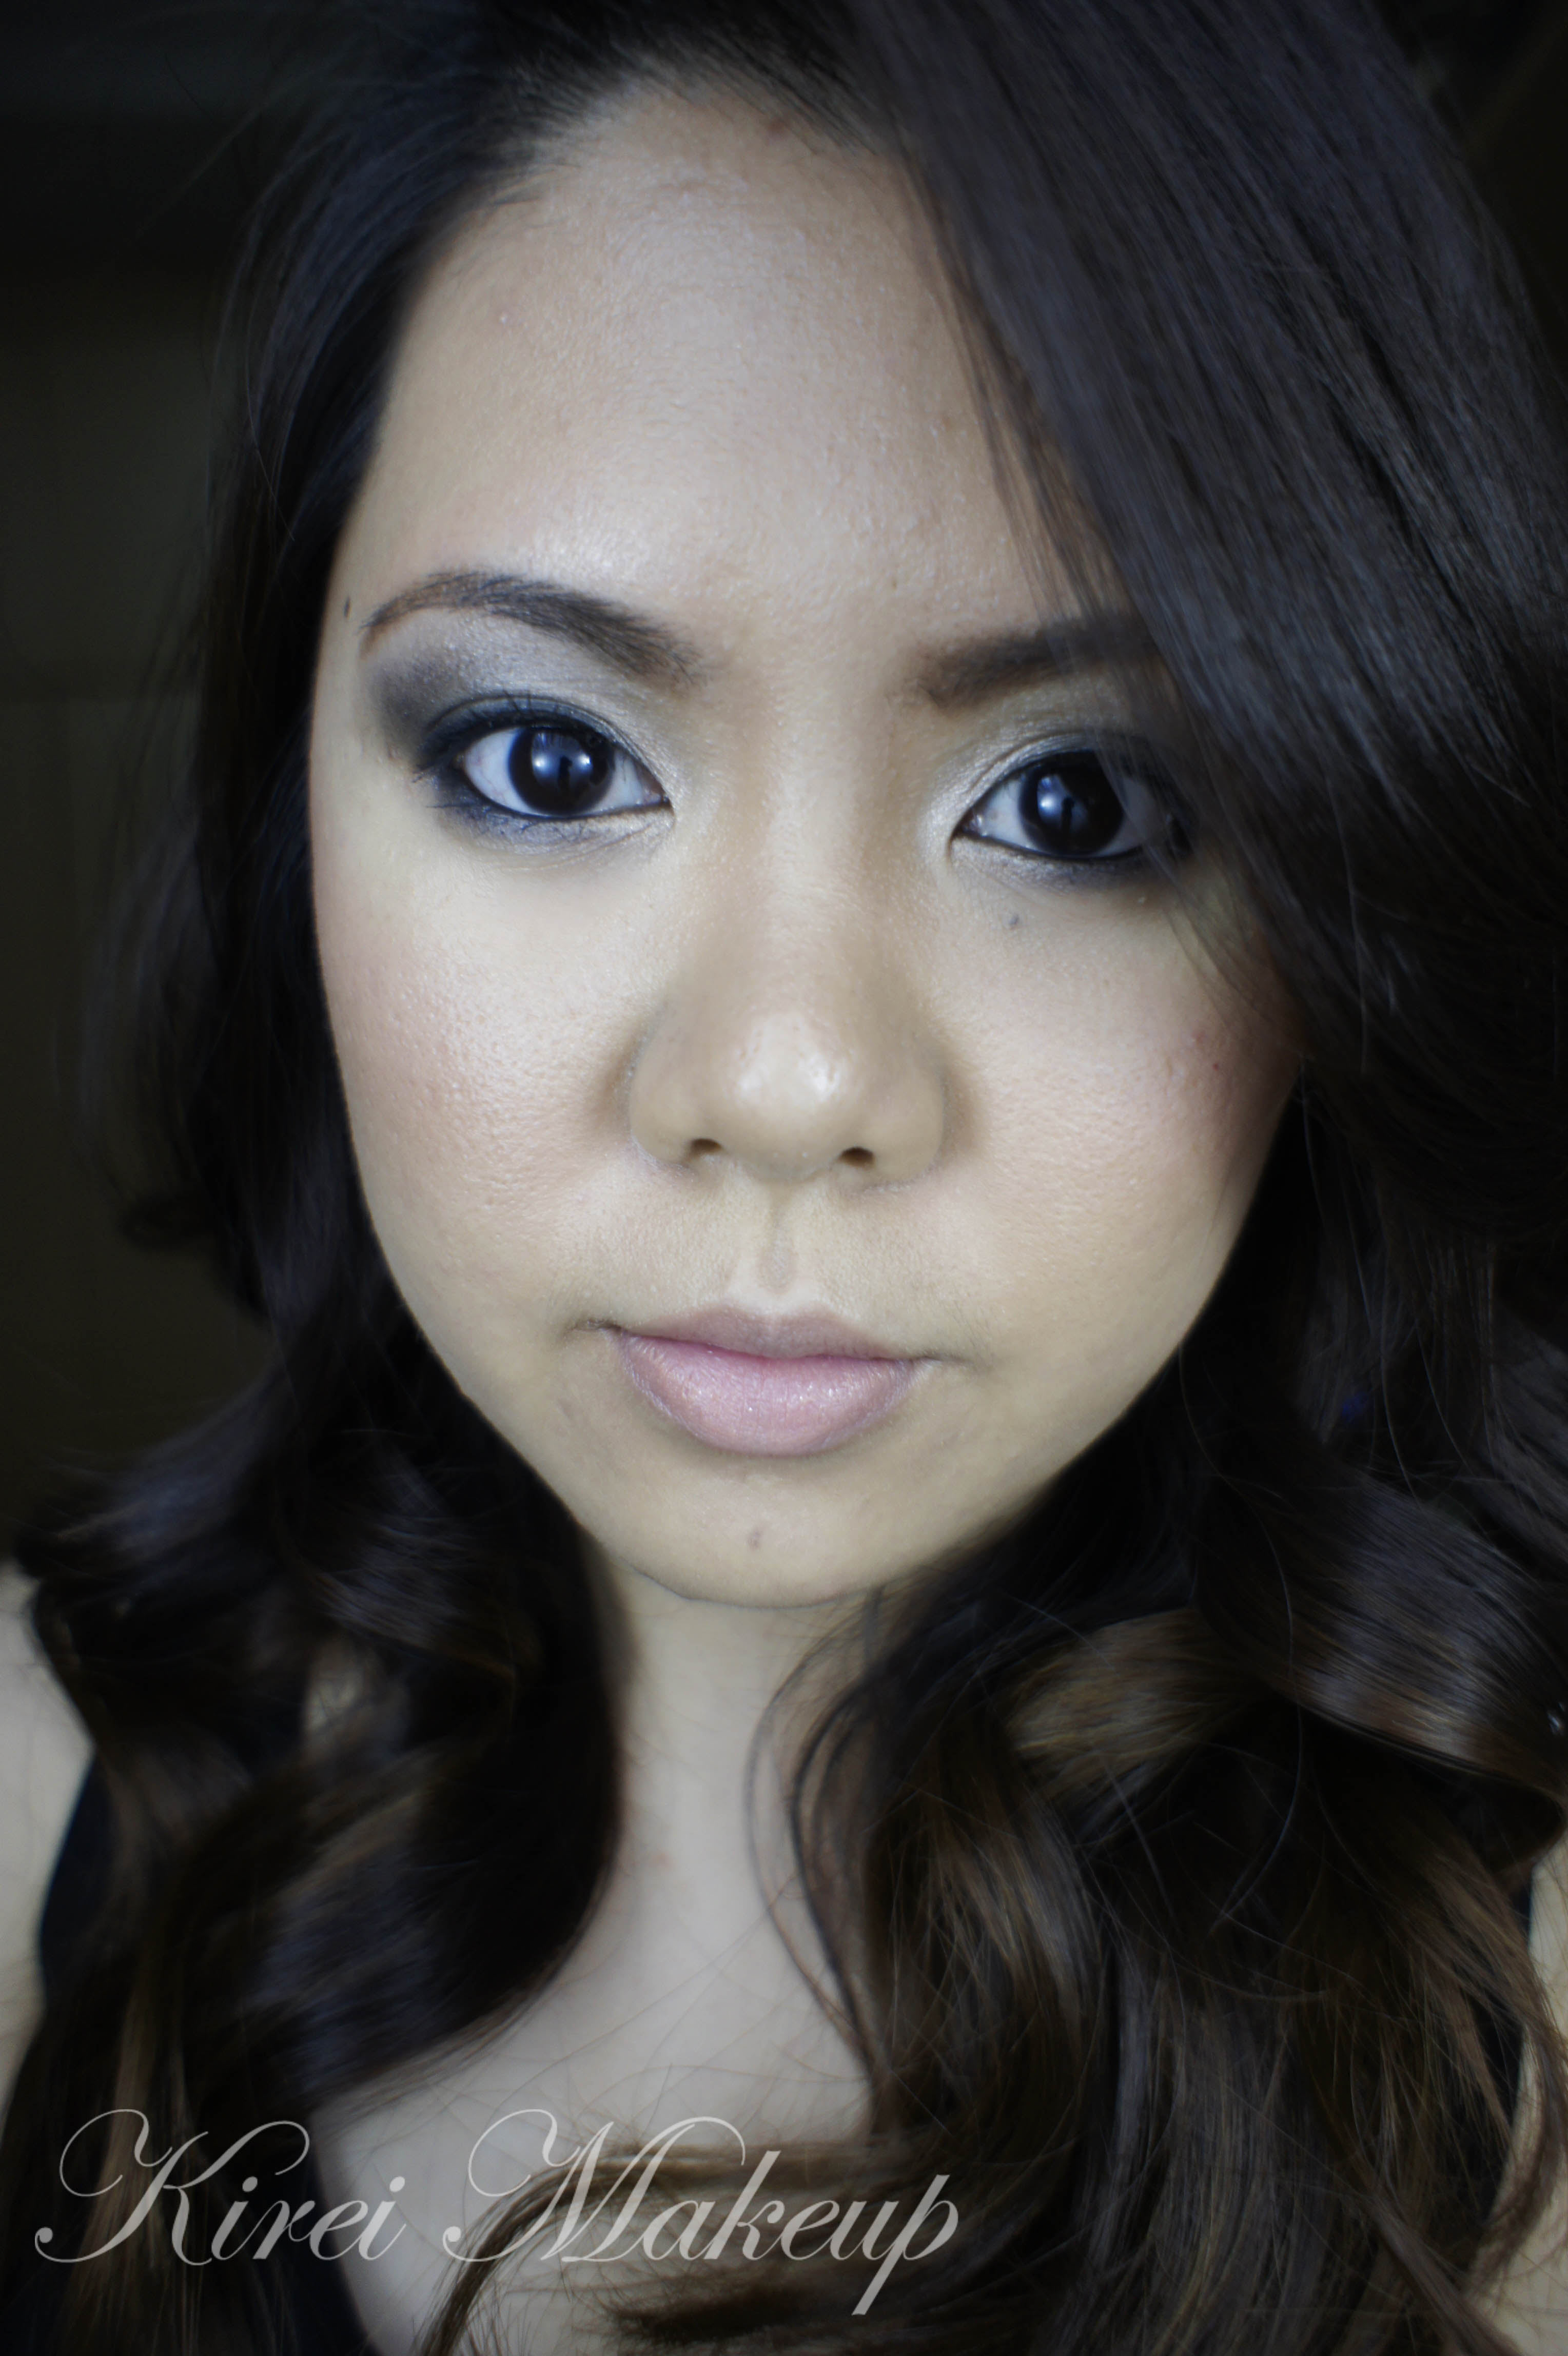
If you prefer a fuller coverage, you can apply this foundation using a buffing brush (like the Sigma Round or Flat Kabuki brushes). Try to avoid this method if you have dry, flaky skin. If you prefer a medium coverage, like me, I prefer to apply this foundation using a normal flat foundation brush (that’s what I used for pictures above and below).

Word of caution: do apply a LITTLE and add more if needed. I’ve seen a lot of youtube “gurus” that definitely used too much foundation. For this review, I only used 1 pump of foundation to cover my entire face. 1 PUMP for the ENTIRE FACE. I actually have extra for neck and chest.
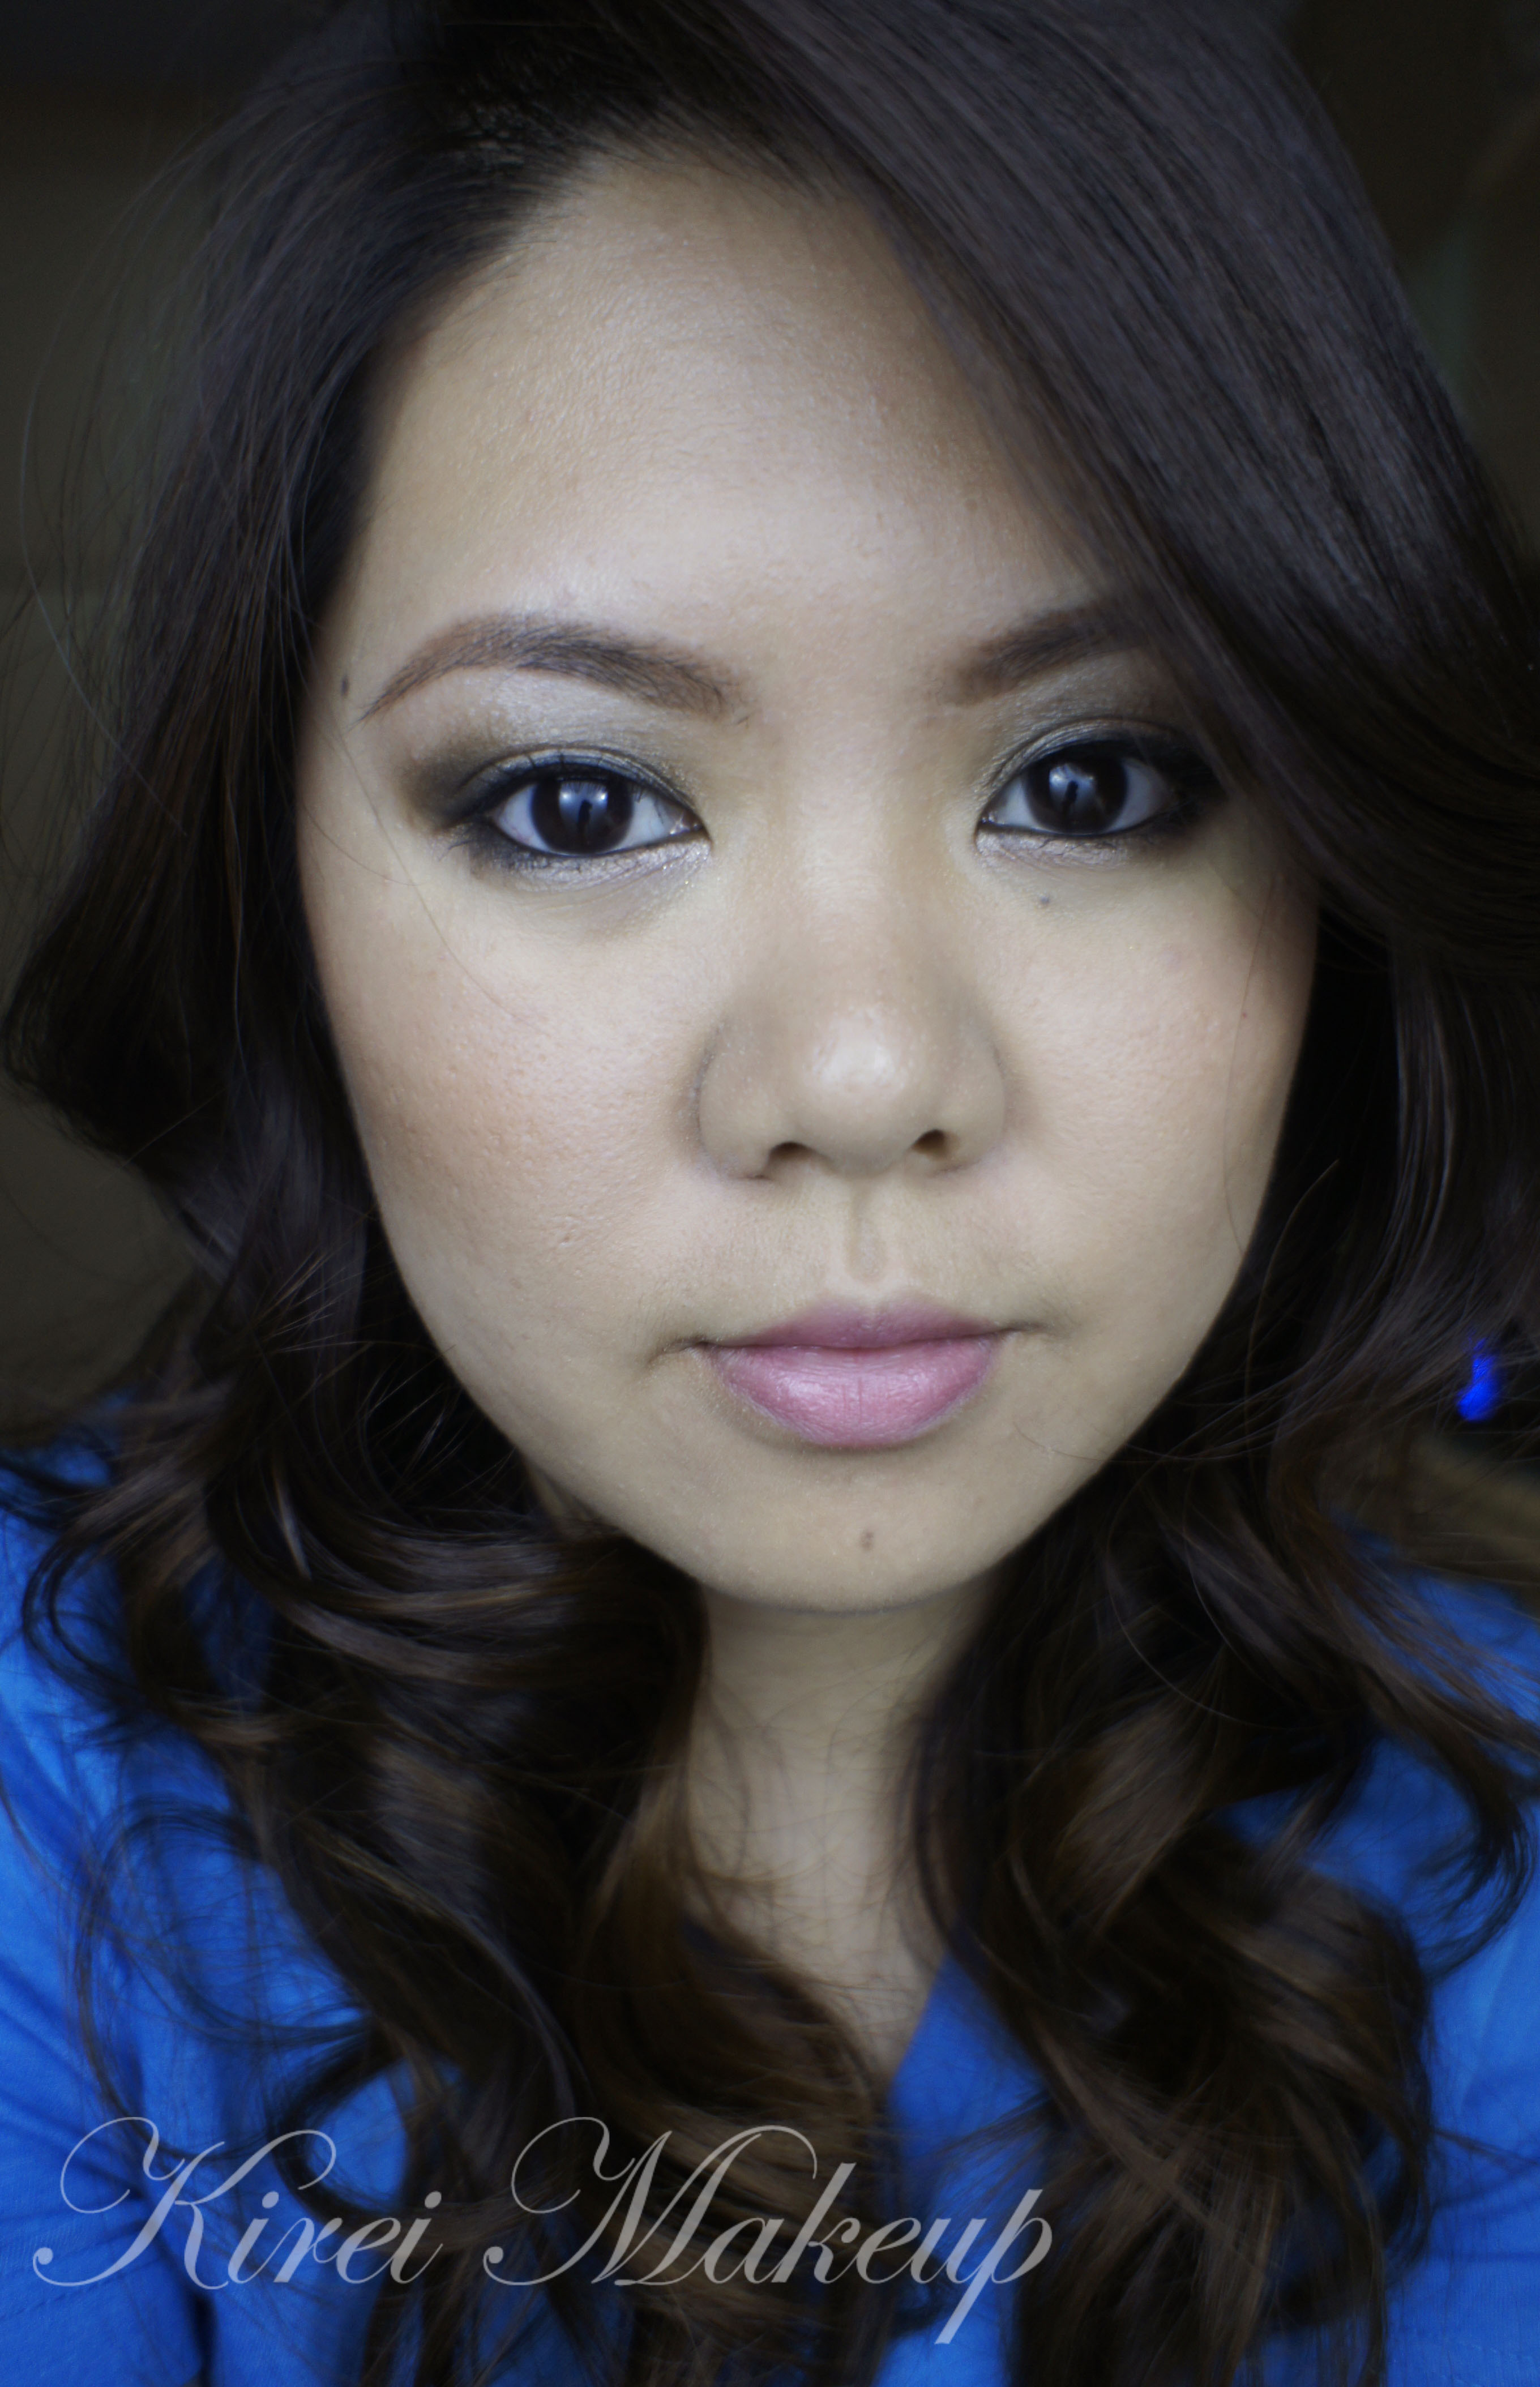
Finish

As you can see in the picture, even though the foundation covers most of my imperfection, it doesn’t leave the skin flat. The skin is still showing through. It doesn’t feel cakey or heavy at all when it dries. I have to say it has a semi-matte finish. It’s not dewy or glowy, but it’s also not entirely matte. *UPDATE: It has a more matte finish compared to other “natural” finish foundation like the Diorskin Star*

Longevity

I’ve used this in photoshoots, bridal makeup, my own makeup etc. It lasted a good 5-6 hours without powdering. If you do powder your face after applying this foundation, it’ll last the whole day in cooler climate. In hotter climate, with powdering, might last a good 6-8 hours depending on your activity. For a bridal makeup that I did in Bali, the bride only needed 1 powder touch-up and that’s it.

If you are very oily, I suggest to powder it. If you have dry skin, you can skip the powder to avoid your skin looking too dry.

Packaging

The foundation comes in a clear plastic bottle with a pump included. Keep in mind if you are going to bring this for traveling, store it properly. I have yet to have any breakage or spillage incident in my luggage or zuca bag yet (hopefully never).

Price

30ml for CAD$49. I’m not sure how much it is in Indonesia.

MUFE HD foundation 118 review


Pros:

  • You can play around with coverage
  • Amazing range of color – 26 shades in N. America.
  • Great for those living in hot climate, like in the Tropics since this foundation will last the whole day.
  • Foundation comes with a pump which make it easier to take the product out.
  • Skin looks great in photograph and real life.
  • Great for any type of skin, but especially good for those with combination to oily skin, as well as those with sensitive skin.
  • Very little product is needed to cover the entire face.

Cons:

  • Pricy.
  • Bottle is prone to breakage.
  • The pump takes practice. If you pump too much, you end up wasting the product.

Verdict:

If you cannot stand MAC foundation, or have sensitive skin, this foundation is definitely worth a try. It gives an amazing finish to the skin without being overly matte or dewy. It makes the skin look very natural, and not cakey at all. I’ve used this on those with sensitive skin, and there were no reaction whatsoever so far.

Please note that I bought this product with my own money. This is not an ad or sponsored post.

Golden Bronze

This week is like my non-colorful week! Today’s look used Urban Decay Naked Palette, and it’s perfect for daytime and bridal makeup. It’s packed with bronze goodness. The colors are perfect for every eye-colors and skintones. Very flattering, very warm and it’s really easy to achieve this look.

I love wearing this look for the summer. It might look like it’s a lot, but once you complete the face, the eyes look pretty natural looking. It really do brighten up the face too. This is my fav. way of wearing bronze eyeshadow. You can immediately turn this makeup to a night look just by adding black liner along the upper lashline and waterline, turning it into a smoky look.

For tutorial on how to fill-in brows, please visit “Product of The Week: MUFE Aqua Brow“. For a smokier version of this look please visit “Baked It Up!

urban decay naked palette

How-to:

1. Using a flat eyeshadow brush, I applied UD Half-Baked all over the lid.

2. Using a flat fluffy brush, I applied UD Buck lightly on the crease and the outer V.

3. Using a fluffy blending brush, I applied a mixture of UD Smog + Snakebite on the outer half of the lid, blending in towards Half-Baked.

4. I applied UD Half-Baked on the inner corner of the lower lid, and UD Smog + Snakebite on the outer half using a small shader brush.

5. I created a winged liner along my upper lashline using Bobbi Brown Caviar Ink cream liner.

6. Using whatever is left on the brush, I applied the liner along the outer corner of the lower lid.

7. I curled my lashes and applied MUFE Smoky Lash mascara on both upper and lower lashes.

8. I filled my brows in using MUFE Aqua Brow.

urban decay naked palette

9. For my face, I applied Tarte Amazonian Clay BB Tinted Moisturizer.

10. I applied Benefit Dallas on my temples, the tip of my nose, my chin and my cheeks.

11. I also applied MAC Peaches on the cheeks.

12. For the lips, I applied L’oreal Colour Riche Lip Liner in Beyond Pink.urban decay naked palette

Neutral

I wanted to do a pretty makeup, something that will be good for brides, or prom goers, or just for anyone who wants an extra something something..bahahahaha..anyways! I love how it ended up and I think this look is perfect for brides, if they don’t want anything too smoky.

Anyways, I love how I’ve been using UD Naked palette more lately. I think I might do more tutorials using the Naked and Naked 2 palettes. Also, how do you like my brows? I managed to fix it today. Lately, I’ve played around with the MUFE Aqua Brow gel and I have to say, I’m loving it! More on that later on during the week.

How-to:

1. I applied UD Sin eyeshadow all over the lid using a flat eyeshadow brush.

2. On the crease, I applied UD Buck eyeshadow using a small blending brush.

3. Using the same brush, I applied MAC Brun on the outer V.

4. I clean the edge of the crease using a clean blending brush.

5. Using a small shader brush, I applied Sin on the inner corner of the lower lid and MAC Brun on the outer corner.

6. I created a winged liner along the upper lashline using MUFE Aqua Black gel liner and an angled eyeliner brush.

7. I lined my waterline using L’oreal Voluminous Smoldering eyeliner.

8. For my lashes, I applied MUFE Smoky Lash mascara on both top and lower lashes.

9. I filled my brows in using MUFE Aqua Brow.

natural makeup with urban decay naked palette

10. For the face, I applied UD Naked foundation using a foundation brush.

11. Under the eyes, I applied MAC Pro Conceal/Correct concealer in Medium.

12. I applied MAC Shadowy as a light contour and then MAC Cubic on my cheeks as blush.

13. For the lips, I filled it in using MAC Dervish lipliner.

asian bridal makeup

Gunmetal

How is everyone’s Monday going??? I apologize for M.I.A last week. If you follow me on twitter/instagram, you’d know that I burnt my fingers (because of steam)  on Tuesday. My ring and pinky fingers were burnt due to the steam from boiling water. Anyways, long story short, my ring finger didn’t get burnt as bad as my pinky. There were bubbles forming on my pinky finger! It hurt a lot, and well it’s red and purple now. Due to the burnt, I couldn’t really hold my makeup brushes properly since it hurt a lot. I have a very low tolerance of pain (exception for piercings..hahaha). Heck, I couldn’t even hold my chopsticks properly.

However, since the ring finger gotten better, I managed to do one tutorial. I wanted to play with the Gunmetal eyeshadow from Urban Decay Naked 1 Palette, so I created this smoky eyes look. Very simple and very easy. This will look great for party makeup, prom or wedding.

Also, ignore my brows, haven’t had time to get them trimmed or shaped because of the recent incident.

How-to:

1. I applied Chanel Illusion D’ombre in Emmervielle all over the lid using my finger.

2. Using a flat eyeshadow brush, I applied UD Gunmetal eyeshadow on the outer third of the lid.

3. I blended the edge of the shadow using a clean fluffy brush.

4. Using a bullet brush by Smashbox, I applied UD Creep eyeshadow from Naked palette on the outer V.

5. Using a small shader brush, I applied UD Gunmetal eyeshadow on the lower lid.

6. Using a flat eyeshadow brush, I applied L’oreal Infallible Hourglass Beige eyeshadow in on the inner half of the upper lid, and slightly on the inner corner of the lower lid.

7. I lined my upper lashline and waterline using L’oreal Voluminous Smoldering eyeliner.

8. I filled my brows using Shu Uemura brow pencil.

9. I curled my lashes using MUFE Smoky Lashes mascara.

asian smoky eyes

10. For the face, I used Giorgio Armani Silk foundation and a foundation brush.

11. Under the eyes, I applied MAC Pro Correct/Conceal yellow corrector.

12. I applied MAC Shadowy as contour and MAC Fleur Power on the cheeks.

13. For the lips, I applied Clinique Chubbystick in Heaping Hazelnut.

asian smoky eyes

Product of the Week: Shu Uemura Hard Formula Brow Pencil

Brows, brows, brows! I’ve been asked to do a brow tutorial, but been putting it on hold for the longest time. Let me first of all, introduce this brow pencil to you guys. Whether you are a beginner or a makeup artist, I think everyone should own the Shu Uemura Hard Formula brow pencil! This pencil is currently my favorite brow product, ever since I ran out of my Anastasia Brow Wiz.

Anyhow, so what is Shu Uemura Hard Formula Brow pencil?

Natural finish and shape. This unique eyebrow pencil only releases color pigment when it interacts with the oils in the brow hairs. The result is natural, defined brows. Smudge-proof and long-lasting. (Shu Uemura, 2013)

Shu Uemura Brow Pencil

If you happen to go to a Shu Uemura counter or their website, you might realized that the shape of their eyebrow pencil is not exactly like my photo. That’s because their pencil is shaped using a cutter in a Naginata shaped. I knew about the shape because I went to a Shu Uemura counter in Canada and they explained it to me back then. However, I purchased this pencil from Shu Uemura counter in Grand Indonesia mall, and they did not cut it for me in Naginata style, instead they handed me in this form. I don’t really care, Naginata or not, this brow pencil still rocks!

Anyways, I might drop by the Shu Uemura counter again just to ask them to re-shape my brow pencil.

Pros

  • The color is perfect. Mine is Hard 9 (Acorn), and I think it has just enough warm undertone for my warm undertone hair. It’s not too red, and at the same time not too ashy.
  • It brings a certain warmness to the face and it works for a lot of people. I’ve used this pencil on several people and for bridal makeup as well.
  • Since its hard formula is very waxy, when you draw this pencil in, it mimicked your brow hair. You can get the most natural finish with this product.

Longevity

I’ve worn this pencil for a good 8-10 hours without any smudging whatsoever in a very warm and humid climate (a.k.a Bali).

Price

I don’t quite recall how much it cost in Jakarta since I’ve bought it quite a while back.  I will let you guys know once Shu Uemura Indonesia answers my tweet 😉

Anyways, I know this pencil costs CAD$29 in Canada and USD$23 in USA.

Cons

  • Since it’s a hard formula and very waxy, you might not be able to swatch this on your hand. I managed to do it after going at it several times the back of my hand.
  • They carry 2 more colors in Asia than in North America, namely Acorn and Walnut Brown.

Shu Uemura Brow Pencil no. 9

Keep in mind, even if your hair is black, you might want to use brown instead so your brows don’t look harsh.

Also, if you want to know how I shaped my brows, please visit my tutorial in Brows 101.

How-to:

1. Starting with a clean brow, use a clean spooly (or mascara brush) to brush the brow hair upwards. Trim any excess with a cuticle scissors if needed.

2. I like to start with the tail of brow. Just filling it in and extend it slightly.

3. I created a diagonal line on the lower part of my brow from the head to just below the arch (hard to explain, please look at photo below…bahahaha).

4. Next I drew a diagonal line along the top of the brow to the highest point of the brow (i.e. arch).

5. I filled it the rest of the brow using the pencil. (I purposely drew a lot in so you can see the difference between my non-filled brow with the filled-in brow).

6. This step is optional, but works wonder if you want an extra shape or an extra lift. So, using a flat sturdy brush, I applied M.A.C pro conceal/correct palette in yellow corrector along the bottom and top part of the brow. I blended it out using a clean flat brush.

7. At this stage, I brushed my brow hair upwards again using a clean spooly (or mascara brush) for a natural finish look.

Pretty much, lots of my tutorials prior to this post used the Shu Uemura Hard Formula Brow Pencil.

how to do brows

Pearlescent

Another smoky tutorial! This time, I wanted to show you guys another way of doing a smoky eye. This look highlights the center of the eyelid, instead of the usual highlight on the inner corner. I like doing this smoky eyes more than the other ones since I find that the eyes catch the light when you blink or look down. It’s something different than the classic sooty, dark grey smoky eyes. Obviously, you can do this with any color. I’ve done this type of look using cranberry and blue eyeshadow in my Peek a Blue post.

How-to:

1. Using a synthetic art brush, I applied Smashbox Stone cream eyeshadow on the inner and outer corner of the eyes, leaving the center part of the lid bare.

2. Using a flat eyeshadow brush, I applied Urban Decay Dark Horse eyeshadow on top of the cream eyeshadow. Again, leave the middle part of the lid empty.

3. Using another clean synthetic art brush, I applied Chanel Illusion D’ombre in Emerveille in the middle of the lid.

4. Using a clean flat eyeshadow brush, I applied Urban Decay Sidecar eyeshadow on top of Chanel Emerveille cream shadow.

5. Using a clean small fluffy brush, I blended the edges where the dark and the light eyeshadow meet.

6. I applied UD Darkhorse on the outer half of the lower lid and UD Sidecar on the inner half.

7. I lined my waterline, tightline and upper lashline using L’oreal Voluminous Smoldering eyeliner.

8. I curled my lashes and applied Maybelline Express Volume Turbo boost mascara on my lashes.

9. I filled my brows in using Shu Uemura brow pencil.

asian smoky eyes

10. On my face, I applied MUFE HD foundation in 118 all over using IPKN Auto Wave makeup.

11. I contoured my cheeks using MAC Shadowy.

12. On the cheeks, I applied MAC Peaches blush.

13. On the lips I applied Chanel Confidentielle lipstick.

asian smoky eyes