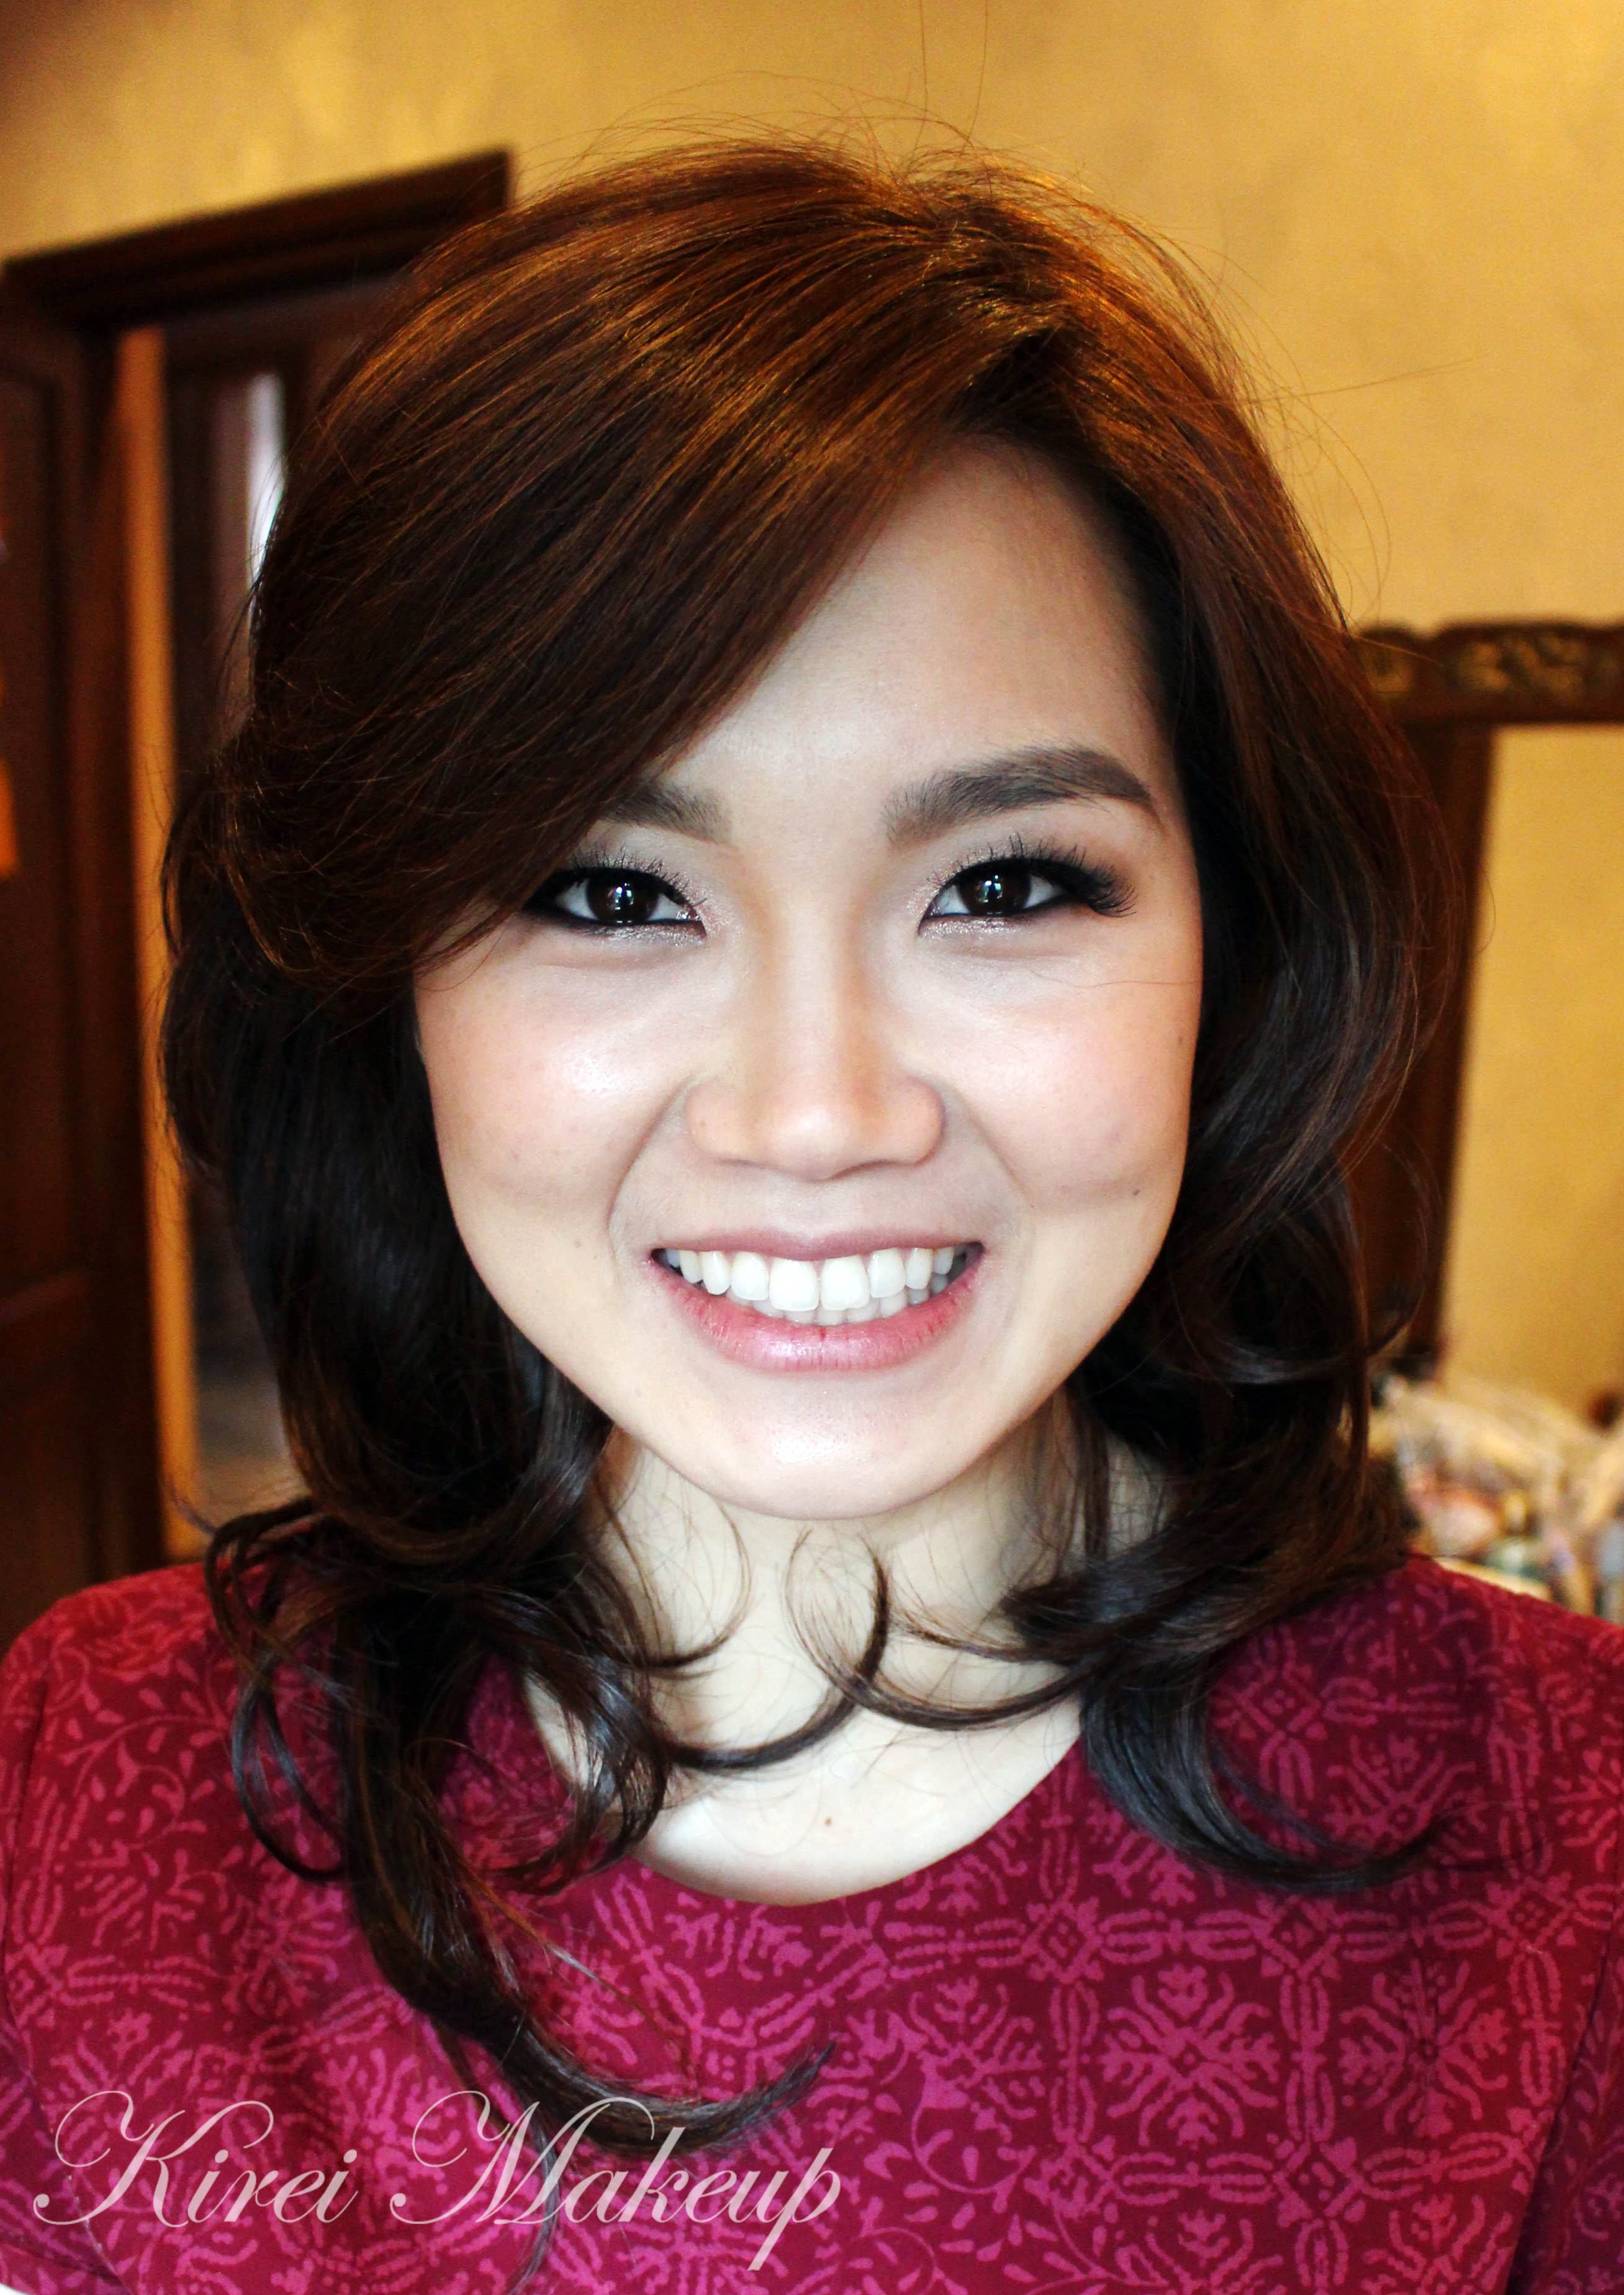
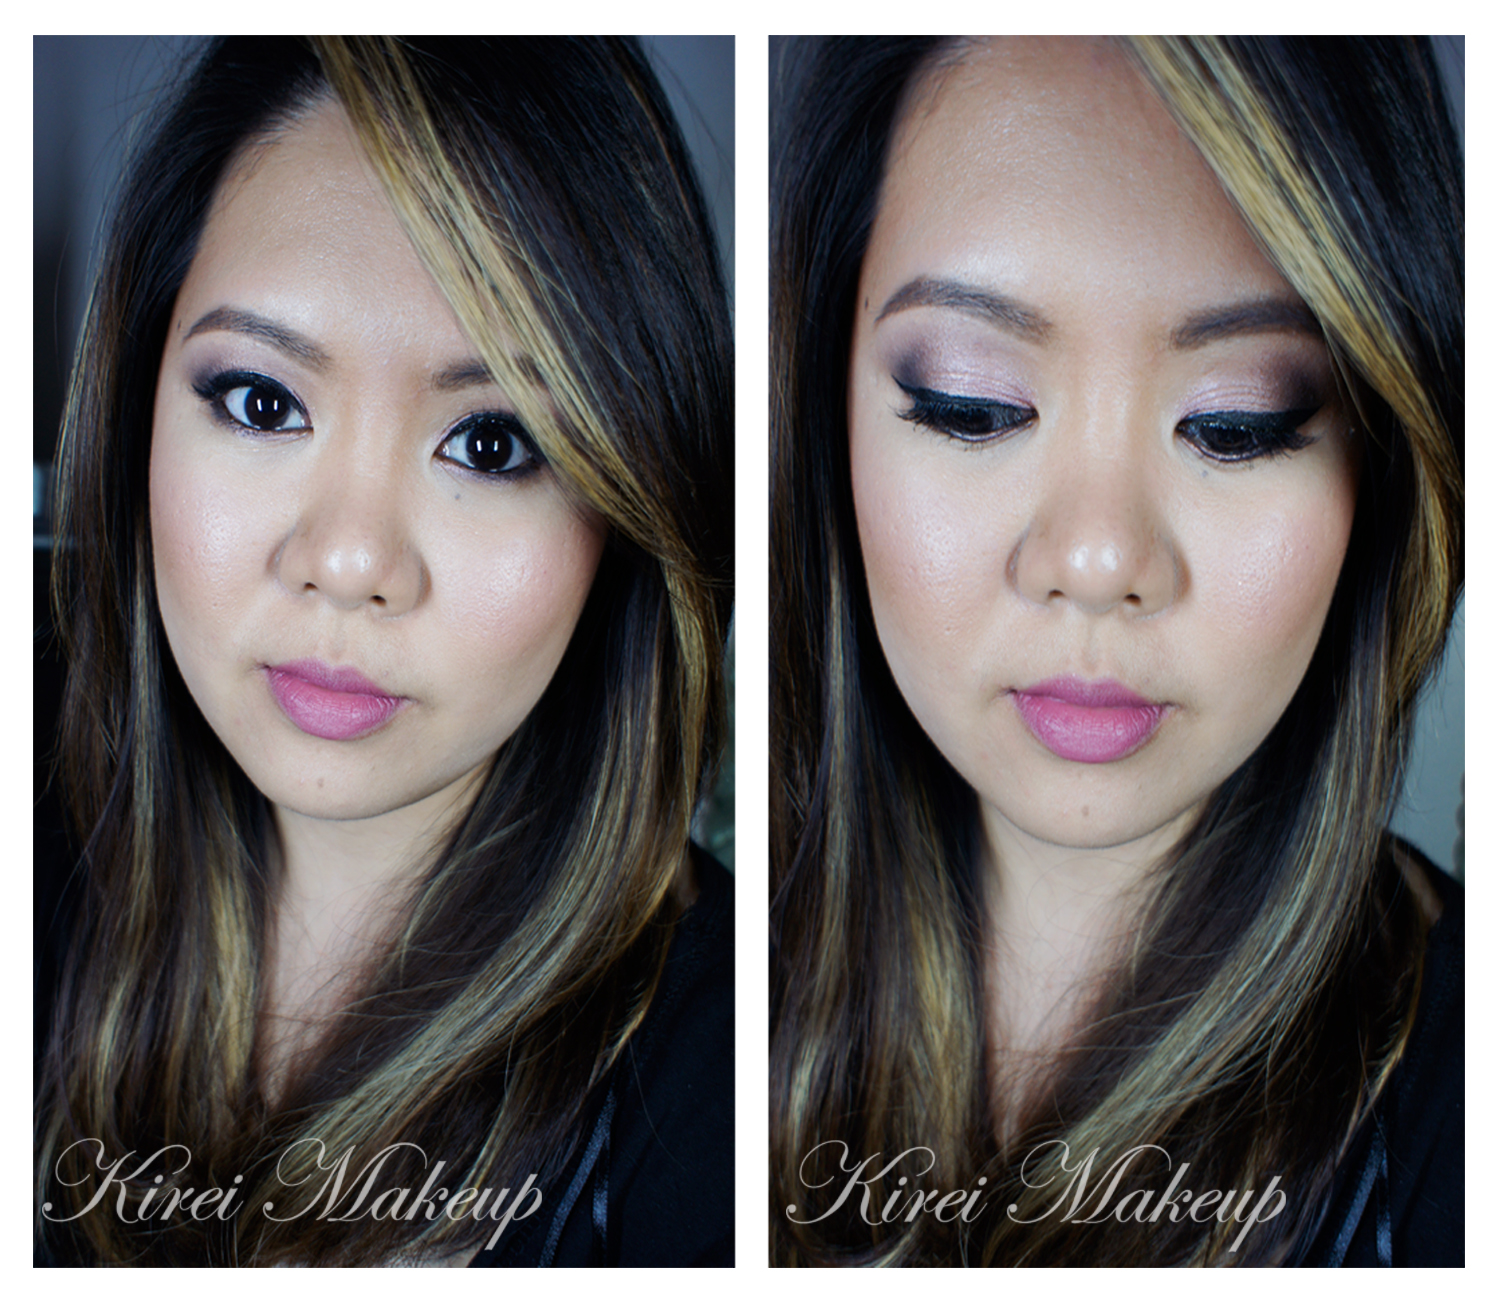
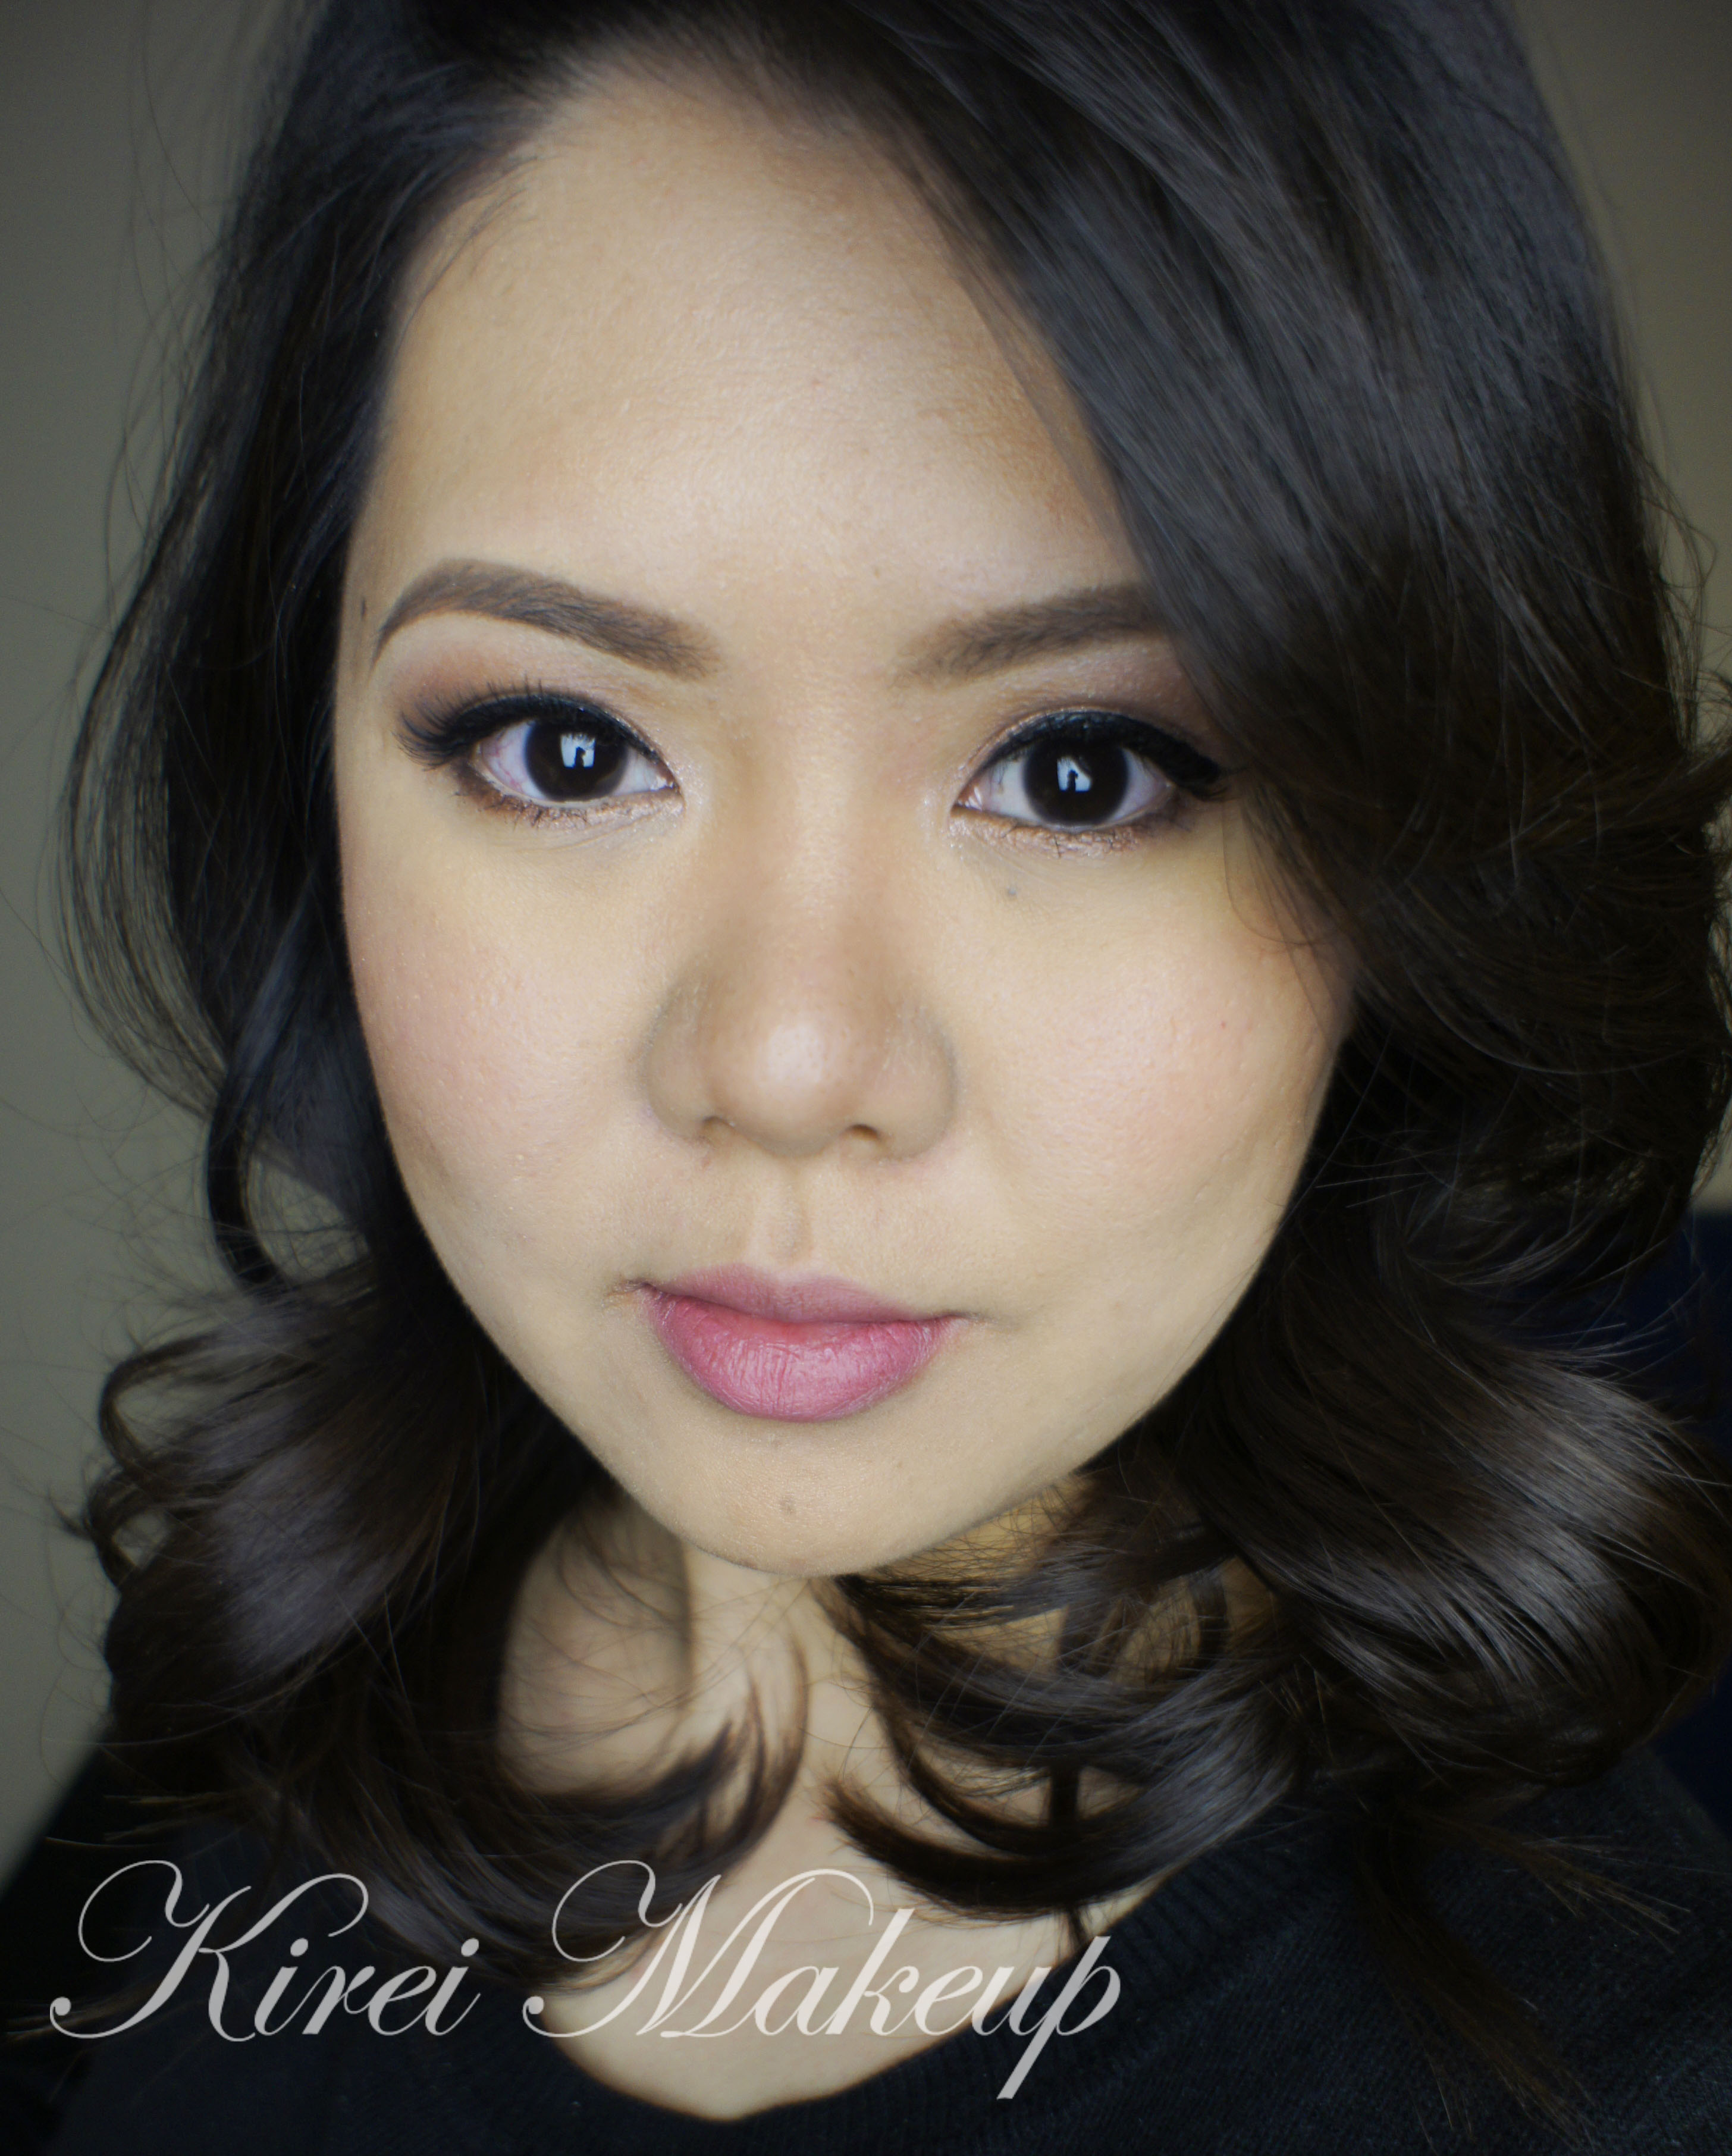
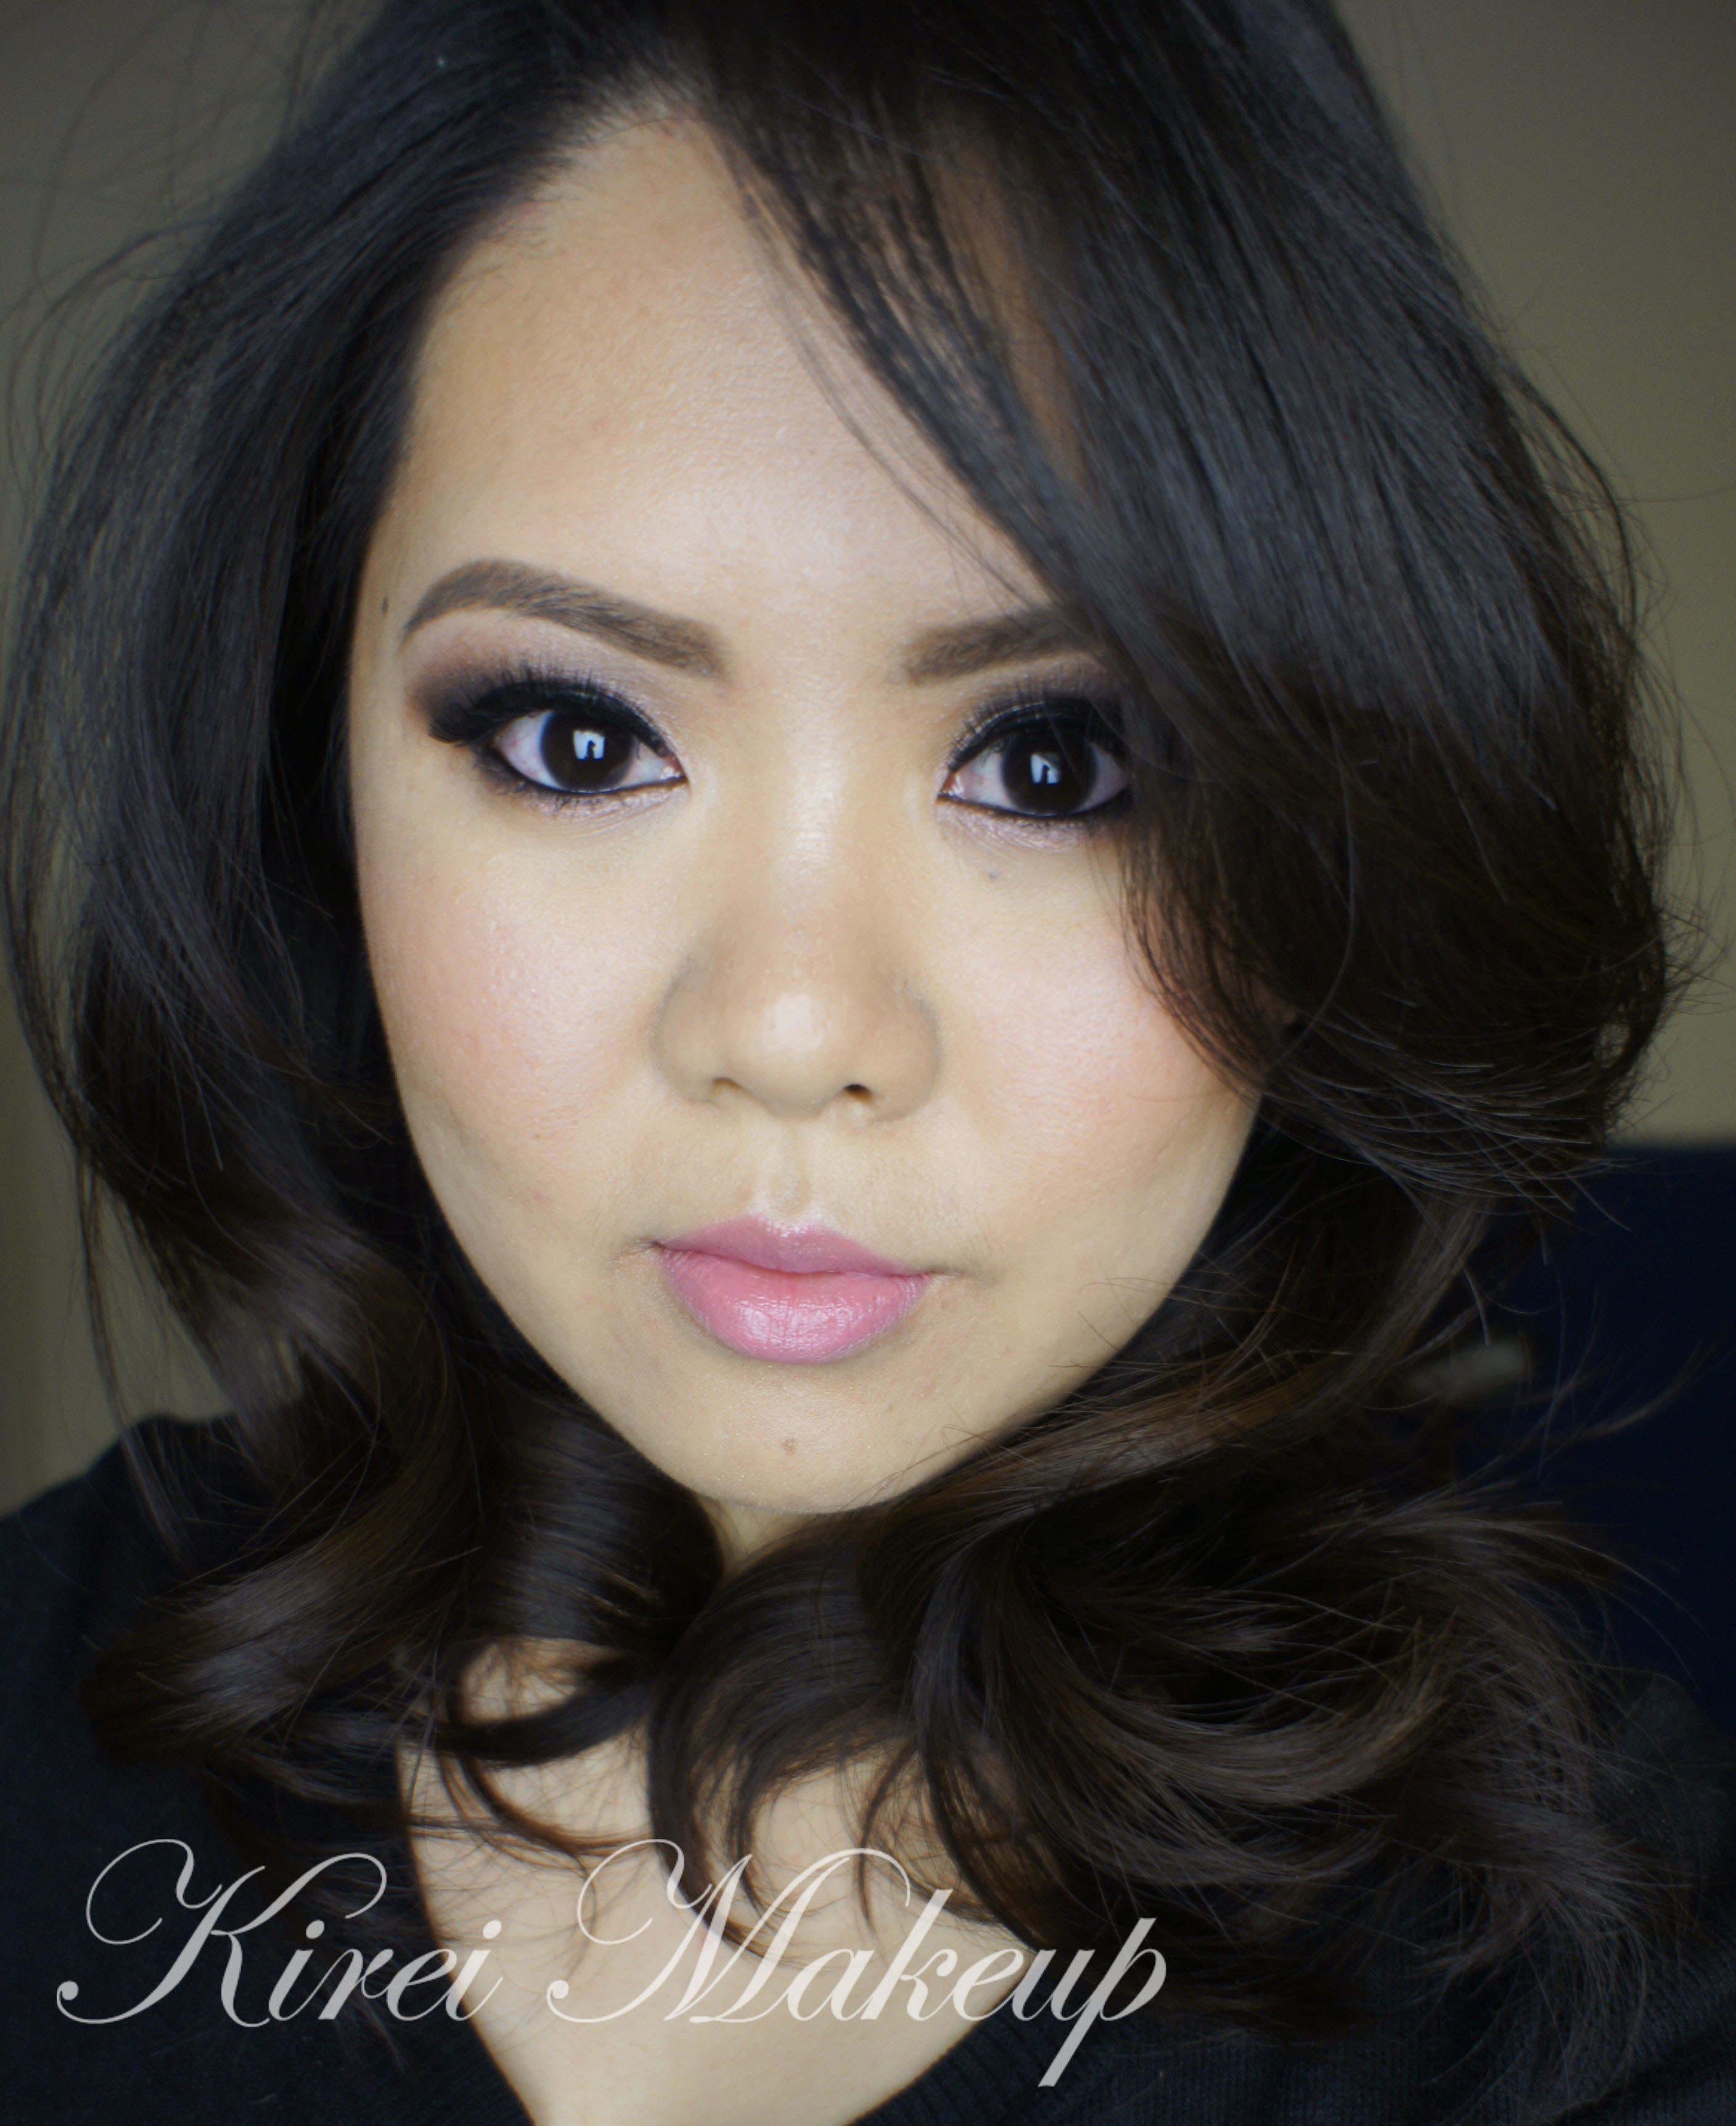
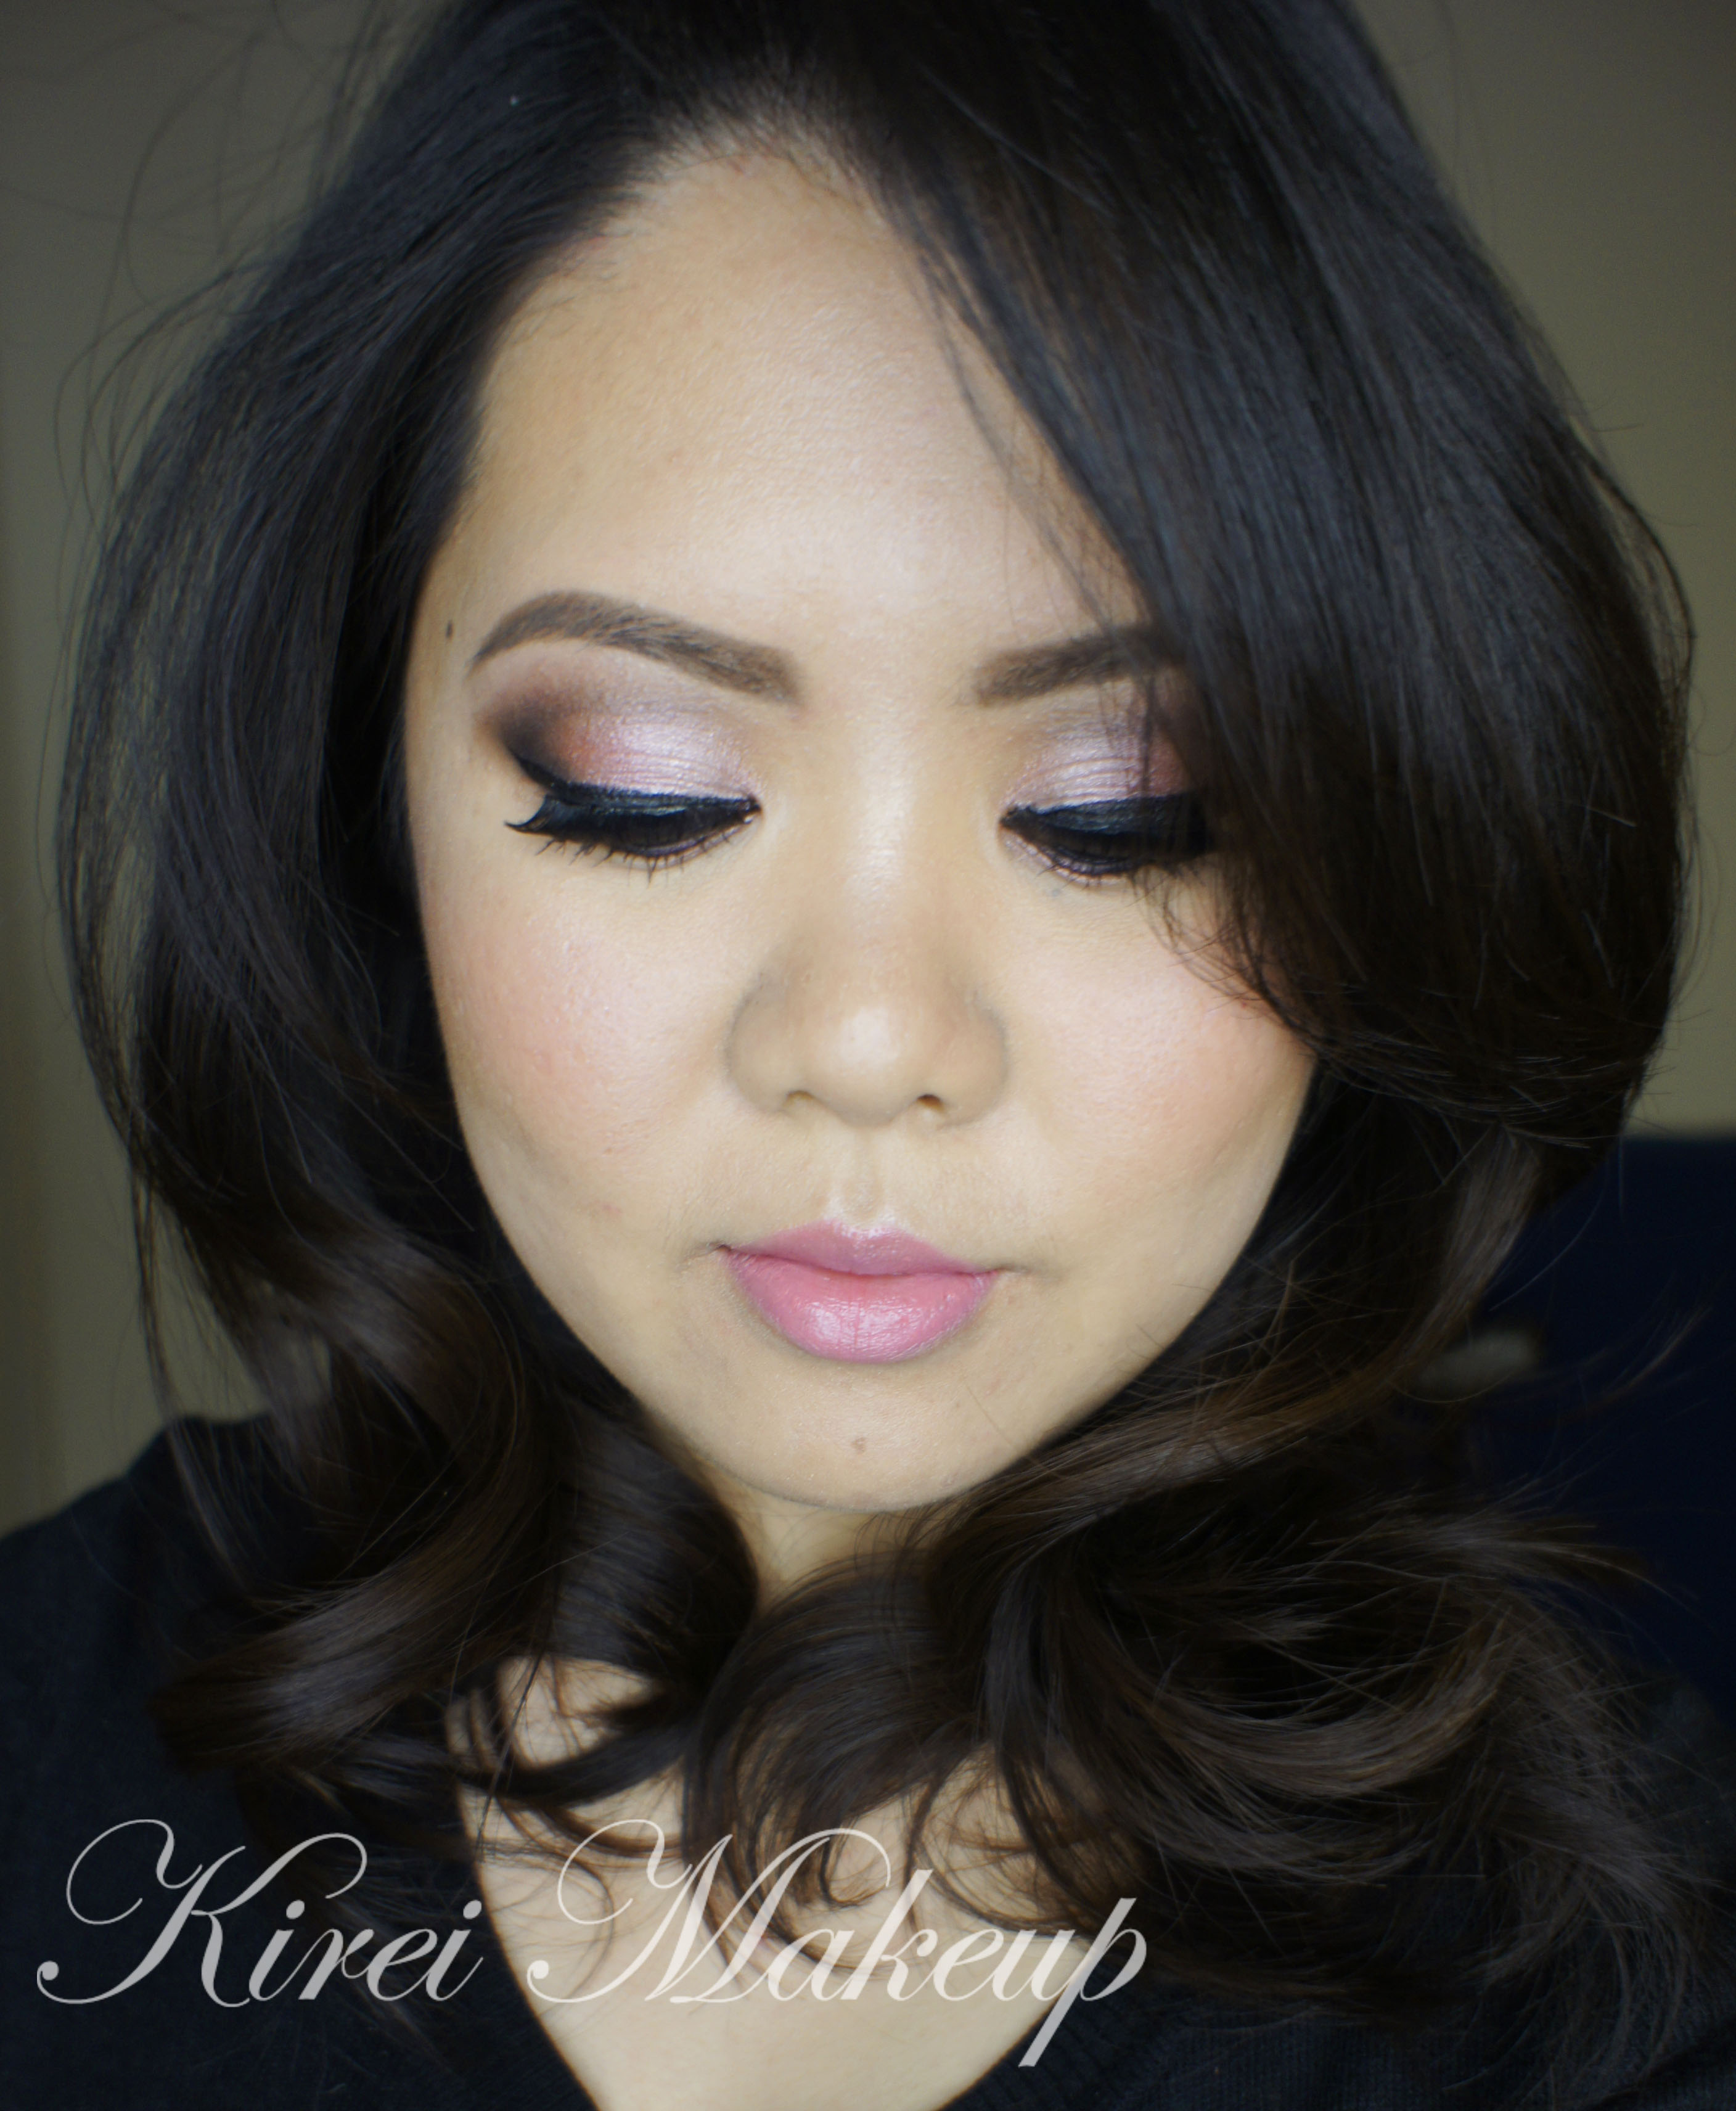
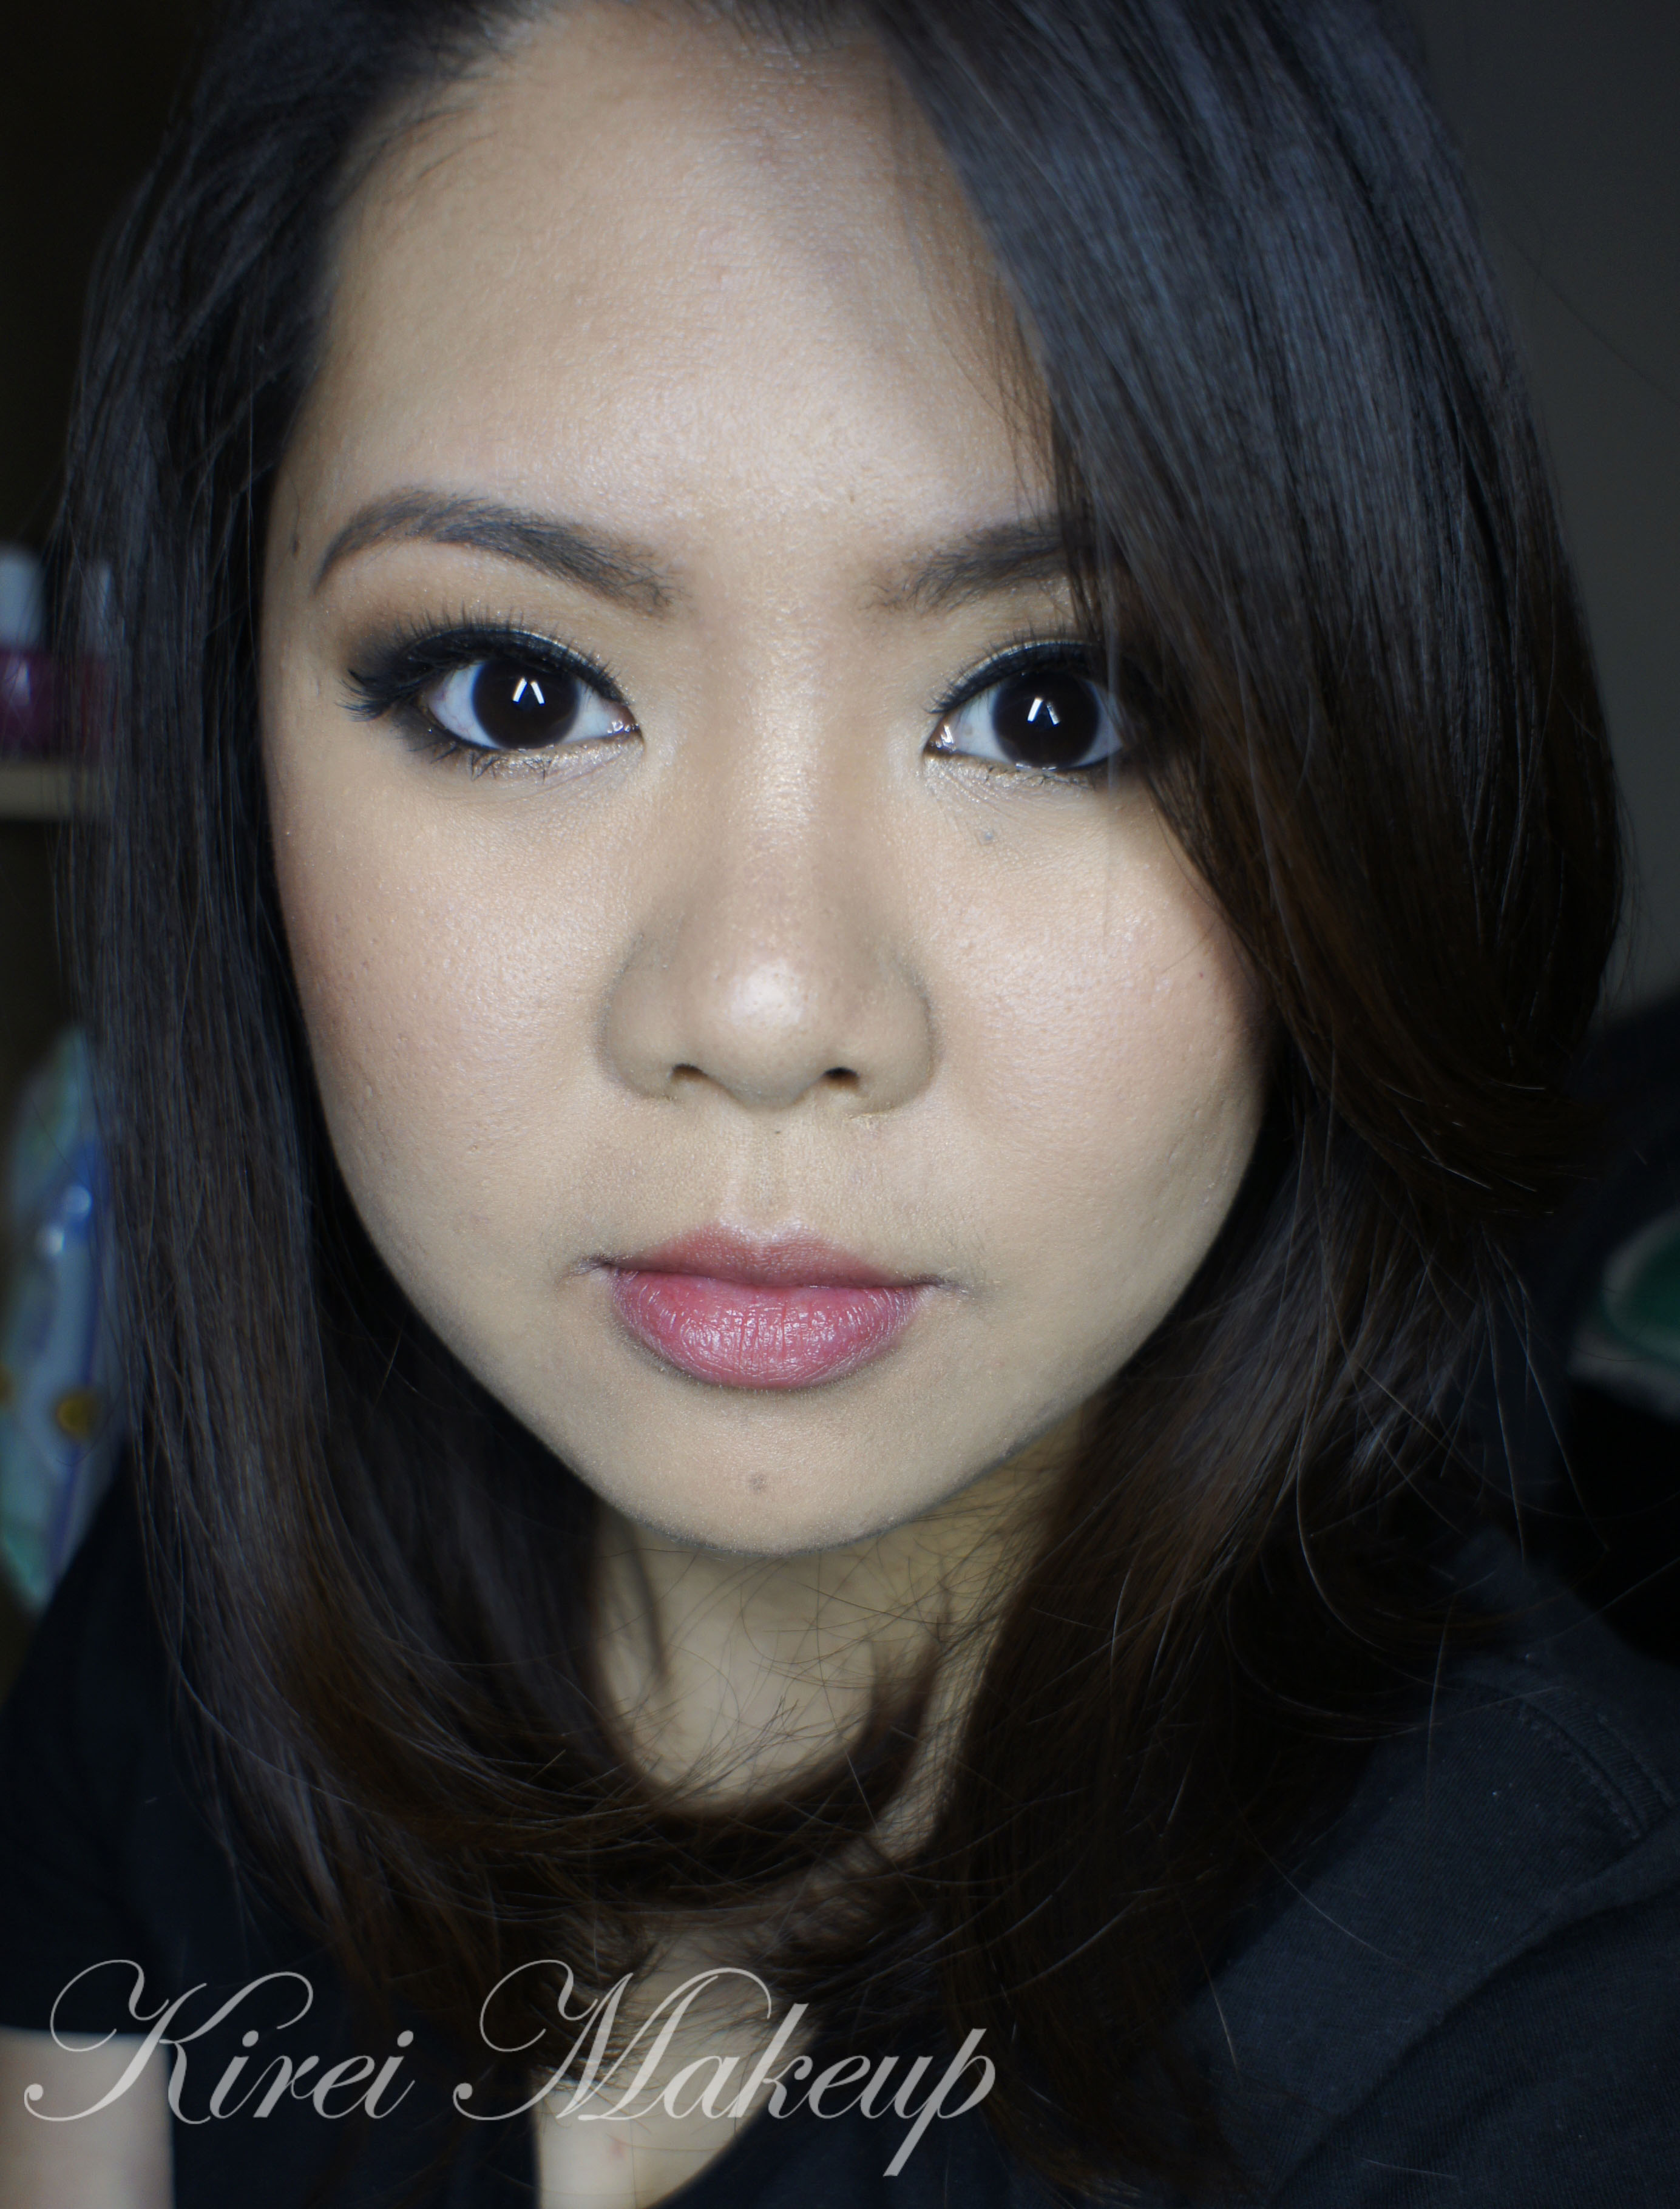
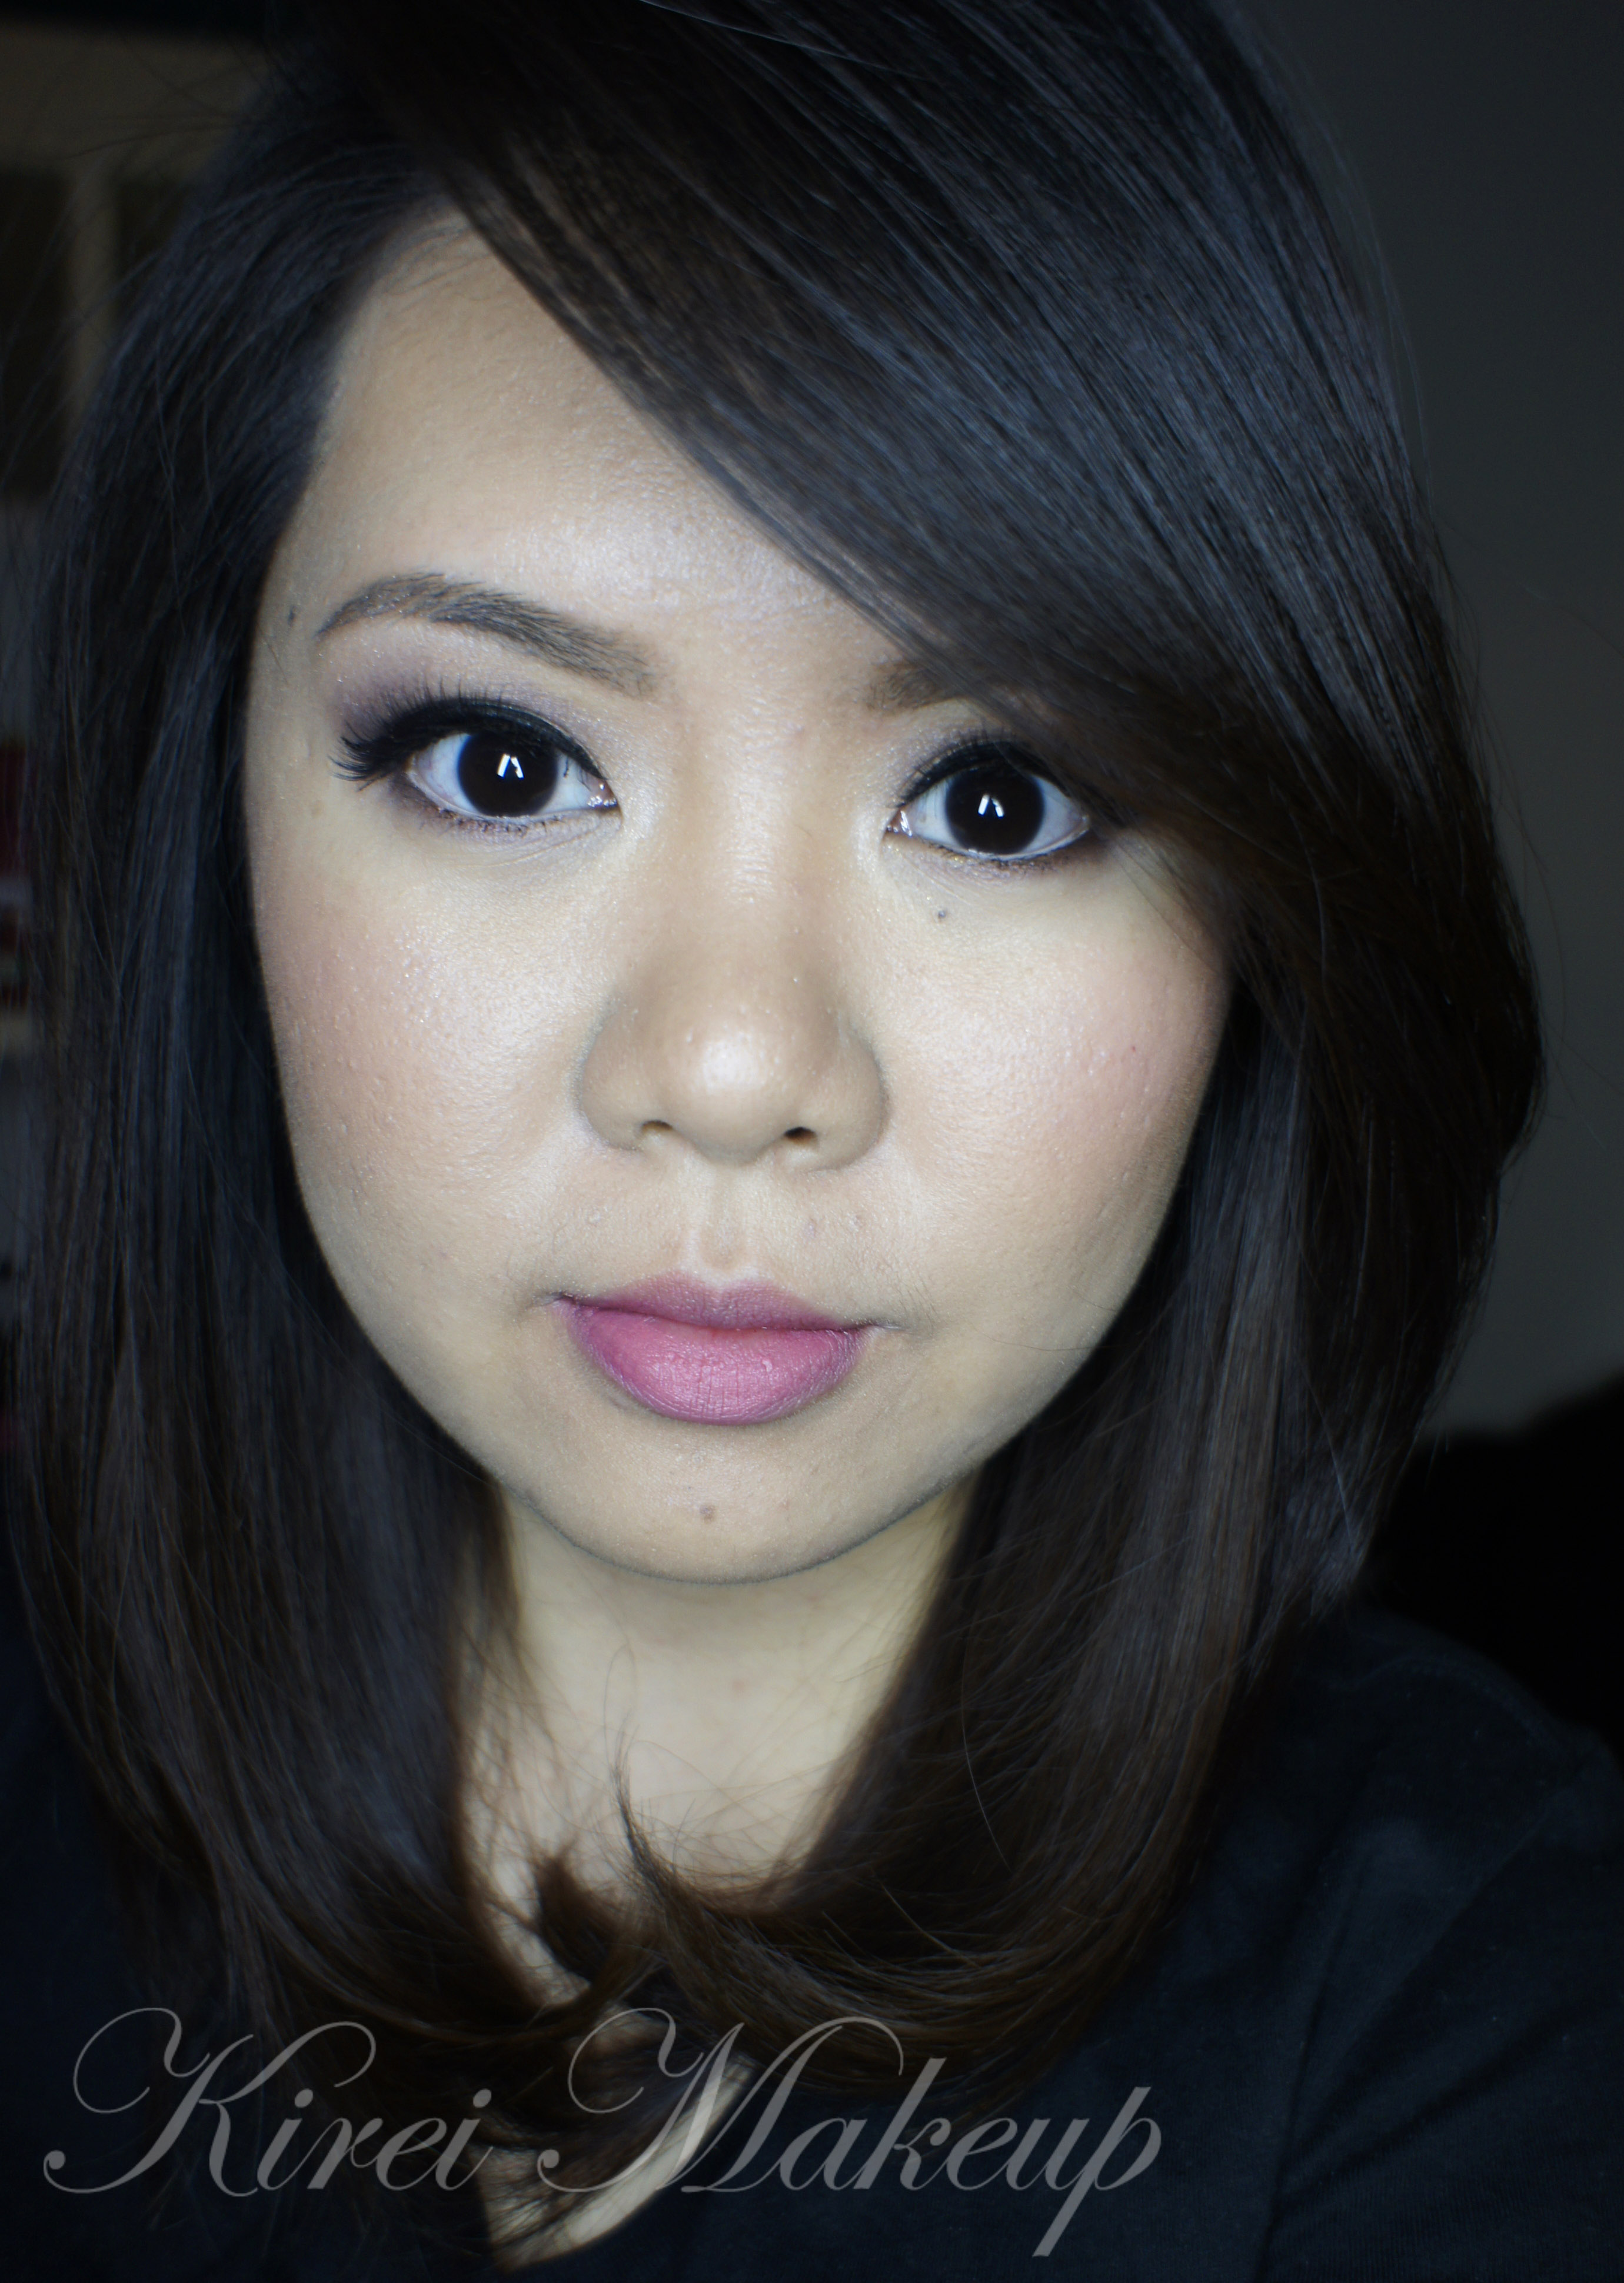
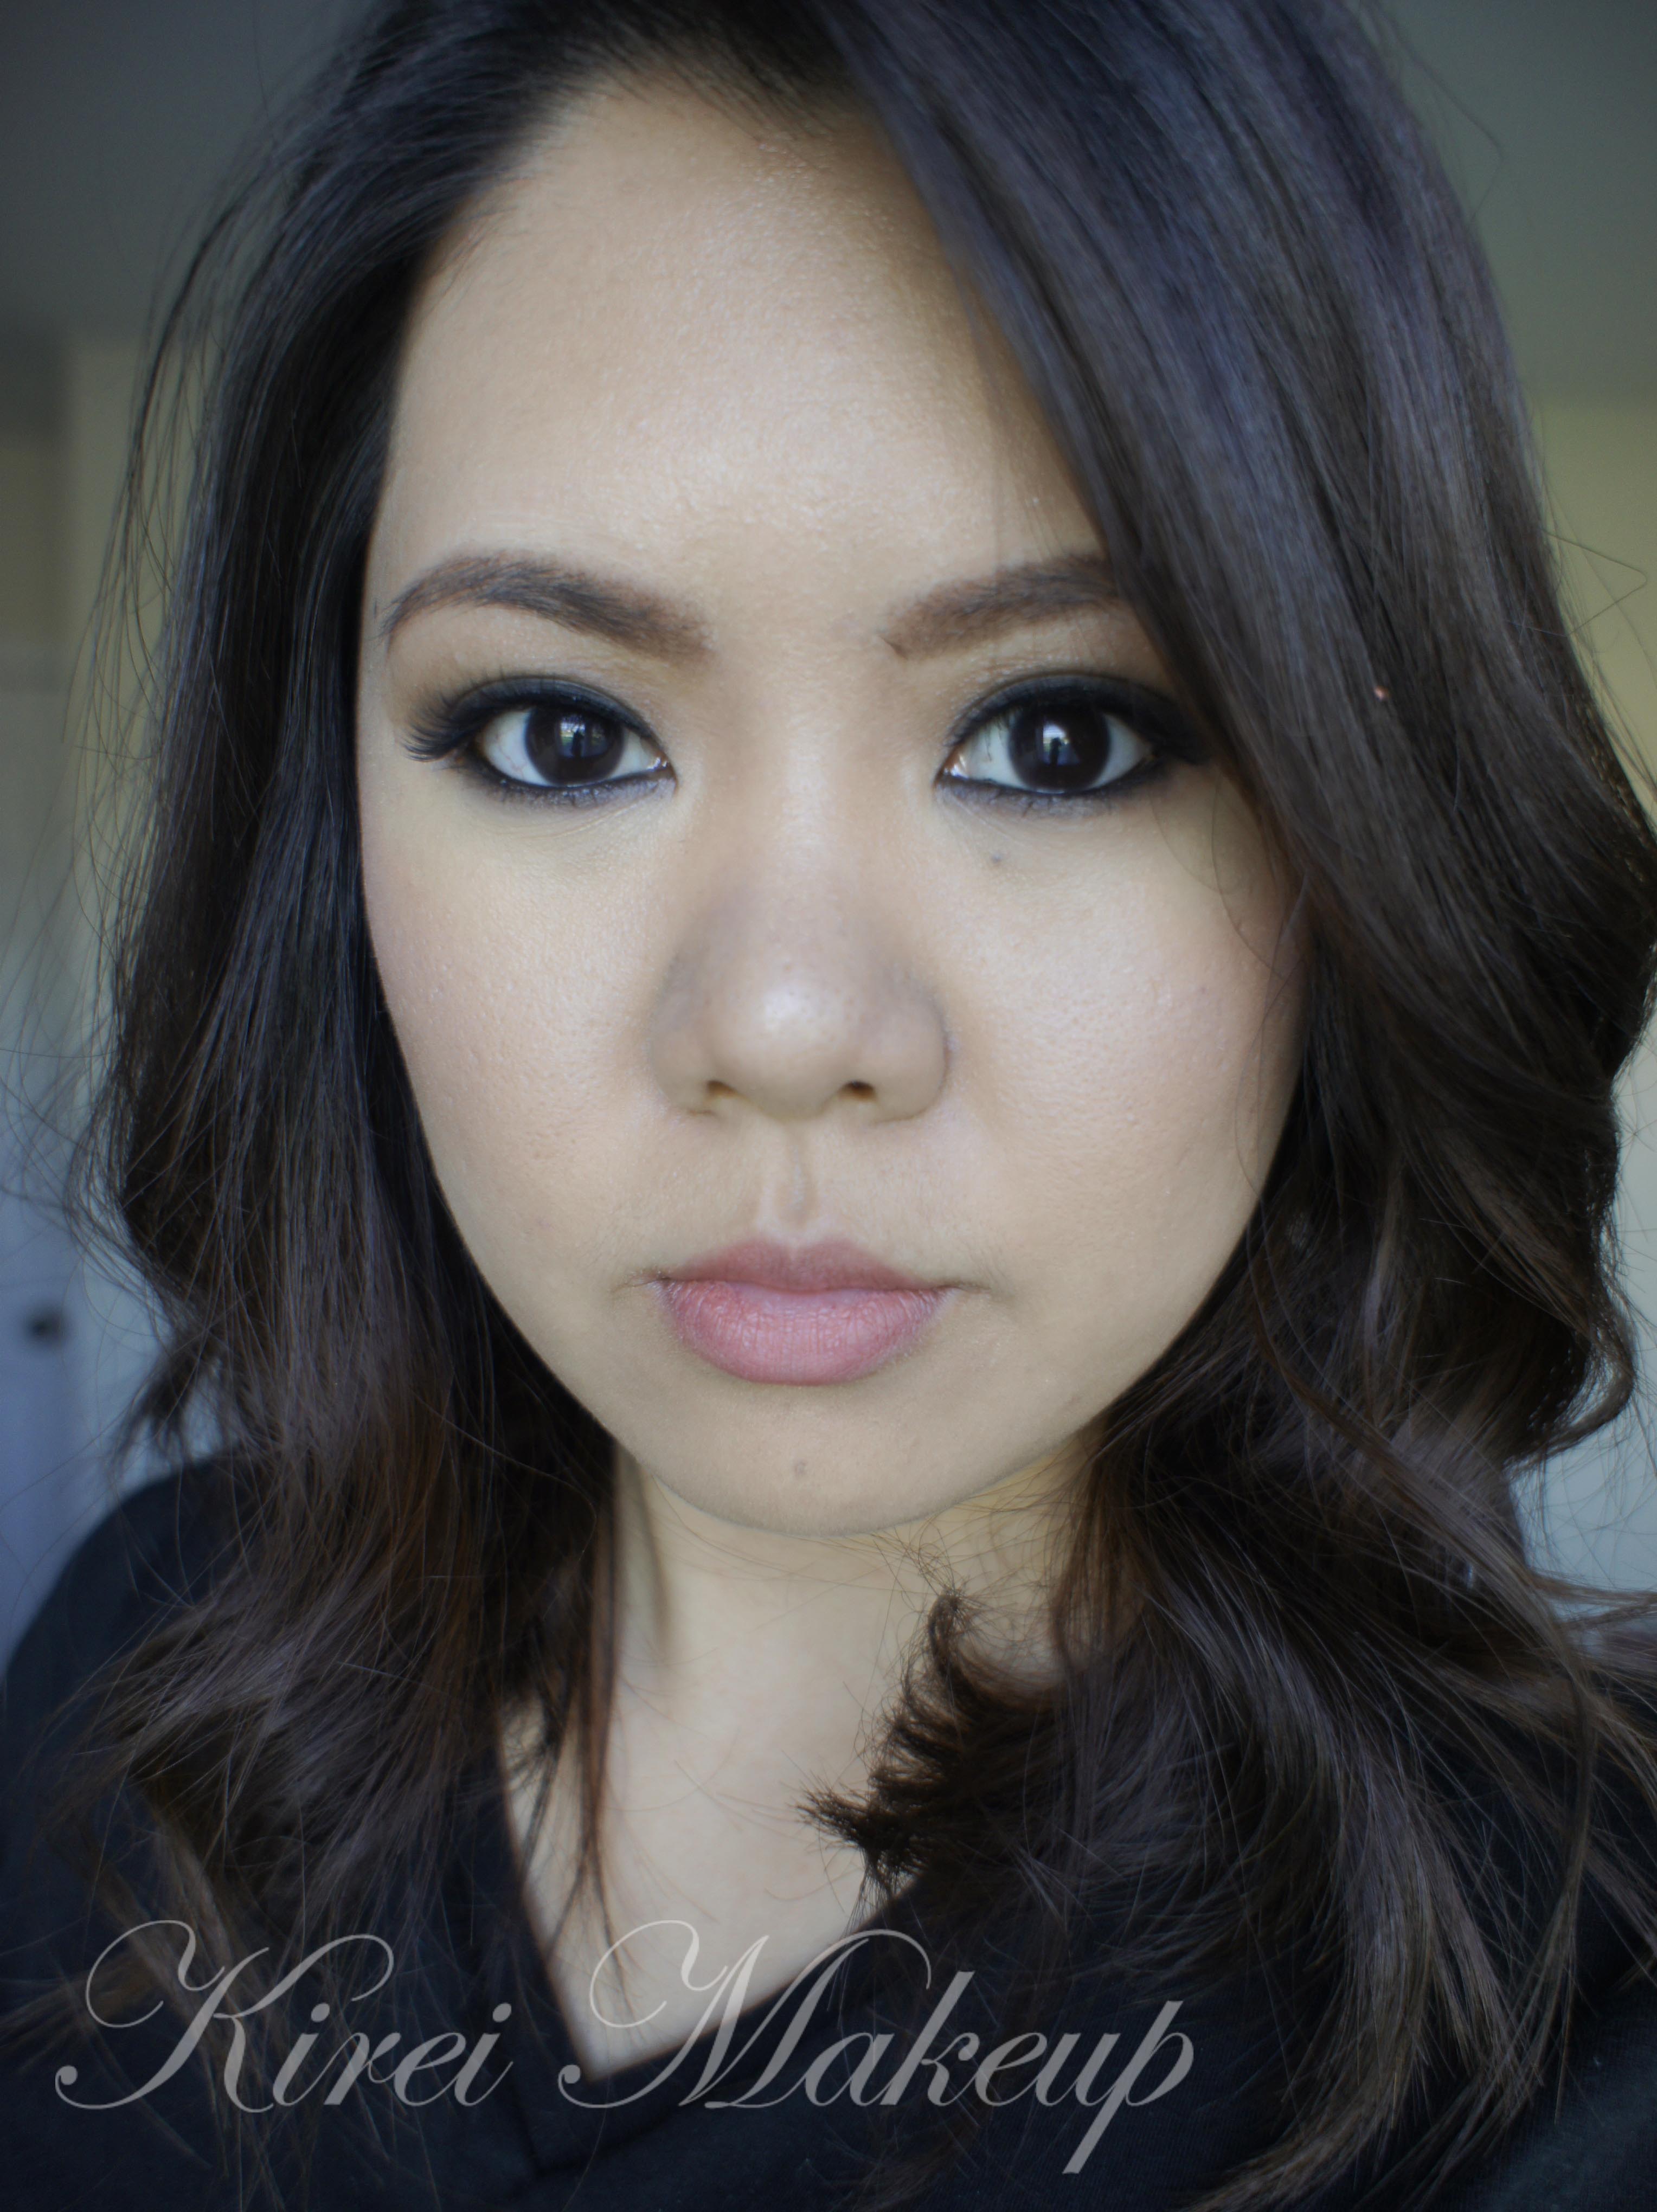
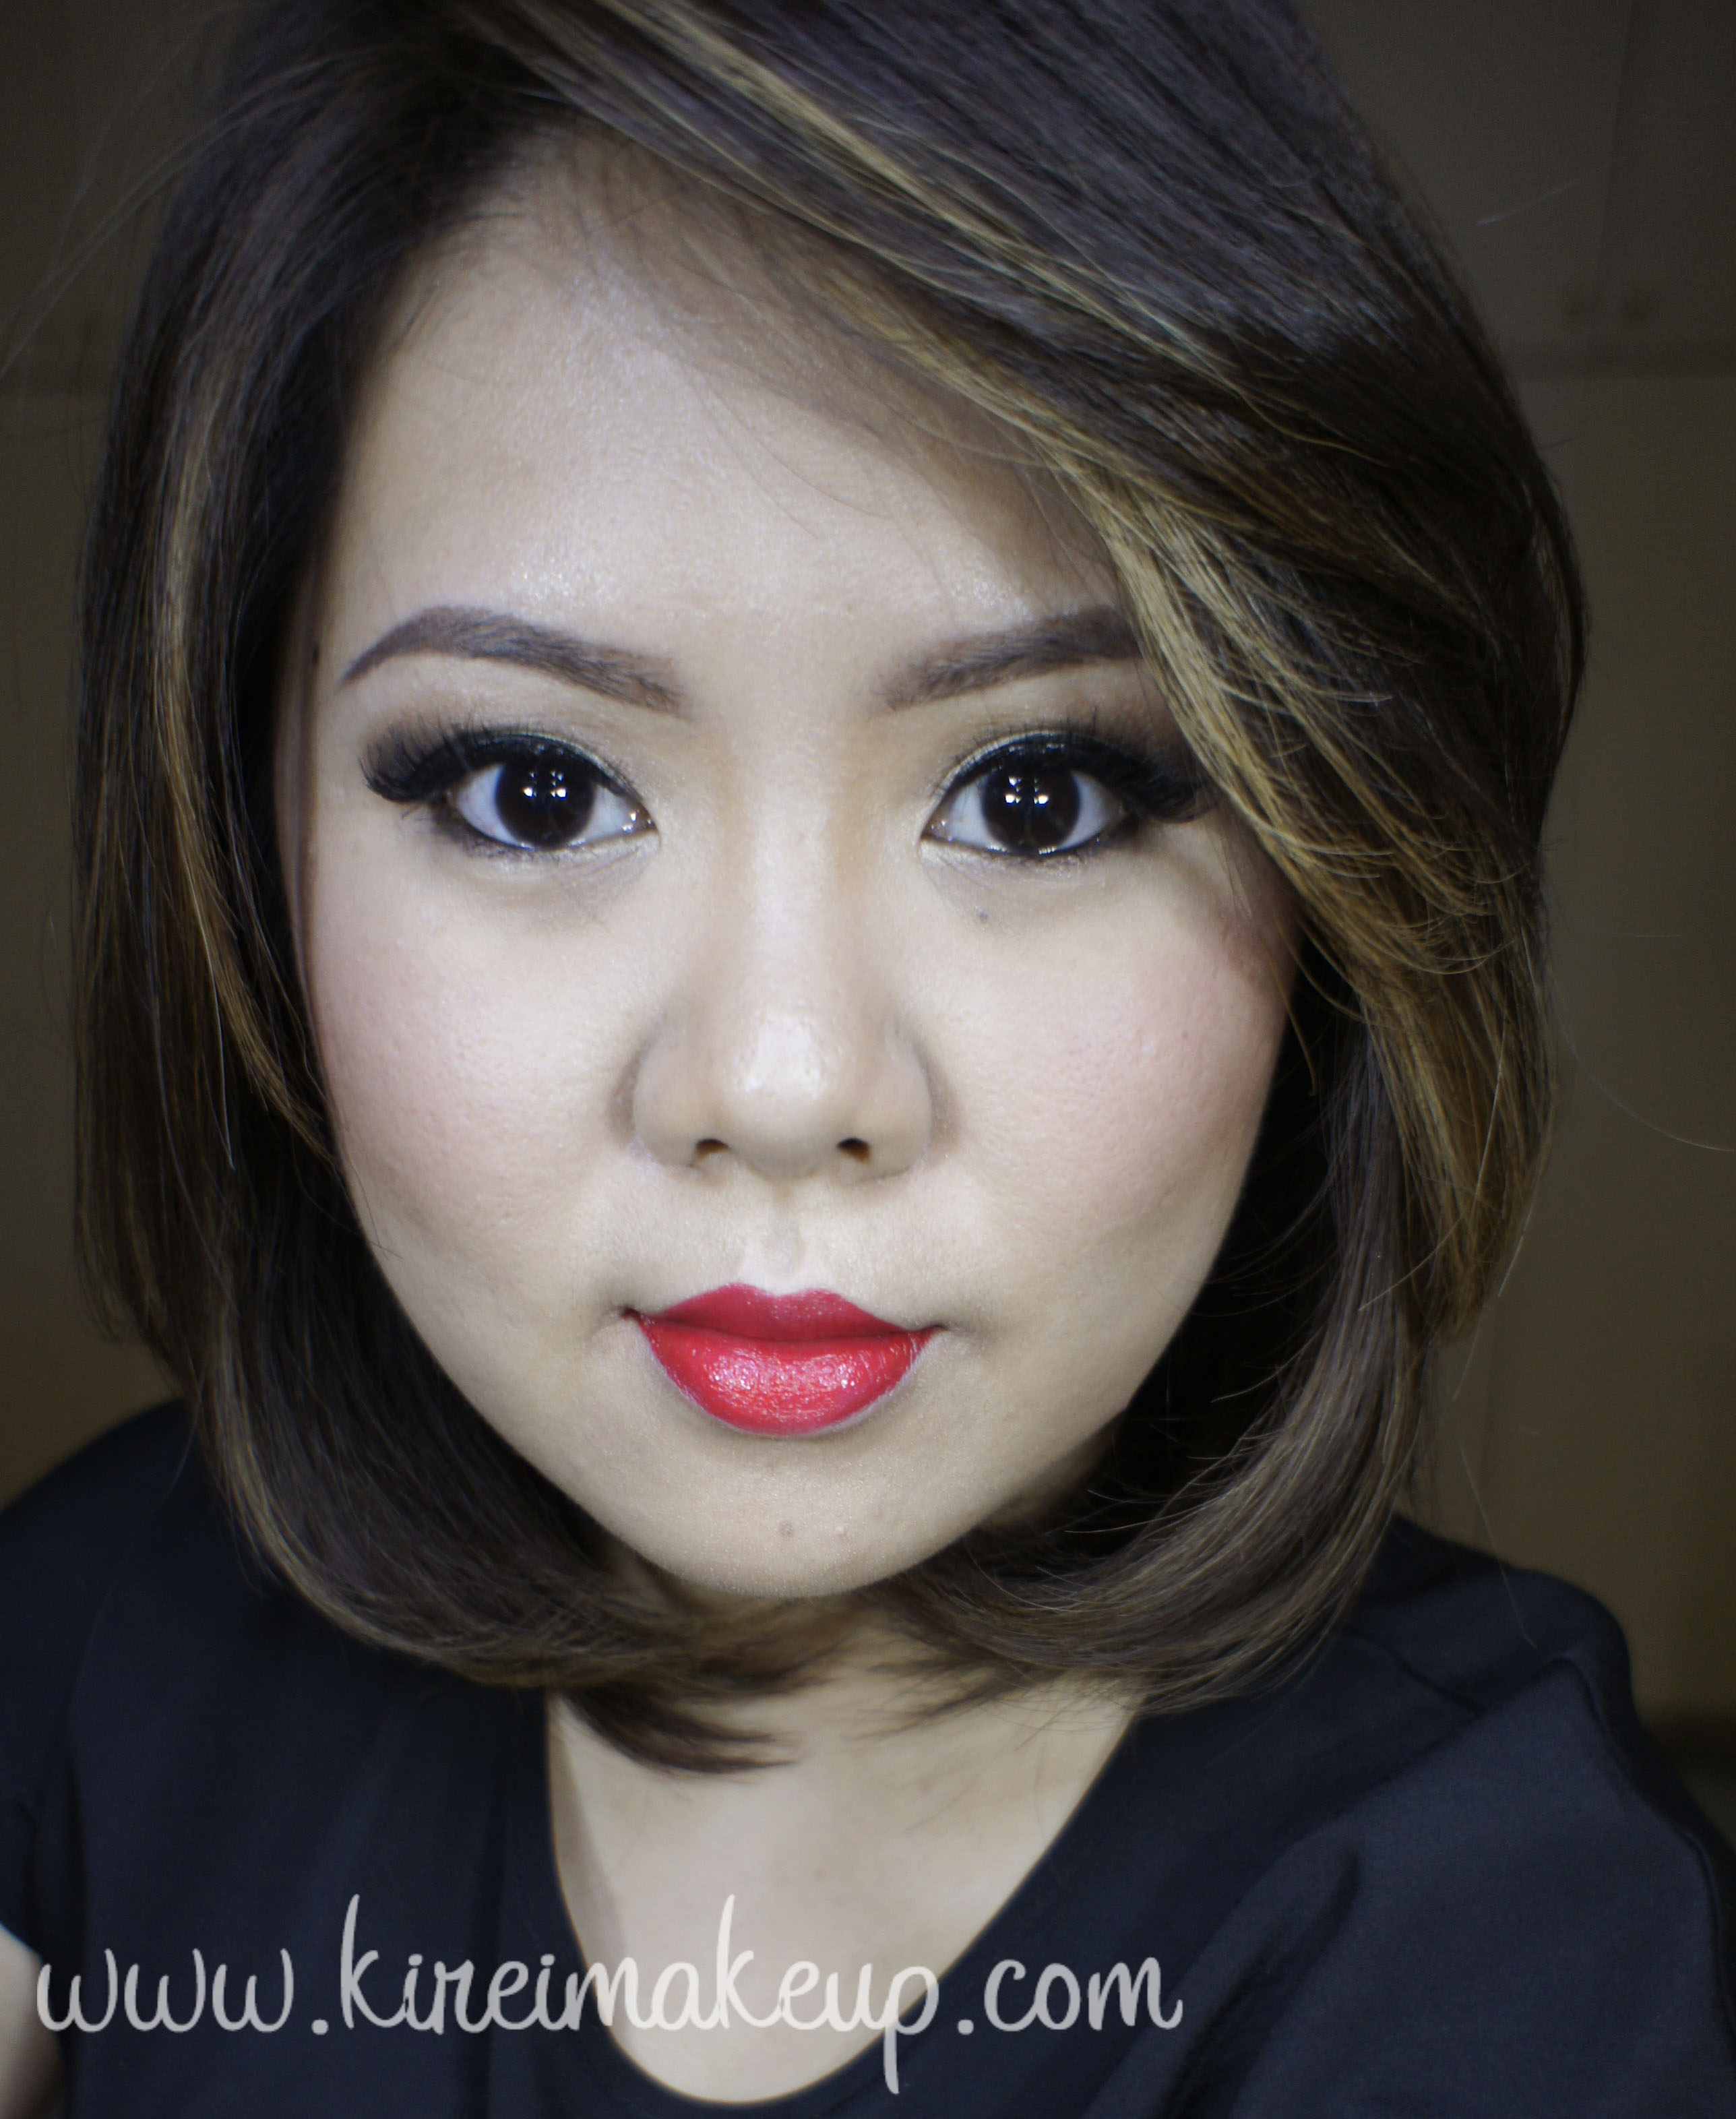
Another lips look, as mentioned, but this time I’ve decided to use this gorgeous shade – Revlon Fire and Ice. Apparently, this shade was first launched in the 50s, so of course I have to have it!To find out more about the history of this iconic shade, feel free to read about it in Fire and Ice, and Everything Nice.
The best part about this shade is the fact that it is a neutral red – it has both warm and cool undertone, which makes it the perfect shade for everyone. To be honest, I personally find this shade to be slightly on the brighter side compared to the other red lipsticks that I owned, but I don’t mind it. On myself, the shade looks slightly on the coral side. However, this shade might look different depending on your own skin tone, which I think is great since it’ll be a unique color to each person.
I applied the lipstick without any lip liner, and straight from the tube. I didn’t blot and powder it for this tutorial so you can see its true shade and texture. Revlon Fire and Ice is a super lustrous lipstick, which means it’s slightly more on the creamier side. I don’t find this shade to be drying at all.
Also, if you noticed, I’ve been switching my makeup from eyes to lips lately. I actually rocked a red lip last weekend to attend a friend’s wedding (after doing her makeup and hair). Curious to see which red lips I wore last weekend? Check out my Instagram!
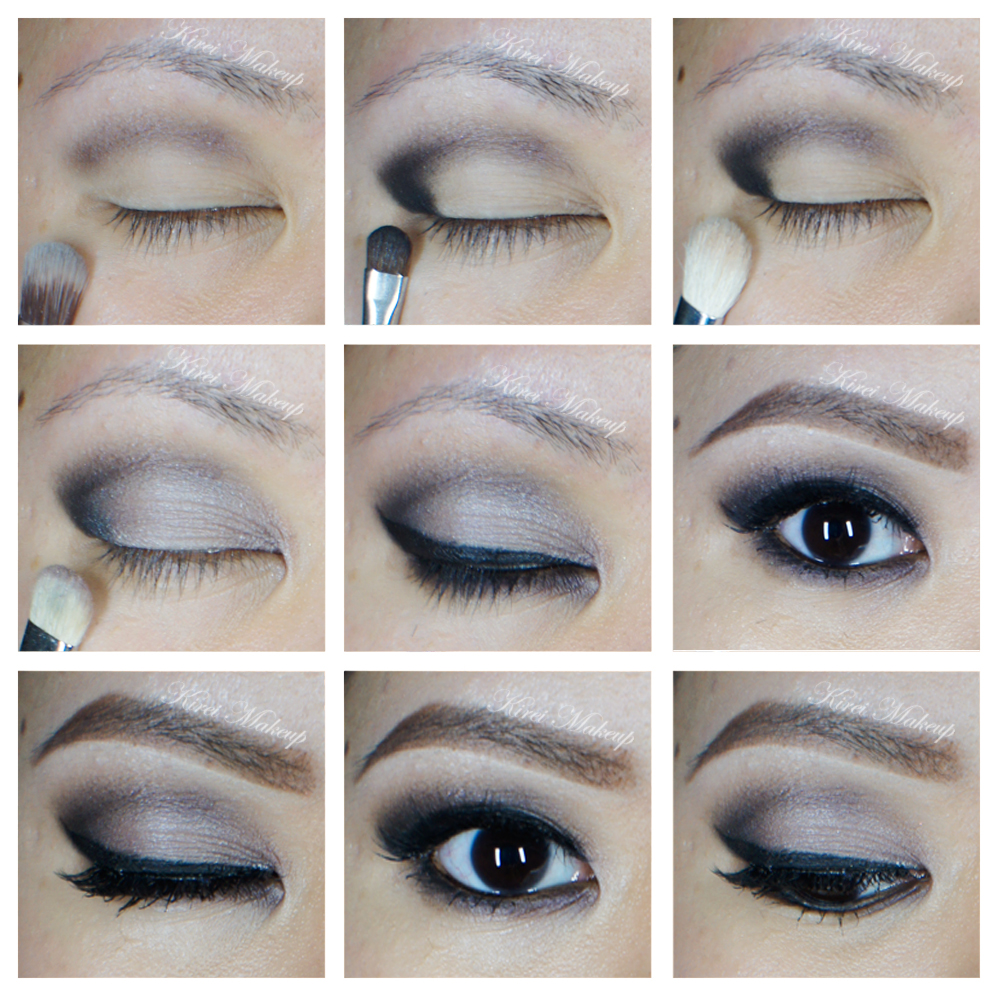
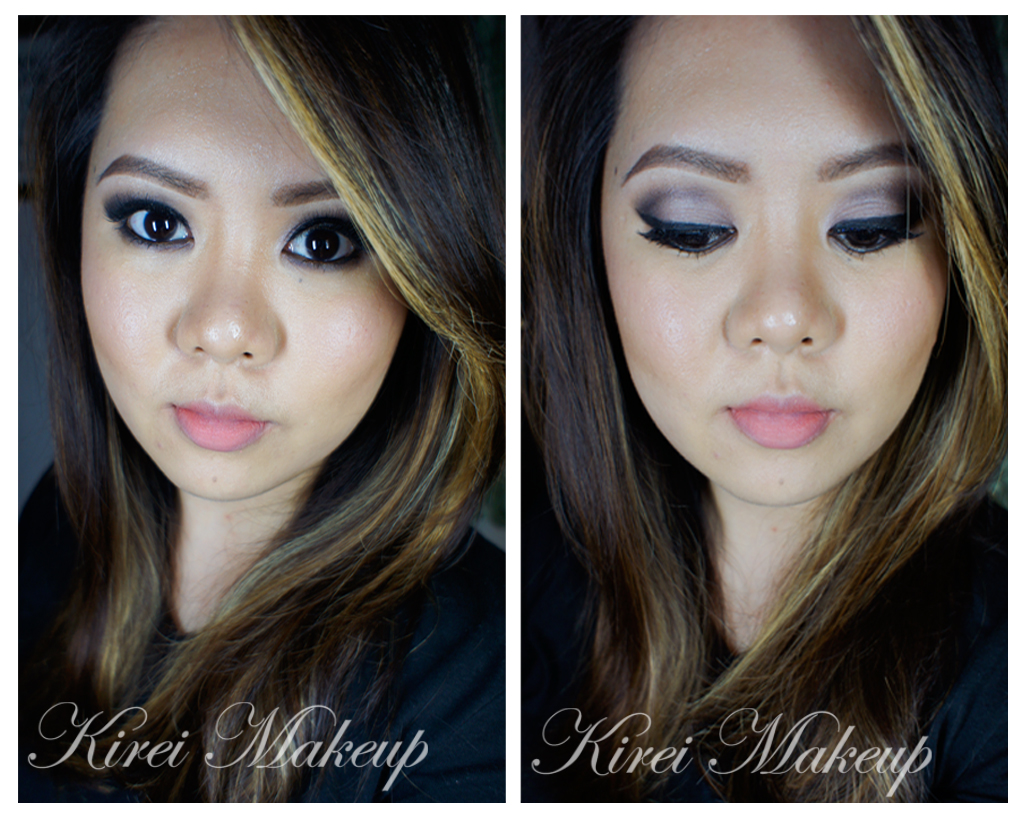
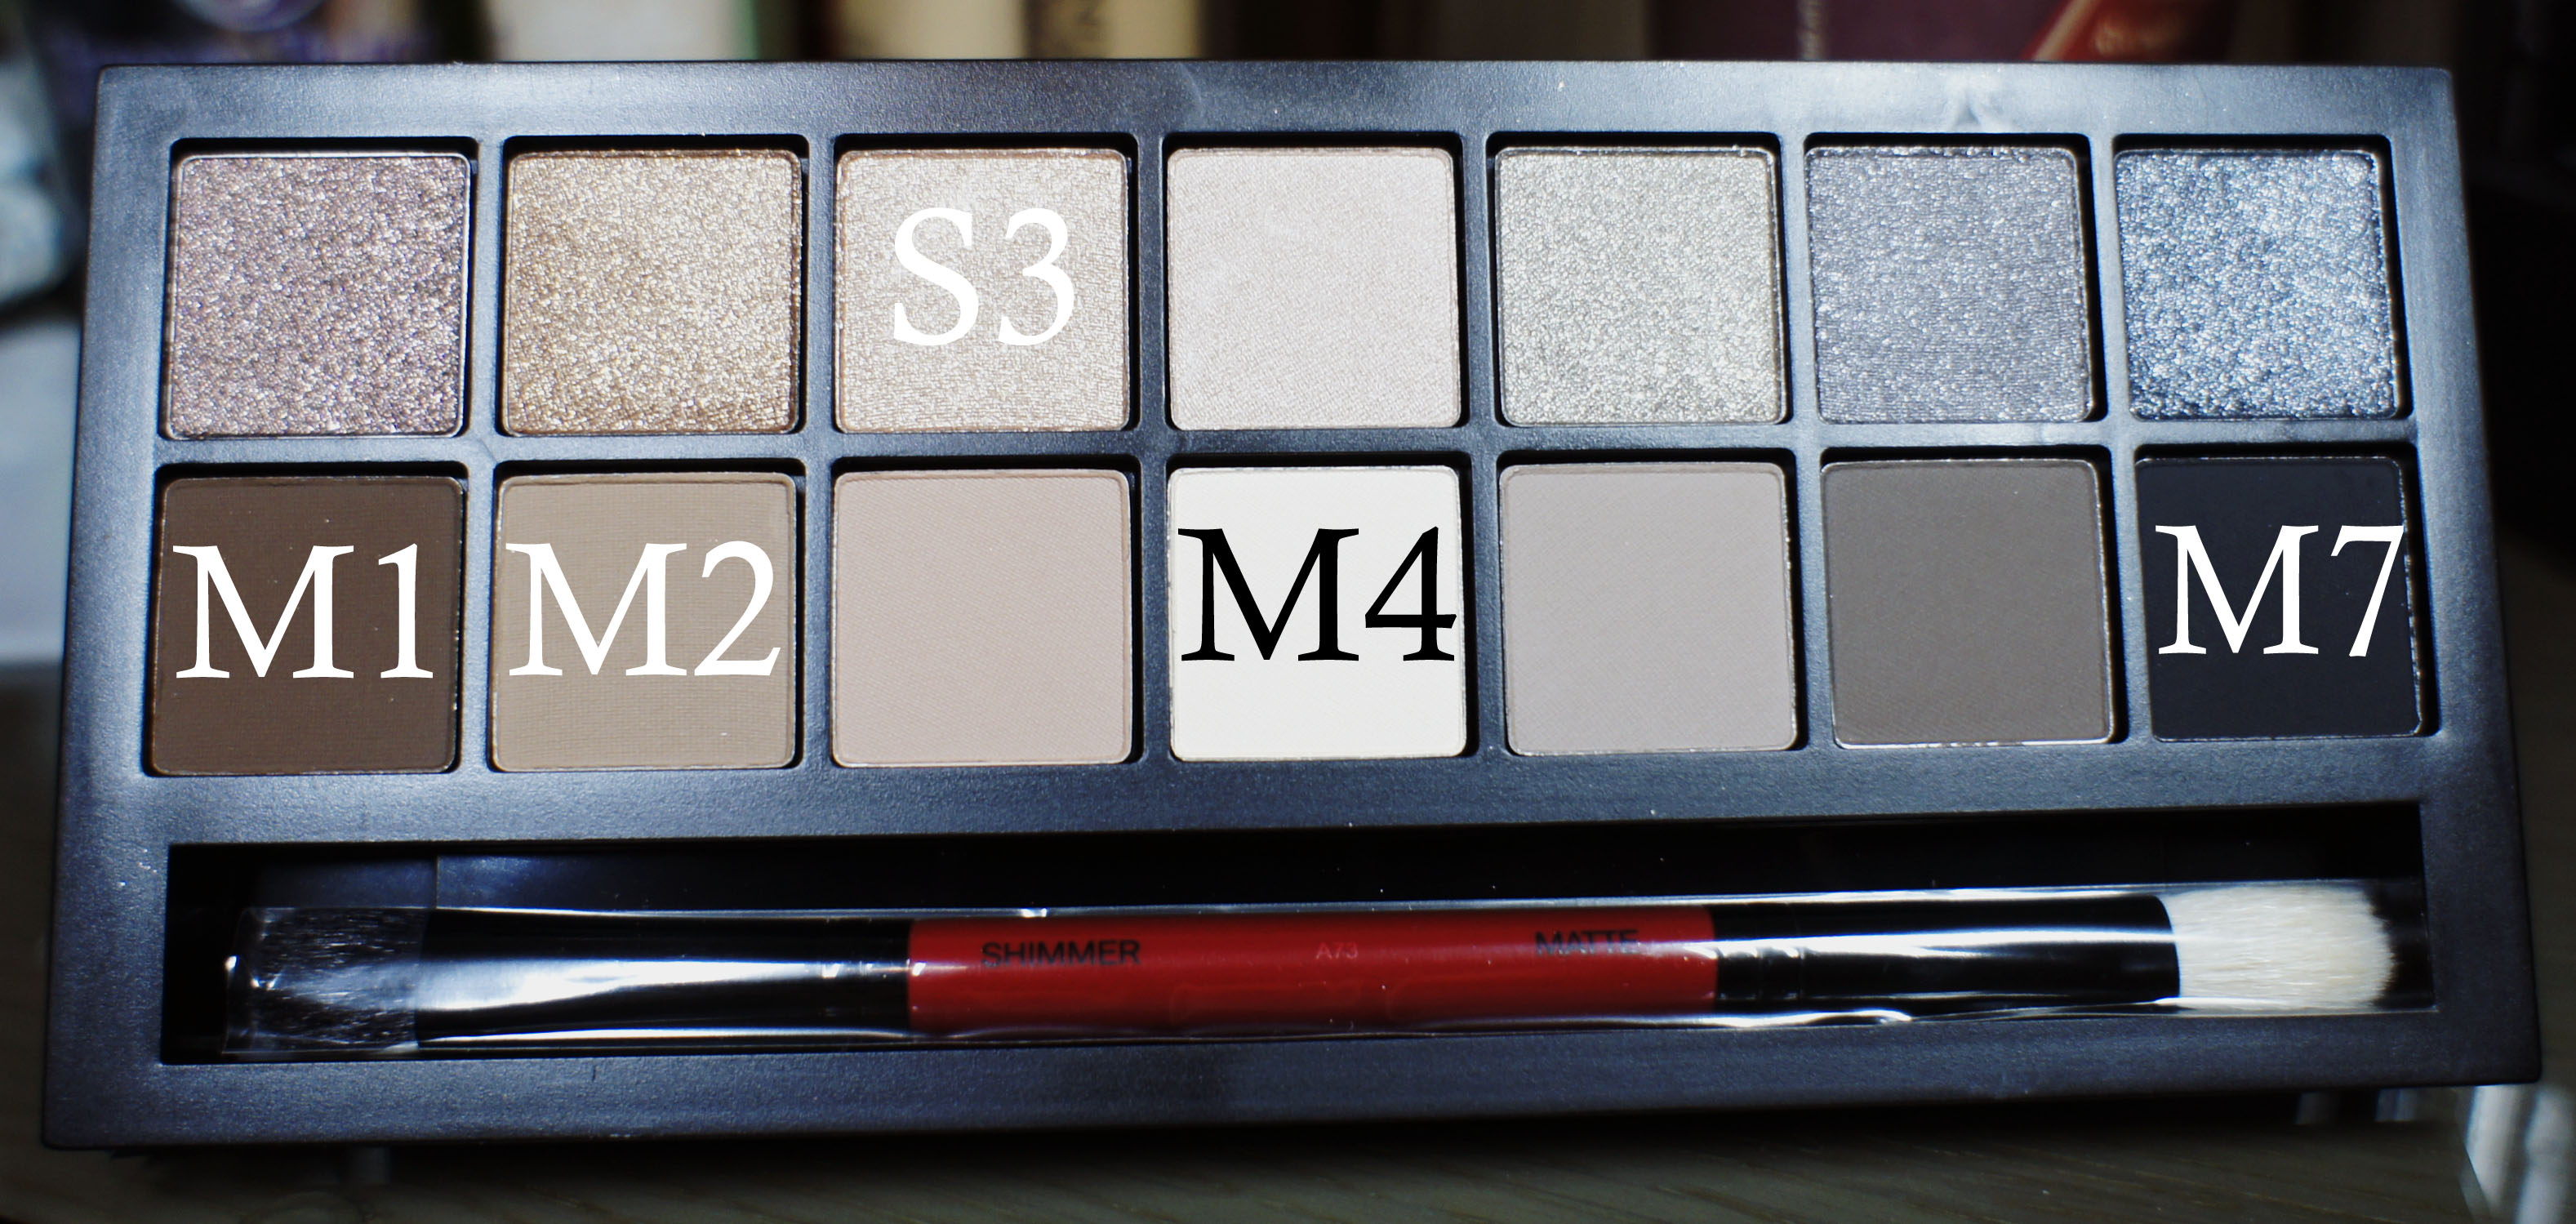
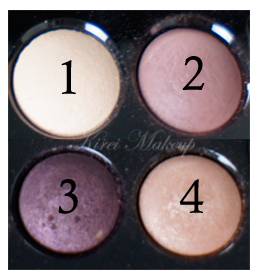
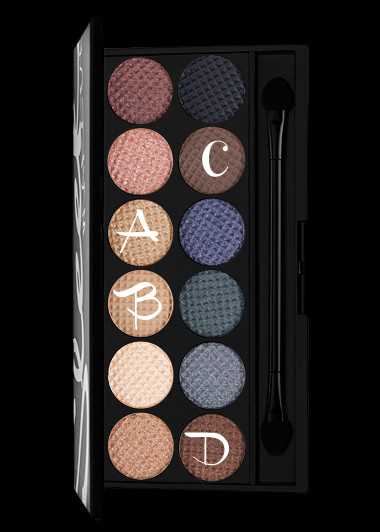
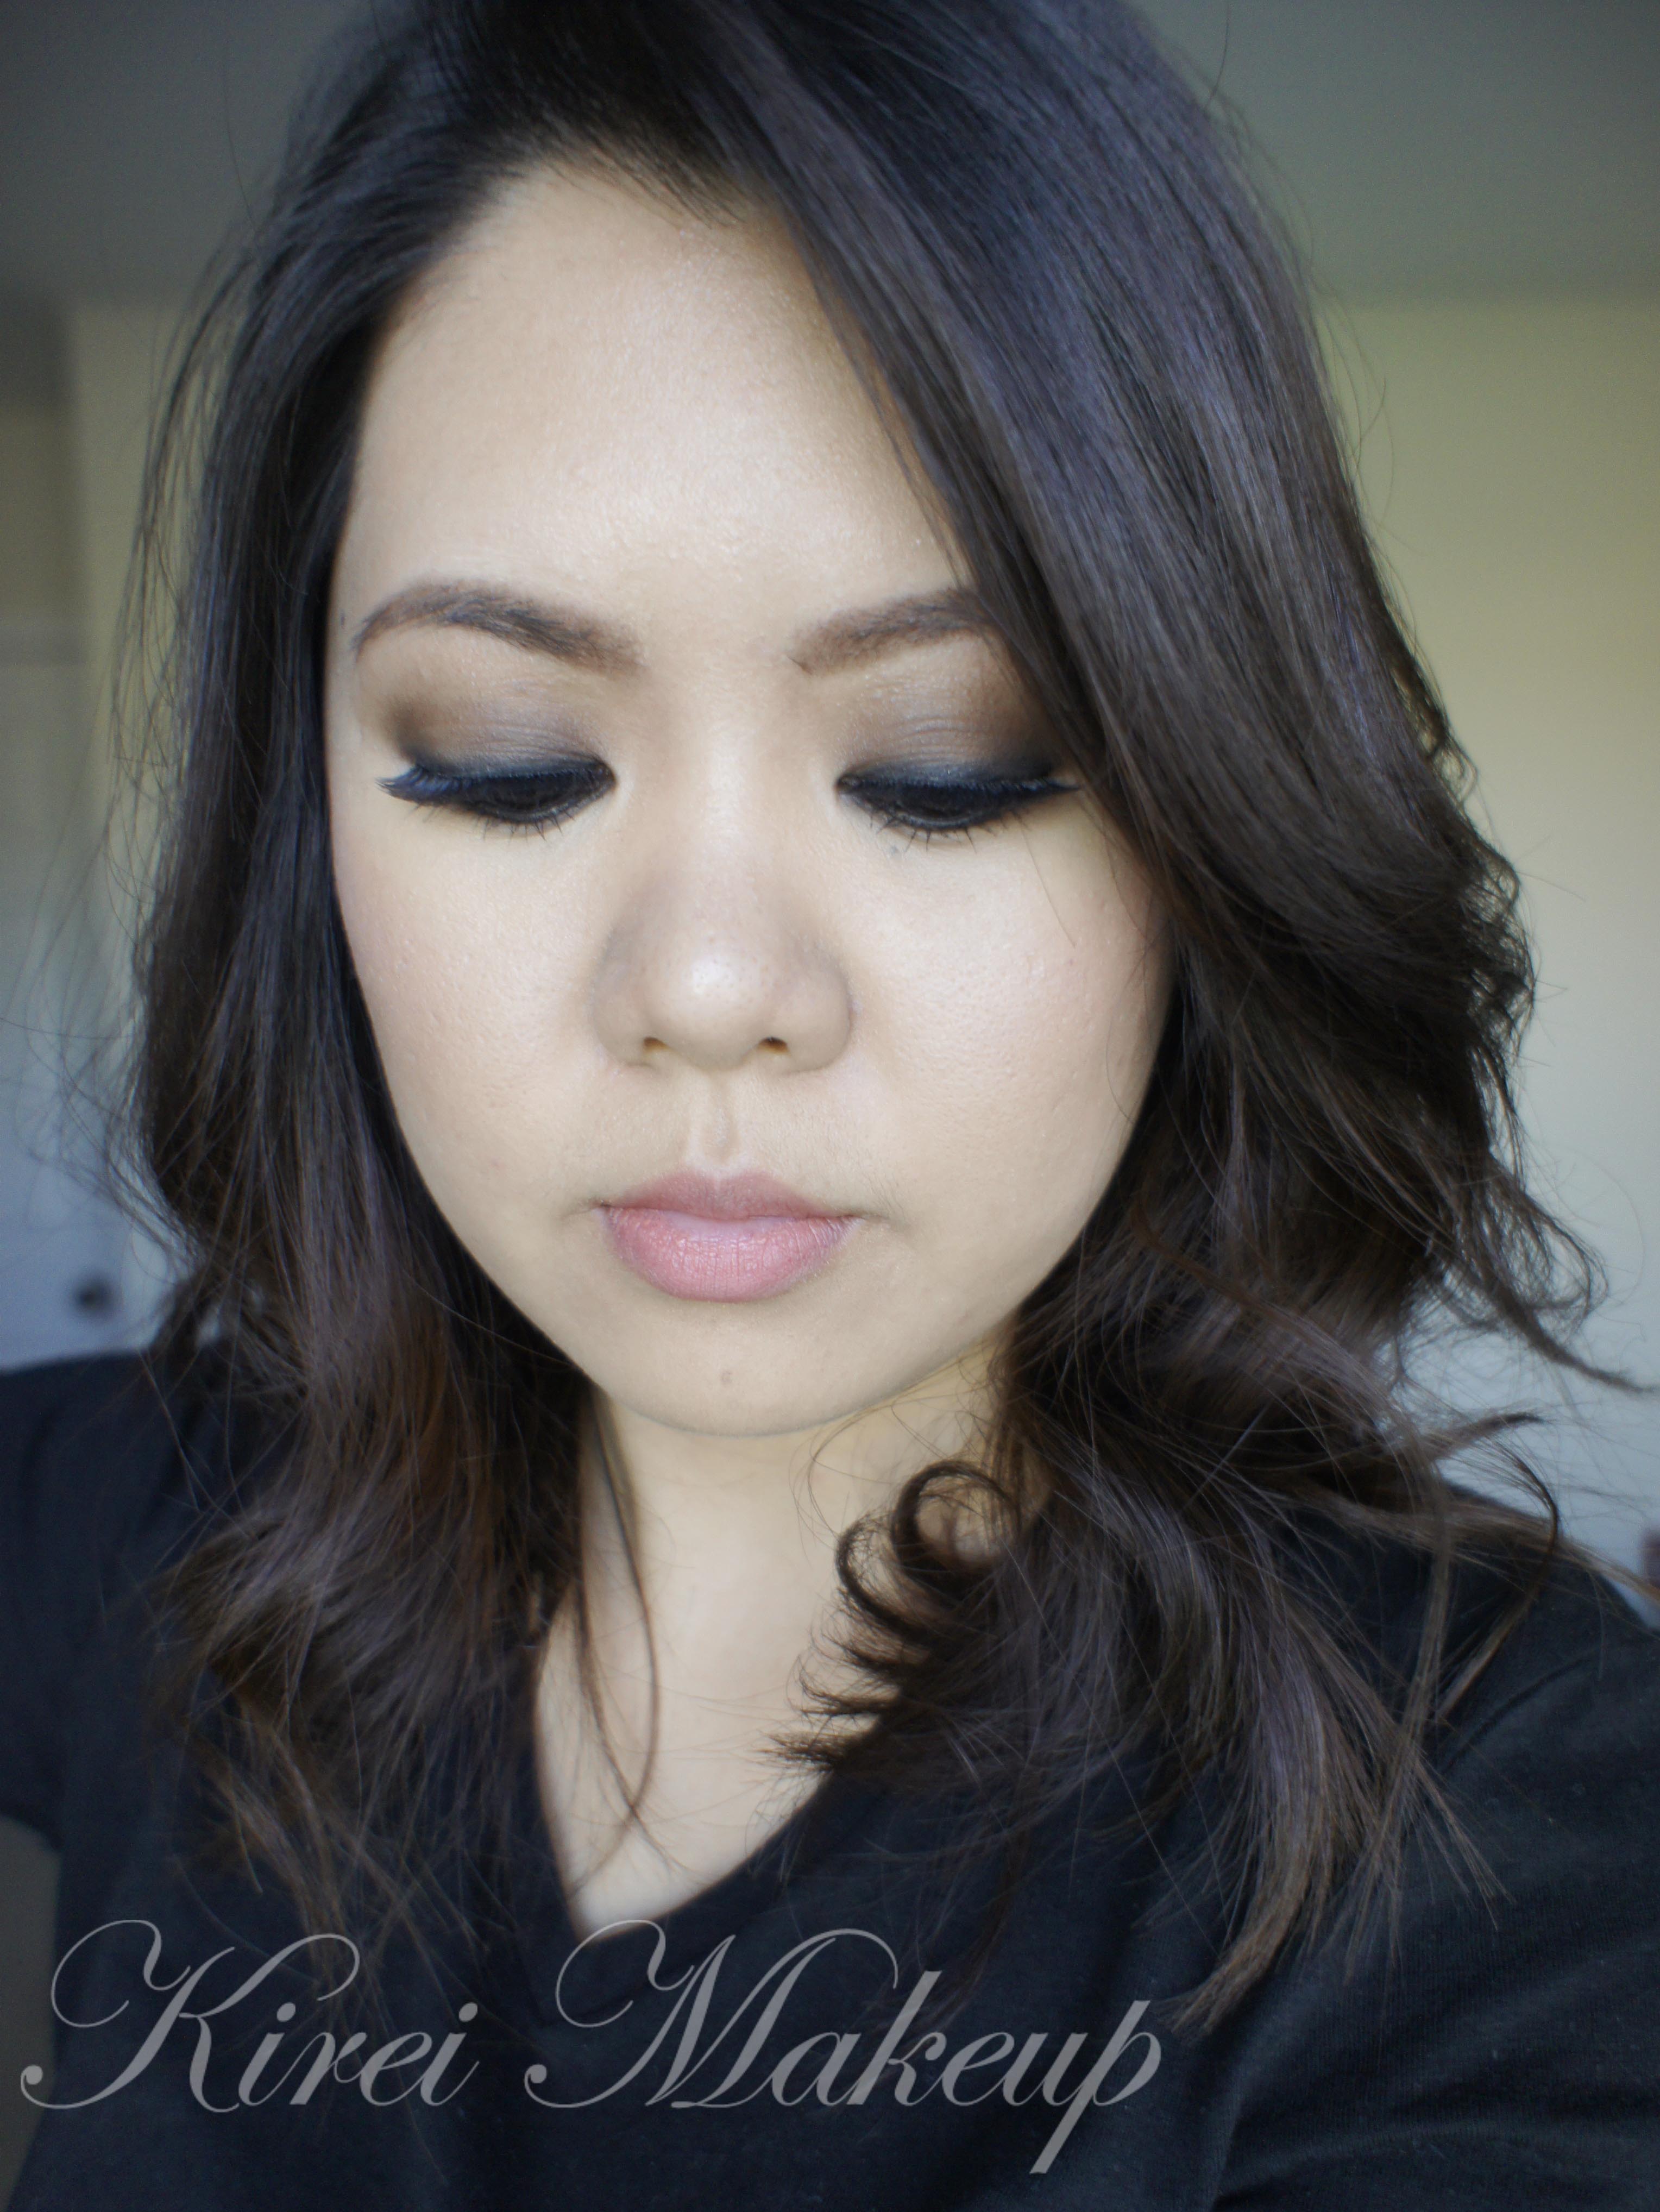
For my eyes, I’m using the Kat Von D Monarch palette. I’ve done a tutorial using this palette before in Kat Von D Monarch Palette makeup tutorial.
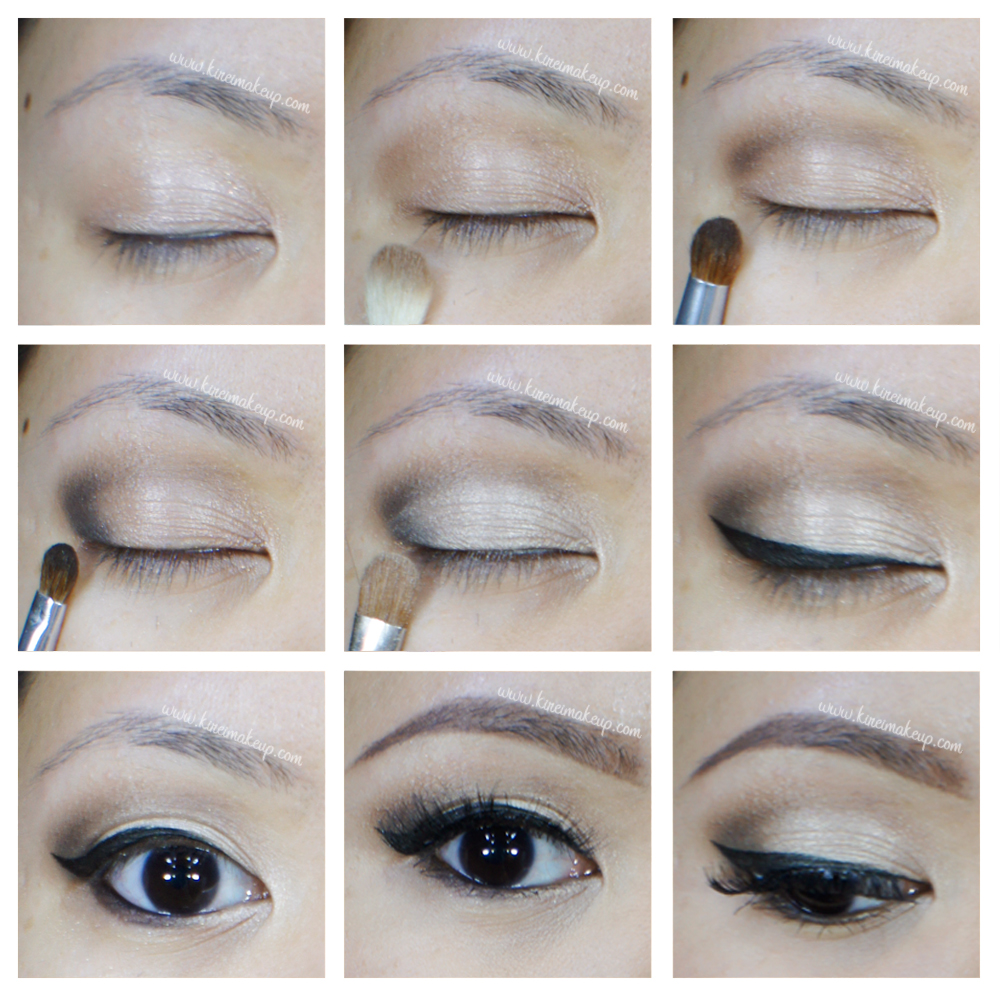
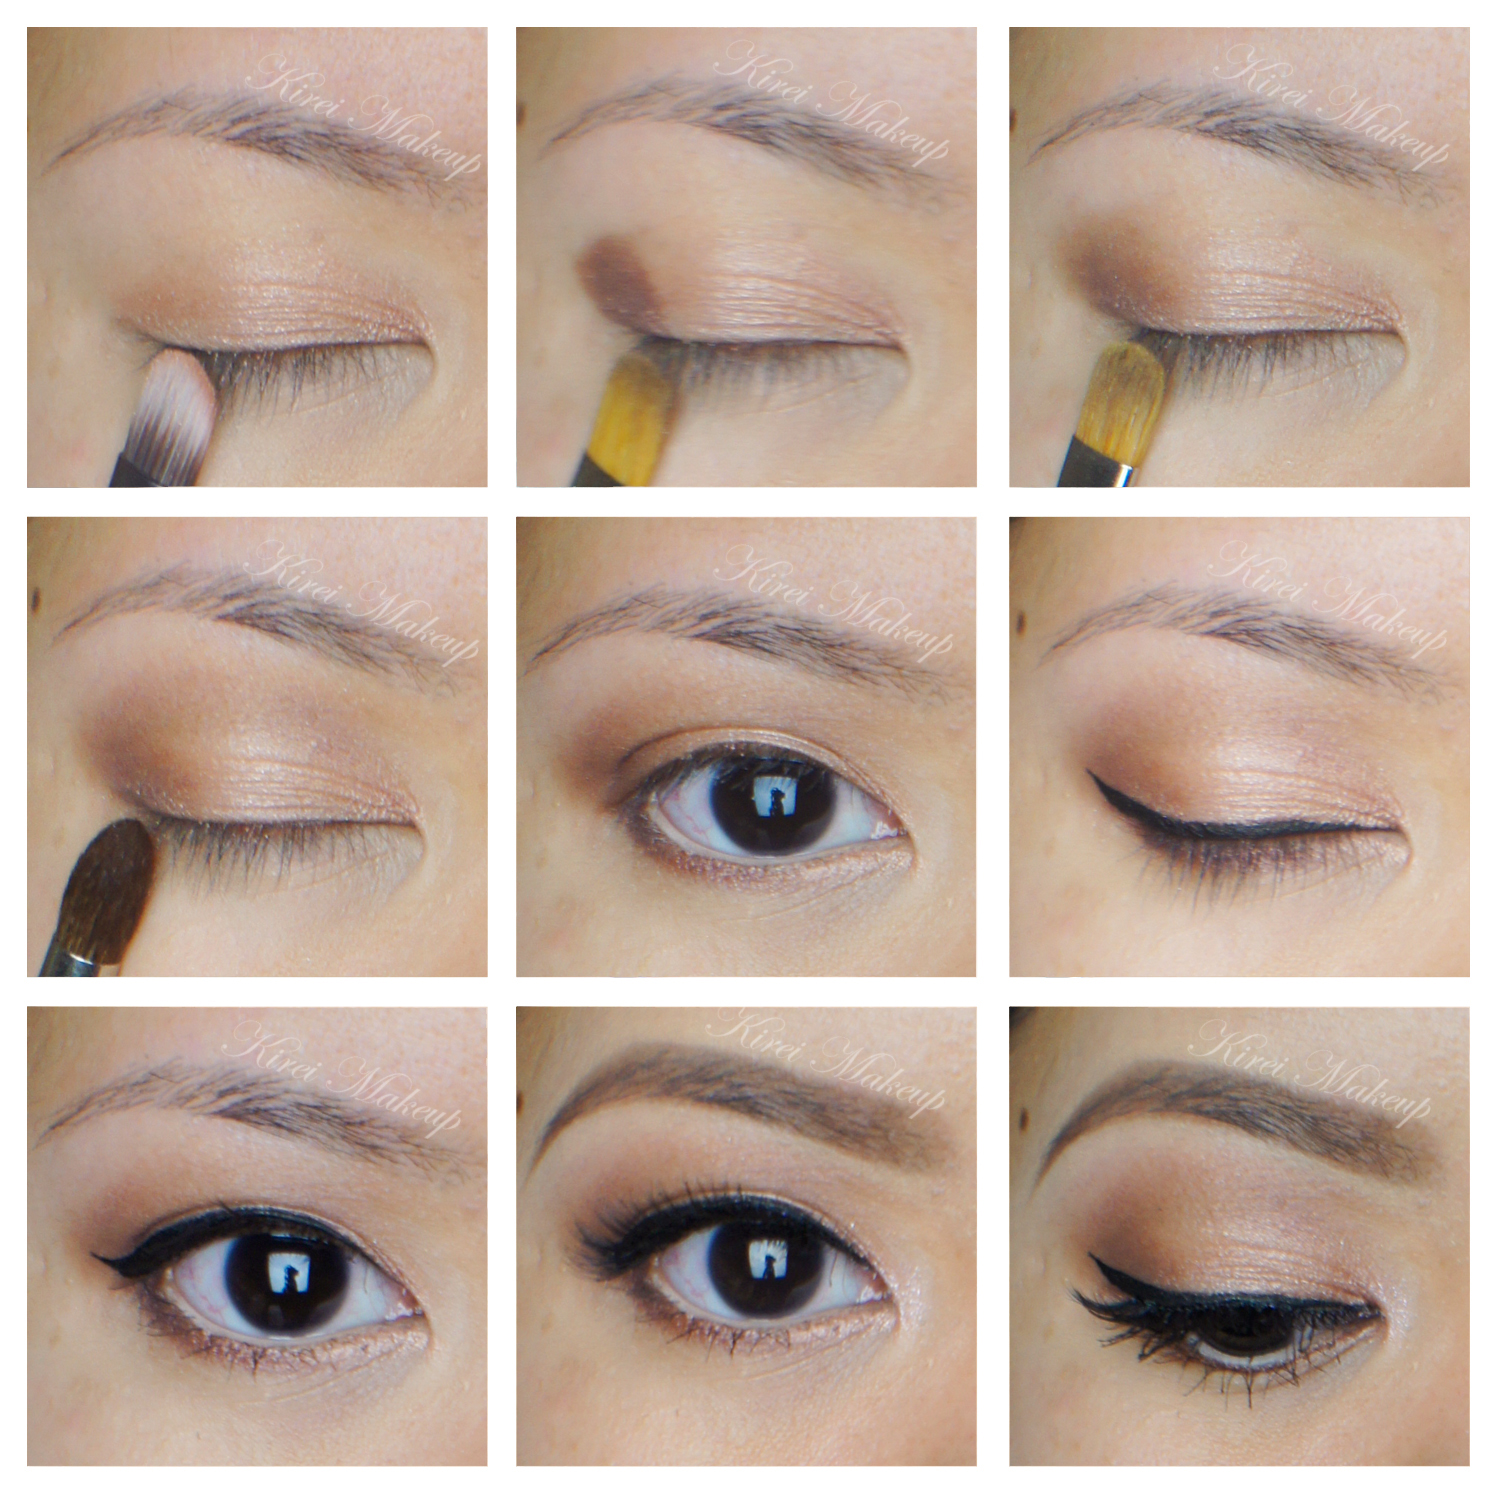
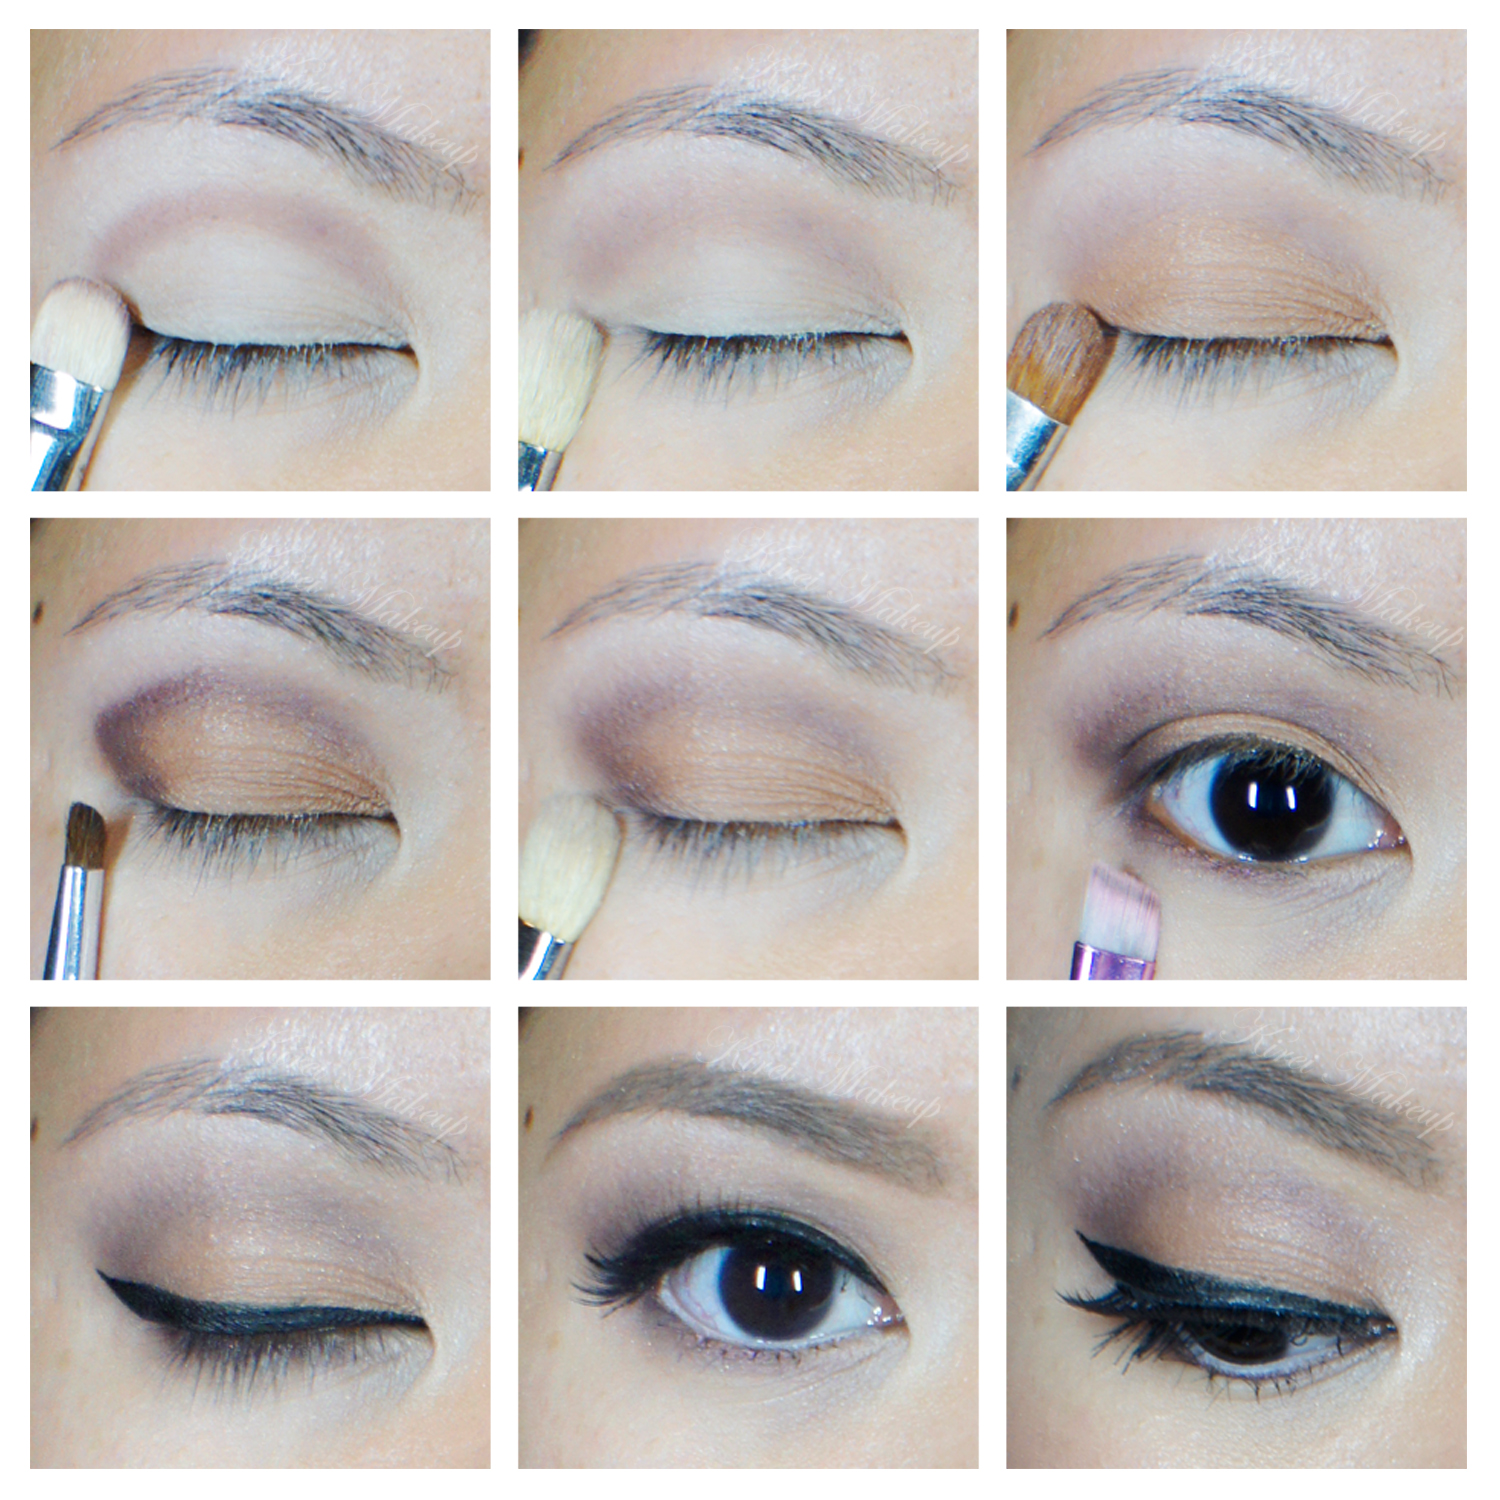
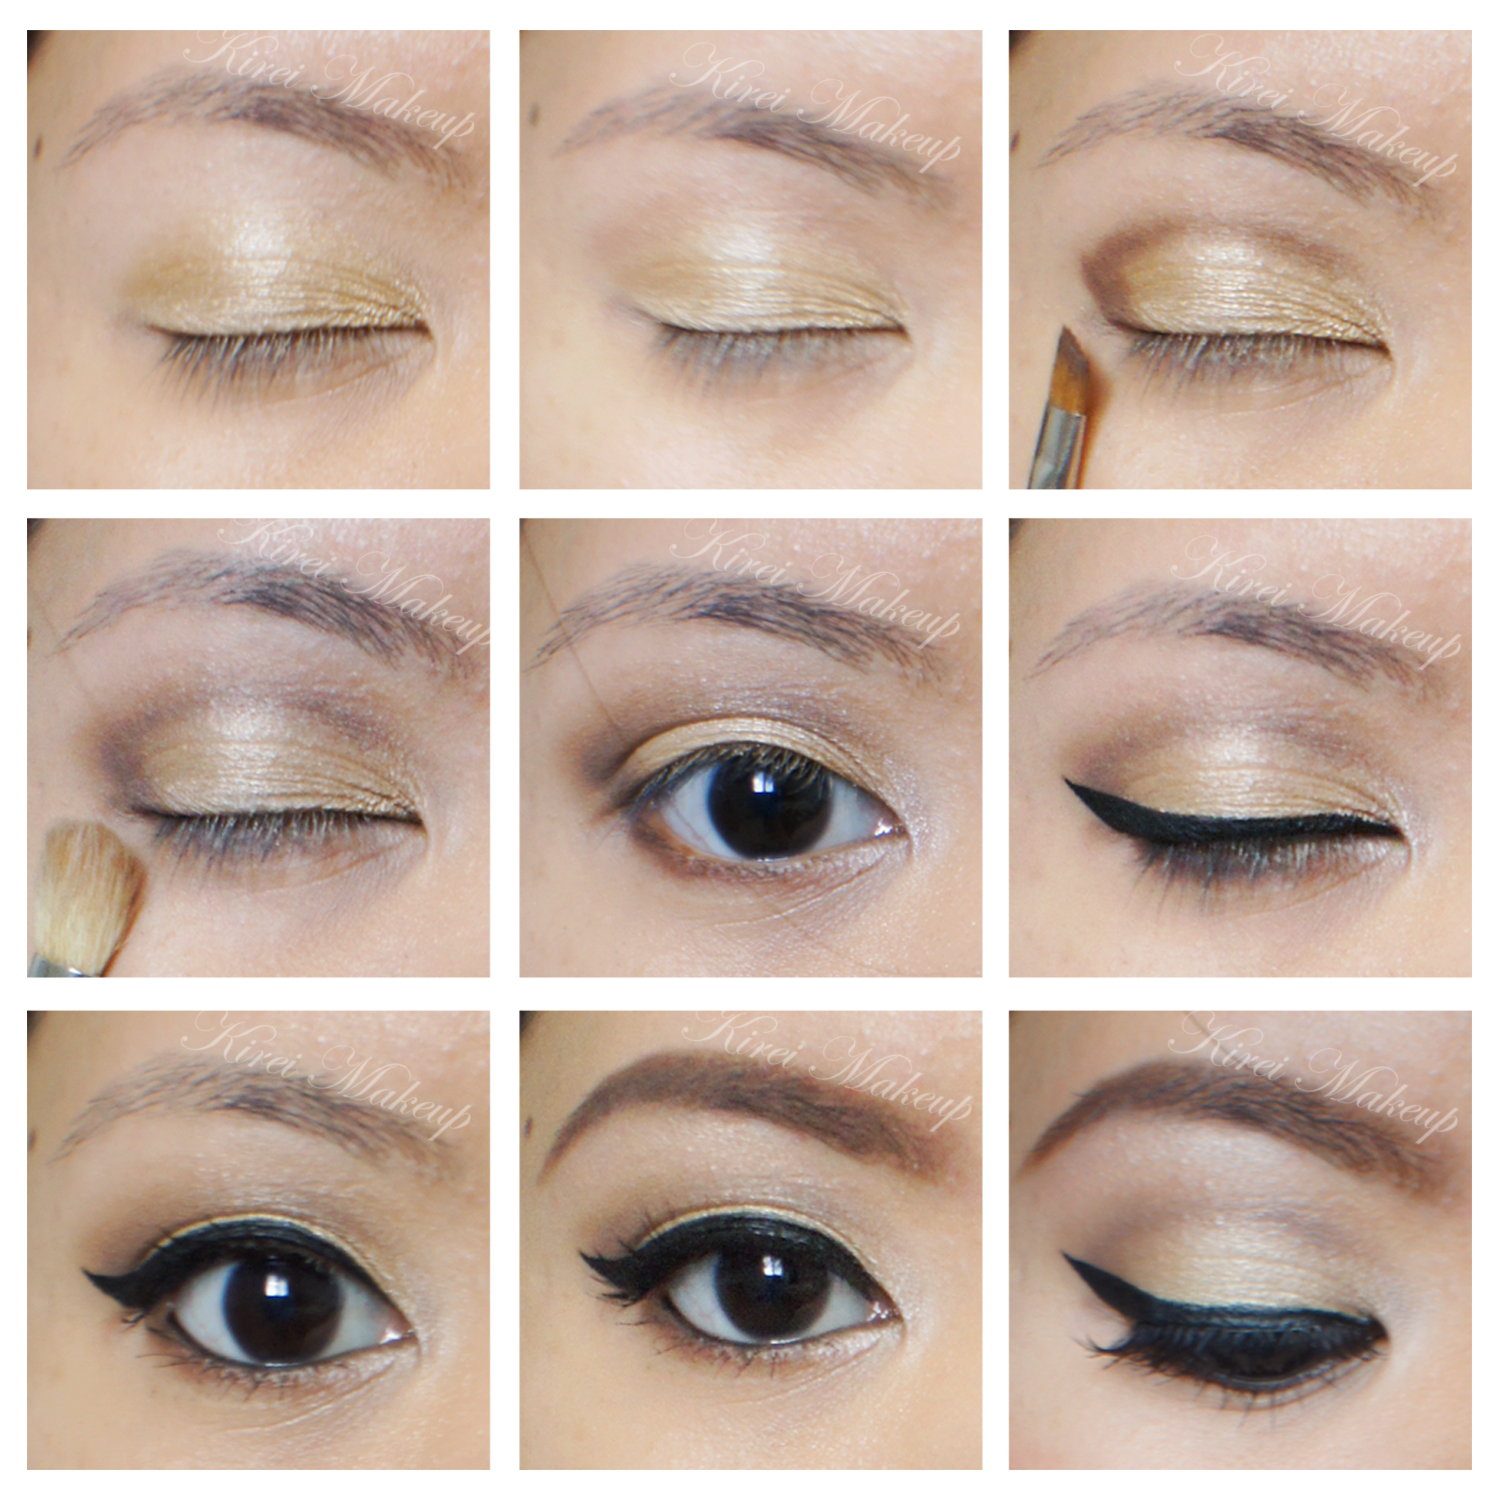
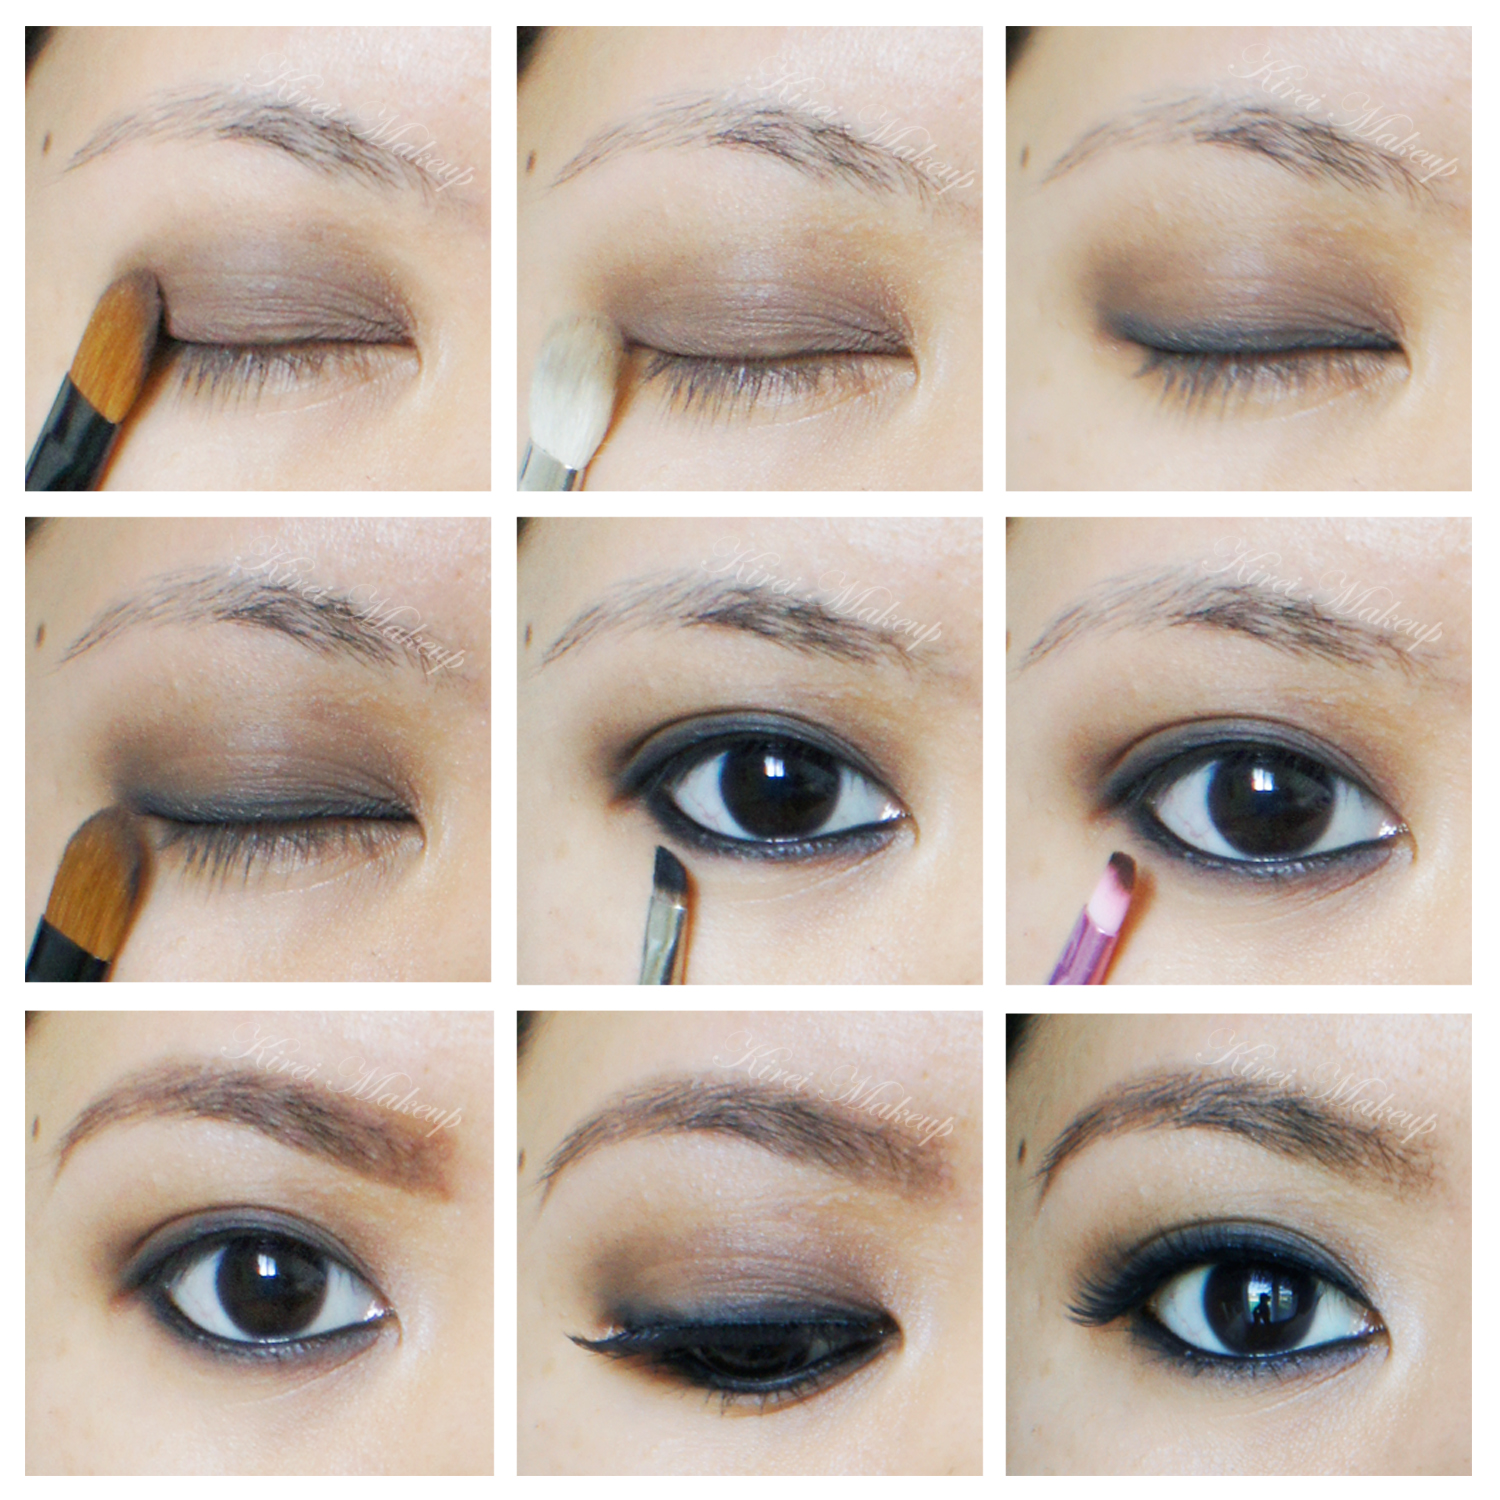
How-to:
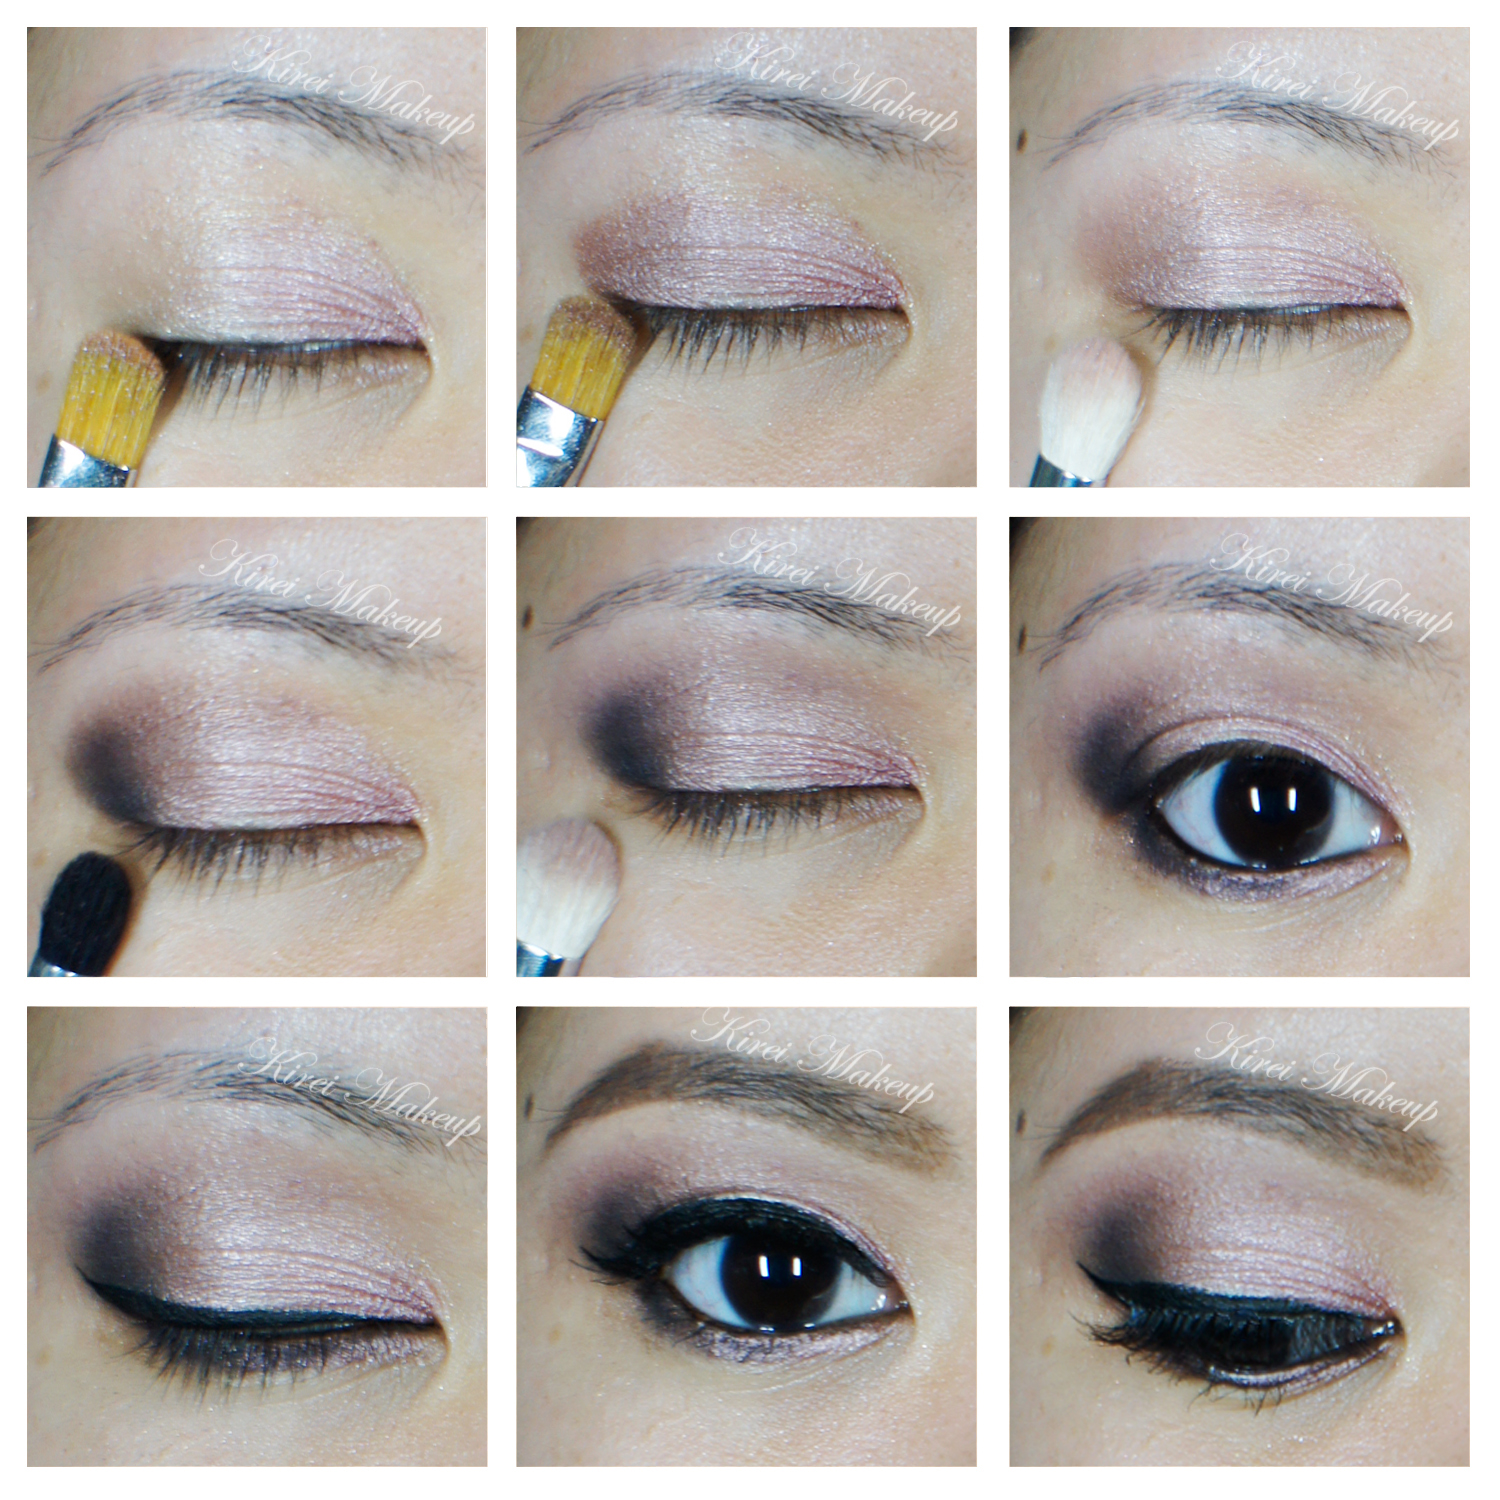
1. I prepped my eyelids using Urban Decay Primer Potion in Sin.
2. On my crease, I applied Buck from Urban Decay using a fluffy blending brush.
3. Using a small crease brush, I defined my crease a bit more using Shadow Box from Kat Von D Monarch palette.
4. I applied Deadhead from Kat Von D Monarch palette on the outer V using a small shader brush.
5. On the eyelid, I applied Telepathy using a flat eyeshadow brush.
6. I created a winged liner using L’oreal Infallible Gel Lacquer in Blackest Black.
7. I lined my lower lid using L’oreal Voluminous Smoldering eyeliner.
8. On the lower lid, I applied Deadhead on the outer half and Telepathy on the inner corner.
9. I also lightly dust Entomology from the Kat Von D palette on the inner corner of my eyes.
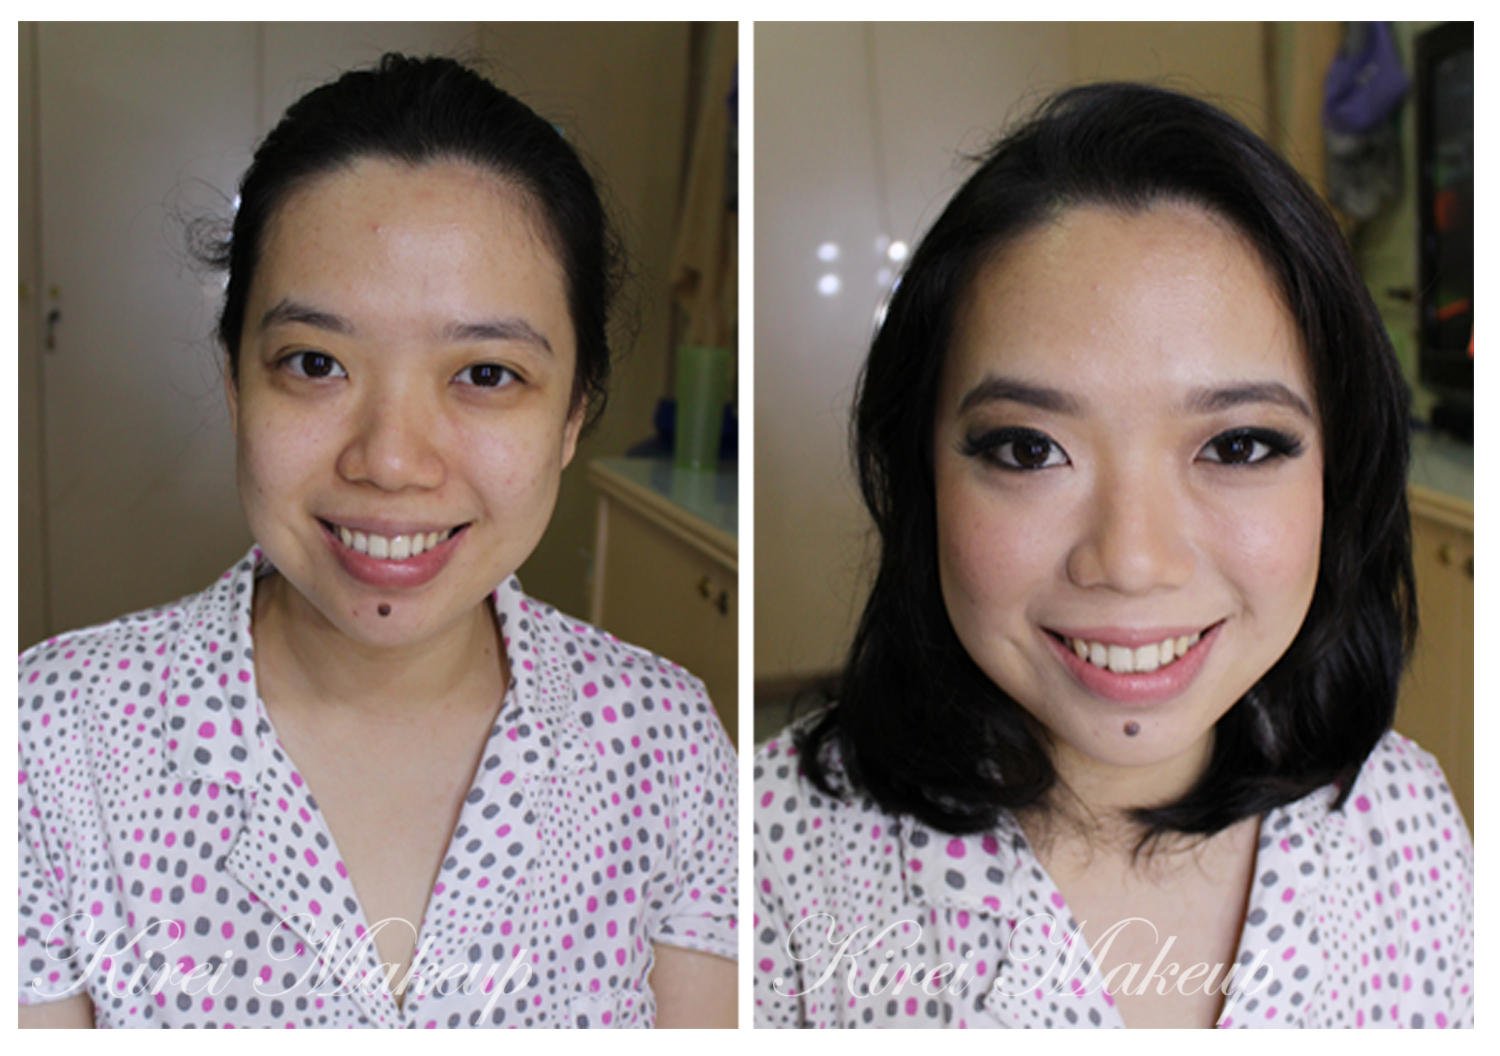
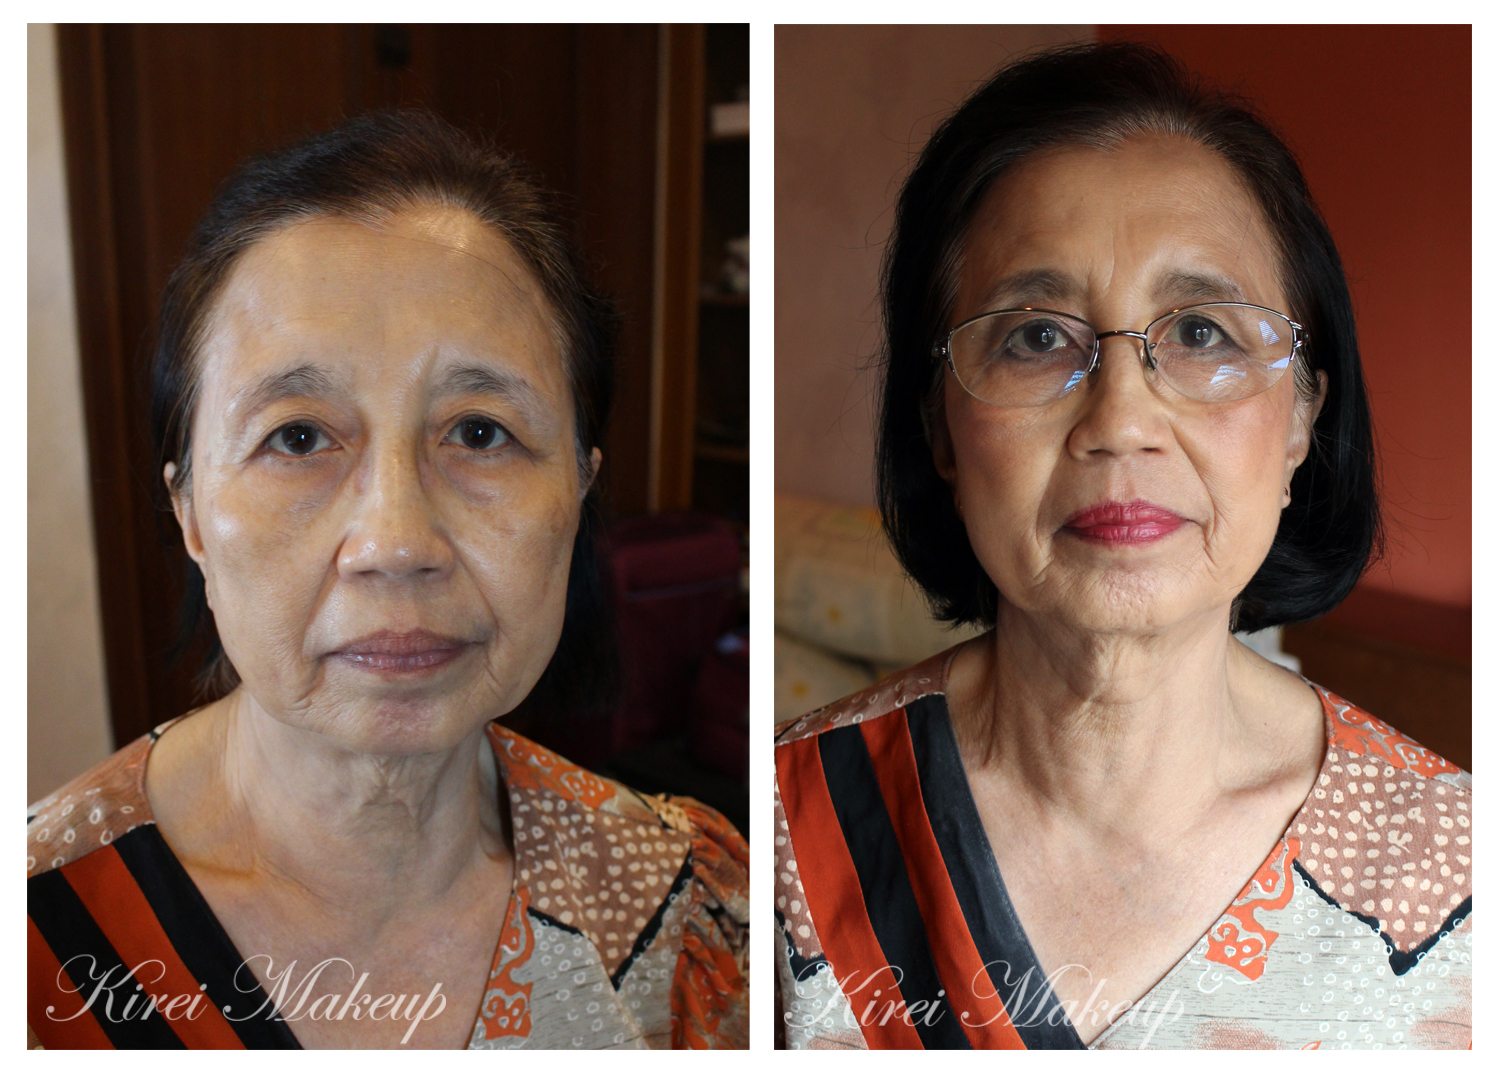
10. I curled my lashes and appied Ardell demi wispies falsies.
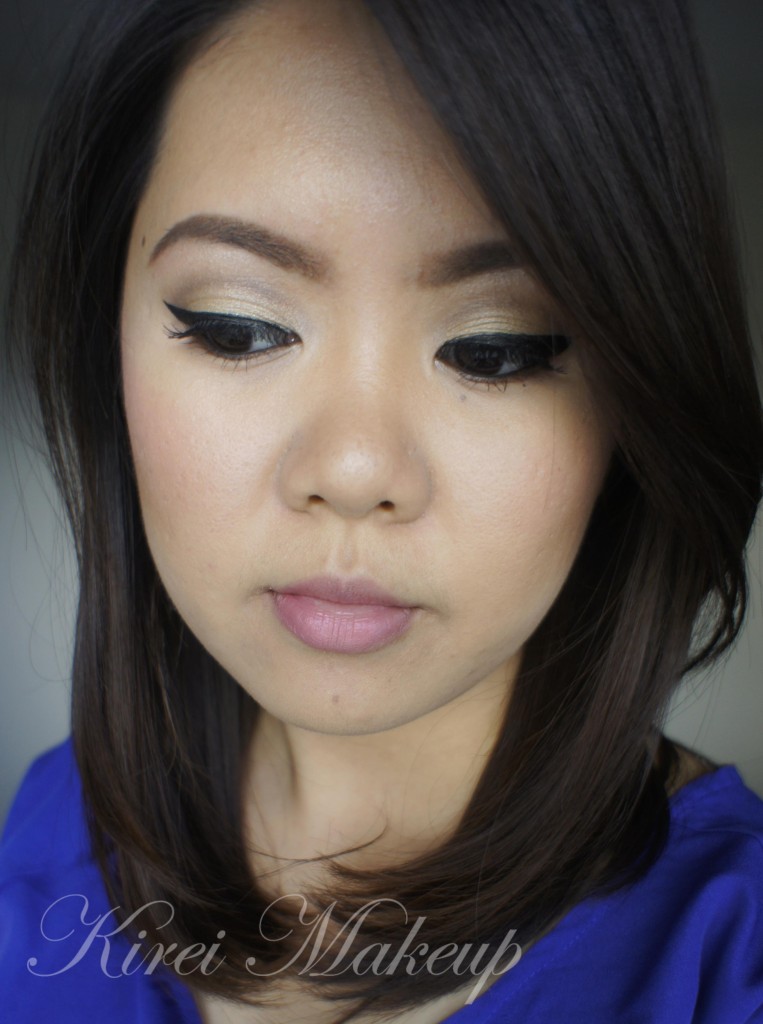
11. On my brows, I applied Anastasia Brow Wiz in Medium Ash.
12. For my face, I applied MUFE HD Foundation in 120.
13. I contoured my face using Cover FX N110 cream foundation.
14. On my cheeks, I applied NARS Mata Hari.
15. On my lips, I applied Revlon Fire and Ice lipstick.