I was thrilled to see L’oreal La Palette Nude 1 in Wal-Mart near my home. I had known L’oreal released this palette from their Instagram account, but didn’t have the chance to get one earlier since I was busy. Last week, I was just browsing through the makeup department in Wal-Mart while I was running errand, and I was excited to see it on the shelf. There were only 3 palettes left, so I had to grab it before it was gone.
If you have followed me on Instagram, you’d have seen half of my nude palette collection I posted last week. My obsession with nude palettes begun when I was in makeup school, where I realized on almost every single makeup jobs I had to do or assist for, most clients asked for a neutral-based makeup look whether it’s simple clean makeup or smoky eyes.
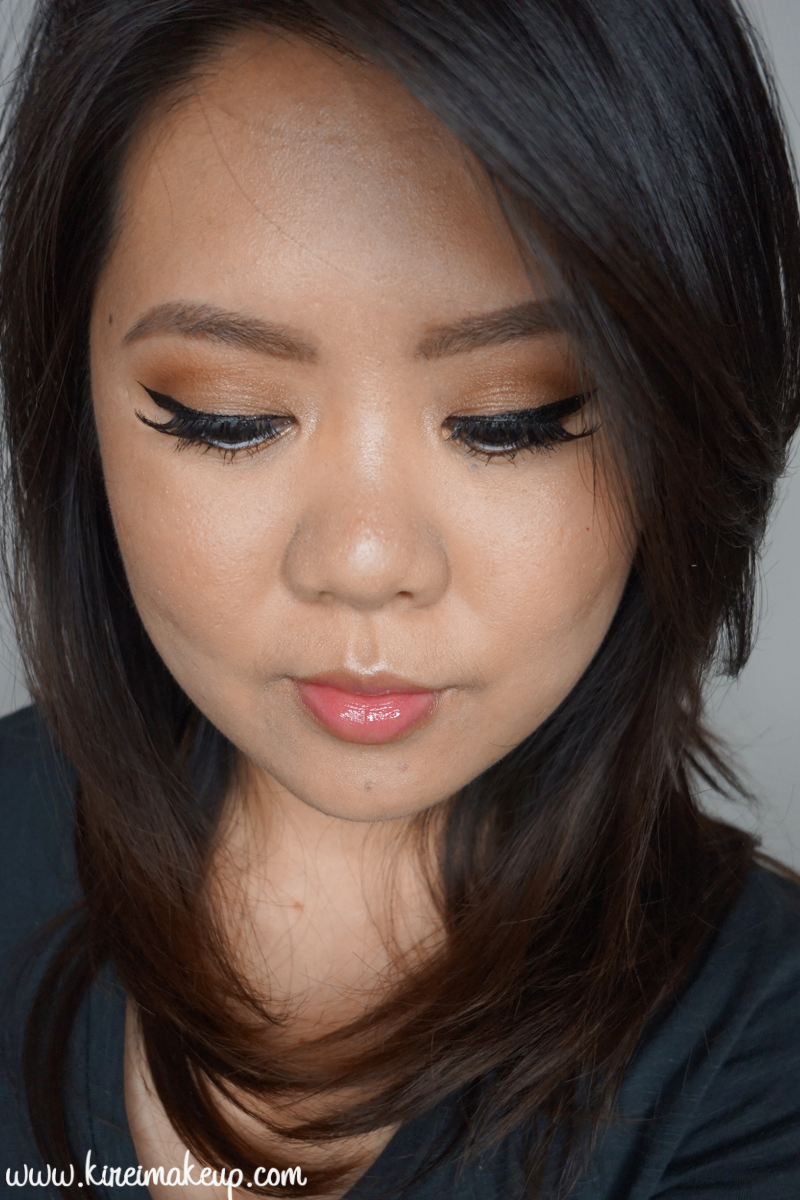
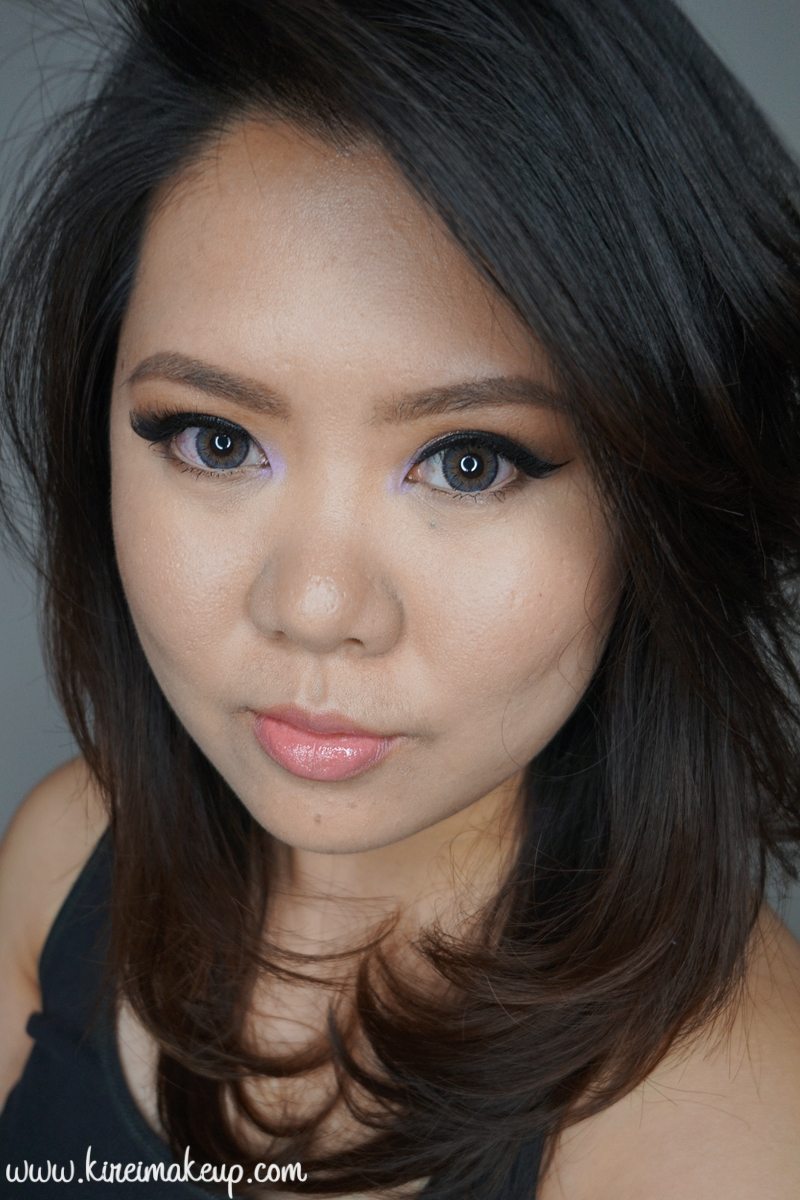
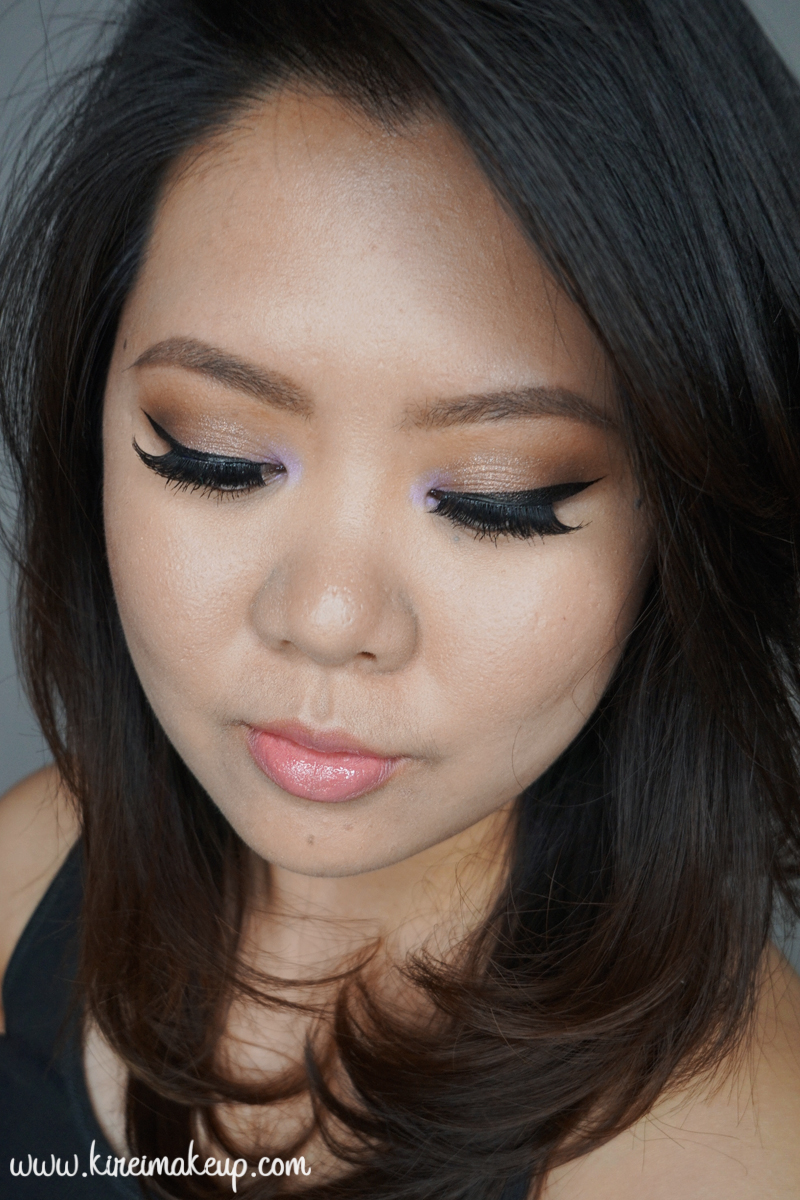
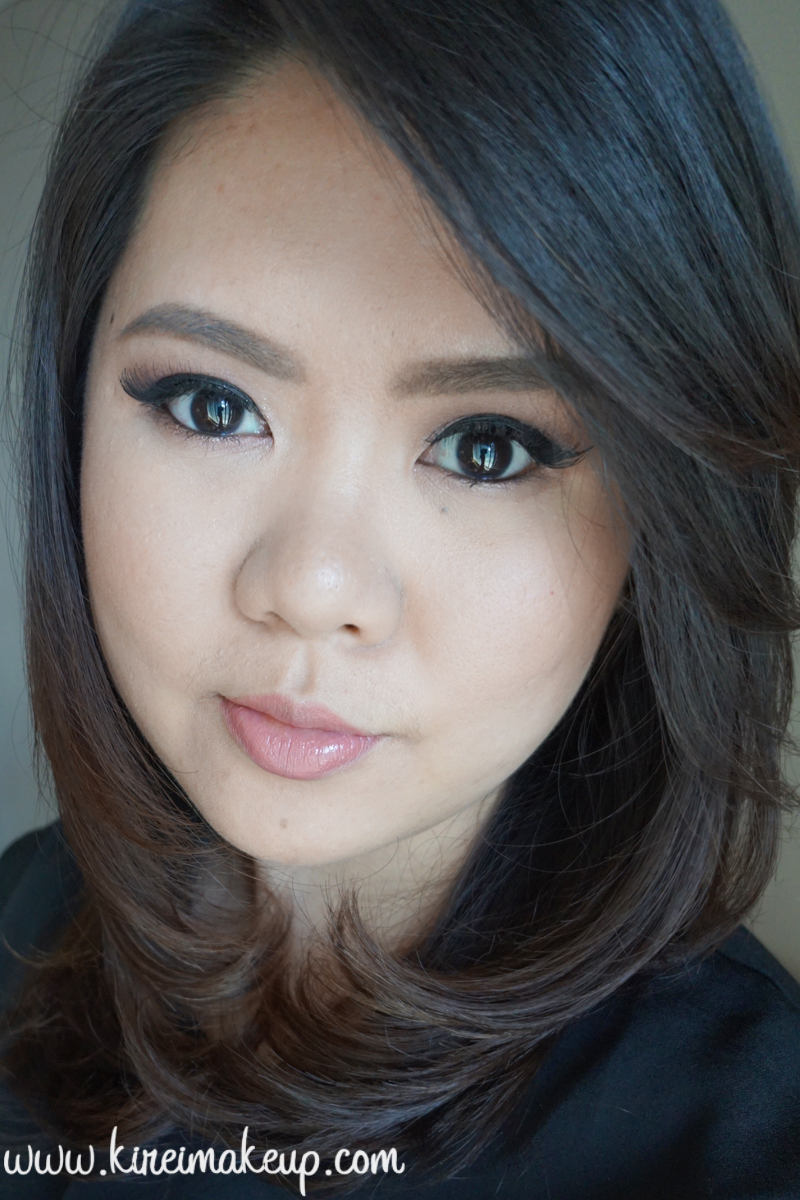
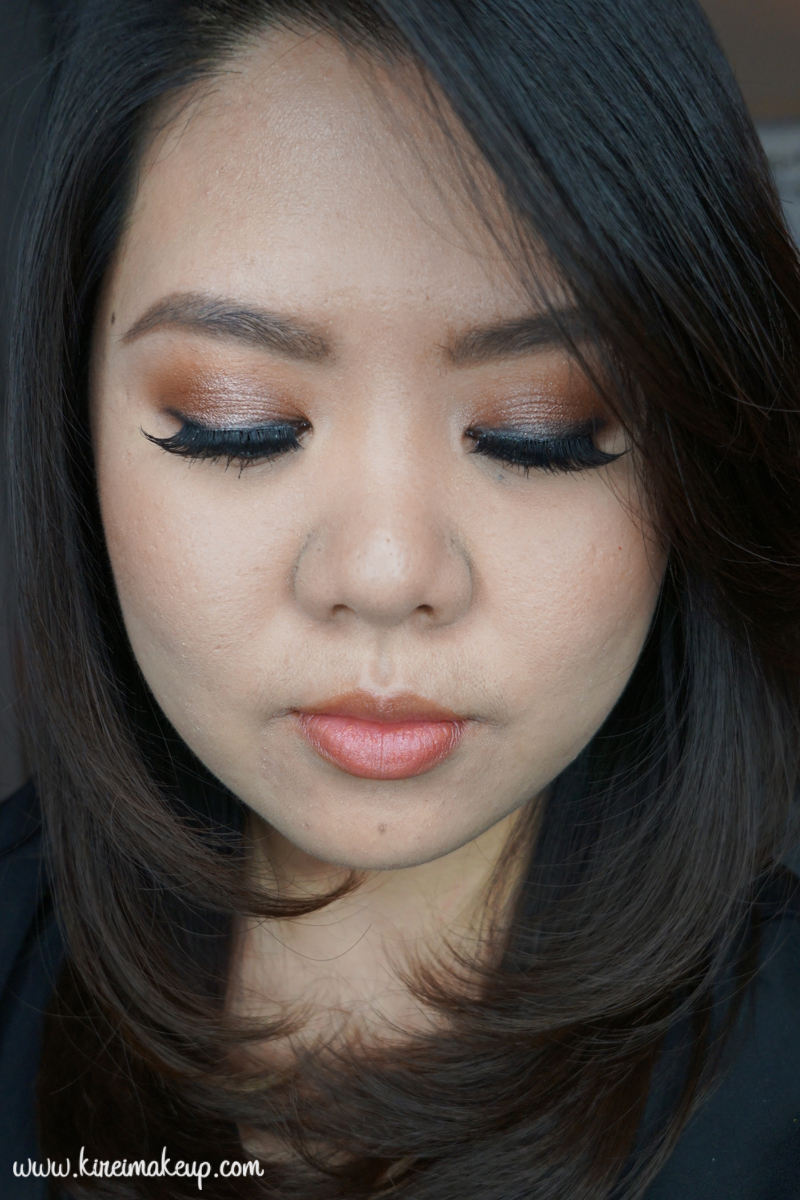
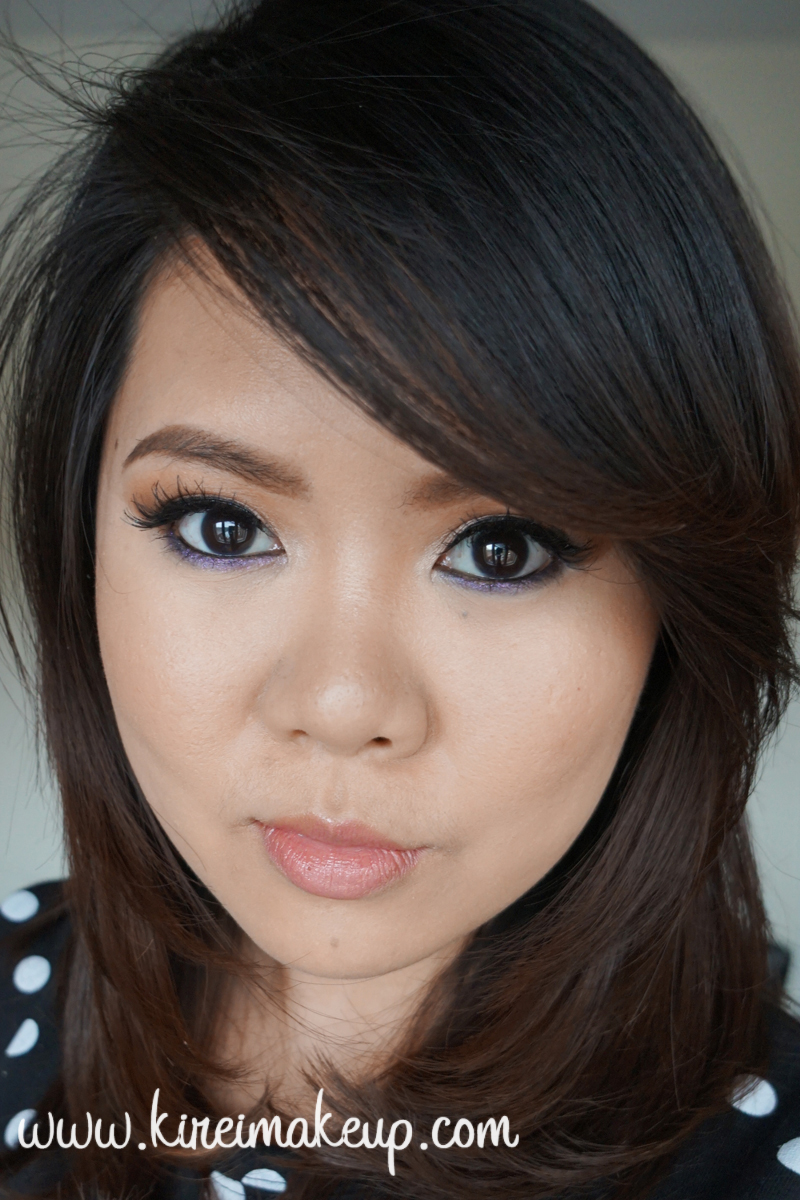
The L’oreal La Palette Nude 1 is a pretty good palette, if you’re looking for an affordable nude palette. It has a great range of shades from your highlight, medium to contour shade. The only 1 thing that’s missing from this palette is a black eyeshadow. This palette reminds me a lot of the Urban Decay Naked 1 palette.
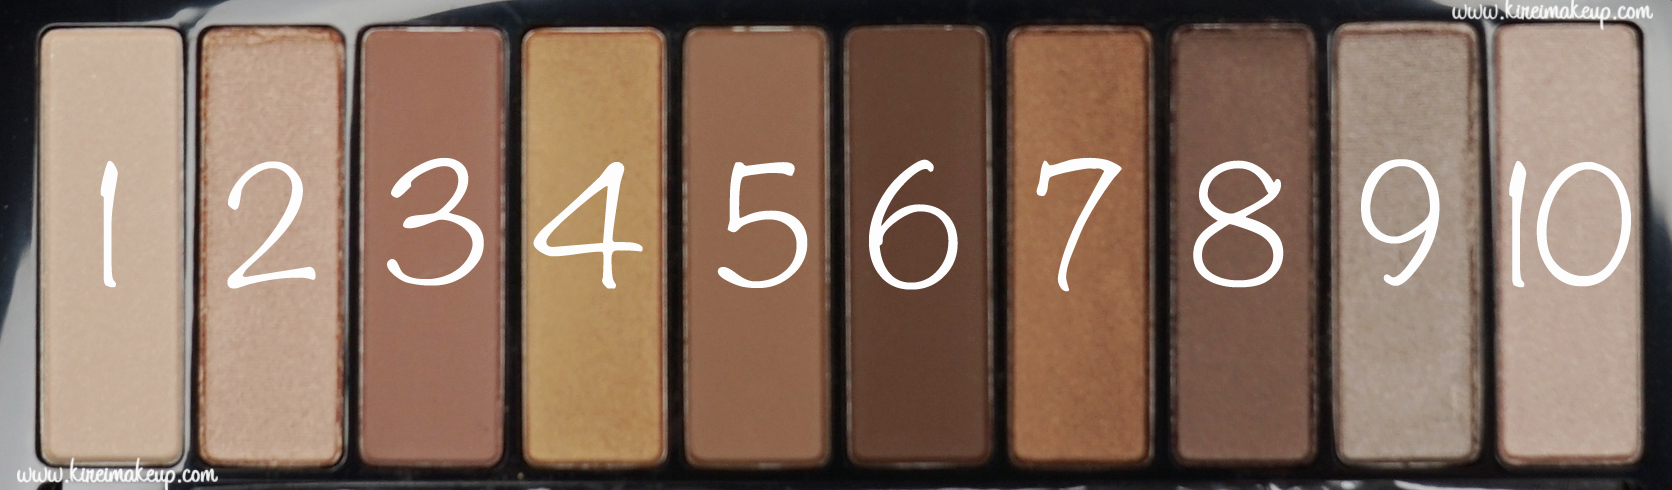
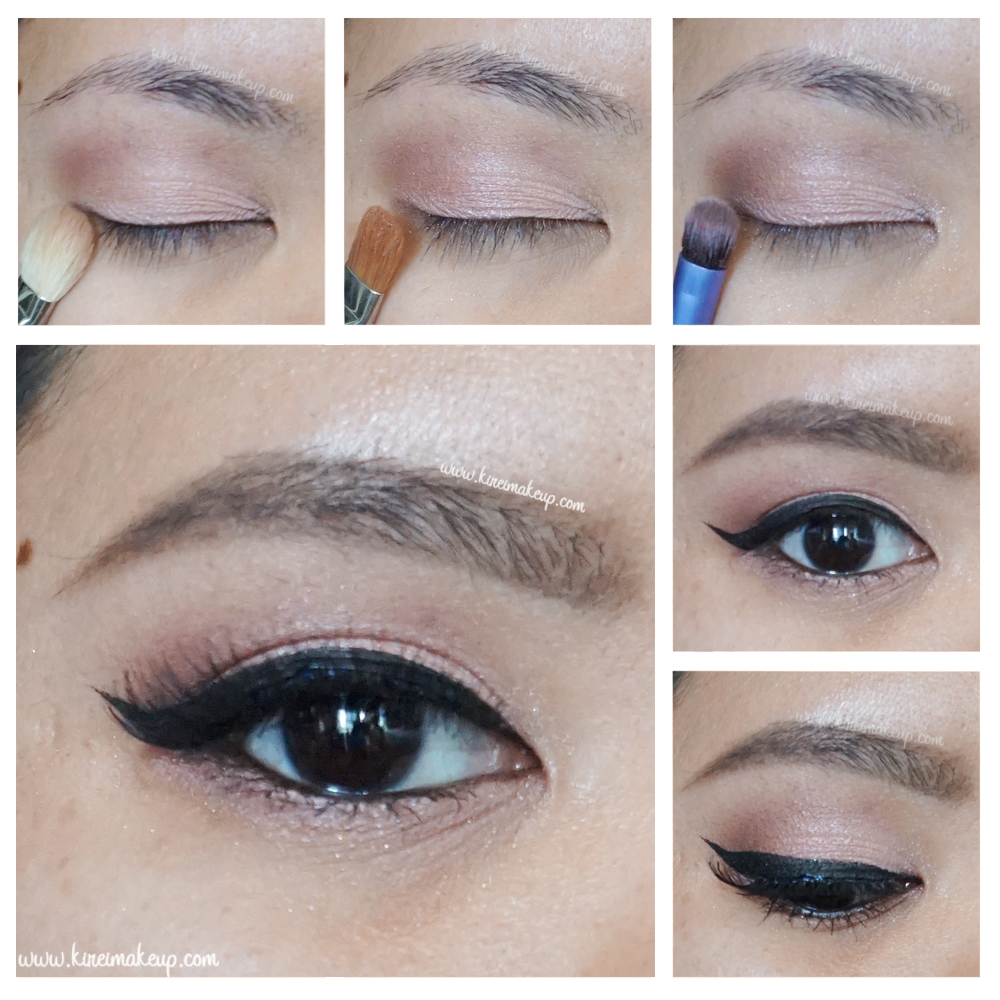
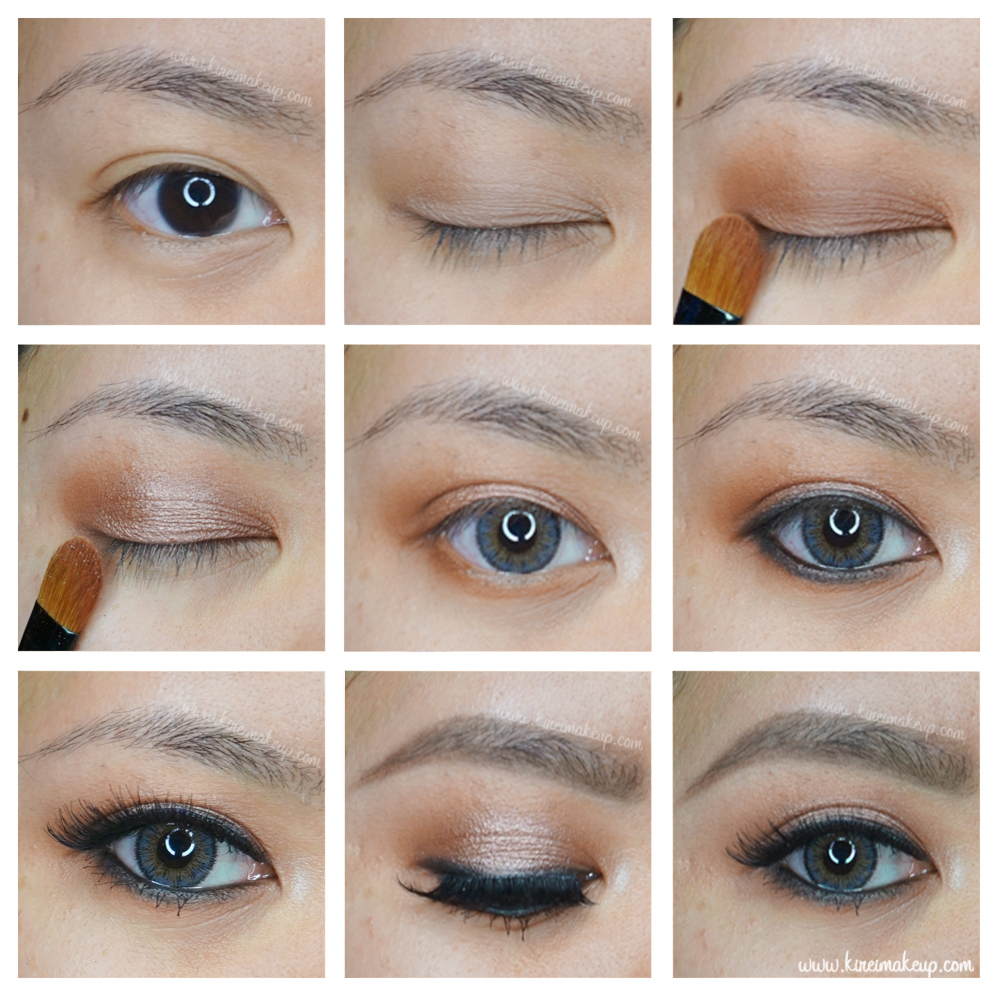
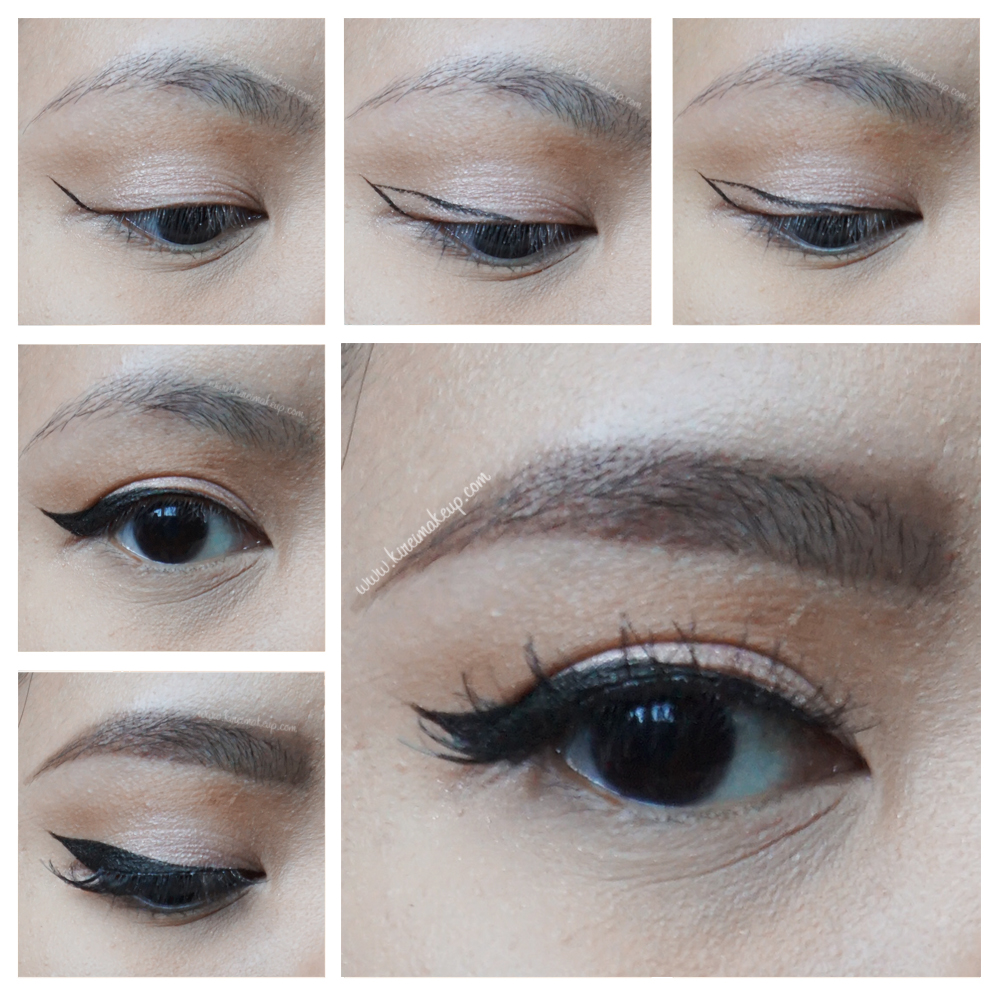
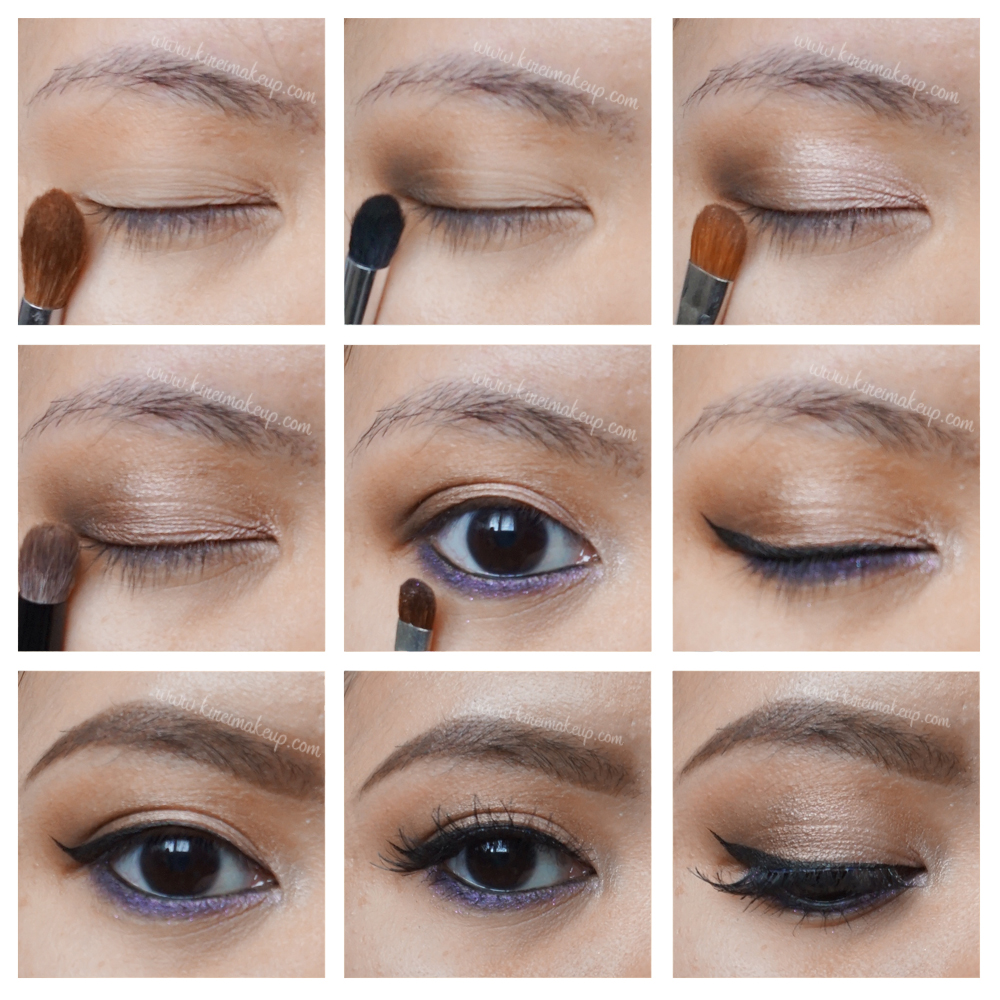
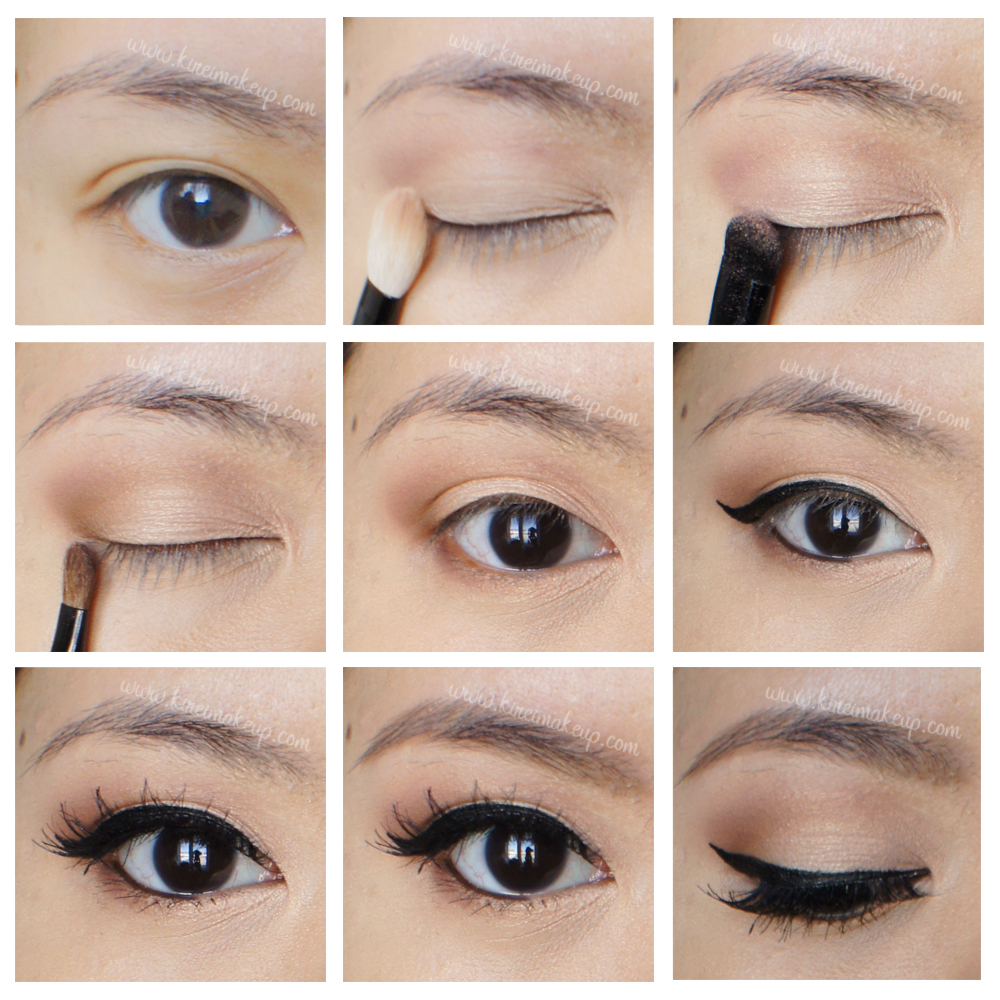
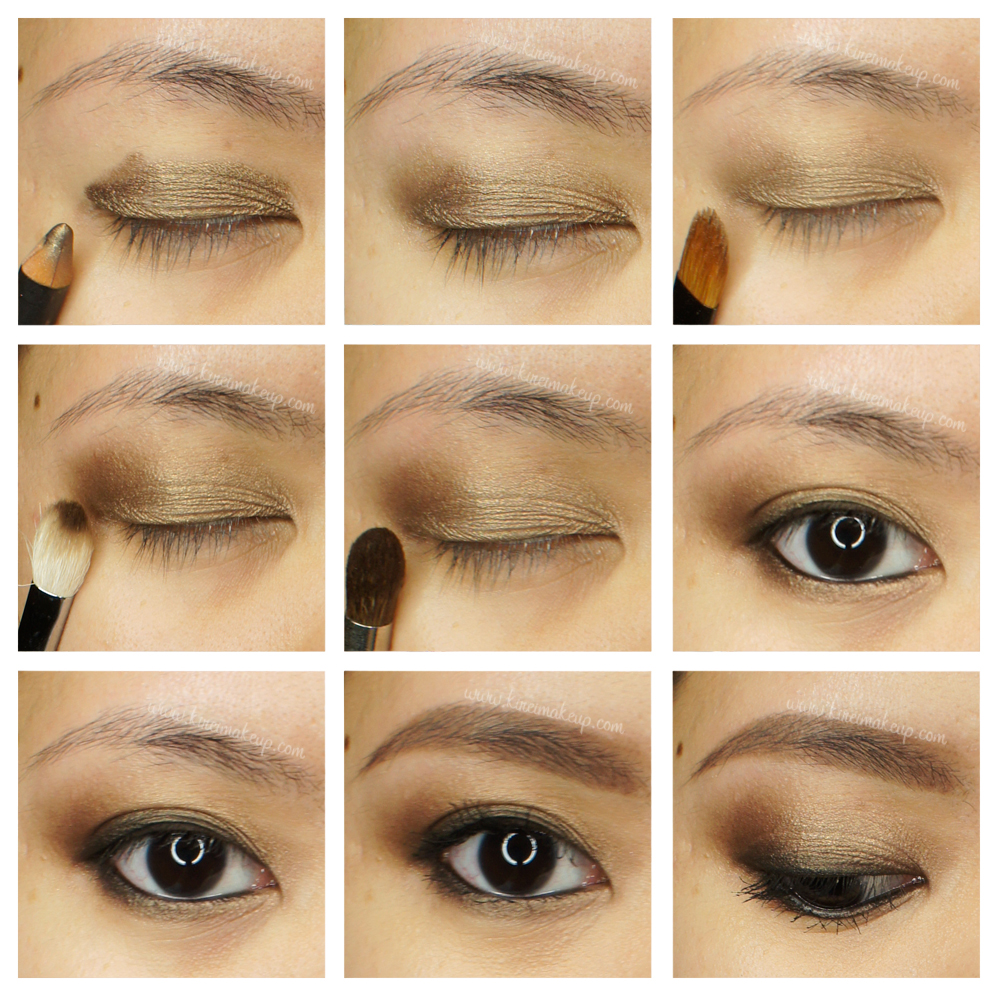
Since there’s no name of each individual shade, I’ve numbered them according to the way L’oreal numbered them. Please refer to the picture above as reference for the shades used in my pictorial below.
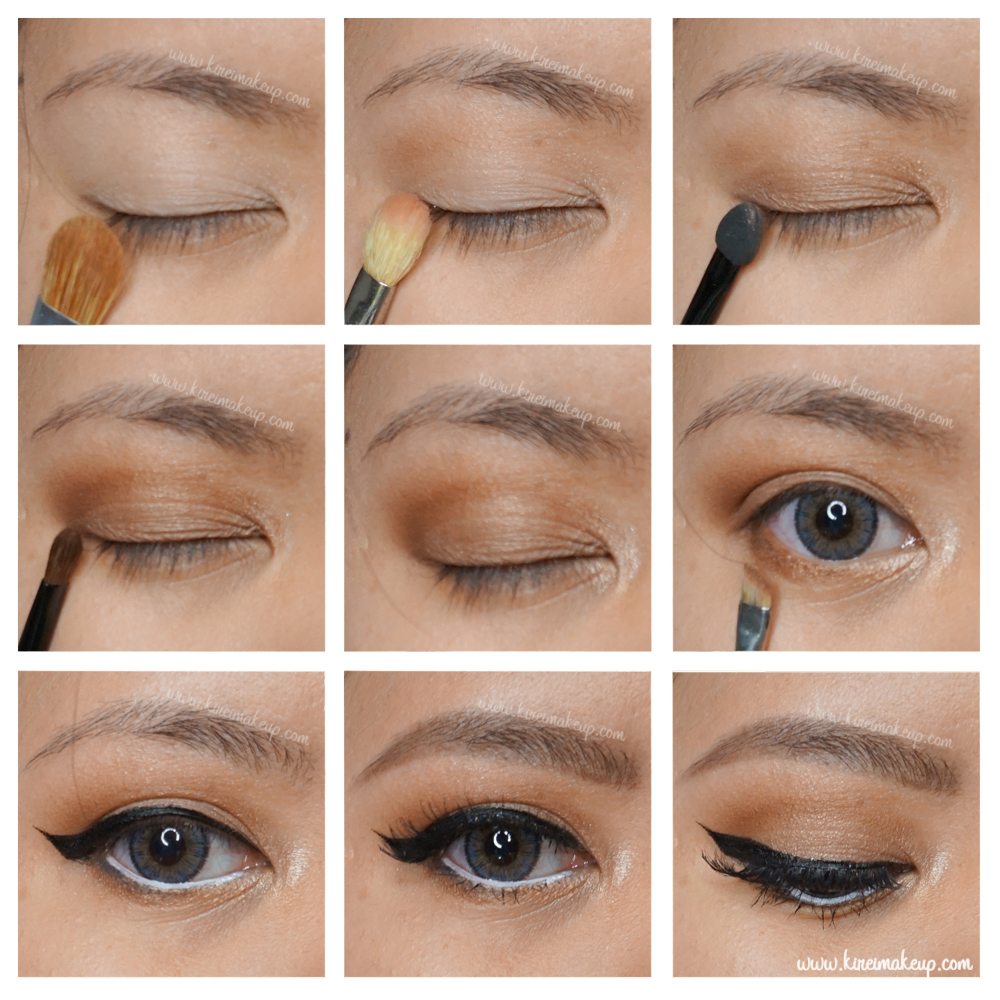
Products used
Eyes
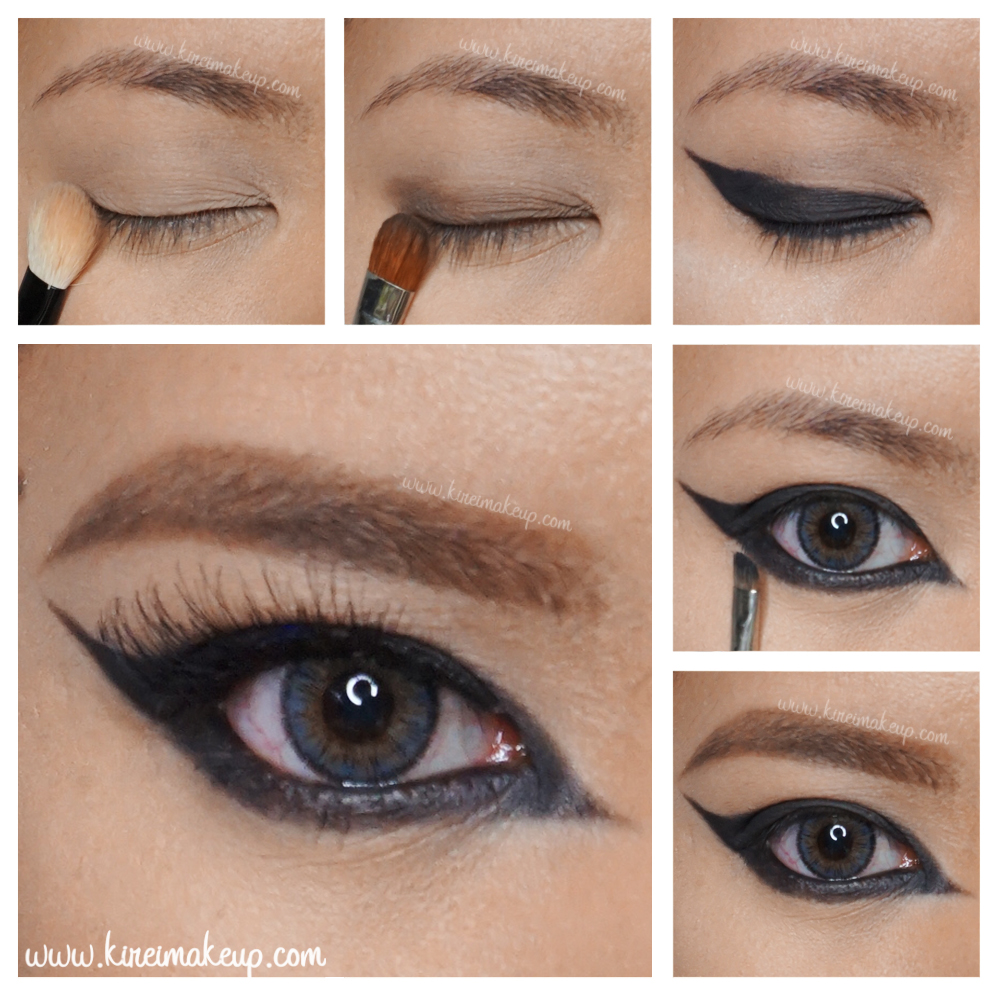
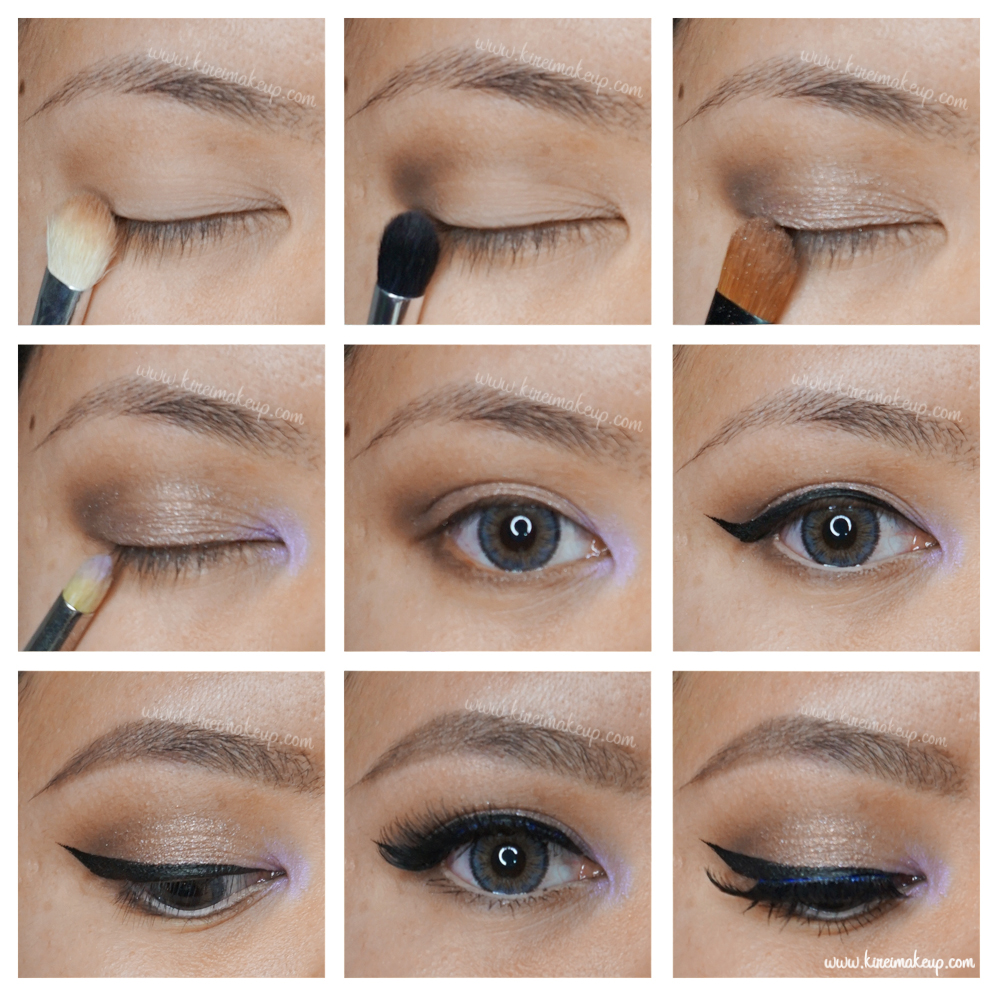
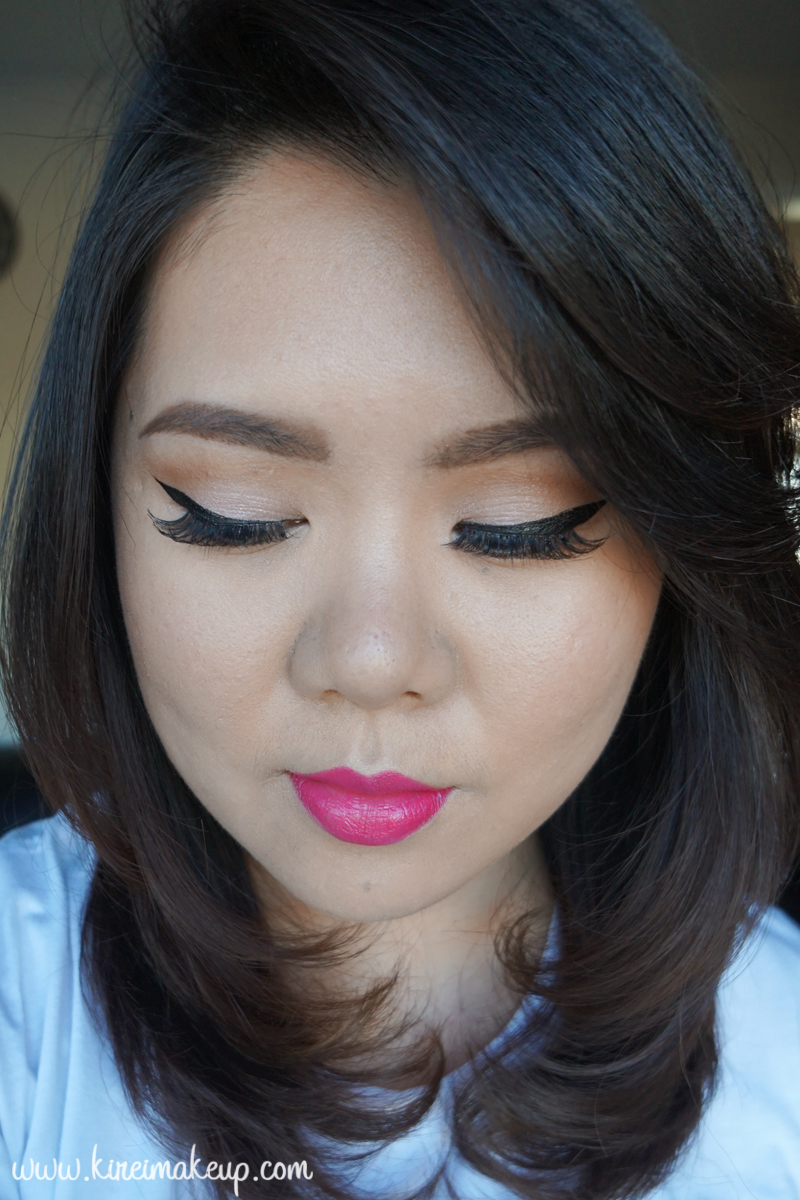
- Primer – Urban Decay Primer Potion “Original”
- Base – L’oreal La Palette Nude 1 “#1”
- Transition – L’oreal La Palette Nude 1 “#3”
- Eyelid – L’oreal La Palette Nude 1 “#4”
- Crease/lower lid – L’oreal La Palette Nude 1 “#6”
- Inner corner – L’oreal La Palette Nude 1 “#10”
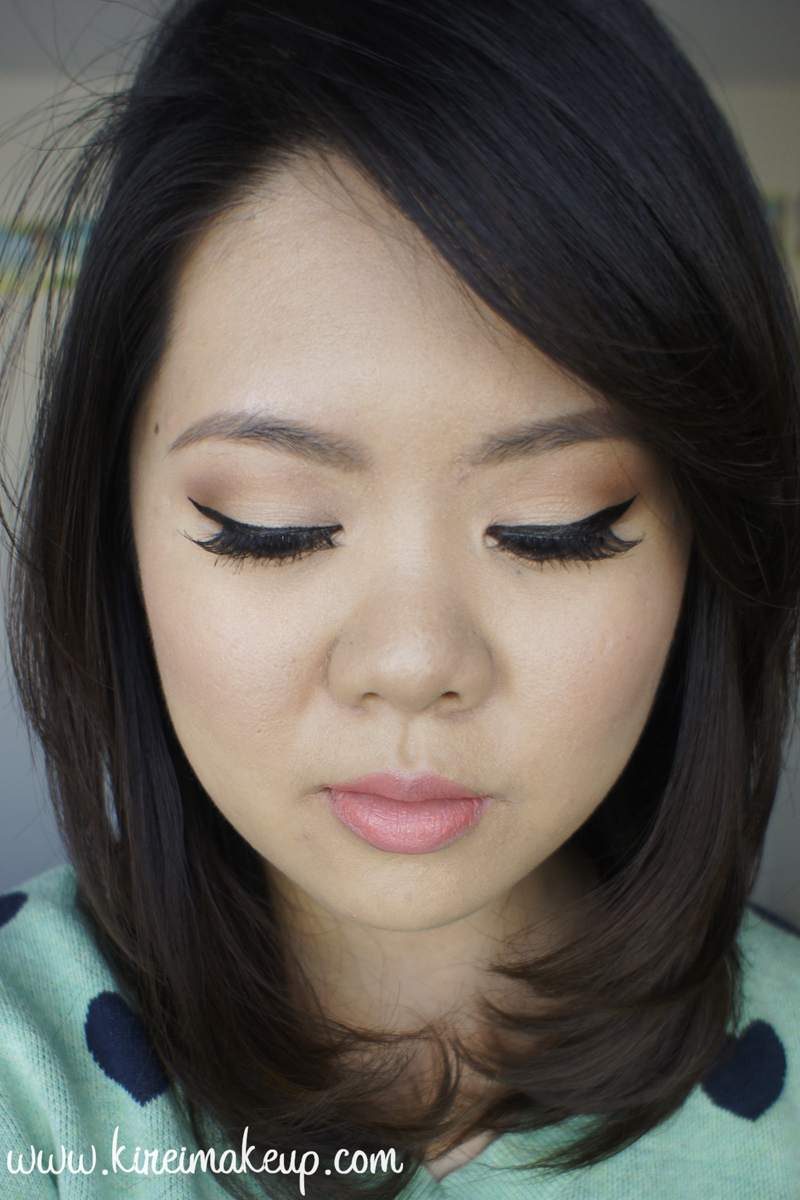
- Winged liner – Kat Von D Tattoo Ink Liner “Trooper”
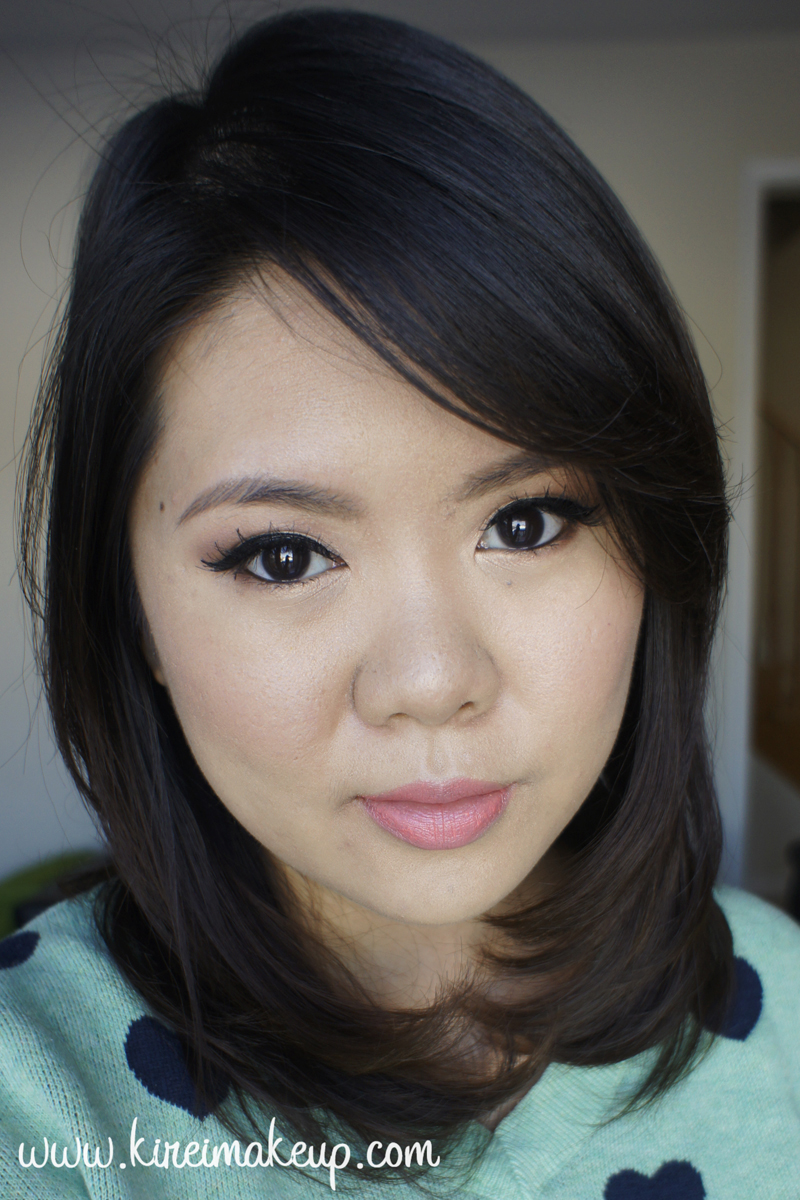
- Lower lash line – Kat Von D Shade + Light Eye Contour Palette “Shax”
- Waterline – Annabelle Kohl Pencil liner “White”
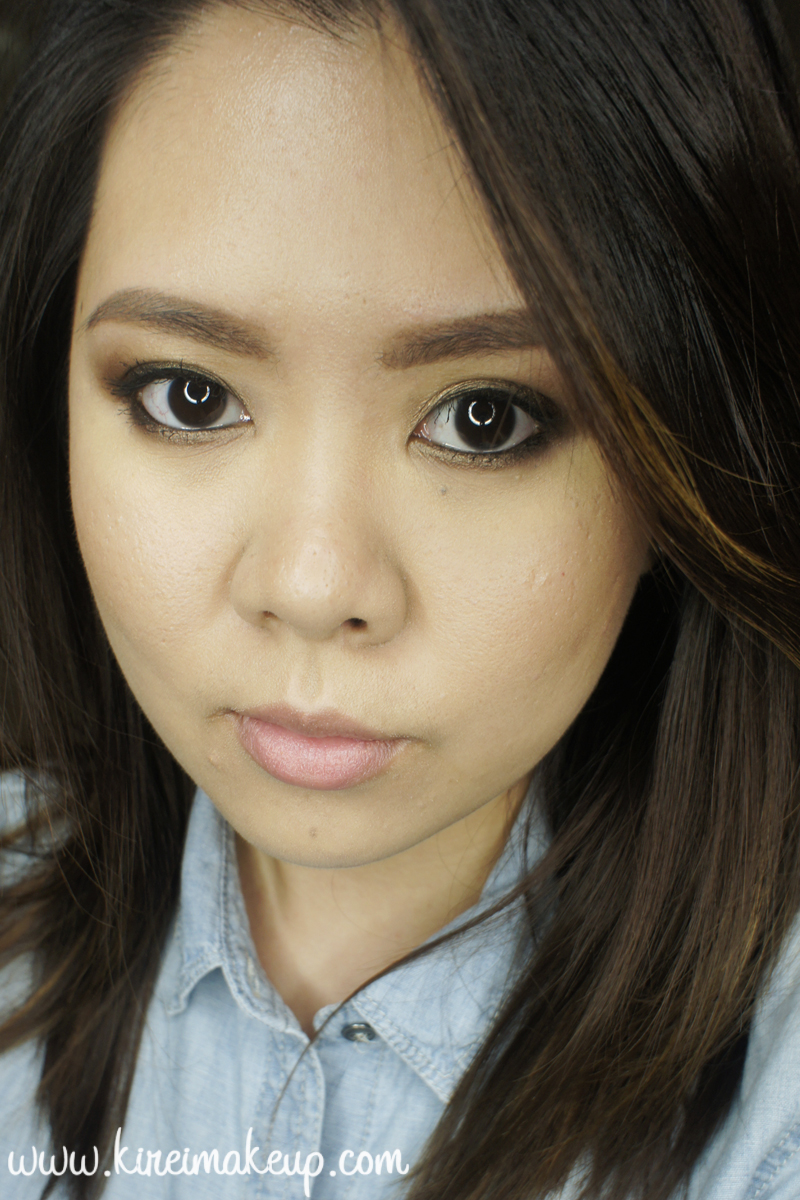
- Brows – Stila All Day Waterproof Brow “Medium”; Anastasia Brow Wiz “Medium Brown”; L’oreal Brow Stylist Plumper “Light to Medium”
- Falsies – Gwiyomi Boutique no. 3 falsies
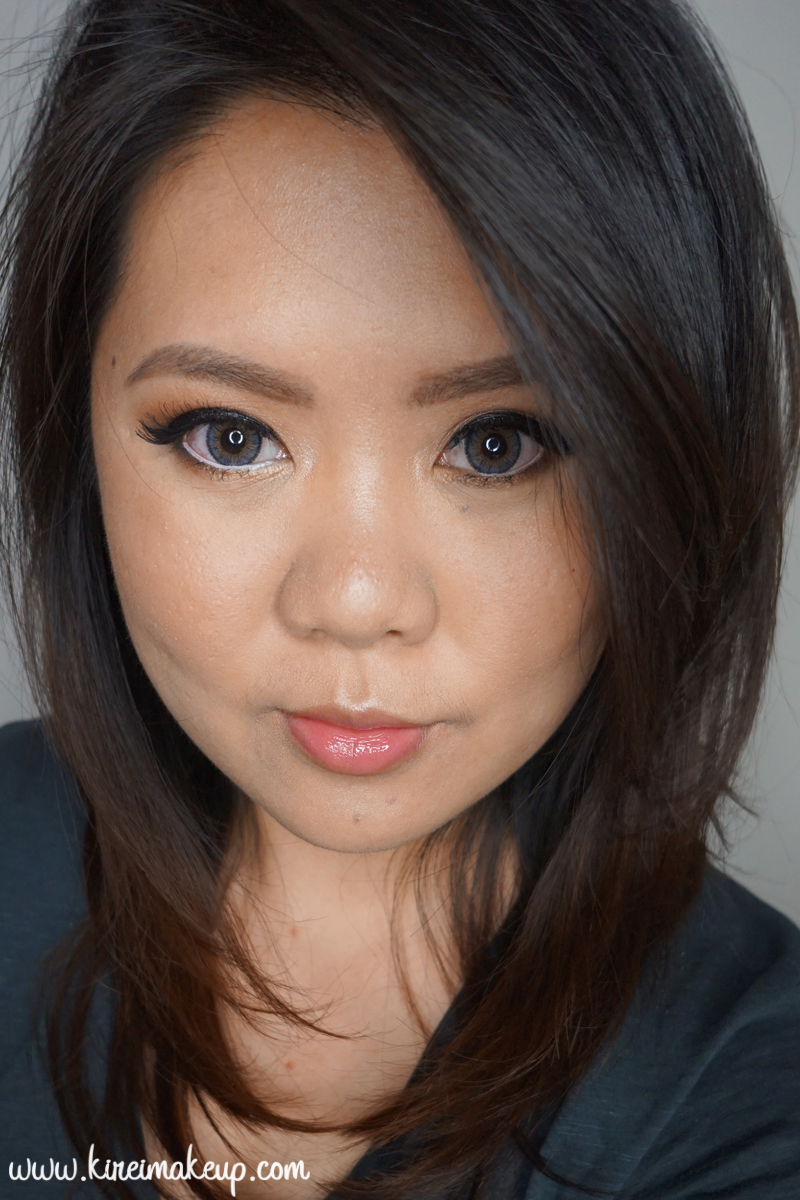
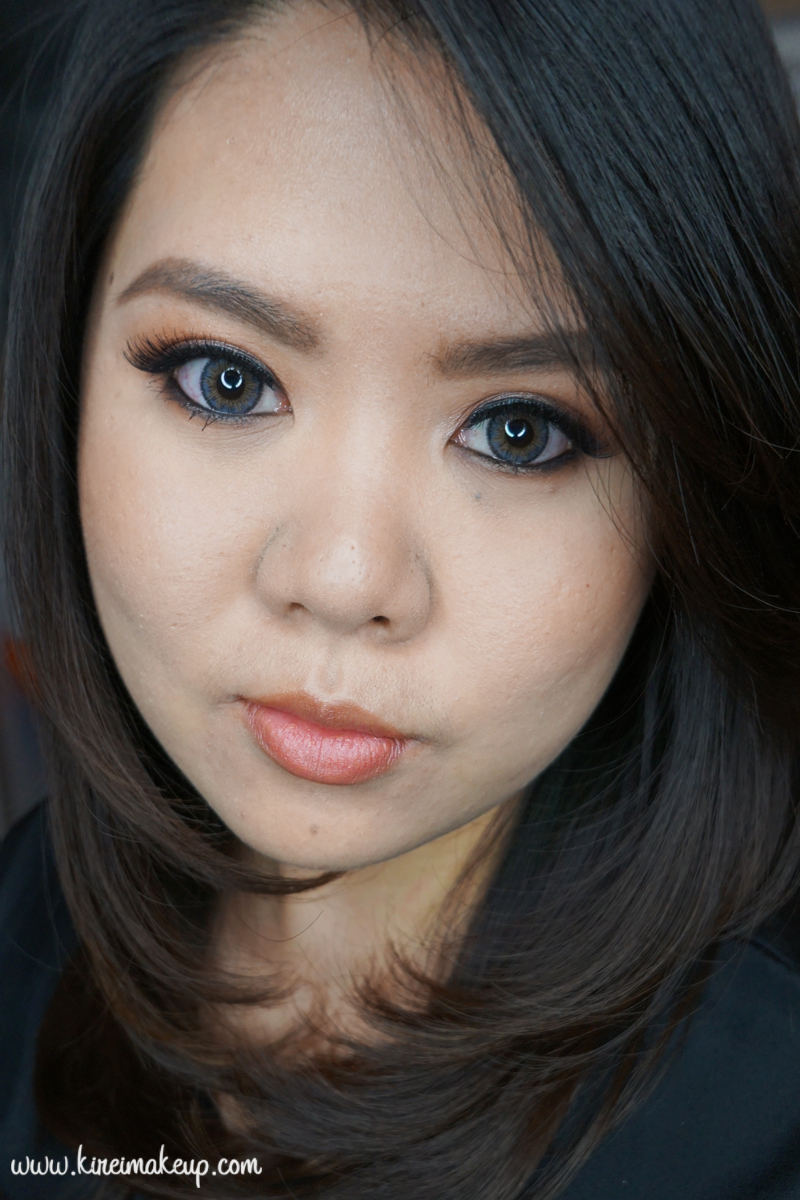
Face
- Primer – Body Shop Drops of Youth “Wonderblur” Face Primer
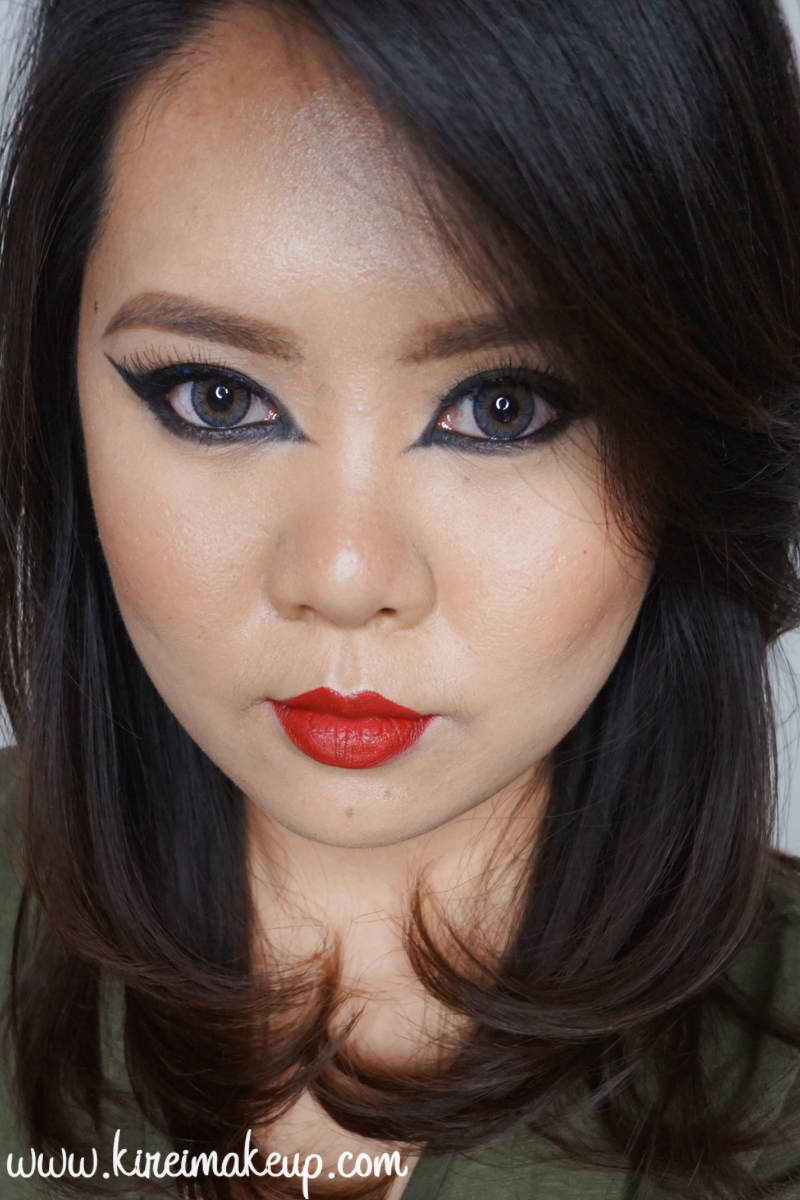
- Foundation – L’oreal Infallible Pro Matte Foundation “#104”
- Concealer – NARS Radiant Creamy concealer “Custard”
- Setting Powder – Coverfx setting powder “Light”
Cheeks
- Bronzer – MAC Mineralized Skinfinish “Medium Deep”
- Blush – Smashbox Halo Powder Blush “In Bloom”
Lips
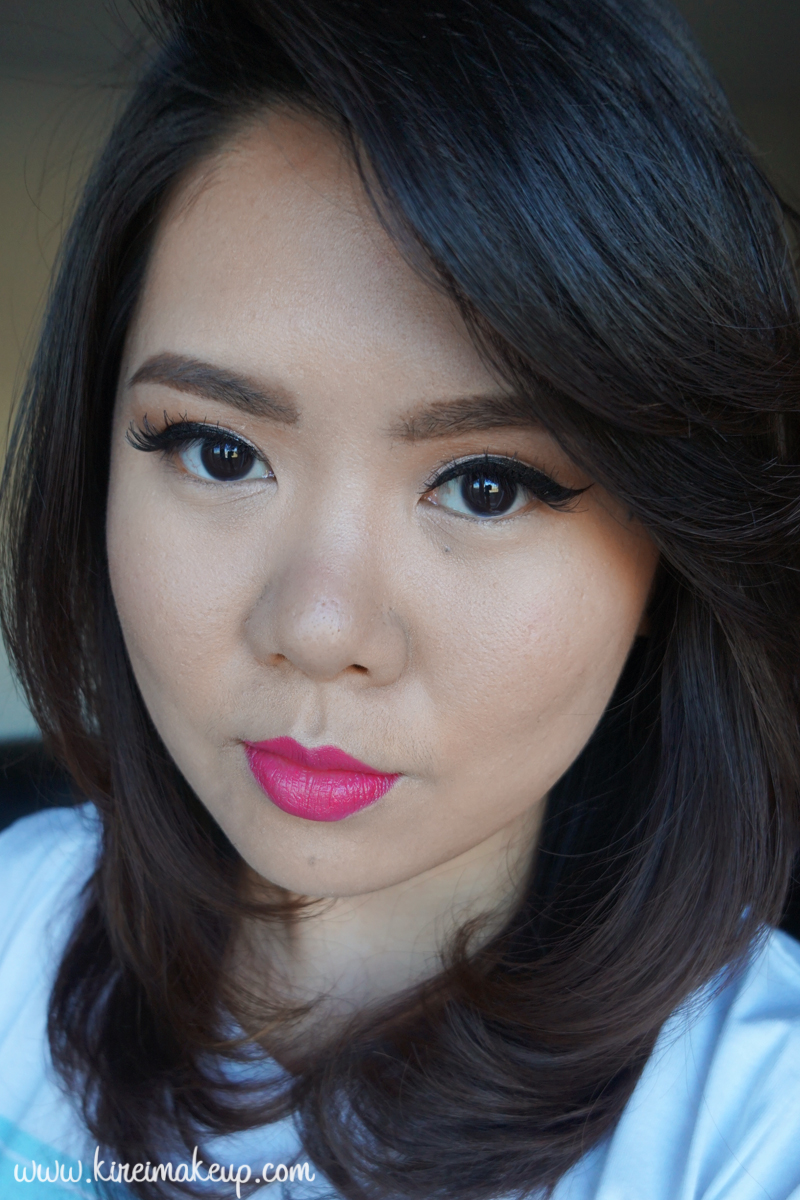
- Lips – L’oreal Color Riche Extraordinaire “Blushing Harmony”