Maybelline Clean Express Miracle Water Review

For today’s post, I wanted to do Maybelline Clean Express Miracle Water review since I’ve received this product for a while now, but didn’t get the chance to review it. I want to thank mbak Hani from Prodigy for sending this product to me! So, very kind of you! I do apologize for taking a while before posting this review.

I’m sure most of you know that blogging isn’t my full-time job, since I do have an obligation in helping out in my parents’ business, I have not been updating my blog regularly. I do try to update it twice a week, so please do SUBSCRIBE to my blog by simply entering your email address on the SUBSCRIPTION BOX (right side-bar). I promise I do no such thing like spamming! All you’ll get on your inbox is a notification that I’ve updated my blog! If you want to find out what I’m up to on a daily basis, go check out my Instagram to satisfy your curiosity!

So, let’s get on the review!

Maybelline Clean Express Miracle Water

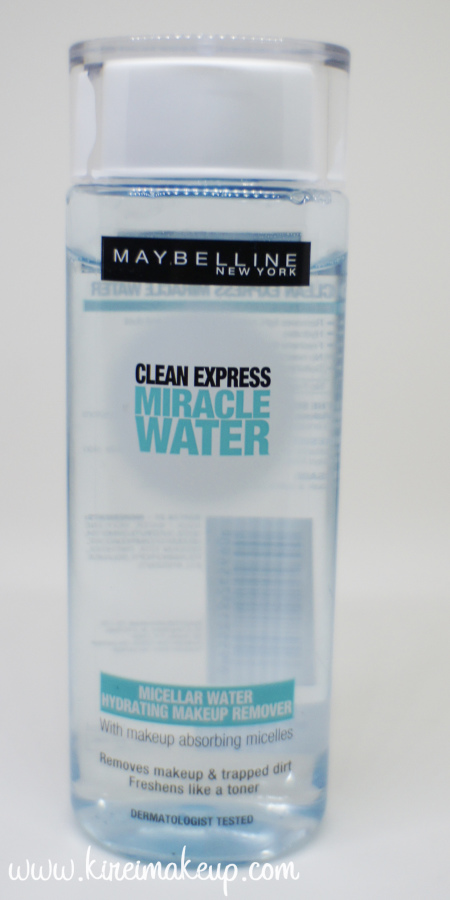
Maybelline Clean Express Miracle Water is a makeup remover that uses Micellar water technology, instead of the usual oil/water combination that most makeup remover has. Ok, so I tried looking up for a definition of this product on maybelline website but it provides none, also I didn’t get the chance to go to Maybelline’s product launching event since I had prior arrangement to go to Tex Saverio’s trunk show. So whatever I write on this post is purely out of my own knowledge, and honest opinion.

Anyways, let’s get back on the review! So, my first impression when I received this product is – WOAH! A dupe for Bioderma Sensibio H2O makeup remover! To be honest, I have high regards for Bioderma Sensibio H2O makeup remover since I’ve used it back in 2012. So, I have really high expectation for Maybelline Clean Express Miracle Water, since it uses the same technology as Bioderma.

(psst, I’m going to post a review for Bioderma makeup remover next week, so check back soon!)

Maybelline Clean Express Miracle Water

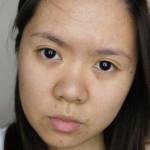
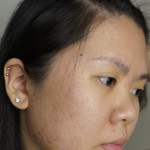
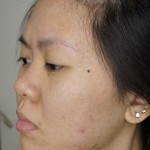
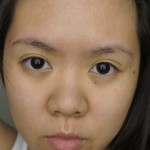
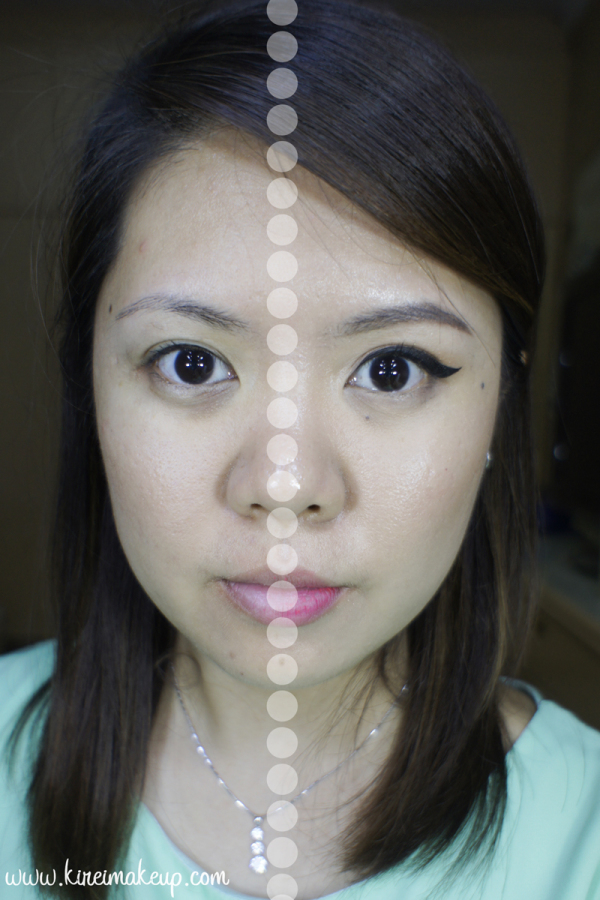
On the picture above, I removed the makeup on one side of my face using a cotton pad soaked in Maybelline Clean Express Miracle Water. I used just ONE cotton pad to remove my foundation, eyeliner, mascara, lipstick etc. I used Kat Von D Tooper eyeliner and Make Up For Ever Smoky Lash mascara, which are known to be waterproof, and hard to be removed.

If you see closely on my lashes on the side with makeup removed (left), you can still see traces of mascara and eyeliner on my eye. I actually left the soaked cotton pad on my eye for a good 3-5 minutes before removing the eyeliner and mascara.

Also, when I removed my makeup using the Maybelline Clean Express Miracle Water, I felt that it left a bit of a residue on my skin which makes my skin feel a little bit sticky.

Oh, when I wake up the next morning, some of the mascara that did not get removed had smeared down to my lower lid! I did not wash my face after using the Miracle Water since I want to test this product to its fullest (the things i’ll do for reviews!).

Maybelline Clean Express Miracle Water

The GOOD

  • Dupe for Bioderma Sensibio H20
  • Does not contain any oil, so it does not leave any oily residue on the skin
  • Great for quick makeup removal

The BAD

  • Does not break down some waterproof mascara and eyeliner
  • Skin feels sticky after usage
  • Have to wash face afterwards to make sure there is no more traces of makeup


My Current Skincare Routine

I was asked over on the Indonesian Beauty Bloggers facebook page to share about my skincare routine. I am, of course, pretty shocked since I don’t have the best skin. I mean, like, my skin is super flawed and I do wished I had taken better care of my skin when I was younger. Lucky for me, my mom was always there to constantly remind me to go for facials, see dermatologist, wash my face etc.

Even though currently my skin looks pretty OK, I had to go through my teenage years with acne. Anyways, throughout the course of my life, I’ve tried several different brands at different stage of my life, some works and others made it worse.

My skin type is combination. A really weird type of combination. In Asia, my t-zone is dry and cheeks are oily. In Canada, my nose is oily and everything else is dry. Weird, right?!

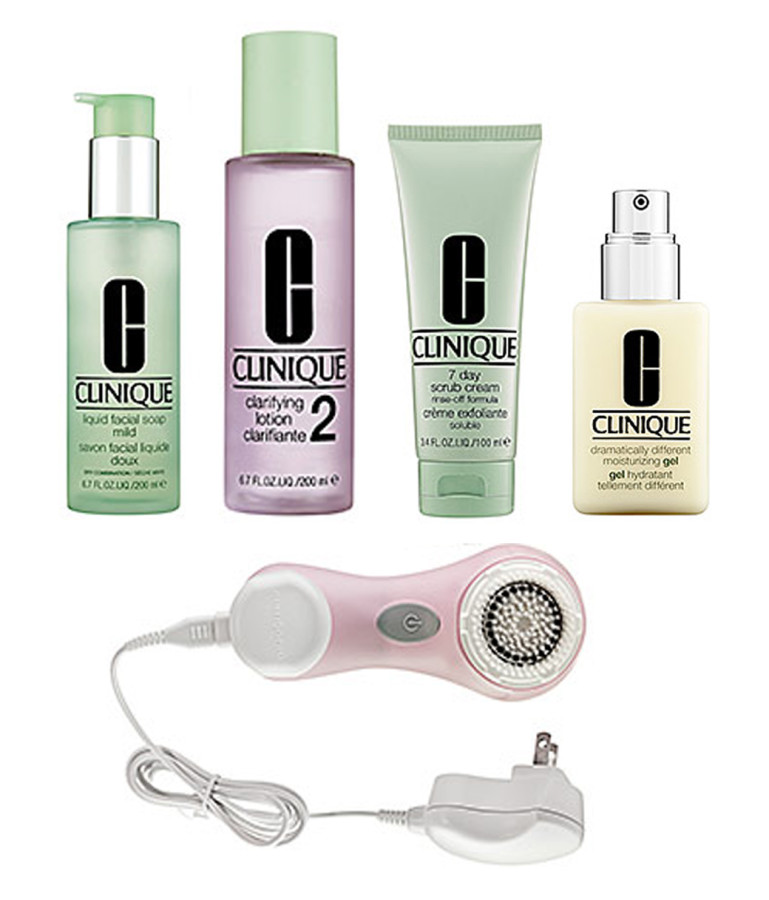
Currently, I’ve been using the Clinique 3-step system for just a little bit less than a year now and I’m loving it! Below is what I’m using at the moment:

Daily 2x/day (+after makeup removal)

  1. Clinique Liquid Facial Soap Mild
  2. Clinique Clarifying Lotion 2
  3. Clinique Dramatically Moisturizing Gel

I started off washing my face with the soap, and then clean up my skin using the clarifying lotion. I applied the moisturizer, 2 pumps, all over my face. In the winter (like right now), I usually layer another pump of moisturizer after the first layer dries off.

Guys, if you’re like me (combination skin in a dry cold winter weather), then the layering step is important to moisturize your skin. I was given the Clinique Dramatically Moisturizing LOTION, within the first week my skin broke out because the cream was too rich.

If you have combination/oily skin, then go for the GEL. It’s lighter and it really does wonder. I was told by family and friends that they noticed my skin looks better and more supple within a week of using the 3-step system. I re-started using the 3-step system when I was in Jakarta, and continued using it while I’m in Canada. This is the only skincare system that works really well in 2 different climate – hot/humid and dry/cold.

Once a week

  1. Clinique 7-day Scrub Cream Rinse-off Formula, OR
  2. Clarisonic MIA + Clinique Liquid Facial Soap Mild

I usually use the Clarisonic MIA + Soap combo once a week to clear out my pores and exfoliates my skin. However, when I forgot to charge my Clarisonic MIA, I usually use my 7-day scrub cream. Once a week is more than enough, especially when I can feel my face is clogged up.

Usually in Jakarta, my mom takes me and my sister out for facial. However, I don’t have that luxury in Canada (so expensive compared to Jakarta). So, the Clarisonic or the scrub is more than sufficient to clear out my clogged pores.

Makeup remover

  1. Bioderma crealine h20, and/OR
  2. Coconut Oil

To remove my eye makeup, I usually used the Bioderma. However, I’ve ran out of the makeup remover just recently, and since I’ve been using coconut oil for hair mask, I decided to use it to remove my makeup as well. I just rub the coconut oil all over my eyes and face, and then removed it with damped face cloth.

After I removed my makeup, then I’ll wash my face using the Clinique Facial Soap TWICE. The first wash is to remove the oil and the remaining makeup residue, while the second wash actually cleans the skin. Then I proceed with the clarifying lotion, and 2 layers of the moisturizing gel.

I also drink A LOT of water to ensure that my skin is not dehydrated. Sometimes, just by drinking a lot of water, you’ll notice a huge difference in your skin. Remember, lots of water is good for you! I keep 2 500-ml water bottles, and 1 1-L water bottle at home. I made sure I drank 2L water everyday.

Let me just mention that it has taken me so many years, a lot of trials/errors to find the one skincare system that actually works for me right now. Please keep in mind that everyone’s skin is different, and what might work for me might not work for someone else.

skincare routine for combination skin

Pictures are courtesy of Sephora


The 5 Most Amazing Benefits of Skin Tightening [Guest Post]

Many people are starting to opt for laser tightening as a form of skin rejuvenation, but you could be wondering if it is the right procedure for you. Luckily, many people find that non-invasive skin tightening is a great way to make them look and feel their best, so you should certainly consider these five amazing benefits if you aren’t sure about this procedure just yet.


1. Results Can Last for Years

Many people are hesitant to shell out the money for tightening procedures because they don’t think that the results will be long-lasting, but this shouldn’t be a concern. Although the procedure might not provide permanent results, most people are able to enjoy more beautiful skin for years. Staying well-hydrated, avoiding the sun, using sunscreen prior to exposure and developing a good skin care routine can help you enjoy these effects even longer.


2. You Can Reduce the Appearance of Aging

Few people like looking in the mirror and seeing an aging face, and skin tightening procedures allow you to do something about it. If you would like to enjoy a younger-looking face but aren’t interested in an invasive, permanent surgery, tightening could be just what you need to get the youthful appearance that you crave.


3. It Can Make You Look Thinner

Sagging skin can make you look puffy and chunky, but a smooth and tight face can make you look much thinner and healthier. If you would like to give your face a thinner look, tightening can help.


4. You Don’t Have to Miss Work

The problem with many cosmetic procedures is the fact that many people have to take off of work for days or weeks afterwards. This probably isn’t practical for you, so you might think that tightening is out of the question. Fortunately, this non-invasive procedure doesn’t affect your ability to work, take care of your kids or handle your other responsibilities.

There is no aftercare required, and you don’t have to have time to heal. In fact, you can reapply your makeup and continue on with your day as normal as soon as the procedure is over.

Not only do you not have to worry about taking off of work after the procedure, but the procedure itself can probably be fit into your lunch break. You can have your entire neck and face done by a professional in approximately one hour, so you don’t have to take too much time out of your busy schedule to make a difference in your appearance.


5. It Improves the Appearance of Your Skin in Many Ways

Skin tightening is commonly associated with aging skin, and the procedure can certainly help you look more youthful. However, it can also help with enlarged or unsightly pores, acne scars and so much more. Many of your skin imperfections will start to look a whole lot better after you have had the procedure done, and you can enjoy an increase in collagen for months afterwards as well.

Sexy and Beauty

About the author:

Natalie Wheeler is a freelance writer and beauty expert offering her perspective on skincare and beauty treatments.

Dermablend Cover Creme Review [sponsored]

First of all, I’d like to say “Thank You” to Nail Polish Canada for sending me the Dermablend Cover Creme to be reviewed. Also, free shipping for any purchase of Dermablend Professional products from Nail Polish Canada!

ย What is Dermablend Cover Creme?

A lightweight creme formula with high coverage and natural skin tone shades. Cover Creme delivers a flawless complexion and 12 hours of consistent color wear.

Cover Creme provides coverage for moderate to major skin flaws including

  • Vitiligo
  • Birthmarks
  • Rosacea
  • Pigmentation Disorders
  • Post-Operative Bruising
  • Scars
  • Burns

Texture: Glides on evenly. Skin looks fresh, feels soft and velvety smooth.

Skin Benefit:All day hydration.ย Suitable for sensitive skin.

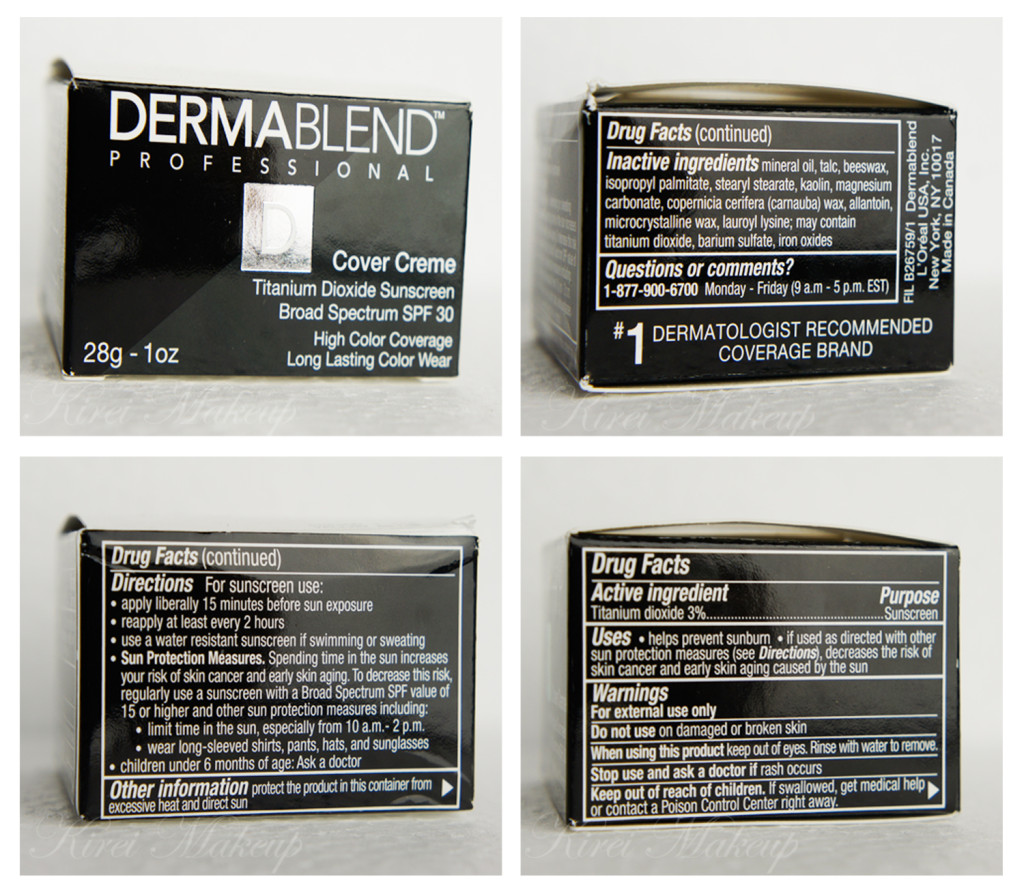
Sun Protection: SPF 30 Sunscreen.

Application

First apply cover creme

  1. Remove a small amount of Cover Creme with either a spatula or fingertips.
  2. Apply directly over imperfection. Tap gently to ensure maximum coverage.
  3. Blend outwardly. If extra coverage is desired, tap onย more product over the area. For sunscreen benefits, apply before sun exposure.

Second apply setting powder (sold separetly)

  1. Pat on Setting Powder generously over covered areas.
  2. Brush off excess using a makeup brush.
Size: 28g / 1 oz
(Nail Polish Canada, 2013)

Dermablend Cover Creme review NC30

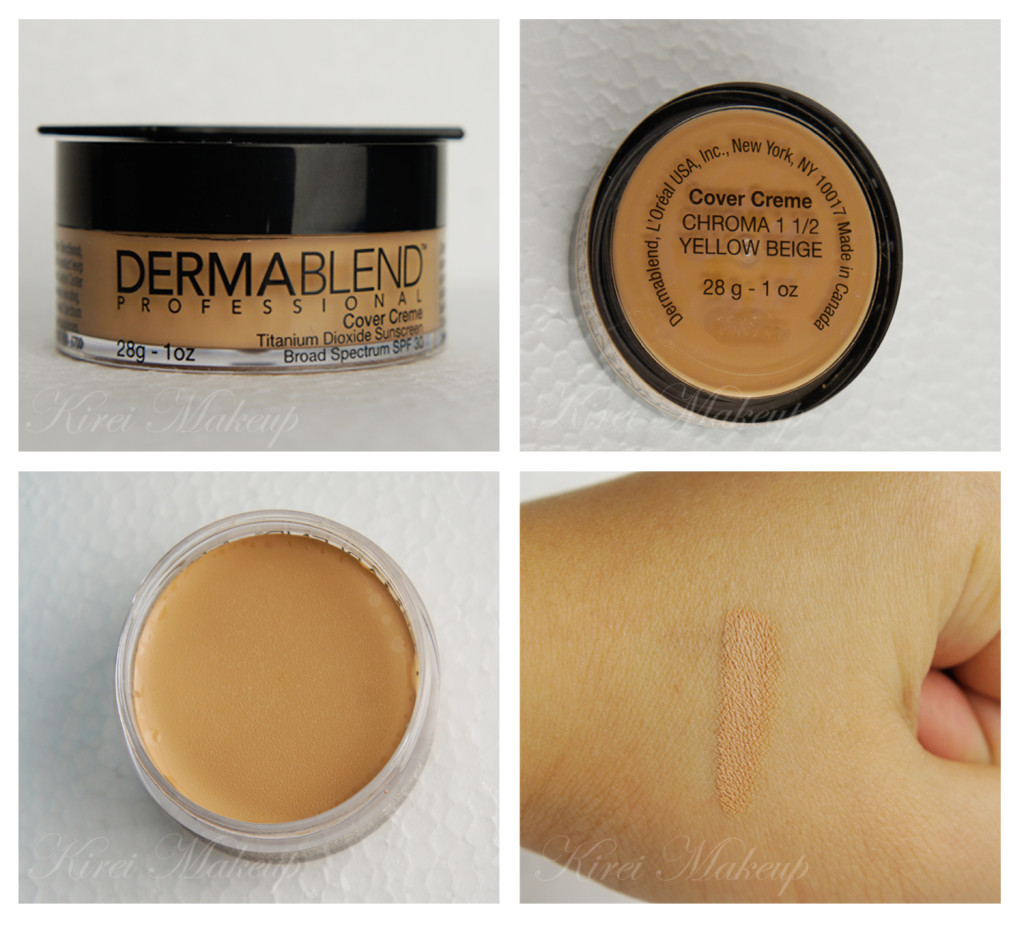
I was asked to choose a shade from the Nail Polish Canada website, but I wasn’t sure which shade I’m in. I decided to go with Yellow Beige, even though I was unsure. I’m usually a MAC NC30 in MAC Pro Longwear. I was also given the option to choose the different Dermablend products, but I chose this foundation since I think it’ll be beneficial for those who’d like to try a full coverage foundation.

I love how the Dermablend Cover Creme comes in a jar and a little spatula. Even if you are not a makeup artist, you might find the spatula to be quite useful. Use the spatula to pick the foundation up from the jar instead of dipping your finger or brush directly into it, to avoid bacterial contamination.

You’ll find that the foundation is very tightly packed into the jar. This little jar will probably last you a good while. A little goes a long way with this foundation.

The foundation also blends very easily and smoothly to the skin. It almost feels like it melts into your skin. I applied the foundation by putting a little bit of it at the back of my hand, and work the product using the spatula. Then, I used the foundation brush to apply it to my face. The foundation is very pliable when you warm it up first.Dermablend Cover Creme NC30

Coverage

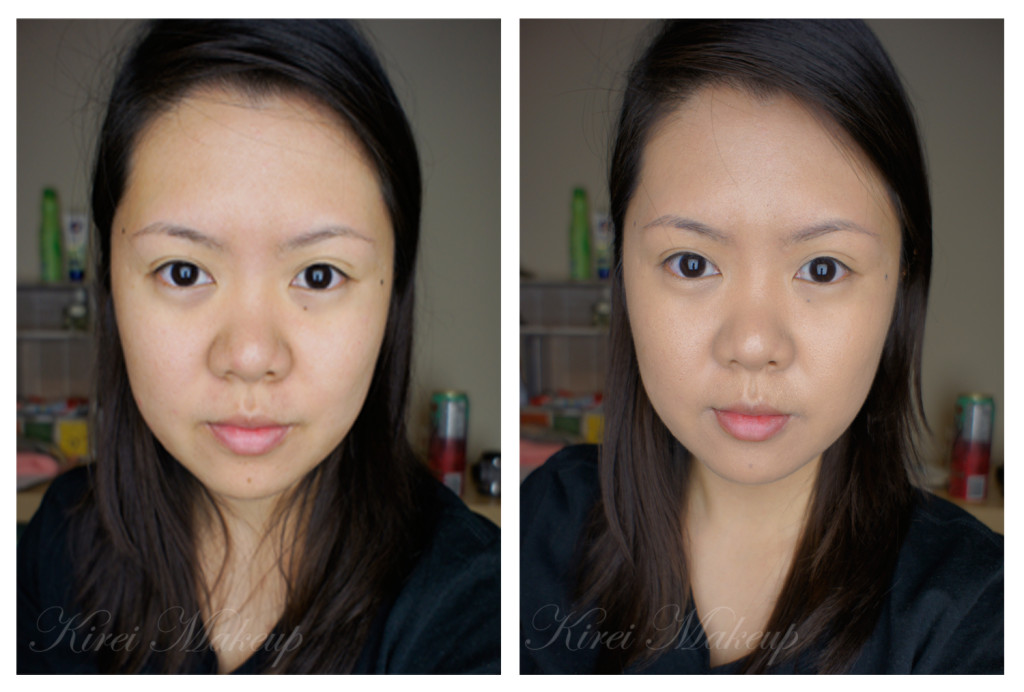
The Dermablend Cover Creme is a full-coverage foundation. However, like any other full-coverage foundation, this product can be applied thinly to create a sheer coverage. You can achieve a sheer to medium coverage by applying it using a damped sponge, or mixing the foundation with a primer or moisturizer.

In the pictures below, I applied a layer of foundation using a foundation brush. There are several ways to create a heavier coverage:

  • Layer your foundation.
  • Stippled or dabbed the foundation to your skin using a dry sponge, or your finger.
  • Buff it to your skin using a buffer brush, something like Sigma Round Kabuki or a Sigma Flat Kabuki brush.

Finish

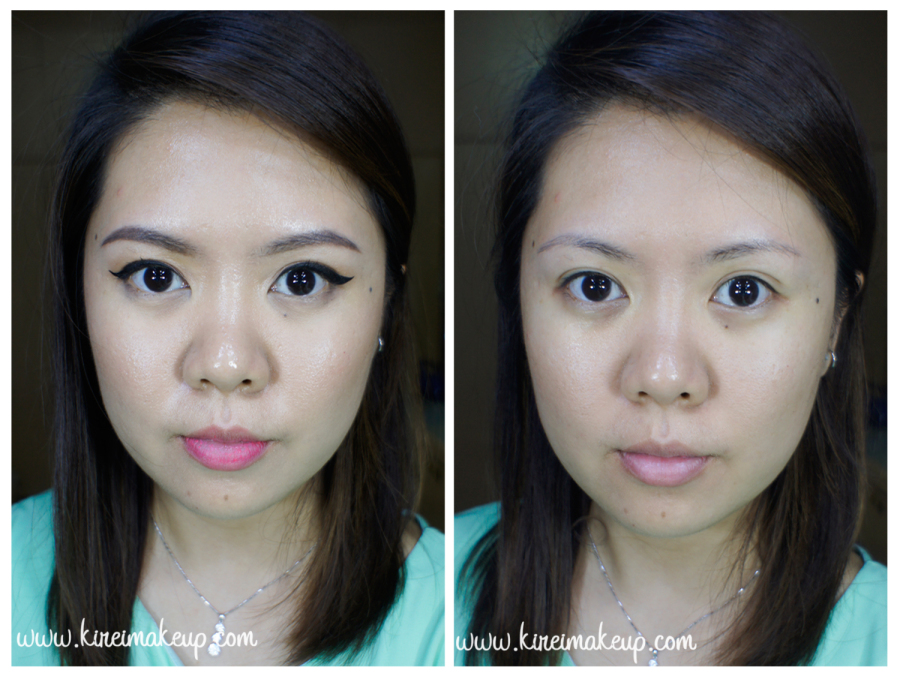
I was expecting the finish to be matte, but I was quite surprised at the result. I mean, look at my “after” picture, it doesn’t look super matte, does it? I feel like it actually has quite a natural finish. I think my “before” picture is more matte than the “after”.

I find the finish to be quite velvety. I like how it looks. It’s not too matte, not extremely dewy either. Just the right amount.

Longevity

The brand claims that it lasted for up to 12-hour. I’m not sure how true it is if you don’t set it. I wore it for couple hours (4hrs), and I noticed the foundation has started to settle on the lines under my eyes. I did not powder it, so may be if I do, it’ll last longer. Keep in mind that I have a combination skin type.

The foundation is quite slippery, so if you have an oily skin, you might want to set it with powder to ensure that the foundation will stay.

Shade

21 shades ranging from light to dark, along with different undertones (yellow, pink, olive, and red).

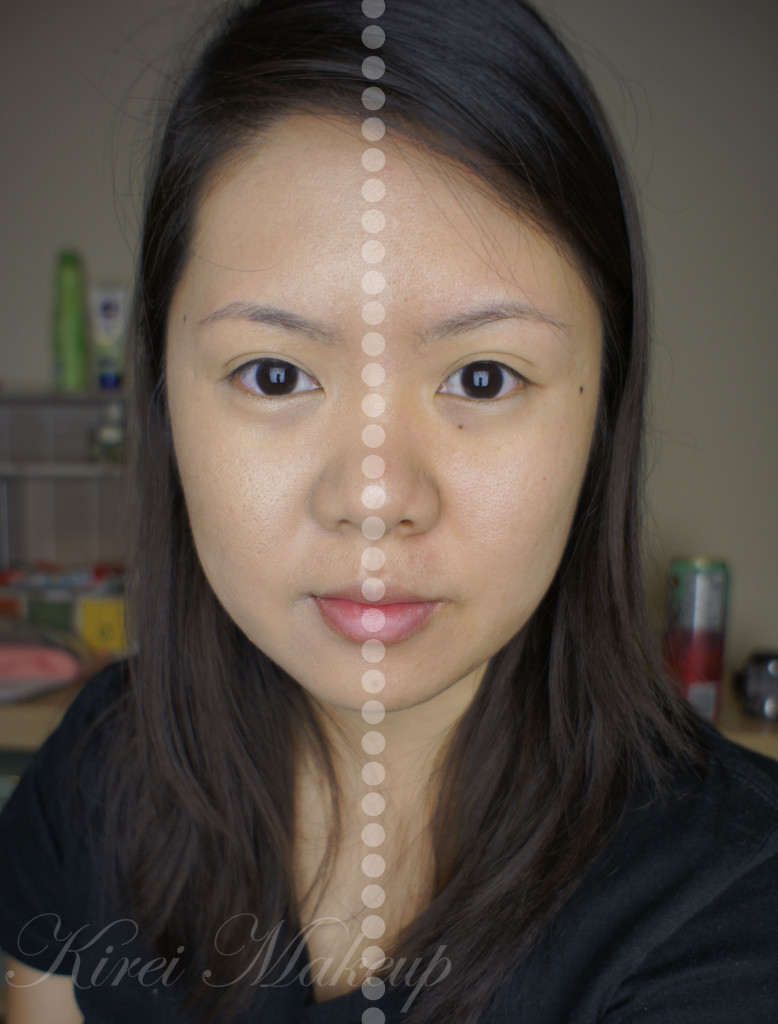
I picked Yellow Beige, thinking it might have more yellow undertone, but I feel that it has quite a pink undertone. In the picture you might think that it matches my skin tone, but I can assure you it did not. It’s very pink, but I know I can probably neutralize the pink slightly using a very yellow powder when setting it.

Price

Currently it’s sold for CAD $36 (usually $38) from Nail Polish Canada. I don’t know how much it is in other store. I think the price it’s not too bad, considering how much you get out of it. There are lots of other foundation that’s even more expensive and not as good as this one.

Dermablend Cover Creme Asian

Pros

  • Full coverage, but can be thinned out if needed.
  • It covers everything! I didn’t even need to use concealer for this review.
  • A large range of shades is available for all different skin tones.
  • Suitable for all skin type, including those with sensitive skin.
  • Natural to velvety finish, if you prefer a non-matte skin.
  • Blends easily.
  • Consists of SPF 30.
  • Great packaging and love the spatula.

Cons

  • For me, the cons would be the wrong undertone. Too pink, may be better luck for me next time…I think if you want to buy this online, make sure you already tested the foundation before hand to match your skin. If not, you’ll be like me doing a guessing game.
  • Settles on fine lines, but can easily be fixed by setting it with powder.

Dermablend Cover Creme review

(Left: with Dermablend Cover Creme; Right: Bare face)

Etude House CC & BB Creams Review

I’m skipping this week’s installment of Product of the Week, in return, I’m posting this review. As you guys know, I received a CC cream and BB cream from Etude House Indonesia. The CC Cream is their latest product, and it’s the first CC Cream ever launched in Indonesia. You probably already know what BB cream is, right? So what is CC Cream? What’s the big deal?

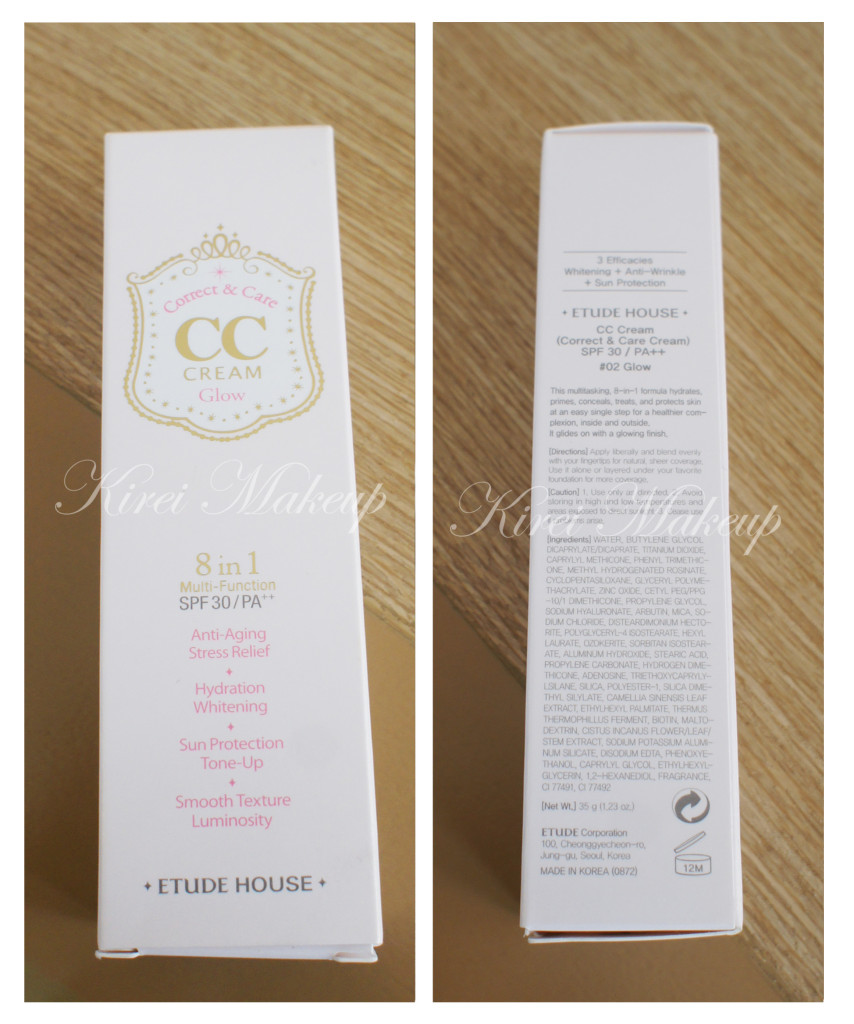
CC Cream is a sister of BB cream. CC (for Etude House) stands for Correct and Care. The main purpose of a CC cream is to color correct the skin. I guess, it’s like a primer for the BB cream. It is colorless and it has SPF. The CC cream from Etude House also provides hydration, it has anti-aging and stress relieving property, it gives the skin luminosity and smooth the texture of the skin.
Korean CC Cream review

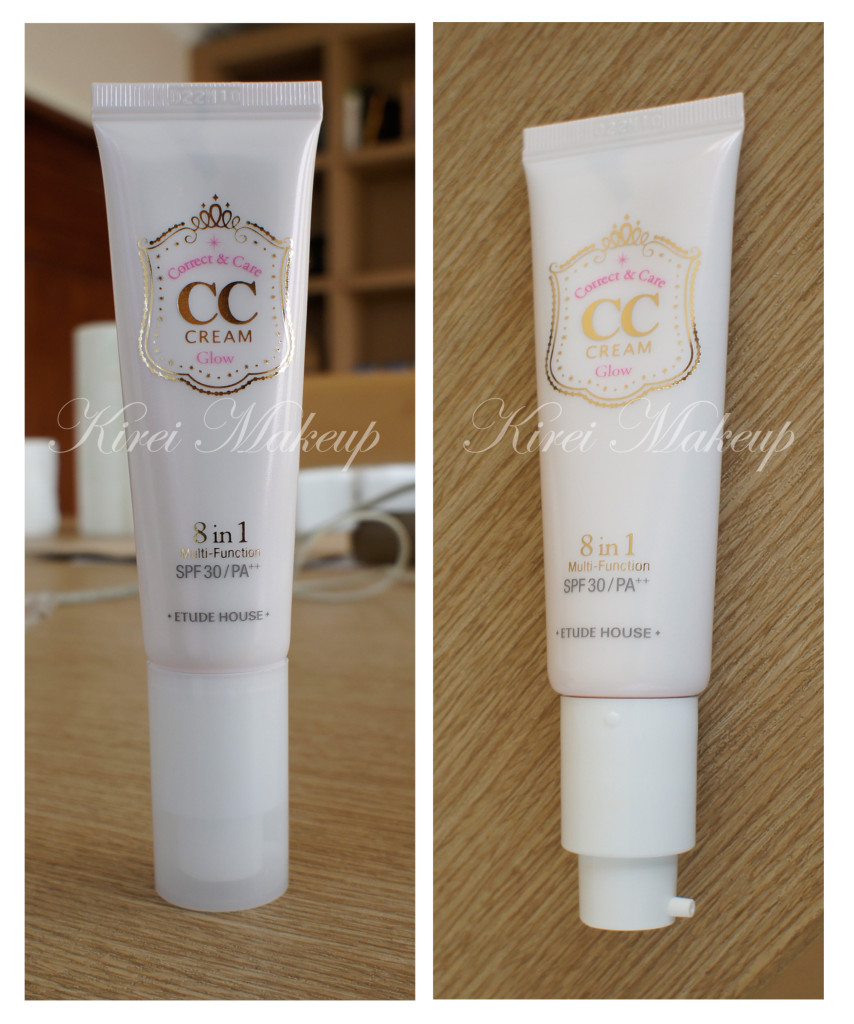
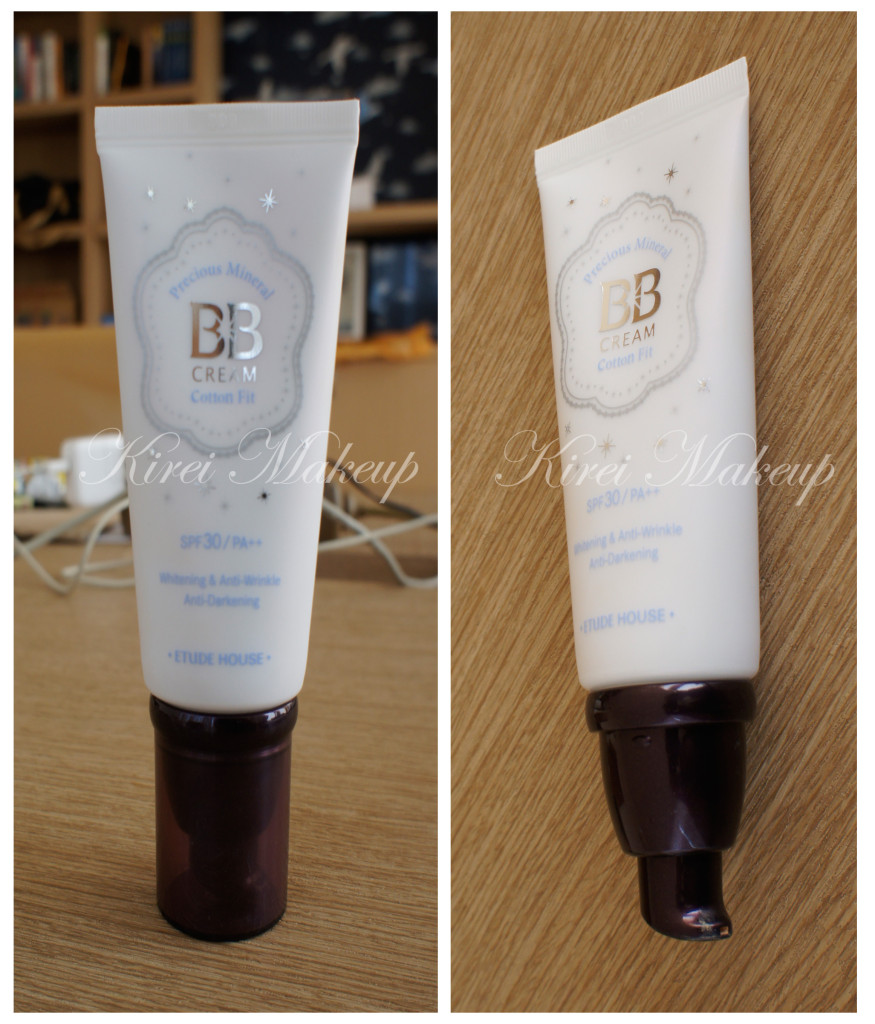
Korean CC CreamAt first look, the packaging is really nice. I actually love this type of packaging. It’s made of a squeeze tube, but instead of squeezing it, there’s a pump for the product to be released. One or two squirts are enough for the whole face. The cream is white with a lot of fine golden particles in it (can’t be seen in picture).

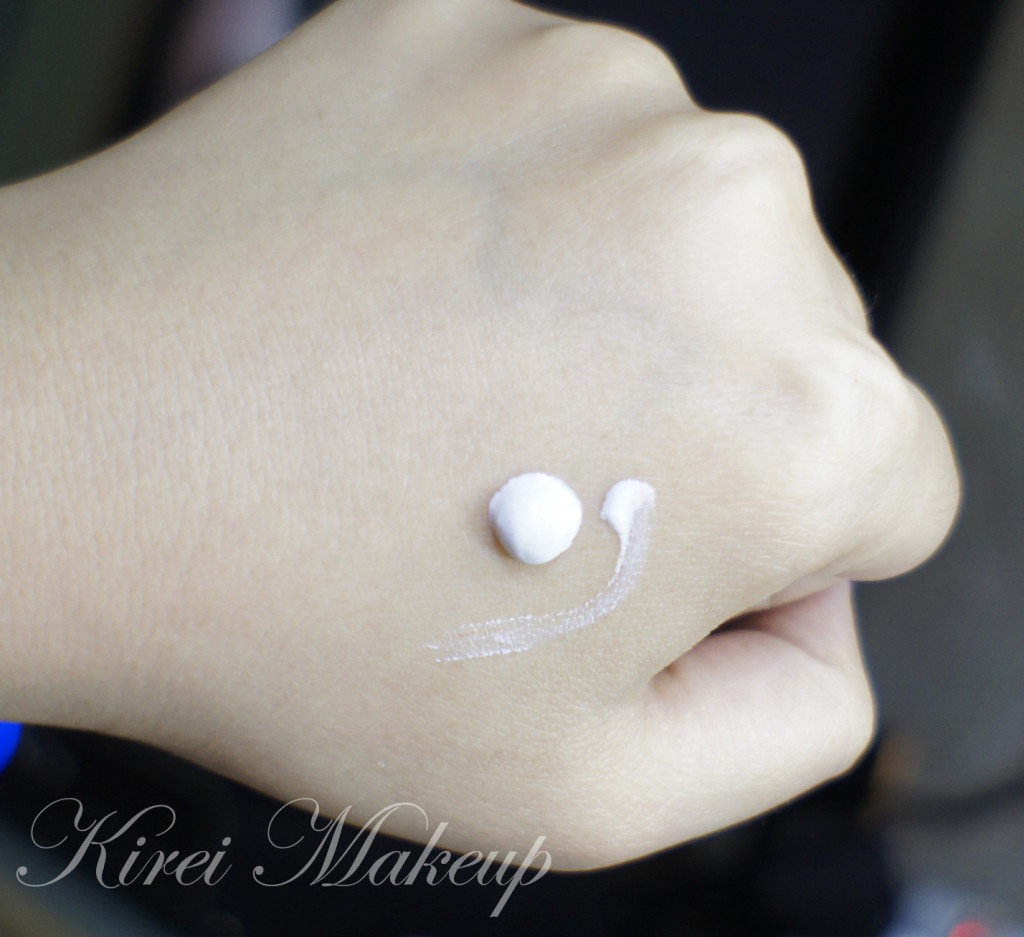
The consistency of this cream is like a sunscreen. Very thick and creamy. It has quite a strong scent to it too. I’m not a fan of anything with strong scent, because that means it has perfume in it. The scent isn’t too bad, it actually smells pretty good, kinda floral-y.
CC Cream review

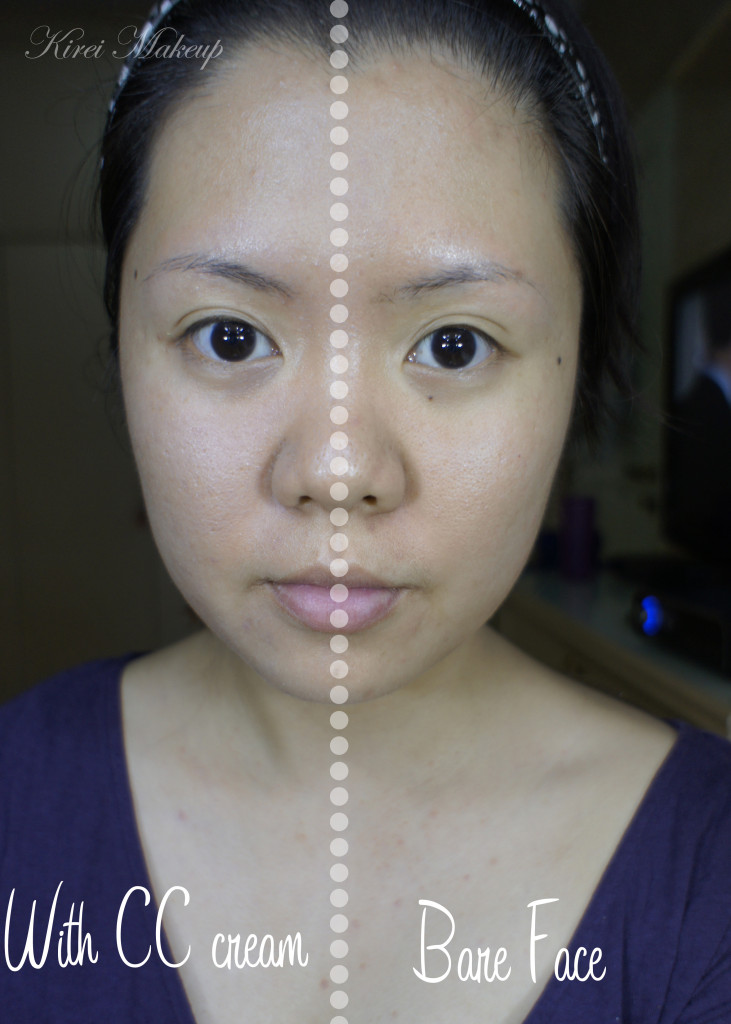
I applied the CC cream on my right side of the face (left on the picture). What do you guys think? I think it causes a slight white cast on my face. Let me also say I’m not a big fan of whitening product. I know a lot of Asians are quite obsessed with skin whitening, but I’m not of one of them.

Let me also mentioned that I feel that this cream seems to make my pores look bigger. On a positive note, it is very moisturizing, and the fact that it has SPF 30 means you can throw this product on your face and go. There’s no need for a separate sunscreen. I don’t like how it doesn’t actually “correct” anything on my face. You can still see the redness, and my skin texture doesn’t seem to have much of a difference.

It doesn’t really have much glow either. I’m not sure about the anti-aging property, but definitely doesn’t feel like it’s firming or tightening the skin either. It’s more like a sunscreen, really.
CC Cream review

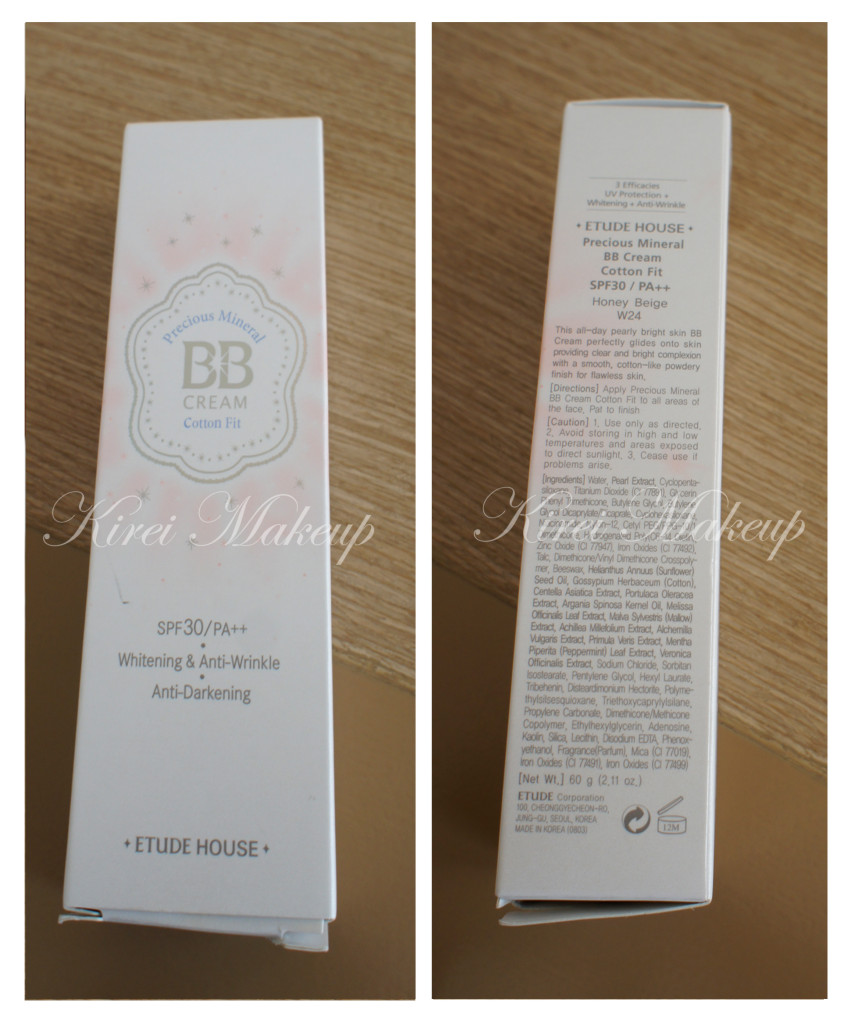
Now, let’s move on to the BB cream. The one that I received is called Precious Mineral BB Cream Cotton Fit. The shade that I received is Honey Beige W24. This one also comes in a squeeze tube, but with a pump! I love the packaging. I mean, it’s genius! I don’t have to worry about the product breaking when traveling, and it’s so convenient with the pump to get the cream out.

The BB cream contains SPF 30, it is also a whitening and anti-wrinkle, as well anti-darkening product. Again, I’m not a big fan of those anti-whitening, anti-darkening stuff. Like I said, there’s an obsession with being fair-skin here in Asia. I guess I wouldn’t mind if it brightens up my face using light-reflecting particle. However, anything that has to do with whitening, I’m quite wary.
Korean BB Cream

Etude House BB Cream

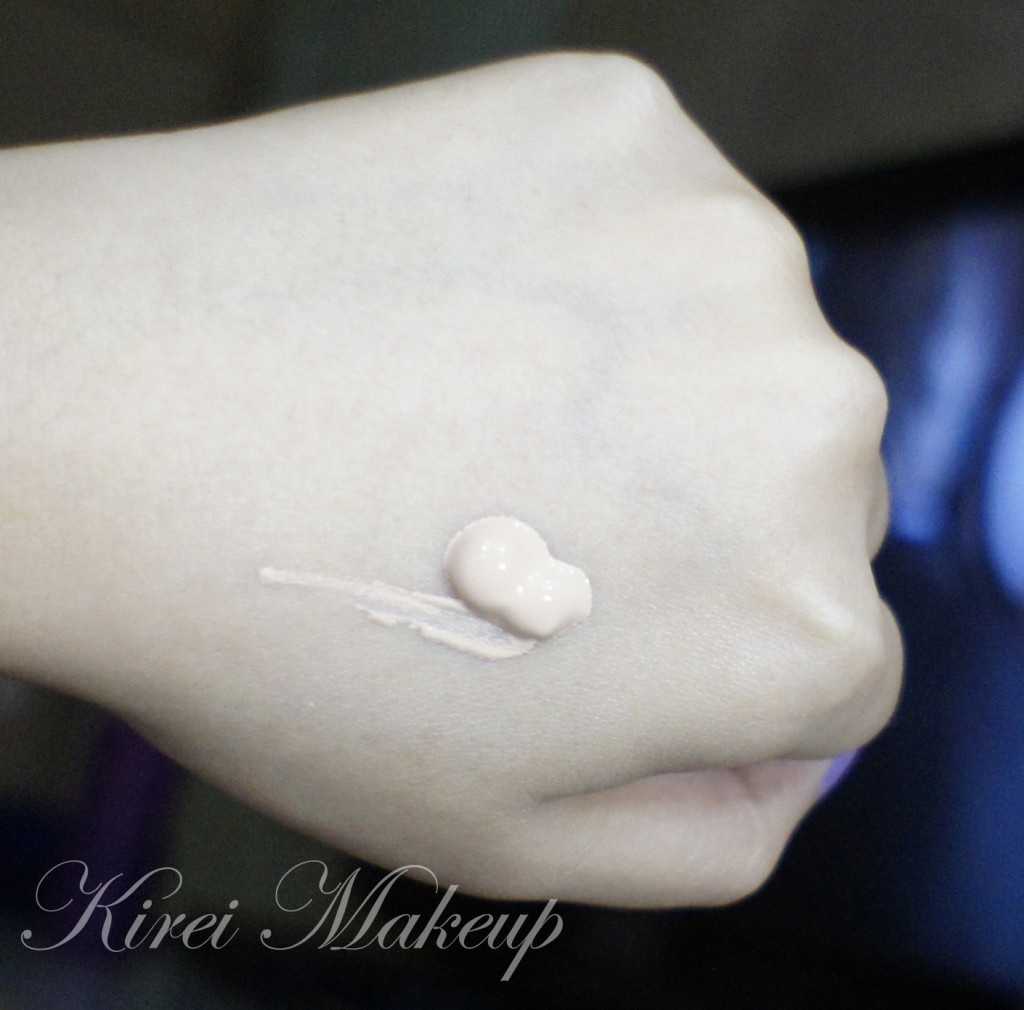
Be very careful when you pump out the product, might squeezed a bit too much (like me..-__-lll)…Anyways, with the amount of product you see on the picture below, I can cover my entire face, neck plus chest. The BB cream is very thick, which is quite unusual since most of the BB creams that I’ve used are pretty runny and light.

It has a fragrance similar to baby-powder, which I don’t really mind. The BB cream has a somewhat yellow undertone, but it does have a slight pink to it as well. I thought it was quite a good match for my skin (yes…i thought..continue reading to find out why). I believe this BB cream comes in 3 colors, Honey Beige being the darkest. So, if you are darker than me (I’m NC27-30), you might not be able to get a match. Just FYI, I didn’t get to pick the shade, it was picked for me by Etude House.
Etude House BB Cream

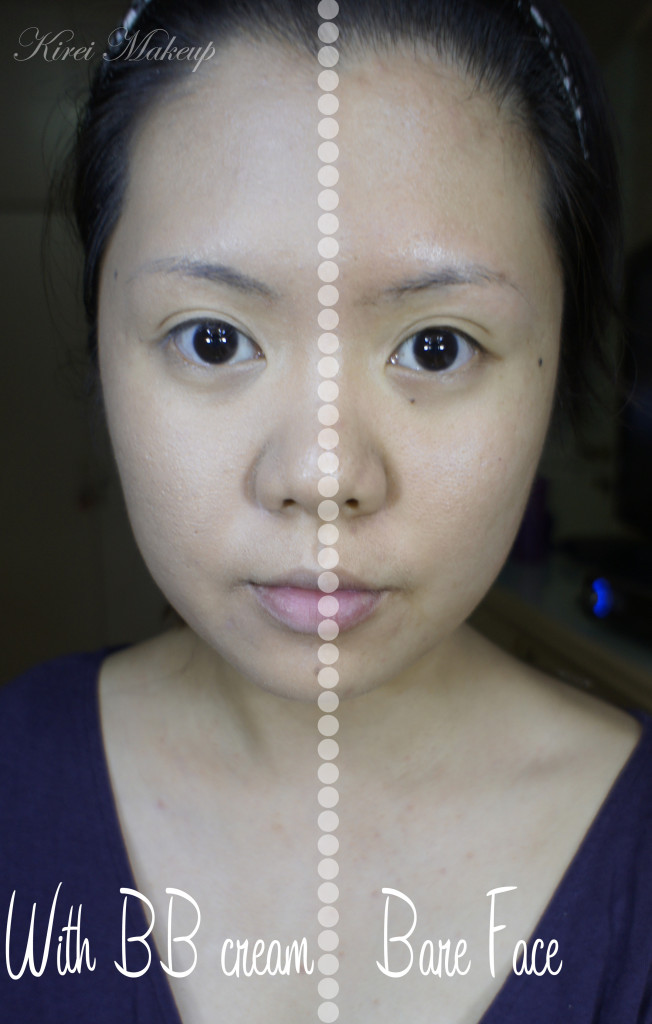
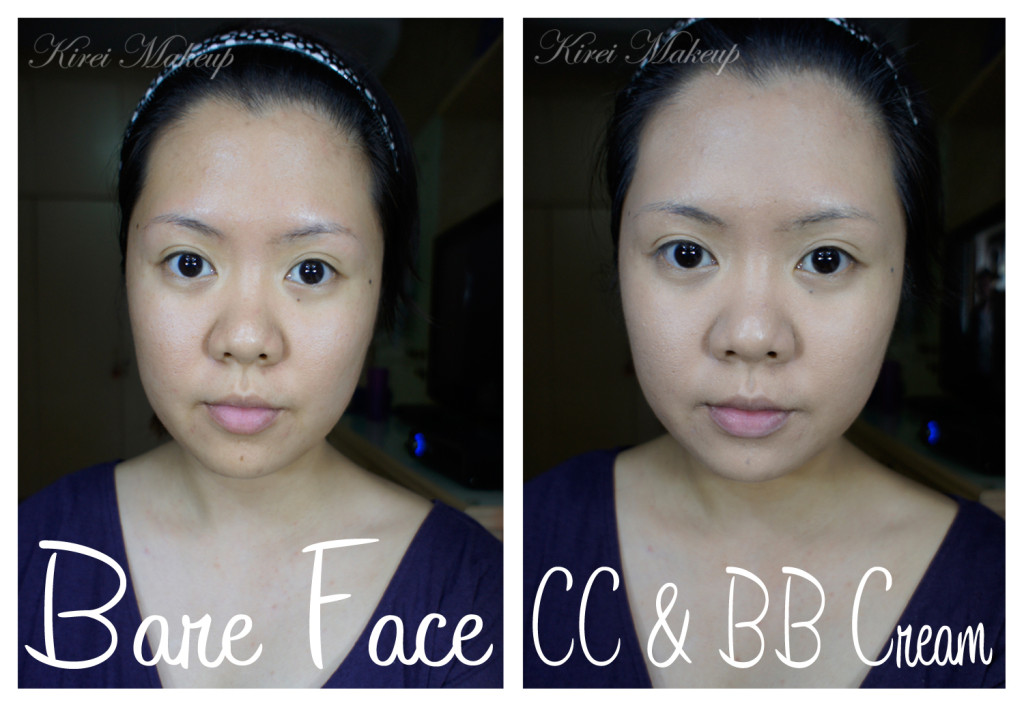
Ok, so I tested the BB cream on my right side of the face (left in the photo), and can you see how cray cray I looked like? I mean, I dotted the BB cream in certain area of my face, and blended it outwards (from center of the face) using my finger, and HOLY GUACAMOLE! I look ghastly! This BB cream is like a full on foundation. It has a medium to full coverage.

What surprised me even more is that the more I rubbed this to my face, the “whiter” it gets. I mean, yea it looks like it matches my chest perfectly, but let me tell you that my face actually looks a lot paler and did not match my chest and neck at all. It has a grey cast on my face, which means that this product is the wrong color.

I’m not sure why it looks very white on my face since it looks quite ok when you squirted the product out. I think it might be due to the SPF 30 ingredient in it. You know how when you use sunscreen your face might look like it has some whitish layer on it? It’s similar to what happened to my face here. If you follow me on twitter, I posted a picture of my makeup during the event, and you can see how much paler my face was compared to the neck.

The BB cream itself is not that easy to blend since it’s quite thick. If you use your fingers to blend, make sure you work it in. I find that using my fingers help to spread the product better. If you use a foundation brush, make sure there’s no streak on the face. It also sinks into the pores. If you have fine lines under the eyes, it will crease.

Another thing I have to mention is that even though I wore this product for a good 3-hour, I had to say I felt like I’m wearing a mask. It’s quite heavy on the skin, definitely different than other foundation/bb cream I’ve worn before.
Etude House BB Cream review

I’m not sure if these 2 products were targeted for any specific audience. I think if you have dry skin, you might have a hard time using the BB Cream, and if you have oily skin the CC Cream might be too slippery for you. If you have sensitive skin, you might want to do a test patch first before applying it all over your face. The reason I said this is because I broke out! Not as bad as I thought it might be, but I have several new breakouts on my jawline, near my ears and chin area. I’m not sure which product caused it, but it might be both. The CC and BB creams were the only new products that I put on my face before the breakout occurred.

Now, for the price, I wasn’t told any numbers by them so I don’t know.

How do I feel about these 2 products? If you’ve been following me for a while, you should know that I feel BB and CC creams are just a big marketing hype. Asian BB and CC creams don’t really carry a large range of color, so more often than not you’ll always end up with the wrong color. Not to mention, a lot of these Asian BB creams are too beige or too pink for our skin-tone.

I do, however like the fact that it contains higher SPF than the Western BB creams, but this also means that you’ll end up with a flash-back if you get your pictures taken.

I’m not sold at all about this idea of BB and CC creams in Asia. I say don’t waste your money, and go get a foundation that perfectly match your skin. Mix it with your moisturizer or primer to thin it out, so it’s not too thick. If you have a Western BB cream, or several like me, you’ll probably find that they are more like a tinted moisturizer which works great for the Summer or if you are traveling. I find that Asian BB creams are still a bit icky, esp. with the shade range and fragrance.

What do you guys think? Have you had any good experience with Asian BB Creams?

For other BB creams product review, please visit:
Etude House Indonesia BB cream

Who might benefit from the CC and BB creams?

To be honest, I’m not sure. I wouldn’t even recommend this product to anyone with sensitive skin. May be if you are a big fan of Korean makeup, and you are quite fair, looking for a medium coverage BB cream, the Etude House BB cream cotton fit might work for you.

For the CC cream, I guess it might work for anyone looking for a sunscreen. I don’t quite actually mind the CC cream, I just don’t see the big hype about it.

Again, those with sensitive skin please do a test patch before purchasing it. What’s a test patch? You apply the product in a certain area of the skin, like behind the ear or on the jaw to see if you have any reaction towards it.
Unboxing Beauty Treats Indonesia!

After a long wait for my first Beauty Treats package to arrive, I finally got my hands on it! Today’s box was quite late because apparently they were changing their courier service, so there was a delay. Also, just to let you guys know, if you did not input the special code given to you for payment confirmation, they will not notify you that there’s something wrong with your payment. You do have to contact them if you have issues with payment and subscription, don’t expect them to contact you.

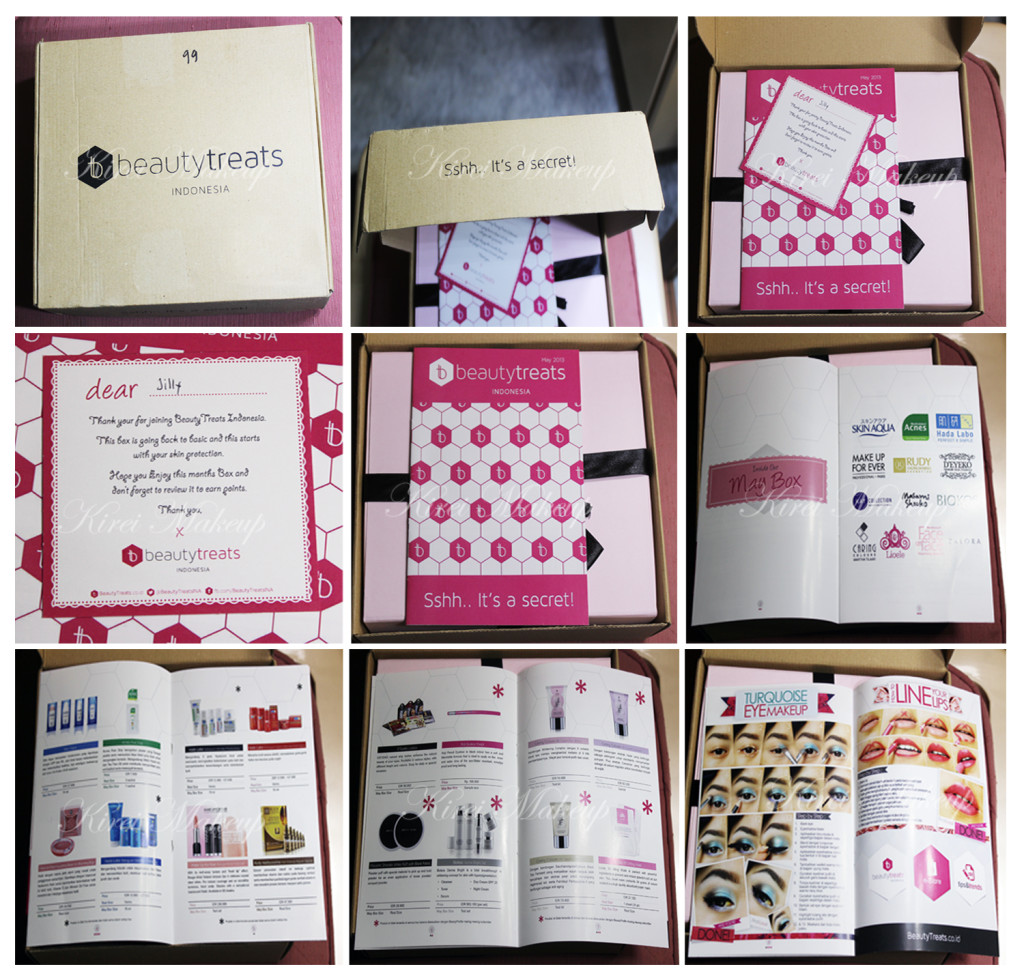
Anyhooow, let’s get to the good stuffs! The package arrived safely. I love the little “sshh…it’s a secret!” slogan. I think it’s cute. Inside the package, there’s a little “thank-you” note, and I find it very lovely that they handwritten my name. I think it’s a nice personal touch.

Beautytreats indonesia

You will find a booklet explaining which brands and products are inside this month’s box. The booklet also contain the full description of each item and their original price should you be interested in buying the original size. I heard that they will be releasing a new section on their website where you can buy the full-size products online. On the last 2 pages, they included makeup tutorials, which you can also find on their Facebook page and website.

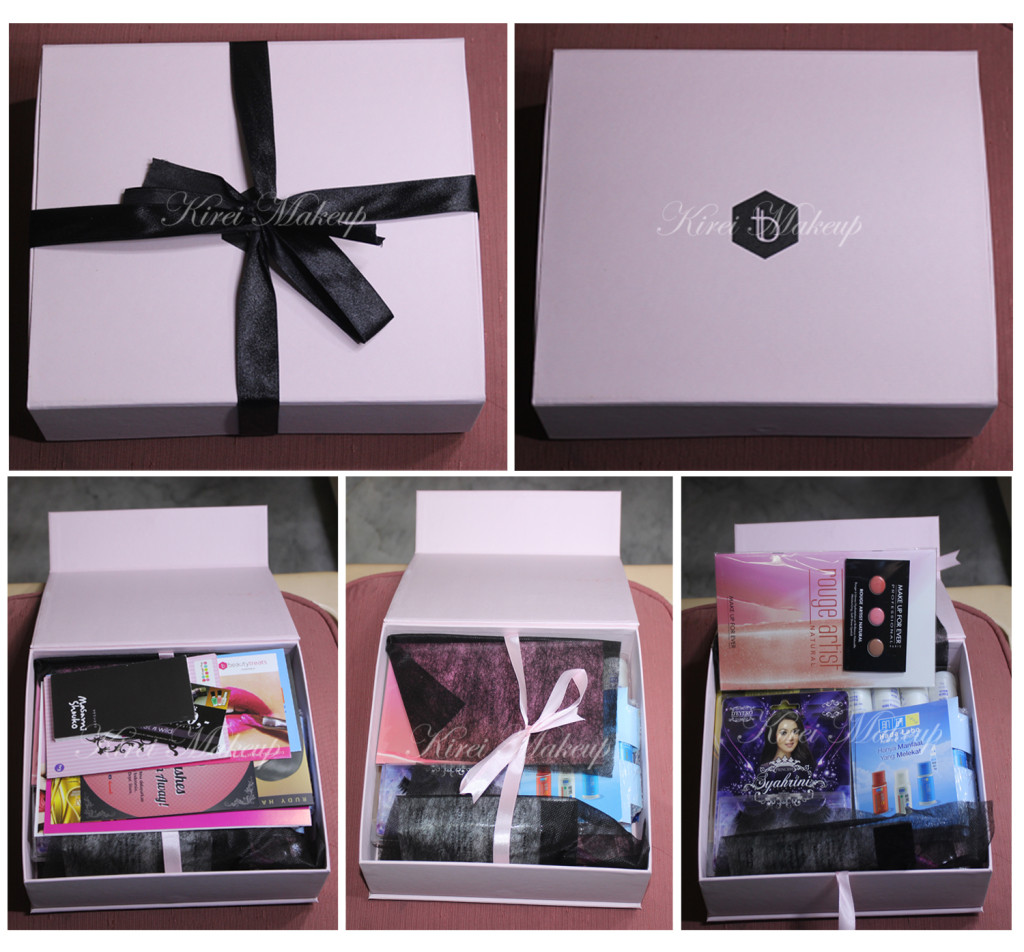
The beautytreats package comes in a pretty pink box, with black ribbon tied around it. I’m keeping the box, and probably will use it as an organizer or to keep my stuffs inside. It’s pretty sturdy! Inside the box you’ll find vouchers and booklets from the different brands that are partnered with beautytreats. Beautytreats indonesia
So, what’s inside this month’s box?

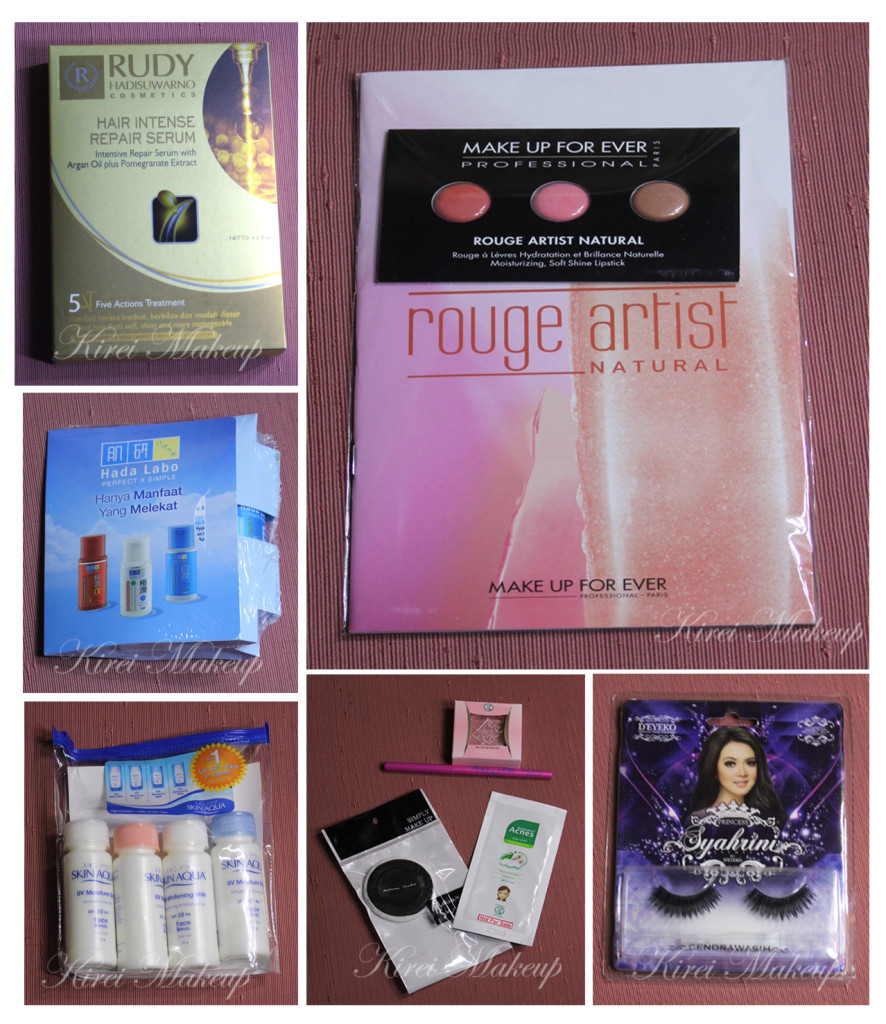
1. Make Up For Ever Rouge Artist Natural lipstick – test set.

2. Rudy Hadisuwarno Hair Intense Repair Serum – real size!

3. Hada Labo Gokujyun Alpha Ultimate Anti-aging, Shirojyun and Gokujyun Ultimate Whitening – 15ml/bottle.

4. Travel-size Skin Aqua moisturizers (super cute!) – 15ml/bottle.

5. Face on Face Nourishing Blush on Blooming Rose – real size! (as big as an eyeshadow..so adorable).

6. Acne Pore Strip – 1 sachet.

7. Masami Shouko White Puff with Black Fabric – real size.

8. Koji Eyeliner Pencil – sample size.

9. D’eyeko lashes – real size.

Other subscribers might receive the following products instead of the Masami Shouko White Puff:

  • Biokos Derma Bright Set, or
  • Caring Colors BB Cream Fair White, or
  • Caring Colours BB Cream Everlast, or
  • Caring Colours BB Cream Luminizing, or
  • Lioele 3D Lifting Mask.make up for ever indonesia

Update: as of July 2, 2013, I’m very disappointed with Beauty Treats Indonesia. The June box arrived in July 2, the products as well as the amount of products inside the box were not up to standard.ย 

MURAD Trial Day 49

How’s everyone’s long weekend going? Hope you guys are enjoying the holiday ๐Ÿ™‚

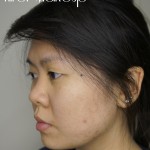
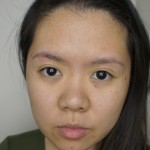
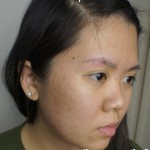
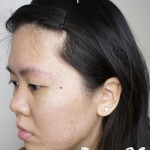
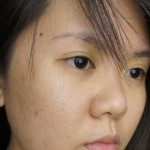
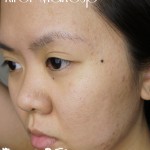
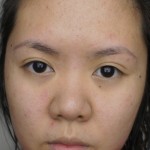
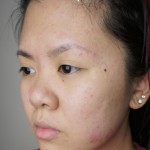
Anyways, as promised, I’m posting my MURAD day 49 pictures! I know I said it was going to be on the weekend, but I was too busy lazying around and stuffing my face with food..lol..Here it is! Currently, my face is pretty much the same like the pictures below.

Changes that I definitely noticed: my pores are unblocking, my skin is softer and more glowy looking, less bumps on my forehead.

If you want to take a look my face from day 0 up until now, check my other MURAD posts for comparison ๐Ÿ™‚

and if you’re interested in buying a kit for yourself to try it out at home, please visit Murad Acne Complex Canada website! ๐Ÿ˜€

MURAD Trial – Week 5 & 6

I’ve been using MURAD for 1.5 months now. The past 2 weeks, I just tried the spot treatment as well as the mask. I have to say it was not a very good 2 weeks. My skin started to break out, especially around the jaw lines! This must be the purging period that the rep from Balley Direct warned me about! It wasn’t a big deal, but the amount of breakouts was quite significant and needless to say I was quite upset. Currently I’m on week 7, and I’ll have the pictures up by this weekend. I’m quite ok with my current skin condition.

What happened when I applied the spot treatment and mask? Well, let’s begin with the fact that I applied my spot treatment twice a day, in the morning and before going to bed. For the mask, I used it once a week only. Right after I used the spot treatment and mask, I immediately noticed either red bumps or white heads. I was very tempted to squeeze the hell out of those white heads! Anyhow, my skin, as shown in the pictures, were quite red and the bumps were quite painful. I’ve never had to experience that much before, so this is totally new for me. Needless to say, I was quite discouraged after seeing the condition of my skin for week 5 & 6. However, I told myself that I should allowed myself to look horrible during the purging period and perhaps, my skin will see a better day by the end of the month.

Will my skin see a better day? Well, you’ll have to wait for the weekend to see the result! ๐Ÿ˜€

If you want to take a look my face from day 0 up until now, check my other MURAD posts for comparison ๐Ÿ™‚

Anyways, I’m warning you this is NOT A PRETTY SIGHT.

Murad – Day 28

I accidentally deleted my week 3 photos from this trial…ANYWAYS! Day 28! I have to say that I’m quite pleased with the result. I mean, I do have breakout still, I had 2 new ones but that’s because of my monthly stress…I am quite pleased that my pores are clearing up, my skin is getting less oily and no itch, no sensitivity issue whatsoever! This is definitely a lot better than having to go through the redness and itch for a month, especially when I’m working in an office environment. Take a look for yourself!

So for the next month, I’ll continue posting a weekly picture, but for the upcoming month I’ll be using the Target Repair cream on the pesky little ones! and the Clarifying mask on the weekend.Oh, btw, here’s a little tip on the application: layer the products thinly! I found that if you apply the products sparingly, you get better result than slapping a lot of products on your face. And be patient!

If you are interested in purchasing the MURAD products in Canada, don’t forget to click here! (I do not receive any commission out of this)

If you want to take a look my face from day 0 up until now, check my other MURAD posts for comparison ๐Ÿ™‚

Click on each picture to enlarge it. Please, do pardon my big pores and flawed skin…but hey! that’s what this review is for ๐Ÿ™‚
Murad Acne Complex Kit (Review)

A big thank you to Balley Direct for sending me the 60-Day Murad Acne Complex Kit! I received this kit last week and right after I finished the last drop of my Obagi Clenziderm. As you all know, I’ve used Obagi Clenziderm kit for a while now, but I’ve actually been having troubles trying to re-stock it since apparently now all the Obagi systems have to be prescribed by dermatologists. My derm is over in Indonesia, and it’s hard for me to get the kit in Canada.

Anyhow! I was super thrilled when I received the Murad kit! I’ve used Murad a looooong time a go when I was in 13-year-old, but at that time, being a teen I was inexperienced and naive. I wanted to get rid of my acne quickly, and I decided to throw the Murad kit away when the kit exacerbated my skin. Little did I know, it was a purging period that I had to go through before my skin cleared up.

Nevertheless, I decided that this Murad kit might just replace my Obagi kit. I was reminded by the Balley rep that my skin might have to go through a period of purging (read: breakouts) before it clears up. I’m fine with it, since with the Obagi Clenziderm kit my skin went pretty nuts on the second and third week anyways. I thought how bad can it be! Balley rep also offered me to call their toll-free number should I have inquiries! How nice! ๐Ÿ˜€
As I opened the kit, and going through all the ingredients on the bottles the first thing I noticed about this kit is that it’s Benzoyl Peroxide free! A bonus for me since my skin reacts quite violently (no joke) to Benzoyl Peroxide. No kidding, my skin gets really red, itchy and swollen, so I’m very happy to know that no peeling, redness, itch and dryness will be involved during the trial period with Murad.

Now, on the booklet that comes with the kit, they said that “92% of users experienced reduced breakouts in just 3 days! It will work for you or your money back”. From my experience, 3 days is not sufficient enough to get rid of acne, especially if yours is worse than mine. So, please, do not buy this kit if you think your skin will get cleared up in 3 days. Give it about a week or two before you notice any difference.

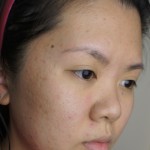
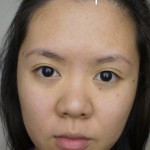
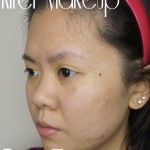
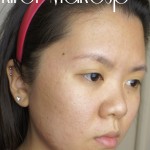
So, my skin type is combination. I get oily on my T-zone, and dry on the rest of my face. My breakouts tend to occur on the outer perimeter of my face (jaws and chin), this usually corresponds with my stress level. I also have quite a few scars on my face from my younger days. The pictures below compare my face from Day 0 to Day 7. I have yet to use the Acne Spot treatment and Clarifying mask.

For this week, I feel that my skin has cleared up quite significantly, but again, I don’t have much breakouts, mostly just scars. Bf said my face has gotten better, and he said this on day 2. The formulation does not dry your skin up and it doesn’t sting. No redness, no peeling, no dryness and no itch! I think I might grab the Post-Acne spot lightening gel in the future to get rid of my scars.

All in all, it has been a great week with the kit! I will continue to update on week 2, 3 and 4 ๐Ÿ™‚

If you want to take a look my face from day 0 up until now, check my other MURAD posts for comparison ๐Ÿ™‚