Smashbox Full Exposure Palette Review

As promised, today I wanted to share my new favorite palette – the Smashbox Full Exposure palette. This palette would make a really great Christmas gift! I wanted to post this next week as my Product of The Week, but I really want to post this today because I’ve been teasing you all with tutorials using this palette. So, I’ll categorize this under Product of The Week even though I do not put it up on the title.

*Update (Feb. 23, 2015) – I have a Smashbox Double Exposure Palette review for you!*

What is Smashbox Full Exposure Palette?

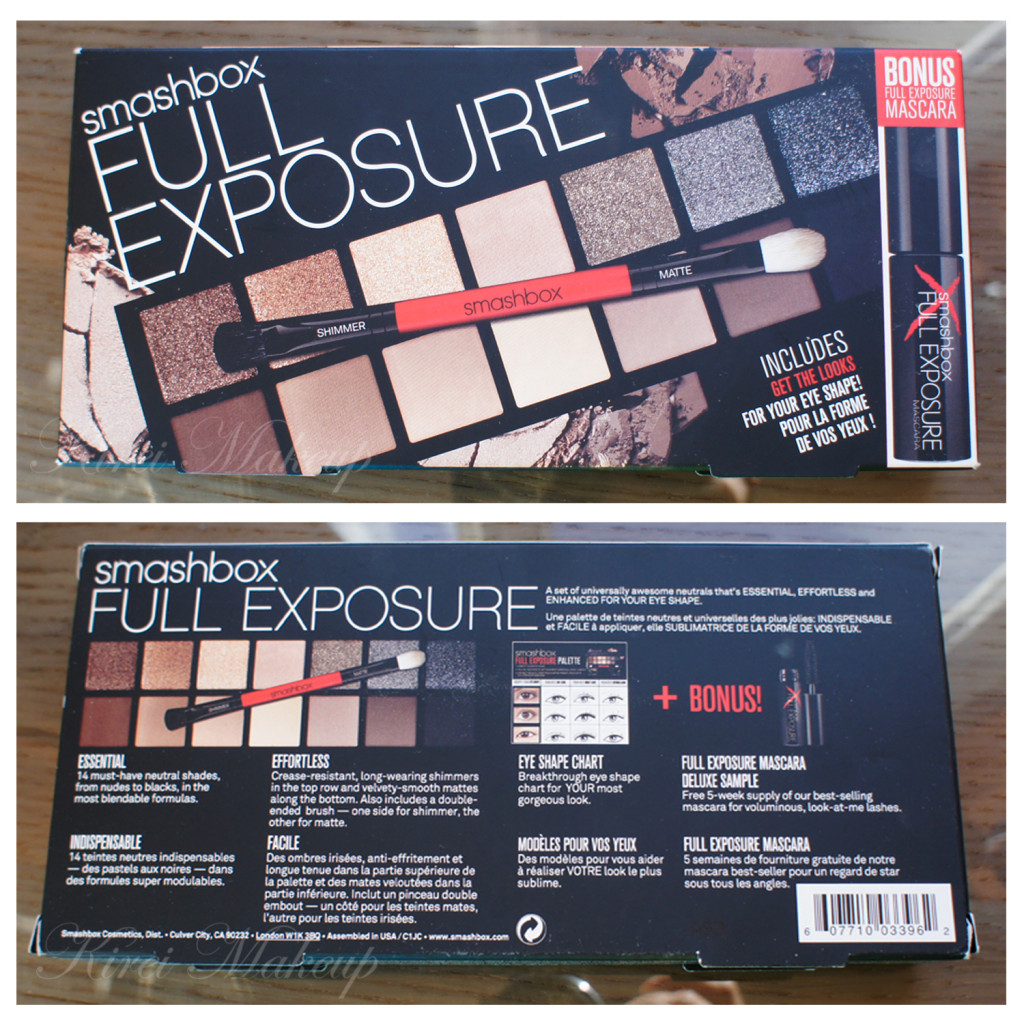
“A set of universally awesome neutrals that’s essential, effortless, and enhanced for your eye shape. […] This totally versatile palette is organized with crease-resistant, long-wearing shimmers in the top row and velvety smooth mattes along the bottom. Fourteen essential neutral shades include a range of nudes, blacks, shimmers, and mattes. Use the brilliant eye shape chart, dual-ended brush, and Full Exposure Mascara to complete any look.

[…] Smashbox has taken the guesswork out of application with a cool, new dual-ended brush. There’s a fluffy end perfect for blending matte shades and a flat end to easily lay down the shimmer shades without sparkle overload. Plus, it’s double-sided with black bristles on one side and white on the other, so you’ll never accidentally dip a light shade into a dark shade.”
Sephora, 2013

Smashbox Full Exposure Palette ReviewAt first look, I was attracted to the huge flecks of glitters in the top row of the Smashbox Full Exposure palette. They did say it’s actually shimmer, but I feel that the light-reflecting particles are definitely too big to be considered as shimmer. I was, also, quite skeptical regarding how well the glitters would stay on the lid when being used dry since I’ve negative experience with other brands.

When I swatched the eyeshadows on my hand in Sephora, I was very surprised and happy that the glitters stayed really well at the back of my hand. That sealed the deal for me! I took the beautiful palette and paid for it.

I know quite a few reviews in Sephora website said that they hated this palette because the glitters couldn’t stick well to the skin. Well, I didn’t have this issue at all, perhaps because I applied the glitters in a different way. First of all I applied eyeshadow primer on my eyelid. Then, I used a dense flat eyeshadow brush to apply it.

If you want to see samples on how I applied the “shimmer” eyeshadow from the Smashbox Full Exposure palette, please check my posts in Smashbox Full Exposure Look #1 and Holiday Look using MAC Diva.

Smashbox Full Exposure Palette

Packaging

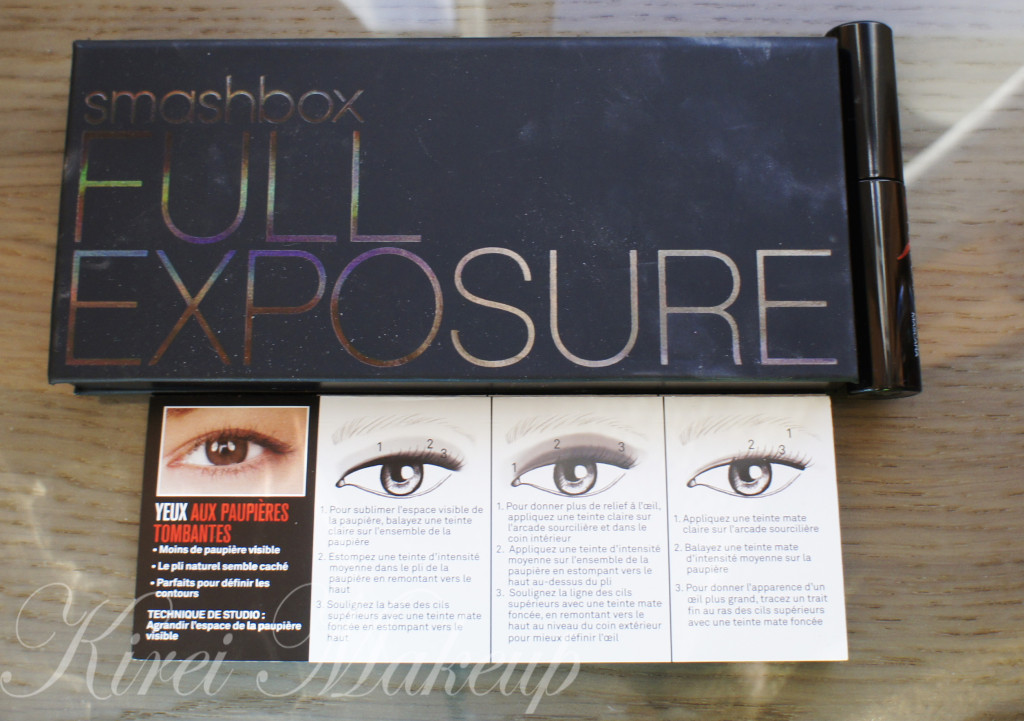
A black sleek carton packaging. 14 eyeshadows  in a square (yay) pan. The Smashbox Full Exposure Palette also contains 1 sample-size Full Exposure mascara tube, a double-ended split-fiber eyeshadow and fluffy blending brush, as well as a large sheet (folded in the picture) of eye makeup tutorial.

The eye chart sheet shows information on how to create several looks based on your eye shape.

Longevity

I’ve yet to wear this palette without a primer underneath. With Urban Decay Primer Potion, the Smashbox Full Exposure palette proves to be quite resilient. It lasted for 8hrs without creasing.

Smashbox Full Exposure Palette Review

Finish

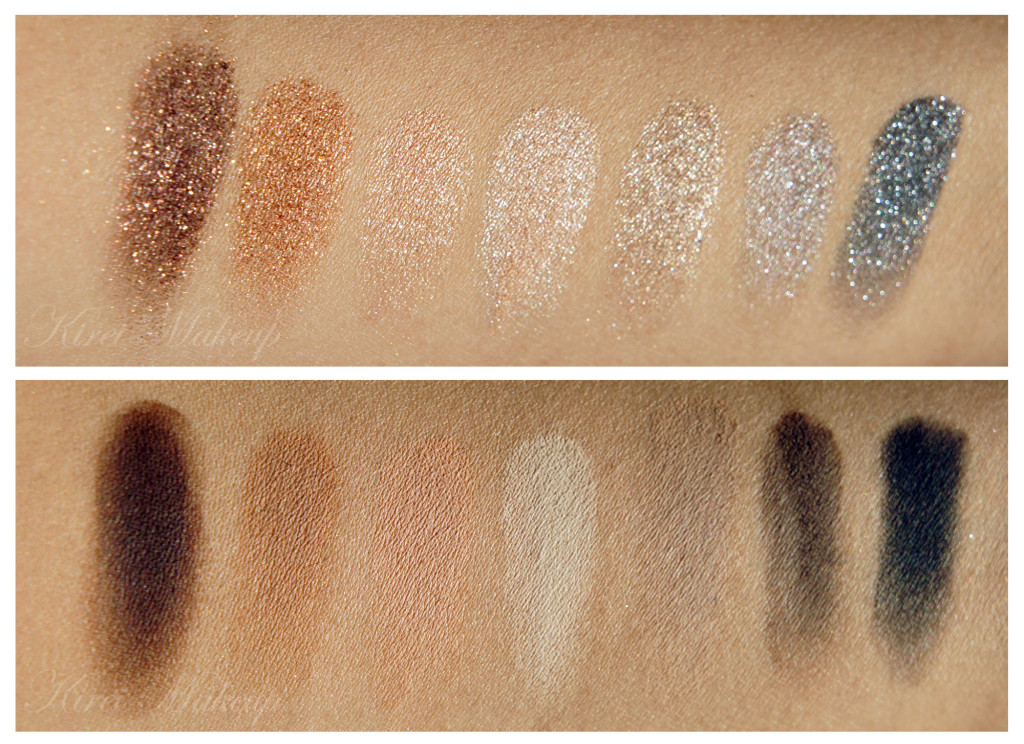
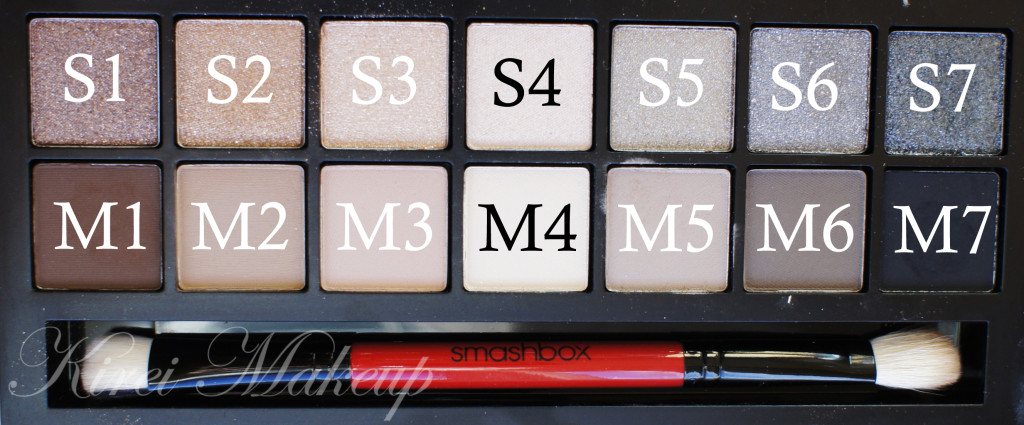
Top row: shimmer (S1-S7); Bottom row: matte (M1-M7)

  • S1 – Chocolate Brown with Golden Pearl
  • S2 – Deep Golden Brown with Gold Pearl
  • S3 – Soft Gold with Gold and Silver Pearl
  • S4 – Light Tan with Gold and Silver Pearl
  • S5 – Golden Wheat with Gold Pearl
  • S6 – Midtone Slate with Silver Pearl
  • S7 – Rich Grey with Multicolor and Silver Pearl
  • M1 – Matte Warm Chocolate Brown
  • M2 – Matte Midtone Brown
  • M3 – Soft Matte Midtone Tan
  • M4 – Creamy Matte Beige
  • M5 – Soft Light Taupe
  • M6 – Ashy Dark Brown
  • M7 – Suede Black

Price

CA$58 (before tax) for 0.035oz x 14 eyeshadows, double-ended makeup brush, mascara and eye chart.

Smashbox Full Exposure Palette Swatches

Pros:

  • Excellent colors – browns, nudes, and greys.
  • You get 2 different textures – shimmer and matte.
  • Great pigment pay-off.
  • Glitters stick well to the skin if you pack the eyeshadow with a flat and dense eyeshadow brush.
  • Matte eyeshadows are not chalky, it has quite a velvet finish to it.
  • You can mix the matte eyeshadows to be used for the brows.
  • Palette have a great range of colors, which is great for different skin tones.
  • Great eye chart for inspiration.
  • Awesome brush and mascara.
  • Not too pricy – considering it’s around $5/eyeshadow when you break it down individually.
  • Makes for a great bridal palette!

Cons:

  • The flat split-fiber eyeshadow brush does not pack the glitter on the eyelid that well. You might have to use another brush for the glitters.
  • Quite a fall-out from the “shimmer” rows, so watch out! Try to do your eye makeup first before your base.
Product of the Week: L’oreal Super Liner Ultra Sharp Tip

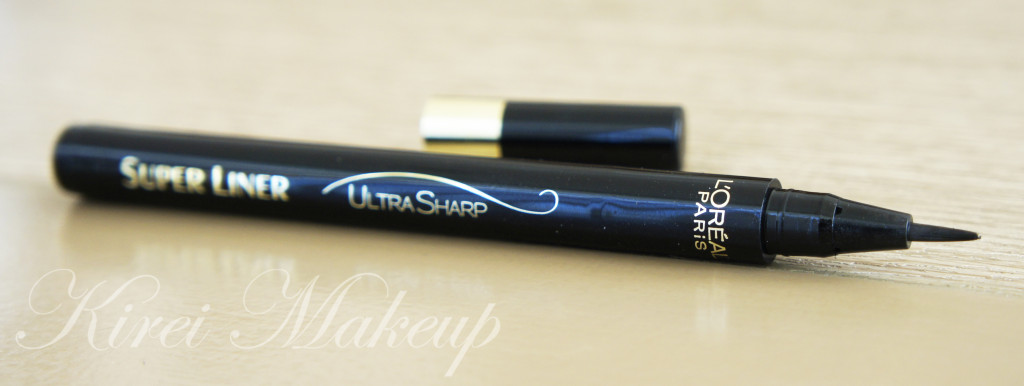
This week in Product of the Week, I’d like to introduce L’oreal Paris Super Liner Ultra Sharp! I bought this when I was in Hong Kong. There’s a Sephora-like store in Hong Kong called Sasa, and it carries a variety of makeup, skincare etc just like Sephora, but they also carry a lot of Asian products from Japan, Korea, China etc. Anyways, one of the few things that I bought there is this eyeliner.

L'oreal SUper Liner Ultra Sharp

As you all know, I love myKat Von D Trooper eyeliner, as well as my Kanebo Kate Super Sharp eyeliner. However, Trooper isn’t available in Indonesia, and neither is Kate. This L’oreal Super Liner, however, is available in Indonesia. I’ve seen it in several department store as well as online store (zalora, lazada etc). Since I was already in Sasa, I decided to buy it and give it a try.

This Super Liner only comes in Black when I was in store. I don’t think it comes in any other color. What is so special about this eyeliner is the fact that the bristle is very slim! Only 0.003mm tip. It’s very sharp, pointy and you can create a thin line.

L'oreal SUper Liner Ultra Sharp

Anyways, getting back to this Super Liner, I’m not sure if the ones sold in Indonesia is the 0.003mm tip. I know there’s a few other tips from this line which is 0.05mm and 0.8mm. This 0.003mm is the smallest I’ve found so far.

I love the packaging, I think the pen is very sleek and slim. The fact that it’s a pen eyeliner makes it even more appealing to me. I don’t have to carry seperate brush, and it makes it so much easier to travel with.

I’ve worn this eyeliner for about 6 hours, and it stays the whole day. I don’t think this eyeliner is waterproof, but it’s definitely smudge-proof. This eyeliner takes a while to dry, so you want to make sure you close your eyes (or look down) after application. If not, you might end up with some product on your lid. However, since it does take a while to dry, it makes it easier to be fixed should you make a mistake.

L'oreal SUper Liner Ultra Sharp

This eyeliner cost HKD$99 (around USD$14). I believe this product is not available in N. America. I think the N. America counterpart of this product is the L’oreal Paris Infallible Super Slim eyeliner, which is a felt tip eyeliner. This one is a brush tip.

This eyeliner costs Rp. 149,000 in Zalora and Lazada. I’m not sure how much it is in store. (I am not affiliated nor endorsed by zalora or lazada).

L'oreal SUper Liner Ultra Sharp review

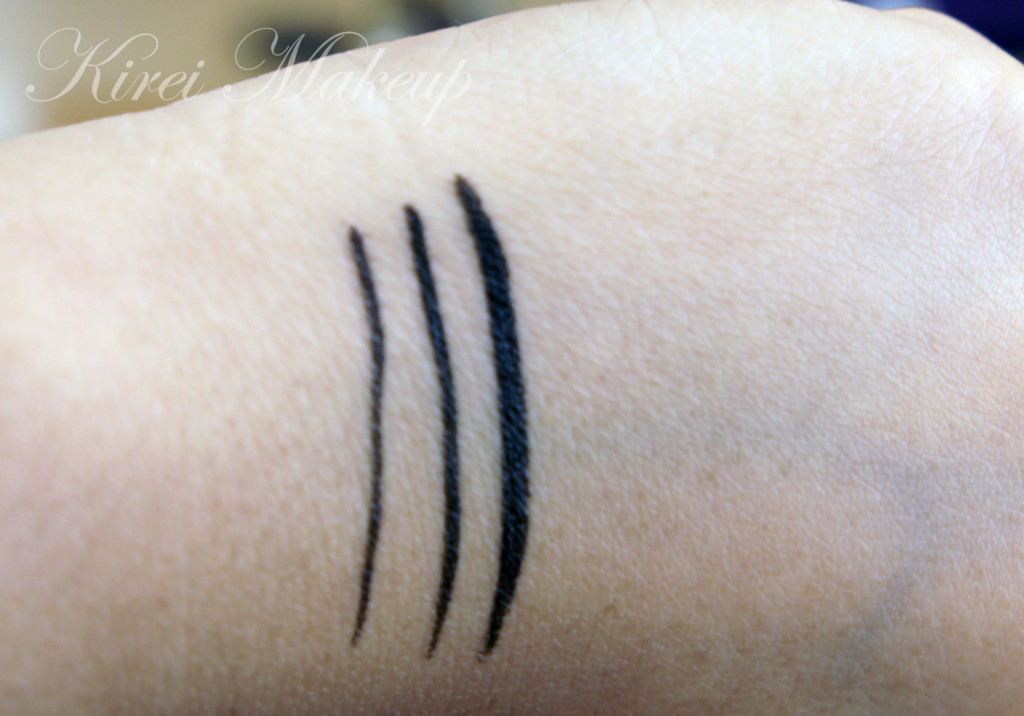
In terms of application, you can create thin, medium and even a thick line if you prefer. Such an easy way to use and apply. The color is very black, yet it doesn’t end up shiny like my Kat Von D Trooper liner. Since it’s soooo thin, I can get it to the most inner corner part of my eyes.

Nevertheless, I still find Kanebo Kate Super Sharp liner creates a much thinner line than this one.

L'oreal SUper Liner Ultra Sharp

Pros:

  • Easy to use
  • Price is mid-range
  • Very travel-friendly
  • Smudge-proof
  • Very black
  • Long lasting

Cons:

  • Not as thin as Kanebo Kate eyeliner
  • Takes a while to dry

Conclusion:

I chose this as my product of the week because should I run out of my 2 favorite eyeliners, I’ll probably stash this one up in my kit. It’s definitely a lot more affordable than the other 2 (Kat Von D and Kanebo Kate), and definitely more widely available where I am living right now.

I’m giving this Super Liner a 4 stars out of 5


Tmart Pink 22-piece Makeup Brush Set

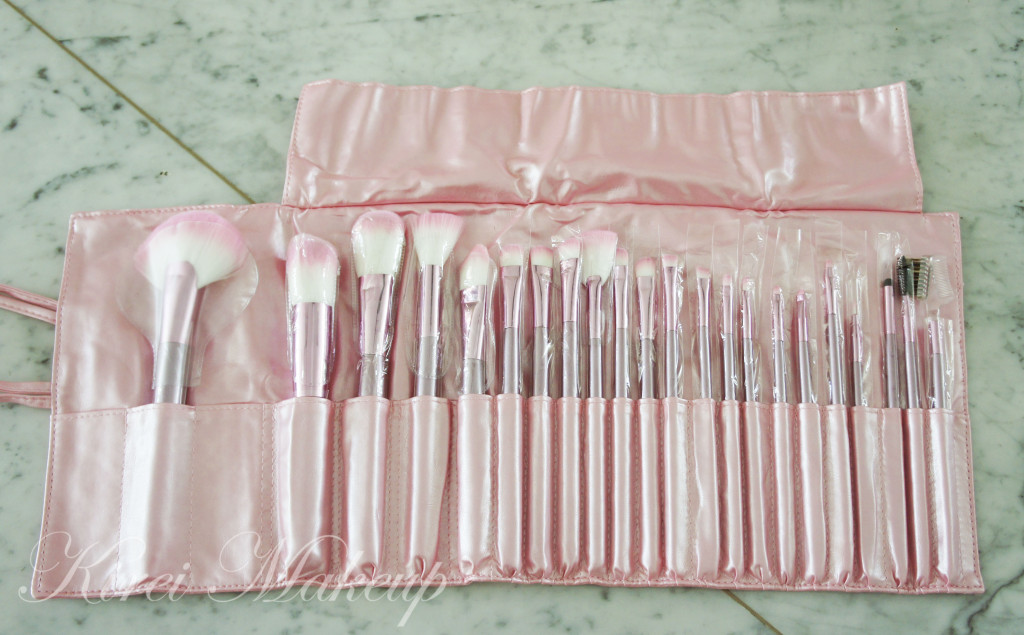
Happy Monday, everyone! Today I want to share with you guys a 22-piece PINK makeup brush set that I recently received from Tmart.com. I’d like to thank Tmart for sending me this product! If you are interested in purchasing this 22-piece brush set for yourselves, please visit their website.  I do not get any fee whatsoever if you click on the link.

Anyways, let’s get the review started!

My first impression of the set was “IT’S SO PINK!” hahahaha..I’m very old fashioned when it comes to my makeup set, every brush that I owned pretty much is black in color. I’ve never bought any pink/green/yellow (i.e. colorful) makeup brushes in my life, and so when I received this set the color was quite of a shock for me. Nevertheless, when I first opened the makeup bag, I am quite impressed by the amount of brushes included in it.

I believe the bristles of these brushes are all synthetic. It’s very soft and fluffy, especially the big fan face brush!

Tmart shopping

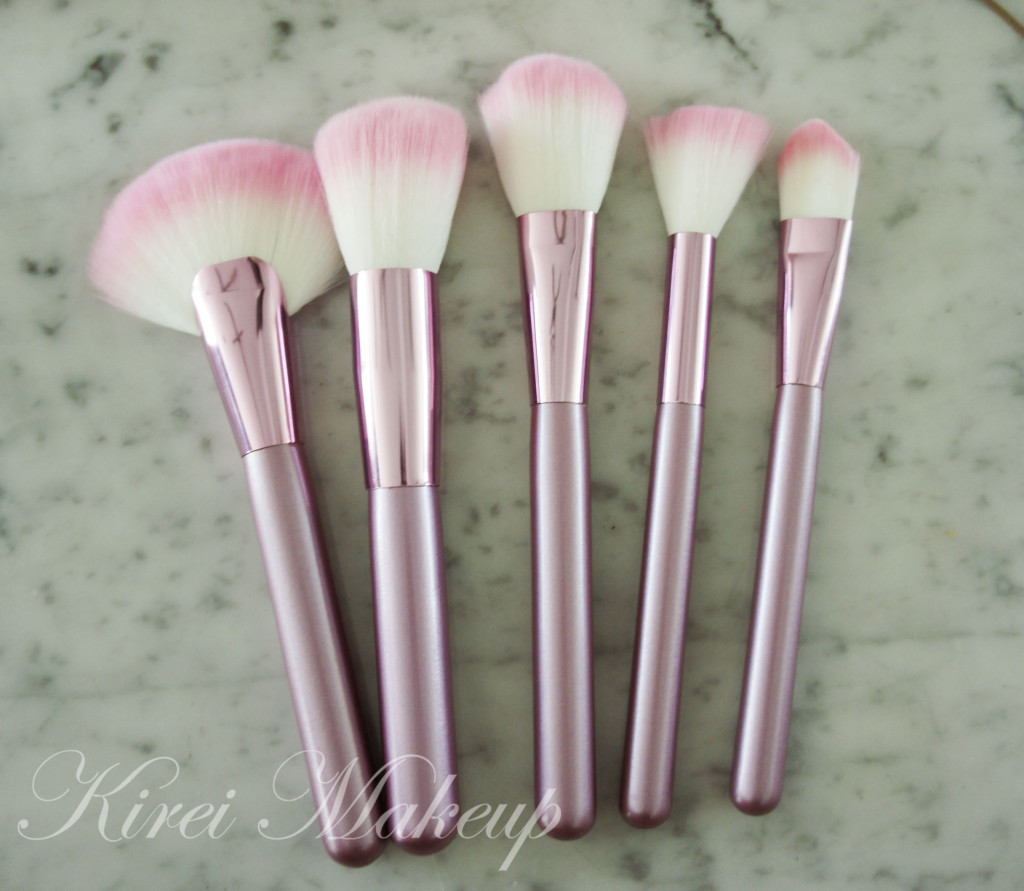
I’ve divided the brushes into several categories, but below we’ll start with the big face brushes. So, you get a big face fan brush, a powder brush, a blush brush, a flat-top brush and a foundation brush. (not in the picture below, but in the picture above: small face fan brush)

I actually do not like these brushes much. There are several reasons why I’m not a big fan of these brushes. One, the first 2 brushes from the left (fan and powder brushes) were broken. It wasn’t obvious when I first held it, however, upon a closer inspection, I realized that the handle of these 2 brushes were loose. So, when I tugged the ferrule (that’s the aluminum part), it came off from the handle! You can fix this by gluing it back together.

Next, the flat-top brush is too flimsy. I’m not sure what this brush is for since it’s not dense enough to be used to apply foundation. It’s also too flimsy to be used for contouring, and buffing. I have yet to find a good way to use this brush.

The foundation brush, however, it’s not that bad. It’s pretty sturdy and dense. It’s a good brush to apply foundation or cream blush/bronzer/highlighter.

Also, I forgot to include the small face fan brush, which is also a great brush for contouring/highlighting! The one that comes with the brush set is pretty good. It comes in a good size, and has enough bristles to do light contouring/highlighting.

makeup brush murah

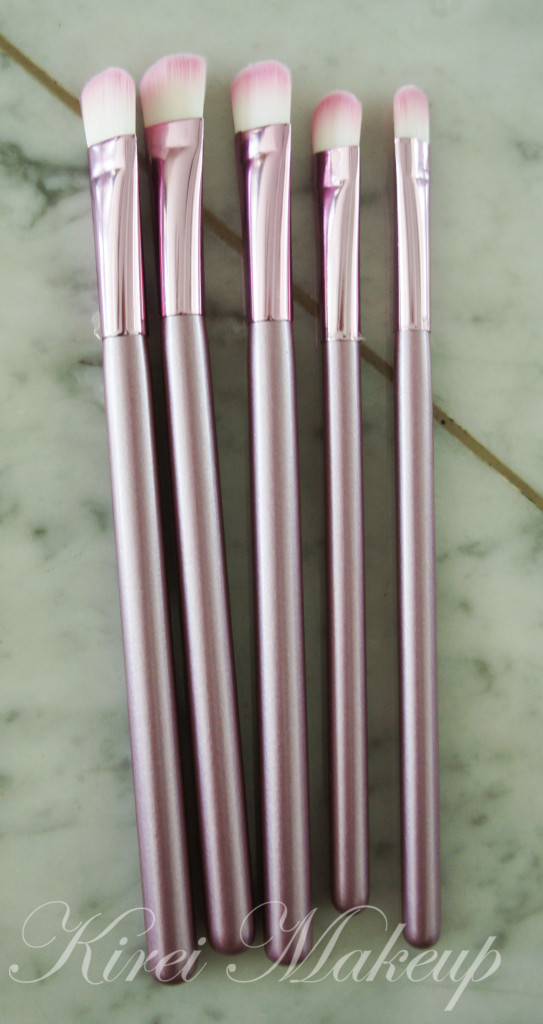
The next set of brushes are the flat shaders, which I love! I want to categorized them as eyeshadow brushes, but I know they also can be used in so many ways. Anyways, if you buy this set, you get 5 flat shader brushes. These brushes are my favorite in this set.

The bristles are very sturdy and dense, which make these brushes great for eyeshadow application. They are also synthetic which means they would work excellent with cream-based products! These brushes will also work great with water-activated products.

tmart makeup brush

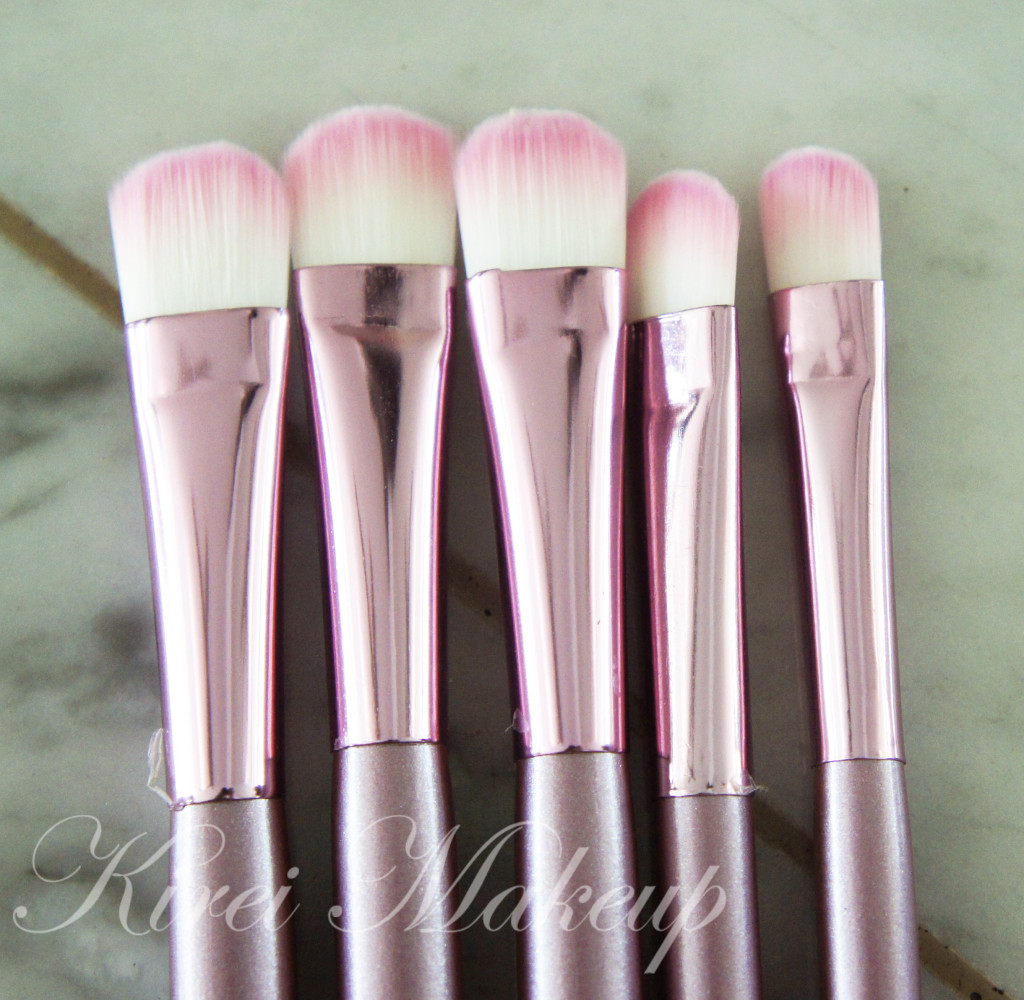
Upon closer look, you can see that the size of the brushes aren’t all the same. You get some of the larger size bristles, and you get the smaller ones. I love that it comes in different sizes. It’s great because you can use some for eyeshadow application, and others for lips or highlighting.

What is great with these brushes is the fact that you can get 5 in the set! Usually you only get 1-2, and to be honest, you can never have enough of the flat shader brush. They are so useful for eyeshadow application, body painting, face painting etc.

cheap makeup brush

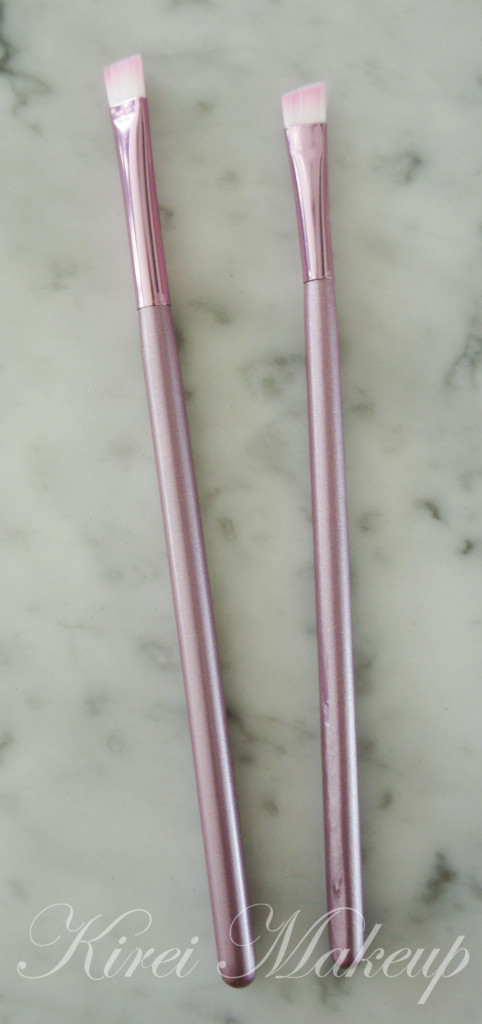
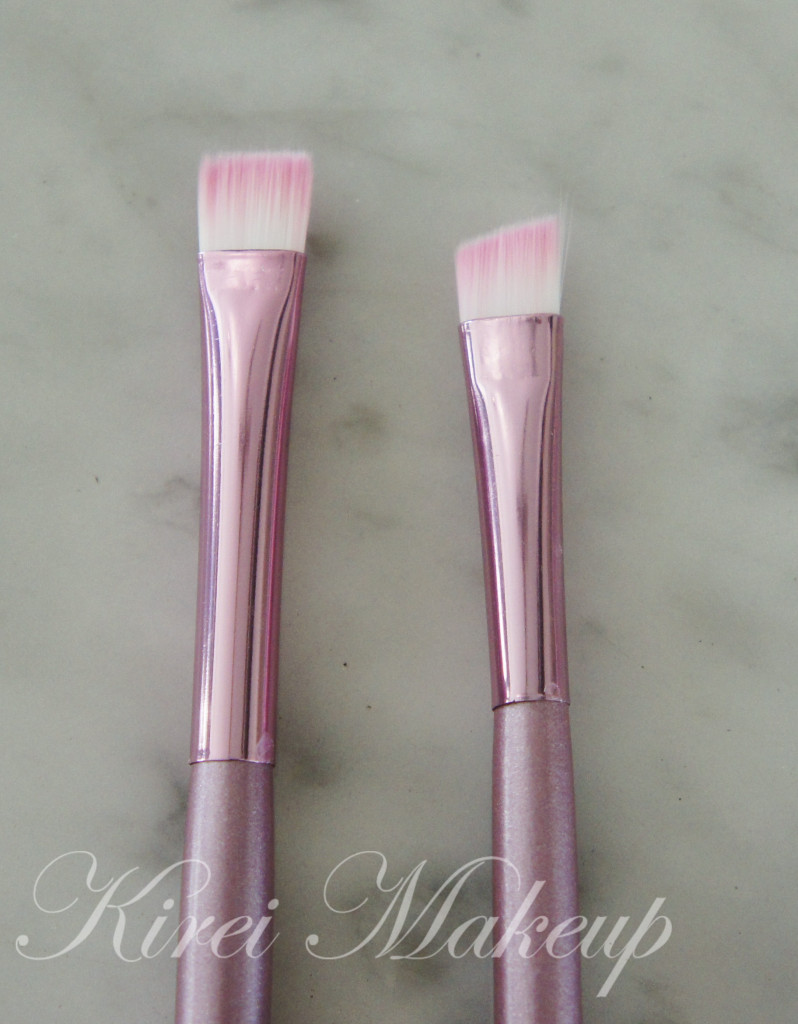
The next set of brushes are the eyeliner brushes. These 2 brushes are more for precise line works for eyeliner, eyebrow or face painting. You get a straight edge brush, and you get the angled brush. The straight eyeliner brush works great for eyeliner application, and also can be used to highlight under the brow. Obviously this can also be used as a lip brush for precise lip work.

The angled brush, as you all know, is widely used to create winged or cat-eye eyeliner. It is also great to be used for filling in the brows using powder or gel product. Other than that, it can be used to create geometric shapes for face paintings and body paintings.

tmar makeup brush

The angled and straight eyeliner brushes are a great addition to this set because they have such dense and sturdy bristles that will work great when creating eyeliner or shapes. It’s not flimsy, so your line can be precise. The brushes are not too dense, so you can create a thinner line if you want.

tmar shopping

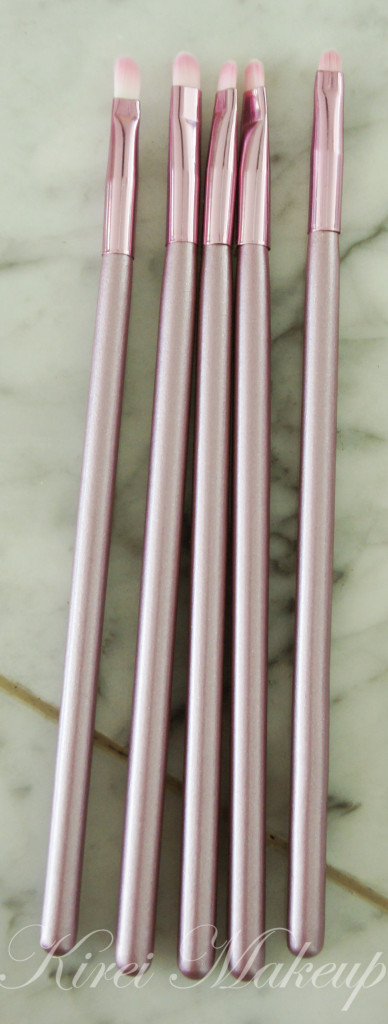
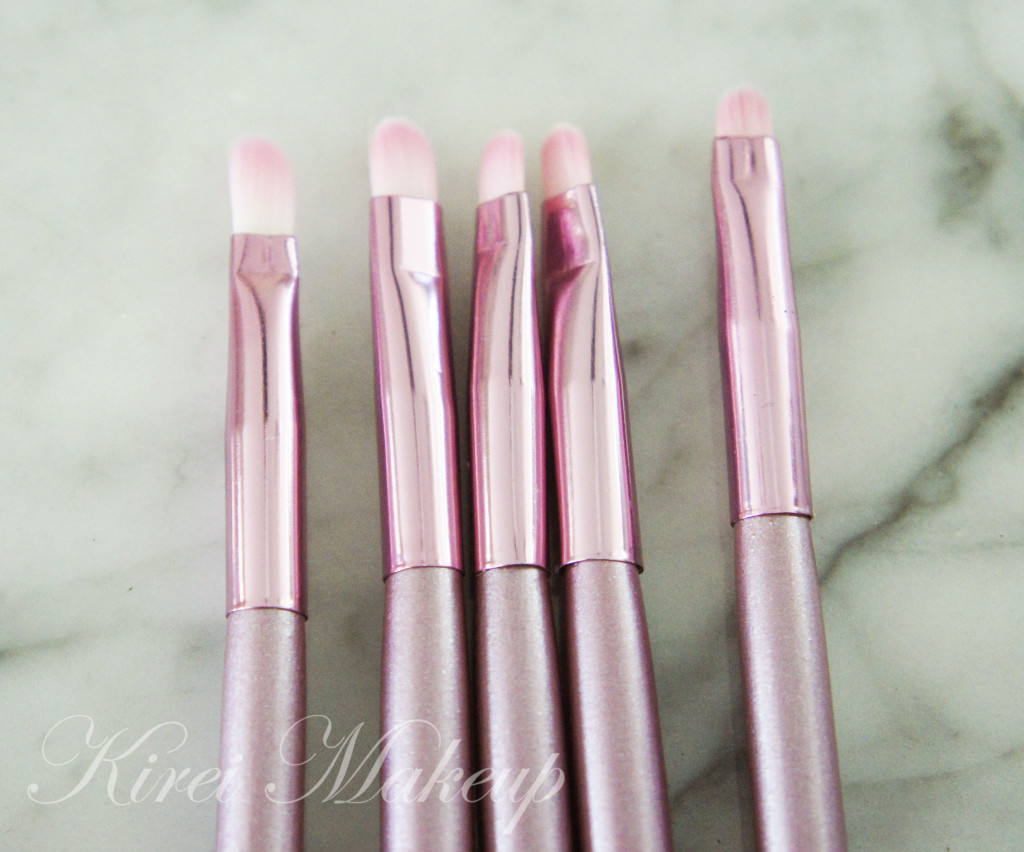
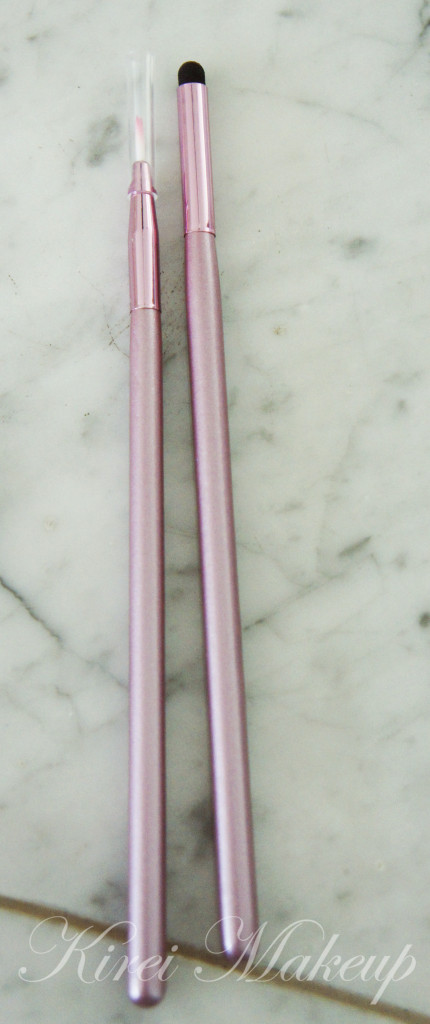
The next 5 brushes, I feel, should be under a lip brush category just because they are so small! I’ve used the longer ones as a shader brush, just to smudge the eyeshadow on the lower lid, which works. However, I feel that they work better as lip brushes.

The bristles on these 5 brushes are smaller in width and shorter in length compared to the eyeshadow brushes. One of these brushes (the first one of the left), is quite flimsy, the rest is quite dense and sturdy.

tmar shopping

These brushes, like I’ve said, will work great for lipstick application, especially that small one of the right in the picture below. It’s so small that you can work precisely for red lipstick application.

They also work for face paintings and body paintings. These brushes are small enough for precision work.

tmart shopping

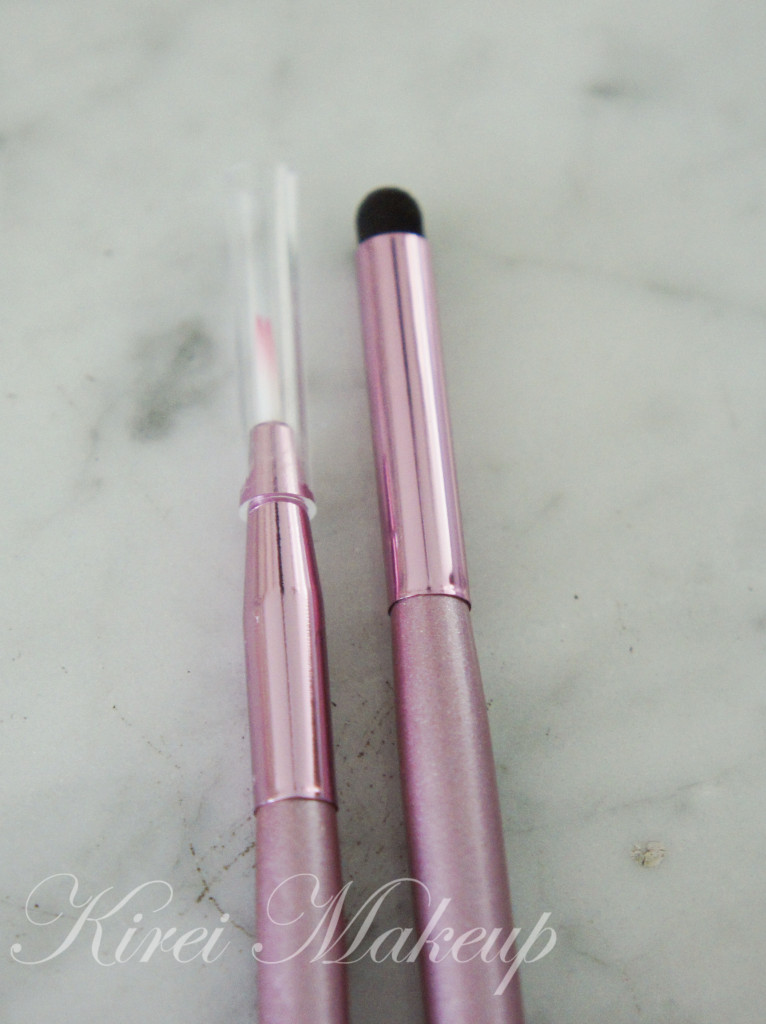
The brushes on the next category, are on the miscellaneous side. I think, I’m not quite sure, the brush on the left in the picture below is supposed to be an eyeliner brush. The one on the right is a smudge brush.

tmart makeup brush

The eyeliner brush is pretty stiff. However, I feel that it’s not thin enough to be used as an eyeliner brush. Nevertheless, it can be used as an eyeliner brush. I just prefer the angled brush over this one.

The smudge brush shaped like a dome. It’s a sponge-tip brush. I’m not a big fan of this brush. It’s not versatile enough to be used as a pencil brush. It’s just good for smudging.

tmart makeup brush

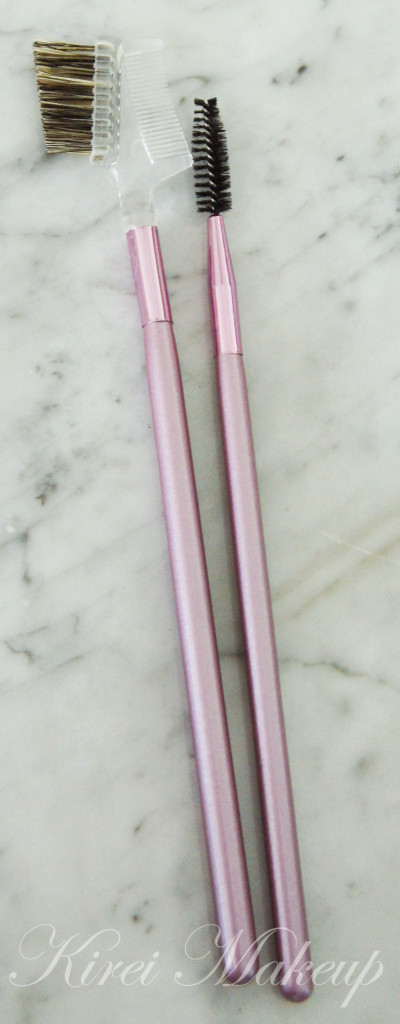
Last but not least, the eyebrow collection! The brush on the left can be used to brush those unruly brows, if you have. The comb side can be used to clean excess mascara off the lashes.

The spooly can be used in conjunction with cuticle scissors to trim eyebrows. It can also be used to remove excess brow product from the eyebrow. Of course, it can also be used to remove excess mascara off the lashes.

tmart makeup brush

Pros:

  • 22-piece for USD$13.95 (from Hong Kong warehouse, meaning for Asia), and USD$15.95 for USA. Usually retailed at USD$33.99. Pretty cheap for a set of 22 brushes.
  • World-wide free shipping!
  • You get a lot of eyeshadow brushes!
  • Bristles are soft.
  • Bristles do not shed much for the smaller eye/lip brushes.
  • Great for beginners who do not want to spend money in buying individual brushes.

Cons:

  • Beware that handle might come off.
  • Bristles of the brushes shed quite significantly on first wash for the larger brushes.
  • Some of the brushes might not be of any use.

I cannot comment much about shipping because this was given to me for free. However, if it helps, the person who contacted me communicated with me throughout the whole time to ensure I received the product on time. I was in Hong Kong when this product was delivered to where I was staying, and it took 5-business days to reach me. It could’ve been faster, however, there was a typhoon in the week that I was there, which might cause a delay.

Conclusion:

Great brushes for beginners who do not want to spend too much money buying medium to high-end makeup brushes. I know that makeup brushes can be quite expensive, and if you’re doing makeup on yourself, these brushes might be great to start with. The price is pretty low, and affordable for most people. However, if you want to become a makeup artist, you might want to invest on a more well-known brands.

Although these brushes are great to start with, I cannot say how long they’ll last. I was quite disappointed to see that the handles of some of the brushes weren’t even glued properly. The bristles do shed quite a lot on the bigger brushes.

On top of that, I wished that they’d have included a blending brush for the eyes, as well as an angled face brush which is more useful than the flat-top brush.

Nevertheless, the eyeshadow, eyebrow and lip brushes are excellent. These eyeshadow brushes by themselves can proved to be very useful for those who are just starting to do makeup on themselves.

So, if you want to buy this set of brushes, please visit TMART.

I’ll give these brushes 3 starts out of 5!


Product Review: PAC Intense Color Eyeshadow Pencil

Hi all! I’m soo sorry for missing for couple days. Let me just warn you that I’ll probably be missing for a couple weeks. Follow me on Twitter or Instagram to see what I’m up to! Since I don’t have much time to do tutorials or product of the week, I wanted to share this new product I recently purchased.

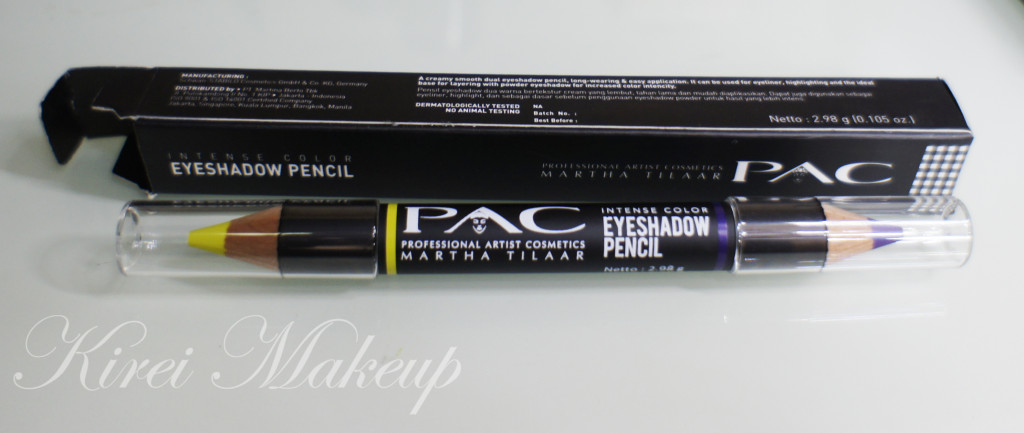
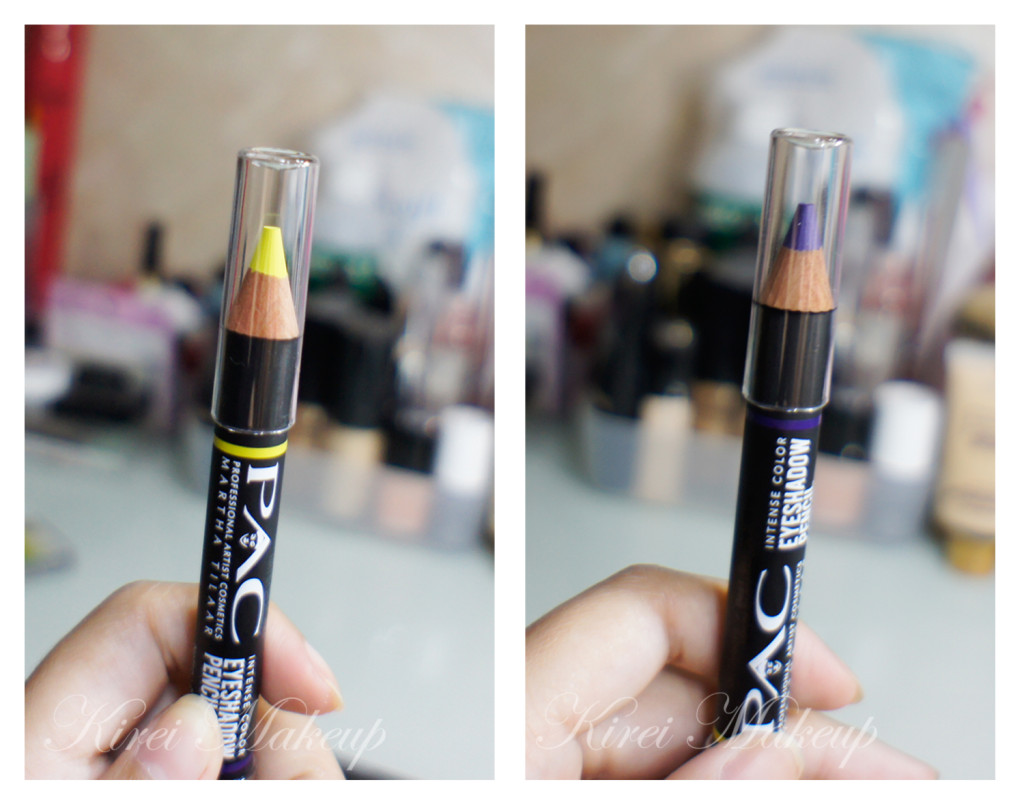
I just saw this PAC Intense Color Eyeshadow Pencil while browsing around in the Martha Tilaar store at Pluit Village Mall. There were several colors, but I think this one caught my eyes, the Oriental Purple pencil. I’m not sure how many shades there were, since I wasn’t paying much attention, but I know there was several.

I can’t find this product on their website, though, I’m not sure why. It’s definitely weird, I do wish they had more info about this product on their website or in store. If I wasn’t curious and touch every single thing in that store, I probably won’t realized that this product exists.

PAC Intense Eyeshadow pencil

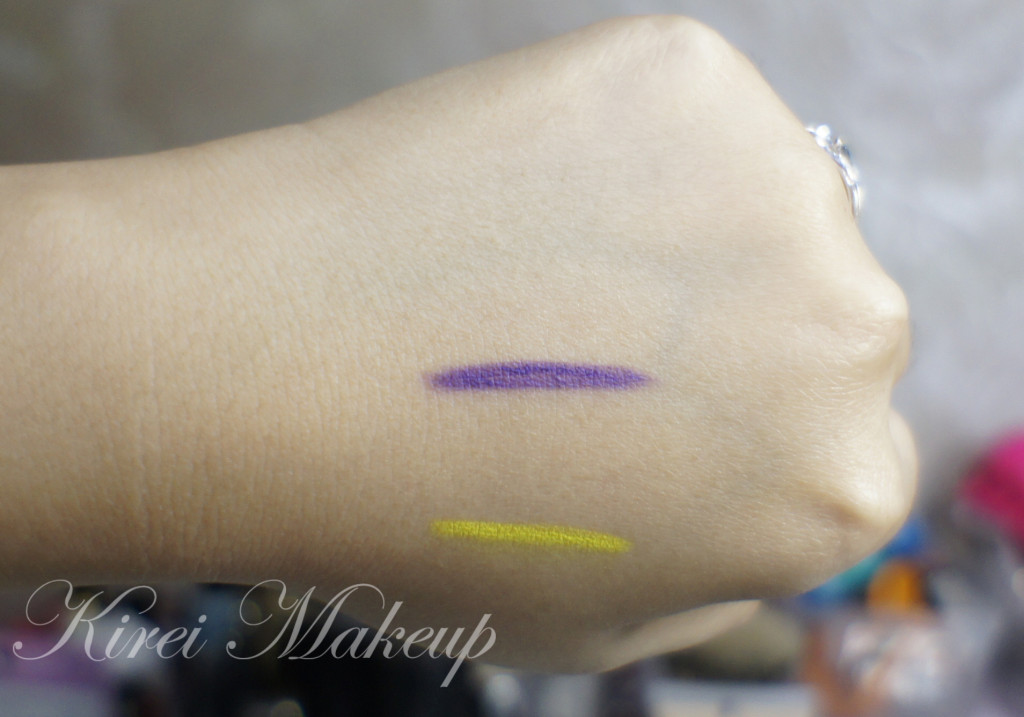
So, this eyeshadow pencil is really similar to NYX Jumbo eyeshadow pencil, but with 2 ends to it, which I totally love. I might go get some more I think. They have a good range of colors. OK so, Oriental is the chartreuse (green/yellow) end, somehow it looks like yellow in the picture. However, I can assure you it is green-yellow. Purple is a warm undertone purple end. It’s gorgeous, and this will look great on everyone’s skintone.

This eyeshadow pencil does not really work well as eyeshadow, it’s more of a base/primer. It’s very soft and easily blends to the skin, but it lacks staying power, which is what I expected. Most of these “eyeshadow pencil” products that I’ve used (from other brands), definitely do not have any staying power. They crease almost instantly and have to be set with powder eyeshadows on top of it.

It does, however, makes a great primer. If you find yourselves having difficulties getting color (mostly the bright ones) out of certain eyeshadows, these eyeshadow pencils will definitely help. You can use white if you don’t want too many colors in your makeup wardrobe, but I always love having the colored ones. It really helps the eyeshadow that are similar in shade with the pencil to show up even more.

PAC Intense Eyeshadow pencil

Longevity

This pencil takes about 15-30minutes before it creases if you have not so oily lid. If you have oily lid, it’ll crease almost instantly. If you have dry lid, this will look horrible on you. It’ll accentuate the dry skin even more, so make sure you don’t have any dry patches.

However, if you use this as a primer or as a base, this baby works like magic! You have to put another product on top of it, preferably similar colored powder-eyeshadow to set this in place. Set it with eyeshadow and it will not crease nor budge. I wore it for 5 hours, and there was no creasing. However, do keep in mind I was in an air-conditioned area most of the time.

Coverage

I think it has a medium coverage. You can apply it as a sheer color by applying it to your finger first and dab it to the lid. If you want it thick, you can apply this directly to your lid to get the most out of it.

Blend-ability

This pencil blends beautifully and very easily. You can use your finger or a blending brush.

Finish

The finish is matte. No shimmer, no glitter, no nothing. It’s a matte finish.

Price

This pencil costs IDR. 132,000 (about USD $14). However, they were having a 15% off if you buy 3 items.


PAC Intense Eyeshadow pencil

Pros

  • Great pigmentation and color pay-off.
  • Matte finish.
  • Blends easily.
  • Great range of shades (from what I saw in the store – may be around 5 pencils which means there’s 10 shades).
  • Lovely packaging – 1 pencil with 2 different colors in each end.
  • Local Indonesian brand.
  • Works amazingly as eyeliner.

Cons

  • Expensive compared to NYX jumbo eyeshadows that I owned from Canada, which only costs around $4.50 each.
  • Smudge and crease easily if you don’t set it with powder.
  • It’s no different than colored pencil eyeliner.

I give this product 3.5 winks out of 5! The reason why they lose 1.5 points is because for this pencil, I cannot justify the price. It’s way too expensive for the quality. Not worth the money. It’s not something that you must have. It’s something nice to have in your kit if you have the extra money. If not, stick to NYX jumbo pencils, or any colored pencil liner. They do the same job.

M.A.C Old Gold Duochrome

So, yesterday we’ve talked about M.A.C Melon loose pigment. Today, I want to show another of my favorites which is M.A.C Old Gold. If you’ve read my blog way back in 2008, I’ve always talked about M.A.C Duochrome eyeshadows and pigments. I’ve always loved these duochrome products and I think that they don’t get enough credits for their amazingness!

M.A.C Duochrome is basically 1 eyeshadow with 2 colors. For example, M.A.C Old Gold (which I used below) actually is a shade of bronzy gold, with green shimmers. If you apply this dry on your skin, you’ll get a gold shade with orange undertone. However, if you apply this eyeshadow wet OR on top of a dark base, you get the green shimmers to show through instead of the gold.

A few examples of MAC Duochromes are: Club eyeshadow (brown with blue), Stars ‘n Rockets (pink with purple), Blue Brown pigments (brown with blue), Reflect Transparent Teal (clear glitter with teal) etc. You get the idea 😉

So for this look, I wanted to show the easiest and fastest way to use this duochrome. So fun, and easy!

How-to:

1. I applied L’oreal Voluminous Smoldering eyeliner all over the lid, and blended the crease using a fluffy blending brush. You can use whatever dark base you want, whichever works for you.

2. Using a damped synthetic art brush, I mixed M.A.C Old Gold pigment on the back of my hand, and then applied it all over the lid.

3. Using a small fluffy brush, I applied MAC Old Gold pigment slightly above my crease. I applied this pigment dry.
4. Using a clean UD Fluffy brush, I blended the crease to remove any harsh edge.
5. I lined my waterline and lower lid using L’oreal Voluminous Smoldering eyeliner. Using a clean pencil brush, I smudged the eyeliner.
6. Using a damped angled eyebrow brush, I once again mixed Old Gold at the back of my hand. I, then, applied it on top of the  smudged liner.

MAC Old Gold pigment

7. Using a flat eyeshadow brush, I applied Martini from Sleek Makeup iDivine Snapshot palette on the inner corner of the eye.

8. I created a winged or cat-eye liner using Kate Super Sharp eyeliner.

9. I filled my brows using MUFE Aqua Gel Brow.

10. I curled my lashes and applied Maybelline Express Volume mascara.

11. For added drama, I applied Quo false lashes.

12. I applied MUFE HD Foundation all over my face using a foundation brush.

13. I applied Benefit Hervana on my cheeks, and contoured my face using MAC Studio Tech NW 55.

14. For the lips, I applied Chanel Confidentielle lipstick to complete the look.

mac duochrome

Product of The Week: MUFE Aqua Brow

As promised, I’ll be talking about MUFE Aqua Brow gel in this week’s installment of Product of The Week. I bought this a few weeks a go out of the blue. I actually didn’t look it up online or even read any reviews about it. I wanted to buy it just because I simply have never used a gel product for my brows. Usually it’s either pencil or powder since I really like a natural finish for the brows. If you want to get a natural finish, please visit my Shu Uemura Hard Formula post.

Let me just start by saying that this is not a beginner’s product. If you are not comfortable using pencil or powder for your brows, stay away from the gel! If you don’t use this properly, you might end up with crazy brows that are too thick. If you have a heavy-hand, stay away from this product!

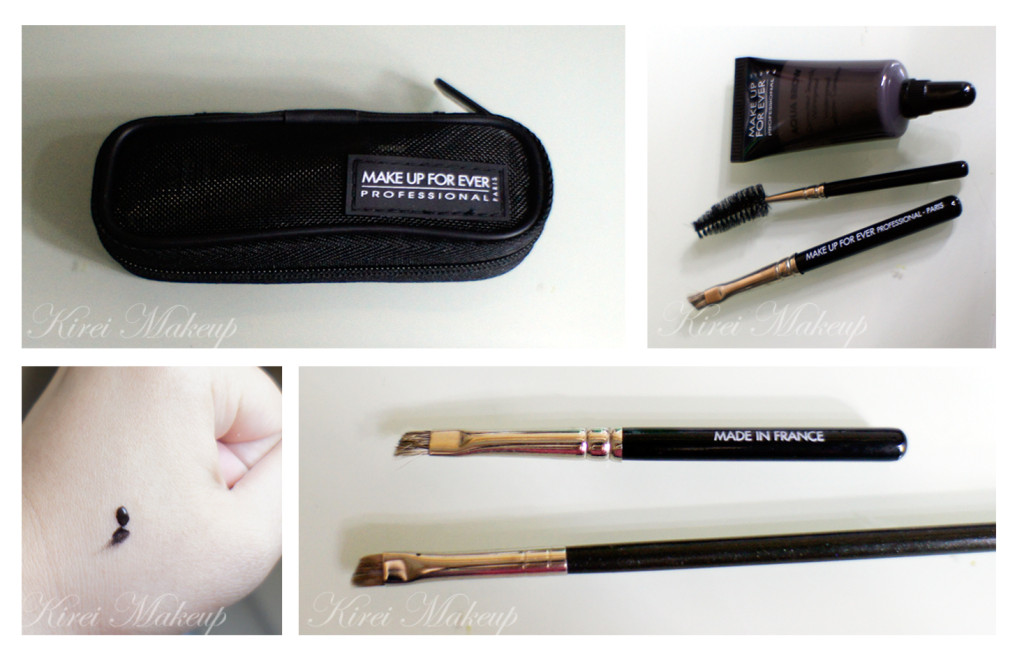
Ok, so the brow set comes in a little MUFE pouch, which I find it to be very convenient! Inside the pouch, you’ll get 1 MUFE Aqua Brow, 1 spooly and 1 angled brush. I don’t use that brush, instead I used my MAC 266 brush. It gives a more define and precise brows.

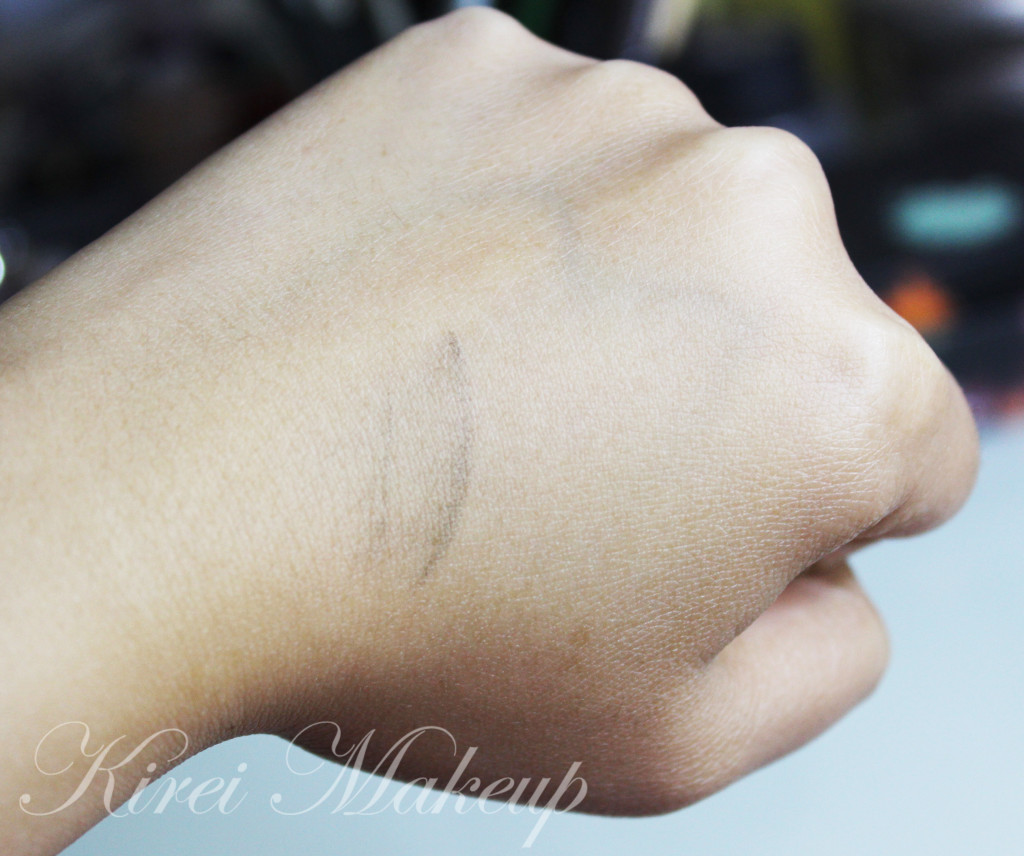
Remember, a little product goes a long way! See that tiny teensy dot on my hand. That will do 1 of my brows. It’s better to use a little then add more, than to use too much and try to take it off.

mufe aqua brow

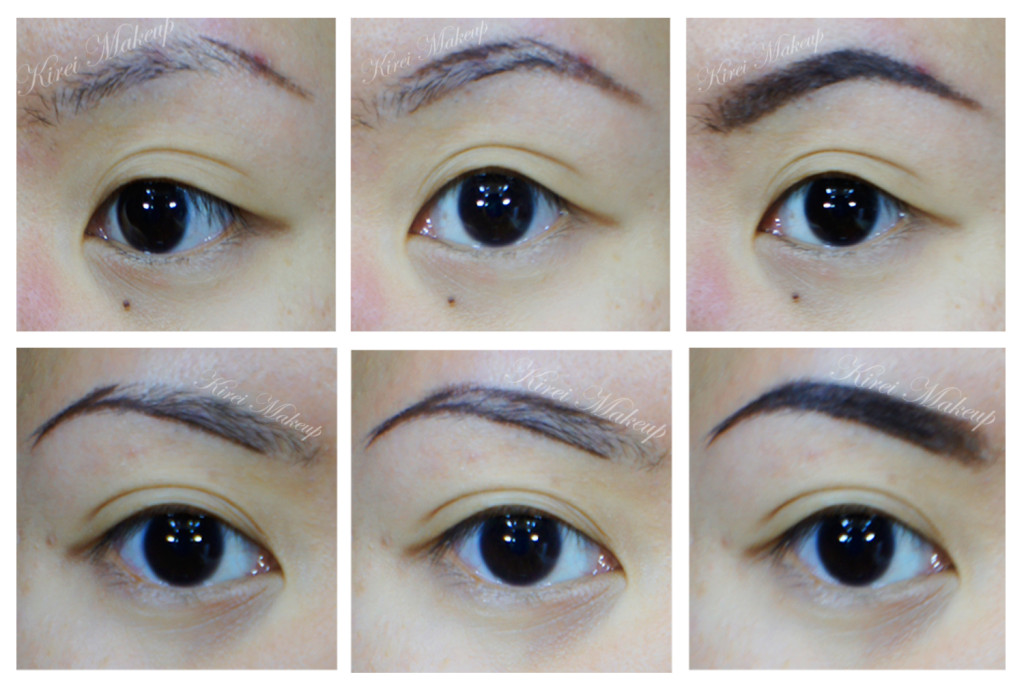
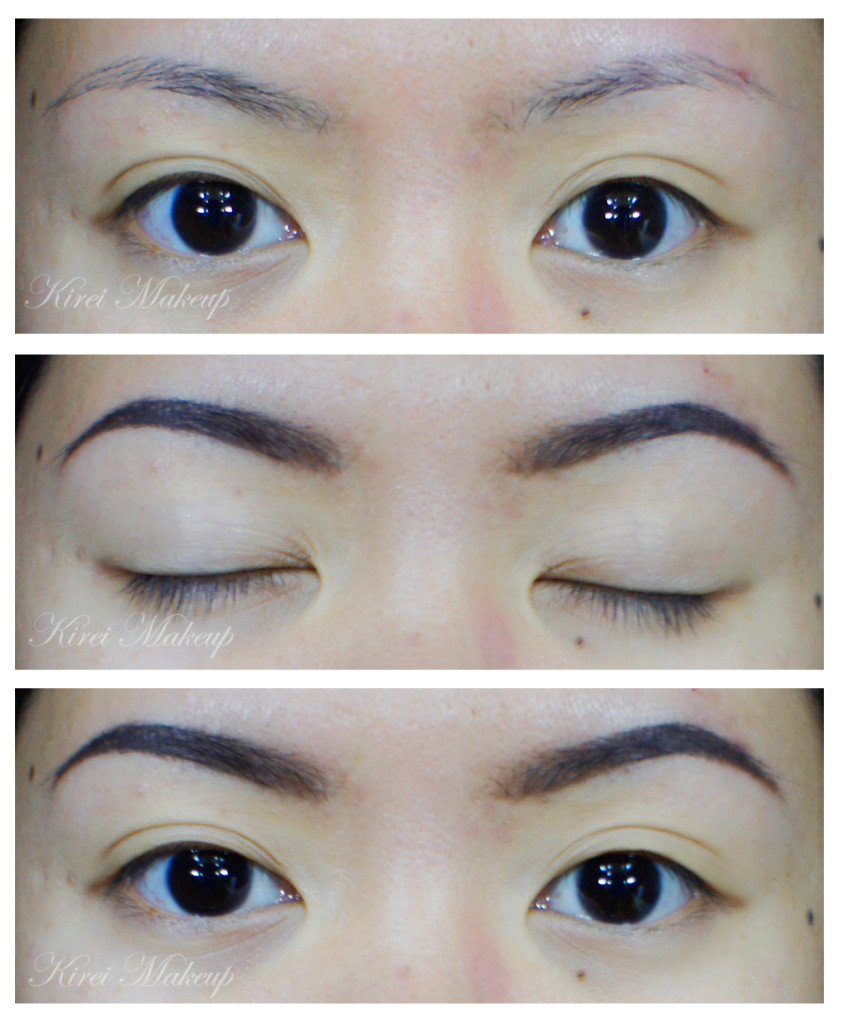
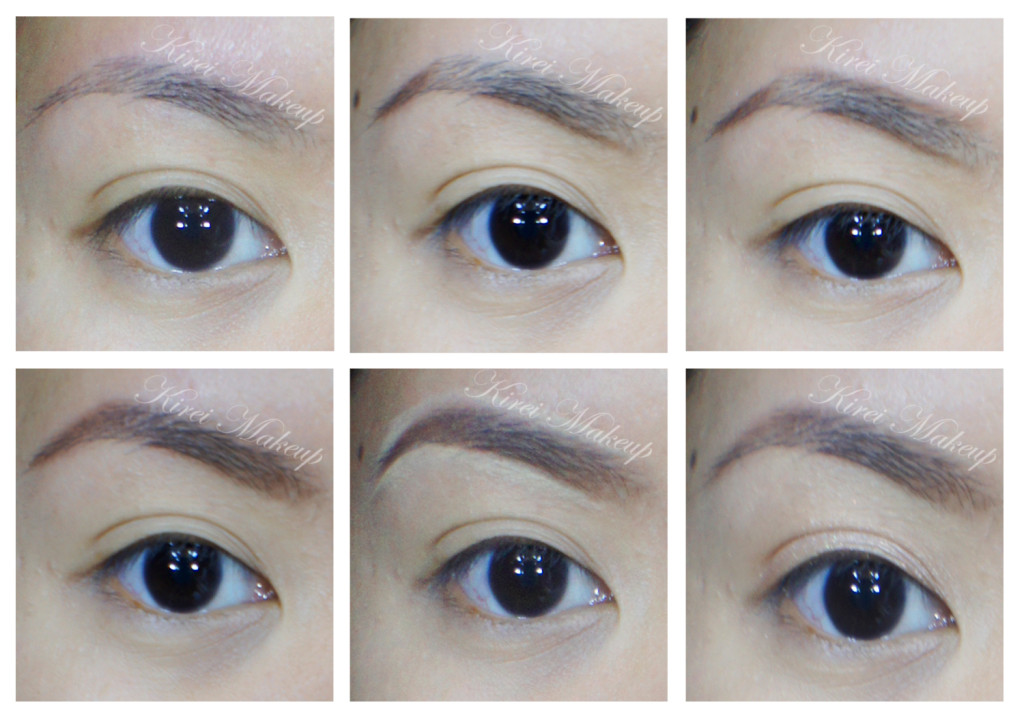
I tweezed and trimmed the brows myself. If you want to find out an easy way to shape your own brows, please check this post Brow 101. My own eyebrows have quite a lot of hair, but the hair has a very unflattering greyish shade to it. Not to mention, my left eyebrow (right in the picture) has a sparse eyebrow “head”. Filling my brows this way really frame my face and eyes nicely.

The pictures below showed how I filled my brows in. I think it’s pretty self explanatory. Oh, at the end of it, I also brushed out my eyebrows using the spooly that came with the set. This will remove some of the products, making it less harsh-looking.

Please comment below if you have any questions or if you want to see me do a video on how to fill in the brows.

mufe aqua brow gel

Back to the product itself!

What is MUFE Aqua Brow?

Aqua Brow is a waterproof eyebrow corrector that fills, defines and lengthens brows. Formulated with volatile oil and carnauba wax, its creamy gel texture gives an even, natural result with a long lasting hold. The result remains flawless throughout the day and holds up under all conditions (water, heat, etc).

Formula:

Volatile oil
Carnauba wax
Hydrophobic treated, concentrated pigments
Xanthan gum

(credit: Make Up For Ever, 2013)

Shades

Comes in 7 available shades – 10 Light Blonde, 15 Blonde, 20 Light Brown, 25 Ash, 30 Dark Brown, 35 Taupe and 40 Brown Black.

I was recommended by the MUFE Artist in the counter to buy no. 40, which is slightly too dark for me I think. I didn’t actually mind it at all since my ombre hair has quite a dark roots. It’s also a great addition to my makeup kit in case I’ve to do dark brows. However, I might get no. 10, 20 and 35 in the near future to be added to my kit.

If you are of medium-dark skin, no. 40 might be a good color for you. It’s a very cool brown.

Longevity

This product is waterproof, smudge-proof, and sweat-proof since it’s from the Aqua range. If you want to go swimming in this, go ahead, it’s completely waterproof. I’ve never worn this product for more than 4-6hrs, so I can’t really say if it stayed on the whole day. But, pretty much when it dries, it will not move until you remove it with makeup remover.

Price

CAD$24 in Sephora. Not sure how much it is in Jakarta. I did buy it in Jakarta, but I bought other stuffs with it and didn’t really pay much attention to it. I think it’s on the Rp. 300,000 range.

Pros:

  • 7 shades that cover every skin-tones.
  • Waterproof, smudge-proof and sweat-proof.
  • The set comes with brush and spooly which makes it very convenient for traveling.
  • Squeeze tube packaging makes it ideal for the kit. I don’t have to worry about it breaking or anything.
  • You can use the product to create a natural look or you can use it for a more precise application.
  • Can be used to darken any stubble or beard or side burns for men, or in creating character makeup.

Cons:

  • Might be too pricy than powder or pencil brow products.
  • If you are not used to working with gel/cream brow products, this might be hard to do.
  • If you apply too much, you might end up with harsh brows.
  • Difficult to remove once you make a mistake. Make sure you have waterproof makeup remover handy.

If you want to see a complete makeup look using MUFE Aqua Brow, please see my previous post “Neutral”.

how to shape brows

MUFE Aqua Brow Gel gets a 4.5 out of 5. It loses 0.5 point because of the difficulty level for beginners.

Product of the Week: Shu Uemura Hard Formula Brow Pencil

Brows, brows, brows! I’ve been asked to do a brow tutorial, but been putting it on hold for the longest time. Let me first of all, introduce this brow pencil to you guys. Whether you are a beginner or a makeup artist, I think everyone should own the Shu Uemura Hard Formula brow pencil! This pencil is currently my favorite brow product, ever since I ran out of my Anastasia Brow Wiz.

Anyhow, so what is Shu Uemura Hard Formula Brow pencil?

Natural finish and shape. This unique eyebrow pencil only releases color pigment when it interacts with the oils in the brow hairs. The result is natural, defined brows. Smudge-proof and long-lasting. (Shu Uemura, 2013)

Shu Uemura Brow Pencil

If you happen to go to a Shu Uemura counter or their website, you might realized that the shape of their eyebrow pencil is not exactly like my photo. That’s because their pencil is shaped using a cutter in a Naginata shaped. I knew about the shape because I went to a Shu Uemura counter in Canada and they explained it to me back then. However, I purchased this pencil from Shu Uemura counter in Grand Indonesia mall, and they did not cut it for me in Naginata style, instead they handed me in this form. I don’t really care, Naginata or not, this brow pencil still rocks!

Anyways, I might drop by the Shu Uemura counter again just to ask them to re-shape my brow pencil.

Pros

  • The color is perfect. Mine is Hard 9 (Acorn), and I think it has just enough warm undertone for my warm undertone hair. It’s not too red, and at the same time not too ashy.
  • It brings a certain warmness to the face and it works for a lot of people. I’ve used this pencil on several people and for bridal makeup as well.
  • Since its hard formula is very waxy, when you draw this pencil in, it mimicked your brow hair. You can get the most natural finish with this product.

Longevity

I’ve worn this pencil for a good 8-10 hours without any smudging whatsoever in a very warm and humid climate (a.k.a Bali).

Price

I don’t quite recall how much it cost in Jakarta since I’ve bought it quite a while back.  I will let you guys know once Shu Uemura Indonesia answers my tweet 😉

Anyways, I know this pencil costs CAD$29 in Canada and USD$23 in USA.

Cons

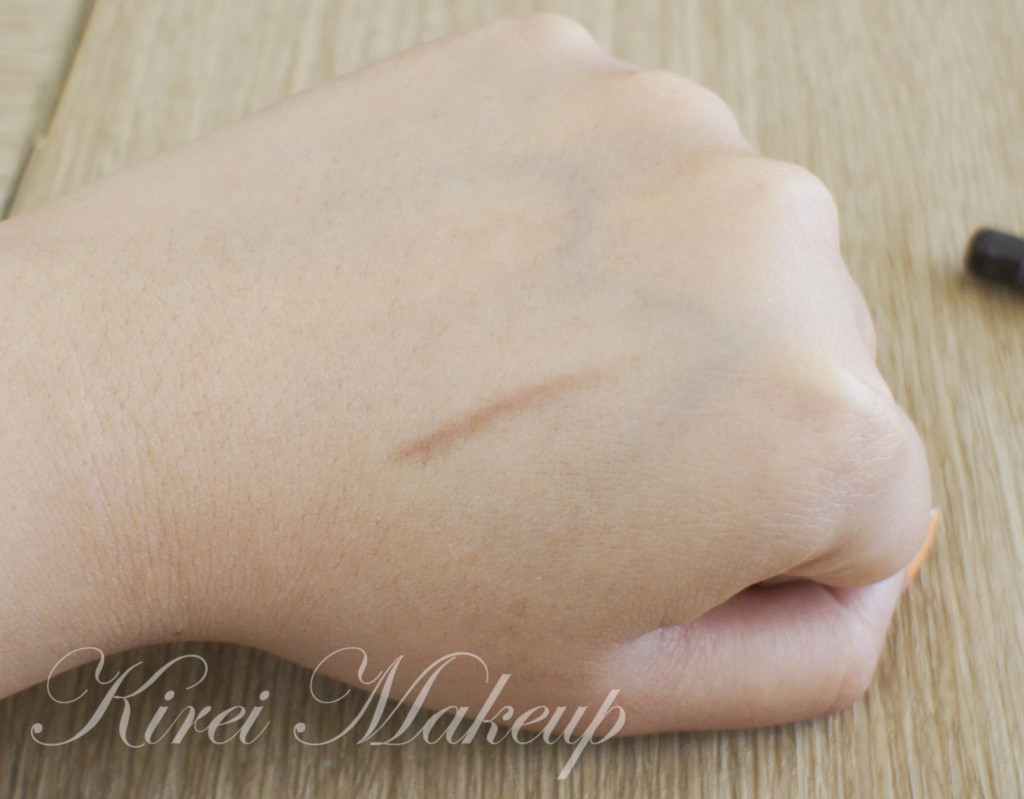
  • Since it’s a hard formula and very waxy, you might not be able to swatch this on your hand. I managed to do it after going at it several times the back of my hand.
  • They carry 2 more colors in Asia than in North America, namely Acorn and Walnut Brown.

Shu Uemura Brow Pencil no. 9

Keep in mind, even if your hair is black, you might want to use brown instead so your brows don’t look harsh.

Also, if you want to know how I shaped my brows, please visit my tutorial in Brows 101.

How-to:

1. Starting with a clean brow, use a clean spooly (or mascara brush) to brush the brow hair upwards. Trim any excess with a cuticle scissors if needed.

2. I like to start with the tail of brow. Just filling it in and extend it slightly.

3. I created a diagonal line on the lower part of my brow from the head to just below the arch (hard to explain, please look at photo below…bahahaha).

4. Next I drew a diagonal line along the top of the brow to the highest point of the brow (i.e. arch).

5. I filled it the rest of the brow using the pencil. (I purposely drew a lot in so you can see the difference between my non-filled brow with the filled-in brow).

6. This step is optional, but works wonder if you want an extra shape or an extra lift. So, using a flat sturdy brush, I applied M.A.C pro conceal/correct palette in yellow corrector along the bottom and top part of the brow. I blended it out using a clean flat brush.

7. At this stage, I brushed my brow hair upwards again using a clean spooly (or mascara brush) for a natural finish look.

Pretty much, lots of my tutorials prior to this post used the Shu Uemura Hard Formula Brow Pencil.

how to do brows

Product of the Week: MUFE Aqua Creams

I’ve been wanting to do this review for the longest time, and finally I have the chance to do it! If you are looking for a cream shadow or a base that is smudge-proof, crease-proof, water-proof, sweat-proof, tear-proof and everything else (you get the idea), this is the products for you! The aqua cream has a great range of colors, which is definitely one of their assets in this era of cream shadow. I’ve been using this line since 2010, and have never looked back.

What is Aqua Cream?

From MUFE website:

The Aqua Cream is an ultra-pigmented, long-lasting waterproof cream. Highly concentrated in mother-of-pearl pigments, it provides an immediate color intensity with a luminous finish.
Its long-lasting formula will not crease or smudge under the most extreme conditions.

Available in 22 shades, the multipurpose Aqua Cream can be applied on your lips, cheeks and eyes.

Shades #5, 6, 7, 8, 9, 10 are formulated for the Lips & Cheeks.
Shades #1, 2, 3, 4, 11, 12, 13, 14, 15, 16, 17, 18, 20, 21, and 22 are formulated for the Eyes & Cheeks.

Formula:

Volatil oil
Filmogen polymer
Synthetic Ester
High concentration of mother-of-pearls and pigments
Kaolin mineral powder
Paraben free
Dermatologist and ophtalmologist tested

MUFE Aqua Cream

Pros

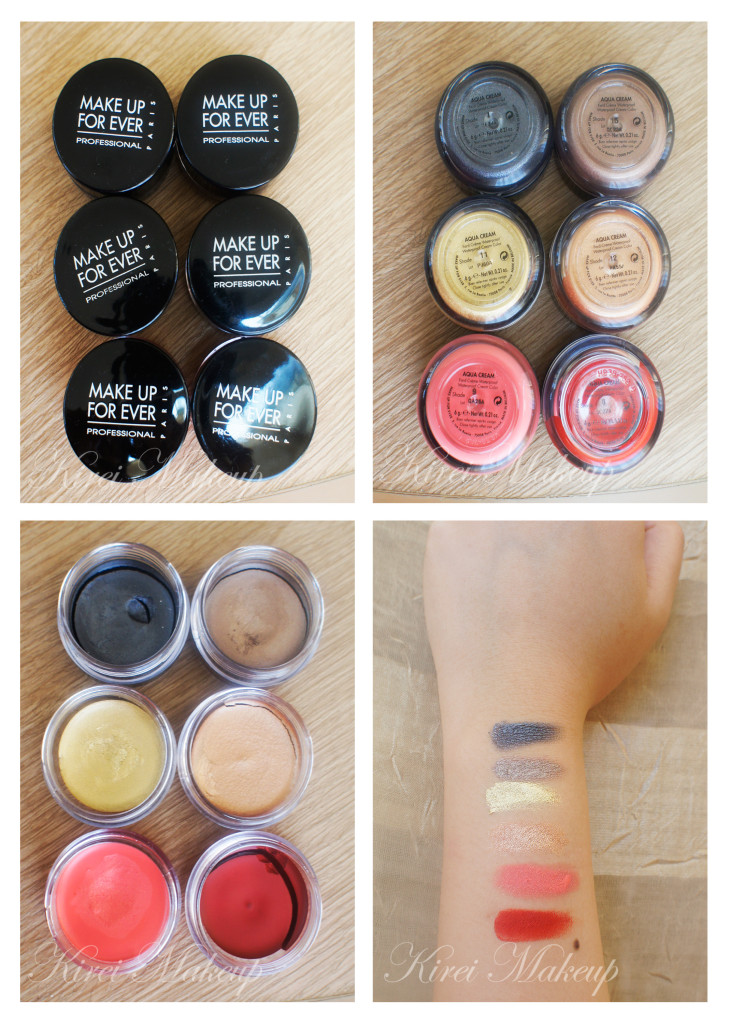
So, I owned 6 different colors (top-bottom, left-right):

  • #1 Anthracite – gunmetal with a silver sheen. The color is leaning towards dark grey than black. I love using this as a base for smoky eyes.
  • #15 Taupe – metallic medium brown with warm undertone. This will look dark brown on lighter skin tone, and light on  darker skin tone.
  • #11 Gold – metallic golden yellow.
  • #12 Golden Copper – rich copper with red undertones.
  • #9 Coral – light coral pink.
  • #8 Red (for cheeks and lips only) – red with orange undertone (think fire trucks). I feel that this product has a golden sheen to it.

Don’t mind the crack in some of them. I had to travel with it a few times (Canada-Jakarta-Bali etc).

Longevity

For all of them, I’d say they (all except #8) lasted a good 8 hours on the eyes. I’ve used this mostly on brides and photoshoots. Once it’s on, it stays ON. This product once it’s on the eyes, it will not move. Like I said, it’s crease-proof, water-proof and smudge-proof.

For #8, I used it for 4-hour and it stayed put throughout. However, when I tried to remove it, it stained my lips pretty much the whole day. It has a velvety finish to it when it dried, so if you prefer a glossy finish, you can apply a clear gloss.

Finish

Out of the 6 that I owned, 4 has a metallic finish (#1, #15, #11 and #12). #9 has a gold shimmer and #8 has a golden sheen to it.

Coverage

You can apply this as a wash of color, or you can build it up in layers.

Packaging

Plastic container with a screw on lid. Very light, made it very easy to travel with.

Price

The product cost CAD$28 for 6 gram in Canada (Sephora). In Jakarta, when I bought #9, it cost me Rp. 250,000 for 6 gram. It’s cheaper in Jakarta than in Canada..(that’s a first!). Since it is cheaper in Jakarta, I might go over and buy a few more colors..hehehee *update as of June 2, 2013* MUFE Indonesia is selling their aqua creams at Rp. 300,000 each. Now, for price-wise, it’s similar to the Canadian counterpart.

Cons

Again, I’ve to repeat this: work fast with this product and in thin layers. The product dries very fast and once it dries, there’s no way of blending it. If you apply this product too thick on your first few layers, you might see a build-up of products on the skin. There’s no way of re-blending it once it becomes lumpy.

Also, for that price, you are better off buying Maybelline Color Tattoo 24-hour gel shadow which cost CAD$6.95! However, the color range might not be as much as the Aqua Cream. On top of that, the color tattoo line is not available in Indonesia.

I’m giving the Aqua Cream 4 winks out of 5!

p.s.: for tutorials using the aqua creams, please check the links below:

Unboxing Beauty Treats Indonesia!

After a long wait for my first Beauty Treats package to arrive, I finally got my hands on it! Today’s box was quite late because apparently they were changing their courier service, so there was a delay. Also, just to let you guys know, if you did not input the special code given to you for payment confirmation, they will not notify you that there’s something wrong with your payment. You do have to contact them if you have issues with payment and subscription, don’t expect them to contact you.

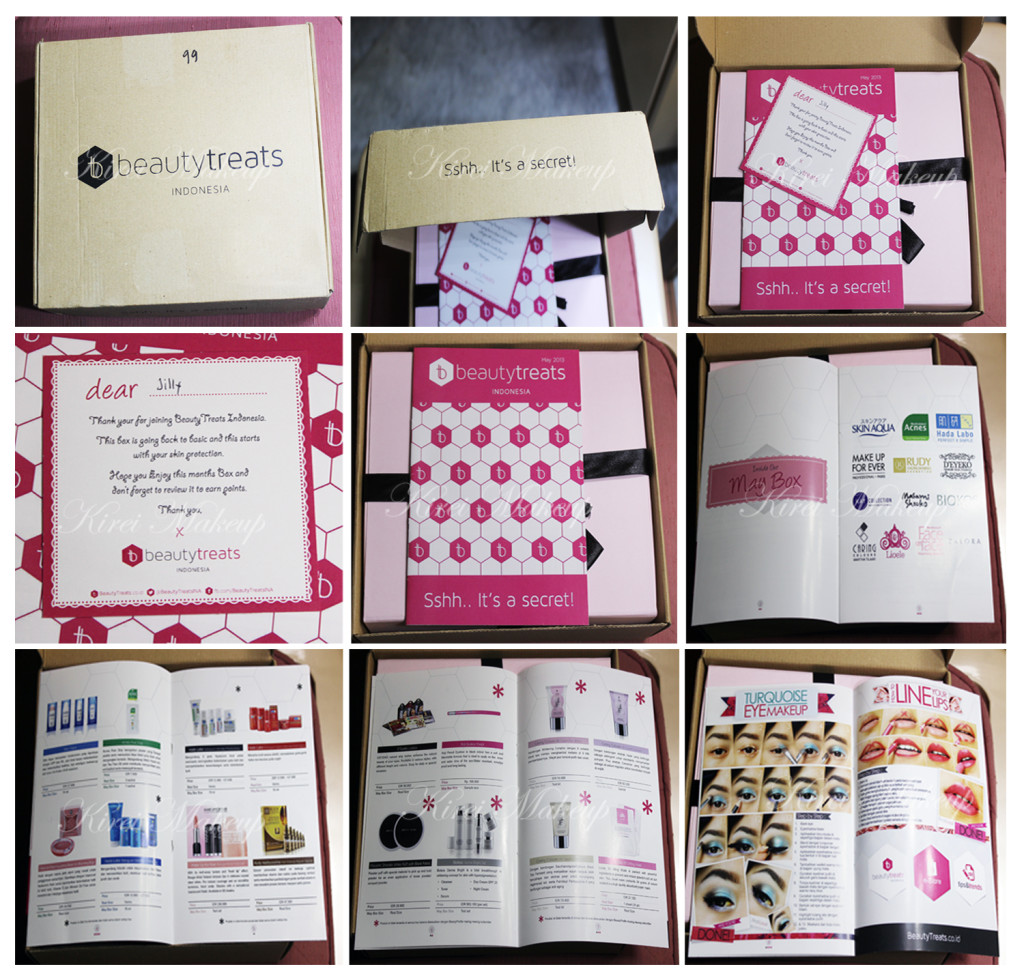
Anyhooow, let’s get to the good stuffs! The package arrived safely. I love the little “sshh…it’s a secret!” slogan. I think it’s cute. Inside the package, there’s a little “thank-you” note, and I find it very lovely that they handwritten my name. I think it’s a nice personal touch.

Beautytreats indonesia

You will find a booklet explaining which brands and products are inside this month’s box. The booklet also contain the full description of each item and their original price should you be interested in buying the original size. I heard that they will be releasing a new section on their website where you can buy the full-size products online. On the last 2 pages, they included makeup tutorials, which you can also find on their Facebook page and website.

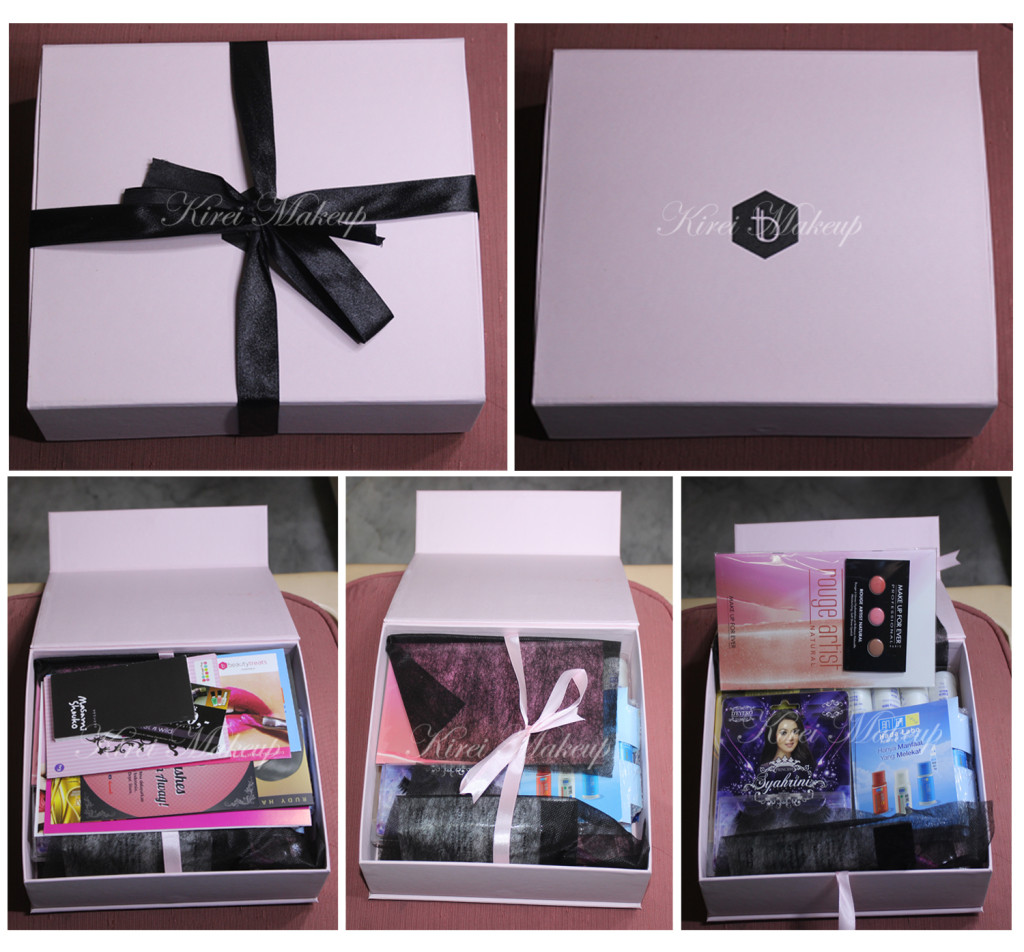
The beautytreats package comes in a pretty pink box, with black ribbon tied around it. I’m keeping the box, and probably will use it as an organizer or to keep my stuffs inside. It’s pretty sturdy! Inside the box you’ll find vouchers and booklets from the different brands that are partnered with beautytreats. Beautytreats indonesia

So, what’s inside this month’s box?

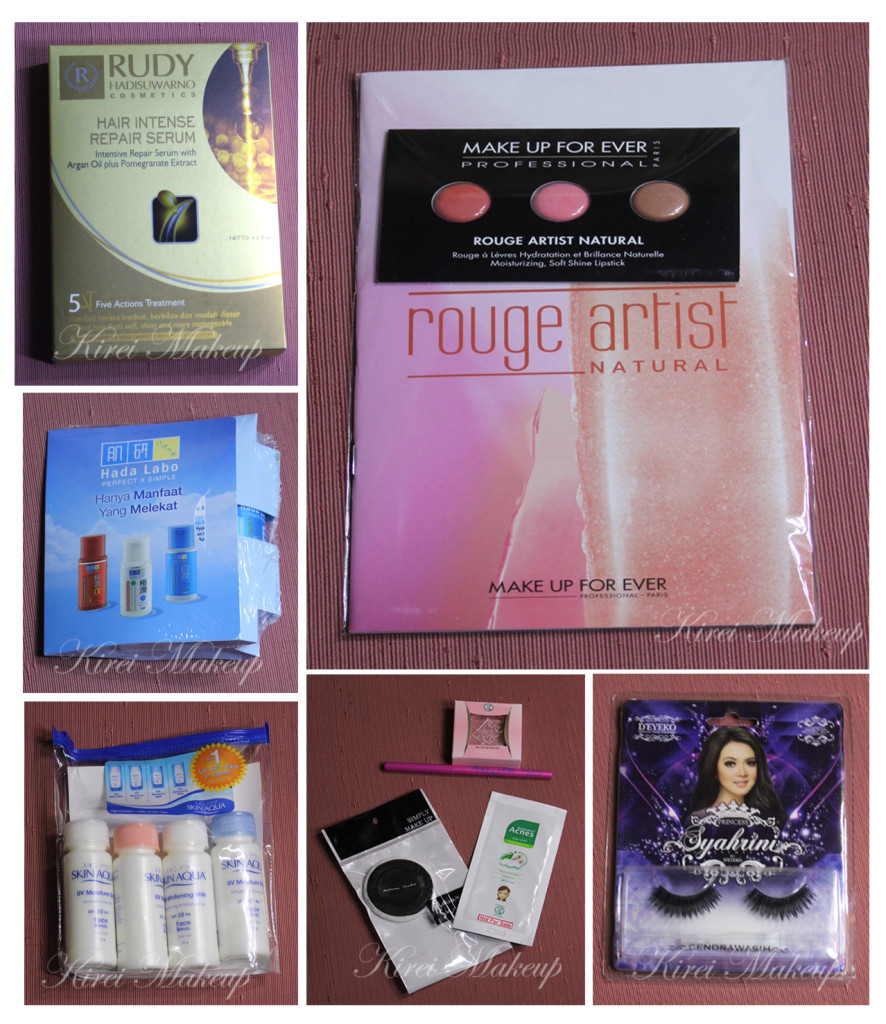
1. Make Up For Ever Rouge Artist Natural lipstick – test set.

2. Rudy Hadisuwarno Hair Intense Repair Serum – real size!

3. Hada Labo Gokujyun Alpha Ultimate Anti-aging, Shirojyun and Gokujyun Ultimate Whitening – 15ml/bottle.

4. Travel-size Skin Aqua moisturizers (super cute!) – 15ml/bottle.

5. Face on Face Nourishing Blush on Blooming Rose – real size! (as big as an eyeshadow..so adorable).

6. Acne Pore Strip – 1 sachet.

7. Masami Shouko White Puff with Black Fabric – real size.

8. Koji Eyeliner Pencil – sample size.

9. D’eyeko lashes – real size.

Other subscribers might receive the following products instead of the Masami Shouko White Puff:

  • Biokos Derma Bright Set, or
  • Caring Colors BB Cream Fair White, or
  • Caring Colours BB Cream Everlast, or
  • Caring Colours BB Cream Luminizing, or
  • Lioele 3D Lifting Mask.make up for ever indonesia

Update: as of July 2, 2013, I’m very disappointed with Beauty Treats Indonesia. The June box arrived in July 2, the products as well as the amount of products inside the box were not up to standard. 

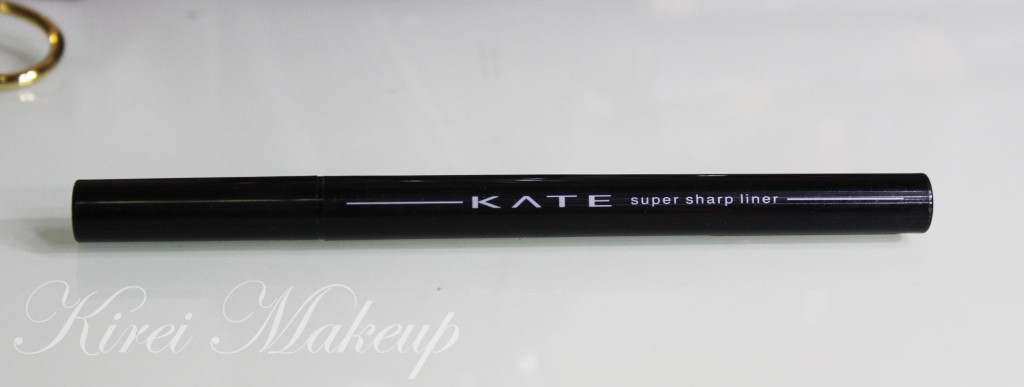
Product of The Week: Kanebo Kate Super Sharp Liner

So, I’ve been slacking a little on my Product of the Week…hehehe..my apologies, I’ll try to update it regularly every week! Anywaaays, as you guys know, I have been using my new Kanebo Kate Super Sharp Liner a lot lately in my tutorials. I bought it on my Japan trip, and regretted for not buying more! I can’t actually remember how much it cost. I actually didn’t even know that this eyeliner was by Kanebo. I bought it in some random drugmart in Osaka while waiting for the rest of the group to show up.

In general, this is an awesome eyeliner! I can say that this is probably the dupe for Kat Von D Trooper eyeliner. It stayed throughout the day, smudge-proof, but at the same time it can be removed easily with makeup remover. You can create thin winged liner, or thick winged liner. Simply love it!

Kanebo Kate Super Sharp Eyeliner

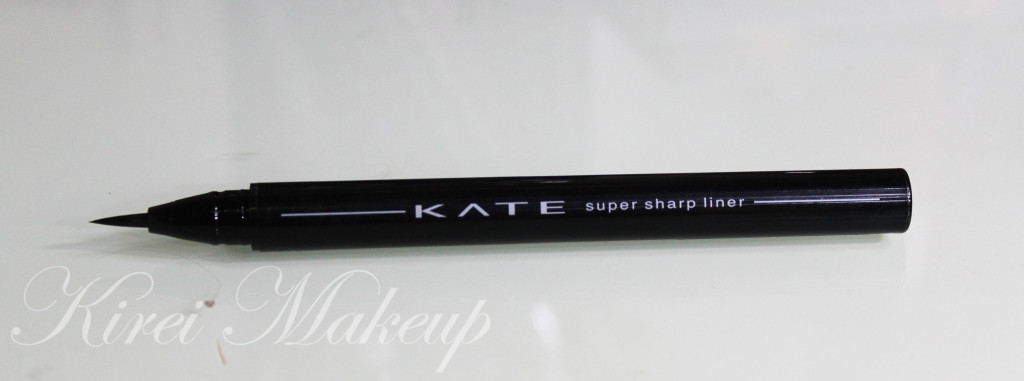
The Kate Super Sharp liner actually have shorter bristles, but it felt more compact compared to Kat Von D’s Trooper. The bristles are very firm, which made it ideal to create a sharp line. I mean, you can actually doodle on your face with this if you want. The bristles don’t get separated at all.

Kanebo Kate Super Sharp Eyeliner

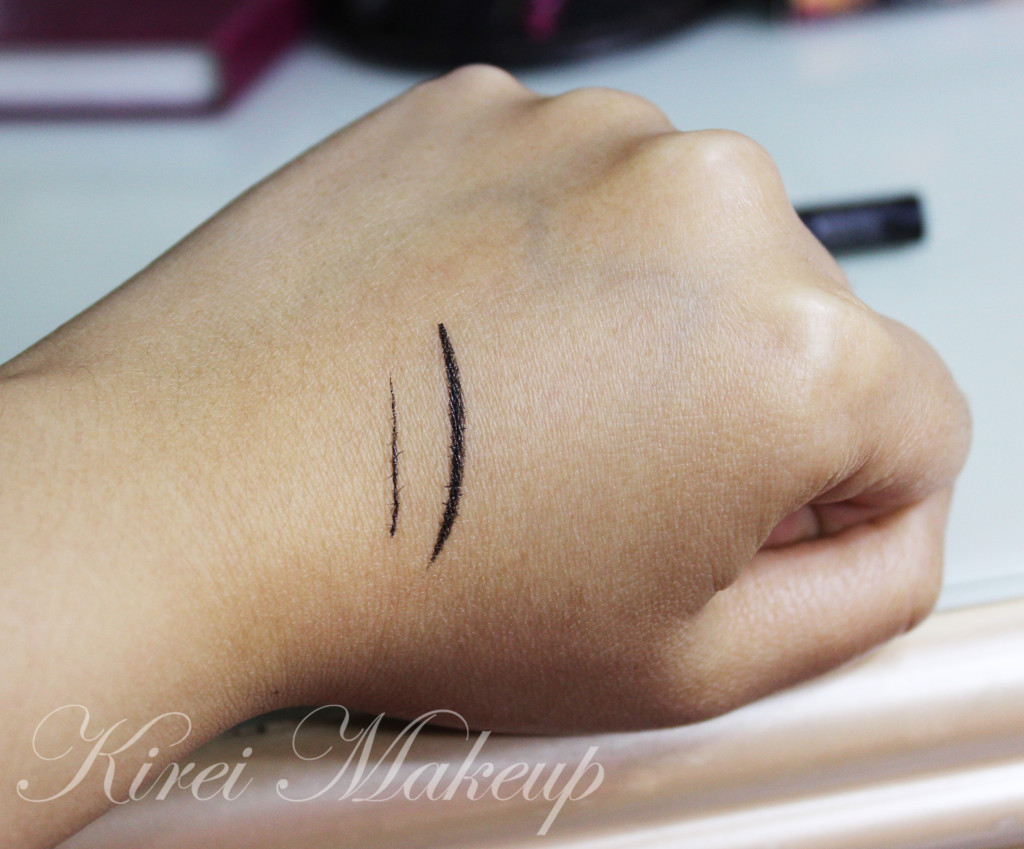
You can create sharp thin lines using the tip of the brush, or a thicker line if you lay the brush flat. The eyeliner itself is very black, but might be a bit shiny when it dries. If you like a matte finish, you might want to add a black eyeshadow on top of it.

The eyeliner takes a while to dry off (may be around 20-30seconds), so make sure you look down or keep your eyes close after application, if not you might end up smudging it. I actually like the fact that it doesn’t dry instantly so I can smudge it (esp. on the lower lid).Kanebo Kate Super Sharp Eyeliner

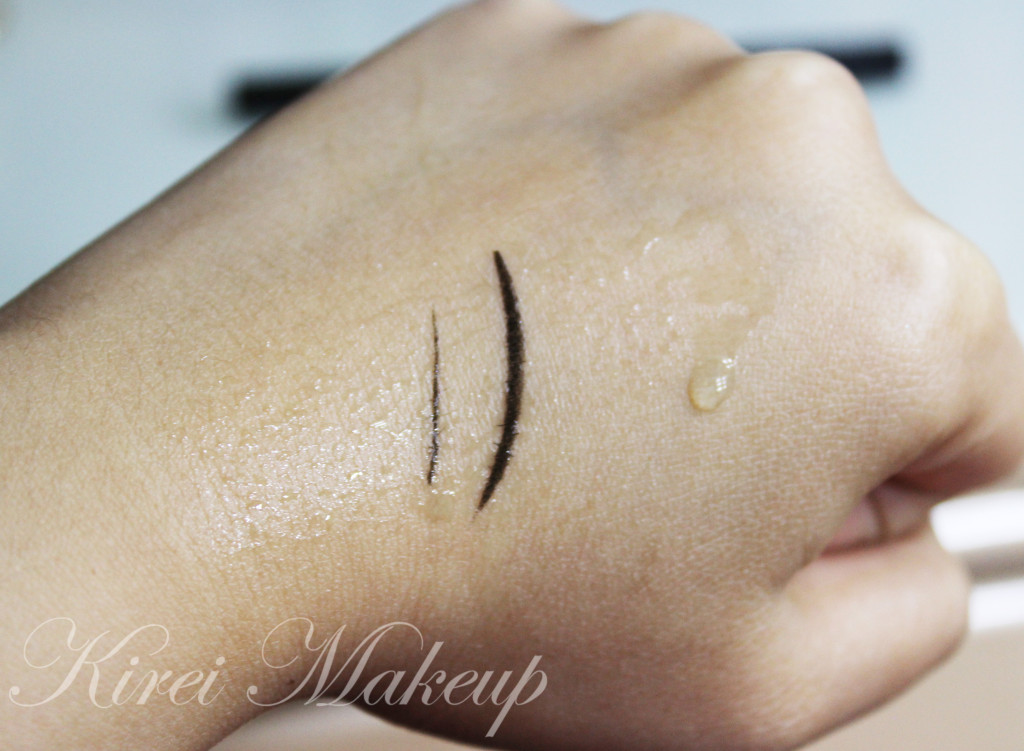
The eyeliner is smudge-proof once it dries. However, you might want to be careful, as it is not water-resistant. Below is a picture of the eyeliner after I spritzed some water on my hand. The eyeliner stayed, but as you can see, some of the ink started to dispersed and get dissolved.

I might have exaggerated the water a little, but you might not want to use this eyeliner to go swimming. I have worn this eyeliner for a good 8 hours, and it stayed throughout the whole time. I was outdoor, in the beach when I wore this eyeliner. I’ve also used this on a bride client last week for her wedding in Bali.

Kanebo Kate Super Sharp Eyeliner

Photo below is traces of eyeliner after I wiped it once using Bodyshop Vit. E facial wipes. It disappeared completely after the second wipe. You can remove this eyeliner easily without having to use much product, no tugging or pulling on the skin. Very easily removed with wipes.

I usually removed my makeup using Shu Uemura cleansing oil, and found that this eyeliner gets removed in an instant.

Kanebo Kate Super Sharp Eyeliner